


Music Systems, Inc.
ROCK BAND 3
W
IRELESS KEYBOARD:
MIDI User Guide
HMXHW1023
REVISION: 01
Date: 07/16/10

Introduction ............................................................................................................................................................................... 3
What is MIDI? ............................................................................................................................................................................ 3
Features ....................................................................................................................................................................................... 3
Getting Started .......................................................................................................................................................................... 4
Control Surface Functions in MIDI Mode ....................................................................................................................... 5
Connection Ports................................................................................................................................................................ ...... 6
Working in a MIDI Studio ..................................................................................................................................................... 6
Connecting the keyboard to a personal computer ................................................................................................ 6
Connecting to a MIDI Sound Module .......................................................................................................................... 7
External Pedal Functionality .......................................................................................................................................... 8
Touch Strip ................................................................................................................................................................................. 8
Understanding the Controls ................................................................................................................................................ 8
Change Octave ...................................................................................................................................................................... 8
Change Program .................................................................................................................................................................. 9
Panic Function ..................................................................................................................................................................... 9
Drum Mapping .......................................................................................................................................................................... 9
Default Settings ...................................................................................................................................................................... 10
LED Indicators ........................................................................................................................................................................ 11
FAQ .............................................................................................................................................................................................. 13

INTRODUCTION
The Rock Band 3 Wireless Keyb oard isn’t just video game controller; it is also a genuine
musical instrument that can be used in your MIDI Studio or on a live performance.
We created this manual to express the R o ck Ban d 3 Wi r e l ess Keyboard’s capabilities as a
MIDI device. Once you are familiar with the topics covered in this user guide, you
should have an understanding of:
RB3 Keyboard Features and Functions
RB3 Keyboard Interface
MIDI
How to use the RB3 Keyboard in a MIDI studio
Use as a Software MIDI Controller
Use as a controller for standalone hardware sound modules
WHAT IS MIDI?
MIDI is the abbreviated term for Musical Instrument Digital Interface. MIDI is a lang uag e
that provides a way for digital musical instruments (or other MIDI compatible devices) t o
communicate with one another. MIDI is not audio; the information contained within MIDI
messages is used to trigger sounds from MIDI compatible sound modules.
The Rock Band 3 Wireless Keyb oard supports a variety of MIDI functions. When used as a
MIDI Controller, it is like remote control that triggers sounds from external hardware or
software devices. When you press a key, MIDI data is sent from the MIDI Output port.
The data travels to the oth er MIDI devices via a 5-PIN MIDI cable. When the data is
received by the device, sounds will be triggered and passed to your audio s yste m.
FEATURES
25 Velocity Sensitive K eys
TRS Port for connecting Stomp and/or Expression Pedals
Modulation strip that can be used as Modulation or Pitch Controller
Compatible with MIDI software sequencers and synthesizers
Compatible with stand alone MIDI sound modules
Battery Powered
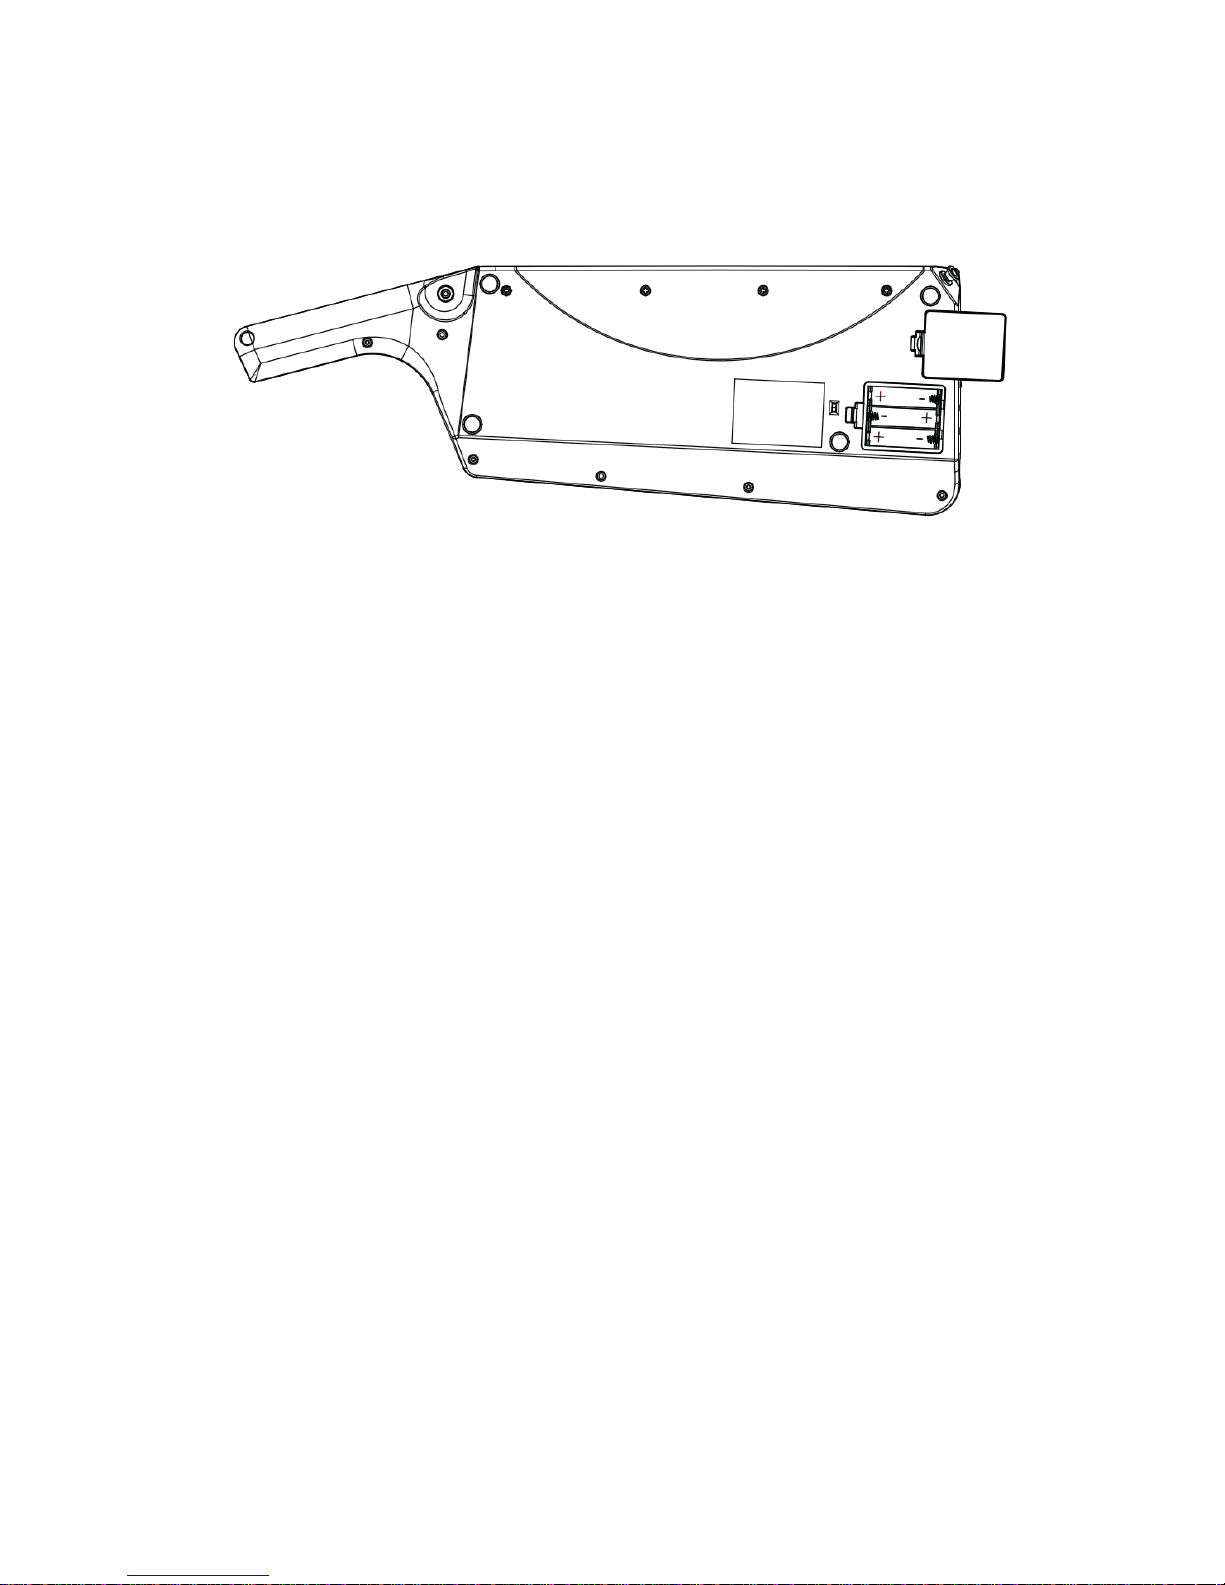
GETTING STARTED
The keyboard will need batteries to function in MIDI mode. To get started, please
follow the steps below:
1. Place 3 AA batteries in the correct position in the battery compartment located
on the bottom side of the keyboard.
2. Slide the power switch to ON (Playstation/Wii) or press and hold button 8
(Xbox).
3. Connect the keyboard to a MIDI sound or a MIDI interface with a 5-Pin MIDI
Cable.

CONTROL SURFACE FUNCTIONS IN MIDI MODE
Expression
Change pedal function to expression
4
Channel Volume
Change pedal function to channel volume
Stop
System real time Stop message
8
Continue
System real time Continue message
Program Increment
Increase current program number
Octave Increment
Increase current octave number
13
Program Decrement
Decrease current program number
Feature Function
1
Touch Strip Modulation Strip or Pitch Wheel
2
3
5
6
7
9
10
11
12
Overdrive/Touch Strip Toggle Button Toggles Touch Strip function to Pitch Wheel when held down
Drum Mapping on/off Enable or disable drum mapping of lower octave of keys
Foot Controller Change pedal function to foot controller
Start System real time Start message
Octave Decrement Decrease current octave number
14
15
LED Indicators 4 LEDs to indicate various keyboard states or user actions
Keybed 25 velocity sensitive keys
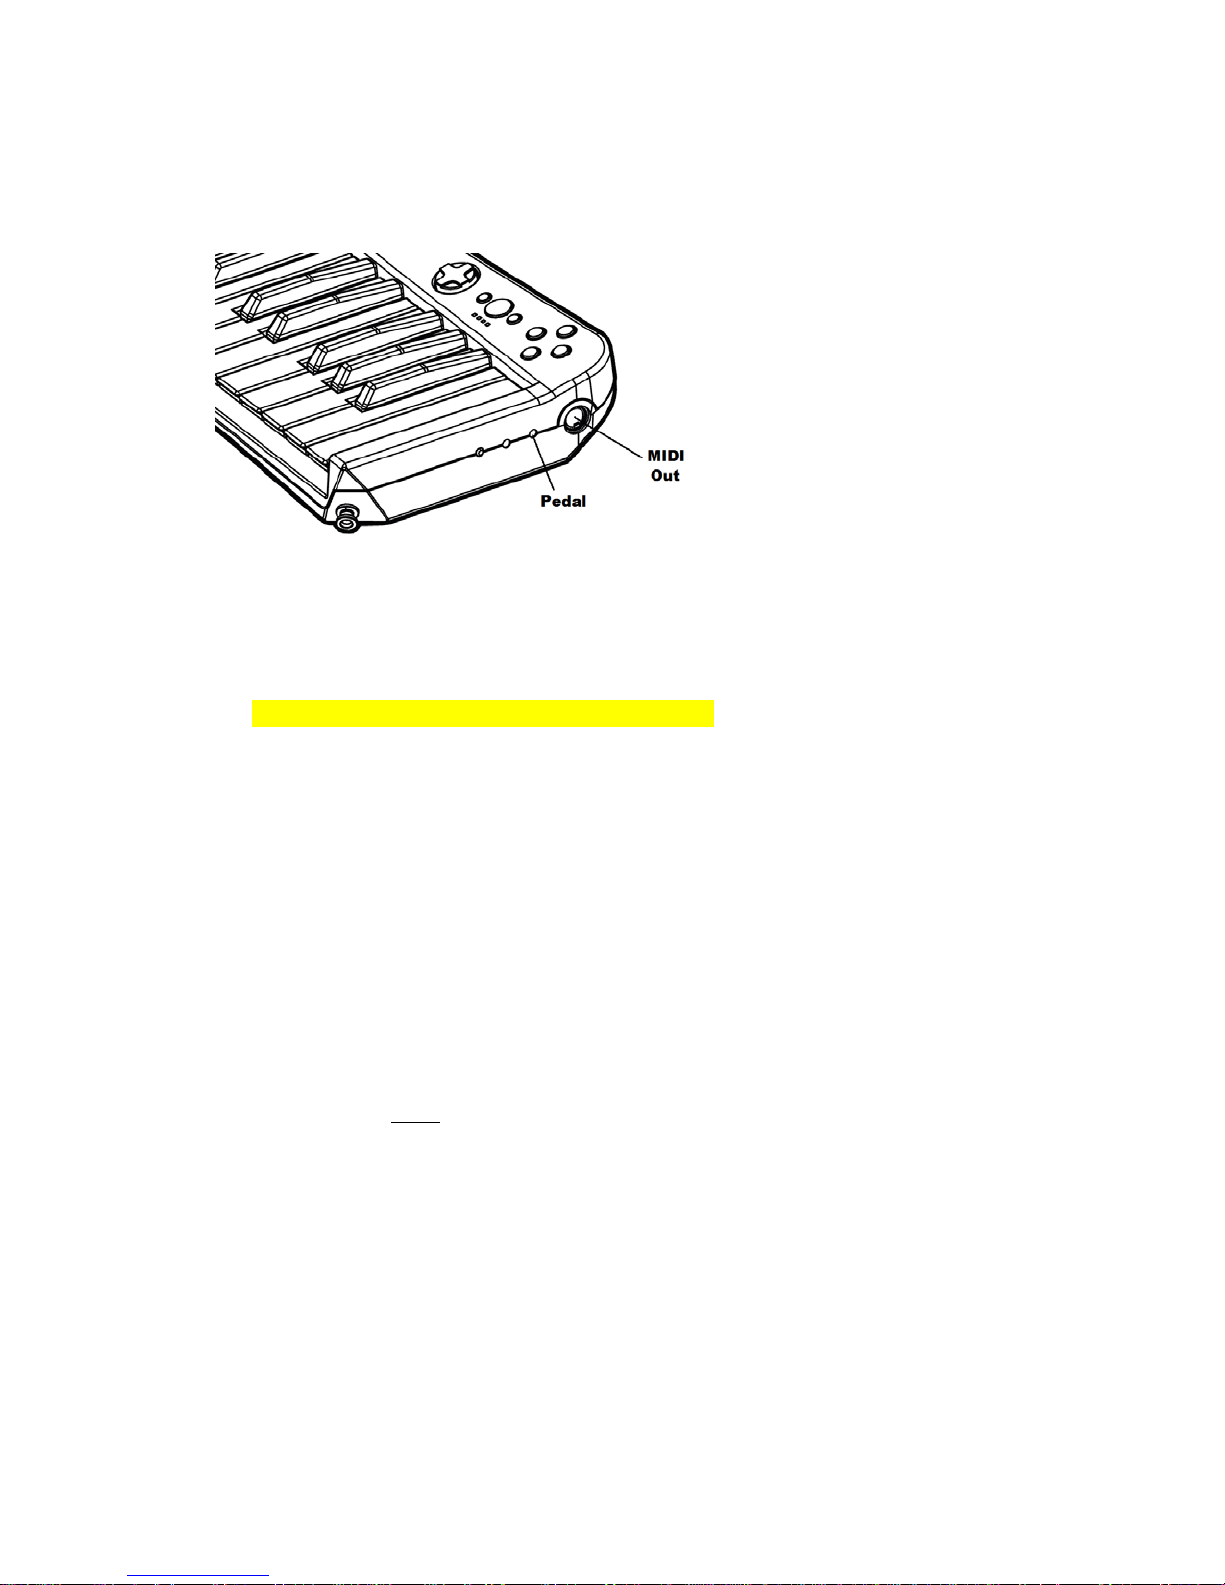
CONNECTION PORTS
MIDI Out Port: Outputs MIDI data.
Pedal Port: Allows the use of use an optional pedal for extra functionality such as:
expression, channel volume, and foot controller .
WORKING IN A MIDI STUDIO
Common MIDI Studio setups include a MIDI Controller (Rock Band 3 Wireless Key board),
personal computer, MIDI sequencing software and/or a standalone MIDI sound module.
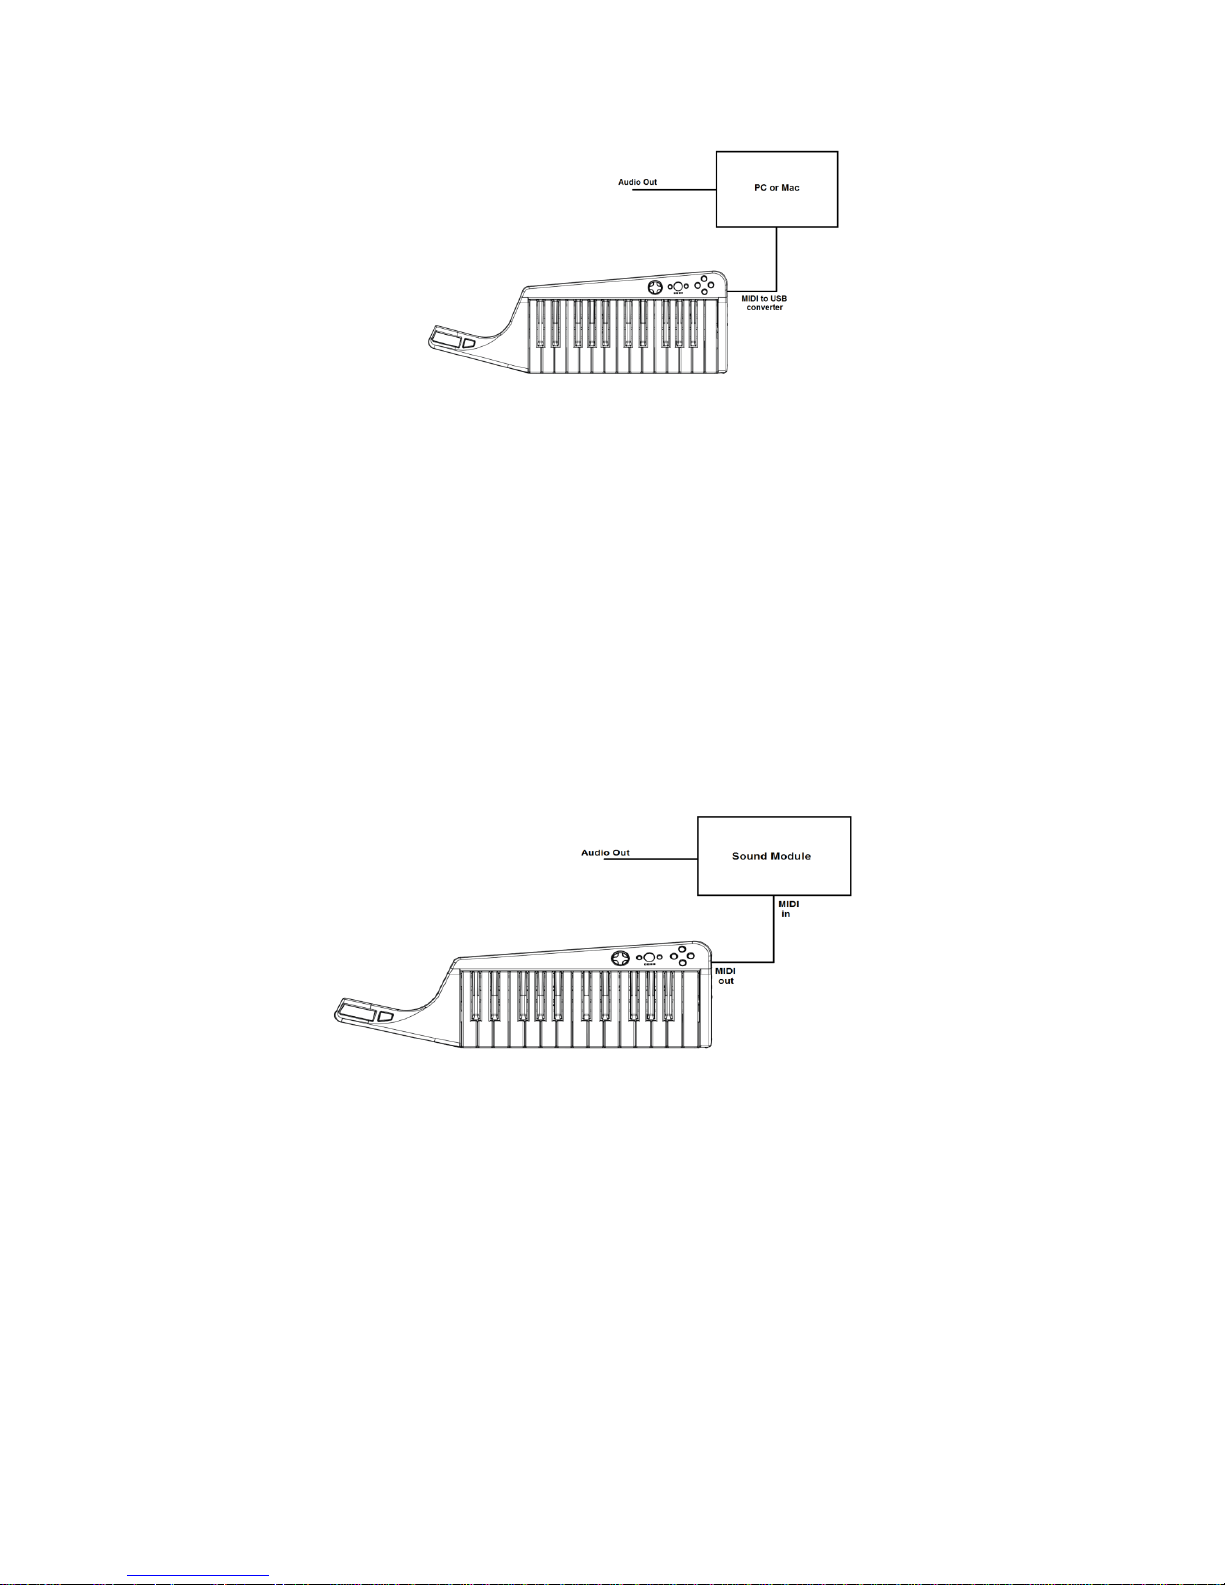
CONNECTING THE KEYBOARD TO A PERSONAL COMPUTER
When you want to use the keyboard as a controller to trigger sounds from your
MIDI sequencing software or your computer’s on board MIDI synthesizer, a
connection from the keyboard’s MIDI output port to a MIDI Interface (such as
the
USB MIDI Sport 1x1
be connected to a sound card or a n audio inter face as long as they are equipped
with MIDI input
interface.
port. Audio output will be provided by the sound card or audio
When using the Keyboard with MIDI sequencing software applications, be sure
to consult the application user guide to ens ur e p roper connectivity and
communication.
) will be necessary. Alternatively, the keyboard can
This diagram is a place holder
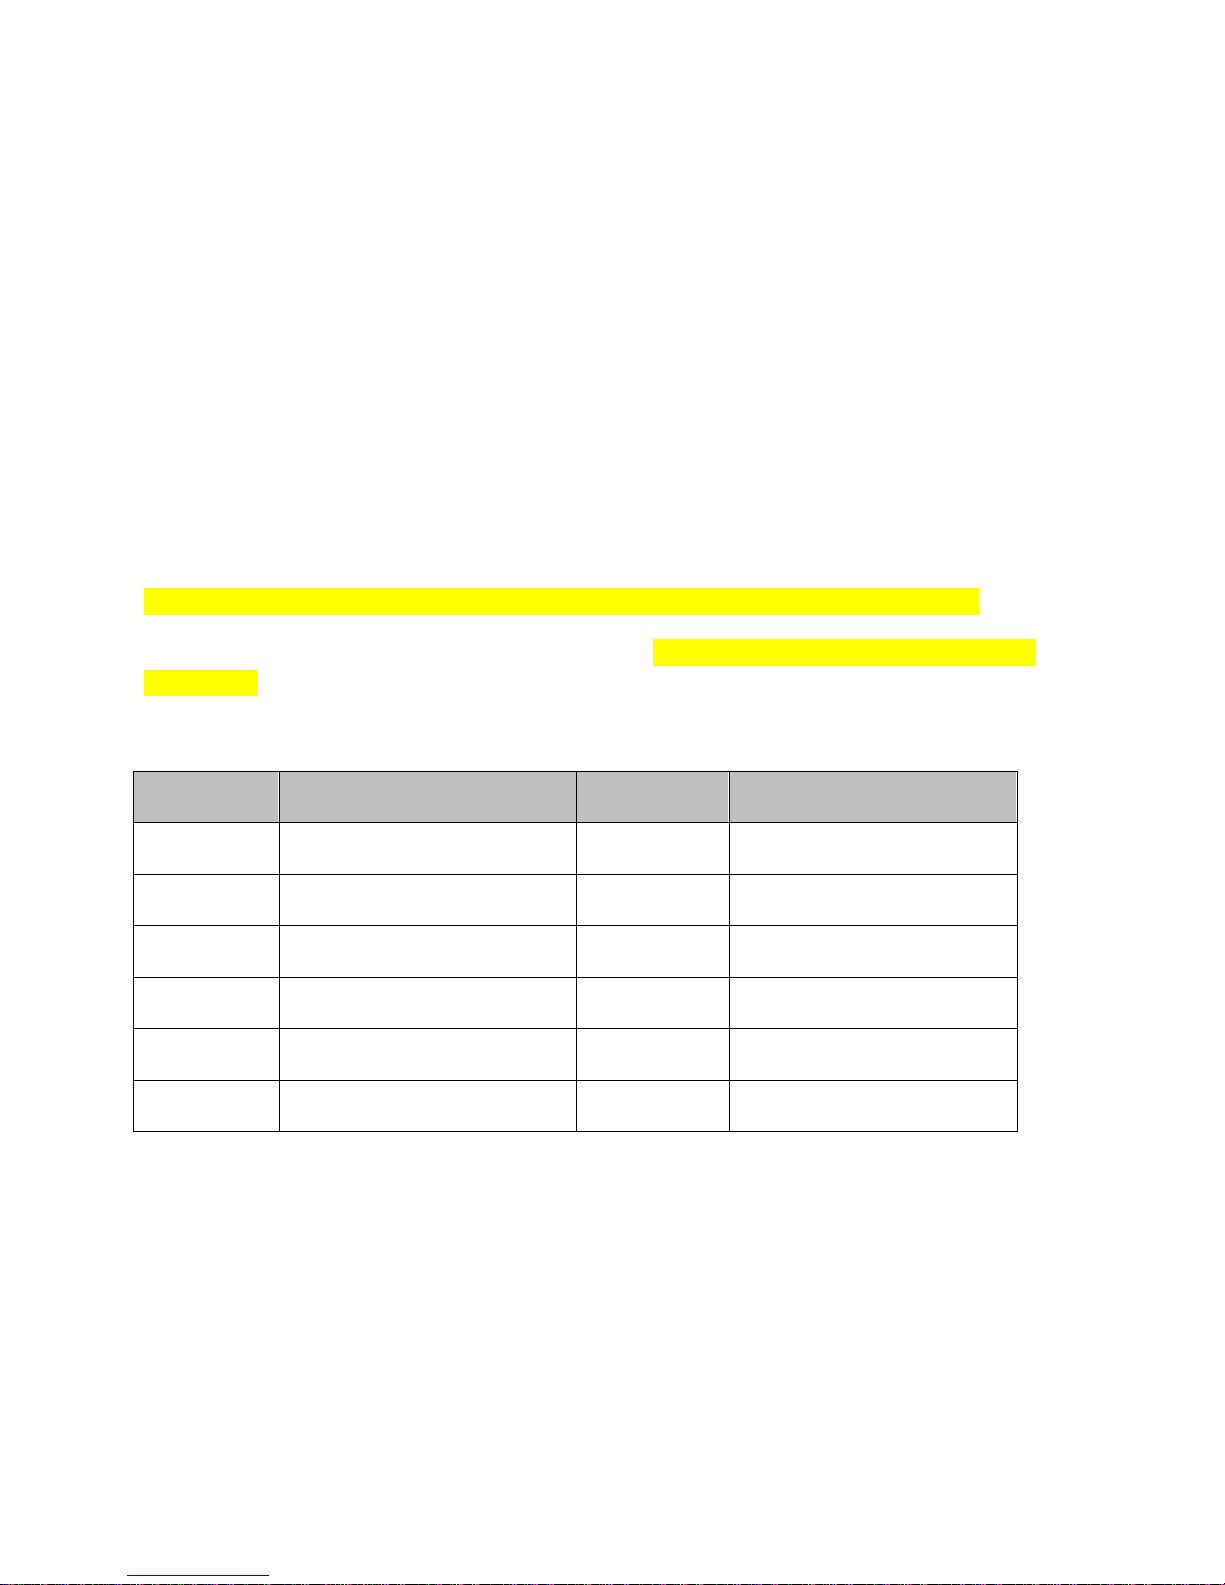
CONNECTING TO A MIDI SOUND MODULE
To connect to a MIDI sound module, Connect one end of the MIDI cable to the
MIDI Out port on the keyboard, and the other end of the cable to the MIDI In
port on a sound module. Audio output will be provided by the sound module.
When using the keyboard with a sound module, be sure to consult the sound
module user guide to ensure proper connectivity and communication.
This diagram is a place holder

EXTERNAL PEDAL FUNCTIONALITY
Pedal Controls
Pedal Type
MIDI Assignment
Digital Stomp
Damper Pedal/Sustain
The pedal jack supports an optional analog Expression Pedal and/or digital Stomp Switch.
The analog expression pedal has three available functions – Expression, Channel Volume, and
Foot Controller. To change pedal function, press the appropriate button on the directional pad.
Analog Expression
Default: Expression Controller (can be changed using buttons 3, 4 and
6)
TOUCH STRIP
To use the Touch Strip, place a finger lightly on the strip. Moving your finger side to
side on the strip will change the output value.
To toggle function as a Pitch Wheel, press and hold button 2. Button 2 must be held
down while using the Touch Strip.
UNDERSTANDING THE CONTROLS
CHANGE OCTAVE
The default base octave of 3 is adjustable from -1 (MIDI notes 0 – 11)
through 7 (MIDI notes 96 – 107) using the octave increment and decrement
buttons. The base octave corresponds to the leftmost set of 12 white and
black keys from C to B.
Pressing both the octave increment and decrement buttons simultaneously
will reset the current base octave to the default of 3.
Octave changes affect only those piano keys that are mapped to channel 1.
CHANGE PROGRAM
Note Name
Drum Assignment
Note Name
Drum Assignment
C3
F#3
C#3
#36 – Bass Drum 1
G3
#42 – Closed Hi Hat
D3
#38 – Acoustic Snare
G#3
#46 – Open Hi Hat
E3
A#3
F3
#47 – Low Mid Tom
B3
#53 – Ride Bell
The default Program value of 1 is adjustable from 1 to 128 using the
Program increment and decrement buttons.
Pressing both the Program increment and decrement buttons simultaneously
will reset the current Program value to the default of 0.
Program changes are transmitted on channel 1 only.
PANIC FUNCTION
To immediately stop all notes across all channels press buttons 7, 8, and 9
simultaneously.
DRUM MAPPING
Drum Mapping enables the use of the lower octave on the keyboard for drum sounds.
To enable/disable, press UP on the directional pad. All drum notes are transmitted on MIDI
channel 10.
#35 – Acoustic Bass Drum
D#3 #40 – Electric Snare A3 #49 – Crash Cymbal 1
#41 – Low Floor Tom
#50 – High Tom
#51 – Ride Cymbal 1

DEFAULT SETTINGS
Transmit on
Octave
Value 3
Program
Value 1
Touch Strip function
Analog Pedal Function
Expression
MIDI Channel 1
Drum Mapping Disabled
Modulation

LED INDICATORS
User Ac tion
Resulting LED State
Turns Keyboard O N
Display Count:
Turns Keyboard O F F
Display Count:
Presses D-Pad Left to assign Expression
Pedal to MIDI Expression channel 1
Display Count:
Presses D-Pad Right to assign Expression
Ped al to MIDI F oot Co ntroll er on channel 1
Display Count:
Presses D-Pad Down to assign Expression
Pedal to MIDI Channel V ol ume o n c han ne l
1
Display Count:
The four Player LEDs are used to indicate various internal states and to acknowledge
actions that the user has performed. The LED behaviors are as follows:
Note: LEDs revert back to their static indicator state,
any sequence
User…
Xbox360 - holds Guide button for 2 seconds
PS/Wii - slides power switch to ON
Xbox360 - holds Guide button for 2 seconds
PS/Wii - slides power switch to OFF
,
(PS/Wii illustrated to show player #s)
LED Key
= LED Off
= LED On
= LED Unchanged
Continuous
Continuous
Continuous
upon completion of
Continuous
Continuous

Presses button to enable/disable Drum
Kit mapping
Presses either Octave or Program
increment button
Display Count: 1x
Presses either Octave or Program
decrement button
Resets either Octave or Program setting
Display Count: Continuous
Enable:
Disable:
100mS
100mS
100mS
200mS
Display Count: 1x
100mS
100mS
100mS
200mS
Display Count: 1x
100mS
100mS
200mS

FAQ
1. Can I use the USB dongle that I use to play Rock Band to connect to PC with
MIDI functionality?
No, to use the MIDI functionality of the keyboard, you must connect to
another device using the MIDI Out port on the keyboard.
2. If the keyboard is considered a ‘real instrument’ why doesn’t it make any sound?
This is true for many MIDI Controllers. One of the key features of a
MIDI controller is its ability to generate sounds through other devices
such as: drum machines, organs and sound modules. One controller can
be used to drive all of those devices and be small enough to carry.
 Loading...