

harmoni LUGOHS440, LUGOHS0660, LUGOHS1320, LUGOHS1540, LUGOHS0880 Instruction And Installation Manual
...
Digital electric radiator
INSTRUCTION & INSTALLATION GUIDE
2
Introduction
harmoni digital electric radiators are programmable with an exclusive electronic temperature program-
mer and manufactured with quality components designed for you. harmoni digital electric radiators
have passed the most demanding quality controls to meet with the most rigorous safety and eciency
requirements. The digital electric radiators are designed for xed installation only and below are the main
features:
• Backlight display
• Easy to follow settings and programming
• Highly accurate electronic thermostat
Please read this Instruction & Installation Guide carefully to ensure correct operation. It is important that this
guide is left with the product after installation.
Contents
1. harmoni Technical Specications ........................................................................................................................................3
2. Installation & Safety precautions ........................................................................................................................................4
2.1. Installation precautions ..................................................................................................................................................4
2.2. Safety precautions ..............................................................................................................................................................4
3. harmoni system Installation........ ........................................................................................................................................4
3.1. Mounting ...............................................................................................................................................................................4
3.2. Fixing the supports .............................................................................................................................................................5
4. harmoni system Information & Instructions.............................................................................................................................5
4.1. Keypad ...............................................................................................................................................................................5
4.2. Screen ................................................................................................................................................................................6
4.3. Switch on & o (stand-by) ............................................................................................................................................6
4.4. Adjust the day & time ..........................................................................................................................................................7
4.5. Lock the keypad.....................................................................................................................................................................7
4.6. Select either MANUAL or AUTOMATIC mode..........................................................................................................7
4.7. harmoni system Advanced Functions........................................................................................................................10
5. Maintenance & Cleaning............... .......................................................................................................................................11
6. Guarantee......................................... .......................................................................................................................................11
3
1. harmoni Technical Specications
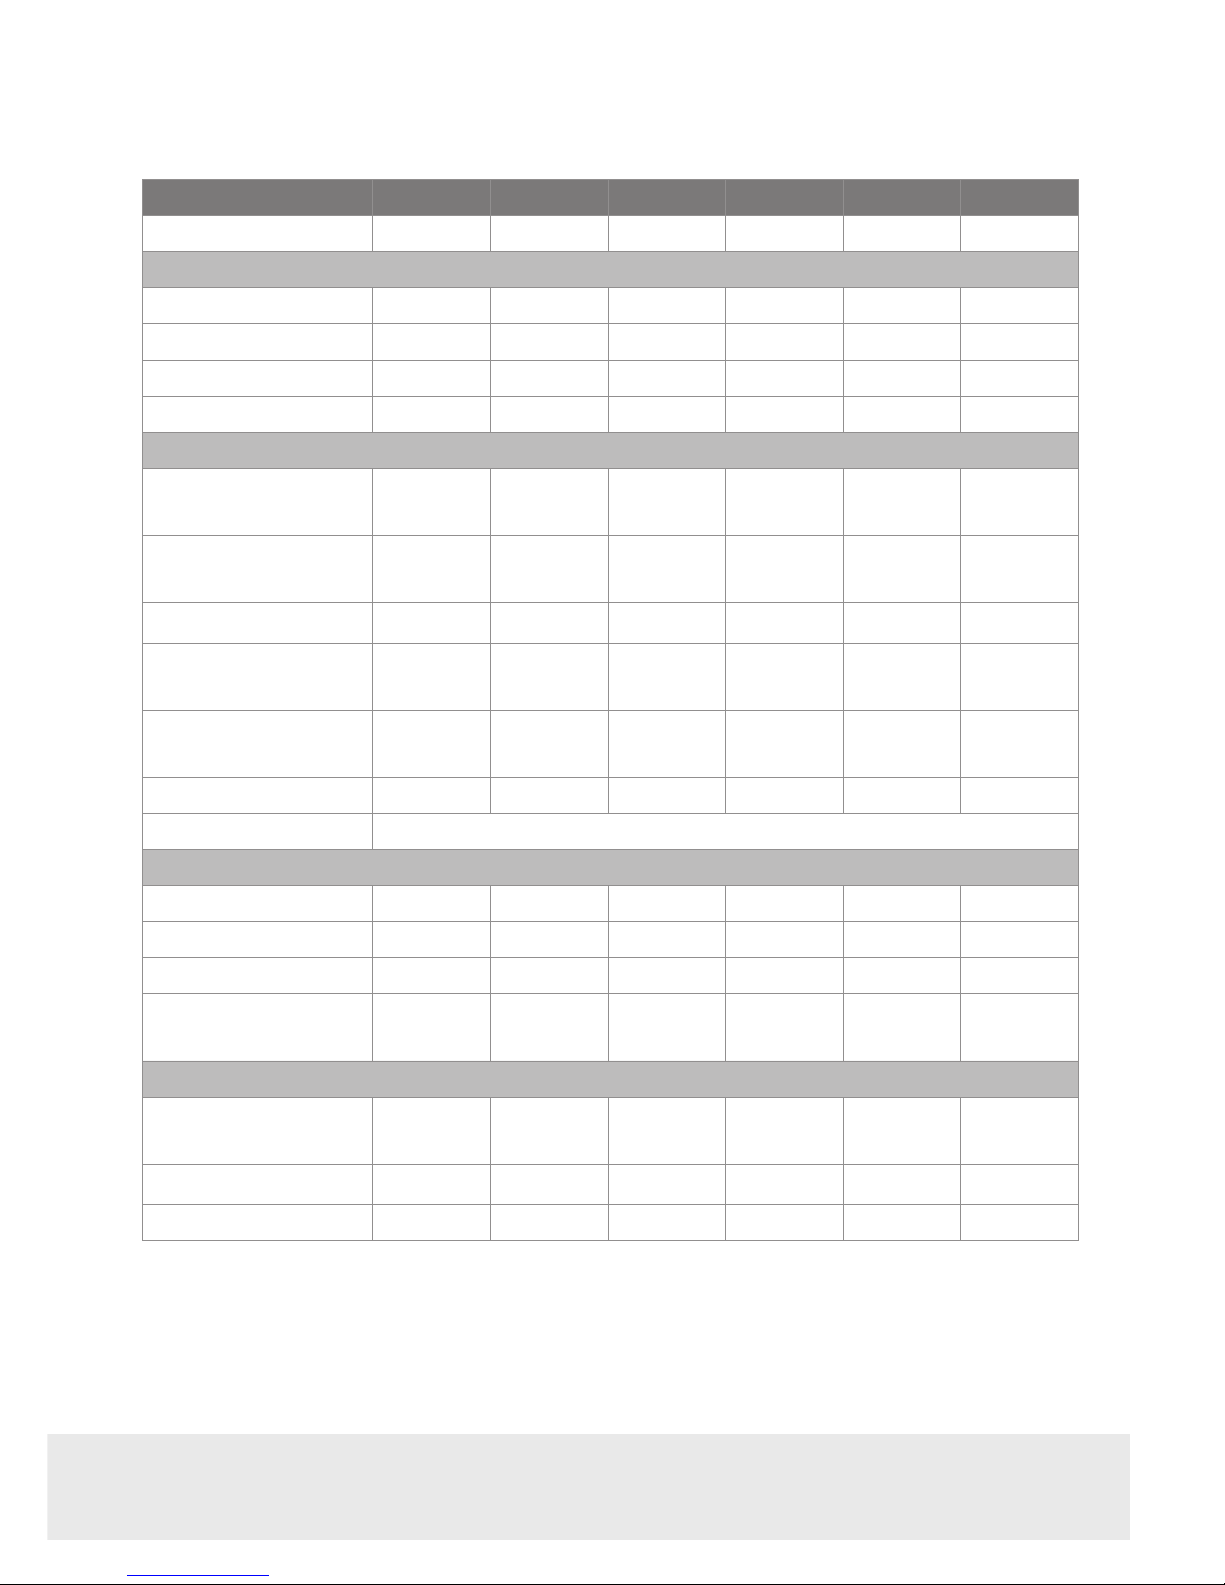
MODEL
LUGOHS440 LUGOHS0660 LUGOHS0880 LUGOHS1100 LUGOHS1320 LUGOHS1540
No. Elements 4 6 8 10 12 14
DIMENSIONS
Width (mm) 425 585 747 907 1,069 1,230
Height (mm) 575 575 575 575 575 575
Depth (mm) 98 98 98 98 98 98
Installed Depth (mm) 120 120 120 120 120 120
MECHANICAL CHARACTERISTICS
Armoured steel
heating element
High purity
aluminium
Thermal oil
PC/ABS panel with
keypad
Left side cover
PC/ABS
Weight (kg) 8 12 16 20 24 28
Finish White RAL 9010
ELECTRICAL CHARACTERISTICS
Nominal Power (W) 440 660 880 1,100 1,320 1,540
Voltage (V) 230 V ~ 230 V ~ 230 V ~ 230 V ~ 230 V ~ 230 V ~
Current (A) 1.9 2.9 3.8 4.8 5.6 6.7
Power per Element
(W/Element)
110 110 110 110 110 110
INSTALLATION & PROTECTION
Template &
Installation Kit
Safety thermostat
Protection Grade IP 24 IP 24 IP 24 IP 24 IP 24 IP 24
4
2. Installation & Safety precautions (EN 60335 Standards)
Before switching on the product, please read the “Installation & Safety Precautions” in detail rst to ensure
the correct operation of the product.
2.1. Installation precautions
The product is designed for household or residential use. You are advised to have the product installed by
an authorized professional installer. Make sure the product is properly connected to 230V and is earthed.
2.2. Safety precautions
This appliance can be used by children aged from 8 years and above and persons
with reduced physical sensory or mental capabilities or lack of experience and
knowledge if they are supervised or have been given instruction concerning use
of the appliance in a safe way and understand the hazards involved. Children
should not play with the appliance. Cleaning and user maintenance should not
be carried out by children without supervision. Children must be supervised at
all times to ensure that they do not interfere with the product.
This product is lled with a precise amount of special oil that does not need
any maintenance. Any repairs requiring the opening of the oil tank must only
be done by an ocial harmoni installer or its after-sales service personnel, who
should also be notied should an oil leak be noticed. The regulations on discarding oil when the heater is being disposed of must be observed. If the power cable
is damaged, it must be replaced by the manufacturer, its after-sales service or
authorized personnel in order to avoid any damage.
3. harmoni system Installation
3.1. Mounting
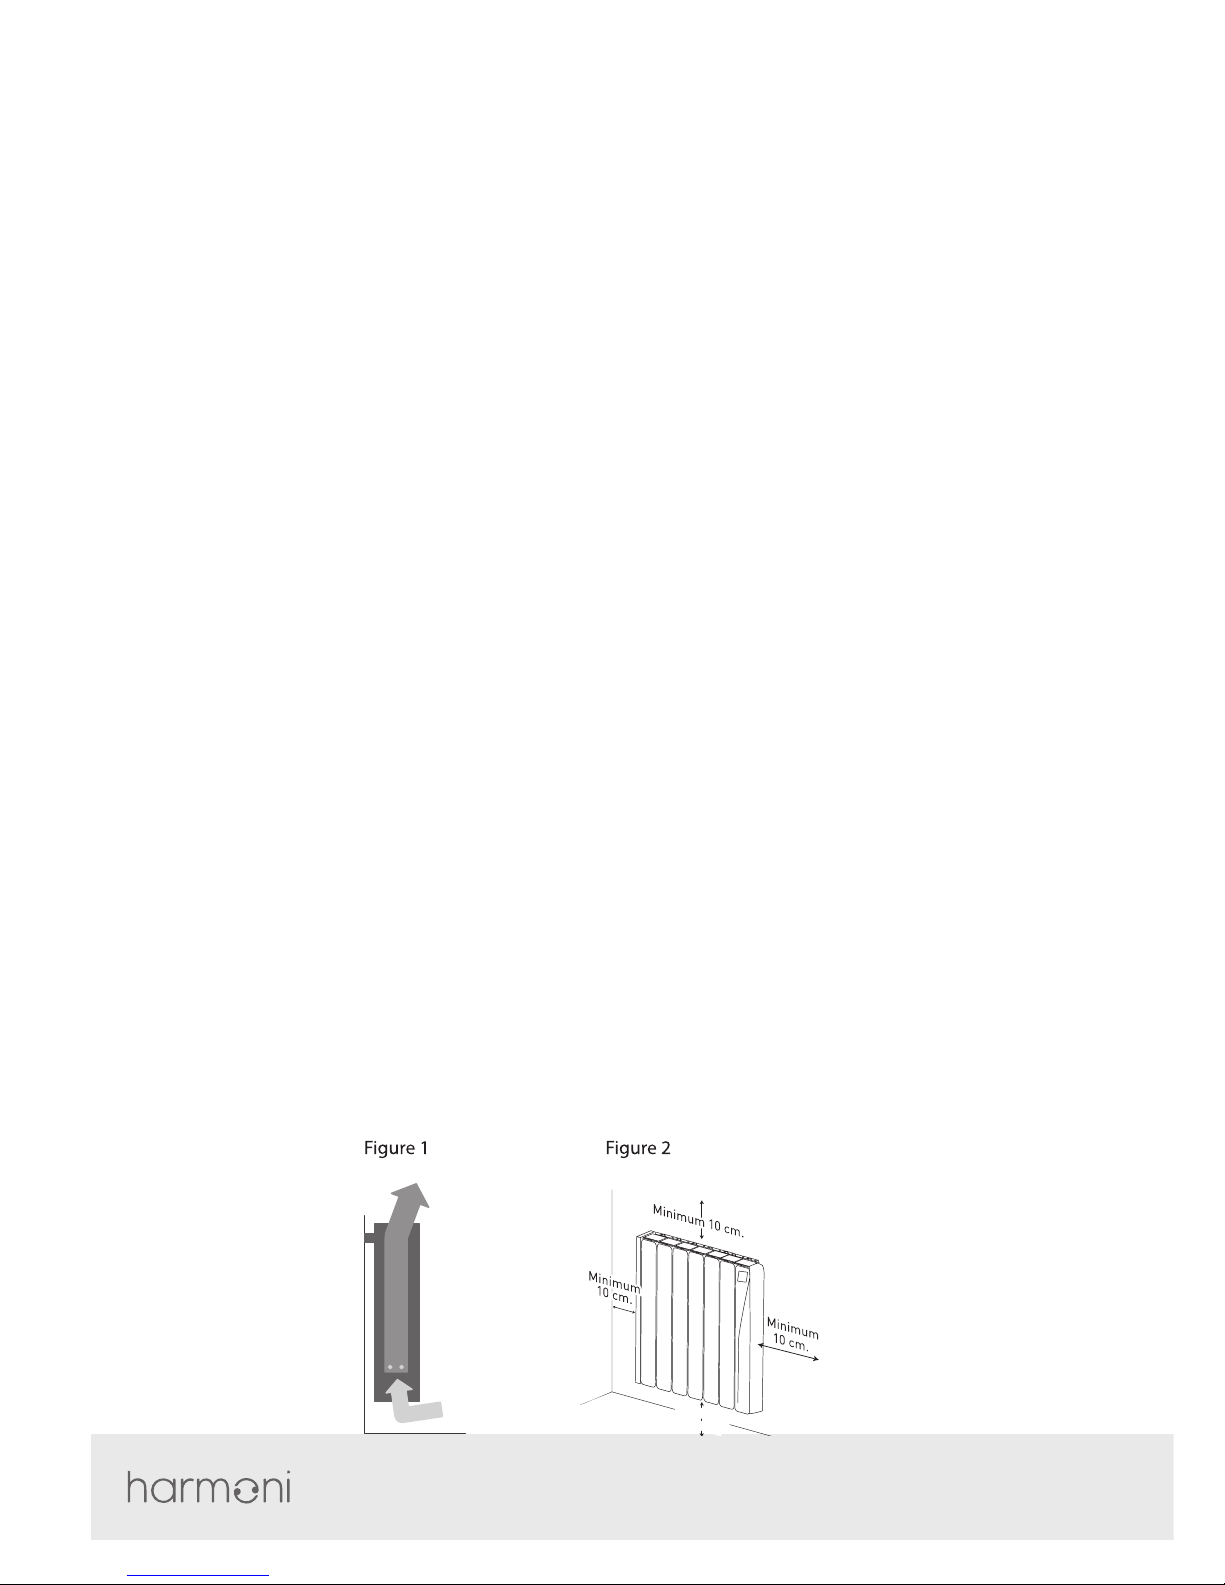
The product works by means of natural air convection (Figure 1). In order to achieve optimal functioning
and an even distribution of heat, the lower part of the product, once mounted on the wall, must be at least
10-12cm from the oor, and 30cm at the most. As for the sides and above, a minimum distance of between
10-12cm must be left from any wall or brickwork in order for it to function correctly (Figure 2).
Minimu
m
10 cm
.
5
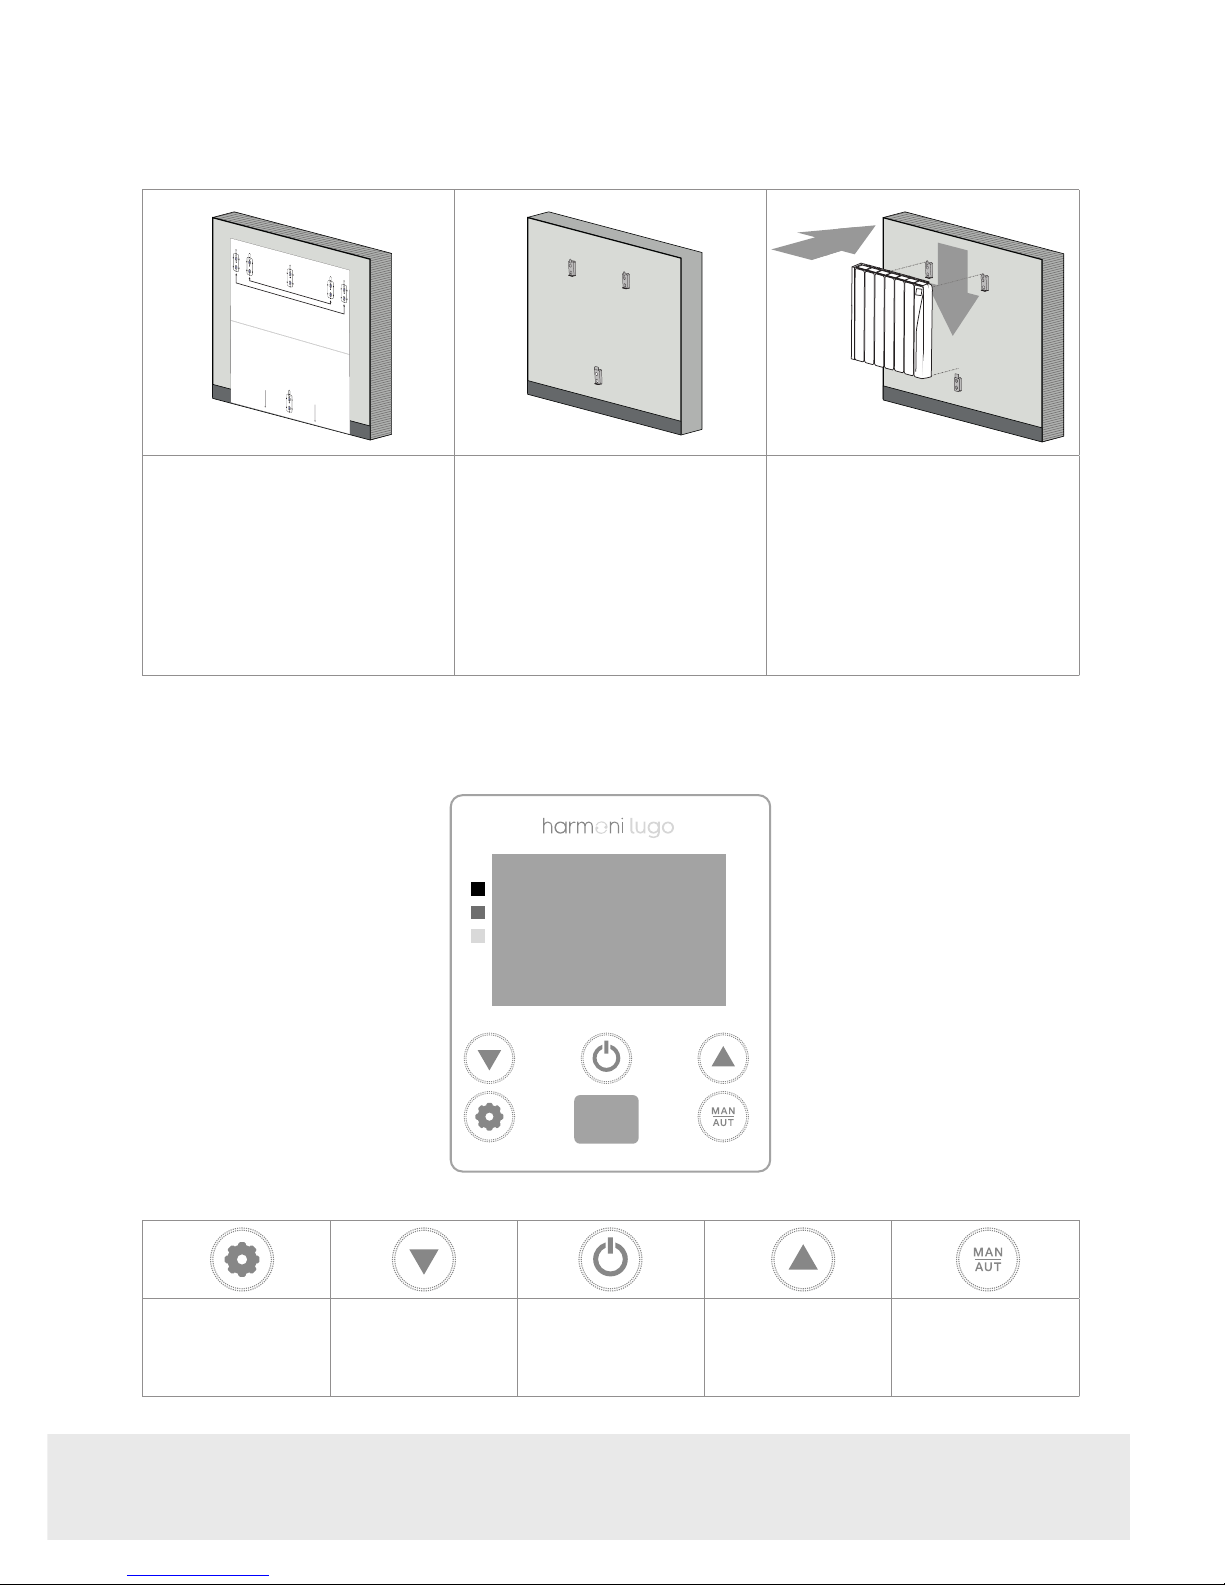
3.2. Fixing the supports
Inside the packaging you will nd a xing kit. Please nd the instructions below:
1. Choose the right part of the
wall.
2. Place the mounting stencil on
the wall, marking the places for
the holes.
3. Remove the stencil and make
the holes in the wall.
4. Fix the supports using the
plugs and screws provided, or
others suitable for the wall type.
5. Check the correct positioning
of the lower support.
6. Align the product with the top
supports.
7. Place the product in the
supports.
4. harmoni system Information & Instructions
4.1. Keypad
Settings
/ Back
Decrease
Temperature
/ Move down
On/O (stand-by)
/ Conrm
Increase
Temperature
/ Move up
MANUAL / AUTO
function
 Loading...