

Page 1
Power for the Digital Revolution
.
®
®
The
Bridge
TM
iPod®Docking Station
Owner’s Manual
iPod not included
Page 2

Introduction
Congratulations! With The Bridge™you
are entering the new world of listening
enjoyment made possible by combining the incredible
playback flexibility
included) with the sonic power of your
Harman Kardon receiver.
With a single, simple connection, your
iPod is connected, and from there all
you need to do is use your remote
control and you are ready to go!
Features
•
Single connection to any The Bridgeready Harman Kardon receiver
• Plays audio from an iPod through
your Harman Kardon receiver
• Controls your iPod using the
Harman Kardon remote
• Easy track selection with on-screen
navigation
• Charges the iPod
Selecting the Correct iPod Insert
Each iPod model is a slightly different
size, making it necessary to use an
insert that matches your specific iPod
to The Bridge. The Bridge is shipped
with the insert for the color screen and
photo models already installed; if you
own one of those models, no further
changes are needed.
If you own a different iPod, first select
the insert that matches your model.
The model identification is printed on
the back of each of the four extra
inserts supplied with The Bridge. Note
that the insert marked “Universal”
should not be used alone. It is
designed for use with future iPod
models that are not accommodated
storage capacity and
of an iPod®(not
by the current inserts. For more
information or updates, visit
The Bridge section of our Web
site at www.harmankardon.com.
Use the following as a guide to
determine which insert is correct
for your iPod model:
• For any iPod with a color screen,
including all iPod photo models, use
the insert with “COLOR/PHOTO” on
the back. This insert is already
installed in The Bridge.
• For 20GB or 30GB iPod photo
only, remove the insert
models
marked “COLOR/PHOTO” and
attach the two included foam pads
to the rear inside wall in the well of
the insert before replacing it.
• For iPods with a black and white
screen and a 10GB, 15GB or 20GB
hard drive, use the insert with
“10GB/15GB/20GB” on the back.
• For iPods with a black and white
screen and a 30GB or 40GB
hard drive, use the insert with
“30GB/40GB” on the back.
• Use the insert with “mini” on the
all iPod mini models.
back for
• Use the insert with “Universal” on
the back for iPod models that come
with a special insert.
To remove the 30GB iPod photo
insert, or if you need to replace the
insert at a later time when you change
iPod models, hold The Bridge with one
hand and grab the edges of the insert
in The Bridge and pull straight up.
Once you have selected the correct
insert, place it over the well in the
center of The Bridge and gently press
it down so that it snaps into place
.
NOTE: Do not place an iPod in
The Bridge unless an insert is
installed; otherwise, the iPod will be
prevented from properly connecting,
and damage will be caused to The
Bridge or your iPod that is not covered
by the warranty for either product.
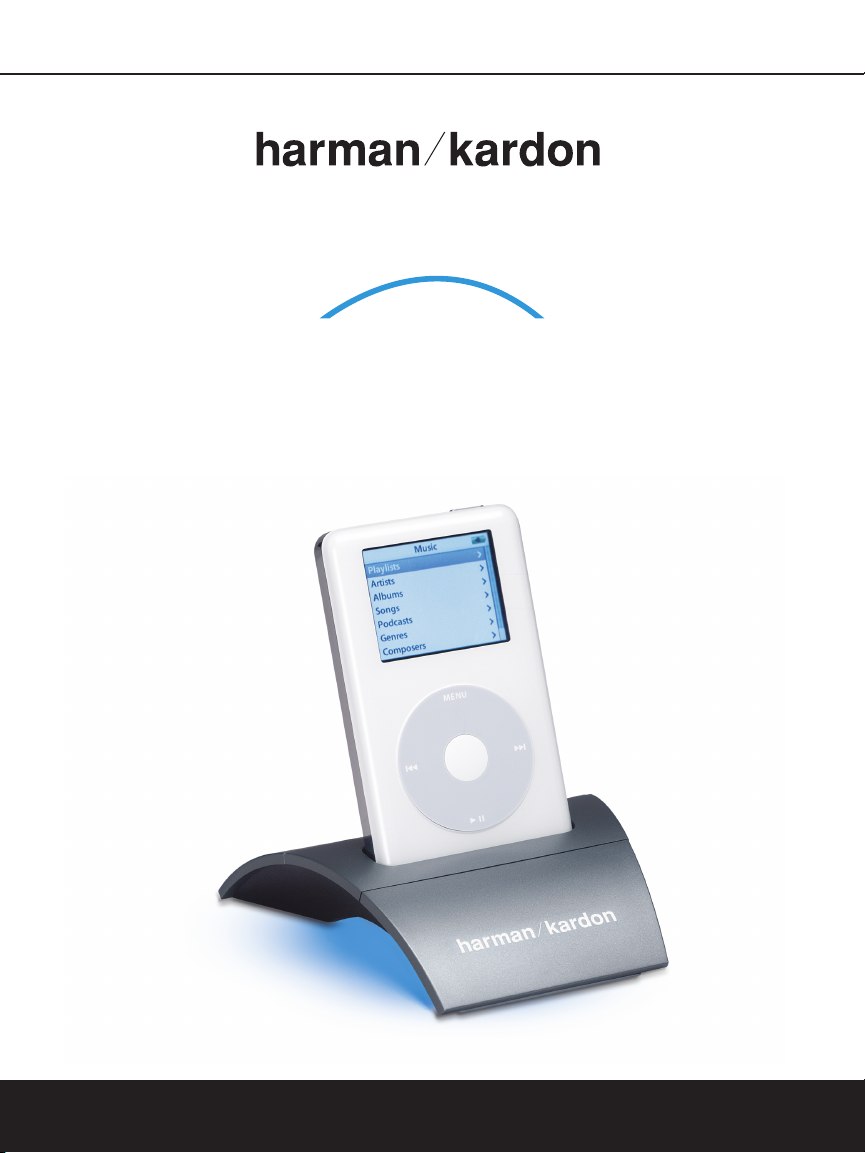
Connecting The Bridge to
Your Receiver
Before connecting The Bridge, turn
your receiver off using its
Power Switch
the power is off when the front-panel
Power Indicator (normally amber
when the unit is in the Standby mode)
goes out. Depending on your receiver
model, the Master Power Switch is
located above the Power Indicator or
behind the front-panel door.
With the receiver off, press the button
on each side of the connector at the
end of The Bridge cable and insert this
plug into The Bridge/DMP port on the
receiver’s rear panel. If the port is horizontal, insert the connector with the
flat side up. If the port is vertical, insert
the connector with the flat side to the
right. In all cases, the connector will
only go in one way. If you inadvertently
try to plug the connector in the wrong
way, do not force it. Simply reverse
the connector and try again.
. You will know that
Master
2
Page 3
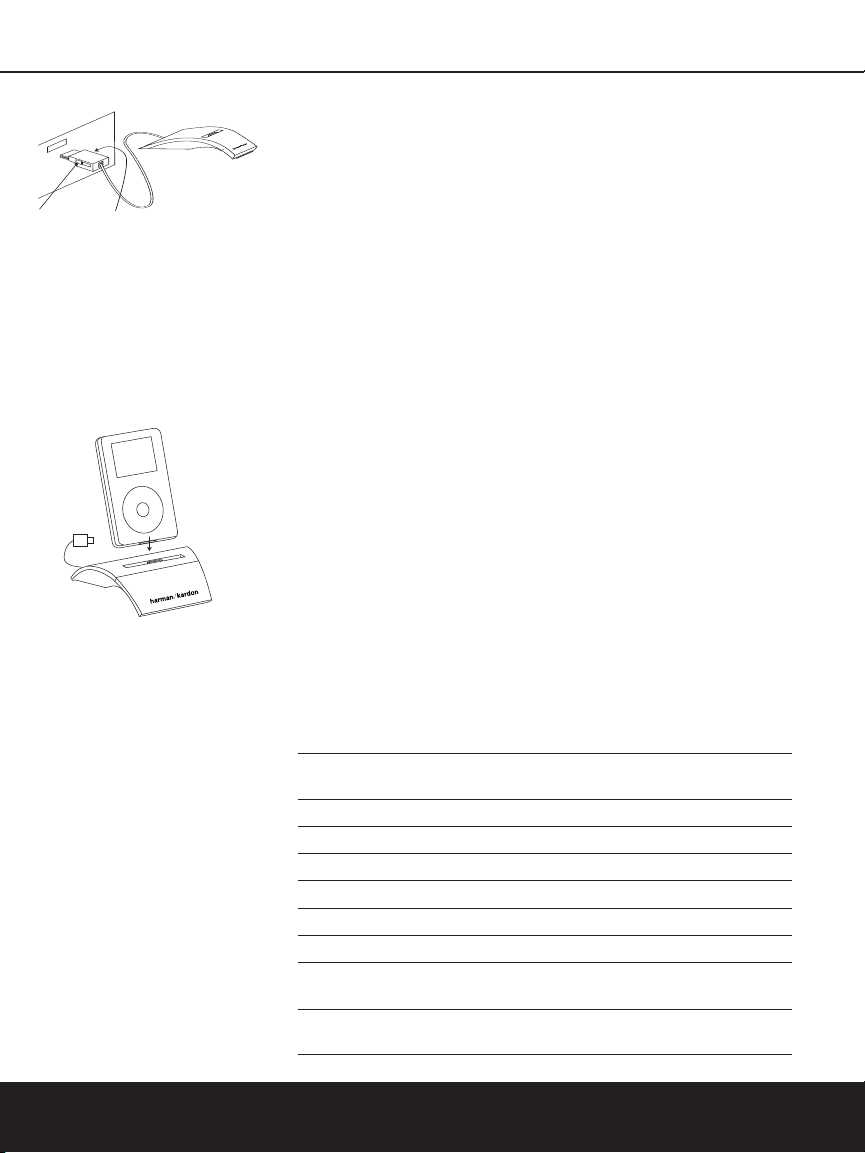
Press buttons when inserting or removing the plug.
Docking Your iPod
After placing the appropriate insert in
the center well of The Bridge and connecting The Bridge to your receiver,
dock your iPod by placing it into the
insert, gently pressing it down until
the connectors mate on the iPod and
The Bridge.
NOTE: If you normally keep your iPod
in a protective case, or “skin,” you will
need to remove it before playing your
iPod in The Bridge.
Using The Bridge
Once The Bridge is connected, you
may use either the front-panel controls
or the AVR’s remote to select tracks
for playback from your iPod.
To select the iPod docked in The
Bridge, press the
Button
DMP/The Bridge
on the remote, or use the
Source Selection Button on the
front panel to change sources, as
described in the receiver’s owner’s
manual. When an iPod is correctly
docked in The Bridge, a message will
appear in the front-panel and onscreen displays to confirm that
The Bridge is
CONNECTED,
after which the displays will switch to
the iPod navigation menus and the
iPod’s own menu screen will be
replaced by a “check mark” and a
message reading “OK to disconnect”.
NOTE: If the iPod is not properly connected to the dock, a message reading “Please check connection or battery condition” may scroll across the
bottom line of the receiver’s on-screen
and front-panel displays. If you see
this message, remove the iPod and
insert it in The Bridge again, making
sure that it seats properly.
When an iPod is properly connected
to a receiver via The Bridge (as confirmed by the appearance of the
check mark rather than the standard
iPod menus) the iPod’s Click Wheel
and controls do not operate. Instead,
you must use either the receiver’s
front-panel buttons or the remote
control to operate your iPod.
Controlling the iPod
Refer to the table below to select the
front-panel or remote control button
for the desired iPod function. Press
that button to operate the iPod. For
example, to play a track on the iPod,
you would normally press the
at the bottom of the Click Wheel. To
play a track using an iPod docked in
The Bridge, press the
Button
on the front panel of your
receiver, or the
Play Button on the
receiver’s remote.
Navigating the iPod’s Menus
To help you in selecting tracks and
navigating through the iPod’s contents,
two-line messages will be displayed in
the receiver’s front-panel display and
on the video display connected to
your receiver. In most cases, these
display and navigation messages will
closely mirror the familiar iPod menus.
The upper line of the receiver’s display
will show the title of the current menu,
such as Playlists,Artists, Albums,
Genres, Songs, etc. The lower line will
show each choice available for selection within that category as you scroll
to it, similar to scrolling down the list
of choices in the iPod’s menu.
iPod Button iPod AVR Front- AVR
Equivalent Function Panel Button Remote Button
›
II Play/Pause Tune Mode Play
‹‹
I
››
I Next Track Tune Up
Previous Track Tune Down
Menu Menu Call-Up AM/FM Menu
Select Button Select Function Set Set
›
II Pause Tune Mode Pause
Click Wheel Scroll Preset Up Navigation
Clockwise Forward Arrow Right
Click Wheel Scroll Preset Navigation
Counterclockwise
Backward Down Arrow Left
Tune Mode
‹‹
››
›
‹
›
II icon
3
Page 4

An arrow at the far right of the bottom
line will indicate whether there are
more choices in the menu stack.
• A right-pointing arrow ( ) tells
you that you are at the start of the
options stack. Press the
on the front panel or the
Button
Preset Up
›
button on the remote to scroll down
through the available choices.
• Two arrows, one pointing in each
direction ( ), indicate that you
are in the middle of the options
stack. Press the
Preset Up or
Preset Down Button on the front
fi/fl
panel or the
buttons on the
remote to scroll up or down through
the available choices.
• A left-pointing arrow ( ) tells you
that you are at the bottom of the
options stack. Press the
Down Button
or the
fl
button on the remote to
Preset
on the front panel
scroll up through the available
choices.
While a track is playing, the upper line
of both displays will continually scroll
the Song, Artist and Album information. The lower line will show the
elapsed time of the current track on
the left, and the remaining time on the
right. The icon between the two time
displays will show the Play icon (
fl
)
when a track is playing and the Pause
±
) when playback is paused.
icon (
The play time and track information
will always be available in the frontpanel display. The on-screen display
will disappear from view after the time
period set in the Advanced Settings
menu in your receiver. If you wish to
change the on-screen display time,
follow the instructions shown in the
Advanced Features section of your
receiver’s owner’s manual. The onscreen display will reappear at the start
of each new track to show you the
time and track information, and then
it will disappear again to prevent
image retention, or “burn-in,” on
CRT or plasma displays.
Basic Playback and Control
of the iPod
• To pause playback at any time,
press the
Tune Mode Button
on the front panel or the Pause
Button
(±) on the remote. Press it
again to resume playback.
• To skip forward to the next track,
Tune Up Button on the
press the
front panel or the
flfl
Button on the remote. Release
Forward Search
the button and press it again, or tap
it repeatedly to skip forward through
the available tracks.
• To skip back to the start of the current track, press the
on the front panel or the
Button
Reverse Search
Tune Down
fifi
Button on
the remote. Release the button and
press it again, or tap it repeatedly to
skip backward through the available
tracks.
• To fast-forward through a track while
it is playing, press and hold the
Tune Up Button on the front panel
or the
Forward Search
flfl
Button on the remote.
• To play in fast reverse through a
track while it is playing, press and
Tune Down Button on the
hold the
front panel or the
fifi
Button on the remote.
Reverse Search
• To display the menus that guide you
through track selection,
press the
Tuner Band Selector (AM/FM)
Button
on the receiver’s front panel
Menu Button on the remote.
or the
• To navigate the menus, scroll forward using the
Preset Up Button
on the receiver’s front panel or the
fl
Button on the remote. Scroll
backward using the
Button
on the receiver’s front panel
fi
Button on the remote.
or the
Press the
Set Button on either the
Preset Down
front panel or the remote to select
the current entry.
Charging the iPod
You may leave your iPod in The Bridge
even when you are not using it as a
playback source.Whenever the iPod
is docked and your receiver is turned
on, The Bridge will charge the battery
in the iPod.
Some Harman Kardon receivers
allow you to select whether you wish
to have the iPod’s battery charge
when the receiver is turned off (in
the “Standby” mode) by changing
a setting in the Input Menu on the
receiver. Consult your receiver’s
owner’s manual to see whether your
receiver has this capability.
Removing the iPod
To remove an iPod from The Bridge,
grasp the sides of the iPod and pull
it straight up, away from The Bridge.
Depending on your iPod model and
the software version it is using, the
check mark may remain in the iPod’s
display for a few minutes before
returning the iPod to normal operation.
This is a function of the iPod’s software and does not indicate a failure in
od, The Bridge or your receiver.
the iP
4
Page 5

Troubleshooting Guide
SYMPTOM SOLUTION
The iPod does not play or respond to • Make sure that The Bridge is properly connected
commands from the receiver’s remote. to a compatible Harman Kardon receiver.
• Make sure that DMP/The Bridge is selected as the input
on the receiver.
The blue LED under The Bridge goes out • Check the menu setting for DMP on your receiver to make
when the receiver is in the Standby mode. sure that the “
turned
RECHARGE IN ST-BY” option is
ON, if available.
• Make certain that the receiver is in the Standby mode by looking for
the amber standby light. The iPod will not charge when the Master
Power Switch is off.
The iPod’s front-panel display and controls • This is normal and does not indicate a problem
do not operate when the iPod is docked in with the iPod, The Bridge or your receiver.
The Bridge and DMP/The Bridge is selected
as the receiver’s input.
Specifications:
iPod Compatibility: All iPod “docking connector” models, including third-generation and later Click Wheel iPods, iPod photo
(audio playback only) and iPod mini. Not compatible with iPod shuffle
™
. iPod not included.
Receiver Compatibility: All Harman Kardon products with The Bridge logo on the carton and owner’s manual.
Dimensions (H x W x D): 1-3/16" x 4-1/2" x 4-1/2"
Weight: 5.9 oz.
© 2005 Harman International Industries, Incorporated. All rights reserved.
Harman Kardon and Harman International are trademarks of Harman International Industries, Incorporated,
registered in the United States and/or other countries.
Incorporated.
national Industries
The Bridge is a trademark of Har
iPod is a registered trademark, and Shuffle is a trademark, of Apple Computer, Inc.
man Inter
,
5
Page 6

The Harman Kardon products listed below are warranted for the period stated
®
• Receivers, Tuners and Amplifiers 2 Years
• Cassette Decks 1 Year
• Compact Disc Players and Recorders 1 Year
• DVD Players 1 Year
• Accessories 1 Year
Who Is Protected by This Warranty
Your Harman Kardon warranty
protects the original owner of a
Harman Kardon product, provided
that the product was purchased within
the continental U.S.,Alaska or Hawaii
from an authorized dealer who was
authorized by Harman Kardon to sell
such products at the time of the original purchase, or was purchased by
military personnel from an authorized
military outlet. Warranty service is
available only in the country of original
purchase. For warranty information
outside the continental United States,
Alaska or Hawaii, please contact your
local dealer or distributor. Warranty
service is available as long as the
original bill of sale is presented when
warranty service is required. Please
attach a copy of your bill of sale to
this warranty statement and put it in
a safe place.
What Is Covered
Your Harman Kardon warranty covers
all defects in material and workmanship with the following specified
exceptions: (1) damage caused by
accident, unreasonable use or neglect
(including the lack of reasonable and
necessary maintenance); (2) damage
occurring during shipment (claims
must be presented to the carrier);
Limited Warranty
from the date of original purchase.
(3) damage to, or deterioration of,
any accessory or decorative surface;
(4) damage resulting from failure to
follow instructions contained in your
owner’s manual; (5) damage resulting
from the performance of repairs by
someone other than an authorized
Harman Kardon warranty station; (6)
any Harman Kardon unit on which the
serial number has been effaced, modified or removed; (7) units used for
other than home use.This warranty
covers only actual defects within the
product itself, and does not cover the
cost of installation or removal from
a fixed installation, normal setup or
adjustments, claims based on misrepresentation by the seller or performance
variations resulting from installationrelated circumstances such as source
quality or AC power.
NOTE: Repair of our product must be
done by an authorized dealer or service
center.
Unauthorized repair will void
the warranty and is done at the risk
of the consumer.
How to Obtain Warranty Service
If your Harman Kardon product ever
needs service, please return the product to your dealer. If this is not possible and you live in the continental U.S.,
Alaska or Hawaii, please visit our Web
site at www.harmankardon.com, or
call 516-255-HKHK (4545) for the
location of the nearest warranty station, or write to Harman Kardon, Inc.,
250 Crossways Park Drive,Woodbury,
NY 11797 (Attention: Customer
Service). You’ll need to present your
original bill of sale to establish the
date of purchase.
Who Pays for What
Harman Kardon will pay all expenses
for labor and materials for all repairs
covered by this warranty. If necessary
repairs are not covered by this
warranty, or if a unit is examined
which is not in need of repair, you
will be charged for the repairs or
examination.
The owner must pay any shipping
charges incurred in getting your
Harman Kardon product to a
Harman Kardon-authorized warranty
station located within the continental
United States,Alaska or Hawaii. We
will pay reasonable return shipping
charges to any location in the continental United States, Alaska or Hawaii
if the repairs are covered under the
warranty. Please be sure to save the
original shipping carton(s), because
a charge will be made for additional
cartons.
6
Page 7

Information
If you have questions regarding
the installation or operation of this
unit, please call Customer Service
at 516-255-HKHK (4545), or e-mail
us at websupport@harman.com,
or write to us at Harman Kardon,
Incorporated, 250 Crossways Park
Drive,Woodbury, NY 11797
(Attention: Customer Service).
Limitation on Implied Warranties
IMPLIED WARRANTIES OF MERCHANTABILITY AND FITNESS FOR
PARTICULAR PURPOSE ARE LIMITED
IN DURATION TO THE LENGTH OF
THIS WARRANTY, UNLESS OTHERWISE PROVIDED BY STATE LAW.
Exclusion of Certain Damages
HARMAN KARDON’S LIABILITY IS LIMITED TO THE REPAIR OR REPLACEMENT, AT OUR OPTION, OF ANY
DEFECTIVE PRODUCT AND SHALL
IN NO EVENT INCLUDE INCIDENTAL
OR CONSEQUENTIAL DAMAGES OF
ANY KIND.
SOME STATES DO NOT ALLOW
LIMITATIONS ON HOW LONG AN
IMPLIED WARRANTY LASTS AND/OR
DO NOT ALLOW THE EXCLUSION OF
INCIDENTAL OR CONSEQUENTIAL
DAMAGES, SO THE ABOVE LIMITATIONS MAY NOT APPLY TO YOU.
This warranty gives you specific legal
rights, and you may also have other
rights which vary from state to state.
We sincerely thank you for your
confidence in Harman Kardon
products.This equipment has been
painstakingly assembled by highly
trained craftspeople. It should give you
many years of musical enjoyment.
7
Page 8

®
8500 Balboa Boulevard
CA 91329 USA
,
Northridge
Designed and Engineered in the USA
9/05 Part No. 950-0083-001
 Loading...