

Page 1
16-15 E130, infotainment system
Vehicle/engine type: L, P, G, R, S series truck (2016- )
Removal - E130, AUS4
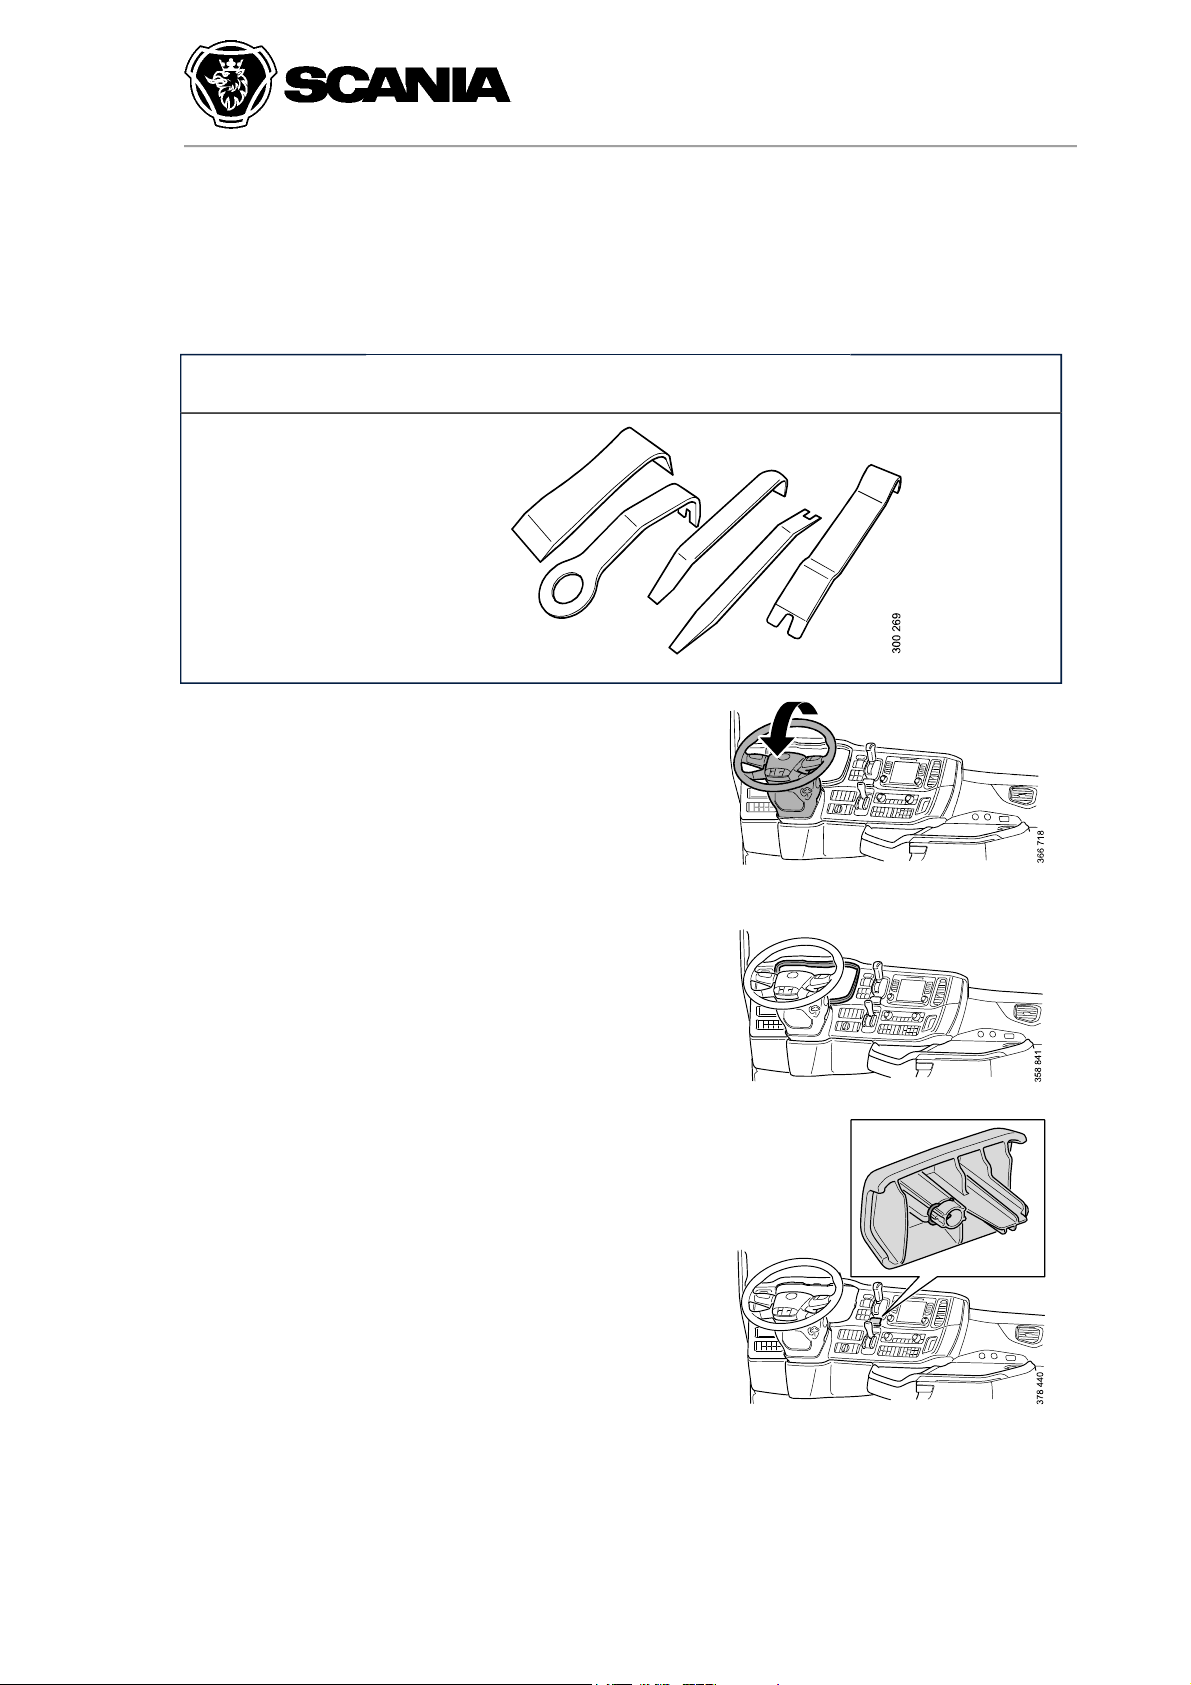
Tools
Number Designation Illustration Tool board
Multi Client User
588 390
1. Lower the steering wheel.
2. Remove the frame around the instrument
cluster. The frame is attached with panel studs.
Plastic removal
tools, 5 parts
N/A
3. For vehicles equipped with an interlock
valve:
Remove the interlock valve casing.
2018-09-18 © Scania CV 1 of 9
Page 2
Vehicle/engine type: L, P, G, R, S series truck (2016- )
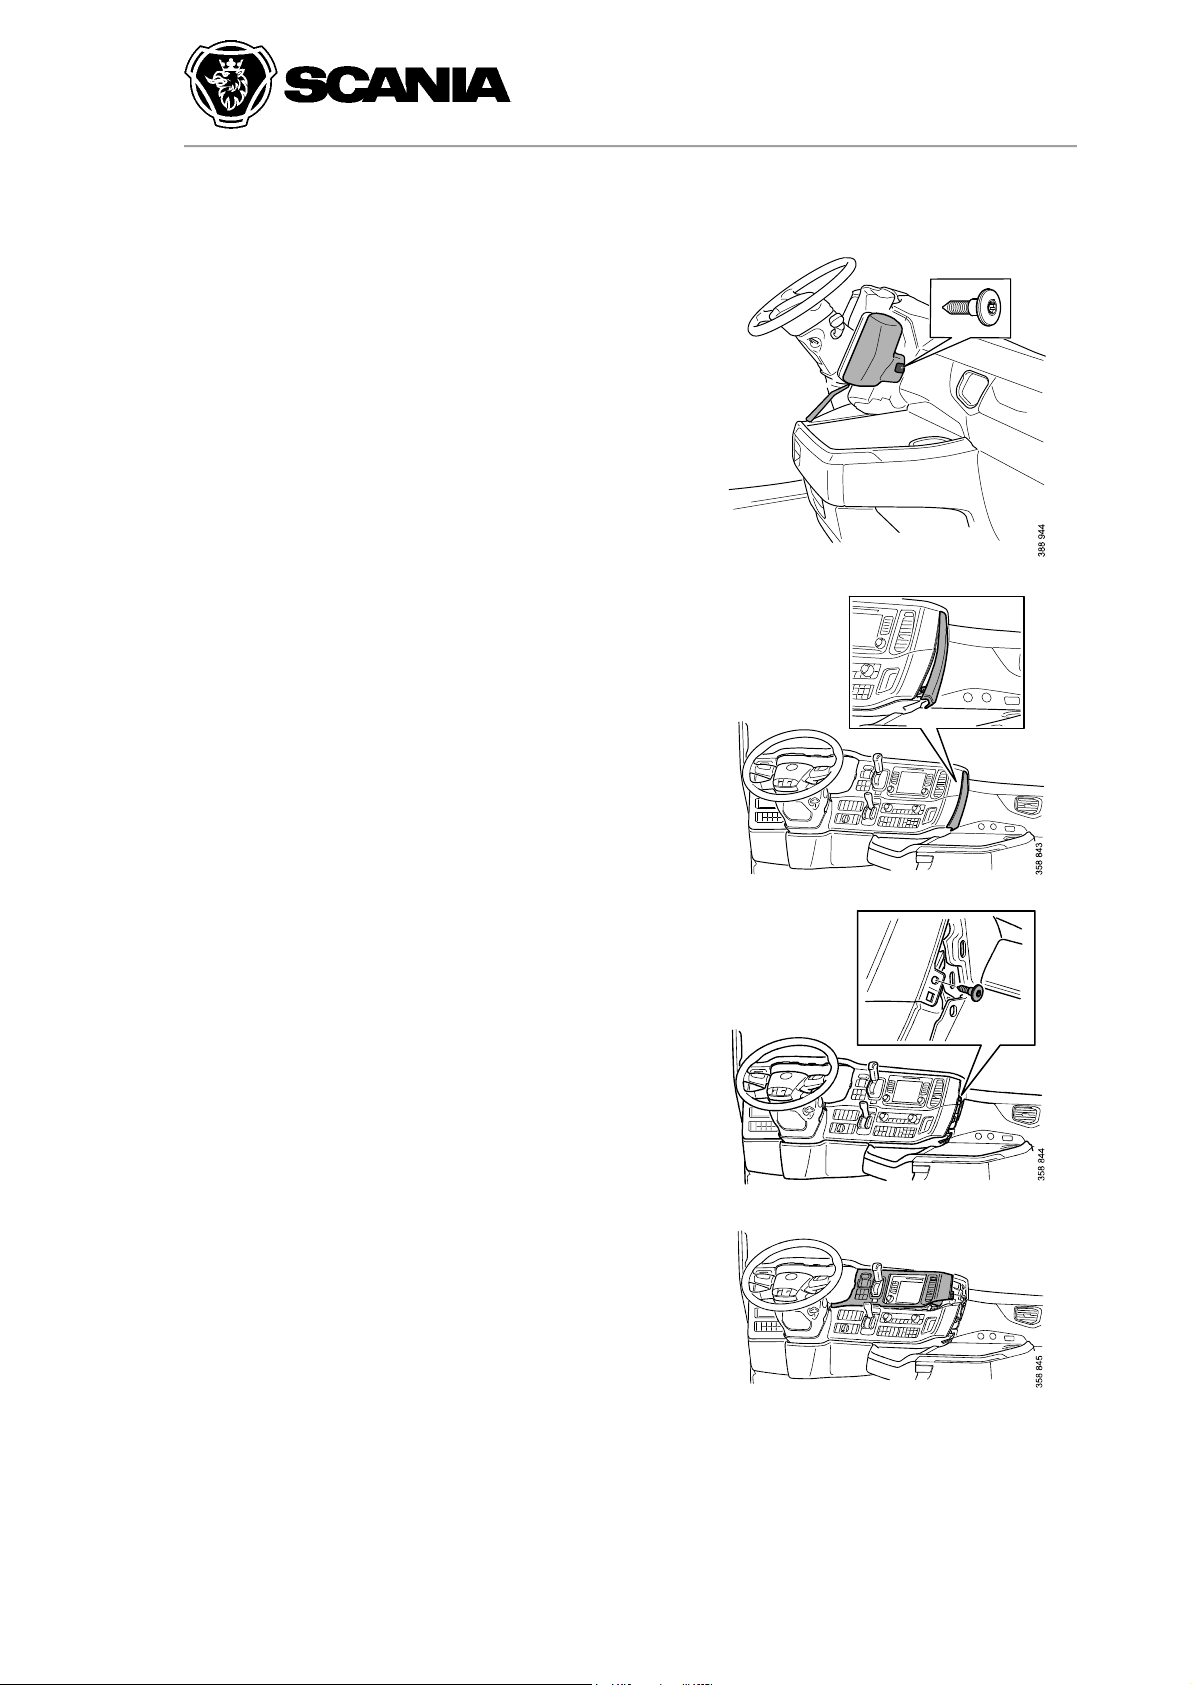
4. On vehicles equipped with an additional
instrument panel module, you must first
remove the casing for this additional
instrument panel module:
Remove the screw.
The casing for the additional instrument panel
module is secured with a latch hook at the
bottom edge. Remove the additional instrument
panel module casing. Use 588 390 Plastic
removal tools, 5 parts.
5. Remove the panel.
Multi Client User
6. Remove the screw.
7. Remove the upper switch panel. Detach from
right to left.
2018-09-18 © Scania CV 2 of 9
Page 3

Vehicle/engine type: L, P, G, R, S series truck (2016- )
8. Remove the casing around the parking brake
valve lever.
9. Remove the lower switch panel and fold down
the panel without undoing the harness-tocomponent connectors.
10. Remove the screws.
Multi Client User
11. Move the infotainment system straight out and
disconnect the connector and the antenna.
Fitting - E130, AUS4
1. Fit the connector and the antenna to the
infotainment system, and push the infotainment
system into place.
2. Fit the screws.
2018-09-18 © Scania CV 3 of 9
Page 4

Vehicle/engine type: L, P, G, R, S series truck (2016- )
3. Fit the lower switch panel and the casing
around the parking brake valve lever.
4. Fit the upper switch panel.
Multi Client User
5. Fit the screw.
6. Fit the panel.
2018-09-18 © Scania CV 4 of 9
Page 5

Vehicle/engine type: L, P, G, R, S series truck (2016- )
7. For vehicles equipped with an interlock
valve:
Fit the clamp in the interlock valve casing.
Fit the casing.
8. Fit the frame around the instrument cluster.
Multi Client User
9. Fold back the steering wheel.
10. Carry out spare parts programming of the
control unit using SDP3.
Removal - E130, AUS4
Tools
Number Designation Illustration Tool board
588 390
Plastic removal
tools, 5 parts
N/A
2018-09-18 © Scania CV 5 of 9
Page 6

Vehicle/engine type: L, P, G, R, S series truck (2016- )
1. Lower the steering wheel.
2. Remove the frame around the instrument
cluster. The frame is attached with panel studs.
Multi Client User
3. On vehicles equipped with an additional
instrument panel module, you must first
remove the casing for this additional
instrument panel module:
Remove the screw.
The casing for the additional instrument panel
module is secured with a latch hook at the
bottom edge. Remove the additional instrument
panel module casing. Use 588 390 Plastic
removal tools, 5 parts.
4. Remove the panel.
2018-09-18 © Scania CV 6 of 9
Page 7

Vehicle/engine type: L, P, G, R, S series truck (2016- )
5. Remove the screw.
6. Remove the upper switch panel. Detach from
right to left.
Multi Client User
7. Remove the lower switch panel and fold down
the panel without undoing the harness-tocomponent connectors.
8. Remove the screws.
9. Move the infotainment system straight out and
disconnect the connector and the antenna.
2018-09-18 © Scania CV 7 of 9
Page 8

Fitting - E130, AUS4
Vehicle/engine type: L, P, G, R, S series truck (2016- )
1. Fit the connector and the antenna to the
infotainment system, and push the infotainment
system into place.
2. Fit the screws.
Multi Client User
3. Fit the lower switch panel.
4. Fit the upper switch panel.
5. Fit the screw.
2018-09-18 © Scania CV 8 of 9
Page 9

Vehicle/engine type: L, P, G, R, S series truck (2016- )
6. Fit the panel.
7. Fit the frame around the instrument cluster.
Multi Client User
8. Fold back the steering wheel.
9. Carry out spare parts programming of the
control unit using SDP3.
2018-09-18 © Scania CV 9 of 9
 Loading...