

Page 1

User Guide v2.0
For Soundcraft Ui12 & Ui16
®
®
series
Page 2
INFORMATION
INFORMATION
INFORMATION
IMPORTANT
Please read this manual carefully before using your mixer
for the rst time.
This equipment complies with the EMC directive 2004/108/EC and LVD 2006/95/EC.
This product is approved to safety standards:
IEC 60065:2005 (Seventh Edition) +A1:2005
EN60065:2006 +A1:2006 +A1:2008
UL60065 2012 7th Edition
CAN/CSA-E60065-03 + A1: 2006
And EMC standards
EN55103-1: 2009 (E2)
EN55103-2: 2009 (E2)
Warning: Any modication or changes made to this device, unless explicitly approved by Harman, will
invalidate the authorisation of this device. Operation of an unauthorised device is prohibited under Section
302 of the Communications act of 1934, as amended, and Subpart 1 of Part 2 of Chapter 47 of the Code of
Federal Regulations.
NOTE: This equipment has been tested and found to comply with the limits for a Class B digital device, pursuant to
Part 15 of the FCC Rules. These limits are designed to provide reasonable protection against harmful interference in
a residential installation. This equipment generates, uses and can radiate radio frequency energy and, if not installed
and used in accordance with the instructions, may cause harmful interference to radio communications. However,
there is no guarantee that interference will not occur in a particular installation. If this equipment does cause harmful
interference to radio or television reception, which can be determined by turning the equipment off and on, the user is
encouraged to try to correct the interference by one or more of the following measures:
* Reorient or relocate the receiving antenna
* Increase the separation between the equipment and the receiver
* Connect the equipment into an outlet on a circuit different from that to which the receiver is connected.
* Consult the dealer or an experienced radio/TV technician for help.
For further details contact: Harman International Industries Ltd, Cranbourne House, Cranbourne Road, Potters Bar,
Hertfordshire EN6 3JN, UK. Telephone +44 (0)1707 665000 Fax: +44 (0)1707 660742 email: soundcraft@harman.com
© Harman International Industries Ltd. 2014 All rights reserved
Parts of the design of this product may be protected by worldwide patents.
Part No. 5056809
Rev 1.0
E&OE September 2014
Soundcraft is a trading division of Harman International Industries Ltd. Information in this manual is subject to change
without notice and does not represent a commitment on the part of the vendor. Soundcraft shall not be liable for any
loss or damage whatsoever arising from the use of information or any error contained in this manual. No part of this
manual may be reproduced, stored in a retrieval system, or transmitted, in any form or by any means, electronic,
electrical, mechanical, optical, chemical, including photocopying and recording, for any purpose without the express
written permission of Soundcraft.
Harman International Industries Limited
Cranborne House, Cranborne Road, Potters Bar, Hertfordshire, EN6 3JN, UK
Tel: +44 (0)1707 665000
Fax: +44 (0)1707 660742
http://www.soundcraft.com
Ui12, Ui16 User Manual
Page 3

CONTENTS
CONTENTS
CONTENTS
1.0 AN INTRODUCTION TO Ui
1.1: Safety
1.2: Warranty
1.3:Specications
2.0: GETTING STARTED
2.1:SystemOverview
2.2:HardwareI/O&Control
2.3:InputChannelRouting
2.4:GettingConnected
3.0: SOFTWARE CONTROL
3.0.1: Updates&Requirements
3.1: SoftwareNavigation
3.1.1:Control/GestureSummary
3.2: TabletNavigation
3.2.1:KeyboardControl
3.3:TabletScreens
3.4: PhoneNavigation
3.5: PhoneScreens
4.0: MIXER CHANNELS
4.1:InputGainPage
4.2:InputMixPage
4.2.1:InputSubMenu
4.3:AuxSends
4.3.1:AuxMaster
4.4:FXSends
4.5:GroupMaster
4.6:MasterChannel
5.0: CHANNEL EDIT
5.1:DigiTech
5.2:ParametricEQ
5.3:GraphicEQ
5.3.1 AFS
2
-FeedbackElimination
5.4:Dynamics
5.5:Aux/FXSends
6.0: MIX FEATURES
6.1:View&MuteGroups
6.2:MoreMe
7.0: LEXICON FX EDIT
7.1:Reverb
7.2:Delay
7.3:Chorus
8.0: SHOWS & SNAPSHOTS
9.0: MEDIA PLA
YER & RECORDER
10.0: SETTINGS
For clarity, this manual uses section references rather than page numbers. In some instances, one section reference
may extend to several pages.
Ui12, Ui16 User Manual
Page 4
1.0: INTRODUCTION
INTRODUCTION TO Ui
1.0: INTRODUCTION TO SIGNATURE
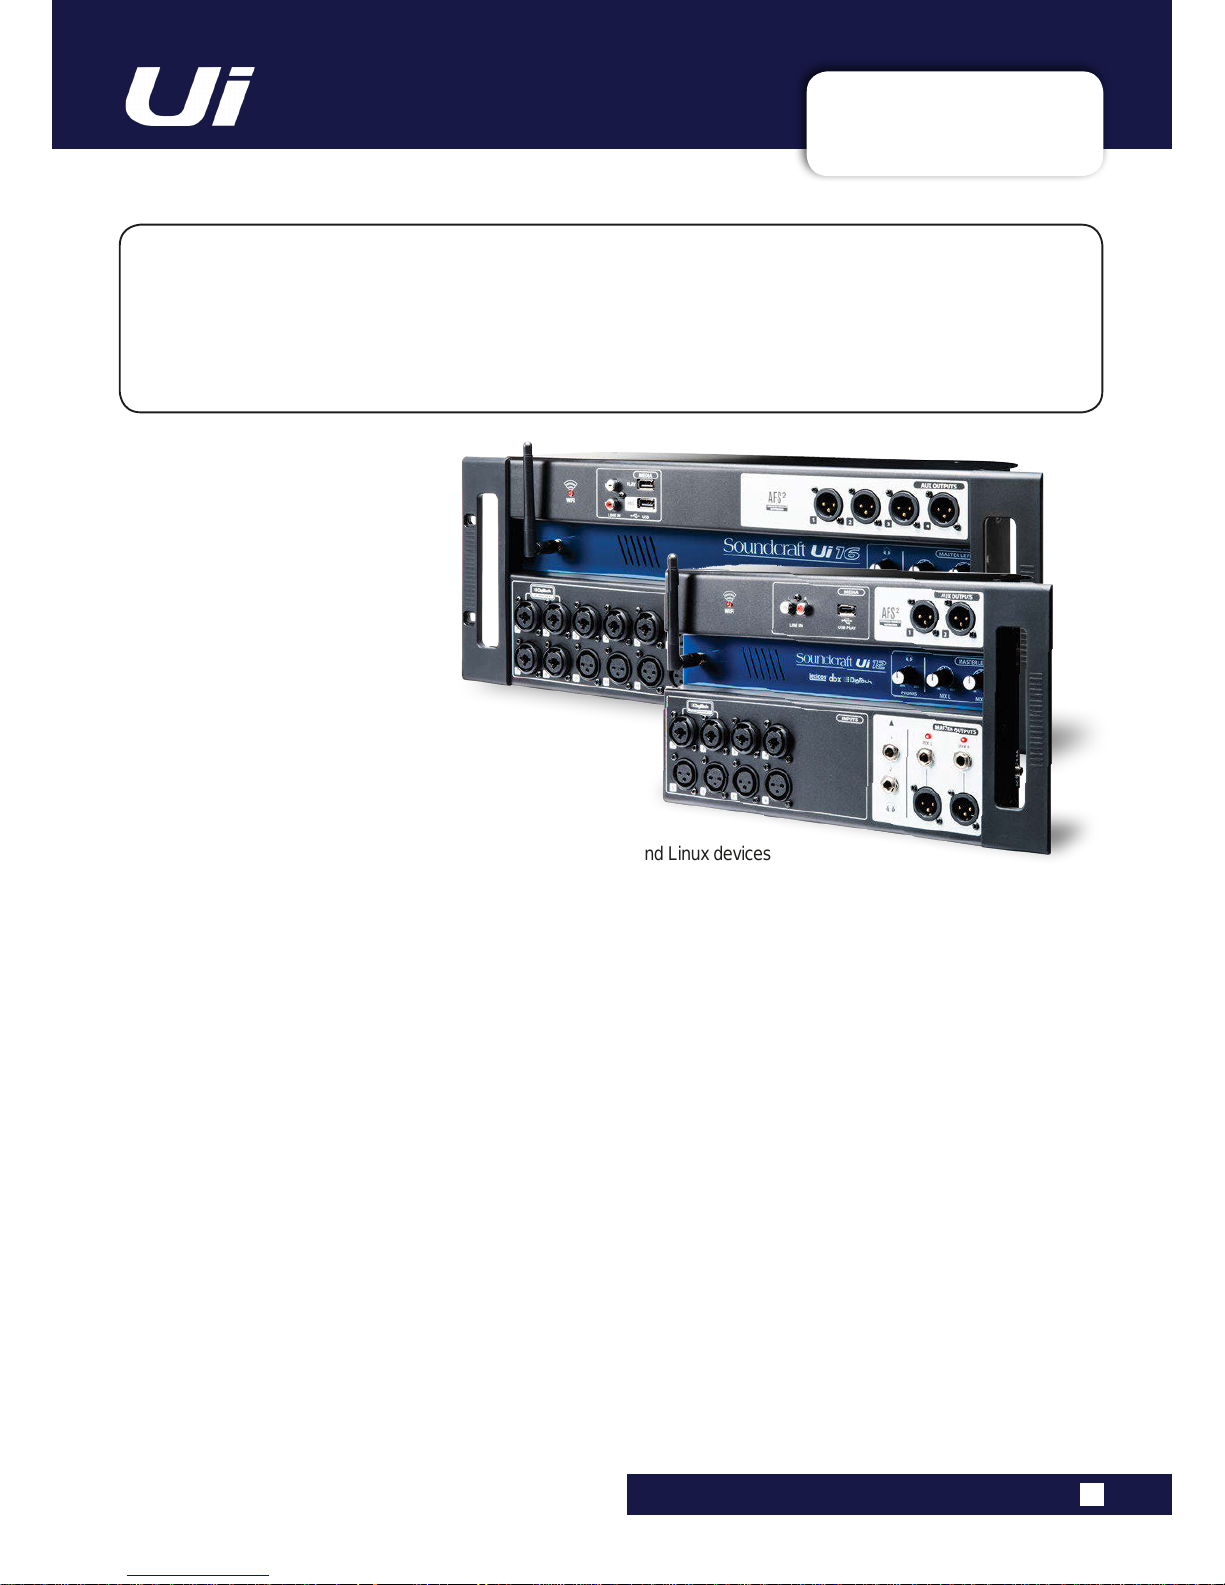
The Ui Series mixers feature cross-platform compatibility with iOS, Android, Windows, Mac OS, and
Linux devices, and can use up to 10 control devices simultaneously. In addition, the Ui12 and Ui16
each feature built-in HARMAN signal processing from dbx, DigiTech and Lexicon, including dbx AFS2,
DigiTech Amp Modeling, and more. Both models feature fully recallable and remote-controlled mic
gain and phantom power, along with 4-band parametric EQ, high-pass lter, compressor, de-esser and
noise gate on input channels.
MAIN FEA TURES
• Tablet/PC/Smartphone Controlled Digital Mixer
• Integrated Wi-Fi
• Cross-platform compatibility with iOS, Android, Windows, Mac OS, and Linux devices
• Use up to 10 control devices (tablets, phones, PCs) simultaneously
• Legendary Harman Signal Processing from dbx®, Digitech®, and Lexicon®
• Fully recallable and remote-controlled mic preamps
• 4-band Parametric EQ, High-Pass Filter, Compressor , De-esser and Noise Gate on input channels
• 31-band Graphic EQ, Noise Gate and Compressor on all outputs
• Real-Time Frequency Analyser (RTA) on inputs and outputs
• 3 or 4 dedicated Lexicon® FX effects processors: Reverb, Delay , Chorus, and Delay/Reverb (Ui16).
• Subgroups, Mute Groups, View Groups, and more mixer controls
• Show/Snapshot recall with channel safes and security lockout
• 2-channel USB audio playback and recording
• Floor-ready rugged chassis for live applications
Ui12, Ui16 User Manual
The Ui16 boasts eight XLR combo mic/line inputs, four XLR mic inputs, two channels of Hi- Z/instrument
inputs, as well as a stereo RCA line input. A 2-channel USB media player is included, along with four
balanced XLR Aux outputs, two quarter-inch headphone outputs with level control, plus balanced stereo
XLR and quarter-inch main outputs. Two-channel USB audio playback is compatible with MP3, WAV and
AIFF formats, and 2-channel USB Record direct-to-memory devices functionality is possible as well.
The Ui16 also has an HDMI display connection output.
Page 5
1.1: SAFETY
INTRODUCTION > SAFETY
1.1: INTRODUCTION > SAFETY
THIS UNIT MUST BE EARTHED
Under no circumstances should the mains earth be disconnected from the mains lead.
The wires in the mains lead are coloured in accordance with the following code:
Earth: Green and Yellow (Green/Yellow - US)
Neutral: Blue (White - US)
Live (Hot): Brown (Black - US)
As the colours of the wires in the mains lead may not correspond with the coloured markings identifying the terminals
in your plug, proceed as follows:
The wire which is coloured Green and Yellow must be connected to the terminal in the plug which is marked with the
letter E or by the earth symbol.
The wire which is coloured Blue must be connected to the terminal in the plug which is marked with the letter N.
The wire which is coloured Brown must be connected to the terminal in the plug which is marked with the letter L.
Ensure that these colour codings are followed carefully in the event of the plug being changed.
This unit is capable of operating over a range of mains voltages as marked on the rear panel.
The internal power supply unit contains no user serviceable parts. Refer all servicing to a qualied service
engineer, through the appropriate Soundcraft dealer.
SAFETY NOTICES
For your own safety and to avoid invalidation of the warranty
please read this section carefully.
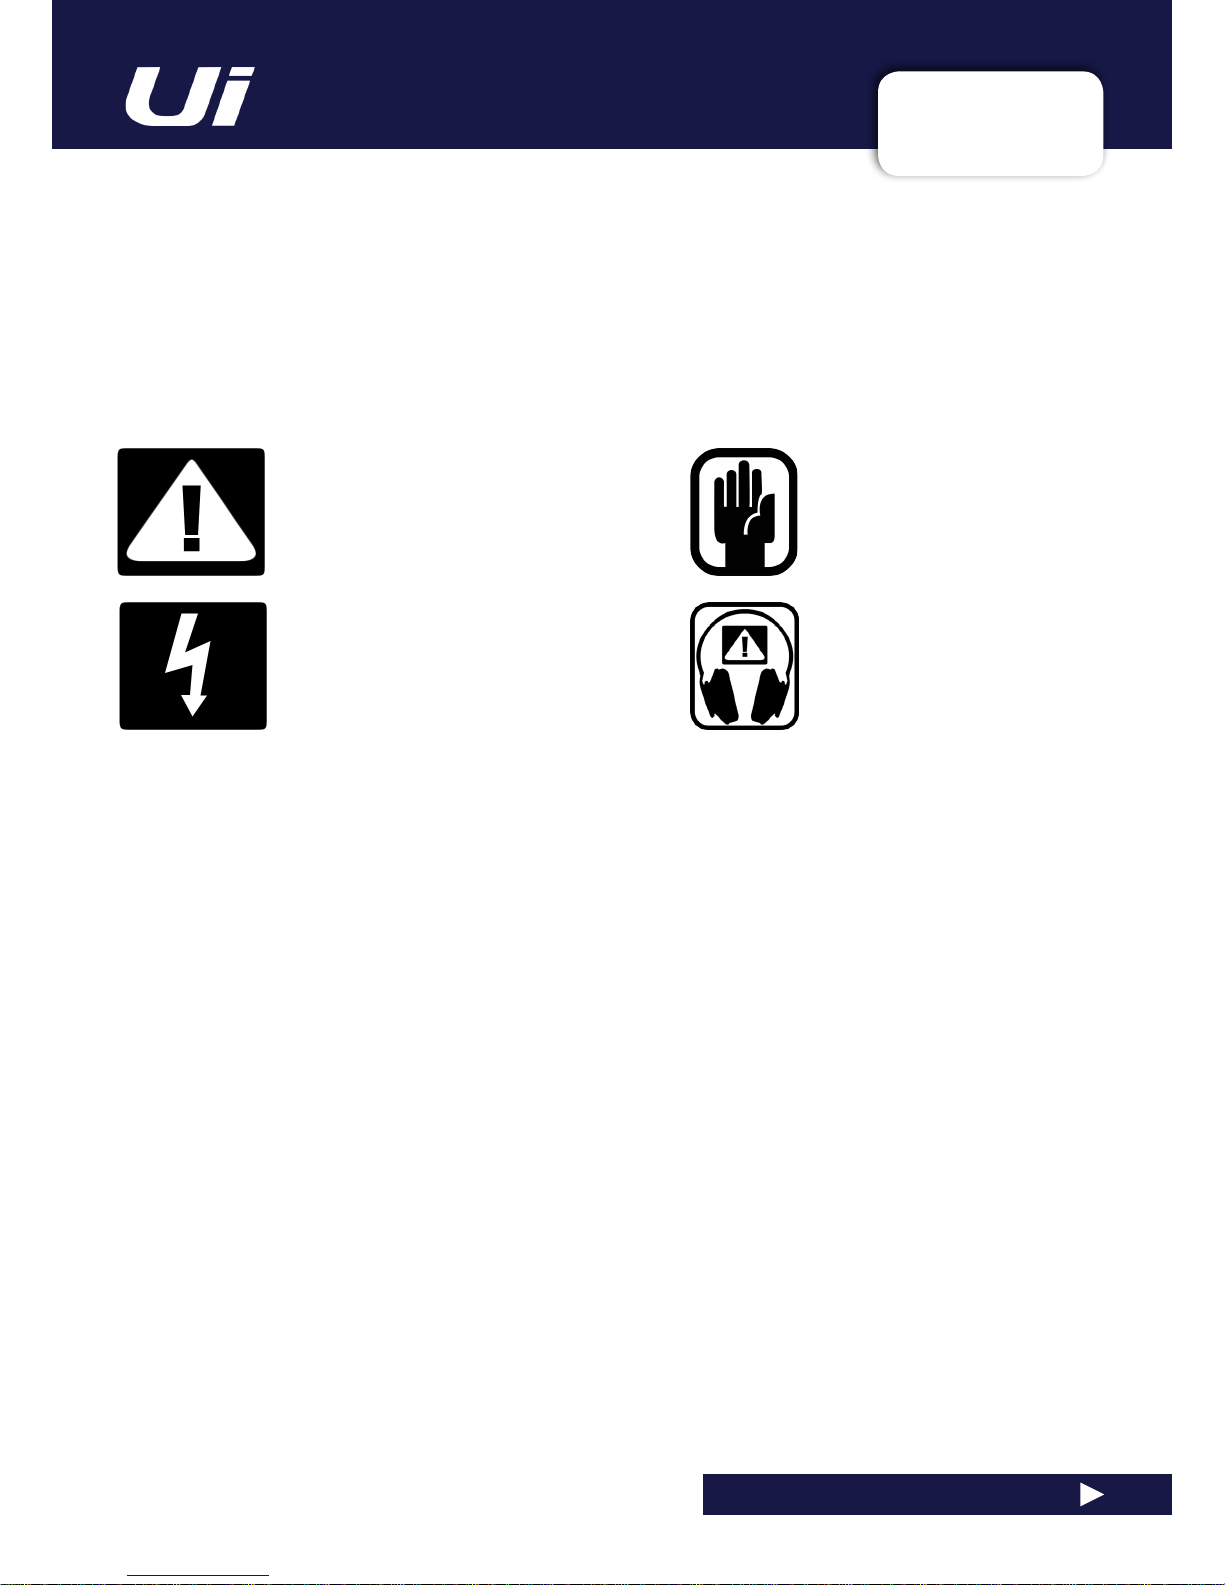
Important Symbols
Warnings
Alerts the user to the presence of uninsulated
‘dangerous voltage’ within the product’s
enclosure that may be of sufcient magnitude
to constitute a risk of electric shock to persons.
Cautions
Alerts the user to the presence of important
operating and maintenance (servicing)
instructions in the literature accompanying
the appliance.
Ui12, Ui16 User Manual
Page 6

1.1: SAFETY
INTRODUCTION > SAFETY
1.1: INTRODUCTION > SAFETY
WARNINGS
• Read these instructions.
• Keep these instructions.
• Heed all warnings.
• Follow all instructions.
• Clean the apparatus only with a dry cloth.
• Do not install near any heat sources such as radiators, heat resistors, stoves, or other apparatus
(including ampliers) that produce heat.
• Do not block any ventilation openings. Install in accordance with the manufacturer’s instructions.
• Do not use this apparatus near water.
• Do not defeat the safety purpose of the polarized or grounding type plug. A polarized plug has two
blades with one wider than the other. A grounding type plug has two blades and a third grounding
prong. The wide blade or the third prong are provided for your safety. When the provided plug does not
t into your outlet, consult an electrician for replacement of the obsolete outlet.
• Protect the power cord from being walked on or pinched particularly at plugs, convenience
receptacles and the point where they exit from the apparatus.
• Only use attachments/accessories specied by the manufacturer.
• Unplug this apparatus during lightning storms or when unused for long periods of time.
• Refer all servicing to qualied service personnel. Servicing is required when the apparatus has been
damaged in any way such as power-supply cord or plug is damaged, liquid has been spilled or objects
have fallen into the apparatus, the apparatus has been exposed to rain or moisture, does not operate
normally, or has been dropped.
• Use only with the cart, stand, tripod, bracket, or table specied by the manufacturer, or sold with the
apparatus. When the cart is used, use caution when moving the cart/apparatus combination to avoid
injury from tip-over.
• No naked ame sources, such as lighted candles or cigarettes etc., should be placed on the
apparatus.
• No user serviceable parts. Refer all servicing to a qualied service engineer, through the
appropriate Soundcraft dealer.
• It is recommended that all maintenance and service on the product should be
carried out by Soundcraft or its authorised agents. Soundcraft cannot accept any
liability whatsoever for any loss or damage caused by service, maintenance or repair
by unauthorised personnel.
• WARNING: To reduce the risk of re or electric shock, do not expose this
apparatus to rain or moisture. Do not expose the apparatus to dripping or splashing
and do not place objects lled with liquids, such as vases, on the apparatus. No
naked ame sources, such as lighted candles, should be placed on the apparatus.
• Ventilation should not be impeded by covering the ventilation openings with items
such as newspapers, table cloths, curtains etc.
Ui12, Ui16 User Manual
Page 7
1.1: SAFETY
INTRODUCTION > SAFETY
1.1: INTRODUCTION > SAFETY
WARNINGS
ADVICE FOR THOSE WHO PUSH THE BOUNDARIES
Although your new console will not output any sound until you feed it signals, it has the
capability to produce sounds which, when monitored through an amplier or headphones,
can damage hearing over time.
Please take care when working with your audio — if you are manipulating controls which
you don’t understand (which we all do when we are learning), make sure your monitors are turned
down. Remember that your ears are the most important tool of your trade, look after them, and they will
look after you.
Most importantly — don’t be afraid to experiment to nd out how each parameter affects the sound —
this will extend your creativity and help.
NOTE: The packaging, in which your console arrived, forms part of the product and must
be retained for future use.
NOTE: This equipment has been tested and found to comply with the limits for a Class A
digital device, pursuant to Part 15 of the FCC Rules. These limits are designed to provide
reasonable protection against harmful interference when the equipment is operated in a
commercial environment. This equipment generates, uses and can radiate radio frequency
energy and, if not installed and used in accordance with the instruction manual, may cause
harmful interference to radio communications. Operation of this equipment in a residential
area is likely to cause harmful interference in which case the user will be required to correct the interference at his own expense.
This Class A digital apparatus meets the requirements of the Canadian Interference-Causing
Equipment Regulations.
Cet appareil numérique de la Classe A respecte toutes les exigences du Règlement sur le matériel
brouilleur du Canada.
Ui12, Ui16 User Manual
Page 8

1.2: WARRANTY
INTRODUCTION > SAFETY
1.2: INTRODUCTION > WARRANTY
WARRANTY
1 Soundcraft is a trading division of Harman International Industries Ltd.
End User means the person who rst puts the equipment into regular operation.
Dealer means the person other than Soundcraft (if any) from whom the End User purchased the Equipment, provided such a person is authorised for this purpose by Soundcraft or its accredited Distributor.
Equipment means the equipment supplied with this manual.
2 If within the period of twelve months from the date of delivery of the Equipment to the End User it shall prove
defective by reason only of faulty materials and/or workmanship to such an extent that the effectiveness and/or
usability thereof is materially affected the Equipment or the defective component should be returned to the Dealer
or to Soundcraft and subject to the following conditions the Dealer or Soundcraft will repair or replace the defective components. Any components replaced will become the property of Soundcraft.
3 Any Equipment or component returned will be at the risk of the End User whilst in transit (both to and from the
Dealer or Soundcraft) and postage must be prepaid.
4 This warranty shall only be available if:
a) The Equipment has been properly installed in accordance with instructions contained in Soundcraft’s manual.
b) The End User has notied Soundcraft or the Dealer within 14 days of the defect appearing; and
c) No persons other than authorised representatives of Soundcraft or the Dealer have effected any replacement
of parts maintenance adjustments or repairs to the Equipment; and
d) The End User has used the Equipment only for such purposes as Soundcraft recommends, with only such
operating supplies as meet Soundcraft’s specications and otherwise in all respects in accordance Soundcraft’s
recommendations.
5 Defects arising as a result of the following are not covered by this Warranty: faulty or negligent handling, chem-
ical or electro-chemical or electrical inuences, accidental damage, Acts of God, neglect, deciency in electrical
power, air-conditioning or humidity control.
6. The benet of this Warranty may not be assigned by the End User.
7. End Users who are consumers should note their rights under this Warranty are in addition to and do not affect
any other rights to which they may be entitled against the seller of the Equipment.
Ui12, Ui16 User Manual
Page 9

1.3: SPECIFICATIONS
INTRODUCTION > SAFETY
1.3: SPECIFICATIONS
Ui12, Ui16 User Manual
SOUNDCRAFT Ui TYPICAL SPECIFICATIONS
• Frequency Response
20Hz-20kHz +/- 1.5 dB
• THD
-20dBFS @ 1kHz <0.006%
• Noise
Residual Noise -96dBu
Mic Input E.I.N.22Hz-22kHz unweighted -118dBu
Mix Noise masters at unity < -90dBu
1 input to Mix at Unity gain < -86dBu
• Cross Talk (@1kHz)
Channel ON attenuation <120dB
Channel Fader Attenuation <120dB
Mic-Mic -103dB@ 1kHz, -93dB@ 10kHz
Line-Line -103dB@ 1kHz, -93dB@ 10kHz
• INPUT GAIN
Mic/Line Gain -30dB - 60dB (0.1dB steps, accuracy of steps depends on size of fader in GUI)
• Gate
Threshold -inf to +6dB
Auto Attack
Auto Release
• Compressor
Threshold -90dB +6dB
Ratio 1:1 - 50:1
Attack 1ms - 400ms
Release 10ms - 2000ms
Makeup Gain -24dB - +48dB
• EQ Channel
4 band parametriq EQ
Each Band Freq 20Hz to 22kHz
Q .05 - 15
Gain -20dB to +20dB
HPF 20Hz to 1kHz
• De-esser
Threshold -90dB to 6dB
Ratio innity to 1:1
Frequency 2kHz to 15kHz
• EQ Outputs
32 band GEQ, 20Hz - 20KHz +-15dB
• Compressor outputs
Threshold -90dB +6dB
Ratio 1:1 - 50:1
Attack 1ms - 400ms
Release 10ms - 2000ms
Makeup Gain -24dB - +48dB
• dbx® AFS on all outputs
12 parametric EQ’s (6 xed, 6 oating)
• Latency
Mic in - ADC -DSP -DAC - Line output 1.8ms
• Input and Output Levels
Mic Input +20dBu max
Line input +20dBu max
Mix output +21dBu max
Headphone outputs 500mW 1 output used
(@120Ω), 380mw both outputs used
• Input and Output Impedances
Mic input 10kΩ
Line Input 10kΩ
Hi-Z Input 250kΩ
Outputs all at 100Ω
• USB
Max Current 200mA
• Power
Consumption (typical) < 25W
AC input voltage range 88-265VAC auto sensing
AC frequency 47-63Hz
• Operating Conditions
Temperature range 5°C - 45°C
Humidity 0%-90%
Storage Temperature -20°C to 60°C
E & OE.
Soundcraft reserves the right to change
specications without notice.
Page 10

Ui12, Ui16 User Manual
2.0: GETTING STARTED
GETTING STARTED - AN INTRODUCTION TO THIS MANUAL
2.0: INTRODUCTION TO THIS MANUAL
Anyone with minimal audio experience should be able to operate the Soundcraft Ui Series consoles
without reading too much of this manual, though we do recommend you take the time to go through it.
An excellent place to start would be the feature list on the introductory page (section 1.0), the Wi-Fi
and software set-up guide (3.1), and the software control guides for phone (3.2) and tablet (3.3) software.
Please note: Most of the hardware illustrations
in this manual are based on the Ui16 console.
Where there are differences between operation
of Ui16 and Ui12, it is noted in the relevant
section.
User Guide
v2.0
For Soundcraft Ui12 & Ui16
®
®
series
PDF
If you’re reading the PDF version of the manual,
you can use the thumbnail view and links from
the Contents page to navigate quickly.
For clarity, this manual uses section references
rather than page numbers. In some instances,
one section reference may extend to several
pages.
Page 11
2.1: SYSTEM OVERVIEW
GETTING STARTED > SYSTEM OVERVIEW
2.1: SYSTEM OVERVIEW
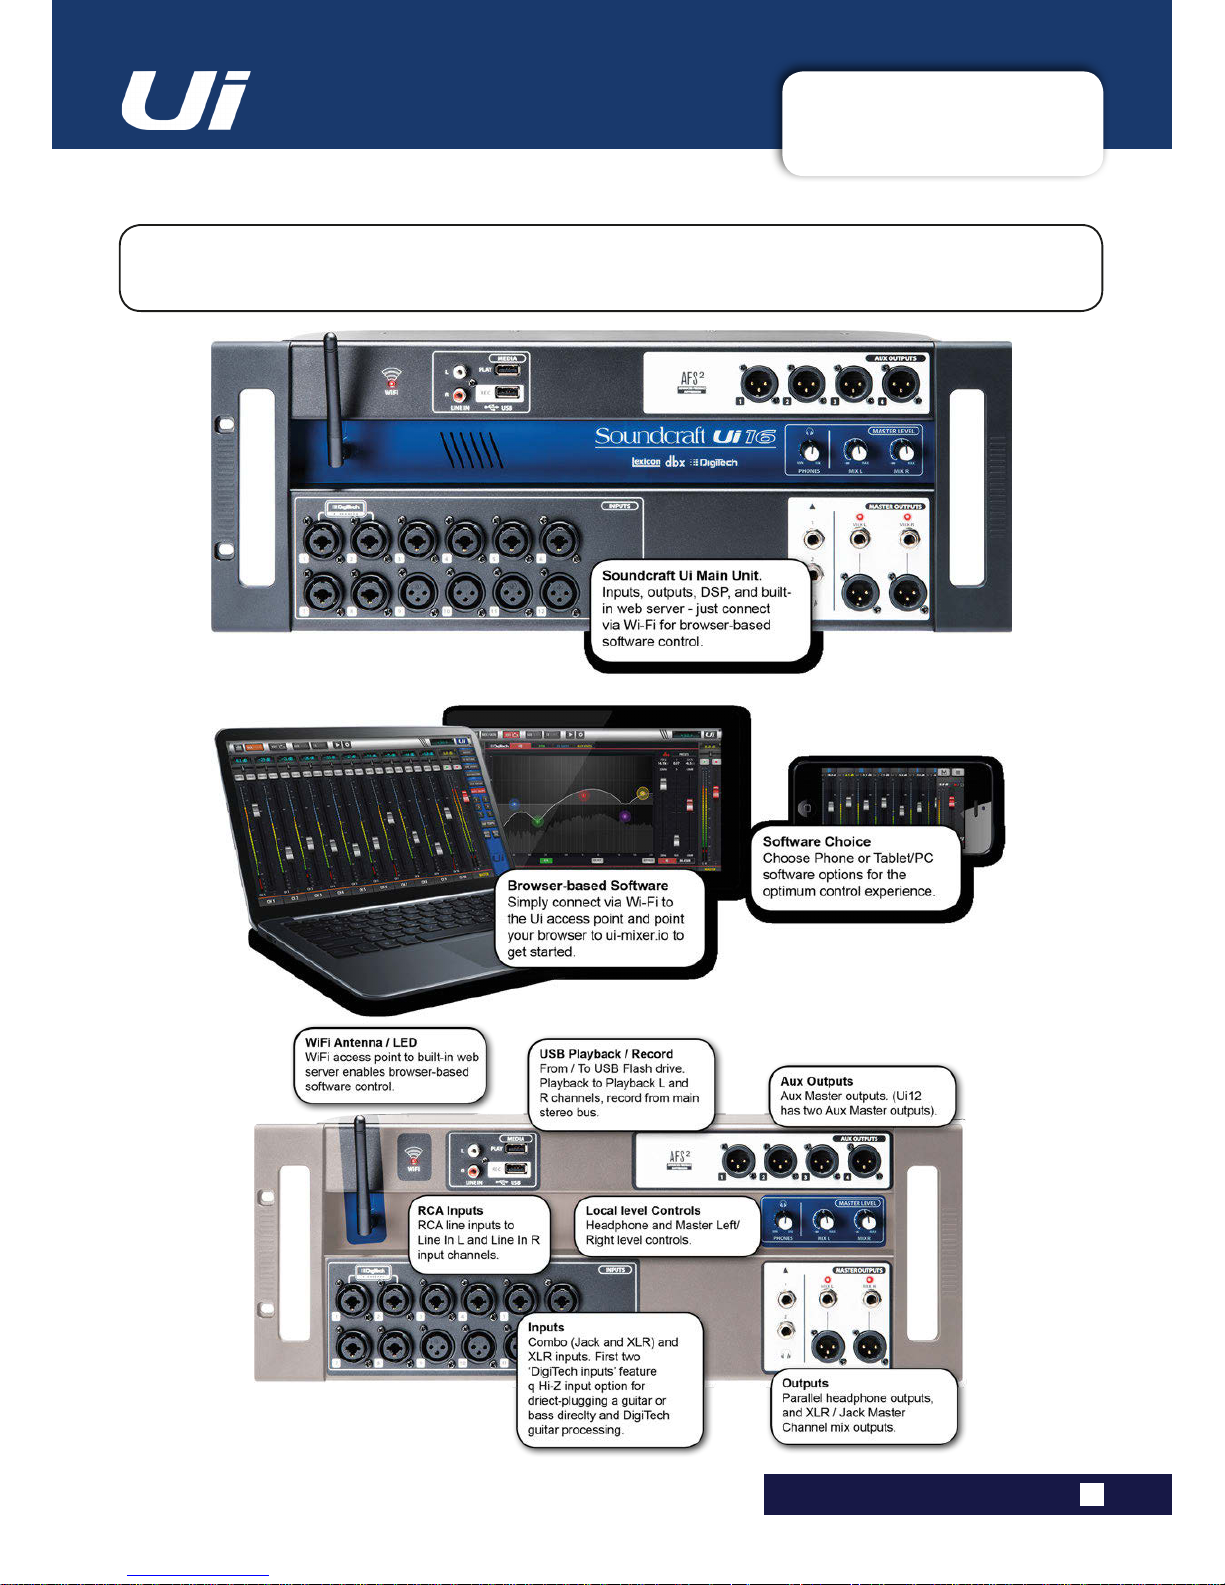
This Soundcraft Ui console uses a compact main unit with built-in I/O, processing, and web server. Phones,
tablets, and PCs can connect to the web server via Wi-Fi for platform-independant software control.
Ui12, Ui16 User Manual
Page 12
2.2: HARDWARE I/O & CONTROL
GETTING STARTED > HARDWARE
2.2: Hardware I/O And Control
The Ui main unit hosts local audio inputs and outputs, including power (at side of main unit) and USB
Drive sockets.
PWR
Power Connector
The Ui mixer has a power adapter with threaded locking ring. Insert the connector and screw the locking ring onto
the socket to prevent accidental removal.
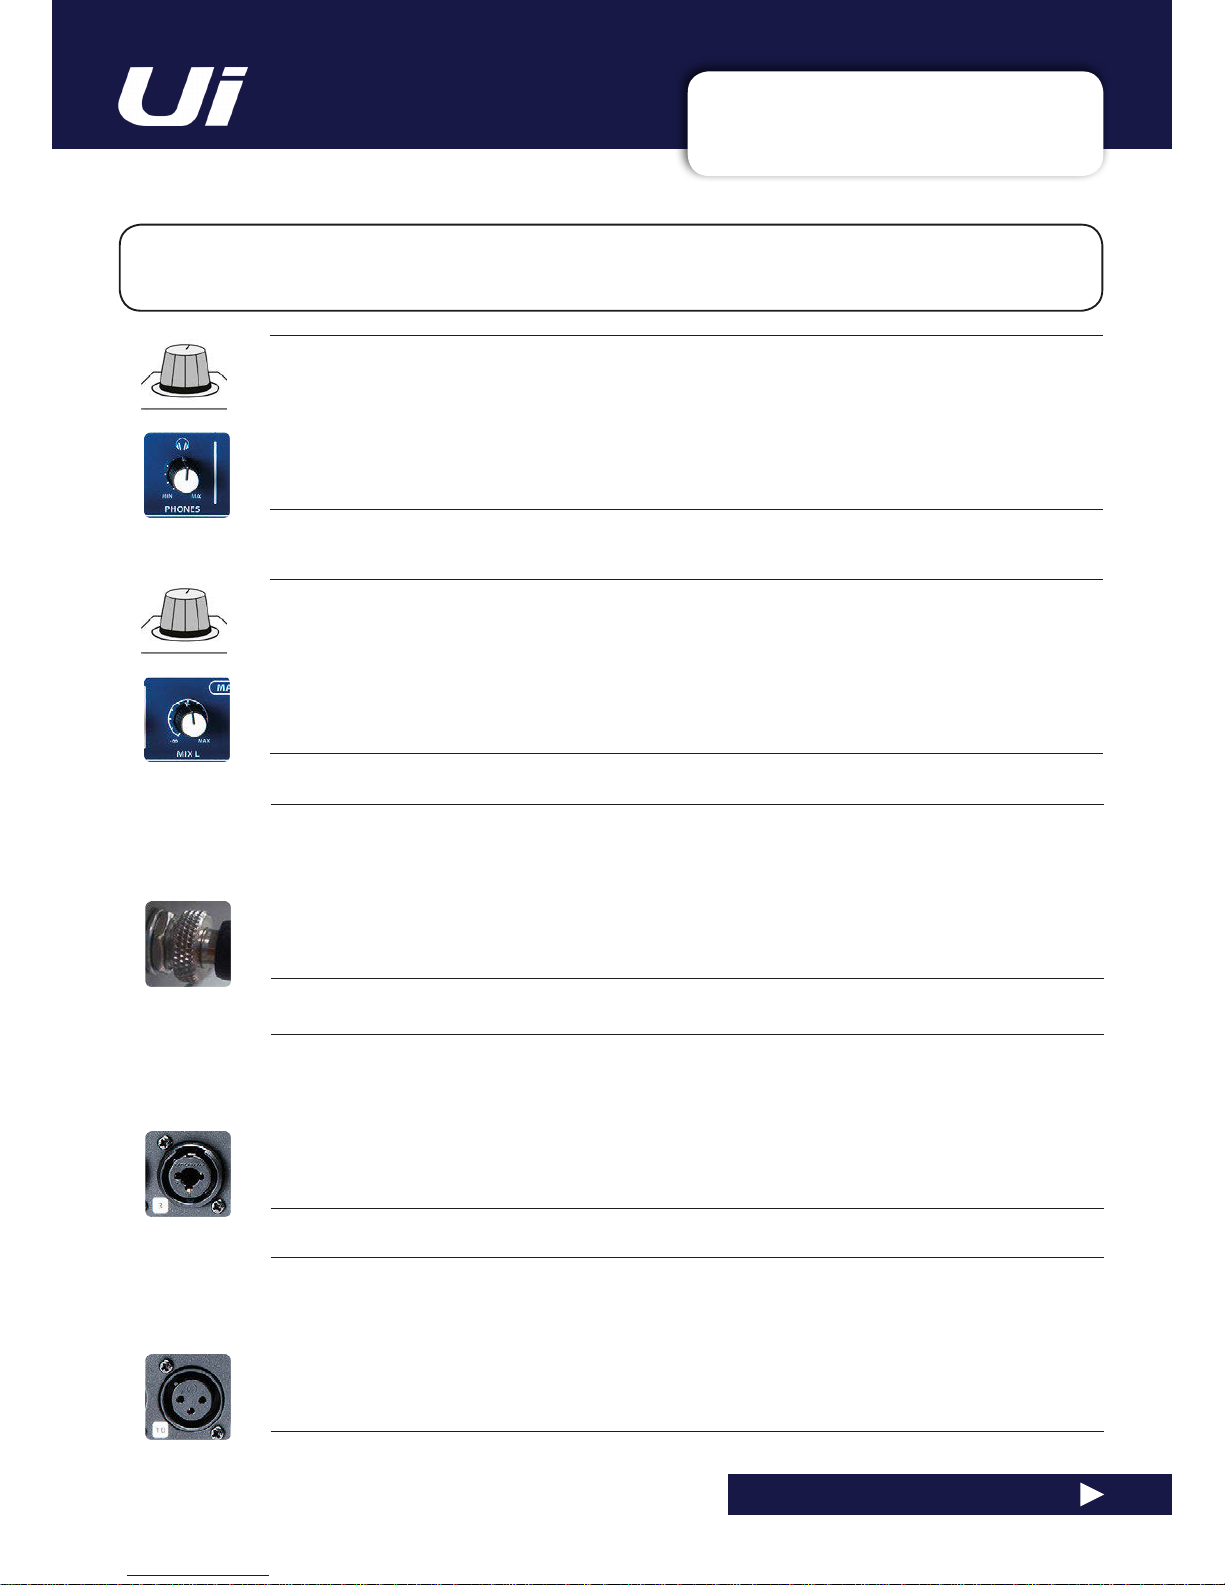
COMBO INPUT
Connection for Jack or XLR - mic or Line level
The input number corresponds to channel number in the Ui control software.
XLR Input
Mic or Line XLR Input
The input number corresponds to channel number in the Ui control software.
Ui12, Ui16 User Manual
PHONES
Set level for headphones outputs
This controls the level on both headphone outputs. The headphone source signal defaults to the main stereo
signal but switches to the Solo bus when AFL or PFL is selected.
MIX L / MIX R
Set levels for MIX L and Mix R outputs
The Mix output is the Ui’s main left/right stereo output and appears on both the XLR and Jack Mix L/R outputs.
Page 13
2.2: HARDWARE I/O & CONTROL
GETTING STARTED > HARDWARE
2.2: Hardware I/O And Control
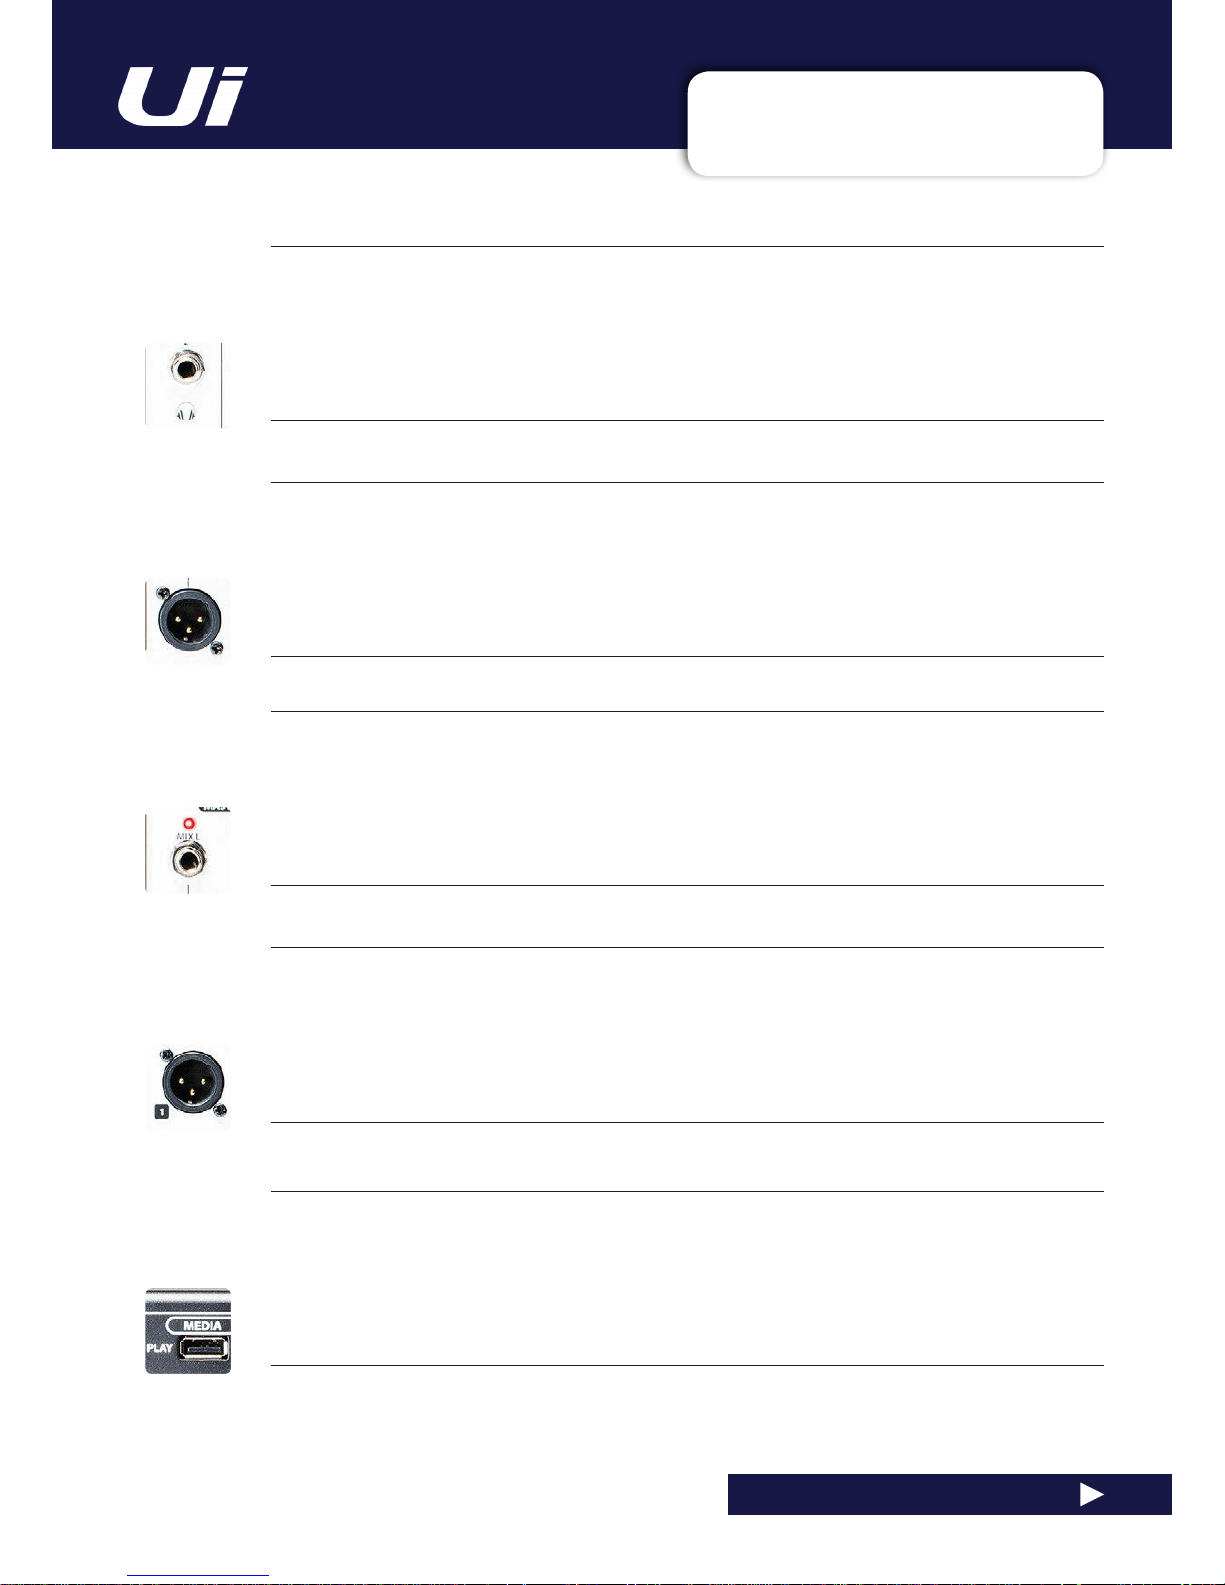
MIX L/R - JACK
Master Channel Jack outputs
The Master Channel XLR and jack outputs are parallel connections (identical).
AUX OUTPUTS
Physical outputs for the Aux Master outputs
The Ui12 has two Aux Master outputs and the Ui16 has four.
MEDIA - PLAY
USB Socket for USB Flash Drive with audio playback les
Audio files must be saved to the USB stick as either MP3, AAC, .WAV, .OGG, .AIFF, or .FLAC files. See section 9.0.
Ui12, Ui16 User Manual
HEADPHONES OUT
Parallel headphone sockets
These are not independent, meaning each output receives the same signal. The headphone outputs receive the
same audio signal as the main outputs unless a channel Solo is active, or the ‘AUX’ option is set in SETTINGS (this
assigns the highest-numbered aux pairs to the headphones outputs).
MIX L/R - XLR
Master Channel XLR outputs
The Master Channel XLR and jack outputs are parallel connections (identical).
Page 14
2.2: HARDWARE I/O & CONTROL
GETTING STARTED > HARDWARE
2.2: Hardware I/O And Control
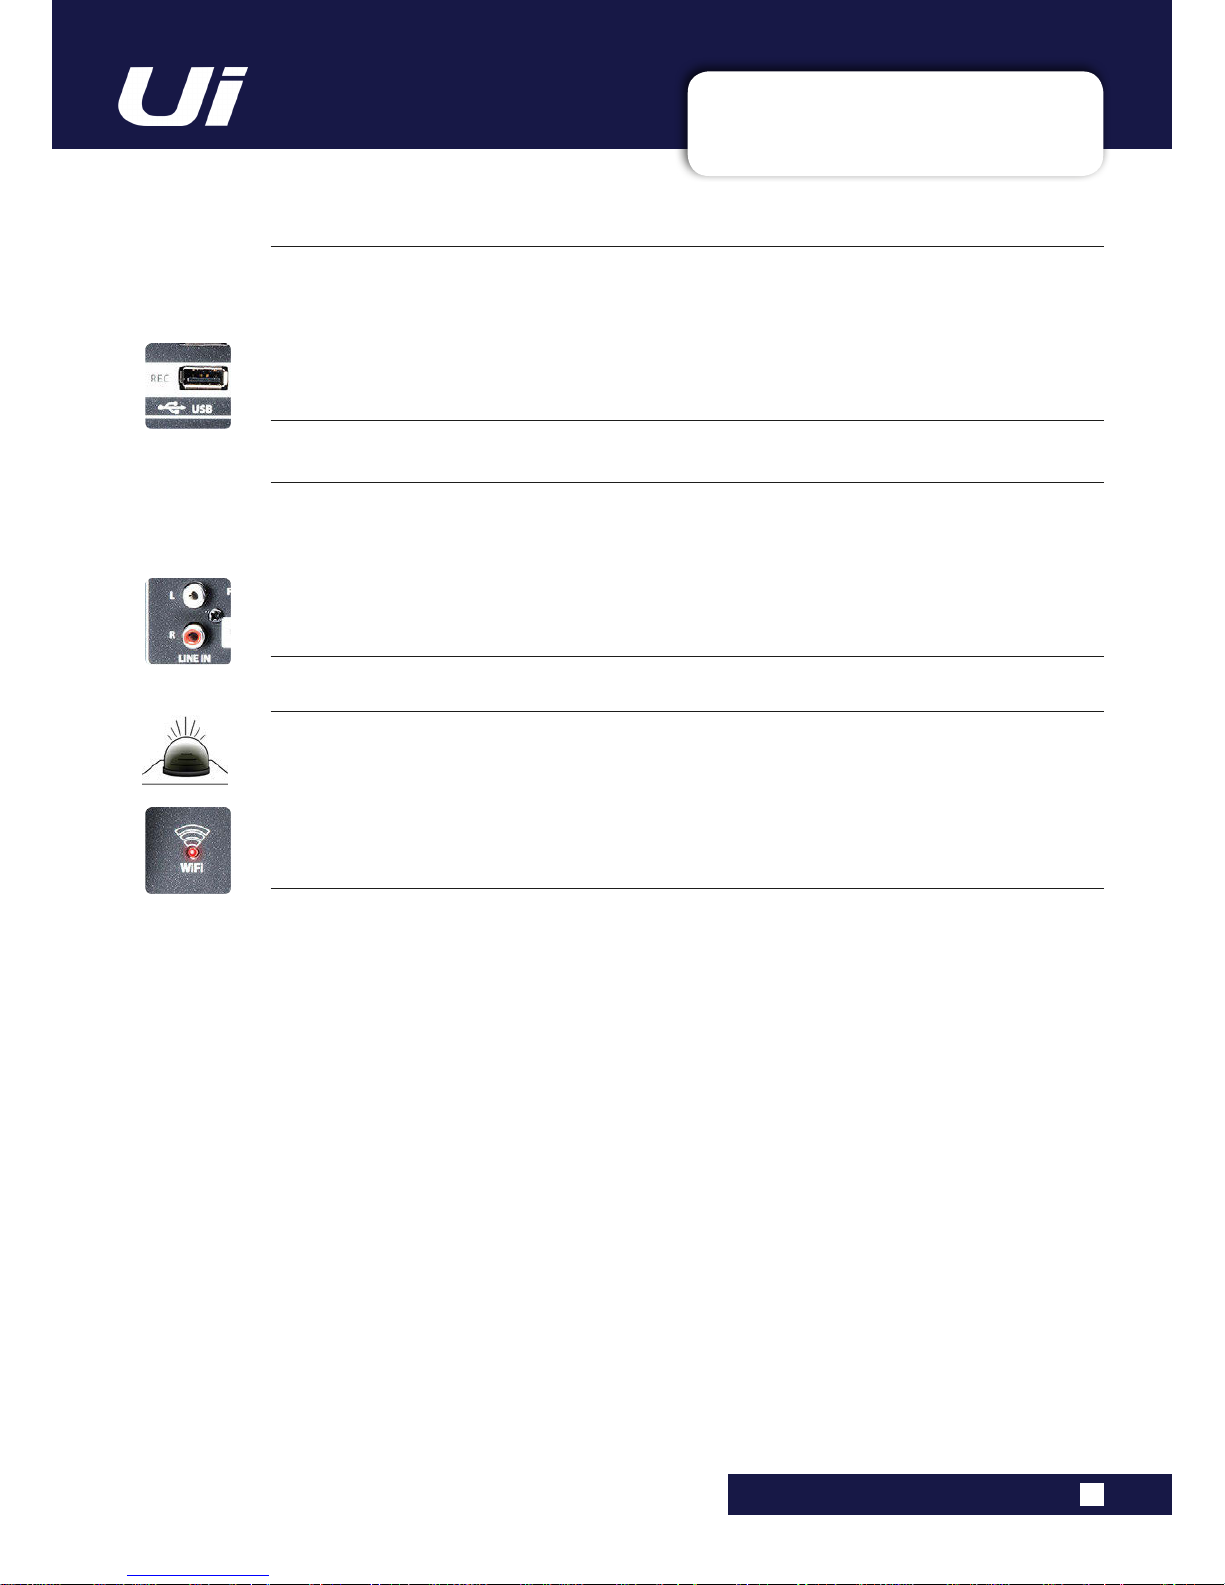
Wi-Fi Indicator
Shows Wi-Fi is operating normally
The indicator also shows Wi-Fi boot status during power up. It stops its timed flash sequence when booted and
available for connections. Then flashes with data activity.
Ui12, Ui16 User Manual
MEDIA - REC
USB Socket for USB Flash Drive - for recording audio
The Soundcraft Ui mixer will record the Master Channel stereo output as a stereo file onto the storage device. See
guide for playback and recording instructions - section 9.0.
LINE IN
Line level RCA inputs
The RCA inputs feed the Line In L and Line In R channels in the UI mixer.
Page 15

2.3: INPUT CHANNEL ROUTING
GETTING STARTED > INPUT CHANNEL ROUTING
2.3: INPUT CHANNEL ROUTING
The diagram shows the audio signal path through an input channel - from physical input to bus sends
(Aux, FX, Mix, and so on).
Please note: The entire signal path (except for the hardware pre and output DACs) is clip-free with innite
headroom. It means that internal clipping is not introduced even by driving the EQ/Dyn to the max.
Sufciently reducing the level on the Master Channel strip will get rid of any clipping on the output.
Ui12, Ui16 User Manual
Page 16
2.4: GETTING CONNECTED
GETTING STARTED > GETTING CONNECTED
2.4: GETTING CONNECTED - SOFTWARE CONTROL
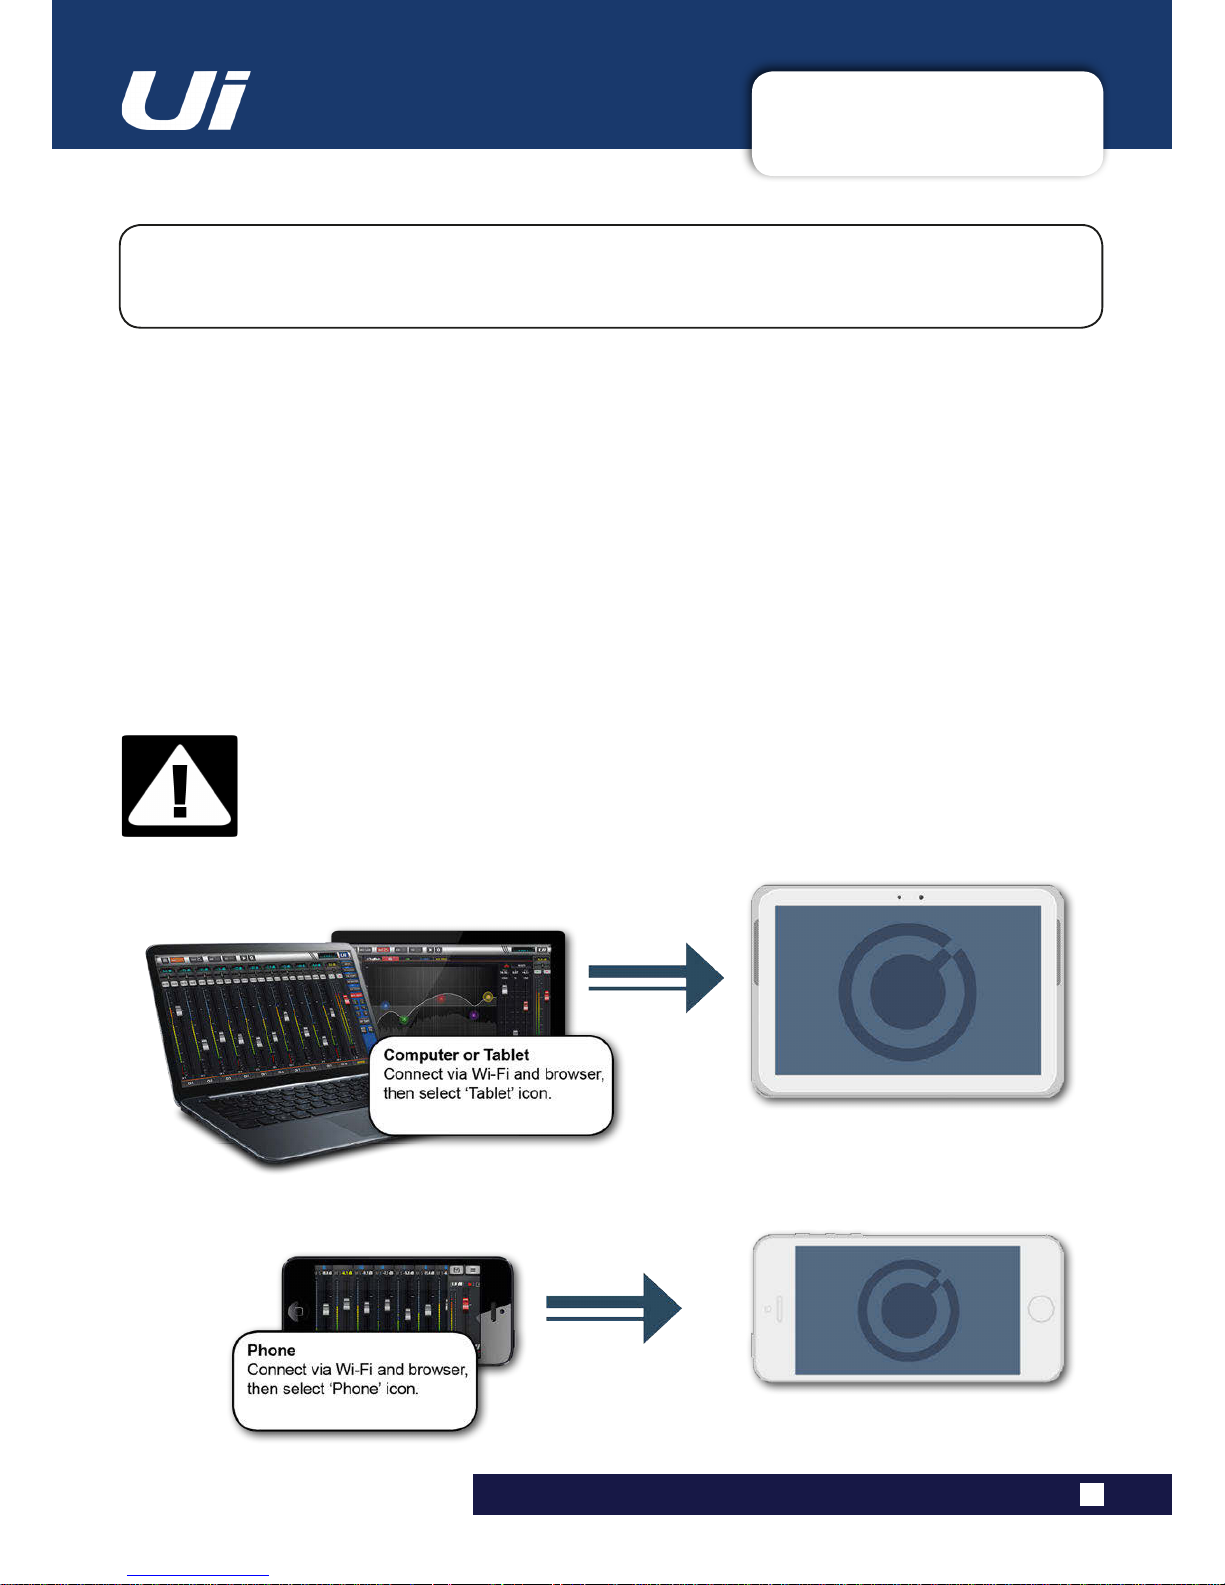
The Soundcraft Ui series uses built-in web server technology to enable computer, tablet, and
phone-based in-browser control of all functions - simply connect to the Ui Wi-Fi access point and
browse to the appropriate URL.
Ui12, Ui16 User Manual
Connecting To Ui with computer, tablet, or phone.
1) Ensure the Wi-Fi antenna is attached to the unit, connect the external power supply, and turn on the
power to your mixer. You will see an LED light up inside the Wi-Fi logo on your Ui hardware; this will ash
until booted successfully.
2) Navigate to Wi-Fi set-up on your device and connect to the “Soundcraft Ui” access point. If this is the
rst time you have connected, you will not require a password.
3) Launch your device’s browser, and enter the URL ui-mixer.io. For Android users, you must use Android
browser 4.4 or later, or another modern browser like Chrome to use the Ui web app.
4) You should see the device selection screen showing icons for large screen (tab icon) and small screen
(phone icon) versions of the Ui software. Choose the version applicable to your device.
IMPORTANT!
The rst time you connect, it is important to set up a password for Wi-Fi access. Press the
Settings icon, then choose the rst tab: ‘NETWORK’ to access the password eld. If you do
not set a password, any nearby device will be able to connect to and control the Ui mixer.
Page 17

Ui12, Ui16 User Manual
3.0: SOFTWARE CONTROL
SOFTWARE CONTROL
3.0: SOFTWARE CONTROL
The browser-based software control for the Ui Series is available to any device in two versions.
The small-screen version is optimised for phone-sized devices; the large-screen version is optimised
for tablets and computers.
In order to make best use of your Ui mixer, please read this section of software control. There are
several navigation and menu access functions that will greatly simplify Ui control.
Page 18

Ui12, Ui16 User Manual
3.0.1: UPDATES & REQUIREMENTS
SOFTWARE UPDATES & REQUIREMENTS
3.0.1: SOFTWARE UPDATES & REQUIREMENTS
The browser-based software control for the Ui Series actually runs from a virtual web server in the
main Ui unit itself and is compatible with any modern browser software running on your control
device. For Android users, you must use Android browser 4.4 or later, or another modern browser like
Chrome to use the Ui web app.
Up to 10 control devices can be used simultaneously.
Software Updates
Regular software updates are posted on the Soundcraft website and are available from the product page.
In the Tablet software you can check your current Ui software version by navigating to the SETTINGS page
and selecting the ABOUT tab. In the Phone software you can check your current Ui software version by
navigating to the SETTINGS page and selecting the HELP tab.
To update the Ui software:
1. Download the Ui update le from the website and leave in .zip format.
2. Copy the .zip le to a USB media device suitable for connection to a Ui mixer’s USB port. Note: The le
can reside in any directory. Any USB port on the mixer is also acceptable.
3. Ensure your client device is connected to the Ui mixer GUI
4. Connect the USB media
5. The GUI display will display that the USB device has been mounted. After the stick has been read (maybe 10 more seconds) the update will be recognised.
6. The GUI will ask if you would like to update. Choose OK.
7. The mixer will perform the update
8. The GUI will present a message stating whether the update has been successful or not.
9. You must power-cycle the unit and reconnect a client device.
10. You can browse to the about page to see the new Firmware version information.
Page 19
3.1: SOFTWARE NAVIGATION
SOFTWARE > SOFTWARE NAVIGATION
3.1: SOFTWARE NAVIGATION
Ui12, Ui16 User Manual
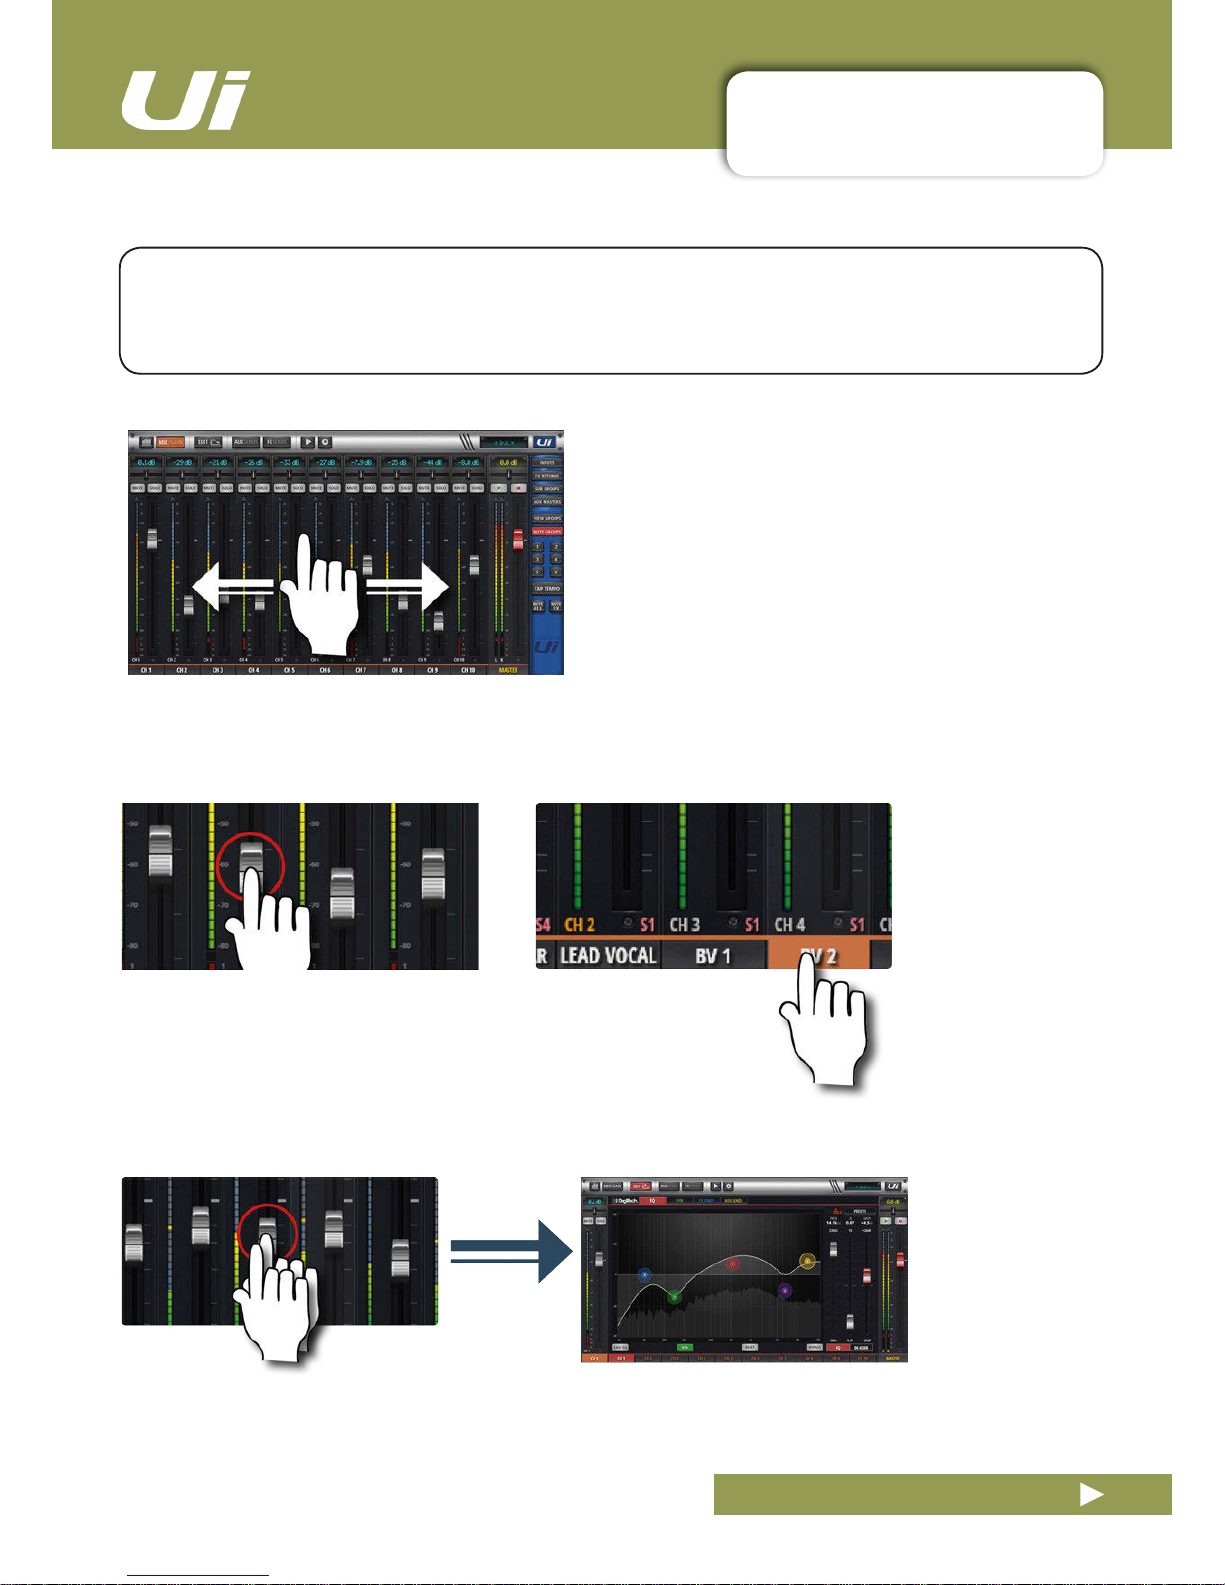
Scroll Mixer
Touch /Click and slide on the mixer screen to scroll
along to whole available mixer - including FX Send, Aux
Send and Group masters.
Fader / Channel Name
Select a channel by touching or clicking on a fader or channel name.
The selected channel will remain active (keep focus) regardless of
function screen until a new channel is selected.
Double Tap Fader
Access the channel EQ from MIX Screen. Double tap or double click.
There are many navigation / gesture techniques common to both the Tablet and Phone versions of the Ui
control software. This section describes the main ones. Section 3.7 summarises all control gestures.
Please Note: The screen shots shown are from the phone version of the software, except where the two
differ signicantly in content.
Page 20
3.1: SOFTWARE NAVIGATION
SOFTWARE > SOFTWARE NAVIGATION
3.1: SOFTWARE NAVIGATION
Ui12, Ui16 User Manual
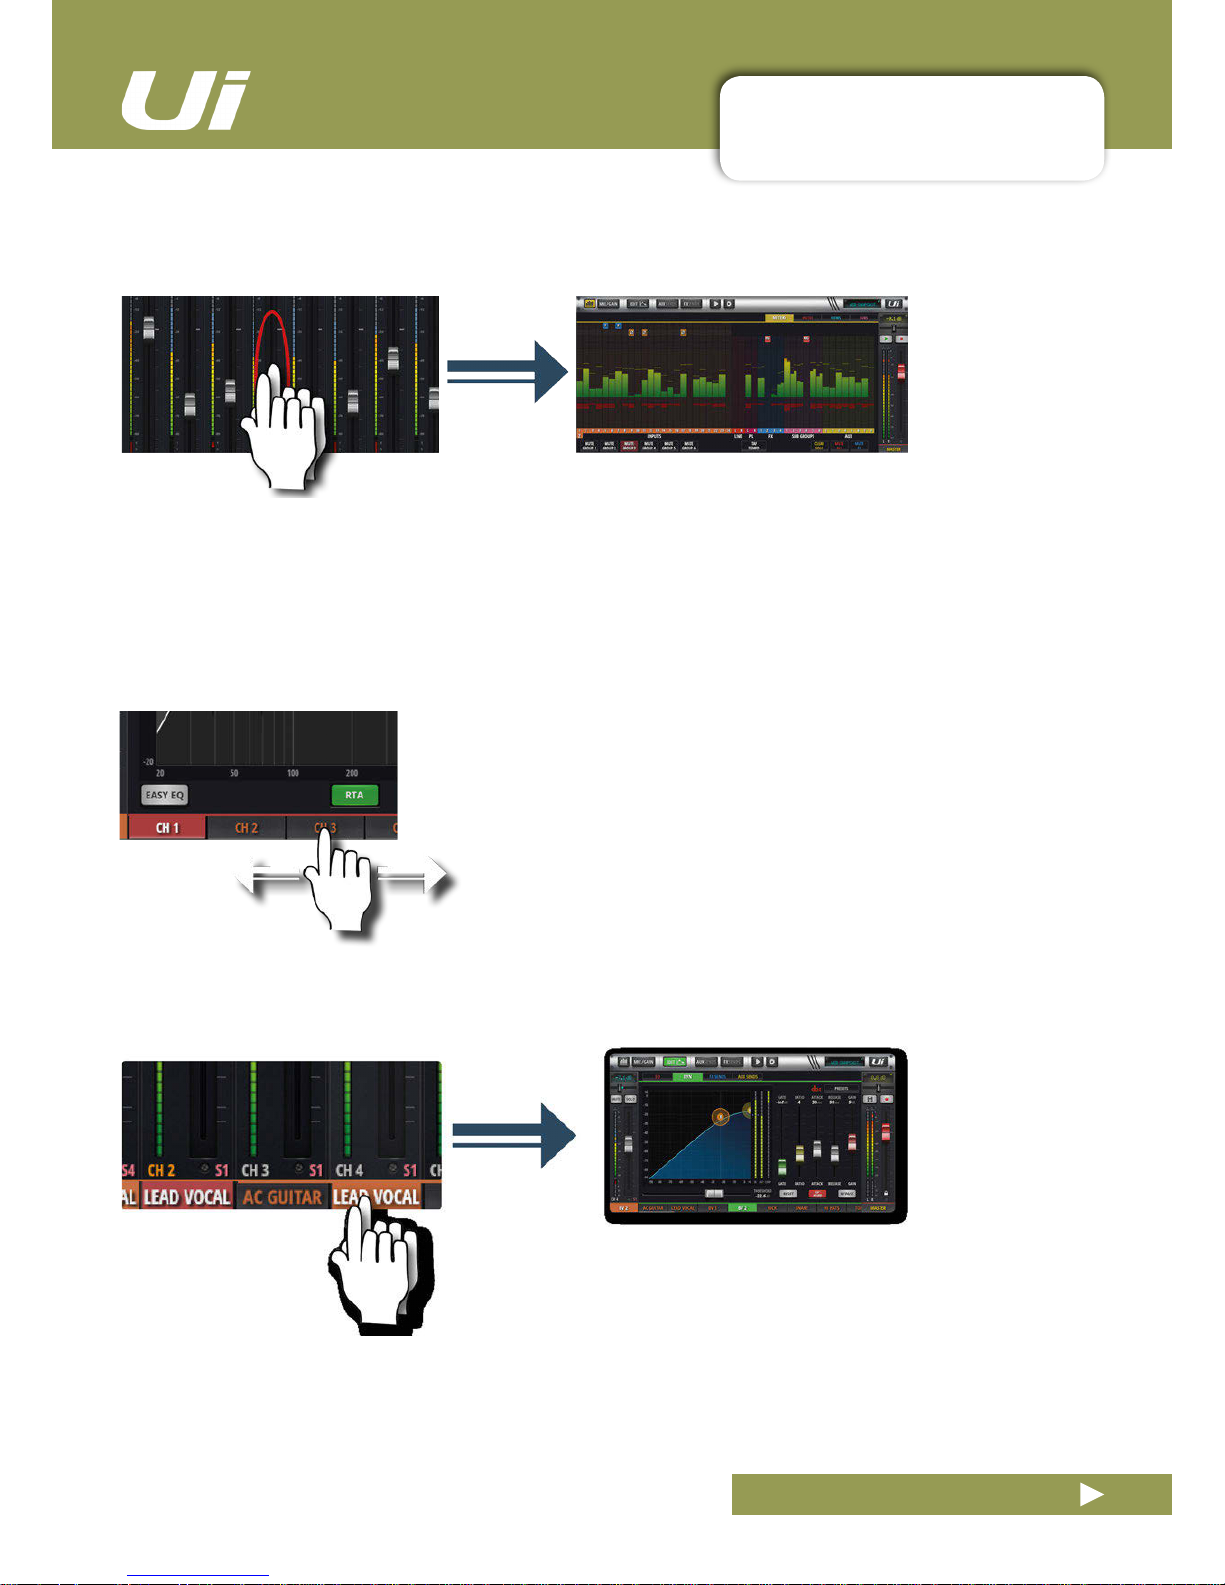
Scroll Channel Names
Touch/click-hold and slide on channel names to access channel
names across the whole mixer, including FX Sends, Aux Sends, and
Group Faders.
Double Tap Channel Name
Phone: Access the Dashboard screen for that channel - access to
EQ, dynamics, Aux and FX Sends, and more.
Tablet: Access EDIT Page > Dynamics tab.
Double Tap Channel Strip
Double tap anywhere except the fader to access the METERS screen or switch back to the MIX screen from the
GAIN screen.
Page 21
3.1: SOFTWARE NAVIGATION
SOFTWARE > SOFTWARE NAVIGATION
3.1: SOFTWARE NAVIGATION
Ui12, Ui16 User Manual
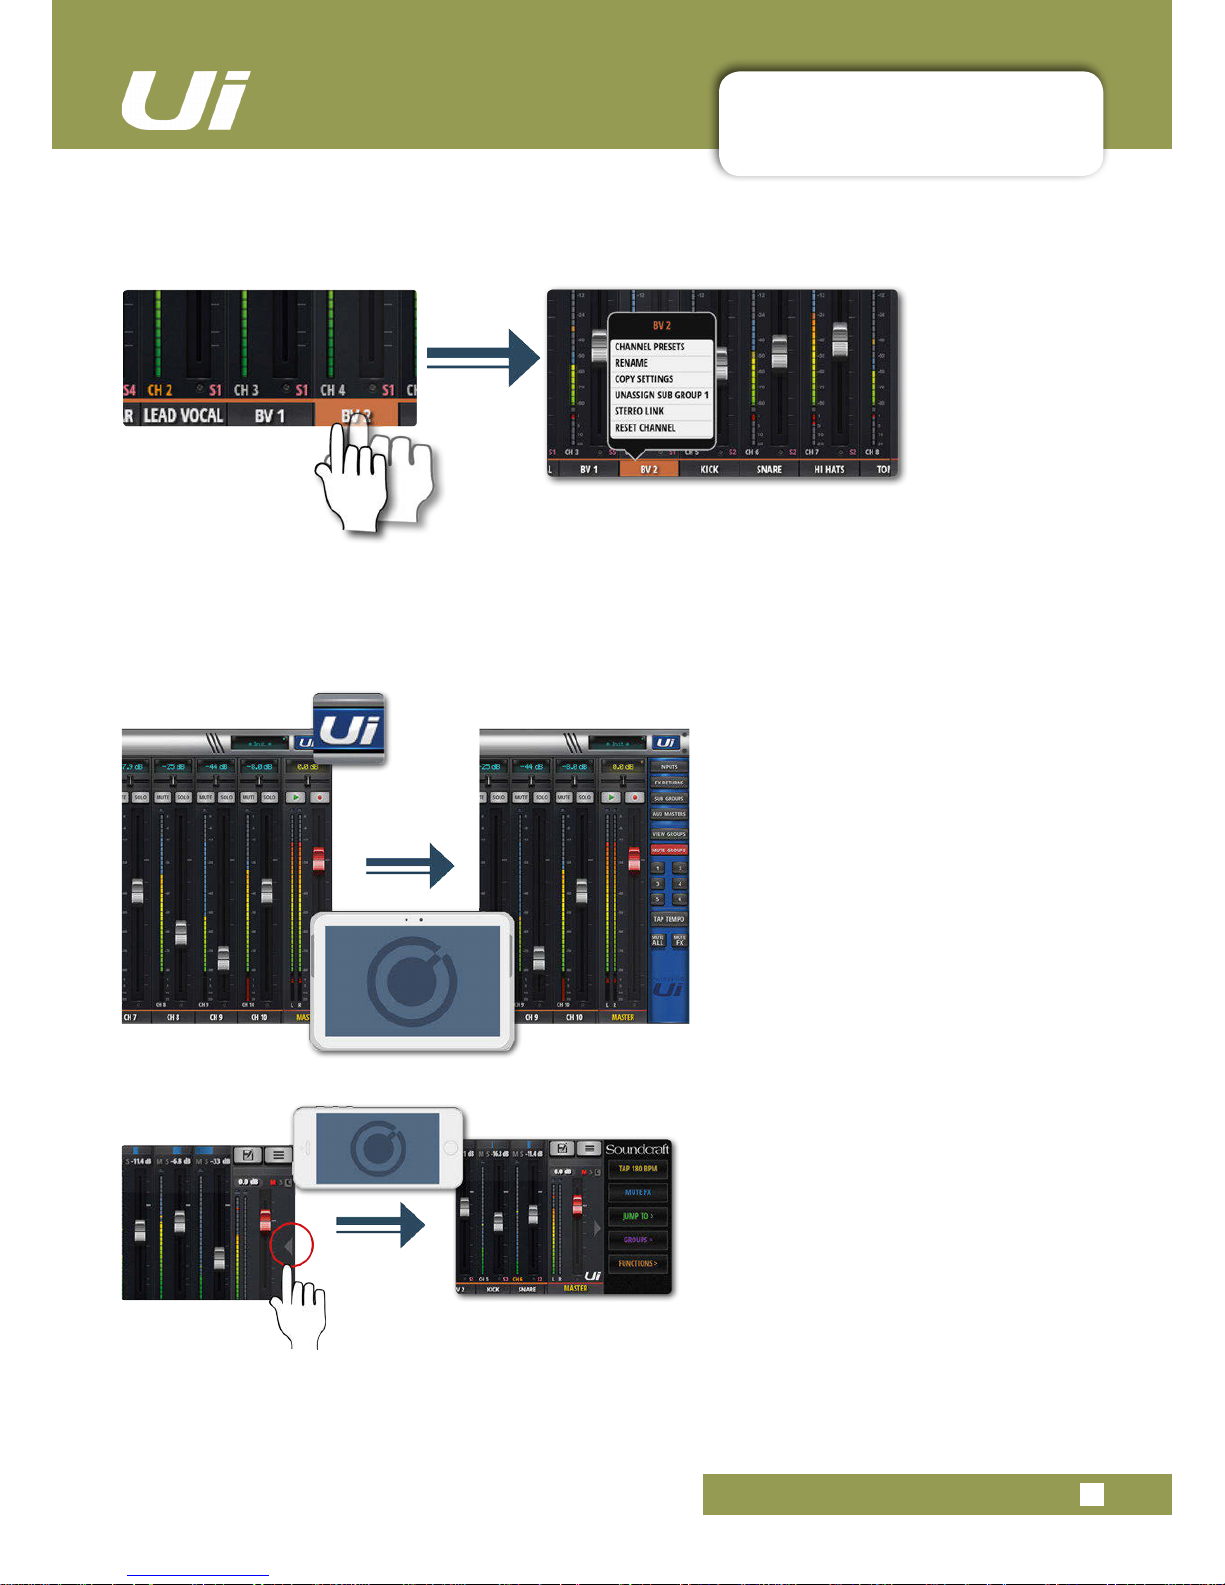
Long (held) Tap/Click
A long tap/click on certain controls brings up a sub-menu specic to that control. For example, a long hold or
click on a channel name gives access to channel presets, renaming, copy/paste settings, sub group assignment,
stereo linking, channel reset, and the ASSIGN ME function.
Slideout View
Touch the Slideout Arrow to the right of the
MIX screen to access the Slideout View
panel.
For the tablet software Slideout panel,
click/touch the Ui button in the top right
corner of the screen. The tablet Slideout
offers fast mixer navigation to common
channel groups, MUTE and VIEW group
access, the TAP TEMPO button, plus
MUTE ALL and MUTE FX functions.
On the phone software this gives fast
access to the TAP TEMPO and MUTE FX
buttons, plus JUMP TO (mixer navigation),
GROUPS (Mute & View Groups), and
FUNCTIONS (fast functions such as
playback and record) options.
You can pin the Slideout View in place via
the SETTINGS Screen.
Page 22

3.1.1: CONTROL / GESTURE SUMMARY
SOFTWARE > CONTROL SUMMARY
3.1.1: CONTROL SUMMARY
There are many control gestures, taps, and clicks to help navigate the Ui Control software quickly and
intuitively. This is a summary of those control options.
Ui12, Ui16 User Manual
List selectors
• Item selections available in list boxes can be made by double clicking/tapping on a selection in addition to using
a ‘load’ button trigger.
MIX page shortcuts
• Double click/tap on channel virtual LCD display to return channel Vol to 0dB.
• Single click/tap on channel Pan or Balance control zone to temporarily display channel Pan or Balance value in
relative virtual channel LCD display.
• Double click/tap on channel Pan or Balance control to centre channel Pan or Balance.
• Double click/tap in INPUT channel strip zone (excluding fader cap) to navigate to METERS Page.
• Double click/tap in LINE INPUT channel strip zone (excluding fader cap) to navigate to METERS Page.
• Double click/tap in PLAYER channel strip zone (excluding fader cap) to navigate to PLAYER/MEDIA Page.
• Double click/tap in FX RETURN channel strip zone (excluding fader cap) to navigate to FX SENDS Page.
• Double click/tap in SUG GROUP channel strip zone (excluding fader cap) to navigate to METERS Page.
• Double click/tap in AUX MASTER channel strip zone (excluding fader cap) to navigate to AUX SENDS Page.
• Double click/tap on channel fader cap to navigate to channel EDIT mode EQ tab.
• Double click/tap on channel label (channel types: INPUT, LINE IN, PLAYER, SUB GROUP, AUX) to navigate to
selected channel EDIT page DYN tab.
• Double click/tap on channel label (channel type: FX RETURN) to navigate to selected channel EDIT page FX
tab (Global FX parameters).
• Long click/press and hold on channel label to instantiate channel pop-up menu.
• Single click/tap on top level navigation panel virtual LCD display to instantiate shows/snapshot pop-up list
short-cut activator.
• Long click/press-and-hold on top level navigation panel virtual LCD display to navigate to SETTINGS page
SHOWS tab.
• Single click/tap on MASTER channel virtual LCD display to navigate to METERS Page.
SLIDEOUT Panel short-cuts
• Long click/press-and-hold on SUB GROUPS to navigate to Sub Group conguration (METERS page, SUBS
tab.
• Long click/press-and-hold on VIEW GROUPS to navigate to Views conguration (METERS page, VIEWS tab).
• Long click/press-and-hold on MUTE GROUPS to navigate to Mute Groups conguration (METERS page,
MUTES tab).
• Long click/press-and-hold on TAP TEMPO for numeric tempo entry.
METERS page
• Single click/tap on any channel meter VU zone to navigate to relevant channel on MIX page.
• Long click/press-and-hold on TAP button for numeric tempo entry.
Channel EDIT page > DIGITECH tab
• Single click/tap on amp head to bring up amp list selector
• Single click/tap on to bring up cab list selector
Page 23

3.1.1: CONTROL / GESTURE SUMMARY
SOFTWARE > CONTROL SUMMARY
3.1.1: CONTROL SUMMARY
Ui12, Ui16 User Manual
Channel EDIT page > EQ tab
Parametric EQ:
• Double click/tap in vacant space to navigate to MIX page.
• Drag PEQ frequency balls to adjust dB gain and frequency values.
• Double click/tap frequency balls to reset selected frequency band to 0dB and default frequency.
• Pinch-gesture or mousewheel/trackpad scroll on selected frequency ball to adjust Q value.
• Drag DE-ESSER frequency ball to adjust frequency and dB threshold values.
• Drag LC/HPF frequency ball to adjust LC/HPF frequency value.
• Pinch-gesture or mousewheel/trackpad scroll on DE-ESSER frequency ball to adjust ratio value.
Graphic EQ:
• Double click/tap in vacant space to navigate to MIX page.
• Drag GEQ frequency balls to adjust dB gain of selected frequency.
• Double click/tap frequency balls to reset selected frequency to 0dB.
• Single click/tap on mini GEQ segments (top left) to present high or low bands in main editor.
Channel EDIT page > DYN tab
• Double click/tap in vacant space to navigate to MIX page.
• Drag threshold ball to adjust dynamics threshold value.
• Drag ratio ball to adjust dynamics ratio value.
Channel EDIT page > FX tab
• Double click/tap in vacant space to navigate to MIX page.
• Single click/tap in virtual FX rack for Preset Manager.
Channel EDIT page > AUX tab
• Double click/tap in vacant space to navigate to MIX page.
AUX SENDS page
• Long click/press-and-hold channel strip PRE/POST button for ‘set all Pre or Post’ option.
• Double click/tap in channel send strip zone (excluding fader cap) to navigate to MIX Page.
• Double click/tap on channel label to navigate to selected channel EDIT page DYN tab.
• Long click/press-and-hold on channel label to instantiate channel pop-up menu.
FX SENDS page
• Double click/tap in channel send strip zone (excluding fader cap) to navigate to MIX Page.
• Double click/tap on channel label to navigate to selected channel EDIT page DYN tab.
• Long click/press-and-hold on channel label to instantiate channel pop-up menu.
PLAYER/MEDIA page
• Double click/tap in channel strip zone (excluding fader cap) to navigate to MIX Page.
• Double click/tap on channel fader cap to navigate to channel EDIT mode EQ tab.
• Double click/tap on channel label to navigate to selected channel EDIT page DYN tab.
• Long click/press-and-hold on channel label to instantiate channel pop-up menu.
Page 24

3.2: TABLET NAVIGATION
SOFTWARE > TABLET / LARGE SCREEN NAVIGATION
3.2: T ABLET NAVIGATION
The MIX Screen is the default for the Ui tablet / large screen software - You can navigate from there to
other screens and functions in a variety of ways. The Level 1 Navigation controls take you directly to
various primary screens, Level 2 navigation (page tabs) switches layers within the selected screen, and
Level 3 navigation controls select individual channels.
Ui12, Ui16 User Manual
METERS
Access the METERS page
Tabs on this page are METERS (meters & status), MUTES, VIEWS, and SUBS (Sub Groups). The default meters
page shows status for phantom power, phase, mute, and solo, plus bargraph metering for level, gain reduction
(dynamics). You can activate mute groups, use Tap Tempo, and CLEAR SOLO, MUTE ALL, AND MUTE FX directly
from this page.
Page 25

3.2: TABLET NAVIGATION
SOFTWARE > TABLET / LARGE SCREEN NAVIGATION
3.2: T ABLET NAVIGATION
Ui12, Ui16 User Manual
EDIT
Access the EDIT page for the selected channel
Resulting page configuration depends on selected channel. For example, the EDIT page for an input channel will
have EQ, Dynamics, Aux Sends, and FX Send tabs. Certain Tabs will be preselected if you navigate from certain
views. For example, selecting EDIT from the FX Sends main page will preselect the FX Sends tab in for the
highlighted channel.
FX SENDS
Access the FX SENDS page
Shows a fader based view of all FX send levels for the selected FX Send Bus. Also shows FX Return channel on
right hand side. Selecting EDIT from the FX SENDS page will preselect the FX Send tab for the selected input
channel.
SETTINGS
Access the SETTING page
System and mixer settings and configurations.
AUX SENDS
Access the AUX SENDS page
Shows a fader based view of all aux send levels for the selected aux bus. Also shows the Aux Master channel on
right hand side. Selecting EDIT from the AUX SENDS page will preselect the AUX SENDS tab for the selected
input channel.
MEDIA
Access the MEDIA page
Playback and record controls, plus playlist and track selections. Also shows Playback L and Playback R channels
on left hand side.
MIX / GAIN
Access the MIX and GAIN pages
When the button is orange, the MIX page is shown (channel faders) and when the button is Red, the GAIN page is
shown (remote gain faders and input stage controls).
Page 26

3.2: TABLET NAVIGATION
SOFTWARE > TABLET / LARGE SCREEN NAVIGATION
3.2: T ABLET NAVIGATION
Ui12, Ui16 User Manual
SNAPSHOT
Access the Show and Snapshots pop-up selector
Load shows and snapshots directly from this pop-up.
SLIDEOUT
Access the SLIDEOUT view on the right hand side of the screen
Oers fast view and status switching functionality. The Slideout view can be configured as ‘pinned’
(permanent) in the SETTINGS page for Mix and Aux/FX Sends pages independently.
Page 27

3.2.1: KEYBOARD CONTROL
SOFTWARE > KEYBOARD CONTROL
3.2.1: KEYBOARD CONTROL
For users mixing with a device that has a keyboard, please see below a set of easily accessible key com-
mands, making it quick and efcient to access the most used features on the mixer.
Ui12, Ui16 User Manual
[1] DASHBOARD
[2] MIX/GAIN
[3] EDIT
[4] AUX SENDS
[5] FX SENDS
[6] MEDIA
[7] SETTINGS
[8] SNAPSHOTS (Same as click in NAV Display)
[9] SLIDEOUT
[SPACEBAR] SLIDEOUT.
[Q] FX RETURNS
[W] SUB GROUPS
[E] AUX MASTERS
[A] MUTE ALL
[P] PRESETS
[F] MUTE FX
[M] MUTE
[S] SOLO
[C] CHANNEL POP UP MENU
[~] UNDO (last page viewed)
[Left arrow] Jump 1 channels to the left
[Right arrow] Jump 1 channels to the right
[Up arrow] Jump 8 channels to the left
[Down arrow] Jump 8 channels to the right
[TAB] Toggle through the tabs inside EQ, DYN, FX, AUX.
Page 28

3.3: TABLET SCREENS
SOFTWARE > TABLET SOFTWARE SCREENS
3.3: TABLET SOFTWARE SCREENS
The main tablet software screens are accessed from the level 1 Navigation Buttons along the top of the
screen area, or via fast-access routes, such as double-tapping on a fader to access the EQ screen (see
section 3.1).
Ui12, Ui16 User Manual
MIX
MIX is the most used screen and includes
a scrollable display of every channel
fader. The channel order from left to right
is: input channel faders, line in faders,
media player faders, FX return faders,
Sub Group faders, and AUX Master
faders. The Ui hardware you own will
determine how many channels you see in
the control software.
METERS
The Tabs are METERS (for all channels),
MUTES (Mute group Assignment), VIEWS
(View Group assignment), and SUBS
(sub-group assignment).
The Meters page features VU meters
and gain reduction meters for all channels, and also provides fast access to the
CLEAR SOLOS, MUTE FX, and MUTE
ALL buttons, plus all Mute Groups.
GAIN
All Ui mixer models include remote gain
control and remote phantom power.
The GAIN screen - easily identied by its
red fader level lines - features Gain
Faders, and the phantom power and
phase invert buttons.
Page 29

3.3: TABLET SCREENS
SOFTWARE > TABLET SOFTWARE SCREENS
3.3: TABLET SOFTWARE SCREENS
Ui12, Ui16 User Manual
AUX SENDS
AUX SENDS is where the aux mixes are
created. The faders determine the level of
signal sent to the selected aux bus. Select
an aux mix from those available at the
top of the view to adjust that mix. The Aux
Master will be available on the right hand
end of the screen, next to the Master
Channel.
EDIT
The EDIT page provides access to audio
processing such as EQ, DYNAMICS, and
FX. The specic audio processing tabs
available depend on the selected channel
type. For example, the aux outputs and
Master Channel include Graphic EQ.
FX SENDS
FX Send faders determine the mix that is
sent to the selected FX processor. First,
select which effect you wish to adjust
using the tabs, then adjust the faders
to increase or decrease the amount of
reverb you would like added to each input
channel.
Select EDIT to edit the selected FX
algorithm.
MORE ME
MORE ME allows users to assign their
own personal channel, and create a
personal monitoring mix with a single
large fader. MORE ME channel names
are highlighted in orange. To assign an
input channel to the More Me fader,
long-press a channel name and select the
ASSIGN ME function. Use the same
process to assign an Aux bus as ‘ME
OUT’. In Tablet software, select MORE
me in the Slideout panel, or turn the ipad
to a portrait view to access the MoreMe
screen.
Page 30

3.3: TABLET SCREENS
SOFTWARE > TABLET SOFTWARE SCREENS
3.3: TABLET SOFTWARE SCREENS
Ui12, Ui16 User Manual
MEDIA
The Ui mixer has a built in media player.
This can be used for backing tracks or for
background music in between sets. The
le playback is streamed directly from a
USB stick. Press the MEDIA icon to enter
the player page. Files can be played from
a playlist or directly from the le list. Press
and hold the PLAYER channel name to
bring up the channel menu.
SETTINGS
System, network, and security settings,
as well as Shows and Snapshots
management. See section 10 for more
details.
Page 31

3.4: PHONE NAVIGATION
SOFTWARE > PHONE NAVIGATION
3.4: PHONE NAVIGATION
The MIX screen is the default for the Ui software - You can navigate from there to other screens and
functions in a variety of ways. To access the Menu screen, press the NAV icon in the top right corner of the
screen. Press it again to return to the MIX screen.
Ui12, Ui16 User Manual
NAV
Access the main menu screen
When in use, the NAV button changes to the ‘Return’ icon. Use this to return to the MIX screen.
SHOWS / SNAPSHOTS
Access the Show and Snapshots load/save page.
Page 32

3.4: PHONE SCREENS
SOFTWARE > PHONE SOFTWARE SCREENS
3.4: PHONE SOFTWARE SCREENS
From the MENU screen you can access the MIX screen (Return button, top right corner) and nine other
primary screens via the large colour-coded buttons.
Ui12, Ui16 User Manual
PLAYER
The Ui mixer has a built in media player.
This can be used for backing tracks or for
background music in between sets. The
le playback is streamed directly from
a USB stick. Files can be played from a
playlist or directly from the le list. Press
and hold the PLAYER channel name to
bring up the channel menu.
MORE ME
MORE ME allows users to assign their
own personal channel, and create a personal monitoring mix with a single large
fader. MORE ME channel names are
highlighted in orange. To assign an input
channel to the More Me fader, long-press
a channel name and select the ASSIGN
ME function. Use the same process to
assign an Aux bus as ‘ME OUT’.
METERS
VU Meters for all Mixer channels, plus
status LEDs for Phantom power, Phase,
Clip, Mute, and Solo. If you press on any
meter bank, it will take you to the faders
of those channels on the MIX page. This
page also provides fast access to the
CLEAR SOLOS, MUTE FX, and MUTE
ALL buttons.
SETTINGS
A range of system settings and
conguration options under the headings
SETUP (mix preferences), GUI (interface), NETWORK (Wi-Fi hot spot and
password settings), ACCESS (multi-user
security), and HELP.
Page 33

3.5: PHONE SCREENS
SOFTWARE > PHONE SOFTWARE SCREENS
3.5: PHONE SOFTWARE SCREENS
Ui12, Ui16 User Manual
AUX SENDS
AUX SENDS is where the AUX mix is
created. The AUX input channel faders
determine the signal level sent to that
aux bus. Select an aux mix on the right to
adjust the mix from all channels.
GAIN
All Ui mixer models include remote gain
control and remote phantom power.
The GAIN screen - easily identied by its
red fader level lines - features Gain
Faders, and the 48V phantom power and
PHASE buttons.
SHOWS
Shows and Snapshots management,
saving, and recall etc. A Show is a
collection of Snapshots. A Snapshot is a
stored set of full mixer settings.
FX SENDS
FX Send faders determine the mix that is
sent to the selected FX processor.
First, select which effect you wish to
adjust using the tabs, then adjust the
faders to increase or decrease the
amount of reverb you would like added
to each input channel. Select FX EDIT to
edit the selected FX algorithm.
EDIT
Double-Tap a channel name or select
EDIT screen to open the channel
Dashboard. This screen allows editing of
EQ, dynamics, FX and aux sends. Simply
click on the display you want and it will
open that feature in full screen.
Double-Tap the Master Channel name for
the Master EDIT page.
Page 34

Ui12, Ui16 User Manual
4.0: MIXER CHANNELS
MIXER CHANNELS
4.0: MIXER CHANNELS
The Ui mixers has a variety of input and output channel types. You can view all channels in the main
MIX screen and drag-scrolling along the virtual console. You can also use the MIX page Slideout
panels to select specic channel types and preset views.
INPUT CHANNEL - sections 4.1 and 4.2
A Ui Input channel consists of a GAIN section (physical input, pre-amp, phase, phantom power etc) and the
MIX section. Input channels feed the main stereo bus (to the Master Channel), the aux send busses (to the Aux
Master channels), and the FX send busses (and on to the FX Returns). An input channel’s contribution to these
busses is controlled on the relevant software page, or in the channel’s EDIT screen.
AUX SENDS / AUX MASTER CHANNEL - section 4.3
Aux Outputs (short for Auxiliary) are the outputs on the top right of the Ui hardware. These outputs each have
their own mix of input sources, separate from the master mix. Generally, aux outputs are used for musicians to
hear their own mix on stage via a stage monitor speaker or to headphone ampliers for in-ear monitoring.
Alternatively, the aux outputs can be sent to external hardware FX units.
SUB GROUP MASTER CHANNEL - section 4.5
If you want to have individual control over the drum kit mix components, for example, but also want single fader
control over the whole kit’s contribution to the mix, you would use a Sub Group.
FX SENDS / FX RETURN CHANNEL - section 4.4
FX SENDS faders effectively determine the amount of effect on each input channel. They work much like aux
sends in that a mix of input channel contributions is created on the FX SENDS page - one for each FX
processor.
MASTER CHANNEL - section 4.6
The Master Stereo Channel is the output channel for the main stereo (left & right) mix - determined by the input
channel and FX Return channel faders and pan/balance controls.
Page 35

4.1: INPUT: GAIN PAGE
CHANNELS > INPUT: GAIN PAGE
4.1: INPUT: GAIN PAGE
Ui12, Ui16 User Manual
The Gain page allows you to control the input stage aspects of a Ui input channel. It is a channel strip-type
display with red fader level indicators.
TABLET: Click/tap MIX/GAIN button to toggle MIX and GAIN pages.
PHONE: Use the GAIN menu button to navigate to the GAIN page.
NOTE: The GAIN screen has the Input Display and Pan/Balance controls in common with the MIX screen please see section 4.2 for details.
All Ui mixer models include remote gain control and remote phantom power. This great feature allows you to
change the Microphone input Gain and Phantom Power remotely on your Ui software without needing to touch
the hardware).
GAIN, PHANTOM POWER, PHASE REVERSE
The audio inputs have an input gain range from -40dB up to +60dB. It’s a good idea to make sure the gain
fader is down when plugging in new sources. Avoid ‘clipping ‘ the input - when you see the red clip light
constantly registering, the signal will be distorted. Simply reduce the gain to avoid this.
When you switch to MIX from GAIN, the volume faders change to GAIN faders (red line underneath the fader
knob). In the tablet software, the MUTE and SOLO buttons change to +48V (Phantom power) and ϕ (Phase
Reverse) buttons. In the phone software those controls are in the EDIT page (you can double-tap a channel
name to switch to the EDIT page faster).
Phantom Power is required to power certain microphones such as condenser microphones, or other active
devices such as an active DI. It is activated per channel. You can get an overview of phantom power status in
the METERS screen (blue indicator).
When phantom power is activated, the channel output is momentarily muted to avoid transients being
transmitted to the rest of the audio chain (protecting your PA speakers).
METERING
The GAIN page meters show input level and input clipping (topmost light, just above main meter).
Page 36

4.2: INPUT: MIX PAGE
CHANNELS > INPUT: MIX PAGE
4.2: INPUT: MIX PAGE
Ui12, Ui16 User Manual
The MIX page is the Ui control software’s default page and allows you to control the routing and panning
and fader of a Ui input channel. Please note - the phone software displays panning/balance, solo, and mute
status, but for control you should use the EDIT page. Those controls are described in this section.
TABLET: Click/tap MIX/GAIN button to toggle MIX and GAIN pages.
PHONE: The RETURN button will always return you to the MIX page.
A double click/tap on a GAIN channel strip (not the fader cap) will return you to the MIX page.
A double click/tap on a channel name will take you to the EDIT page for that channel.
FADER
Adjust the level of this channel in the master stereo mix.
METERING
VU metering for input level and volume level.
The VU meters on the MIX page show two colours. The blue meters show the input gain (from the GAIN page)
and the yellow meters over the top show the volume level. Please note, EQ & DYN aects the volume meters.
Page 37

4.2: INPUT: MIX PAGE
CHANNELS > INPUT: GAIN PAGE
4.2: INPUT: MIX PAGE
Ui12, Ui16 User Manual
MUTE
Turn off the audio signal of a channel
MUTE is an immediate audio o, rather than having to slide down the fader (and removes the possibility of forgetting its original position). The MUTE button mutes the channel output to the main stereo bus. It can also mute an
aux output, depending on the aux’s PRE or POST status (post fader aux will be muted).
SOLO
Solo this channel
The SOLO button is grey when not in use and yellow when operational. Press the SOLO button to only hear the
Soloed channel. In SETTINGS the SOLO button signal can be routed to the headphones or to the Master outputs
+ headphones. There are also two solo modes: SOLO 1 (pressing a SOLO button deactivates a previous solo) and
SOLO+ (solos are cumulative and do not cancel previous solos). NOTE: If the ‘AUX’ option is set for the HEADPHONES OUT parameter (SETTINGS), the headphones output will not reflect the Solo selection.
PAN / BALANCE
Adjust the Pan / Balance
In a mono channel this control is a Pan control, with a blue 'pan line'. In a stereo (linked) channel, this control is
a balance control with an yellow 'balance line'. Pan moves a single source from left to right; balance moves the
whole stereo image from left to right.
CHANNEL DISPLAY
Numeric fader level and pan
Shows the input as a dB level. It also shows the Pan position for three seconds after the pan slider is moved.
CHANNEL NAME
Channel sub menu access, channel name scrolling, channel select
The Channel Name is usually a name/description of that channel. You can click on channel names to select that
channel, double click/tap a channel name to go to the EDIT screen for that channel, or you can Long-Click/Tap on
a channel name to access the channel sub-menu (See section 4.3).
Page 38

4.2.1: INPUT SUB-MENU
CHANNELS > INPUT SUB-MENU
4.2.1: INPUT SUB-MENU
Ui12, Ui16 User Manual
By long-clicking/tapping on a channel name you can access the channel sub-menu for access to various
channel parameters...
CHANNEL PRESETS
Recall and save whole channel settings - Factory and User preset banks.
RENAME
Rename the channel. The new name will be shown in the Channel Name elds.
COPY / PASTE SETTINGS
Copy the channel settings to the pasteboard. A ‘PASTE SETTINGS’ option will appear when you select another
input channel sub menu. Use that to paste the copied settings to that channel.
ASSIGN SUB GROUP
Choose a sub group for this channel. For example, you might want to assign all drum kit microphones to a ‘Drum
Kit’ sub group. Once assigned, the sub group assignment grid will be replaced with an ‘UNASSIGN
SUBGROUP’ option.
STEREO LINK
Create and stereo channel from two mono channels. Odd/even (L/R) pairs are linked, so if you link channel 2
(right), it will create a stereo channel with channel 1 (left).
RESET CHANNEL
Reset channel settings to their defaults.
Page 39

4.3: AUX SENDS
CHANNELS > AUX SENDS
4.3: AUX SENDS
Ui12, Ui16 User Manual
Aux Outputs (short for Auxiliary) are the outputs on the top right of the Ui hardware. These outputs each
have their own mix of input sources, separate from the master mix. Generally, aux outputs are used for
musicians to hear their own mix on stage via a stage monitor speaker or to headphone ampliers for in-ear
monitoring. Alternatively, the aux outputs can be sent to external hardware FX units.
AUX SENDS is where the aux mixes are created - these can be for monitor outputs, for external FX sends, and
more. They have dedicated outputs on the Ui hardware. The aux faders have orange level indicator lines and
determine how much of each input channel is contributed to the Aux bus. Ui12 has four main Aux busses
available, and Ui16 has six. The highest-numbered aux pairs (3/4 for Ui12 and 5/6 for Ui16) are available as
physical outputs when the HEADPHONES OUT option is set to ‘AUX’ in SETTINGS. You can view all aux contributions from a single channel by navigating to that channel’s EDIT page and selecting the AUX SENDS screen
/ tab.
Select the AUX tab you wish to mix (AUX 1 to AUX 8), and then adjust the channel volumes (contributions from
input channels). The AUX SEND fader on the right (orange fader) is the Aux Master channel fader - the
overall output volume for your AUX mix.
Aux Master channel faders can be viewed together either with the AUX MASTERS button in the Tablet version
Slideout panel, or from the JUMP TO option in the phone software slideout panel. You can also scrolling to the
right-hand end of the Mix page channels. Aux Master channels can be renamed and stereo-linked (see below).
STEREO AUX
Stereo-linking channels is possible for both the input channel sends and the Aux Masters. To stereo link Auxes,
use the Aux Master channel sub-menu (long-click/tap on the channel name).
Go to the channel pop-up menu (long click channel name) to access the Stereo Link feature. When 2 mono input
channels are stereo-linked on the main MIX page, those channels will also be stereo-linked on the AUX SENDS
page. (2 channels panned left & right with a green link line above the dB display).
FX ON AUX
It is possible to add FX to your aux mix. Scroll to the end of the channel list and you will see the FX RETURN
faders. Please note that you cannot control the FX of every channel for the AUX. When adding the FX you are
adding a global FX signal from the main mix.
Page 40

4.3: AUX SENDS
CHANNELS > AUX SENDS
4.3: AUX SENDS
Ui12, Ui16 User Manual
PRE/POST (Tablet software)
Switch input channel’s Aux contribution between PRE and POST sources
AUX channels are pre-fader by default, meaning the volume faders on the MIX page do not aect the aux levels.
Press the PRE button to change individual channels to POST fader. A long press on the PRE/POST button opens a
dialog for ALL CHANNELS TO PRE or POST.
AUX SEND MUTE (Tablet software)
Mute the input channel’s contribution to this aux mix.
Separate to the normal input channel mute - only aects contribution to the selected aux mix.
M-AUX / COPY MIX
Copy the main mix to this aux mix
This button copies the fader positions from the MIX page and moves all aux send faders to the same position on
the AUX SENDS page. This is a handy starting point for an AUX mix rather than starting from all faders down.
You can press this button at any time if you want your monitor mix fader positions to resemble the MAIN mix. For
safety, user confirmation is required.
Page 41

4.3.1: AUX MASTER
CHANNELS > AUX MASTER CHANNEL
4.3.1: AUX MASTER CHANNEL
Ui12, Ui16 User Manual
The Aux Master channel is the output path for Aux busses. In other words, the Aux 1 mix of contributions from all input channels passes through the Aux 1 Master channel before being sent out of the
physical Aux 1 output. Ui12 has four Aux busses available, and Ui16 has six. The highest-numbered
aux pairs (3/4 for Ui12 and 5/6 for Ui16) are available as physical outputs when the HEADPHONES
OUT option is set to ‘AUX’ in SETTINGS
Aux Master channels have their own EDIT channels, featuring a
GEQ (Graphic EQ) rather than a parametric EQ, and dbx AFS2
feedback elimination (See section 5).
You can view all Aux Master channels either in the MIX screen
(scroll to right) to by selecting AUX MASTERS from the tablet
software Slideout panel or from the JUMP TO pop-up menu in
the phone software Slideout panel.
Page 42

4.4: FX SENDS
CHANNELS > FX SENDS
4.4: FX SENDS
Ui12, Ui16 User Manual
FX SENDS faders effectively determine the amount of effect (delay, reverb, chorus) on each input channel.
They work much like aux sends in that a mix of input channel contributions is created on the FX SENDS
page - one for each FX processor. After processing, that mix is returned via its own FX Return channel,
which works just like an input channel - adjusting the overall level of that processor’s mix in the master
stereo mix. The FX Return channel for the selected FX processor is shown in the FX SENDS view, next to
the Master Channel.
All FX Return channels can be viewed either by scrolling in the main MIX view, by choosing FX RETURNS from
the Slideout panel in the tablet software, or from the JUMP TO option in the phone software Slideout panel.
You can view all FX contributions from a single channel by navigating to that channel’s EDIT page and selecting
the AUX SENDS screen / tab.
In the FX SENDS page, rst select which effect you wish to adjust using the tabs. Adjust the grey faders to
increase or decrease the contribution of that channel to the selected FX processor. Adjust the blue FX RETURN
fader labelled FXR 1 REVERB to control the total amount of REVERB heard in the mix.
Input channel FX Sends can be individually muted in the FX SENDS page.
NOTE: FX sends are POST FADER, meaning a change of level on the main mix page affects the level
sent to the FX processor. This ensures that each input channel’s contribution to the FX send is always
proportional to its prominence in the main mix.
Page 43

4.5: SUB GROUP MASTER
CHANNELS > SUB GROUP MASTER CHANNEL
4.5: SUB GROUP MASTER CHANNEL
Ui12, Ui16 User Manual
If you want to have control over the drum kit mix, for example, but also want single fader control over the
whole kit’s contribution to the mix, you would use a Sub Group.
When input channels are allocated to Sub Groups, either via the input channel sub-menu, or via the SUBS
screen in the DASHBOARD/METERS page, they are mixed together into a single stereo channel,
according to the relative positions of the main channel faders. That stereo channel is the Sub Group Master
and is used as a stereo input channel.
Sub Group Master channels have their own EDIT channels, as per any other Ui input channel.
Page 44

4.6: MASTER CHANNEL
CHANNELS > MASTER CHANNEL
4.6: MASTER CHANNEL
Ui12, Ui16 User Manual
The Master Stereo Channel is the output channel for the main stereo (left & right) mix - determined by the
input channel and FX Return channel faders and pan/balance controls. The Master Channel has its own
EDIT page tabs, just like other channels (see section 5). The EQ for Ui Output channels (including Aux
Masters) is a Graphic EQ (GEQ) rather than a parametric EQ (input channels and sub group masters).
The Master Fader (red fader knob) controls the overall output volume of your mixer. The actual level set by
the fader is shown in the top display above the fader in dB (decibels).
Display & Indicators
As well as dB, this display also has 3 useful indicators:
CLIP (C)
Noties you of any input gain clipping. When an input channel signal
is too hot and likely to be distorting, press this display to jump to the
DASHBOARD page. In DASHBOARD, press the word GAIN in the
top right corner of the bank that is clipping, then reduce the channel
GAIN fader.
MUTE (M)
This indicates that a channel is muted. Press the display to see the
DASHBOARD overview where all mutes are viewable.
SOLO (S)
This indicates that a channel is in solo mode. Press the display to
see the DASHBOARD overview where all SOLOS are viewable.
BALANCE (Tablet Software)
The horizontal Balance fader allows the volume of left and right
to be increased or decreased, but the mix of left and right is unchanged. Double press the balance slider to return it to the centre
position. To adjust balance in Phone Software, double tap the
Master Channel name to access its EDIT page.
F1 & F2 Buttons (Tablet Software)
The picture shows F1 and F2 set as PLAY and RECORD. F1 and
F2 are programmable buttons that can be used for multiple options.
These options are selectable in SETTINGS > CONFIGURATION.
The options are: New Snapshot, Update Current Snapshot, Next
Snapshot, Master EQ, Play, Record.
If Record is selected, press record to start recording directly to your
USB stick. The REC button will highlight in red. You must have a
USB stick mounted to make a recording.
Page 45

Ui12, Ui16 User Manual
5.0: CHANNEL EDIT
CHANNEL EDIT
5.0: CHANNEL EDIT
The EDIT page is the basic access point for channel-based signal processing: EQ, dynamics, and FX
and auxiliary sends. The actual processing and options available depend on the channel type.
The selected channel strip will be shown on the left of the EDIT screen. In the phone software, the
default EDIT page is a via-point for more detailed views and also offers access to basic channel
parameters such as pan/balance, phase, phantom power, and more.
EDIT PAGE ACCESS
The EDIT page is available from a number of different Ui Software screens. To select the EDIT page directly
either click/tap the EDIT button in the top-line navigation bar (tablet software) or select the EDIT menu item
(phone software).
Alternatively you can:
• Double click/tap on a channel fader cap to navigate to channel EDIT mode EQ tab.
• Double click/tap on channel label (channel types: INPUT, LINE IN, PLAYER, SUB GROUP, AUX) to navigate to
selected channel EDIT page DYN tab.
• Double click/tap on a channel label (channel type: FX RETURN) to navigate to selected channel EDIT page FX
tab (Global FX parameters).
Page 46

Ui12, Ui16 User Manual
5.1: DIGITECH
CHANNEL EDIT > DIGITECH
5.1: DIGITECH
DigiTech input processing and channel view is available to the rst two Ui mixer channels, and
includes Hi-Z (high input impedance) selection for sources such direct-input guitar pick-ups.
The DigiTech processing includes amp modelling: Emulations of guitar amps (with associated parameters) and cabinets. The DigiTech view also allows single-view editing of selected channel features via
the ‘Jack-Plug Buttons’.
AMP SELECT
Choose a guitar amp model
Clicking or tapping anywhere on the guitar amp graphic will bring up a pop-up menu of available guitar amp
models.
CAB SELECT
Choose a guitar speaker cabinet model
Clicking or tapping anywhere on the guitar cab graphic will bring up a pop-up menu of available guitar cab
models.
HI-Z ON/OFF
Turn the Hi-Z input on or off
If you have an input source that requires a high impedance input - such as the direct output from electric guitar
pick-ups - turn the Hi-Z option on.
Page 47

Ui12, Ui16 User Manual
5.1: DIGITECH
CHANNEL EDIT > DIGITECH
5.1: DIGITECH
DIGITECH ON/OFF
Turn DigiTech processing on or off
When DigiTech processing is turned o, the channel will revert to its standard input stage.
PRESETS
Open the PRESETS management pop-up
You can save and load settings presets for the DigiTech processing using this pop-up.
AMP CONTROLS
Adjust detailed settings for the selected amp model
The controls include GAIN, LEVEL, BASS, MID, and TREBLE. Use the GAIN control to overdrive the amp model.
CHANNEL CONTROLS
Single view editing of selected input channel controls
Available input channel sections are: FX, High Pass Filter, Notch Filter, Compressor, Gate
Page 48

Ui12, Ui16 User Manual
5.2: PARAMETRIC EQ
CHANNEL EDIT > PARAMETRIC EQ
5.2: PARAMETRIC EQ
EQ adjusts the amplitude of an audio signal at particular frequencies. Ui input channels, FX Return
channels, and Sub Group master channels have a four-band parametric EQ, plus High Pass Filter
(HPF), and a De-Esser controlled from the same screen. The display also incorporates an optional
Real Time Analyser (RTA), which shows a spectral view of the incoming signal. In addition, the EQ can
be switched to a three-band (xed frequency, xed Q) ‘Easy EQ’.
EASY EQ ON/OFF
Turn Easy EQ feature on or off
Easy EQ is a three-band, fixed frequency, fixed Q mode with a Mid bell-type band plus low and high shelving
bands. Switching Easy EQ OFF preserves the ‘curve’ in the parametric EQ, However, turning Easy EQ ON resets
the current curve because parametric EQ settings cannot be mapped to the Easy EQ format.
RTA - REAL TIME ANALYSER
Turn RTA feature on or off
The RTA display shows a real-time spectral view of incoming audio. This is sometimes useful for targeting specific
characteristics with EQ bands quickly. Note that RTA is only active on one channel at a time. If activated it will
deactivate any other channel’s active RTA (on other clients)
DE-ESSER ON/OFF
Turn De-Esser processing on or off
When o, no draggable De-Esser ball will be shown in the main EQ graphic interface.
Page 49

Ui12, Ui16 User Manual
5.2: PARAMETRIC EQ
CHANNEL EDIT > PARAMETRIC EQ
5.2: PARAMETRIC EQ
RESET
Reset the EQ to default values
The EQ is set ‘flat’, and frequency and Q values are reset to defaults.
BYPASS
Bypass the EQ section of channel processing
This control bypasses only the parametric EQ. HPF and De-Esser processing is unaected.
EQ / DE-ESSER FADER CONTROL
Choose EQ or De-Esser fader control
Controls for whichever is selected are assigned to the three control faders. For EQ, the faders show values for the
currently selected band.
H - DE-ESSER BALL
Draggable graphic ‘ball’ for De-Esser control
Drag this graphic element to control. UP/DOWN adjusts Threshold, LEFT/RIGHT adjusts frequency; use a
pinch-gesture or mouse-wheel/track-pad scroll on DE-ESSER ball to adjust the ratio value. Double-click/tap to
reset.
1/2/3/4 - EQ BAND BALL
Draggable graphic ‘ball’ for EQ band control
Drag this graphic element to control. UP/DOWN adjusts Gain, LEFT/RIGHT adjusts frequency; use a pinchgesture or mouse-wheel/track-pad scroll on the EQ ball to adjust ‘Q’ value. Double-click/tap to reset an individual
band.
Page 50

Ui12, Ui16 User Manual
5.2: PARAMETRIC EQ
CHANNEL EDIT > PARAMETRIC EQ
5.2: PARAMETRIC EQ
H - HPF BALL
Draggable graphic ‘ball’ for High Pass Filter control
Drag this graphic element to control. Left/Right adjusts Cut-O frequency. Double-click/tap to reset.
DE-ESSER FREQUENCY
Fader control of De-Esser Frequency
Determines the centre frequency of the De-Esser dynamic filter - the frequency on which the de-essing process is
focussed. To access the De-Esser fader controls in phone software, tap the DE-ESSER SETUP button.
DE-ESSER THRESHOLD
Fader control of De-Esser Threshold
De-Esser threshold is the level at which the De-Esser starts to attenuate the ‘ess’ band. To access the De-Esser
fader controls in phone software, tap the DE-ESSER SETUP button.
DE-ESSER RATIO
Fader control of De-Esser Ratio
De-Esser Ratio is the amount by which the ‘ess’ band is attenuated when the audio level crosses the Threshold. To
access the De-Esser fader controls in phone software, tap the DE-ESSER SETUP button.
EQ FREQUENCY
Fader control of EQ band Frequency
Fader control of EQ is only available with tablet software. Double-click/tap to reset.
Page 51

Ui12, Ui16 User Manual
5.2: PARAMETRIC EQ
CHANNEL EDIT > PARAMETRIC EQ
5.2: PARAMETRIC EQ
EQ Q
Fader control of EQ ‘Q’
Q is eectively a measure of how tall and thin the bell shape of the EQ band is - the lower the Q, the wider the
bandwidth aected, and vice versa. Fader control of EQ is only available with tablet software. Double-click/tap to
reset.
EQ GAIN
Fader control of EQ Gain
The amount by which the selected EQ band is either boosted or attenuated. Fader control of EQ is only available
with tablet software. Double-click/tap to reset.
Page 52

Ui12, Ui16 User Manual
5.3: GRAPHIC EQ
CHANNEL EDIT > GRAPHIC EQ
5.3: GRAPHIC EQ
Ui Aux Send Master channels and the Stereo Master Channel incorporate Graphic EQ (GEQ) instead
of the parametric EQ of the input channels. This includes 31 xed frequency bands (selected in banks
of 16 and 15 with the mini-GEQ graphic) with adjustable boost/cut. In addition, the GEQ screen gives
access to the dbx AFS2 (Automatic Feedback Suppression) processing. The display also incorporates
an optional Real Time Analyser (RTA), which shows a spectral view of the incoming signal.
GEQ Band ‘Ball’
Adjust the boost/cut in this audio band
Each ball can be dragged up (boost) or down (Cut), or double-tapped/clicked to reset to zero. Switch bands in
two banks of 16 and 15 by selecting the upper or lower portion of the mini GEQ graphic.
RTA
Activate the Real Time Analyser feature
The RTA display shows a real-time spectral view of incoming audio. This is sometimes useful for targeting specific
characteristics with EQ bands quickly.
RESET
Reset the GEQ to ‘at’
Page 53

Ui12, Ui16 User Manual
5.3: GRAPHIC EQ
CHANNEL EDIT > GRAPHIC EQ
5.3: GRAPHIC EQ
BYPASS
Bypass the GEQ processing
dbx AFS2 SETUP
Set up and operate the feedback elimination system for this bus.
Only available with tablet software. See section 5.3.1 for more detail.
PRESETS
Save / load GEQ presets
Brings up a standard preset management pop-up box.
Page 54

Ui12, Ui16 User Manual
5.3.1: AFS
2
CHANNEL EDIT > GRAPHIC EQ > AFS
2
5.3.1: AFS
2
AFS2 is a dbx feedback suppression system that uses 12 intelligent lters to detect and eliminate
feedback across the audio spectrum. You can set AFS2 up on the master stereo output and/or Aux bus
master channels by navigating to the channel’s Edit screen and selecting the EQ tab.
AFS2 works in two modes. Fixed mode is used for ‘ringing out’ a system before a performance to ensure
maximum headroom. Live Mode, continuously updates lter placement and is used during a performance.
Live lters are smarter than Fixed lters. They have the ability to detect feedback within complex program
material. This makes them ideal for protecting the system from feedback as conditions change during the
performance. Live lters can also detect when they are no longer needed and remove themselves from the
chain, effectively restoring sonic delity and freeing up Live lters for use elsewhere.
In normal operation, you would setup AFS
2
in Fixed mode before a performance, then switch to Live mode
for the actual performance.
Ringing Out The Sound System
Fixed lters are set before a performance in a process called ‘ringing out a system’. This is done after all
other system EQ has been performed. Ringing out the sound system for feedback before use allows you to
squeeze more gain out of the system before the onset of feedback and can help ensure you’re not right at
the edge of feedback during system use.
dbx AFS2 SETUP
Set up and operate the feedback elimination system for this bus.
A dialogue box will open up with setup options.
CLEAR FILTERS
Clear the AFS
2
lters for a new performance / set-up
All filters need to be cleared before normal set-up. However, you can also reset the Live and Fixed filters independently, depending on need.
Page 55

Ui12, Ui16 User Manual
5.3.1: AFS
2
CHANNEL EDIT > GRAPHIC EQ > AFS
2
5.3.1: AFS
2
AFS2 MODE
Choose LIVE, FIXED, or LOCK
Fixed mode is for pre-performance set-up, Live mode is for use during performance, and LOCK prevents changes
to the current filters status.
SENSITIVITY
Adjust the input level feeding the AFS2 detector and make AFS2 more or less prone to mark a
signal as feedback.
Setting this parameter high will allow AFS2 to detect the feedback and notch it out more quickly. Conversely,
setting it low will cause AFS2 to be a little more hesitant to set a filter on the feedback until it reaches a higher
level.
BYPASS
Bypass the AFS2 process.
You need to bypass the process while setting up for Fixed Mode set-up (‘ringing out’)..
Manual AFS2 Set-up in FIXED mode (Ringing Out The System)
1) Make sure all lters are cleared and set the AFS
2
process to Bypass using the blue bypass button.
2) Perform a sound check and set up a rough mix for all microphones that will be active during the
performance. Take note of the output fader position for the aux master or stereo master that you are ringing
out – your TARGET GAIN will be around 5dB above this (see step 6).
3) If noise gates are being used on active mics – including inside FX processors, bypass them before
ringing out the system. You can re-enable them once the ring-out procedure is complete.
4) Have the musicians stop playing and fully lower the master bus faders. NOTE: When ringing out the
system in Fixed Mode, any sustained sound detected by AFS
2
will trigger Fixed lters to be set. Therefore,
make sure the microphones are active, but there is no appreciable signal present at the mics.
5) Ensure the musicians are not playing, then set the FILTER MODE parameter to FIXED.
6) Un-bypass the AFS2 process then slowly raise the master fader until you reach your target gain
(described in step 2) or run out of Fixed Mode lters, whichever happens rst.
7) Lower the Master bus fader back to performance level.
8) Set the FILTER MODE parameter to LIVE. The system is now ready for use and any available Live lters
will be available for on-the-y feedback suppression during the performance.
Page 56

Ui12, Ui16 User Manual
5.4: DYNAMICS
CHANNEL EDIT > DYNAMICS
5.4: DYNAMICS
The Ui dynamics section is a comprehensive audio compressor/limiter and gate section. Basically, a
compressor reduces the level of the audio once it passes a particular threshold. You can set the Ui
Compressor Release parameter to ‘Inf’ (Innite) to create a Limiter. An audio gate uses a threshold to
determine its ‘open ‘ (above Threshold) or ‘closed’ (below Threshold) status. When a gate is closed,
the signal level is reduced, or cut completely. A gate can, for example, be used to reduce ambient
noise picked up by a microphone when the source (instrument/voice) is not active.
THRESHOLD
Adjust the Threshold of the compressor
The tablet version of the software includes a horizontal THRESHOLD fader. You can drag the orange ‘T’ ball in the
dynamics graphic in both phone and tablet versions.
GATE
Adjust the Threshold of the gate
When the audio signal level falls below this threshold, the signal is attenuated. The gate threshold is depicted in
the dynamics graphic as a darkened horizontal zone.
RATIO
Adjust the compression ratio
This determines how much the compressor attenuates the audio after the threshold level has been passed.
An infinite (inf) RATIO setting causes the compressor to become a limiter.
Page 57

Ui12, Ui16 User Manual
5.4: DYNAMICS
CHANNEL EDIT > DYNAMICS
5.4: DYNAMICS
ATTACK
Adjust the compressor Attack
This is the speed at which the compressor reacts and reaches the attenuation set by the RATIO parameter.
RELEASE
Adjust the compressor Release
This is the speed at which the compressor returns to ‘no attenuation’ after the signal level has fallen below the
threshold level.
GRM - METERING
Gain reduction metering
There are three meters: Input signal, output signal, and a meter showing the amount of attenuation currently
being applied due to the dynamics processing.
GAIN
Adjust the compressor Make-up Gain
Compression results in an overall reduction in signal level, so a GAIN control is provided to ‘make-up’ the lost gain.
Heavy compression plus make-up gain can often result in an increase in perceived overall loudness.
RESET
Reset the Dynamics for this channel to default values
BYPASS
Bypass the Dynamics for this channel
Page 58

Ui12, Ui16 User Manual
5.4: DYNAMICS
CHANNEL EDIT > DYNAMICS
5.4: DYNAMICS
SOFT KNEE / HARD KNEE
Set SOFT KNEE or HARD KNEE mode for the compressor
This determines how threshold level is interpreted. HARD KNEE mode means that the threshold represents an
abrupt transition. SOFT KNEE means that it represents a gradual transition.
PRESETS
Save / load Dynamics presets
Brings up a standard preset management pop-up box.
Page 59

Ui12, Ui16 User Manual
5.5: AUX/FX SENDS
CHANNEL EDIT > AUX/FX SENDS
5.5: AUX/FX SENDS
The AUX and FX SENDS tabs in the EDIT screen are a convenient way to access all output
contributions for a single channel - as opposed to the ‘mix view’ approach of the dedicated AUX SEND
and FX SEND pages. The AUX SENDS view/tab for both phone and tablet software versions includes
PRE/POST and MUTE buttons for each send.
The FX SENDS view/tab for both phone and tablet software versions offer MUTE buttons and
selections for editing the settings of the different FX processors. In the phone software, clicking/
touching one of these takes you to an additional detail view to edit that FX processor.
For details on the internal FX processors, please see section 7.
Page 60

Ui12, Ui16 User Manual
6.1: VIEW & MUTE GROUPS
MIX FEATURES > VIEW & MUTE GROUPS
6.1: VIEW & MUTE GROUPS
In Ui software you can mute channels individually, or in Mute Groups. There are six Mute Groups
available to be assigned to any muteable channels. To mute all channels in a Mute Group, simply
select the required Mute Group button. View Groups work in much the same way, though these dene
mixer channel views. For example, you could assign all vocal channels, plus an aux master to View
Group 1 for instant recall. The ‘INPUTS’, FX RETURNS, SUB GROUPS, and AUX MASTERS buttons
available in the Slideout panel are simply convenient preset View Groups.
To assign Mute Groups, View Groups, (and Sub Groups) navigate to the assignment page. In Tablet
software, choose the appropriate tab on the Meters page or long-click/touch the respective group button in the Slideout panel. You can then choose groups and assign channels to them as required.
Page 61

Ui12, Ui16 User Manual
6.2: MORE ME
MIX FEATURES > MORE ME
6.2: MORE ME
MORE ME allows users to assign their own channels (which may include a vocal mic and an
instrument channel for example) and mix the balance of those channels with a single large fader.
This is a simple way to mix your own sound against other band members.
To view MORE ME in the phone software, open the NAV menu and press MORE ME, or it can be accessed
from the AUX SENDS screen with a double press on the green AUX MASTER fader. Double press the
blank section in between the MORE ME faders to return to the AUX SENDS screen. In the Tablet software,
choose MORE ME from the Slideout panel.
MORE ME can be displayed in both landscape and portrait orientations. Landscape is accessed from the
NAV menu, whereas anytime you turn your phone to portrait orientation, the MORE ME page is shown in
portrait view.
For MORE ME to work, you rst need to assign your ME channels. Do this from a channel sub-menu in the
MIX page. Long-press a channel name for the channel sub-menu, then select ASSIGN ME.
Next you need to assign your aux output. Still in the MIX screen, scroll along to the AUX MASTER faders,
Long press on your AUX Master output channel and select ASSIGN ME OUT.
When a channel is assigned to MORE ME, its channel name is displayed in orange colour.
Page 62

Ui12, Ui16 User Manual
7.0: FX EDIT
FX EDIT
7.0: FX EDIT
Digital FX are used in all types of audio to help create depth and colour to a mix. The Ui12 has three
internal Lexicon FX processors: Reverb, Delay, and Chorus. The Ui16 has an additional processor that
can either be an additional reverb or delay.
There are dedicated FX Sends and Returns for the internal FX - simply adjust the corresponding FX
Send level and bring up the level of the FX Return channel to incorporate FX into your mix.
See section 4.4 for more details of FX Sends.
FX Edit panels have Preset Save / Recall, and Fader-based parameter adjustment with numeric LCDstyle numeric display.
Page 63

Ui12, Ui16 User Manual
7.1: REVERB
FX EDIT > REVERB
7.1: REVERB
Reverberation (or “reverb” for short) is the complex effect created by the way we perceive sound in an enclosed
space. Reverb is dependent on many features of that space, including the size, shape and the type of materials
that line the walls. Reverb is a natural component of the acoustic experience, and most people feel that
something is missing without it.
HF
HF Damping
By damping the high frequencies you can ‘tune in’ a more natural reverberation.
TIME
Reverb Time (milliseconds)
The amount of time it takes for the reverberation tail to decay. Reverb time is an aural indication of the type of
space - large eective spaces have longer reverb times than small absorbent ones.
BASS
Bass Gain
Adding bass to a reverberant signal can help thicken audio that is been weakened by the reverberation algorithm,
or create greater clarity in low frequencies that is sometimes masked by reverberation.
LPF
Low Pass Filter Frequency
Higher frequency settings increase high frequency response, creating brighter reverbs; lower frequency settings
create darker reverbs with more bass frequency emphasis.
HPF
High Pass Filter Frequency
Reduce ‘rumble’ and undesirable muddiness by cutting the low frequencies.
Page 64

Ui12, Ui16 User Manual
7.2: DELAY
FX EDIT > DELAY
7.2: DELAY
Delays repeat a sound a short time after it rst occurs. Delay becomes echo when the output is fed back into
the input (feedback). This turns a single repeat into a series of repeats, each a little softer than the last. The Ui
delay time is set in Milliseconds or in musical values. Press the DIV display to access a drop down box with the
available musical note values. Press the TAP TEMPO button repeatedly to tap in the desired delay time. (This is
usually done in time with the music.) Press and hold the TAP TEMPO button to manually type in the delay time
in BPM.
TIME
Delay Length
Delay time set in milliseconds.
TAP / BPM
Delay Tempo
A delay time setting that uses a ‘tapped’ tempo as a guide. Tap the ‘TAP TEMPO’ button to set the delay time.
The TAP TEMPO button is also available in the control software SlideOut panel.
DIV
Length Subdivision
Delay time set as a musical sub-division of the tempo. Press the DIV display to access a drop down box with the
available musical note values.
FBACK
Controls the number of delay repeats by feeding the delay output signal back into the delay input
This creates a series of delay repeats, each slightly attenuated until they become inaudible. Higher settings create
more repeats; lower settings reduce the number of repeats. When this knob is turned fully clockwise, it engages
Repeat Hold – delay repeats play back in an infinite loop, but no further input signal is introduced into the delay
eect. Repeat Hold is available only on Studio, Mono and Pong Delay.
LPF
Low Pass Filter - Frequencies above this are ltered / removed
Cut the high frequency content by adjusting the cut-o frequency of a shelving filter.
Page 65

Ui12, Ui16 User Manual
7.3: CHORUS
FX EDIT > CHORUS
7.3: CHORUS
Chorus creates a lush, full sound by combining two or more signals together where one is unaffected and the
other signals vary in pitch very slightly over time. Chorus is commonly used to fatten up tracks and to add body
to guitars without colouring the original tone. Chorus can also be used with discretion to thicken a vocal track.
DENSITY
Adjust the density of the chorus effect
The more dense the chorus, the thicker and richer the result will be.
DETUNE
Amount of deviation from the pitch of the original signal
LPF
Low Pass Filter - Frequencies above this are ltered / removed
Cut the high frequency content by adjusting the cut-o frequency of a shelving filter.
Page 66

Ui12, Ui16 User Manual
8.0: SHOWS & SNAPSHOTS
SHOWS & SNAPSHOTS
8.0: SHOWS & SNAPSHOTS
A SHOW is a collection of SNAPSHOTS. A SNAPSHOT is a record of every setting on the console.
You can save and recall snapshots and shows via the Ui control software - Phone or Tablet.
The SHOWS & SNAPSHOTS page is accessible in the tablet software from the SETTINGS page OR by
tapping/clicking the LED display in the top navigation bar (which displays the name of the currently loaded snapshot). The quick key to the snapshots pop-up is [8]. You can also assign an F1 or F2 key (top of
Master Channel) to update the current snapshot or create a new one. In the phone software, simply tap the
disk icon or assign the SlideOut F1 key to a snapshot function.
Page 67

Ui12, Ui16 User Manual
8.0: SHOWS & SNAPSHOTS
SHOWS & SNAPSHOTS
8.0: SHOWS & SNAPSHOTS
To set up a show, from a SHOWS & SNAPSHOTS view select SHOWS and press the NEW button.
Then name your show.
Now take a snapshot by pressing the NEW button (next to the SNAPSHOTS column or in the
SNAPSHOTS view). A snapshot remembers every setting of your mixer at one time. A common usage for
snapshots is to have one snapshot per song. So your snapshot list could look exactly like your song list.
At the end of each song, change to the next snapshot and every setting on the mixer is ready for that song
to start.
Channel Safes
Activating a channel safe means the highlighted channel will not change when a new snapshot is recalled.
You can congure select Channel Safes, and save them to the current show, via the CHANNEL SAFES
view (accessed through the main SHOWS & SNAPSHOTS page).
Page 68

Ui12, Ui16 User Manual
9.0: MEDIA PLAYER & RECORDER
PLAYBACK & RECORDING
9.0: MEDIA PLAYBACK & RECORDING
The Ui mixer has a built in media player and recorder. The player can be used for backing tracks or
for background music in between sets, for example, while the Record facility records the main stereo
mix. Playback is via the PLAYBACK L and PLAYBACK R channels - these are normal input channels
dedicated to the USB playback function.
The Record and Playback features use USB Memory sticks placed in the corresponding USB sockets on
the Ui hardware.
Press the MEDIA icon to enter the player page, or go via the PLAYER menu button in Phone software.
Files can be played from a playlist or directly from the le list.
Menu Pop-up
Press and hold the PLAYER channel name to bring up the channel menu. The menu items are:
Disable Stereo Link
This feature separates the stereo channel into two mono faders. This is useful for musicians who want the
audio on one channel and a click (tempo) track on the other channel.
Place Before Inputs
This useful feature moves the Player fader before Channel 1, so it is the 1st fader in the mixer.
File Types
Audio les must be saved to the USB stick as either WAV, AAC, MP3, OGG, AIFF, or FLAC les. Once this
is completed, insert your USB stick into the USB slot labelled PLAY on the top of the Ui hardware and your
song les will be shown in the USB media les column.
Page 69

Ui12, Ui16 User Manual
9.0: MEDIA PLAYER & RECORDER
PLAYBACK & RECORDING
9.0: MEDIA PLAYBACK & RECORDING
F1 & F2 PLAY
In the tablet software the F1 & F2 buttons above the Master fader(and in the phone software the F1 button
in the SlideOut panel) can be assigned to play next song (in the SETTINGS > CONFIG/SETUP screens).
If the player is set to manual, then the player will stop at the nish of each song. Pressing the F1/F2 play
button will play the next song in the list. This allows the musician to play the next song in his set without
having to view the player page.
Manual / Auto
Manual mode means the player will stop playing at the end of each song.
Auto mode means the player will automatically start playing the next song in the le list.
Cue
The Cue button is a jump to next song feature. CUE is only needed when working in manual mode.
It allows the next song to be played using the F1 or F2 PLAY button (above the Master fader), without having to jump to the media player page before every song.
Recorder
Recording of the Master Stereo Output can be activated with a RECORD button. You can assign F1 and/or
F2 buttons to this function.
Page 70

Ui12, Ui16 User Manual
10.0: SETTINGS
SETTINGS
10.0: SETTINGS
The SETTINGS page allows the user to manage basic setup congurations, network parameters
(including the password setting for the WiFi access point), GUI preferences, and access permissions
on a per-user basis. Phone and tablet software versions display the settings in slightly different forms,
but al are accessible on either platform. The sub headings used in this section refer to the Tablet
software.
GLOBAL
HEADPHONES OUT
MASTER/SOLO, AUX
Choose a source for the headphones. MASTER/SOLO is normal operation (either Master stereo output or Solo bus if
an AFL or PFL is selected). AUX selects the highest pair of Aux buses as the source (3/4 for Ui12 and 5/6 for Ui16).
SOLO ROUTING
HEADPHONES, MASTER + HP
When channels are soloed, either route the solo bus to Headphones only, or to both
Headphones and the Master Output.
SOLO MODE
SINGLE, MULTIPLE
SINGLE deactivates any previous solo when a new one is pressed. MULTIPLE is an accumulative solo mode
(previous solos are not deactivated).
RECORD MODE
32-bit, 24-bit, 16-bit
Choose a sample rate for the media recording function.
LOCAL
MASTER LOCK
ON, OFF
When ON, the Master Channel fader is locked in place. Other parameters are still changeable.
Page 71

Ui12, Ui16 User Manual
10.0: SETTINGS
SETTINGS
10.0: SETTINGS
METER QUANTISATION
OFF, ON
Choose between quantised metering - rather like an LED bargraph - or non-quantised (continuous).
FADERGLOW
OFF, THIN, NORM
Options for the coloured lines under the faders. 1. On, 2. Thin and 3. Off. These lines are handy to quickly see which
group of faders you are viewing (blue for FX, orange for AUX, and so on).
DISABLE LED METERS
OFF, ON
If you are using a slower CPU, you may wish to turn off the LED channel meters to reduce CPU usage.
HIDE COMP/GATE
OFF, ON
When off, the channel meters include shorter red LED gain reduction metering below the primary meters.
DIM LED METERS
OFF, ON
Turn on to lower the intensity of the metering colours.
PIN SLIDEOUT IN MIX MODE
OFF, ON
When this option is on, your mixer page will always display the Ui SlideOut without having to re-open it each time you
go back to the main mix screen.
PIN SO FOR AUX/FX SENDS
OFF, ON
When this option is on, your Aux Sends page will always display the Ui SlideOut without having to re-open it each
time you go to that screen.
KINETIC SCROLL
OFF, ON
Allow screen to continue scrolling after release. Ensure the screen is not scrolling for channel sub-menu selection.
MIXER SCROLLING
1 FINGER, 2 FINGERS
For more stability across the mix screen, you can yet the swipe mode to two ngers.
BUTTON FUNCTION
F1, F2
NEW SNAPSHOT, UPDATE CURRENT SNAPSHOT, PLAY, RECORD
Choose functions to assign to the F1 and F2 buttons. On the tablet software these buttons appear at the top of the
Master Channel. In the phone software only F1 is available; F2 is always the MENU or RETURN button.
Page 72

Ui12, Ui16 User Manual
10.0: SETTINGS
SETTINGS
10.0: SETTINGS
LANGUAGE
ENGLISH, CHINESE, GERMAN, FRENCH, SPANISH
The default language for Ui software is English, but here you can change to Chinese or German language version.
The browser will automatically refresh when these options are selected.
NETWORK
The Network options are available for manual set-up, though the most important requirement on this page is to setup
a WiFi password. When you power on your Ui mixer, it will automatically send out a WiFi signal so you connect your
device to the Ui network, and enter your password.
MONITOR ACCESS LIMIT
This Tab/View manages access permissions - limiting feature access per user. Given that a typical setup may have
multiple users logged into the Ui software, each doing their own monitor mix, it makes sense to limit their access to
reduce the possibility of accidentally changing a front of house mix.
This feature is not password protected, it is intended as a safety measure to protect accidental corruption of your mix
by other users. It is especially helpful for setting up monitor permissions.
 Loading...