

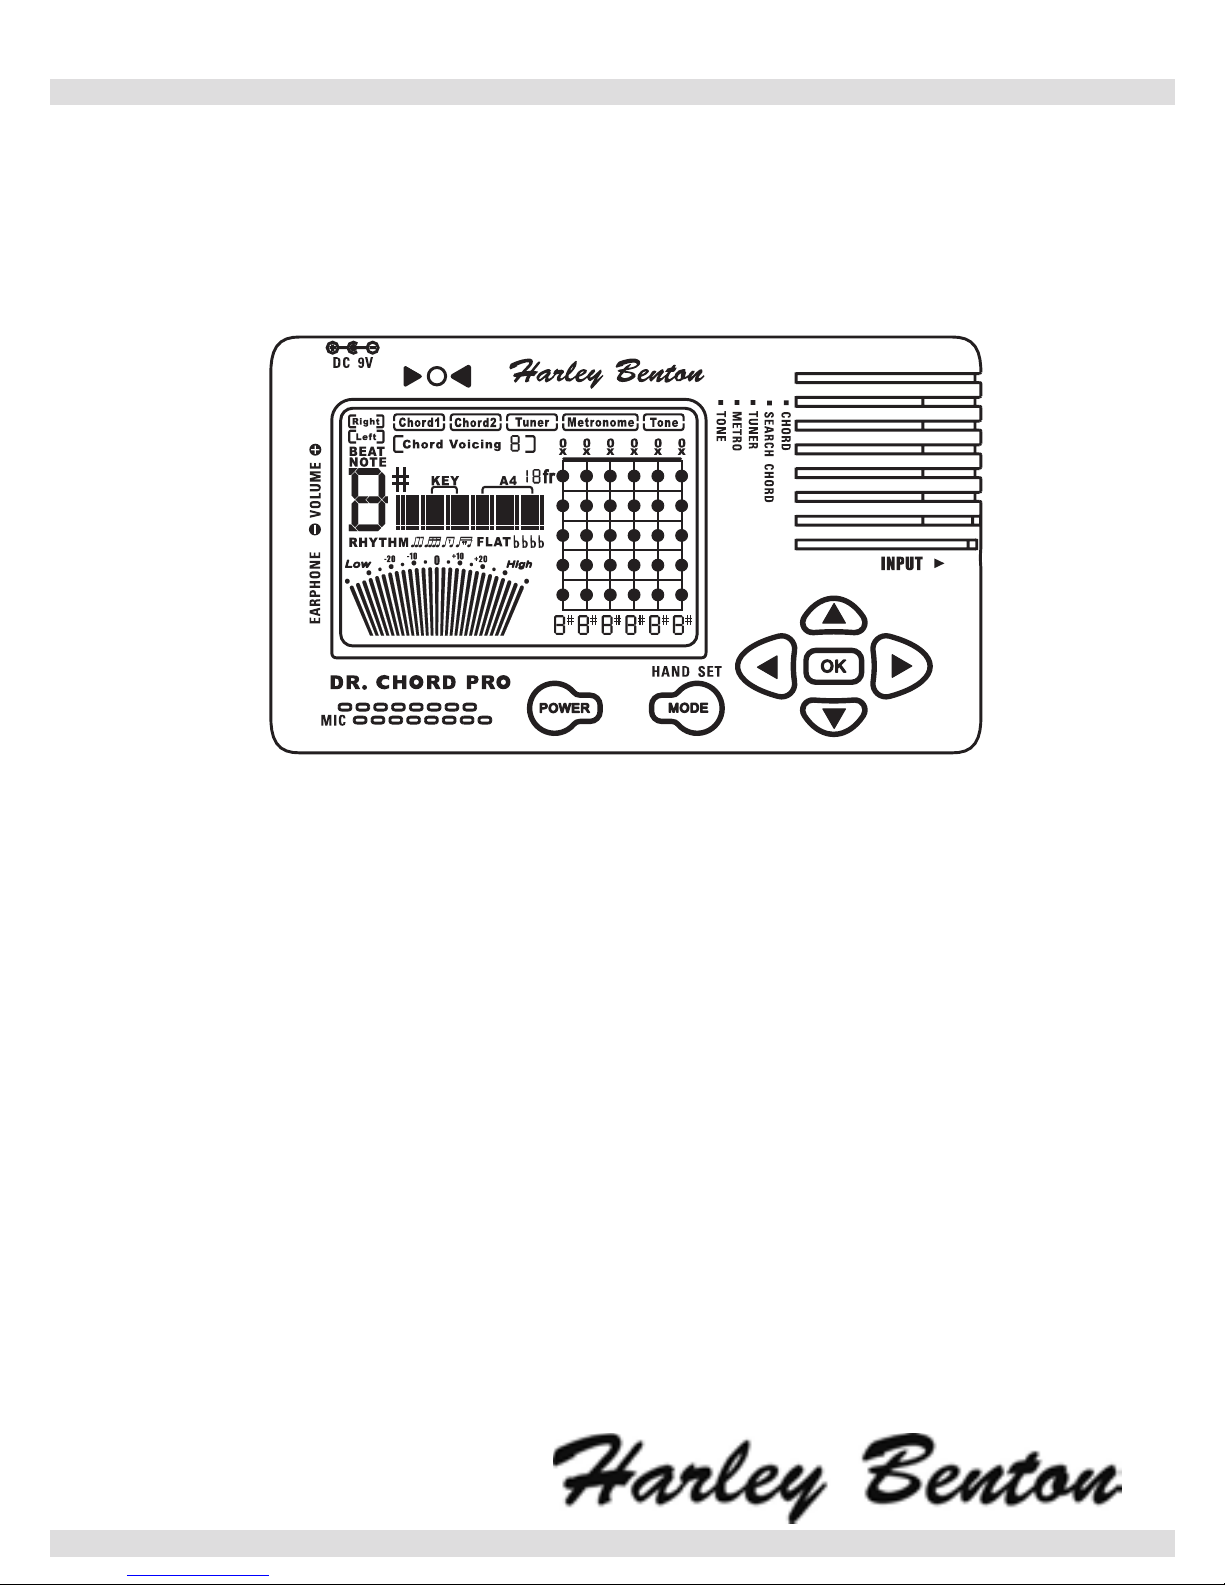
Harley Benton DR. CHORD PRO Owner's Manual
Owner’s Manual
DR. CHORD PRO
CHORDFINDER • TUNER • METRONOME

2
Product description
Owning one Dr. Chord Pro, you will own a chord encyclopedia,
an accurate chromatic tuner, an accurate metronome and an accurate tone generator. These are Dr. Chord’s features:
Find Chord Position
The Dr. Chord Pro contains over 2,500 chord voicings and over
500 unique chord types. All chords are organized rst by root and
then by quality or type, you can nd the chord position you need
by this theory. Whether you are a beginner looking for your rst
chord, or a budding jazz guitarist searching for a new voicing, you
will nd what you are looking for here.
Find Chord Name
When you play an elegant chord on guitar, but you don‘t know
what name it is, Dr. Chord Pro can tell you easily with its memory
of over 2,500 chords.
Chromatic Tuner
Dr. Chord Pro has also chromatic tuner function. It‘s sensitive,
accurate and easy to use. You can tune any musical instrument
conveniently.
Metronome
Another function of Dr. Chord Pro is metronome. It‘s accurate with
loud sound and clear display.
Tone Generator
One more function of Dr. Chord Pro is tone generator, giving you
accurate sounding of standard notes for reference.
Please read this manual thoroughly to familiarize yourself with
proper usage of this unique Dr. Chord Pro.

3
CAUTION!
z Do not open the casing for any reason as this may
cause short circuit or malfunction of the product.
z Do not apply excessive force to the product. In the event of the
product suffering breakage, be careful not to hurt yourself with
the broken pieces.
z Do not put in any liquid nor foreign object.
z Keep unit away from dust, extreme temperatures and humidity.
z When the unit is not in use for a long period of time, remove
the battery to prevent leakage.
Operation panel
q Power switch i Input
w Mode button hand set button o MIC
e Left arrow button a Earphone
r Right arrow button s Volume
t OK button d DC adaptor input
y Up arrow button f LED Indicator
u Down arrow button g Dynamic Speaker
4
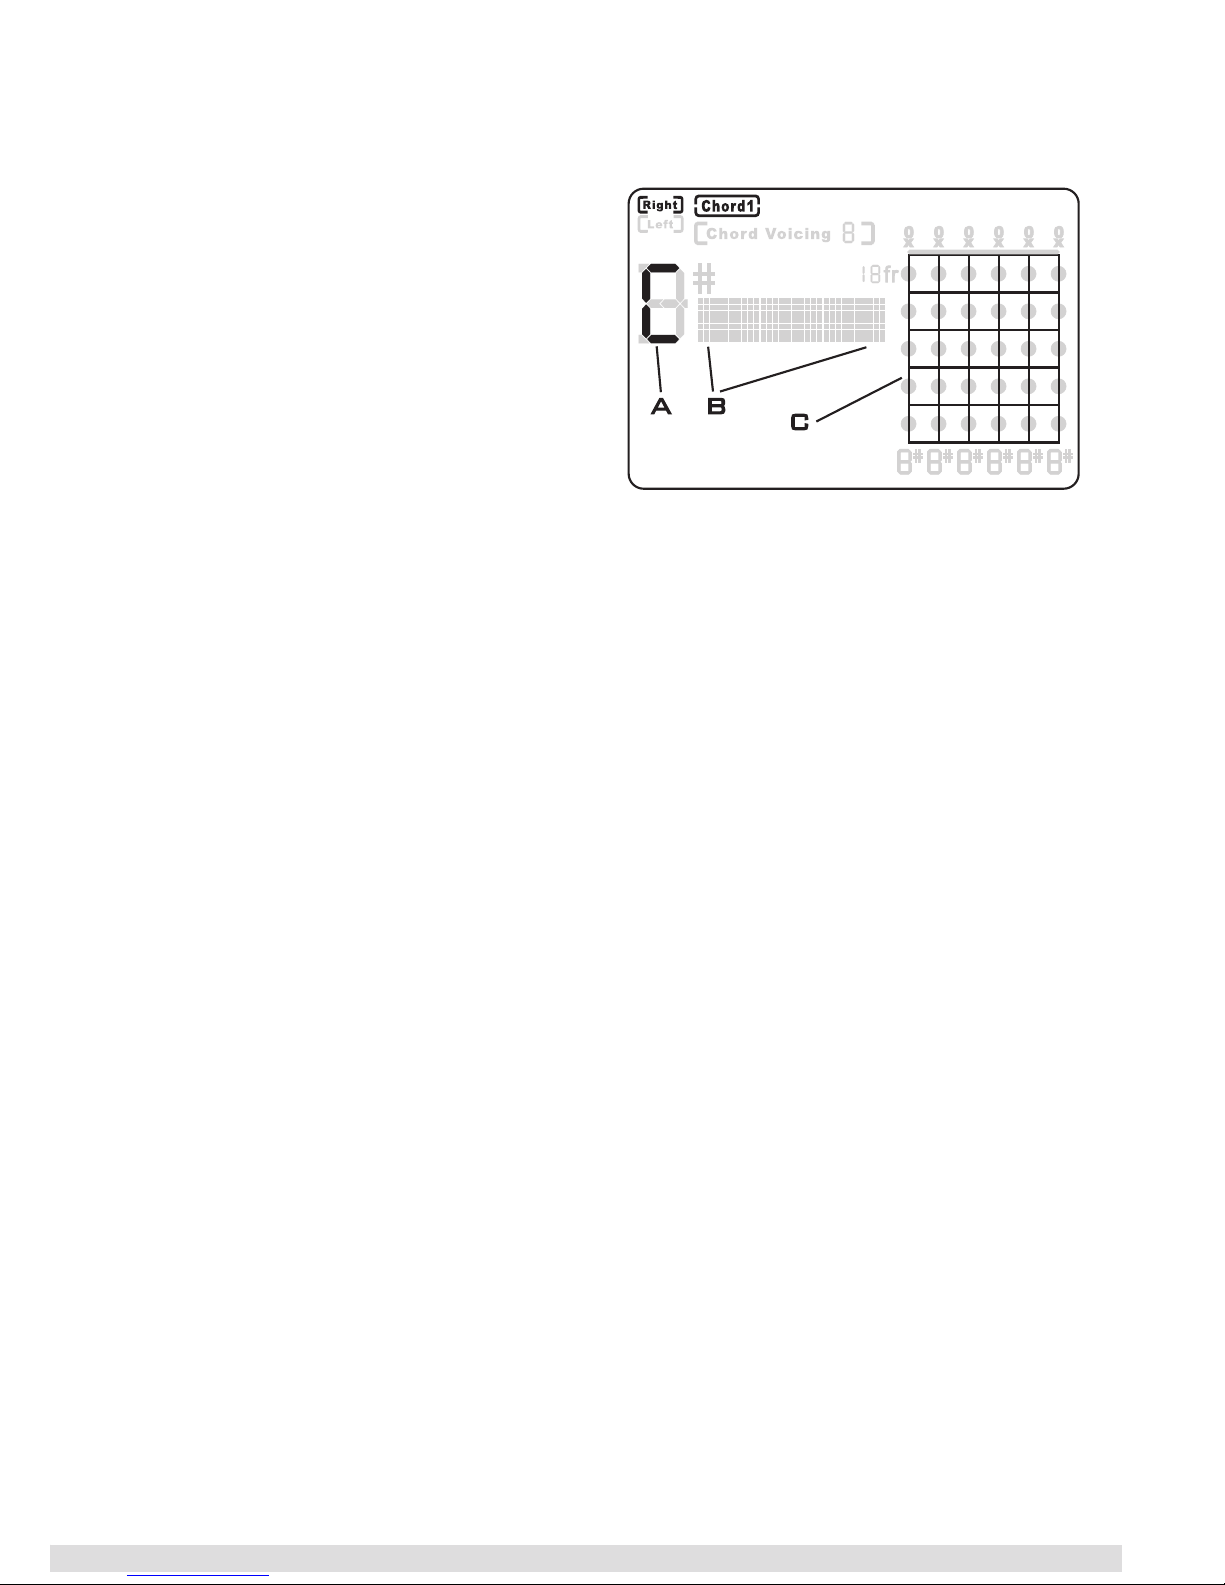
LCD Display
z Mode display area A: Find chord position mode,
Find chord name mode, Tuner mode, Metronome mode, Tone generator mode.
z Hand set display area B: Right handed (standard).
Left handed.
z Chord Voicing display position C: Displays your
selected chord voicing.
z Guitar Fret number display position D: This tells you to move
your hand up to that fret to position your ngers.
z Guitar fretboard area E: On the guitar fretboard, the six vertical
lines represent the six strings on the guitar, from low E to high E
if right hand setted, from high E to low E if left hand setted (from
left to right). „X“ stands for mute, „0“ indicates an open string.
Black dots indicate the nger position. Note name appearing below each string tells you which note name you played.
J OPERATING PROCEDURE
z Press button q to turn on Dr. Chord Pro. The power will be
turned off automatically 5 minutes later if the unit has been left
unattended. Press this button again to turn the device off.
z Mode select:
When you press button w under any situation when the unit is
on, the mode selecting menu will appear
on the LCD like the above picture. The ashing outline frame
indicates the mode you select, you can press button e and r
to move the ashing cursor. When you have moved the ashing cursor to the mode you desire ,press button t to conrm
your selected mode, the system will enter your selected mode.
* If you have not pressed button t to conrm your selected mode, the
system will stay on the mode select menu untill auto power off.
Mode selecting menu
* The gray parts are possibly to be displayed.
Only the black parts are displayed for certain.
5
z Find Chord Position mode:
1. Under Find chord position
mode, the LCD will display
like the picture to the right.
The position A on the LCD
shows your selected chord
root. When the chord root
is ashing, you can press
button y and u to select
chord root from C to B,
when your desired chord
root appears, you should
press button t to conrm
your selecting or press button r to move the ashing cursor to
the next position.
2. When the LCD position B is ashing, you can press the button
y and u to select the chord quality or type. When the chord
type you need appears, press button t or r to conrm your
selecting or move the ashing cursor to the next chord type se-
lecting if the next chord type exist. If the next chord type does
not exist, press button t to nish chord name setting. Then the
chord position will be displayes in the area C .
3. How to select a chord name:
The Dr. Chord Pro contains 44 chord types for each of the
twelve chord root. You can nd your desired chord under its
symbol. For example, you want to nd the chord C7b5#9, you
should select the chord root as C, then select the rst chord
type as 7, select the second chord type as b5,select the last
chord type as #9. For the chord name selecting process you
do not need you to know the chord’s construction, you only
need to kwon how to spell the chord symbol. The following
table present the Dr. Chord Pro’s chord types:
Find Chord Position mode LCD display
* The gray parts are possibly to be displayed.
Only the black parts are displayed for certain.
 Loading...