

Harken Performa 70.2 STP, Performa 40.2 STP, Performa 40.2 STQP Installation And Maintenance Manual
Installation and Maintenance Manual
MRPW-03
Performa
™
Winch 70.2 STP
Index
Introduction 3
Technical characteristics 3
Weight 3
Maximum working load 3
Outline 3
Installation 4
Installation procedure 7
Positioning the self-tailing arm 8
Maintenance 8
Washing 8
Maintenance table 8
Disassembly procedure 8
Exploded view with maintenance products 12
Assembly 13
®
Harken
Ordering spare parts 14
Exploded view 15
Parts list 17
limited worldwide warranty 14
Performa™ Winch
70.2 STP
2
Installation and Maintenance Manual

Introduction - Technical characteristics - Outline
Introduction
This manual gives technical information on winch installation and maintenance, including
disassembling and reassembling.
This information is DESTINED EXCLUSIVELY for specialised personnel or expert users.
Installation, disassembling and reassembling of the winch by personnel who are not experts may
cause serious damage to users and those in the vicinity of the winch.
Harken
In case of doubt the Harken
This Manual is available only in English. If you do not fully understand the English language, do
not carry out the operations described in this Manual.
Technical characteristics
®
accepts no responsibility for defective installation or reassembly of its winches.
®
Tech Service is at your disposal at techservice@harken.it
Power ratio Gear ratio
1st speed
2nd speed
22,20 : 1 5,70 : 1
72,00 : 1 18,50 : 1
The theoretical power ratio does not take friction into account.
Weight
ST Version
Weight (Kg)
11,3
Maximum working load
WARNING!
The maximum working load (MWL) for the 70.2 ST Performa™ Winch is 2700Kg (5952 lb)
Subjecting the winch to loads above the maximum working load can cause the winch to fail or
pull off the deck suddenly and unexpectedly during high loads causing severe injury or death.
Outline
Performa™ Winch
70.2 STP
Ø130
Ø240
257
115
Line entry height
3
Installation and Maintenance Manual

Installation
Installation
The winch must be installed on a at area of the deck, reinforced if necessary to bear a load equal
to at least twice the maximum working load of the winch.
It is the installer's responsibility to carry out all structural tests needed to ensure that the deck can
bear the load.
Harken® does not supply the screws needed to install the winch since these may vary depending
on the deck on which it is to be installed.
It is the installer's responsibility to choose the correct screws taking account of the loads they will
have to bear.
Harken® assumes no responsibility for incorrect installation of its winches or for an incorrect choice
of mounting screws.
DANGER!
Incorrect installation of the winch may cause severe injury or
death. Consult the yard that built the boat in the case of doubt
over the correct positioning of the winch.
WARNING!
Failure to use the correct number and type of mounting fasteners
or failure to ensure the correct deck strength can result in the
winch pulling off the deck suddenly and unexpectedly during
high loads causing severe injury or death.
WARNING!
Verify the entry angle of the sheet. This must be 8° with tolerance
of ±2°, to avoid sheet overrides and damaging the winch or
making the winch inoperable leading to loss of control of the boat
which can lead to severe injury or death.
WARNING!
Mount the winch on the deck so that the drive gear is positioned
where the sheet enters the winch drum.
Incorrect position of drive gear can weaken winch leading to failure
which can cause an accident leading to severe injury or death.
8°
drive gear
SHEET
Once you have chosen the correct mounting position for the winch on the deck proceed with
installation.
Performa™ Winch
70.2 STP
4
Installation and Maintenance Manual
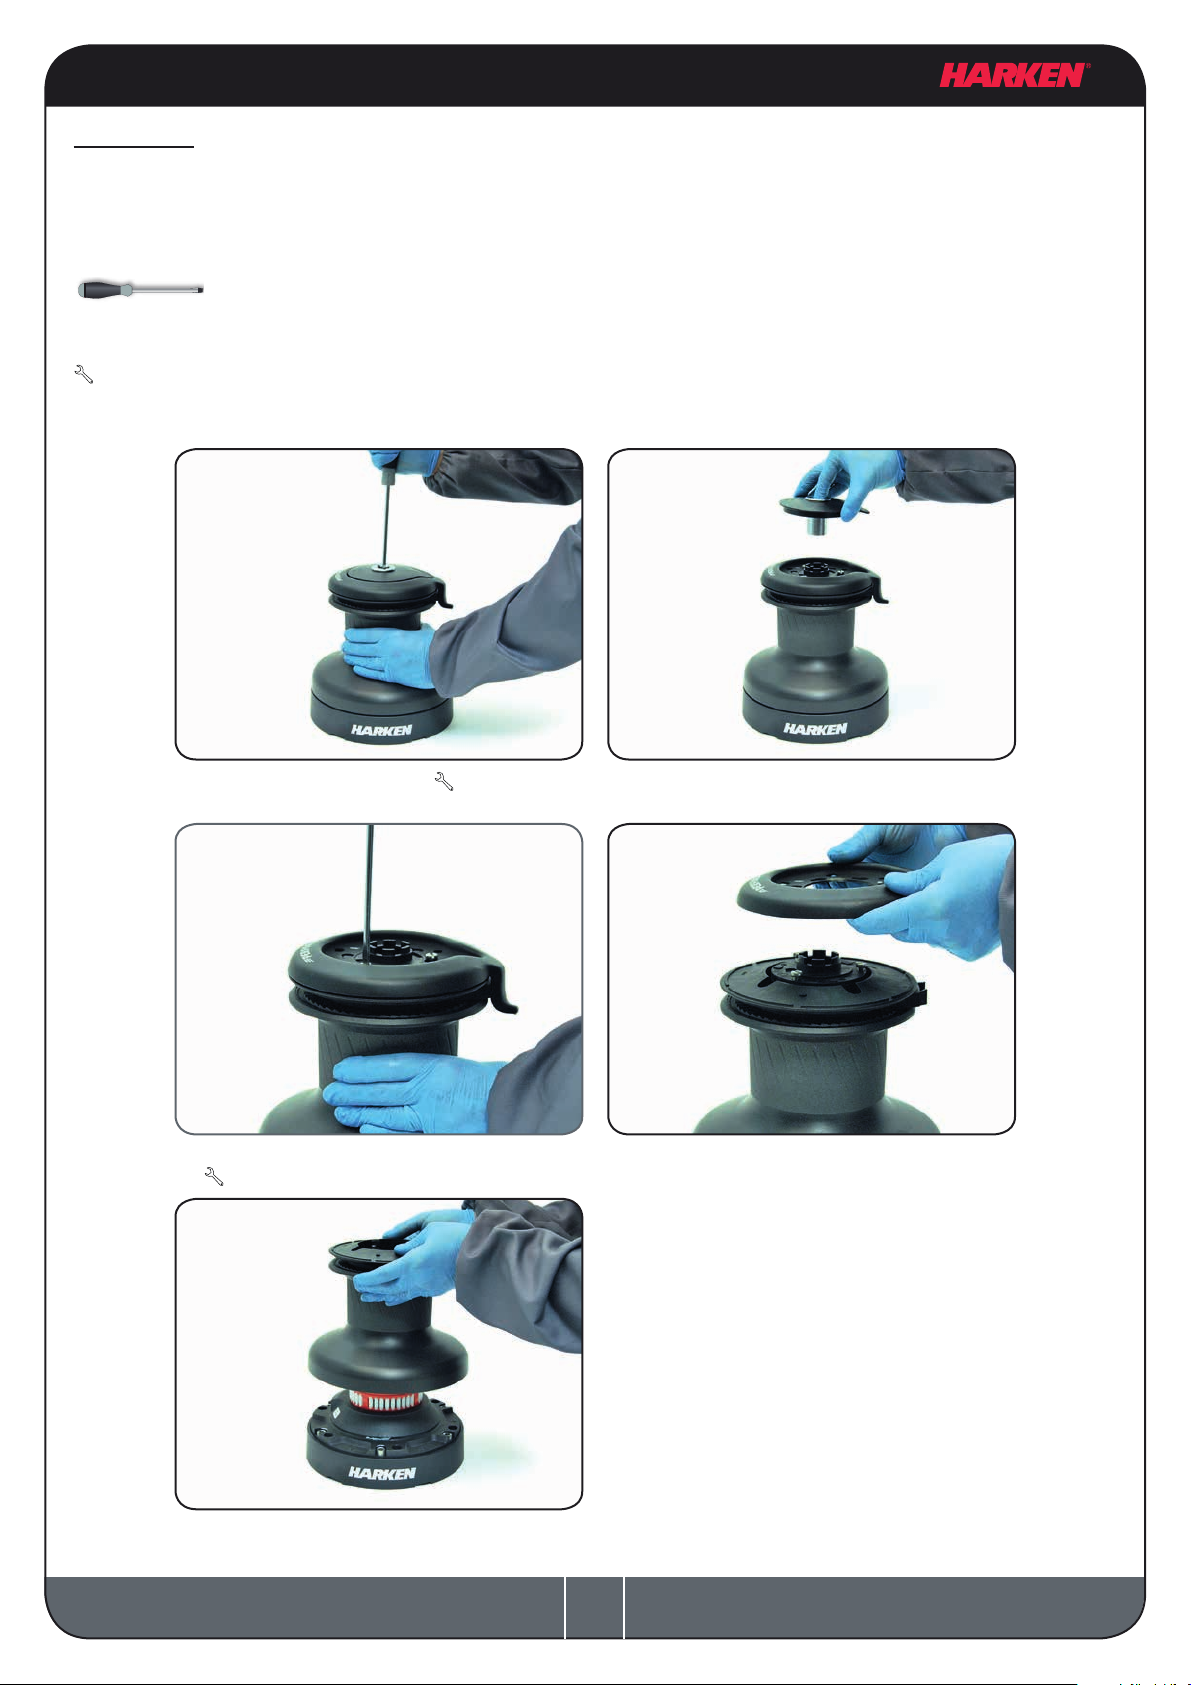
Procedure
To install the winch you must remove the drum and use Socket Head (SH) bolts or Hexagonal
Head (HH) bolts.
Tools needed
One medium at-bladed screwdriver
To identify the various parts, refer to the exploded view at the end of this Manual.
Torque to apply when assembling
Follow steps below only to install the winch using Socket Head (SH) bolts
1. Unscrew the central screw ( 2Nm/18 in-lb)
3. Unscrew the three screws n°26
4Nm/35 in-lb)
(
2. Slide off the assy socket n°28 and the
cover n°27
4. Remove the stripper arm n°25
by rotating and lifting it.
5. Lift off the drum n°23
Performa™ Winch
70.2 STP
Install the winch on the deck in the
position you have chosen, keeping in
mind the limits described on page 3.
(See paragraph on installation)
5
Installation and Maintenance Manual
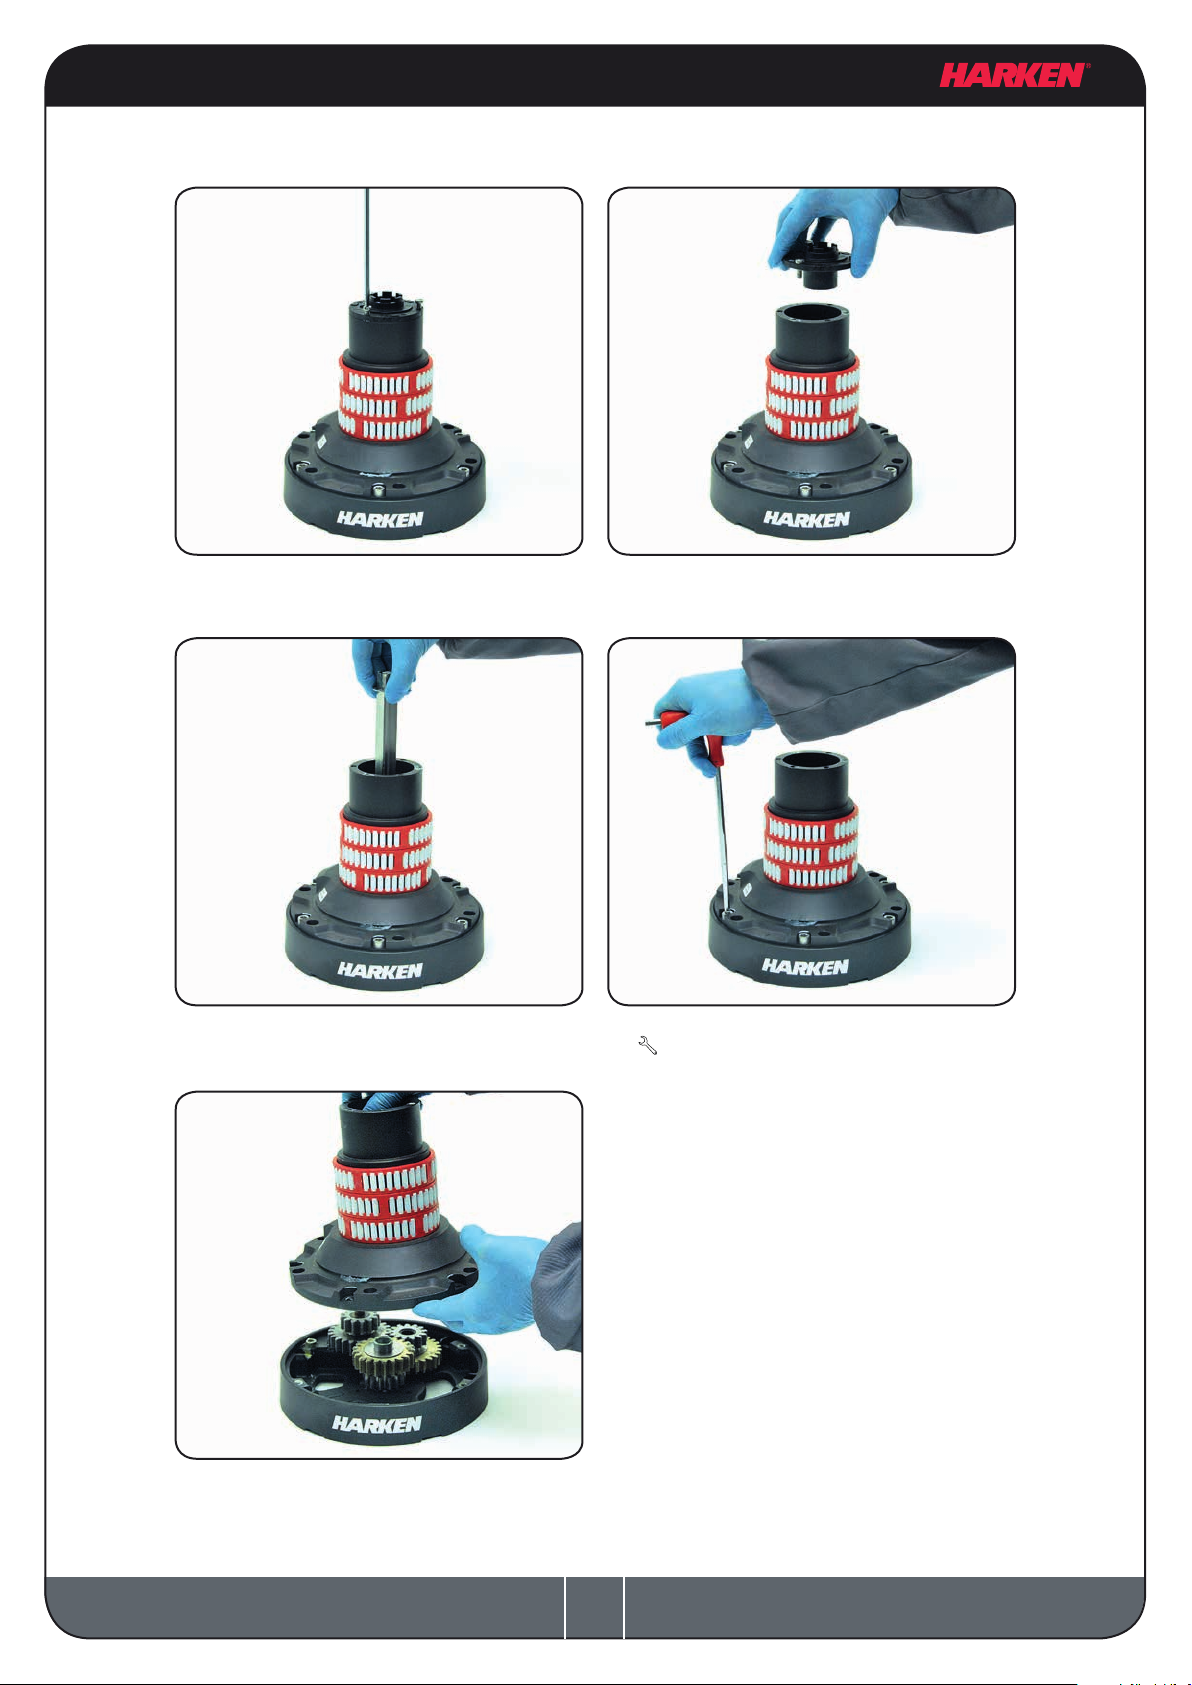
Follow steps below only to install the winch using hexagonal headed bolts
6. Completely unscrew the three screws n° 26
8. Slide out the central shaft n°19
7. Remove the stripper arm housing n°21
9. Unscrew the 6 hex screws n°17
20Nm/177 in-lb)
(
10. Remove the assy housing n°16
Performa™ Winch
70.2 STP
Install the winch on the deck in the
position you have chosen, keeping in
mind the limits described on page 3.
6
Installation and Maintenance Manual
 Loading...