

Page 1
INSTRUCTION SHEET
Halyard Restrainers
944/945
N15W24983 Bluemound Rd, Pewaukee, WI 53072-4974
Telephone: (262) 691-3320 • Fax: (262) 701-5780
Web: www.harken.com • Email: harken@harken.com
Strictly follow all instructions to avoid an accident, damage
to your vessel, personal injury or death. See www.harken.com/
manuals for additional safety information.
To be used if angle between halyard and headstay is less than 7°. This
is common on masts where halyard sheave is very close to headstay.
USE ONLY IF NECESSARY
If halyard angle is greater than 7° and halyard is wrapping a halyard
restrainer may not be necessary. Halyard swivel must be near top of
foils and headstay must be tight. This will prevent halyard wraps in
most cases. Consult furling instruction manual.
Tools and Supplies
Method Rivet Tap U.S. Tap Metric
Fasteners
(not included)
Drill Ø
Tap Size —
3
(6)
/16"
SS Rivets
13
/64" (5 mm)
(6) 10-32 x 3/8 SS
Machine Screw RH
5
/32" 4.2 mm
10-32 5 x .80 mm
(6) 5 x .80 x 10 mm
SS Machine Screw TH
Drill • Pliers • Heavy-duty rivet gun or screwdriver
Mounting Instructions
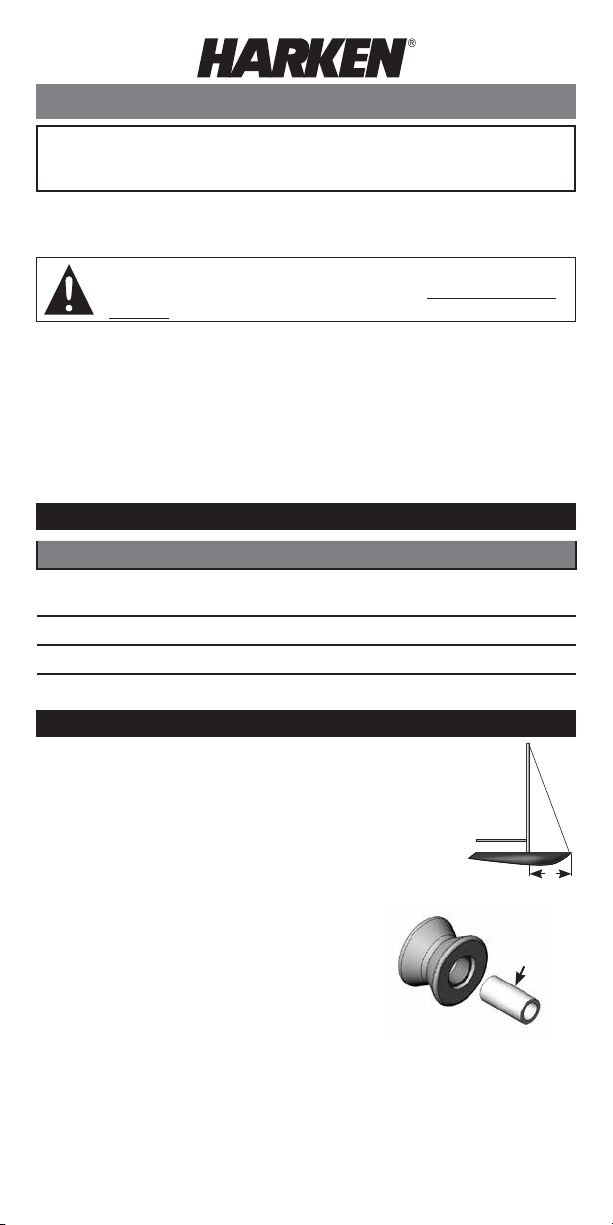
1. Hoist tallest sail that will be used.
If mast is down, angle headstay out to stemhead
chainplate (“J” dimension). Measure luff length of
tallest sail and position restrainer as directed below.
Installations aloft should be performed by rigging
professionals only.
J
2. Remove sheave from restrainer, install wire
and re-fasten sheave. Note: Be careful to not
lose stainless steel sleeve when removing
sheave. Make sure forward side of restrainer
Don't lose
stainless
steel sleeve
is parallel to headstay. Do not install upside
down. See drawing on reverse side. Bend cotter
pin so clevis pin will not fall out.
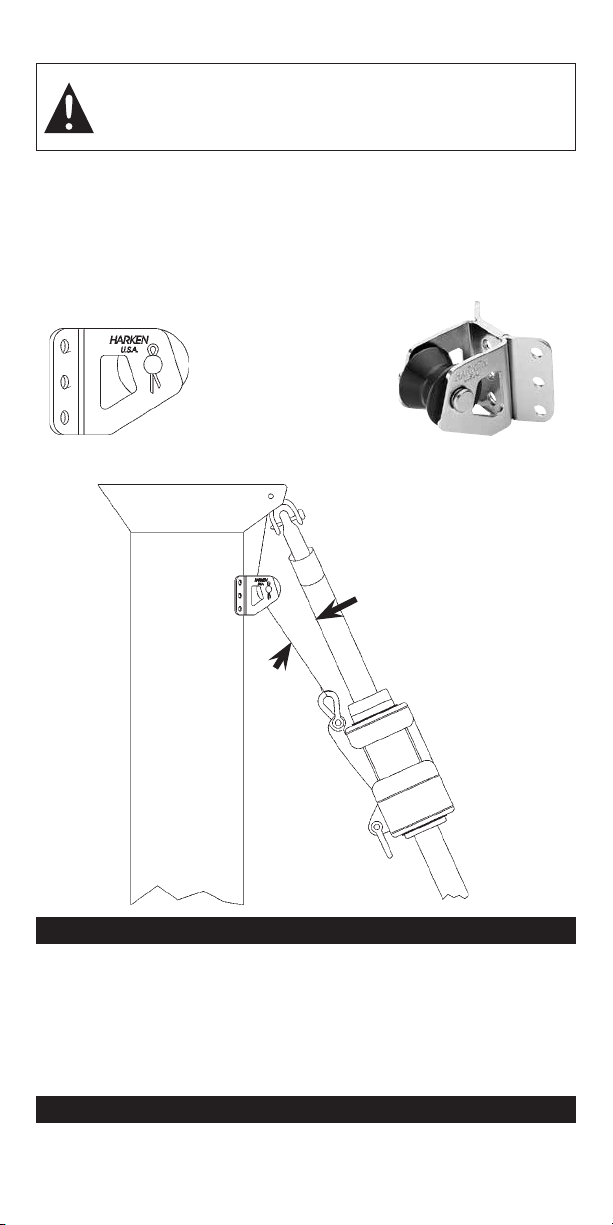
3. Position restrainer on mast so halyard is at a 7 to 10° angle to
headstay. See drawing on reverse side.
If necessary have a sailmaker cut down top of sail to create a 7 to 10°
angle between halyard and headstay.
With restrainer installed, halyard swivel will ride lower than installations
without restrainers. This is necessary to achieve correct halyard angle.
Page 2
4. Mark position of holes and drill.
WARNING! Drilling or fastening into mast may snag halyards
holding the installer aloft seriously reducing strength. Limit drill
depth and avoid fasteners protruding into mast where they may
interfere with halyards.
5. Ease halyard. Install fasteners in all six holes.
6. Tension halyard and test furling system. Do not over-tension halyard
or system will be difficult to furl.
7. If a shorter-hoist sail is used, install a pendant between sail and
halyard swivel so halyard swivel is at same height as tallest sail.
This End Up
Install so
“HARKEN”
is up.
Angle between
halyard and
headstay must
be 7 to 10°
Maintenance
Harken equipment requires minimal maintenance, but some is required to give the best
service and to comply with Harken's limited warranty.
It is important to keep equipment clean by frequently flushing with fresh water. In
corrosive atmospheres, stainless parts may show discoloration around holes, rivets and
screws. This is not serious and may be removed with a fine abrasive.
With the exception of winches, do not use grease unless specifically recommended in
the instruction sheets.
Warranty
For additional safety, maintenance and warranty information see www.harken.com/
manuals or the Harken® catalog.
Printed in USA. 4410 04/14
 Loading...