

Hark HK0528, HK0521 Cooking Manual
COOKING GUIDE
HARK GAS SMOKER
HK0521 & HK0528
Prepared by:
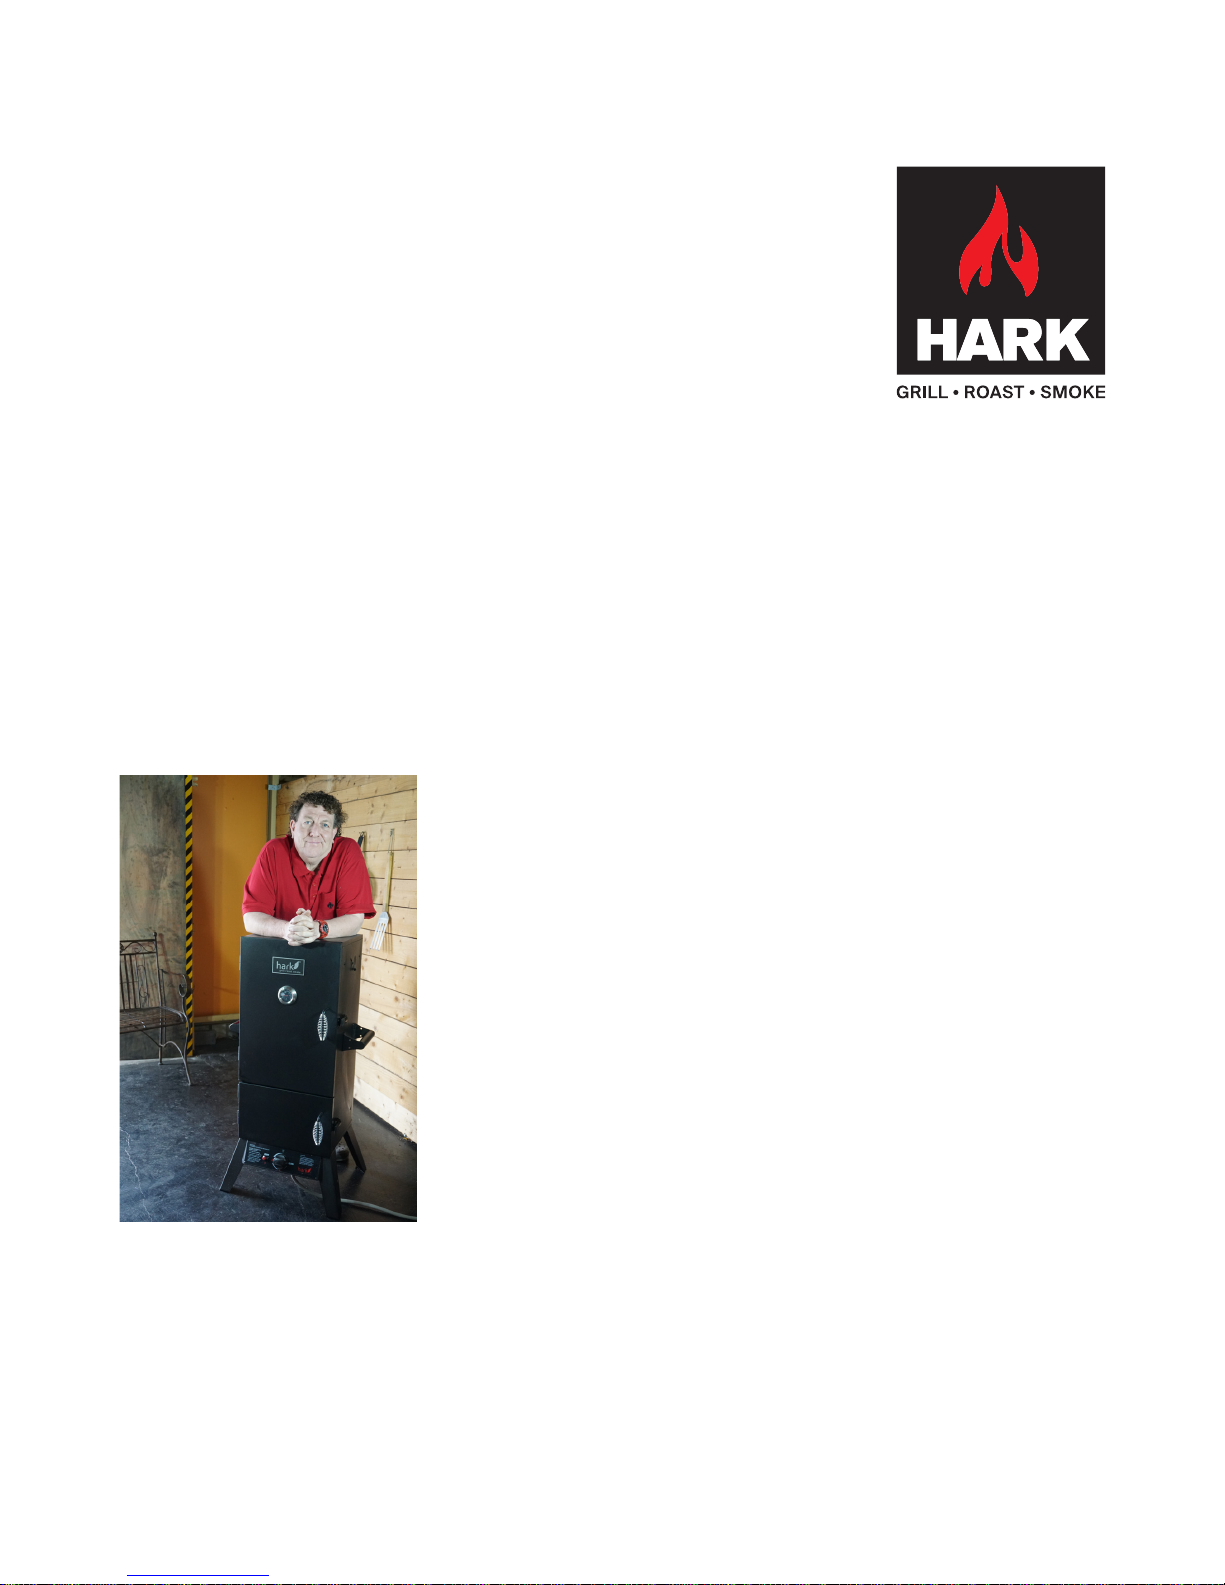
Chris Girvan-Brown
www.urbangriller.com.au

I
INDEX
1. INTRODUCTION 1
2. GET TO KNOW YOUR GAS SMOKER 1
3. SEASONING THE HARK GAS SMOKER 2
4. SMOKING INTRODUCTION 3
4.1 COLD SMOKING 3
4.2 HOT SMOKING 3
4.3 SMOKE QUANTITY 3
4.4 SMOKE RING 4
5. MEAT PREPARATION 5
5.1 BRINE CURING 5
5.2 SALT AND SUGAR CURING 5
5.3 MARINADES 6
5.4 DRY RUBS 6
6. WOOD FLAVOURING 7
6.1 WOOD CHIPS 7
6.2 WOOD PELLETS 8
6.3 OTHER SMOKING MATERIALS 8
6.4 RECOMMENDED QUANTITIES 8
7. SMOKE COOKING 9
7.1 RECOMMENDED EQUIPMENT 9
7.2 PREPARATION 9
7.3 GOOD SMOKING PRACTICES 10
7.4 TIPS 11
8. TEMPERATURE CONTROL 12
8.1 CONTROLLING SMOKER TEMPERATURES 12
8.2 TEMPERATURE RANGE 12
8.3 COOKING TEMPERATURE ZONES 13
9. GUIDE TO COOKING MEAT 14
9.1 GRADES OF MEAT 14
9.2 INTERNAL TEMPERATURES 14
9.3 RESTING MEAT 15
9.4 FOOD SAFETY 15

II
10. TROUBLESHOOTING 16
10.1 TEMPERATURE FLUCTUATIONS 16
10.2 INTERNAL TEMPERATURE ‘STALL’ 16
11. CARE INSTRUCTIONS 18
HARK GAS SMOKER COOKING LOG 19
GAS SMOKER RECIPES 21
1. CLASSIC TEXAS BBQ BRISKET 22
2. REVERSE SEAR STEAK 24
3. PORK RIBS 25
4. SMOKY PORCHETTA 27
5. COUNTRY HAM 29
6. OLD-SCHOOL BACON - NITRATE FREE 29
7. PULLED PORK 30
8. PULLED LAMB OR MUTTON 32
9. BEER-CAN CHICKEN – TEXAS STYLE 34
10. SMOKED CHICKEN 35
11. SMOKED CHICKEN & PROSCUITTO 36
12. OLIVE BRINED QUAIL 37
13. CEDAR PLANK SALMON 38
14. SMOKED TROUT 39
15. BACON-WRAPPED SMOKED TROUT 40
16. SMOKED OYSTERS 41
17. SMOKED ITALIAN SAUSAGE [BOERWARS] 41
18. JALAPENO POPPERS 42
19. ARMADILLO EGGS 42
20. SPICED BBQ CORN 42
21. STUFFED POTATO WITH SWEET CORN & CAPSICUM 43
22. SMOKED PORTABELLO MUSHROOMS 43
23. SMOKED ROAST POTATO 44
24. SMOKED GARLIC 44
25. SMOKED SALT 44
26. SMOKED TOMATOES 45
27. SMOKED LEMONS 45
28. SMOKED APPLES 45
29. SMOKED ALMONDS 45
30. BRINE, MARINADES, RUBS AND SAUCES 47
1
1. INTRODUCTION
Hark gas smokers can be used as an outdoor oven and a smoker, enabling low to medium
temperature cooking. You can use a Hark gas smoker as a traditional smoker or, for baking and
reheating. It can also be used to produce slow cooked, US style BBQ, where food is cooked gently
over long periods of time using the 'Hangi' style steam cooking.
Smoke cooking requires a whole new set of cooking techniques that once mastered, will
guarantee meal after meal of delicious food.
The aim of this Hark Cooking Guide is to help you become condent with smoke cooking and will
cover everything from seasoning you smoker, to preparing meats, types of wood chips and pellets
and a list of recomended recipes to get you started.
(also available on the Hark website - www.hark.com.au).
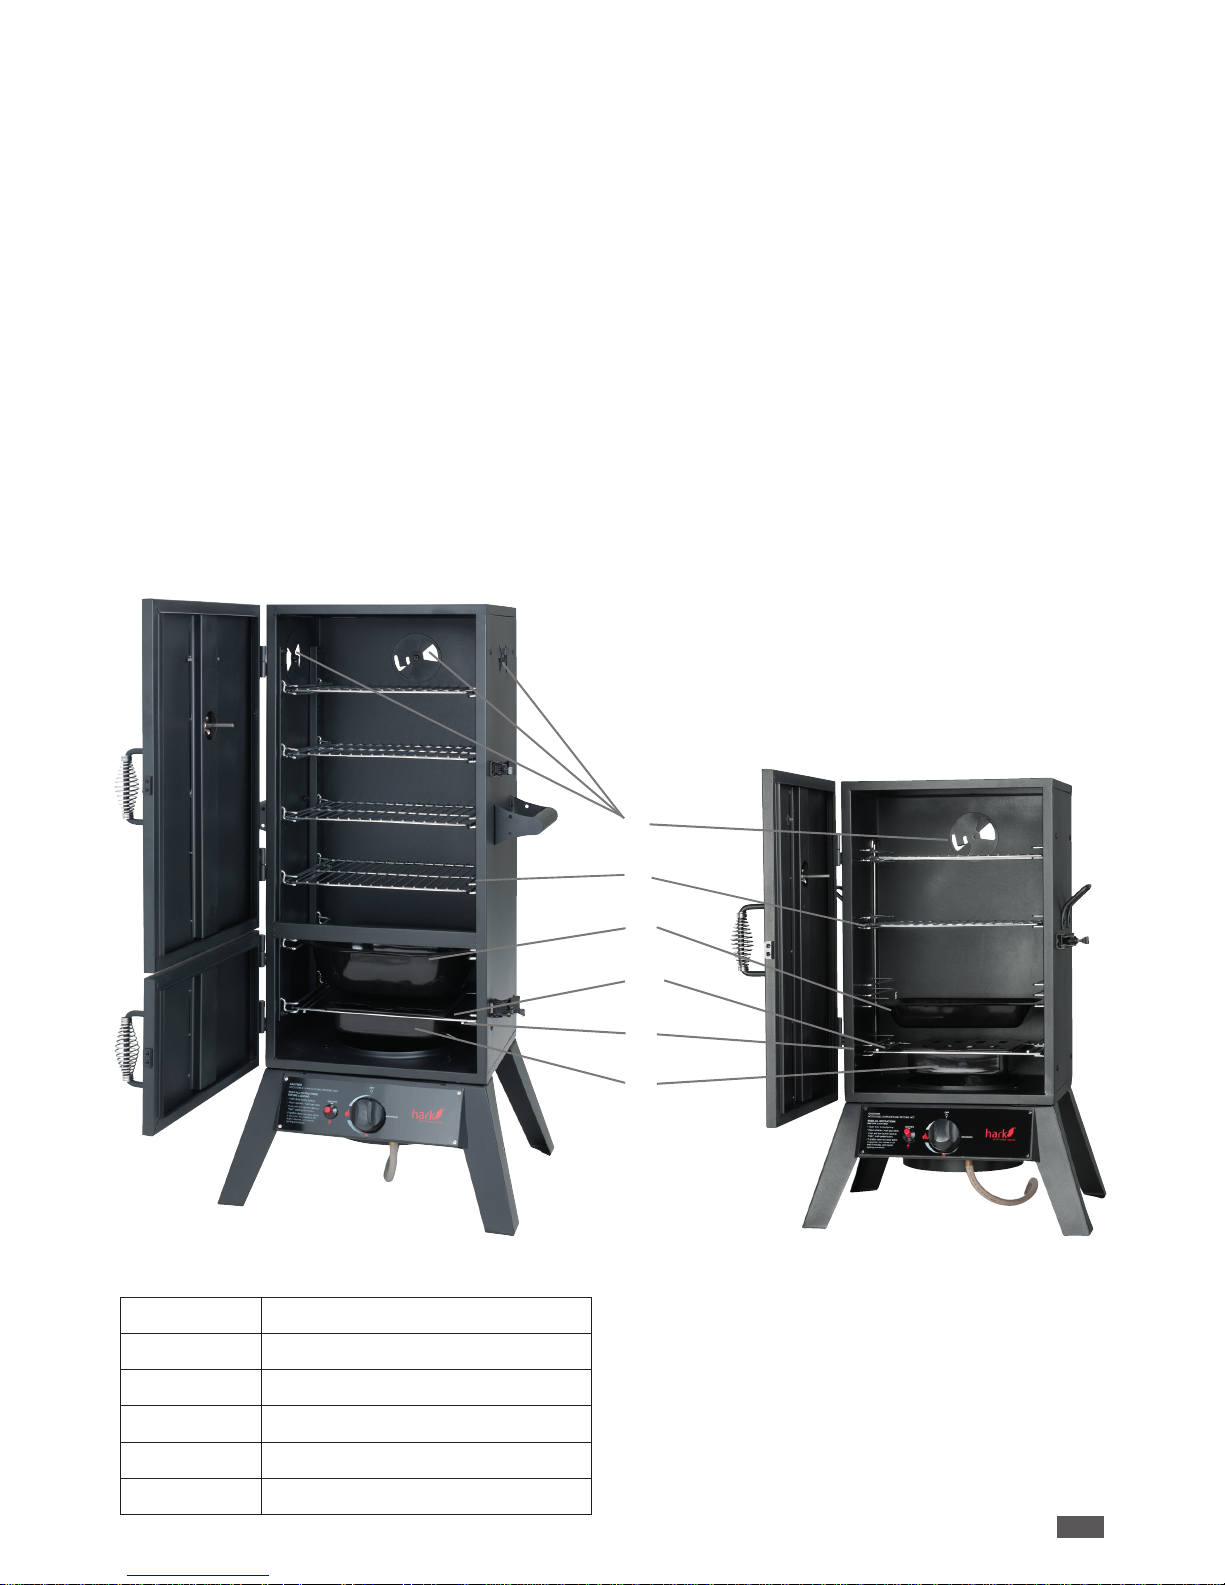
2. GET TO KNOW YOUR GAS SMOKER
A
B
C
D
E
F
A Wood Chip Box
B Wood Chip Box Lid
C Wood Chip Box Rack
D Water Bowl Grid Track
E Cooking Rack (Grid)
F Damper
Table 1: Key components of your gas smoker

2
3. SEASONING YOUR SMOKER
Once you have carefully read and followed the assembly instructions contained in your
accompanying manual, your Hark gas smoker should be seasoned prior to use. Seasoning
effectively burns off any impurities and manufacturing oils that occur during the production
process. It further protects the smoker by coating the cooking surfaces with a thin patina of smoke
residue.
The following steps are a guide to seasoning a Hark gas smoker:
• Lightly spray the shelves and inside walls with canola oil.
• Fill the wood chip box with wood chips, then light the smoker and set the gas control to
MEDIUM.
• DO NOT USE THE WATER BOWL.
• Once your Hark gas smoker lls up with smoke, leave it to season” for approximately 30
minutes.
• Your Hark gas smoker is now seasoned and ready to use!
Note: It’s good practice to re-season your gas smoker at regular intervals and once a year at the
very least.

3
4. SMOKING INTRODUCTION
Smoking food is an art form. There is much to learn about the different processes and equipment
available today. Cold smoking and hot smoking are two different ways to smoke food and there
really isn’t one singular cooking or smoking device that does both.
4.1 Cold Smoking
Cold smoking takes place at temperatures around 20°C or lower and involves smoking partially
cured foods with very little heat. This is a popular smoking method for foods such as nuts, sh,
jerky and foods that are dried or cured prior to smoking. It is important to remember that cold
smoking is not a cooking process and that cold smoked foods are not actually ‘cooked’. Instead
they are cured and preserved. This can allow foods to be edible for hours, days, weeks or months
after smoking. It is always advisable to employ safe food practices when cold smoking and ensure
that you follow recipe instructions very carefully.
Your Hark gas smoker is not ideally suited to cold smoking.
4.2 Hot Smoking
Hot smoking involves cooking at low temperatures over long periods of time (anywhere from
7-24 hours). Hot smoking takes place when cooking food with temperatures greater than what is
considered to be normal ambient temperatures.
Typically, hot smoking is carried out in temperatures between 70-180˚C. It is important to note that
hot smoking alone does not act to preserve food. Anything hot smoked should generally be stored
in a refrigerator.
Electric and gas smokers tend to burn the source of smoke ie wood chips or pellets, from the
outset. They ll the chamber with high density smoke and heat the food within this smoke-heavy
cooking chamber. This is what we mean by hot smoking. The process works well and produces
more of a ‘smoked’ taste than a barbequed one. Think smoked chicken vs barbequed chicken,
there’s a subtle difference.
Your Hark gas smoker is suited to hot smoking.
Low and Slow
US style barbequing with meats such as pork shoulder (pulled pork), ribs and briskets
are examples of hot smoking. These classic smoked BBQ meats are generally smoked at
temperatures between 110-120˚C and will soften greatly and increase in avour if you hold them
‘at temperature’ for several hours inside the cooking chamber.
Temperature control is essential to smoking successfully. Practice keeping your smoker at a stable
temperature in the smoking “zone” for hours at a time. Don’t be tempted to open the smoker
door, as this lets out heat and air in and may take some 15 minutes or more to regain the original
temperature.
4.3 Smoke Quantity & Quality
Too much smoke or the wrong type of smoke will make food bitter. The bitter taste is attributed to
creosote produced from ‘white smoke’, or, from the soot deposited from ‘black smoke’. Good hot
smoking means clean smoke travels over food continuously from the wood chip box and into the
cooking chamber, picking up faint smoke on the way.

4
4.4 Smoke Ring
A smoke ring is the result of nitrates in the smoke “curing” the outer layer of meat, turning it pink
(the same way cured ham is pink but roast pork is grey). Whilst it’s an attractive look, a smoke ring
is not an integral part of smoking and isn’t a criteria used by judges in US BBQ competitions.
What’s more, you can “cheat” and obtain this look by adding nitrate-curing salt to the surface of
the meat via a rub or brine. But more often than not, it will occur naturally in the normal smoking
process.
It is important to understand that when hot smoking, meat won’t take on any more smoke once the
internal temperature hits 65°C. However if a glaze or marinade is added to the meat towards the
end of the cooking process, the meat will still absorb the smoke avour.

5
5. MEAT PREPARATION
There are a number of methods that can be employed to tenderise, moisten and avour your
meat. These include brining, curing, marinating and rubs.
5.1 Brine Curing
Brining foods in a mixture of salt and water is a form of curing and is one of the simplest
techniques to prepare foods for smoking.
The brining of meats is an age-old process used for preserving foods. Heavy concentrations of
salt helped preserve meats for long ocean voyages and military campaigns before the arrival of
refrigeration.
Brining today uses smaller quantities of salt, mixed with other spices and herbs, and is used
to avour and tenderise meat. The most basic brining mixture incorporates a minimum of 1
tablespoon of salt to every 1 litre of water. We recommend salt akes as they are easier to
dissolve, and the use of non iodised salt where possible. A good rule of thumb for achieving an
effective brine cure is that it should contain enough salt in the mixture to allow a raw egg to oat.
This equates to 20% of the salt in the liquid. Always store brine meat in a refrigerator.
In terms of the quantity of brine required, you will need enough brine to completely submerge
the meat. Some foods may need to be weighed down to stay submerged. Meat is best brined for
approximately 4 hours per kilogram. Depending on the size of meat you wish to brine, it can take
up to 24 hours or more. If you are brining whole poultry you will need to add 6 to 12 hours between
brining and cooking. It is best to sit the poultry in the refrigerator for several hours after you
remove it from the brined so that the skin can dry before cooking.
Also, when brining poultry or pork in a low salt brine it is recommended that you change the brining
liquid every 24 hours. Beef and lamb however can be submerged in the same brine for up to 3
days. Once you have nished brining lightly rinse the cut of meat to remove any excess salt before
cooking. Do not reuse the brine.
Chris' Basic Brine Recipe
1 litre of water
1 tblsp of salt
Directions:
Flavour the mixture with anything you like ie. crushed garlic, lemon, peppercorns, herbs, a
teaspoon of good curry paste, brown sugar, soy sauce or ginger.
Soak the meat in the brine and place in the refrigerator overnight. Ensure that the meat is fully
submerged in the brine.
Note that there is an increasing push to include Iodised salt in our cooking. Whilst this is a good
initiative, Iodised salt is not recommend for use in brining.
5.2 Salt and Sugar Curing
Salt and sugar curing is an age-old technique that involves removing all the available moisture
from the food in order to prevent it from spoiling. Once foods are cured this way, they are generally
hung up in the open air or left packed in salt or sugar.
When the food is required for consumption, it is usually reconstituted with a liquid such as water.

6
Salt and sugar curing can be enhanced with the addition of pepper, herbs or honey for extra
avour.
5.3 Marinades
Marinades are liquids or pastes comprising a mixture of spice or herbs, used to avour and
tenderise meat over generous periods of time.
Marinades are used to increase the avour of foods. However a common problem with them is
that they often contain far too much sugar for close-contact cooking such as on barbeques or in
fry pans. Marinades however, are perfect for smoking as the temperatures used in this cooking
environment aren’t high enough to burn the sugars.
Chris' Basic Marinade Recipe
1 cup white wine
1 cup grape seed oil
Juice from one lemon
3 crushed cloves of garlic
3 or 4 stems of rosemary
1 tsp of crushed pepper
Directions:
Combine all ingredients in a ceramic or glass dish.
Add the meat and thoroughly cover it with the marinade before refrigerating overnight.
5.4 Dry Rubs
Dry rubs are generally comprised of a mixture of dry herb and spices combined with salt and
sugar. These rubs help dry the food by extracting moisture from the meat. When used properly, dry
rubs can function like a combination of brining and salt or sugar curing. Generally rubs are applied
on the outside of the meat the day before and allowed to refrigerate overnight.
If smoking for long periods, it is advisable to apply the dry rub in small batches throughout the
cooking process. Or as an alternative, add the dry rub towards the end of the smoking process in
order to ensure the spice avours are at their peak.
Note: wet rubs are essentially dry rubs combined with a wetting agent, such as olive oil, beer, wine
or fruit juice.
Chris' Basic Rub Recipe
1 tblsp cumin powder
1 tblsp smoked paprika
1 tsp black pepper powder
Directions:
Rub the meat with a clove of garlic, cover with the rub mixture. Leave in a plastic bag or in a glass
or ceramic bowl in the fridge overnight.

7
6. WOOD FLAVOURING
Wood chips or wood pellets are considered to be premium smoke generating materials and greatly
impact the quality of the foods you have choosen to smoke.
6.1 Wood Chips
Wood chips are small pieces of suitable wood that can be used during the cooking process to
produce avoured smoke. For use in a Hark gas smoker, they need to be small pieces. Large
chunks of wood aren’t suitable for this type of smoking.
Flavoured wood provide a subtle avour to your food from the smoke that is generated. Typically
the wood will come from a fruit tree or from Mesquite, banksia and sheoak. Generally fruit and nut
trees produce a sweeter, milder smoke, which complements white and pink meats. Hardwoods like
wattle, box, gum and mesquite produce more robust smoke and are more suited to redder meats.
Imported timbers like hickory, mesquite and beech (favoured by European smallgoods makers) are
also available.
The following table provides a guide to the different types of avoured woods available today.
Table 2: Flavoured Wood Types
WOOD FLAVOUR DESCRIPTION FOODS
Black Wattle
Grey Box
Red Gum
Jarrah
Strong. pungent, smoky bacon
avour
Similar to Hickory
Great for most meat smoking
Not as ideal for seafood and
vegetables
Ironbark
Melaleuka
Medium smoke, similar to
Hickory but not as strong
Great for most smoking,
including seafood
Beech (Imported) Strong earthy avour Good for most meats,
particularly beef. Also great
with vegetables
Beech (Imported) Very mid. A light, sweet avour Pork, ham, poultry, cheese,
game birds
Sheoak Mild smoke, slightly sweet,
preferred for sh
Good with red meat, pork, sh
Apple Slightly sweet but denser, fruity
smoke avour
Beef, poultry, game birds, pork
(particularly ham)
Cherry, Peach and other
stonefruit
Slightly sweet, fruity smoke
avour
Good with all meats
Banksia (the Banksia cone
is particularly good)
Very delicate light taste with a
hint of sweetness
Good with sh, pork, poultry
and light-meat game birds
Grapevine Aromatic, similar to fruit woods Good with all meats
Macadamia Nutty and sweet smoke avour
Light and subtle smoke
Good with all meats
Myrtle
Tasmanian Oak
Strong smoke, but not bitter Good with everything

8
As a general rule, the wood of any plant which bears an edible fruit is usable. For example grape,
vine cuttings and olive tree wood. Experiment with different types and quantities of wood chips and
remember that you can mix different types of wood chips together.
NEVER USE THE FOLLOWING WOOD TYPES IN YOUR SMOKER - PINEWOODS, TEA TREE
AND TREATED, PAINTED OR STAINED WOODS. THESE WOODS PRODUCE TOXIC FUMES
OR HIGH HEAT THAT WILL ADVERSLEY AFFECT THE FLAVOUR OF THE FOOD YOU ARE
COOKING!
6.2 Wood Pellets
Smoking pellets can also be used to enhance the smoking process and are increasingly becoming
more popular and available in Australia. Pellets are formed from compressed, kiln-dried sawdust
and come from many of the same woods that wood chips are sourced from. Hark offers a range of
pellets - Apple, Pecan and Hickory.
6.3 Other Smoking Materials
Other materials than can be used in the smoking process, include herbs, spices, rice, tea, sea
weed and nut shells. The resulting avours can range from subtle or to strong and pungent. This
is where it can be benecial to experiment with adding new ingredients and to keep notes for
future reference.
6.4 Recommended Quantities
The biggest “rookie” mistake is to over smoke your food. Less is more when it comes to adding
wood chips and pellets. Most smoke and therefore avour is absorbed in the rst 2 hours of
smoking. After that, you may not need to replenish the pellets or chips.
Wood chips – 1 cup at a time
Wood pellets – up to 2 cups.

9
7. SMOKE COOKING
Ensure that you have followed the assembly instructions in your Hark gas smoker Owner’s
Manual, particularly section D (The Gas System), to ensure that your gas bottle and smoker are
safe to use.
7.1 Recommended Equipment
Before commencing cooking with the Hark gas smoker, it pays to ensure you have all the
necessary tools and utensils required to achieve the best cooking results.
Thermometers
Prior to using your smoker, we recommend you invest in two types of thermometers. The rst
thermometer can be used for checking the inside temperature of your smoker box. There are
several digital oven thermometers that are available in the marketplace, some of which are
remote. The second thermometer is used to check the internal temperature of the meat being
smoked. Here you can use products such as the Hark Remote Wireless Digital Thermometer or a
Hark Stainless Steel Meat Thermometer to periodically check the internal temperature of the meat.
Warning: Never wash a temperature probe, never immerse in water. Always wipe clean with a
damp cloth or sanitiser wipe.
Long Handle Tongs
A pair of long handled BBQ tongs for smaller pieces of meat or a meat hook for larger cuts is
recommended to safely handle meat during the cooking process and, to safely remove the meat
once take it out when you have nished.
BBQ Mitts
A good pair of extra-long, heavy duty BBQ mitts or gloves so that you do not burn your hands or
forearms. These are particularly necessary when adding water or wood chips to the smoker during
the smoking process. Refer the Hark Leather BBQ Gloves.
Smoking Sheet
Hark Smoking Sheets are great for smoking smaller items that will fall through between the bars
of the shelves. The coated Smoking Sheets will stop the food sticking to the shelves while still
allowing the smoke to push through. They also make handling delicate foods like sh easier as
well as the washing up process!
Aluminium Foil
Al foil is also required to wrap around meat once it has reached the desired temperature and
colour. The foil will help prevent the wood resins from further darkening the meat. It is also a good
idea to line the wood chip box and water bowl with foil before use. This can make the cleaning
process less cumbersome.
7.2 Preparation
• Place the smoker outside in a well ventilated area.
• Ensure there is enough gas for the Hark gas smoker to complete the preheating and cooking
process.
• Ensure the water bowl has water in it and is placed under the wood chip box. This way any fat
will fall into the water bowl and not onto the wood chips. If fat falls directly onto wood chips, it
could potentially cause a re to break out.

10
• Consider placing a BBQ mat under the smoker unit to avoid staining your deck or patio.
• Always preheat your Hark gas smoker before commencing cooking. Remove the cooking
racks beforehand and load them with the food once the smoker is preheated. Loading racks
into the smoker takes time and can let out signicant heat.
• Soak your smoker wood chips in a separate bowl of water for at least 20 minutes prior to
smoking. This will give a longer burn time and improve the smoky avour. DO NOT SOAK
WOOD PELLETS AS THEY WILL DISINTEGRATE!
• Line the wood chip box and water bowl with aluminium foil to minimise cleaning later.
• Put some wood chips into the wood chip box and slide the box onto the wood chip box rack.
• Insert the water bowl and add hot water. Other liquids can be used, such as beer or wine.
• Insert clean cooking racks (grids) at the levels you want and lay the meat on the grill (always
place the smaller pieces on the lower grid if double loading).
• Remember that some meats will drip during the cooking process, so place vegetables on a
rack above the meat to eliminate contamination.
CAUTION:
The wood chip box and lid become very hot during the smoking process. Always wear protective
BBQ mitts or use long handled tongs when adding wood during the smoking process.
7.3 Good Smoking Practices
Preheat
Always wait until the re has stablished and the cooking chamber is up to the desired oven
temperature before commencing cooking.
Thin Blue Smoke
Too much acrid creosote laden “white” smoke will ruin the entire cook. Always use avour wood,
wood chips or pellets sparingly, be sure to add small amounts at a time, waiting 30 to 45 minutes
before adding any more. Smoke will penetrate meat up until internal temperatures hit 77°C
(170°F). Beyond that, smoke and therefore avour won’t penetrate the meat much. Most smoke
penetration occurs within the rst two hours of cooking. If you choose to add glaze to your meat
prior to nishing cooking, you may wish to add a small amount of smoke to give the glaze a smoky
avour.
The biggest “rookie” mistake is to over smoke the food. With this style of smoking or barbequing,
less is more!
Air Flow
Control your Hark gas smoker by the gas control knob and simply adjusting the vents. Make ne
adjustments to the airow out of the Hark gas smoker to achieve the desired temperatures.
Monitor Temperatures
Invest in a good thermometer to monitor the temperature. A digital meat probe is also important for
tracking the internal temperature of the meat you are cooking.
Ambient weather conditions can affect the cooking temperatures. Rain, wind and snow can
signicantly lower the cooking temperature.
Tip: Rotate the thermometer gauge on the Hark gas smoker door so that your target temperature
is at the top of the dial. This will allow you to easily track whether the needle is vertical and
therefore “on temperature”.

11
Food Position
Understanding temperature variations in the Hark gas smoker is essential. These zones can be
used to great advantage. The areas beside the vents for example, have an increased airow. This
can be useful if you want to dry the surface of the food.
Note that some foods may also drip therefore you will need to think about what food place under
them, to avoid contamination!
Relax
The most important tip when it comes to any kind of smoking is to relax. Stay near your Hark gas
smoker, check your temperatures, enjoy a drink as you watch it all unfold. Remember that it will
take practice and some experimentation before you master your smoker. Taking notes and using
the Hark gas smoker Cooking Log will help you repeat success stories and avoid mistakes more
easily.
7.4 Tips
• Always use the best quality ingredients available.
• Do not allow food to touch the smoker walls, or other pieces of food.
• Always use a temperature probe so that you know the temperature of the food being cooked.
• Always make sure you know what temperature the smoker unit is in order to avoid over-cooked
food.
• Use a Hark gas smoker Cooking Log (appendix) as the basis for your recipe development.
These sheets have been specially designed to take into account all of the variables you may
experience. This way, you will be better able to build you smoking expertise over a shorter
period of time.

12
8. TEMPERATURE CONTROL
8.1 Controlling Smoker Temperatures
Air ow is crucial for gas smokers. The dampers in your Hark gas smoker can be used to make
small temperature adjustments. Important to note is that the Hark Patio gas smoker has one
damper at the rear of the unit where as the Hark 2 Door gas smoker has three in total – rear and
each side].
The more the vent dampers are open, the more heat and smoke escapes. You’ll notice that the
dampers aren’t able to be 100% closed. This is an intentional design to ensure there is always
airow for the gas re.
Whilst starting out, it is recommended that your dampers are always set to approximately ½ open.
This will allow plenty of air into the smoker and will provide a good supply of smoke ow past the
meat. As you become more experienced, the vents can be adjusted for future sessions.
If you want a more intense smoke avour, you can close the dampers (as far as they go)
to effectively trap the smoke. However if you do this, it is important to ensure that cooking
temperatures don’t get too high.
Below is a rough guide of smoking cooking temperatures with the vents fully open:
LOW: 90°C (194°F)
Slow smoking for delicate foods: sausage, small goods, sh, vegetables, nuts etc.
Ideal for food warming.
MED: 135°C (275°F)
Smoke cooking for US style BBQ, ribs, chicken etc. Also good for baking.
HIGH: 180°C (356°F)
Smoke roasting, roast cooking, baking and general oven cooking.
The best way to develop reliable smoke cooking techniques is rstly understand the processes
you are working with and to record each step. Again, use the Hark Smoker Cooking Log
(appendix) as the basis for your recipe development, these sheets have been specially designed
to take into account all of the variables you may experience.
8.2 Temperature Range
A number of factors can impact on what temperatures your smoker can achieve. These factors
include ambient temperature, humidity, wind conditions and even low gas pressure. Small
differences in temperature are nothing to worry about, it simply means the food will cook slower or
faster. If you can protect your smoker from wind, it will function more efciently.
At the start of a cooking process, it’s normal for the smoker to show a lower temperature. Cold
water in the water bowl and cold food brings the temperature down. As the food and the water
in the water bowl increase in temperature, so does the smoker itself. It should be noted that the
colder the food is during the initial smoke phase the better the smoke adheres to the food.

13
8.3 Cooking Temperature Zones
Unlike an oven, it is often difcult to aim for an exact temperature when smoking outside with a
gas smoker. As such , it is more effective if we aim to achieve temperatures a certain cooking zone
ie LOW, MEDIUM and HIGH.
LOW ZONE 105°C - 135°C.
MED ZONE 135°C - 160°C.
HIGH ZONE 160°C - 180°C.
When focusing on cooking zones, we can aim to smoke foods within a healthy range of
temperatures, rather than a set temperature that may be difcult to achieve or hold on that given
day. You will note that many of the recipes included at the end of this Cooking Guide, refer to a
Temperature Zone, rather than an exact temperature for this very reason.
 Loading...