

Hardy HI 6300 User Manual
HI 6300 Quick Start Guide
The HI 6300 is a single-channel instrument designed to process signals
from analog load cells and output stable gross or net weight readings to
a display, a PLC or PC.
This Quick Start Guide is intended for users that are already familiar
with setting up Hardy Process Solutions weighing instruments.
A complete User’s Guide can be found online:
http://www.hardysolutions.com/6300_support/index.php
or by scanning the QR Code below:
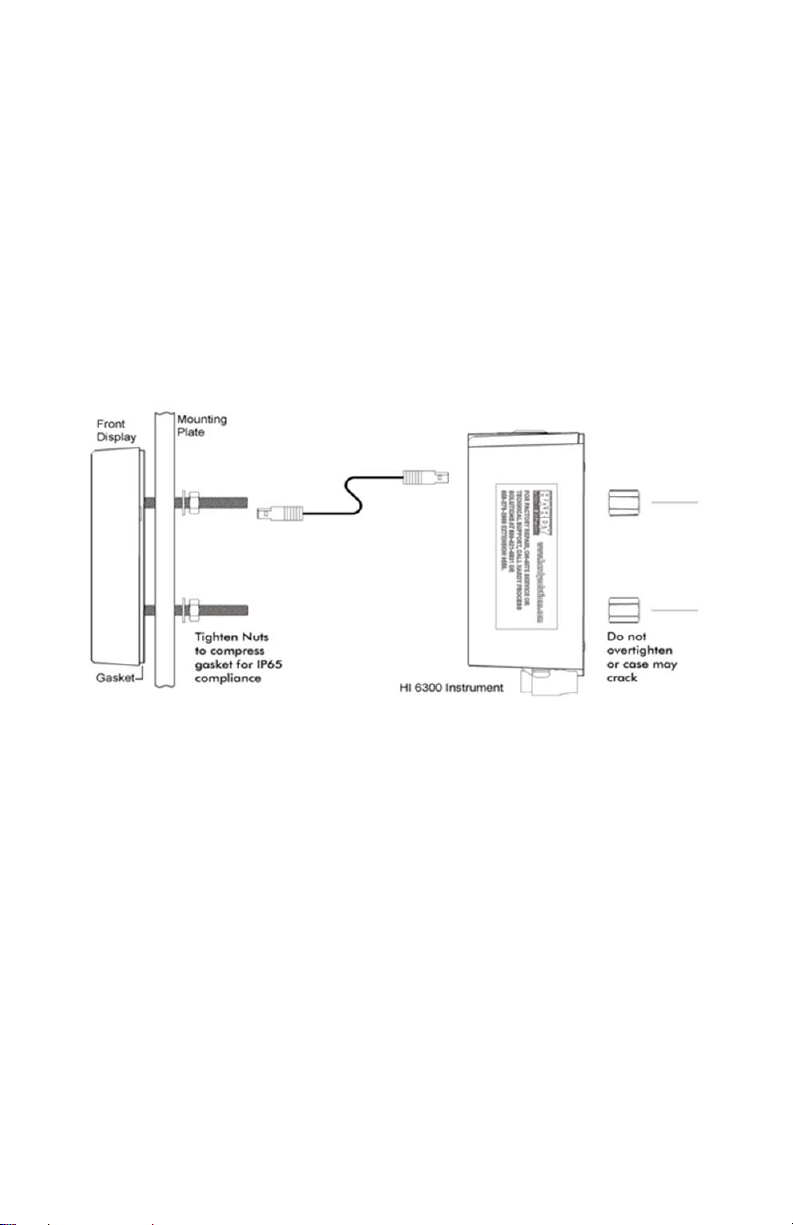
Panel Installation:
1. Use template provided to drill the hole pattern into panel.
2. Install the display onto the panel using 4mm nuts and washers,
tighten until gasket is compressed and display bezel comes in
contact with the panel.
3. Connect display cable to display and then to the instrument.
4. Slide the instrument onto threaded rods and secure in place with
8mm x 4mm retaining nuts (do not over tighten instrument
retaining nuts, overtighting could cause the instrument to crack).
DIN Rail Installation:
1. Use template provided to drill the hole pattern into panel
2. Install the display panel using 4mm nuts and washers, tighten until
gasket is compressed (4mm screws with length appropriate to panel
thickness can be used in place of the 4mm rods sent with the unit).
3. Place the instrument onto the DIN rail, slide DIN rail clip up until it
snaps into place to secure.
4. Connect display cable to display and instrument (le
as needed by using a thin screwdriver to release and replace wires
between the two connectors).
ngthen the cable

Wiring:
1. Remove connectors from the instrument and wire as per markings
found on the connector labels.
2. When using 4 wire sensors place a jumper between Excitation(+)
and Sense(+) and a jumper between Excitation(-) and Sense(-).
3. Grounding of the instrument is recommended by connecting to
either of the 2 screws located left of power connector or right of the
RS-485 connector.
 Loading...