


PANT RACK SERIES
Installation Instructions
for the PPR-1814, PPR-2414, PPR-3014
IMPORTANT:
Before you begin, make sure you familiarize yourself with all the
parts and fully read the instructions.
CUSTOMER SERVICE:
Toll free customer help line available weekdays between 7:00am
and 6:00pm Central Time at 800-463-0660.
TOOLS NECESSARY:
Screw gun or Phillips screwdriver. NOTE: If screw gun has a
clutch, set to lowest setting so as not to over tighten and/or
strip screws.
PARTS IDENTIFICATION:
2
6
3
2
5
STEP 1
Determine mounting location and install the mounting bracket with the arrows pointing up with the 5 mm Euro screws provided.
STEP 2
4
1
1 Mounting Bracket qty 2
2 Pant Rack Slide Covers qty 2
3 Pant Rack Cross Member qty 1
Pant Hanger
4
5 5 mm Euro Screw qty 4
6 Color coated Pan Head Machine Screw qty 4
PPR-1814 qty 9
PPR-2414 qty 13
PPR-3014 qty 16
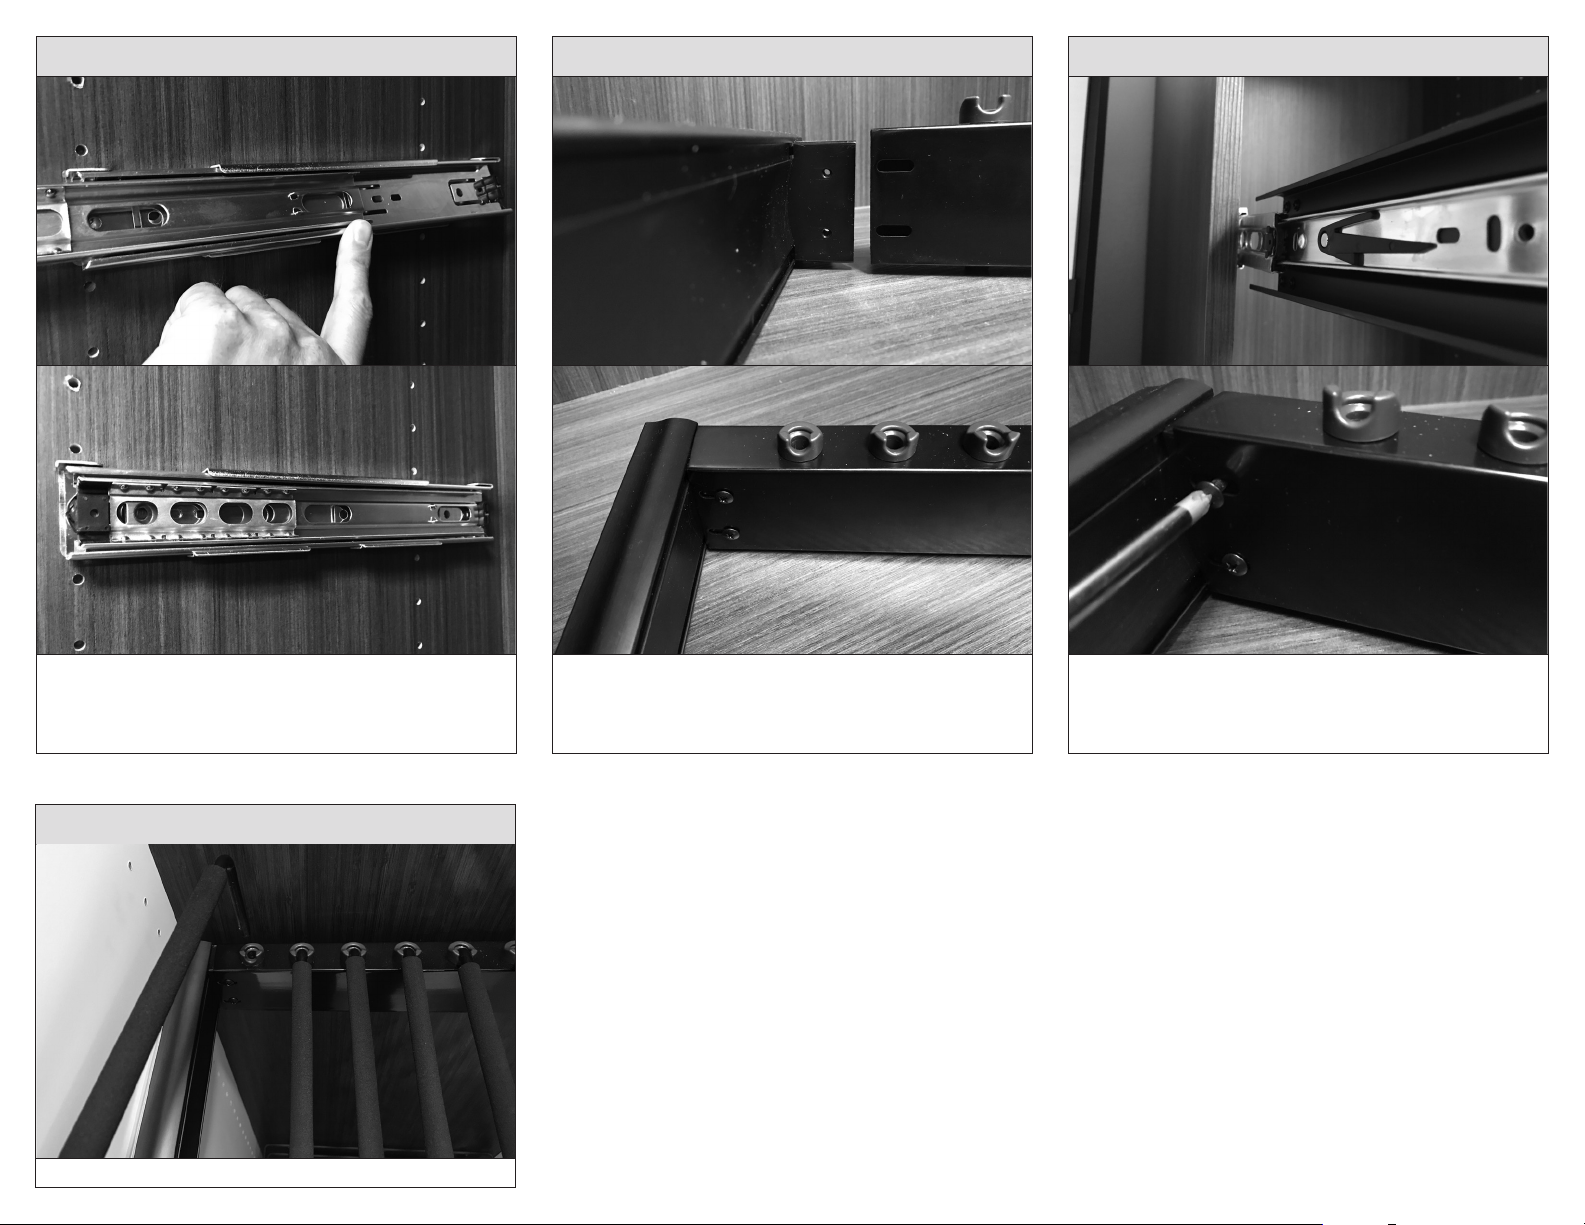
Separate slide by compressing the black release clip.
STEP 3
STEP 4
STEP 5
Install cabinet member of the slide into the mounting bracket.
Angle the top in rst and then snap into place.
STEP 6
Install the pant rack hangers.
Install Cross Member to Slide Cover by sliding the angle brace
inside the Cross Member making sure the slotted pant hanger
holders are pointing upward. Loosely fasten with 2 – Pan
Head Machine screws provided.
Install the Pant Rack organizer back onto the slide. Cycle the
unit a couple of times to be sure it is not binding, allowing the
Cross Member to center between the Slide Covers. Securely
tighten the machine screws.
PPR07/17 v.1
 Loading...