

Page 1

IMS-640 VoIP Intercom Master Station Operating Instructions MicroComm DXL
MicroComm DXL
IMS-640 VoIP Intercom Master Station
Operating Instructions
Printed in Canada 2009 Harding Instruments
November, 2009
Page 2

MN-DXL-IMS-640-Pv1 Page 2
Page 3

IMS-640 VoIP Intercom Master Station Operating Instructions MicroComm DXL
Table of Contents
Section 1 - Introduction ............................................................................................................................1
Purpose of This Manual..........................................................................................................................1
Welcome to the MicroComm DXL ..........................................................................................................1
Elements of the System............................................................................................................................1
The Master Station..................................................................................................................................2
This Operating Manual...........................................................................................................................2
Notation Used in This Manual ................................................................................................................3
Section 2 - Getting Started........................................................................................................................5
What is a DXL Intercom Station? ...........................................................................................................5
How the DXL System Handles Alarms....................................................................................................5
How the DXL Handles Call Requests .....................................................................................................5
Intercom Stations.....................................................................................................................................6
Initiating a Call Request......................................................................................................................6
Disabled Stations.................................................................................................................................6
Intercom Calls .....................................................................................................................................6
Station Identification ........................................................................................................................... 7
Station Priority ....................................................................................................................................7
IMS-640 VoIP Intercom Master Station..................................................................................................7
Display ................................................................................................................................................8
Telephone keys.................................................................................................................................... 8
Telephone Keypad............................................................................................................................... 9
Navigation Keys..............................................................................................................................9
Function Keys .................................................................................................................................9
Hold Key .........................................................................................................................................9
Release Key.....................................................................................................................................9
Audio Keys.................................................................................................................................... 10
Beeper................................................................................................................................................ 10
Loudspeaker and Microphone...........................................................................................................10
Handset..............................................................................................................................................11
Section 3 - Principles of Operation........................................................................................................13
Menu System..........................................................................................................................................13
Function menus .....................................................................................................................................14
Use of the Right-Arrow Key ..................................................................................................................15
List of Functions....................................................................................................................................16
Page i MN-DXL-IMS-640-Pv1
Page 4

IMS-640 VoIP Intercom Master Station Operating Instructions MicroComm DXL
Function.................................................................................................................................................16
Lists ...................................................................................................................................................17
How Lists are Displayed ...................................................................................................................18
Alarm Code .......................................................................................................................................18
ID Number and Name............................................................................................................................19
List Order...........................................................................................................................................19
List Sizes ...........................................................................................................................................19
Section 4 - Intercom Procedures............................................................................................................21
How to Select a List...............................................................................................................................21
How to Select a Station .....................................................................................................................22
Scrolling ............................................................................................................................................22
If you know the ID Number of the Station........................................................................................22
A Shortcut to Help With Long Lists..................................................................................................23
To Back Out of Your Selection .....................................................................................................23
Making a Call to a Station.....................................................................................................................24
Functions Available When You are Making a Call...........................................................................25
Level Setting Adjustments ................................................................................................................25
Call Requests.........................................................................................................................................26
Responding to a Call Request................................................................................................................26
Acknowledging the Call Request ......................................................................................................26
Ending the Call ..................................................................................................................................26
Section 5 – Enabling and Disabling Stations.........................................................................................27
Enabling/Disabling Intercom Stations..................................................................................................27
Enabling/Disabling Call Request Switch at an Intercom Station......................................................27
Enabling Call Request Switch from the Disabled list .......................................................................28
Enabling/Disabling Tamper Alarm at an Intercom Station...............................................................28
Enabling/Disabling Music at an Intercom Station.............................................................................28
Setting the Audio Level Alarm Thresholds for an Intercom Station.................................................28
Section 6- Monitoring Procedures .........................................................................................................31
Monitoring a Station..............................................................................................................................31
Background Monitoring ........................................................................................................................32
Monitoring a Visiting Booth..................................................................................................................33
Section 7 –Alarm Handling Procedures................................................................................................35
Section 8 - Other Master Station Procedures .......................................................................................37
Changing Master Station Display and Sound Volume Settings............................................................37
Changing Clock Display Mode .........................................................................................................37
MN-DXL-IMS-640-Pv1 Page ii
Page 5

IMS-640 VoIP Intercom Master Station Operating Instructions MicroComn DXL
To Change Programming (Music)..................................................................................................... 38
Activating a Signal ................................................................................................................................38
Page iii MN-DXL-IMS-640-Pv1
Page 6

Page 7

IMS-640 VoIP Intercom Master Station Operating Instructions MicroComn DXL
Section 1 - Introduction
Purpose of This Manual
This manual is intended to familiarize you with the operation of the MicroComm DXL IMS-640 VoIP Intercom
Master Station. The IMS-640 is a telephone style intercom station that uses Voice over Internet Protocol (VoIP).
The IMS-640 connects to an exchange via the inter-exchange Network (an Ethernet network).
The menus are similar to those used by the IMS-440 series of intercom master stations. You should easily master
the operation of the IMS-640 if you are already familiar with the operation of the IMS-440.
Welcome to the MicroComm DXL
The MicroComm DXL intercom system is designed to make your job easier. Here are some of the DXL’s main
features:
an Intercom Station can request your attention when needed
you can call an Intercom Station at any time
you can communicate with other Master Stations in your system
if you do not respond to a call request within a specified time, another Master Station will be notified
(assuming there are at least two Master Stations in your facility)
you can make zoned paging announcements directly from your Master Station
you can “step” through Intercom Stations to monitor what is happening at their locations
you can control whether program is distributed to intercom stations and paging zones
you can adjust the volume of your Master Station and the Intercom Station you are speaking with during
the call
all important activities are logged and saved for printing or reference, and
for ease and speed of maintenance, the system generates alarms whenever wiring faults and other internal
system failures are detected
Elements of the System
The DXL system consists of:
Intercom Stations
Master Stations that can communicate with Intercom Stations and other Master Stations
Secondary Master Stations, at which call requests not answered by a Master Station in a timely manner,
and other alarms are annunciated,
Digital Communications Controller (DCC), contains process control card, master control card and up to
two station control cards,
Digital Communications Expander (DCE) contains process control card (with reduced functionality) a
master control card and up to two station control cards.
Page 1 MN-DXL-IMS-640-Pv1
Page 8

IMS-640 VoIP Intercom Master Station Operating Instructions MicroComm DXL
other system devices such as paging speakers, page zone expanders (PZE), talk back expanders (TBE),
program sources, telephone type stations, etc.
All of these elements are linked together in a communications network.
The Master Station
You can use your IMS-640 Master Station to perform a wide range of intercom and alarm functions. From your
Master Station you can:
call an Intercom Station
call another Master Station
respond to an intercom call request
disable an Intercom Station or alarm monitor point
(re)enable an Intercom Station or alarm monitor point
monitor the intercom status of every Intercom Station that is connected to your Master Station
make public address announcements to Intercom Station and loudspeaker zones
turn program distribution to Intercom Stations and zones on or off
This Operating Manual
This operating manual is designed to help you learn to use all of the important features of your Intercom Master
Station. It will also serve as a handy reference document.
The manual is divided into eight sections, each one dealing with a key aspect:
Section 1 Introduction
Section 2 Getting Started
Section 3 Principles of Operation
Section 4 Intercom Procedures
Section 5 Enabling and Disabling Stations
Section 6 Monitoring Procedures
Section 7 Alarm Handling Procedures
Section 8 Other Master Station Procedures
Remember that the DXL is an intercom system designed to help you do your job more effectively.
The more familiar you are with its operation, the easier your job will be!
MN-DXL-IMS-640-Pv1 Page 2
Page 9
IMS-640 VoIP Intercom Master Station Operating Instructions MicroComn DXL
Notation Used in This Manual
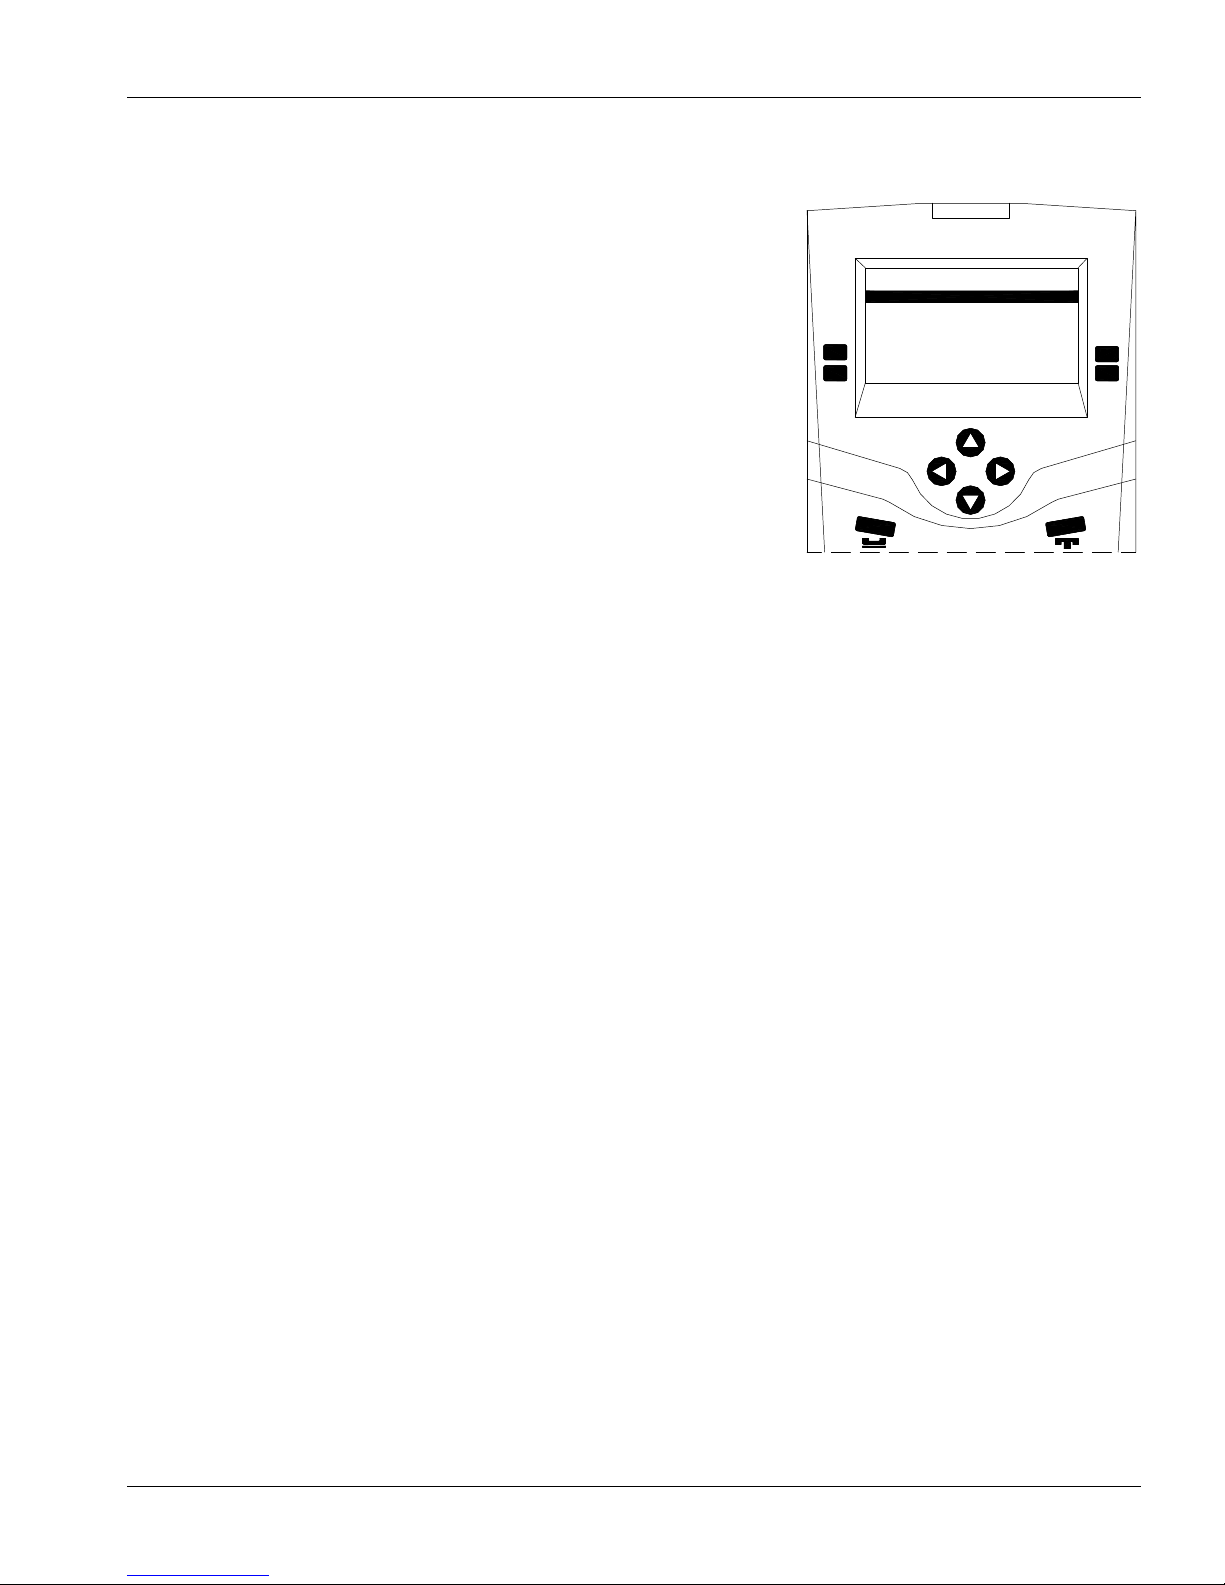
Your Intercom Master Station uses text on a dark background of the LCD
display to represent such things as a selected Intercom Station or which
list you are viewing. In this manual, the selected text is shown as inverted
text.
Master Station #20
2001 Housing1Entry 0
2001 Housing1Exit 0
2003 UnitAEntry 0
Station :131
Reject
Accept
Selected text is represented by
inverted text
Page 3 MN-DXL-IMS-640-Pv1
Page 10

Page 11
IMS-640 VoIP Intercom Master Station Operating Instructions MicroComn DXL
Section 2 - Getting Started
What is a DXL Intercom Station?
In a MicroComm DXL system, an Intercom Station refers to a speaker/microphone combination from which
audio communications can be carried out. Associated with the Intercom Station are one or more switches that can
be used to generate call request, select programs or other possible functions.
How the DXL System Handles Alarms
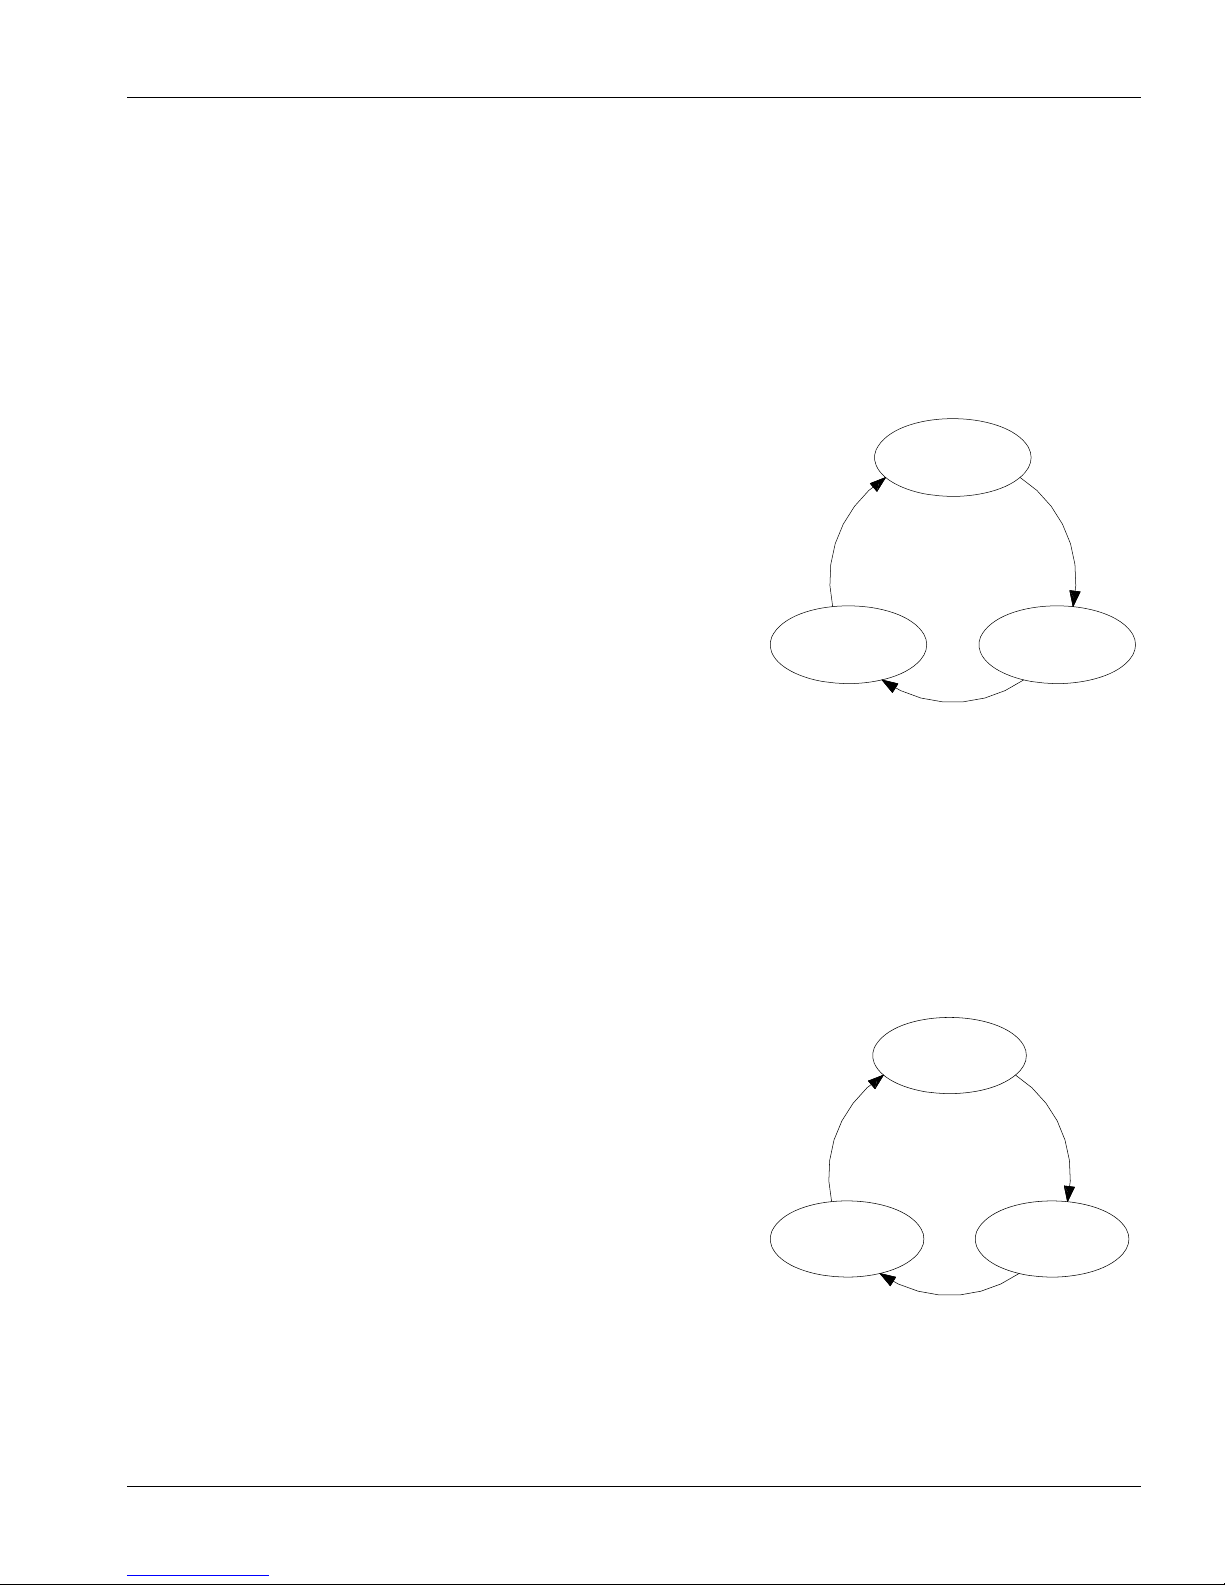
The MicroComm DXL is an integrated system that handles a wide
variety of alarms, in addition to intercom call requests. To simplify
operation of the system, the DXL treats call requests and alarms in the
same basic fashion. (The only difference between the two is that, with
call requests, intercom functions are available.)
First we will discuss how the DXL handles alarms.
Cancel
Alarm
Station Status
is "Idle"
Receive
Alarm
Normally, the Stations that communicate with your Master Station are
in the “idle” state.
Station Status
is "Acknowledged"
Station Status
is "Alarm"
When a Station initiates an alarm, the alarm is sounded at your Master
Station, and the system changes the state of that Intercom Station
Acknowledge
Alarm
from “idle” to “alarm”.
When an alarm is acknowledged, the system changes the status of the Station from “alarm” to “acknowledged”.
And when the alarm is canceled, the system changes the status of the Station from “acknowledged” back to “idle”.
The DXL keeps track of the status of all Stations and displays this information for you - as lists of Stations with
“alarm” and “acknowledged” status.
Now let’s look at call requests.
How the DXL Handles Call Requests
When a call request is initiated at an Intercom Station, the Master
Station alerts you (with a beep). The station that initiated the call
request is added to the Event Queue. Until the call request is
acknowledged, the Master Station will sound an alarm reminder beep
at a regular interval.
When you acknowledge the call request:
End
Call
Station Status
is "Idle"
Receive
Call Request
a tone sounds at the Intercom Station to let the calling party
know that the call request has been acknowledged,
the DXL removes the Intercom Station from the Event Queue,
and
your Master Station is connected to the Intercom Station.
Once you are connected, you may speak to the calling party, or listen.
When you have completed your communications with the Intercom Station you may “end” the call.
Page 5 MN-DXL-IMS-640-Pv1
Station Status
is "Acknowledged/Call"
Acknowledge
Call Request
Station Status
is "Alarm"
Page 12
IMS-640 VoIP Intercom Master Station Operating Instructions MicroComm DXL
After a fixed interval, if the call request is not acknowledged (or canceled), it will “time out” and a call request
time-out alarm will be annunciated at the Secondary Master Station. (The original call request remains queued at
the Master Station.)
Note: When the system is set up, the System Administrator will set the time allowed before a time-out
alarm is triggered by a failure to respond to the call request.
A Secondary Master Station is simply another Master Station designated to receive time out calls, fault reports as
a back up function.
All intercom activities (call requests, calls, cancels, etc.) are logged so that they can be printed and accessed for
review.
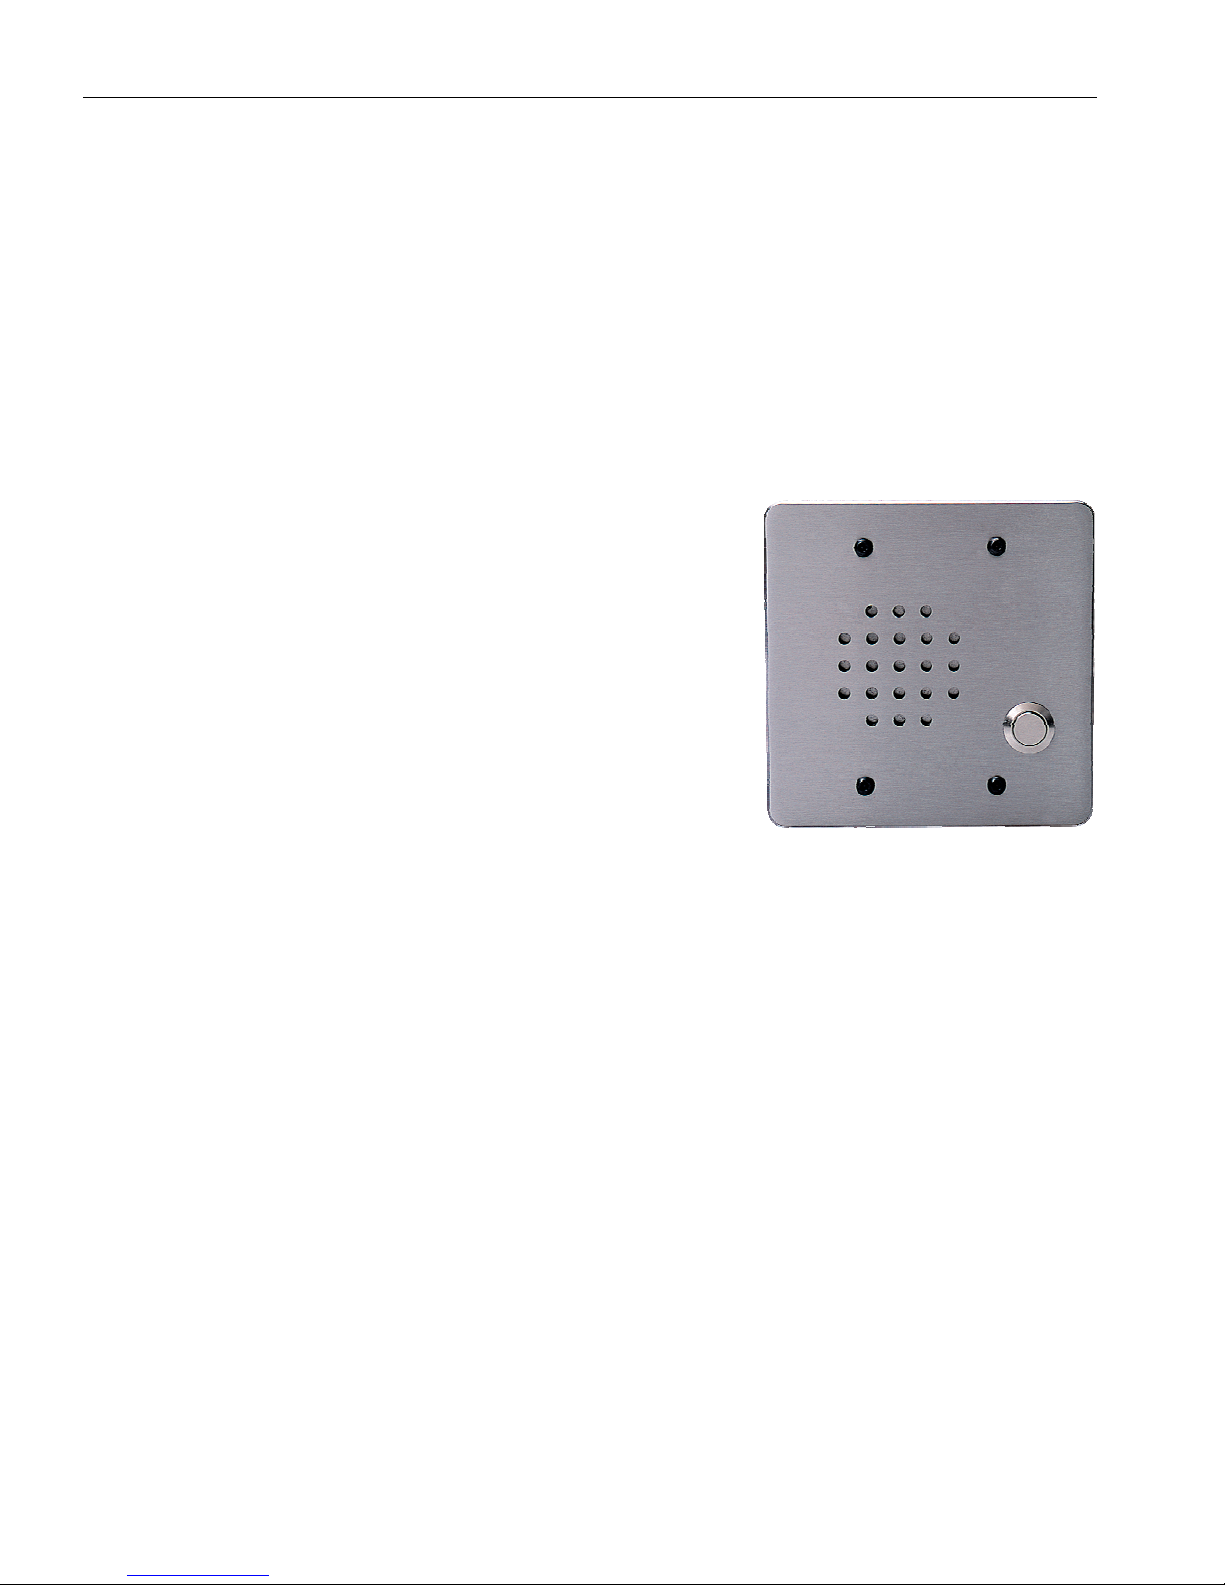
Intercom Stations
A typical Intercom Station consists of:
a call switch
a loudspeaker/microphone, which enables two-way
communication.
Intercom Stations may also take the form of telephone handsets, talkback
loudspeakers with call request buttons, etc. Whatever their configuration,
they include a means to place a call request and a means of two-way
communication. They may include call indicator lights to signal that call
requests have been placed or that calls have been acknowledged.
Typical Intercom Station
Initiating a Call Request
A call request is initiated by pressing the call request switch (lifting the telephone handset, etc.) at the Intercom
Station.
A call request will not be able to be initiated from an Intercom Station if:
the Station is disabled, or
the Station has initiated a call request that has not yet been acknowledged.
Disabled Stations
If you disable an intercom or other station, it can no longer initiate a call request. However, you may call a
disabled Intercom Station.
At any time, you may enable a disabled Station, which puts it back into operation.
When you disable a Station, it is added to the Disabled List. When you enable a disabled Station, it is removed
from the Disabled List.
Intercom Calls
Your Master Station will be connected to the Intercom Station whenever:
MN-DXL-IMS-640-Pv1 Page 6
Page 13
IMS-640 VoIP Intercom Master Station Operating Instructions MicroComn DXL
you initiate a call to the Intercom Station, or
you acknowledge a call request. (In this case, the Master Station is automatically connected to the
Intercom Station.)
When you call an Intercom Station, a call announce tone sounds (this indicates to the party at the Intercom
Station that you are calling, or that you have acknowledged the call request).
Note: An Intercom Station cannot initiate a conversation with the Master Station. The Intercom Station
can only communicate with the Master Station when the Master Station calls the Intercom Station, or
acknowledges a call request from an Intercom Station.
Station Identification
When the system is initially set up the using the Administrator Software stations will be identified by an ID
number and name. The IMS-640 LCD screen will display both.
Station Priority
Each Station is assigned a call request priority in the Administrator Software. Call request priority determines the
order in which Stations that have initiated call requests are displayed on the Event Queue.
A new call request with a high priority will appear on the Event Queue ahead of previously received call requests
with lower priority.
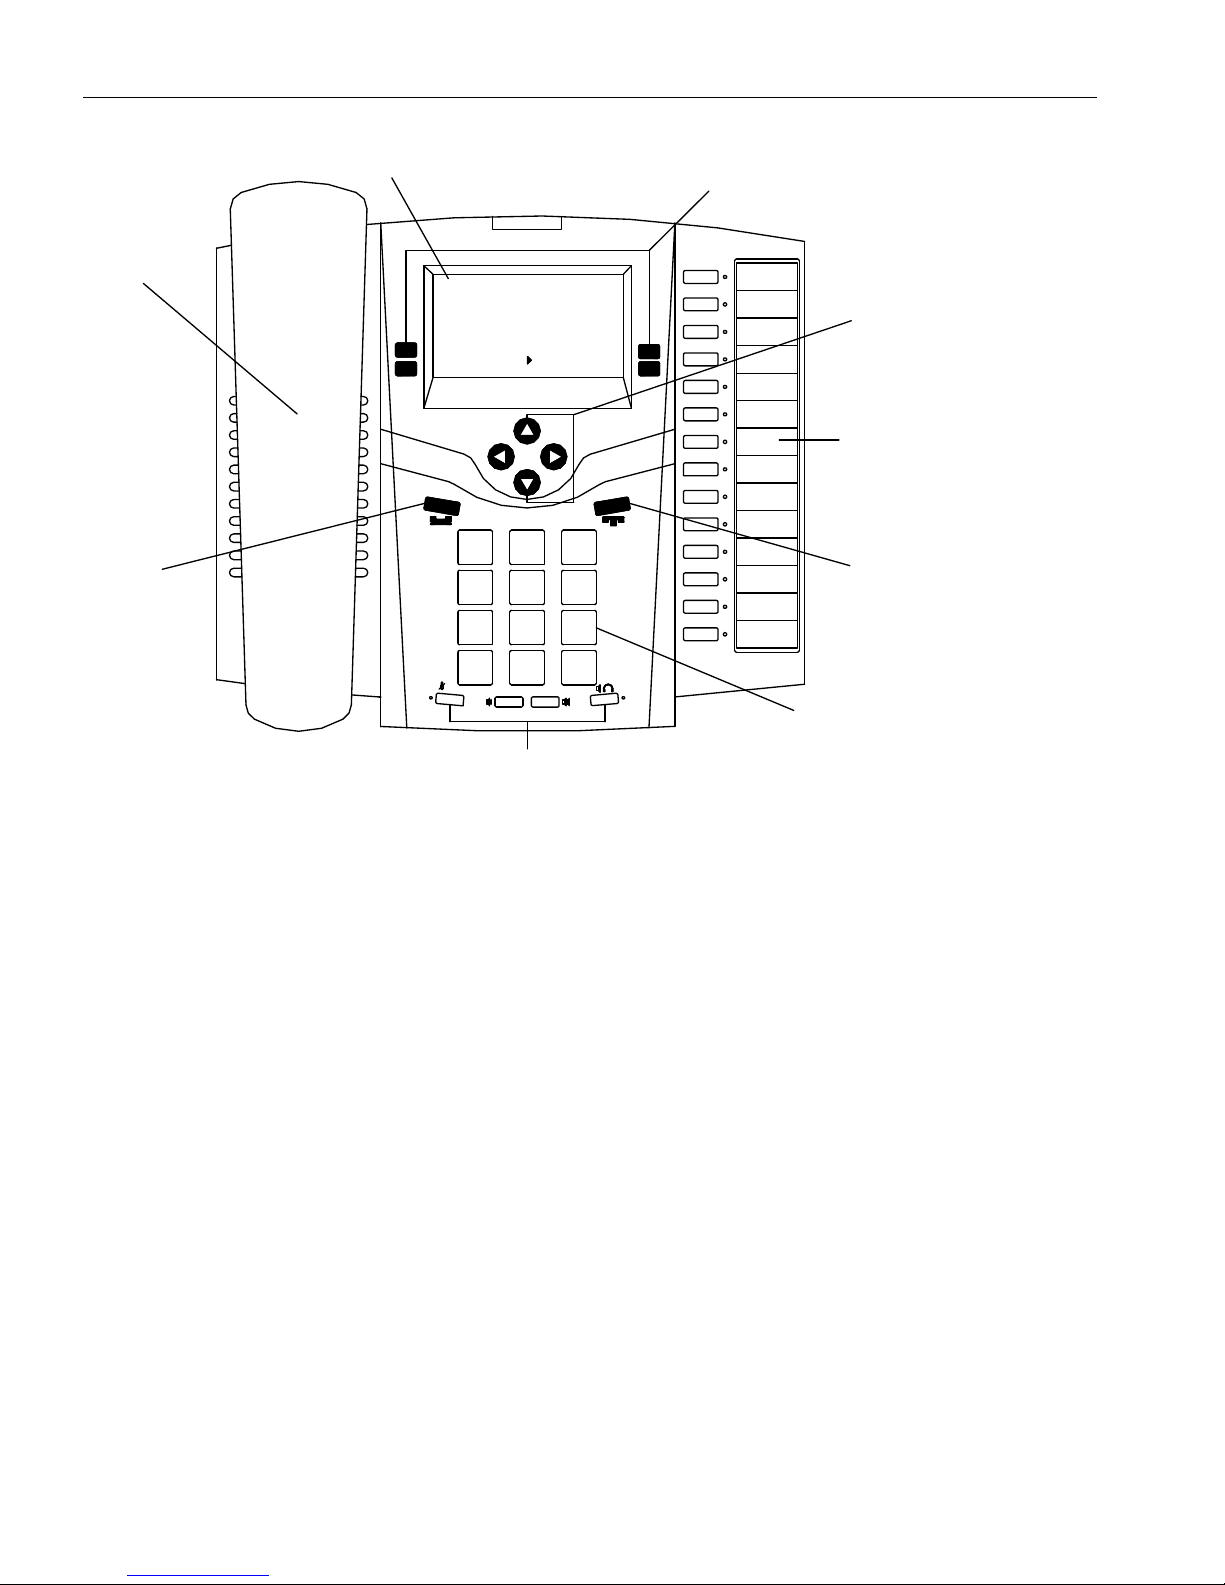
IMS-640 VoIP Intercom Master Station
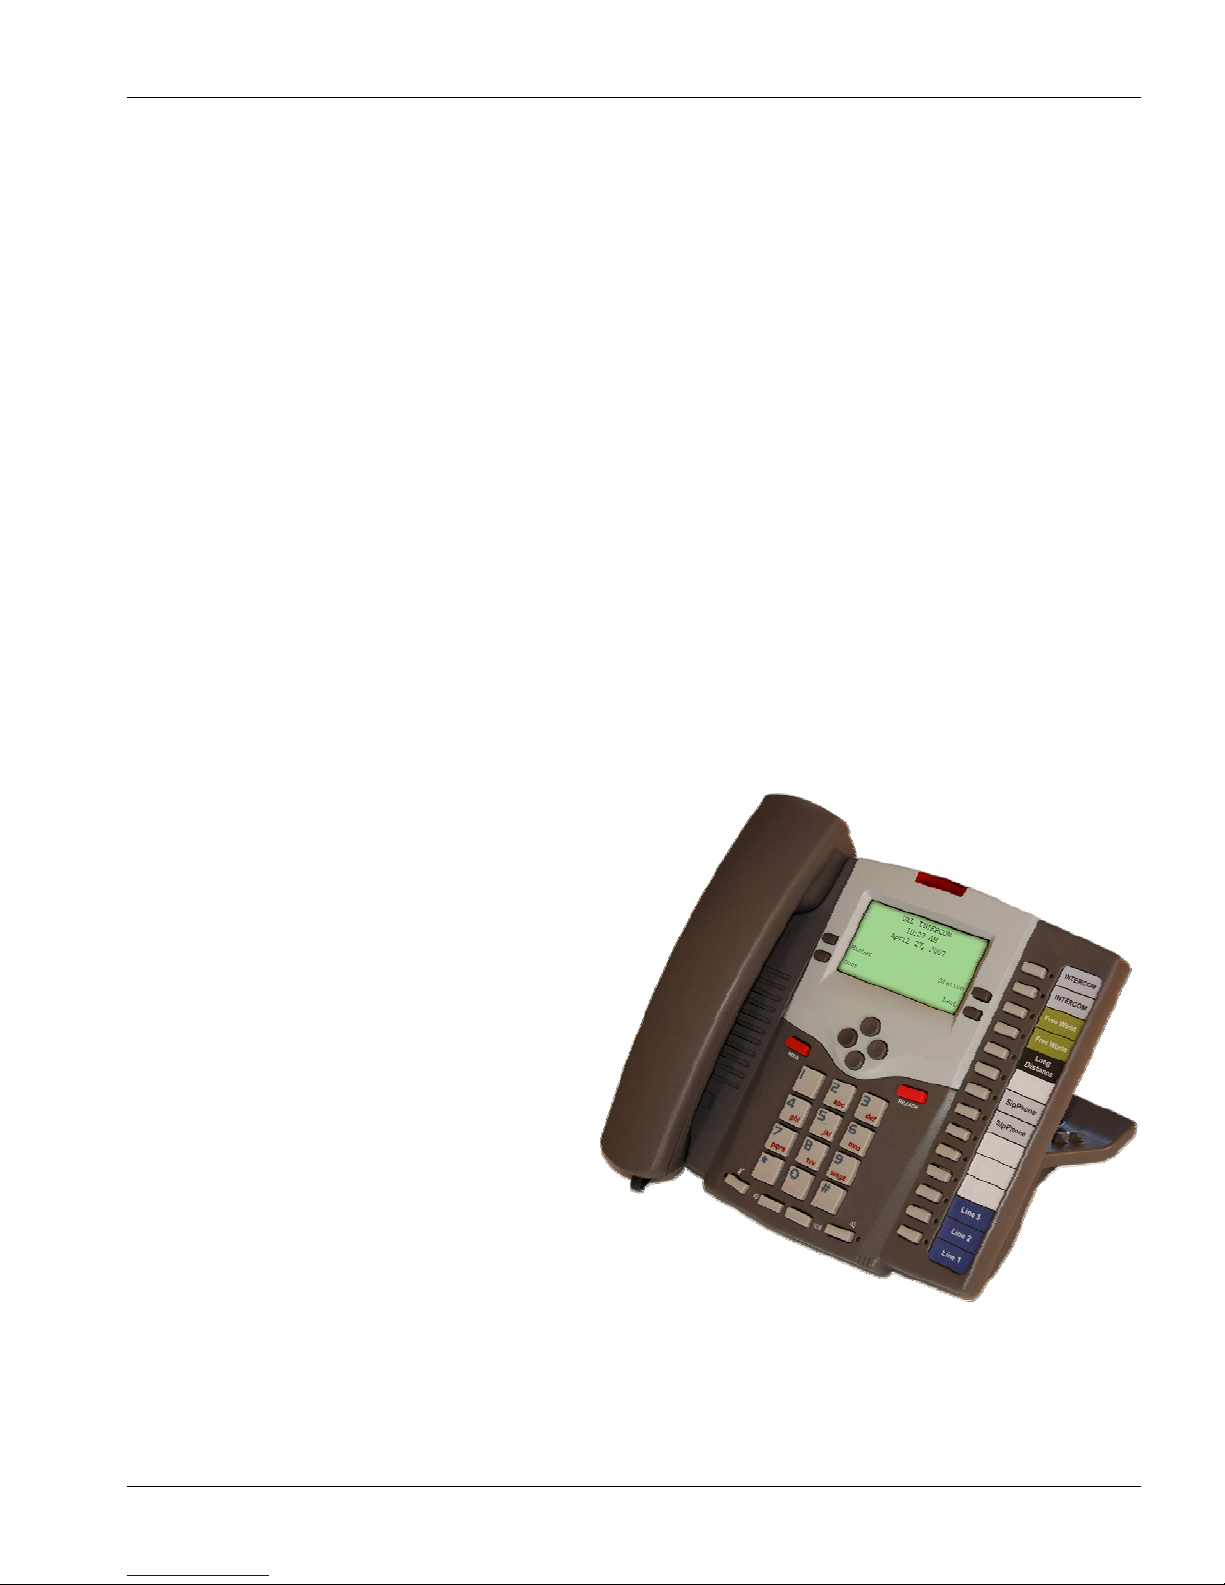
The IMS-640 Intercom Master Station is a
telephone style master station and includes:
a display,
a keyboard,
a beeper
a loudspeaker and microphone, and
a handset
IMS 640 Intercom Master Station
Page 7 MN-DXL-IMS-640-Pv1
Page 14
IMS-640 VoIP Intercom Master Station Operating Instructions MicroComm DXL
Handset
Hold
Key
LCD Screen
Message/Ringing
Indicator
Master Station #20
01:51 PM
Jul 8, 2008
Answer Next
Master Setup
2
1
4
ghi
7
pqrs
*
3
abc
5
6
jkl
mno
8
9
wxyz
tuv
0
#
Unman
def
Call
Function Keys
0
0
0
Navigation
Keys
14 Programmable
"feature" keys
Release
Key
Telephone
Keypad
Audio Keys
IMS-640 showing keyboard and display
Display
The display is a 128 x 64 pixel LCD screen with backlighting that provides information you need to perform
intercom functions.
Telephone keys
The telephone keys consist of:
a standard telephone-12 key numeric keypad,
four navigation keys,
four function keys
a Hold key (The operation of this key is disabled when the IMS-640 functions as a DXL master station)
a Release key
four audio keys.
14 programmable “feature” keys, each with an LCD indicator
MN-DXL-IMS-640-Pv1 Page 8
Page 15
IMS-640 VoIP Intercom Master Station Operating Instructions MicroComn DXL
Telephone Keypad
The keypad consists of a numeric key set - (0 to 9), (*) and (#) - in a standard telephone layout. These keys are
used to speed up station selection when performing intercom functions and to set level controls.
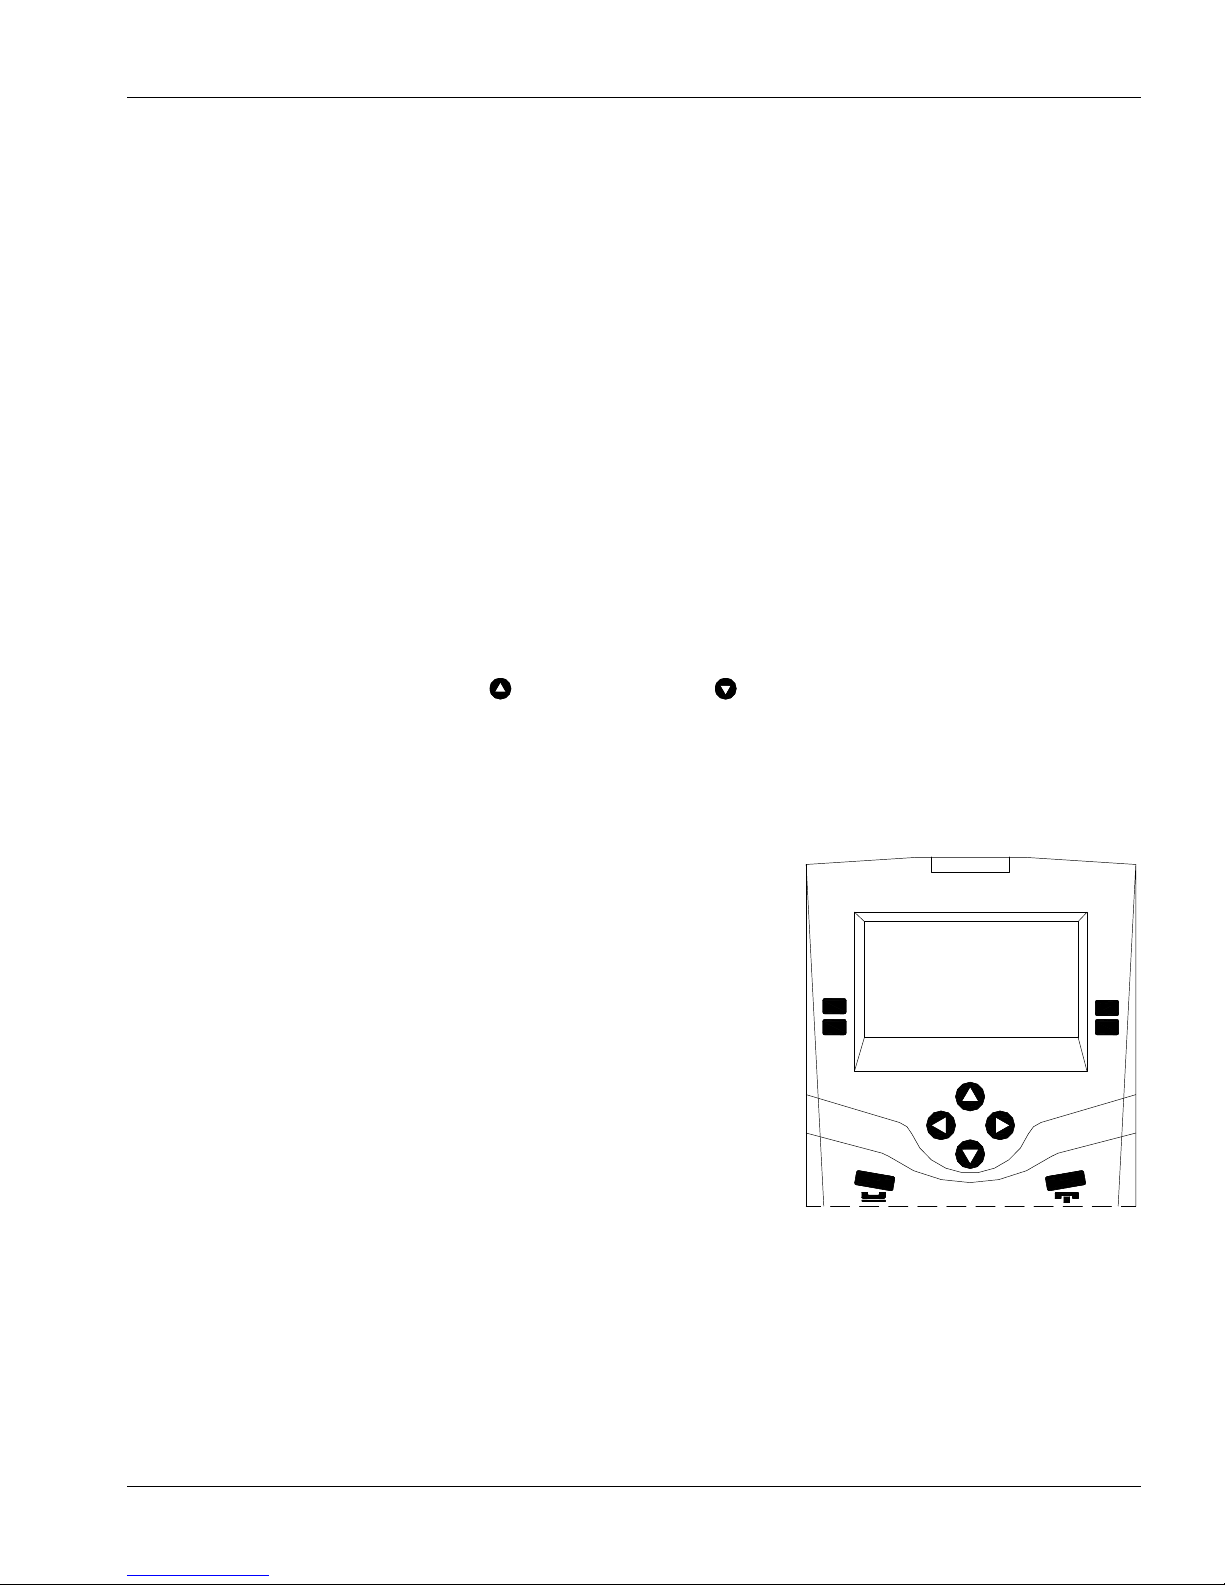
Navigation Keys
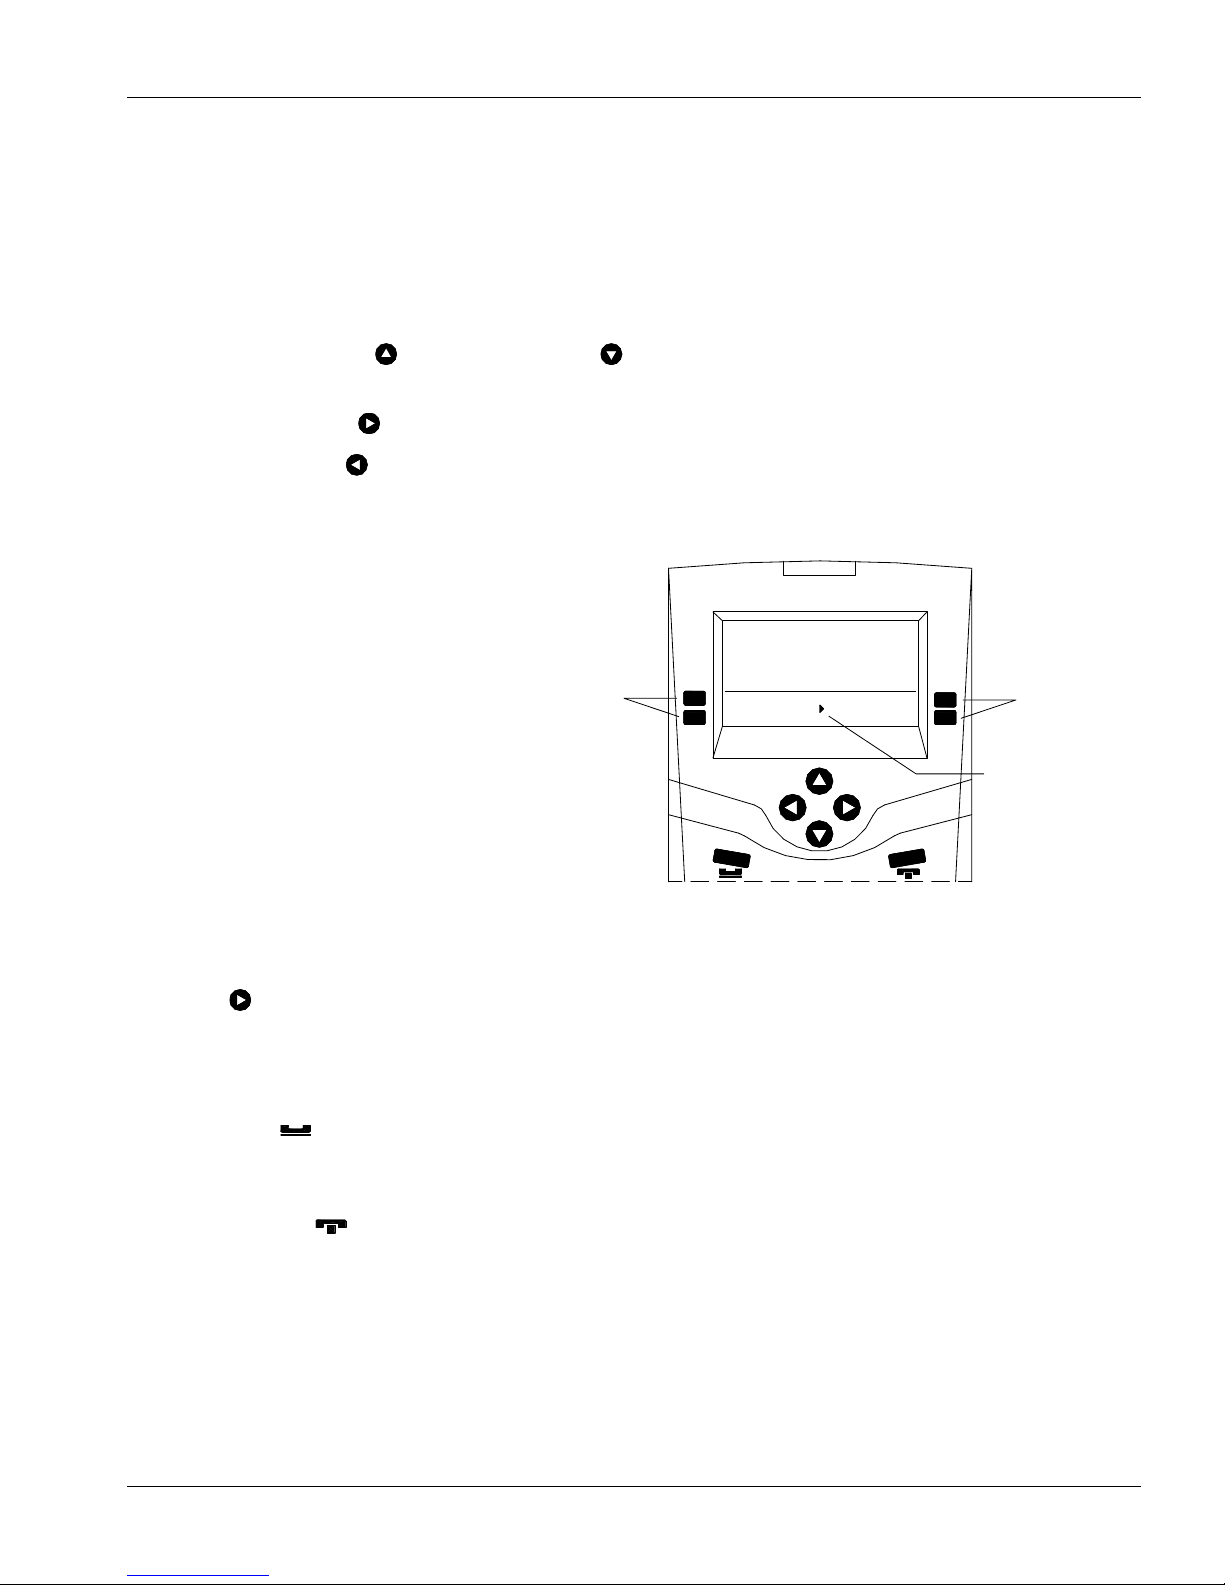
There are four control keys:
The Up-Arrow key
and Down-Arrow key are used to scroll through the displayed list of
stations and to adjust settings and volumes.
The Right Arrow
The Left Arrow
key is used to scroll to a new menu
key is used to scroll back to a previous menu
Function Keys
Function keys are used to perform the
intercom functions that appear beside them
on the display. Each key is associated with
the function name that appears directly
beside it.
If a function name does not appear beside a
function key, the key is not operative. (If you
press it nothing happen).
The functions that you may perform at any
one time will change, according to the keys
you have pressed, the list displayed and the
station selected.
Function
Keys
Master Station #20
01:51 PM 0
Jul 8, 2008
Answer Next
Master Setup
0
0
Call
Unman
Four Function Keys
Function
Keys
Additional functions
are available
The center arrow head ► indicates additional functions are available and will be displayed if you press the RightArrow key
. Additional functions are available only if a right-arrow head appears in the center of the bottom
two lines of the display.
Hold Key
The HOLD key ( ) is not used in the operation of the IMS-640 and its operation is disabled
Release Key
The RELEASE key ( ) is used to abort a value entry and return to previous settings. (The RELEASE key
operation is similar to the CLEAR key operation in an IMS-440.)
Page 9 MN-DXL-IMS-640-Pv1
Page 16
IMS-640 VoIP Intercom Master Station Operating Instructions MicroComm DXL
Audio Keys
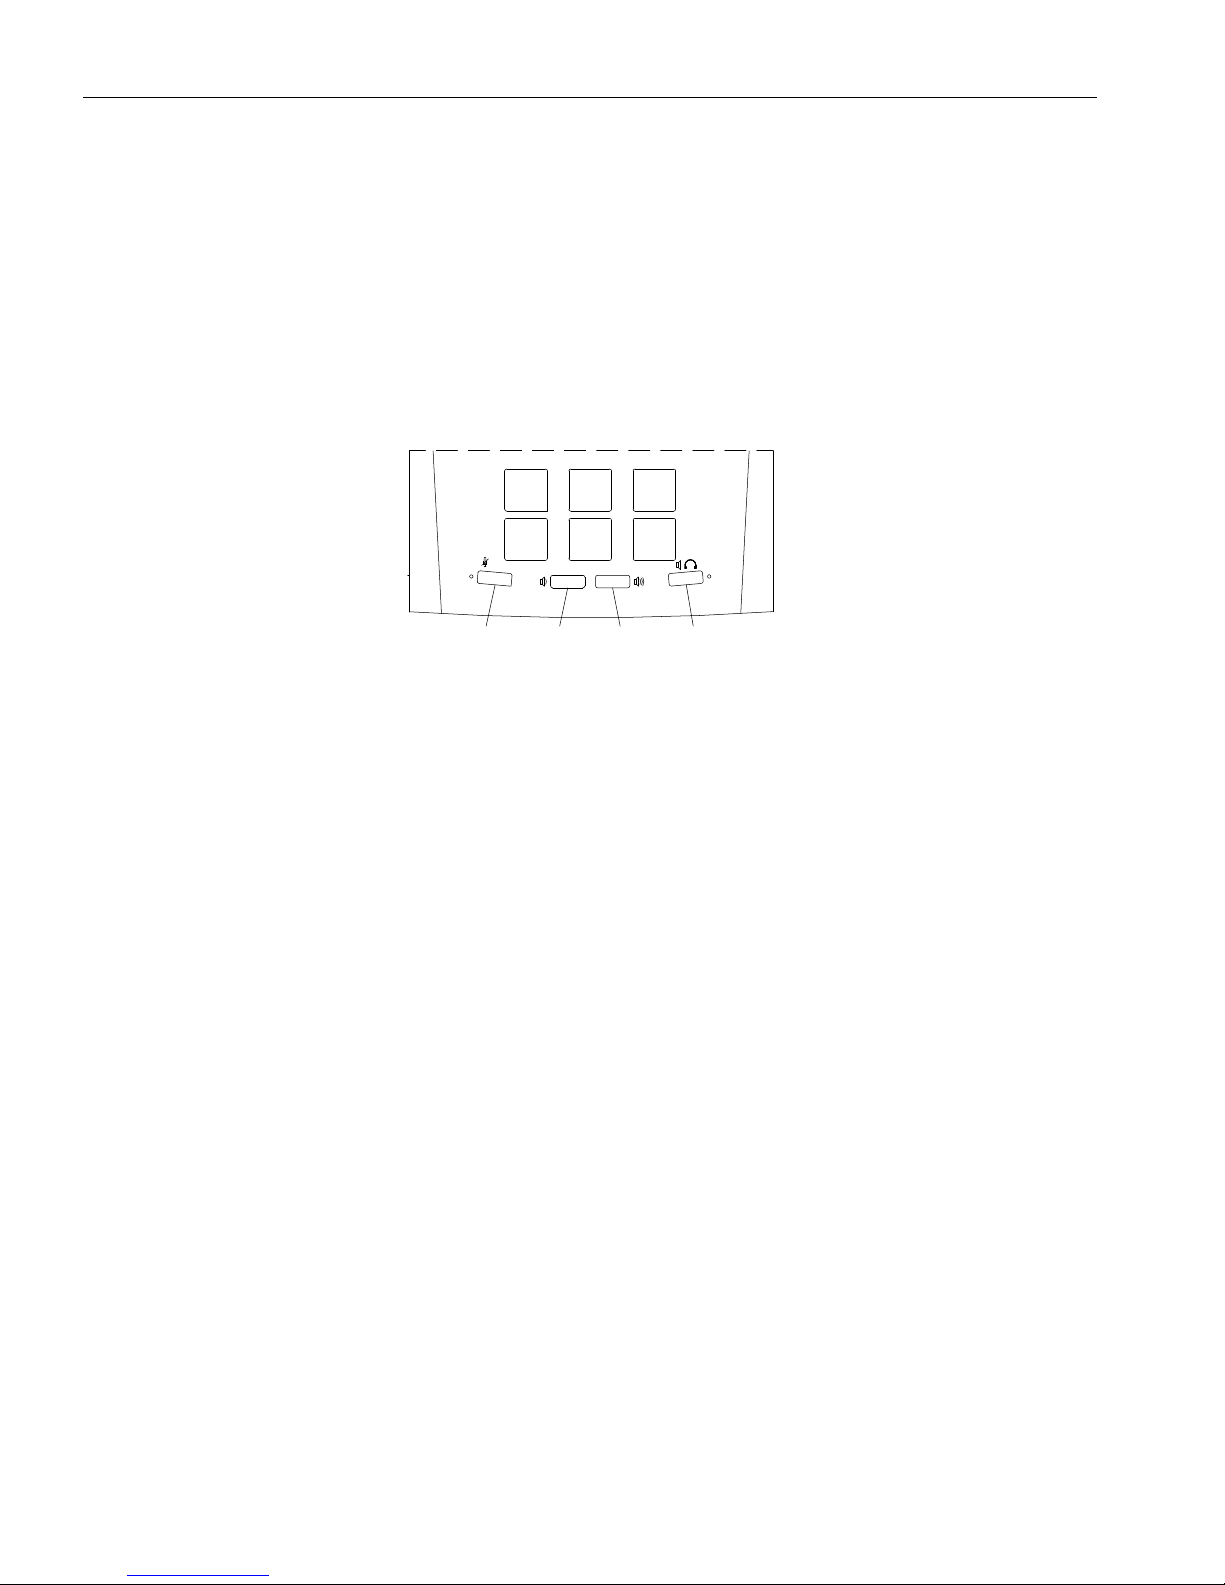
The MUTE key is used to temporarily suspend audio communication during a call. It will mute the
Master Station microphone and allow the operator to listen to the connected station. A green LED
indicates when the microphone is muted.
Two volume control keys are used to either increase or decrease the volume of the incoming speech.
The HANDS FREE key is used to allow hands free operation. A green LED comes on when the master
station is in hands free operation.
7
*
8
pqrs
0
tuv
9
wxyz
#
Microphone
Mute
Increase
Volume
Decrease
Volume
Hands Free
Operation
Audio Switches on the IMS-640
Beeper
The Master Station contains a beeper. Various conditions will cause a beep:
new alarm beep
a single tone will sound when a new call request or other alarm is received
an error beep
a single tone will sound when you press a numerical key
reminder beep
a double beep will sound at a fixed interval (from 5 to 60 seconds) as long as all call requests have not
been acknowledged.
The reminder beep interval is set in the Administrator Software.
Note: If you are in a call, the reminder beep and new alarm beep will be disabled for the duration of your call.
Once your call is completed the reminder beep and new alarm beep will automatically be re-activated.
Loudspeaker and Microphone
A loudspeaker and microphone are included in the IMS-640. They are used for hands-free communication with
Intercom Stations and other Master Stations. When using the loudspeaker and microphone to communicate, the
communication is one way at any one time so each party must take turns speaking. The Master Station operates
with a Voice operated switch (VOX) and the communication path will switch automatically so that it routes the
signal from the person speaking to the person listening.
MN-DXL-IMS-640-Pv1 Page 10
Page 17

IMS-640 VoIP Intercom Master Station Operating Instructions MicroComn DXL
Handset
The handset can also be used to communicate with Intercom Stations or other Master Stations. When the handset
is lifted from its cradle, the loudspeaker and microphone are automatically disconnected.
Handset communications to Intercom Stations are one way as for loudspeaker and microphone communications.
When speaking to another Master Station using its handset, both parties can speak and listen at the same time as
for normal telephone communications.
Page 11 MN-DXL-IMS-640-Pv1
Page 18

Page 19
IMS-640 VoIP Intercom Master Station Operating Instructions MicroComn DXL
Section 3 - Principles of Operation
Menu System
A compact Master Station requires a small display and a limited sized keyboard. To achieve this goal and still
provide the required functionality, the DXL IMS-640 uses four programmable keys (called function keys) and a
menu system that defines the function of the keys. The bottom two line of the display shows the different
functions. Each time you press a function key either the specified action will be carried out or the menu will
change allowing you to make further choices. The structure of menu system resembles an inverted tree, staring at
the top level the menu is called the “Idle menu”.
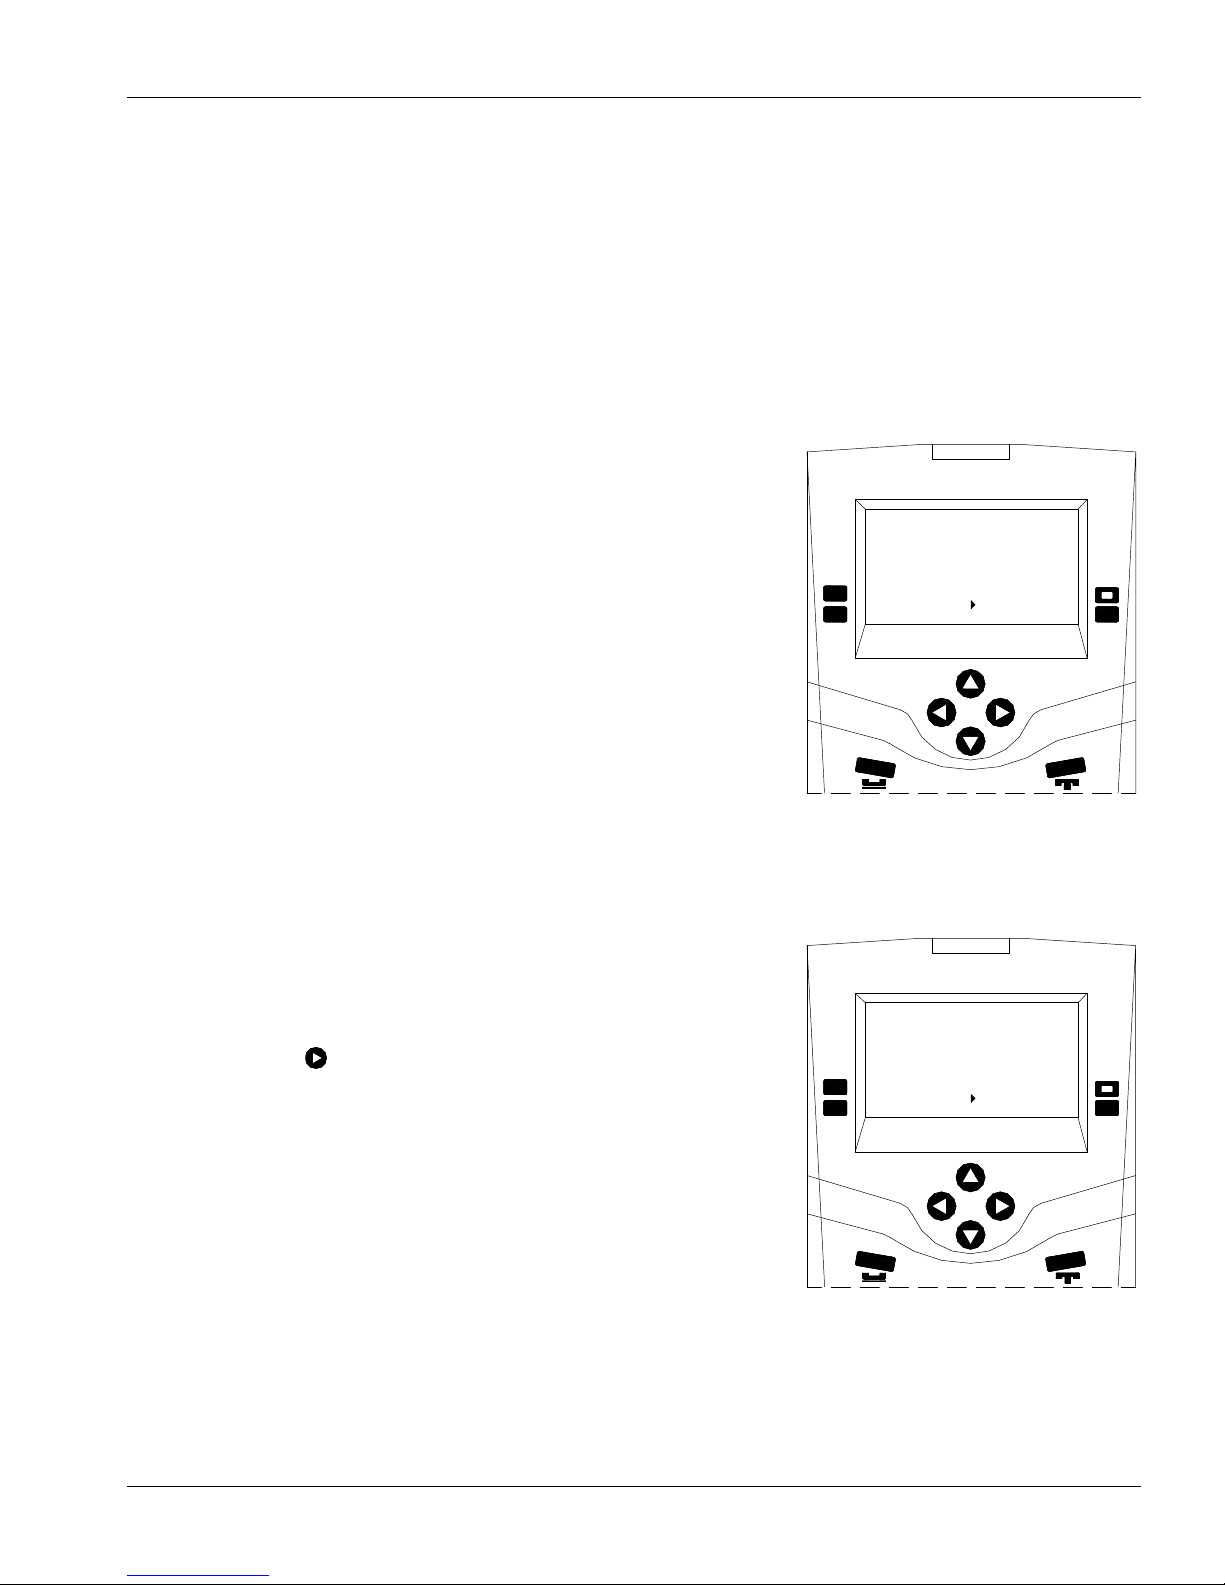
From the “Idle menu” if we press one of the function keys, for example
Call, we move down the tree to a lower level menu (similar to moving to
one of the tree branches).
Master Station #20
01:51 PM 0
Jul 8, 2008
Answer Next
Master Setup
0
0
Call
Unman
In this case the menu will change and the function keys will indicate the
various lists that can be called. These include a list of Master Stations
(Master), a list of Intercom Stations (Station), a list of Page Zones (Zone),
and a convenient entry (Last) that allows you to call the last station you
called. Pressing the
navigation key will bring up a new set of lists that
can be called.
Pressing a function key from this menu, for example “Station” will again
change the display and present the list of Stations that you may call. In
place of the menu functions the display will now indicate that you are on
the “Station” list, as well as indicate the total number of Stations on the
list.
If you press this key the ‘Call’
function is performed.
Master Station #20
01:51 PM 0
Jul 8, 2008
Master
Zone
0
0
Station
Last
Page 13 MN-DXL-IMS-640-Pv1
If you press this key the ‘Station’ list
will be displayed
Page 20
IMS-640 VoIP Intercom Master Station Operating Instructions MicroComm DXL
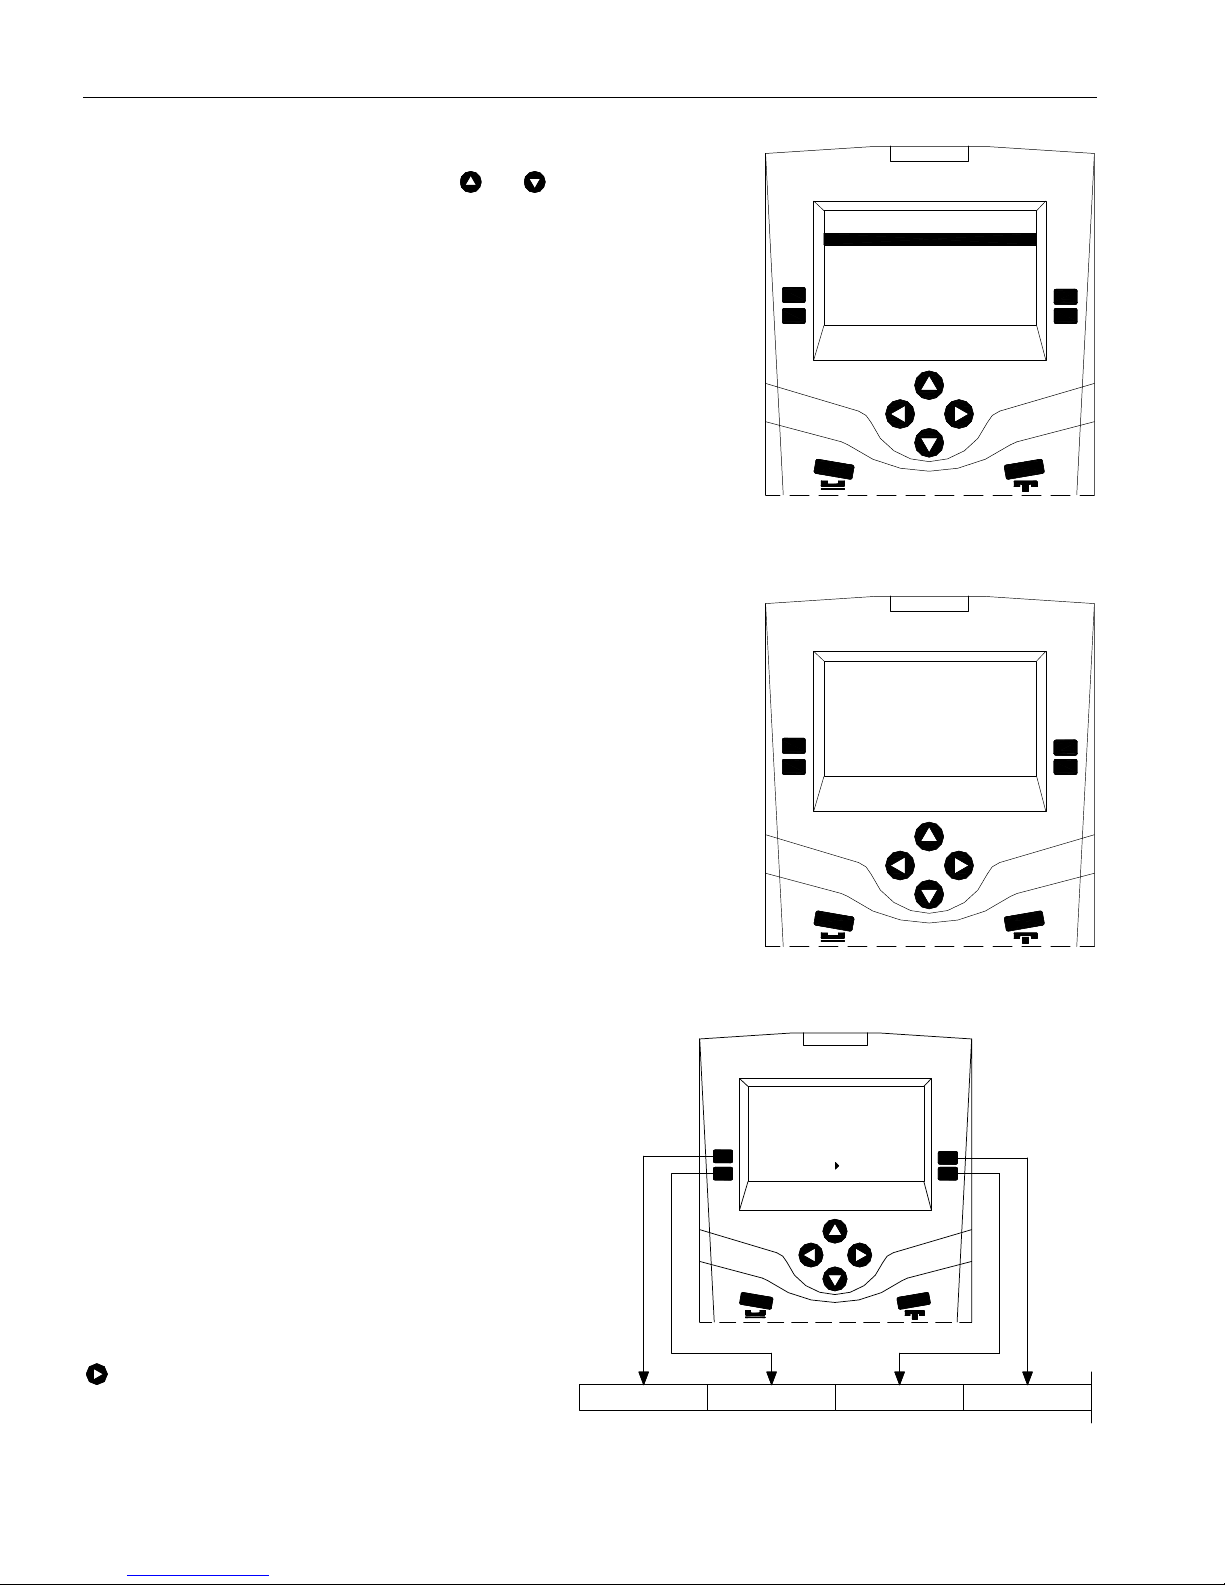
With the limited display area, three station names can be displayed at one
time; however you can use the scroll keys
list of stations until you reach the particular station you want to call.
Pressing the Accept function key will connect you to that station.
and to move through the
Master Station #20
2001 Housing1Entry 0
2001 Housing1Exit 0
2003 UnitAEntry 0
Station :131
Reject
Accept
The list of Stations that you
can call.
The menu system will now change and one of the End Call function key
will allow you to terminate the call.
Master Station #20
Connected to:
Station #2001
Housing1Entry
End Call
My Volume
0
0
0
Their Volume
Screen Display during a call
Function menus
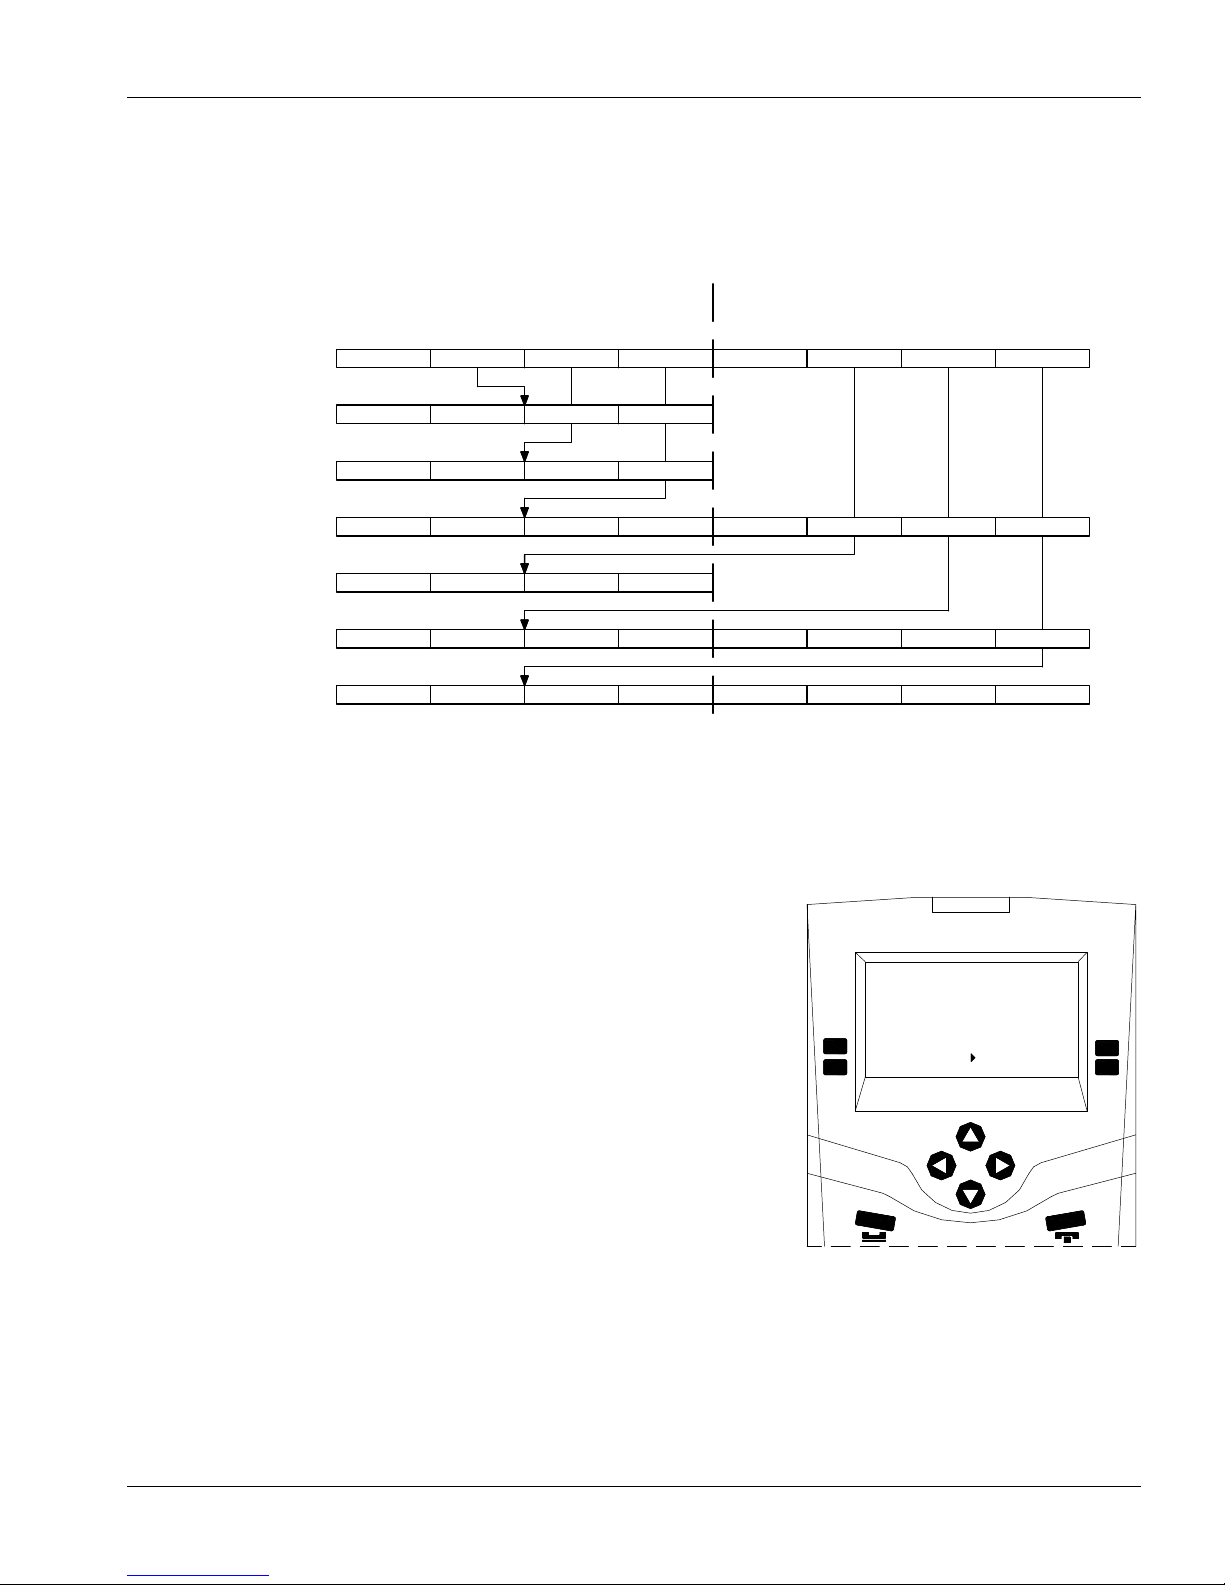
The functions have been grouped together for your
convenience into menus. A menu consists of all the
functions you can perform at a point in time. The
following diagram gives a pictorial representation of
the menus that can be reached from the top level
“Idle menu” The “Idle menu” is normally displayed
when there is no system activity. (By repeatedly
pressing the “RELEASE” key you can always return
to the “idle” menu. Often a menu will consist of two
pages; if a second page is available the right arrow in
the center of the bottom two lines of the display will
be present. Pressing the right arrow navigation key
will display the second page of the menu.
Answer Next
Master Setup
Mapping of Function keys to Representation in
MN-DXL-IMS-640-Pv1 Page 14
Master Station #20
01:51 PM 0
Jul 8, 2008
Answer Next
Master Setup
Document
0
0
Call
Unman
Unman
Call
Page 21
IMS-640 VoIP Intercom Master Station Operating Instructions MicroComn DXL
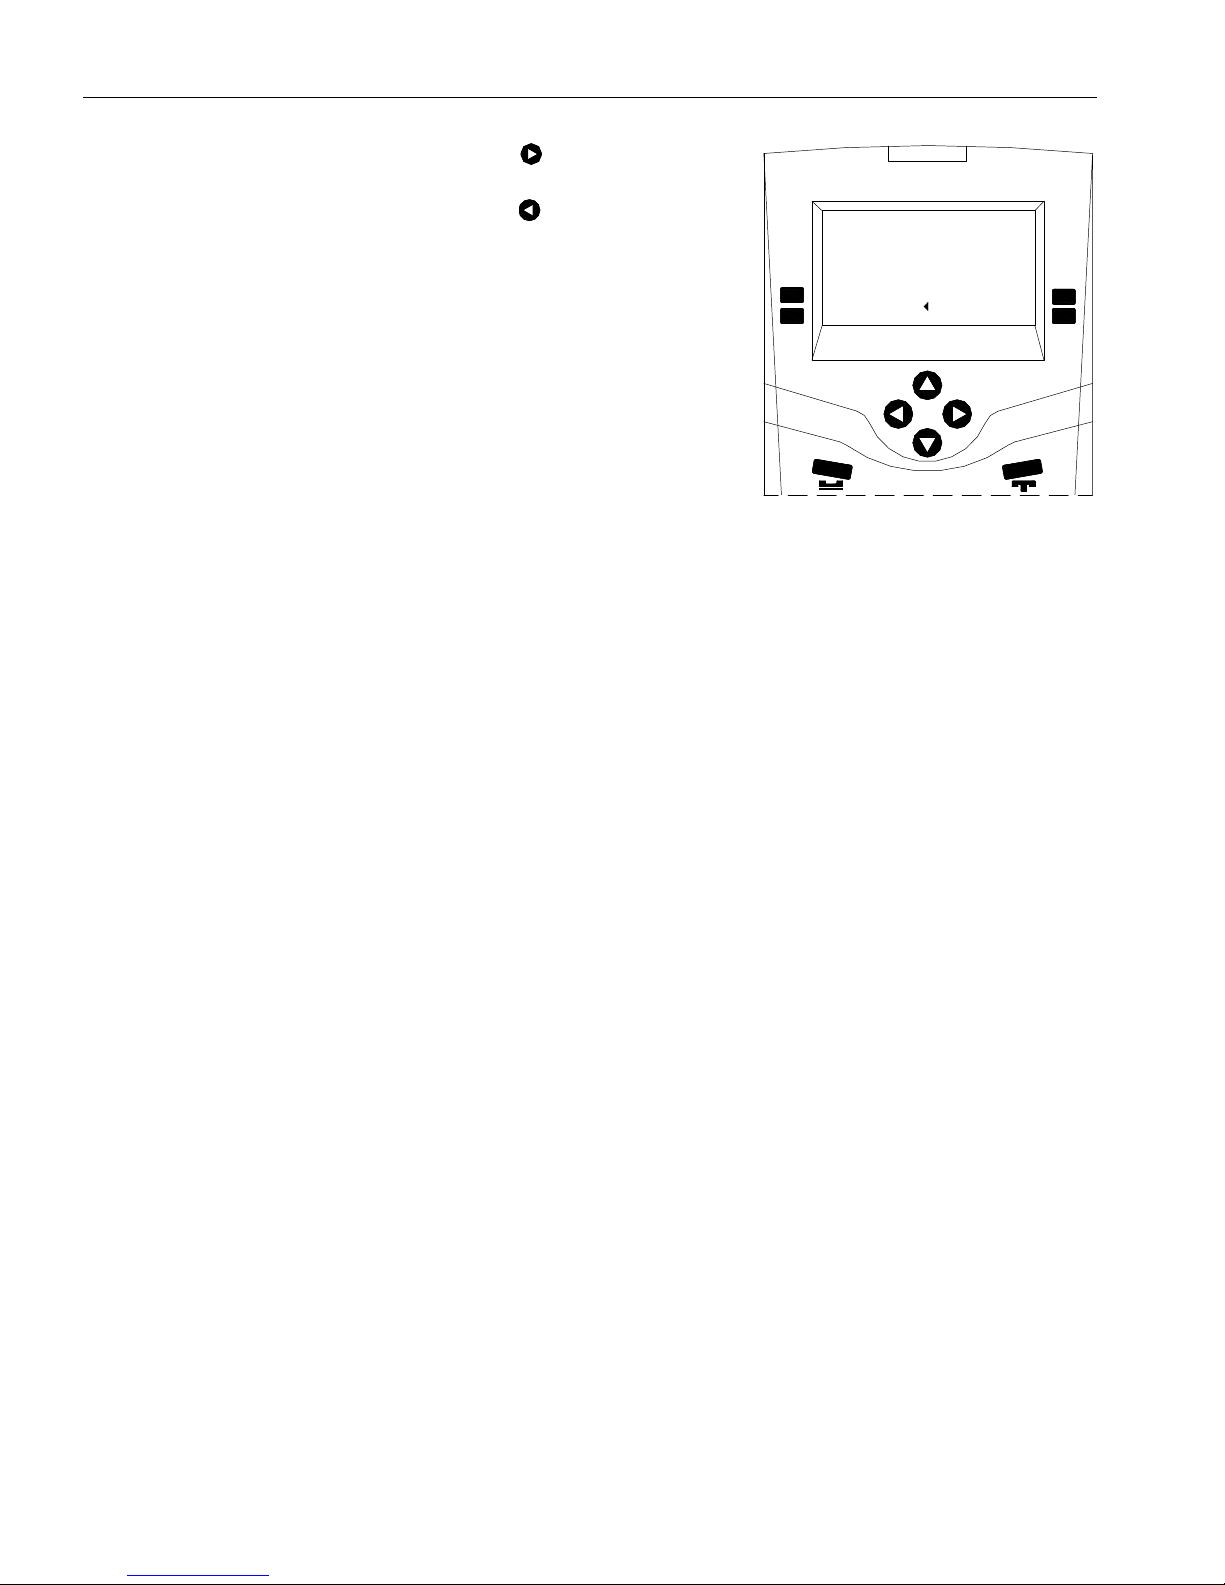
The following diagram shows the “idle” menu and the menus or lists that will be displayed by pressing the
various function keys. Pressing the Signals function key does not bring up a menu but a list of Signals that are in
the DXL configuration.
First Page of Menu Second Page of Menu
Idle Menu
Master Setup Menu
Unman Menu
Call Menu
Signals List Menu
Control Menu
Monitor Menu
Answer Next
Man
Start
Station
Station
Master Setup
Music
ZoneMaster Last
Music
Unman
Master
Background
Call
Clock Mode
Station
StationGroup
Visiting Booth
Events
Visiting Booth
Menus reached from the top level “idle” menu
Use of the Right-Arrow Key
The two bottom lines of the display shows the different functions you may
perform by pressing the ‘function key(s)’ adjacent to the display. Up to
four functions are shown at one time. Each one corresponds to the key
directly beside the function name.
If a Right-Arrow Head ► is displayed in the center of the two bottom
lines of the display line, it means there are additional functions available
on a second page of the menu.
Signals
Disabled
Control
Master Station #20
01:51 PM 0
Jul 8, 2008
Station
Music
Monitor
AcknowledgedVisiting Booth
0
0
StationGroup
Master
Page 15 MN-DXL-IMS-640-Pv1
Right-Arrow indicate more functions
available
Page 22
IMS-640 VoIP Intercom Master Station Operating Instructions MicroComm DXL
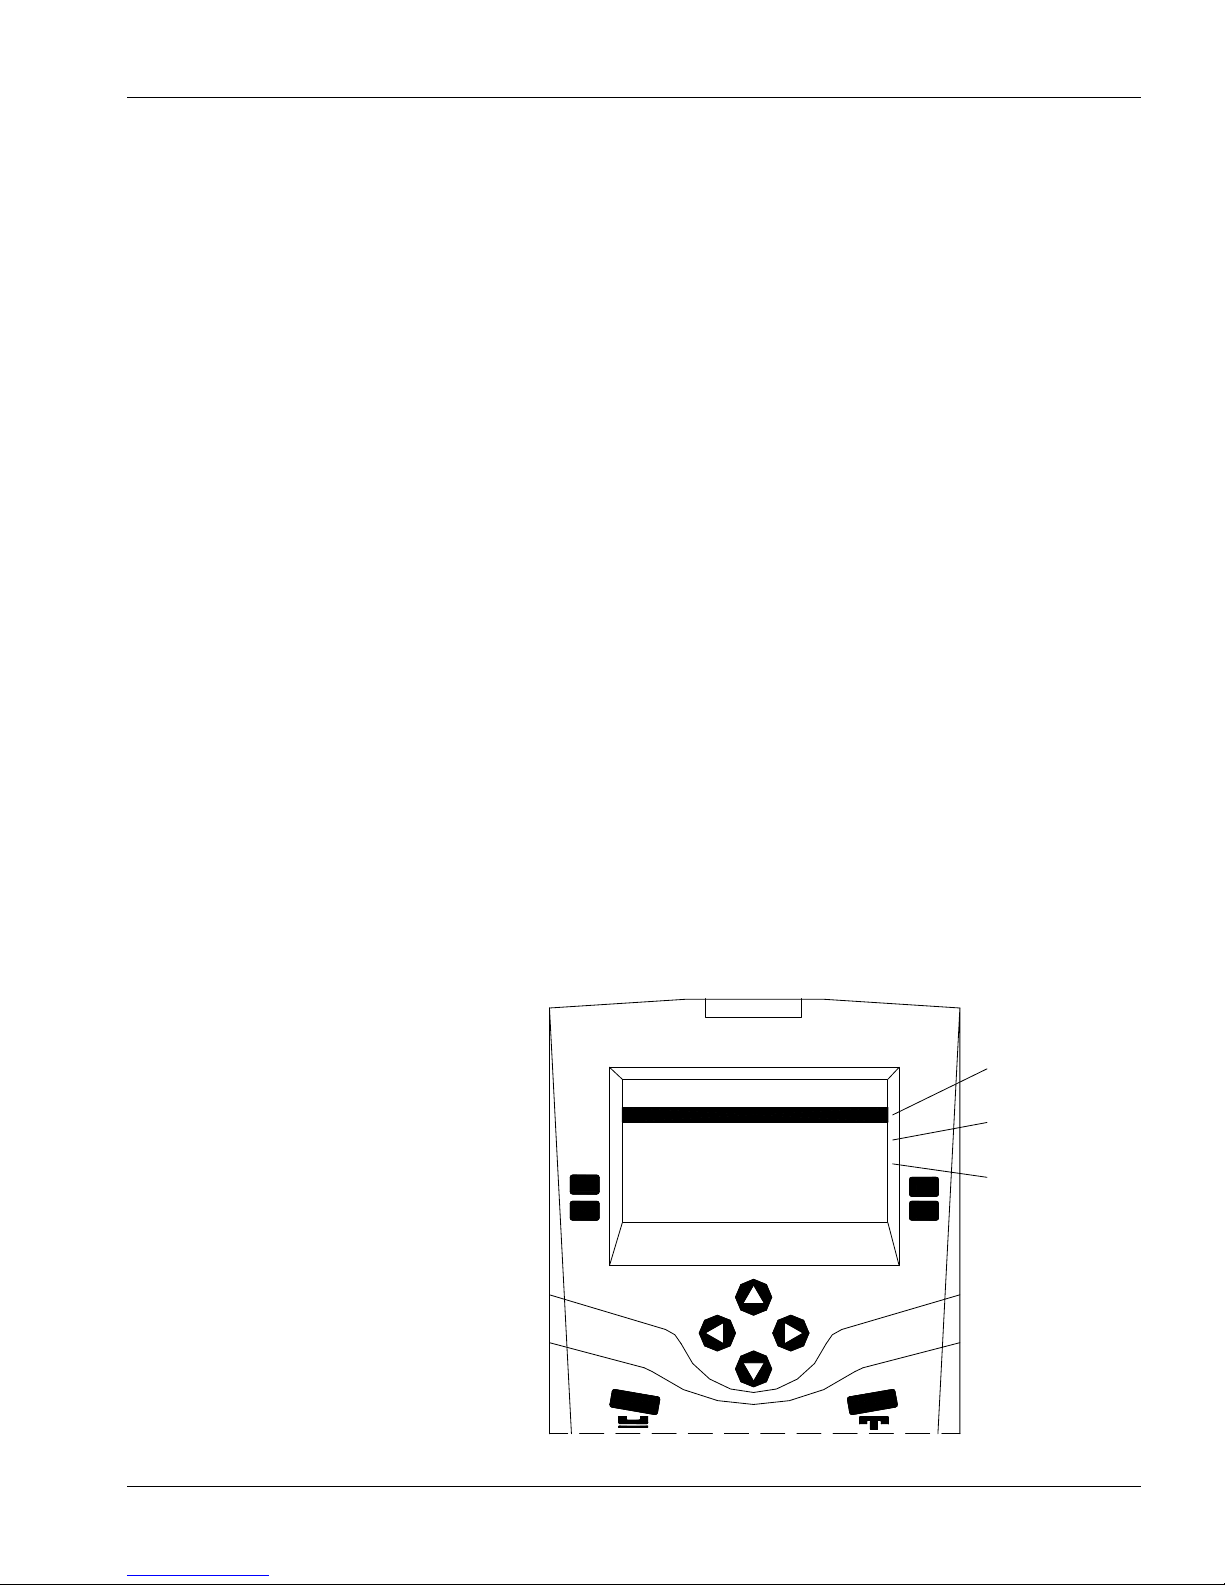
When you press the Right-Arrow navigation key
, additional functions
will appear. Notice the arrow direction in the display changes direction,
and now pressing the Left Arrow navigation key
first page of the menu.
will return you to the
Master Station #20
01:51 PM 0
Jul 8, 2008
Events
Disable
0
0
Acknowledged
VisitingBooth
Additional menu keys are displayed
List of Functions
Here is a list of functions that you may perform on the DXL system. The "function key label" is the term that will
appear on the display.
Note: Only those functions that you may use at any one time will be displayed. Pressing an unlabelled function
will do nothing.
Function
Key Label Meaning
Acknowledged After you press ‘Control’, pressing this key will cause the Acknowledged List to be displayed.
Accept Pressing this function key will make an audio connection to a selected station.
Answer Next Pressing this key will acknowledge the highest priority event in the Event Queue.
Background Pressing this key will bring up a menu which allows you to select stations or station groups
that can be added to the monitoring list.
Call When you press this key from the Idle menu the function display will allow you to select a list
of Master Stations, Page Zones, Stations or Visiting Booths that can be called.
Clock Mode After pressing ‘Master Setup’, you can adjust the time format of the clock to either display
AM/PM, or military time (MT).
Call Request Pressing this key will give you the ability to enable or disable the Call Request Button of an
Intercom Station.
Control When you press this key, the function key menu will display the types of things you can
control.
Disabled When you press this key, you will disable the station that is selected. (Remember, if the
Intercom Station that you disable has initiated a call request that has not been acknowledged,
the call request will be acknowledged when you disable the station).
Disabled After you press ‘Control’, pressing this key will cause the Disabled List to appear.
MN-DXL-IMS-640-Pv1 Page 16
Page 23

IMS-640 VoIP Intercom Master Station Operating Instructions MicroComn DXL
End Call Pressing this key from the Monitor menu will exit you from the Monitor menu and stop the
monitoring of the Station.
Events When you press this key after ‘Control’, the Event Queue is displayed.
Last Pressing this key after ‘CALL’ will place the last call made from the Master Station.
Man Pressing this key will change the status of a master station from unmanned to manned.
Monitor Pressing this key will bring up the monitoring options available.
Master When you press this key, the display will change to show you the directory list of Intercom
Station Master Stations.
Music Pressing Music from the Unman menu the display will change to show the list of music
sources that can be selected to be broadcast at the master station.
Music Pressing Music from the Control menu will change the display and allow you to select the list
of Stations, Page Zones or Station Groups that can receive programmed music.
My Volume When you press this key, you will be able to adjust the sound level for your Master Station.
This function will be available during a call.
Signal When you press this key, the function menu will change to display the list of signals that you
can activate.
Start When you press this key from the Signals list the selected signal will start.
Station Pressing this key will change the Master Station display to show the Station Directory.
Their Volume When you press this key, you be able to adjust the sound level at the Intercom Station you are
communicating with. This function is available during a call.
Unman After pressing this key will set the Master Station into Unmanned mode. A password is
required to return the master into operation.
Visiting Booth Pressing this key will change the Master Station display to show the Visiting Booth Directory.
Zone Pressing this key will change the Master Station display to show the Paging Zone Directory.
Lists
The MicroComm DXL uses two types of lists to perform its functions:
Active Lists - these are lists that change as calls and alarms are placed, acknowledged and canceled. Active
lists help you know what is happening at your station at any time.
Directory Lists - these are lists that contain all the Master Stations, Intercom Stations, paging zones, and
visitor booths that your Master Station can communicated with. Directory lists let you find stations that you
need to communicate with or control.
The number of stations on the Active Lists will vary from time to time.
The length of the Directory Lists, on the other hand, is constant.
Unless they are doing the same job, your Master Station will probably have different Directory Lists than the
other Master Stations in the system.
The following describes the Active Lists:
Page 17 MN-DXL-IMS-640-Pv1
Page 24

IMS-640 VoIP Intercom Master Station Operating Instructions MicroComm DXL
Event Queue this is a list of stations whose call requests have not been acknowledged
Acknowledged List this is a list of stations whose call requests have been acknowledged, but not canceled.
Disabled List this is a list of stations that have been disabled
Last Call List this list always contains only one entry. You use it to recall the last station you were
talking to. Every time you talk to a different station, this list is updated.
Monitor List this is a list of all intercom stations that are automatically monitored in sequence.
The following describes the Directory Lists:
Station List this is a list of all Intercom Station that can communicate with your Master Station
Station Group list this is a list of all Station Groups that can be controlled with your master station
Master List this is a list of all Master Stations that can communicate with your Master Station
Paging Zone List this is a list of all paging zones that you can make announcements to from your Master
Station.
Signal List this is a list of signals that your Master Station can activate.
Visiting Booth List this is a list of all visiting booth stations that you can communicate with, monitor, and
control their on/off status.
How Lists are Displayed
The display on your Master Station is divided into three parts:
Alarm Code and ID Number and Name for each station on the list
Note: A maximum of three stations can be displayed at one time.
The current list sizes of the Event Queue, Acknowledged List and Disabled List. These values appear on the
right-hand side of the display in the top three rows. They are always displayed.
Remember that these lists vary in size from time to time. Even if the list size is zero, a value will still appear.
A set of functions that you can perform by pressing the function keys immediately beside the display.
Let's look at this information in more detail:
Alarm Code
The alarm code indicates the type of alarm that has been received:
Alarm Code Meaning
I Intercom Station Call Request
A Audio Level Alarm Call Request
t Call Request Time-out Alarm
d Disabled Station Alarm
M Master Station or Staff Call Request
F Fault Alarm
MN-DXL-IMS-640-Pv1 Page 18
Page 25
IMS-640 VoIP Intercom Master Station Operating Instructions MicroComn DXL
T Tamper Alarm
Note: t and d alarms are displayed only at the Secondary Master Station.
ID Number and Name
All the stations in your facility are identified by ID Number and Name. The ID Number is a numeric value
(between 1 and 65,535) assigned to the given station. It has no special significance other than the fact that it is a
unique identification for that station only. The Name describes the Station in terms commonly used in your
facility. The Name may contain any characters, including numbers and punctuation and it may be up to 20
characters long. On the display Stations are identified by both ID Number and Name
List Order
Each list has its own default order. The default order is the order in which the DXL normally displays the Stations
on that list.
Event Queue
Stations are sorted according to call request priority. (The DXL Administrator Software is used to set the
priorities of the Intercom Stations.) If two or more Stations have equal priority, they will appear in the order
in which their call requests were received.
Acknowledged List
Stations are sorted in the order in which they were acknowledged.
Disabled List
The Disabled List display stations in order of Station ID Numbers.
Directory Lists
The order will be by ID Number.
List Sizes
The three numbers on the right hand side of
the display indicate the current number of
Stations on each of the three variable-length
lists:
2001
TOP -- Event Queue
MIDDLE -- Acknowledged List
BOTTOM -- Disabled List
Remember that these values will vary. At
any one time, the list size may be zero or
some number up to the total number of
stations
2002 Housing1Exit 2
2003 UnitAOuterExit 6
Reject
Master Station #20
Housing1Entry
Station :131
Accept
Number of Stations
in Event Queue
7
Number of Stations
in Acknowledge List
Number of Stations
in Disabled List
Page 19 MN-DXL-IMS-640-Pv1
Page 26

IMS-640 VoIP Intercom Master Station Operating Instructions MicroComm DXL
MN-DXL-IMS-640-Pv1 Page 20
Page 27
IMS-640 VoIP Intercom Master Station Operating Instructions MicroComn DXL
Section 4 - Intercom Procedures
How to Select a List
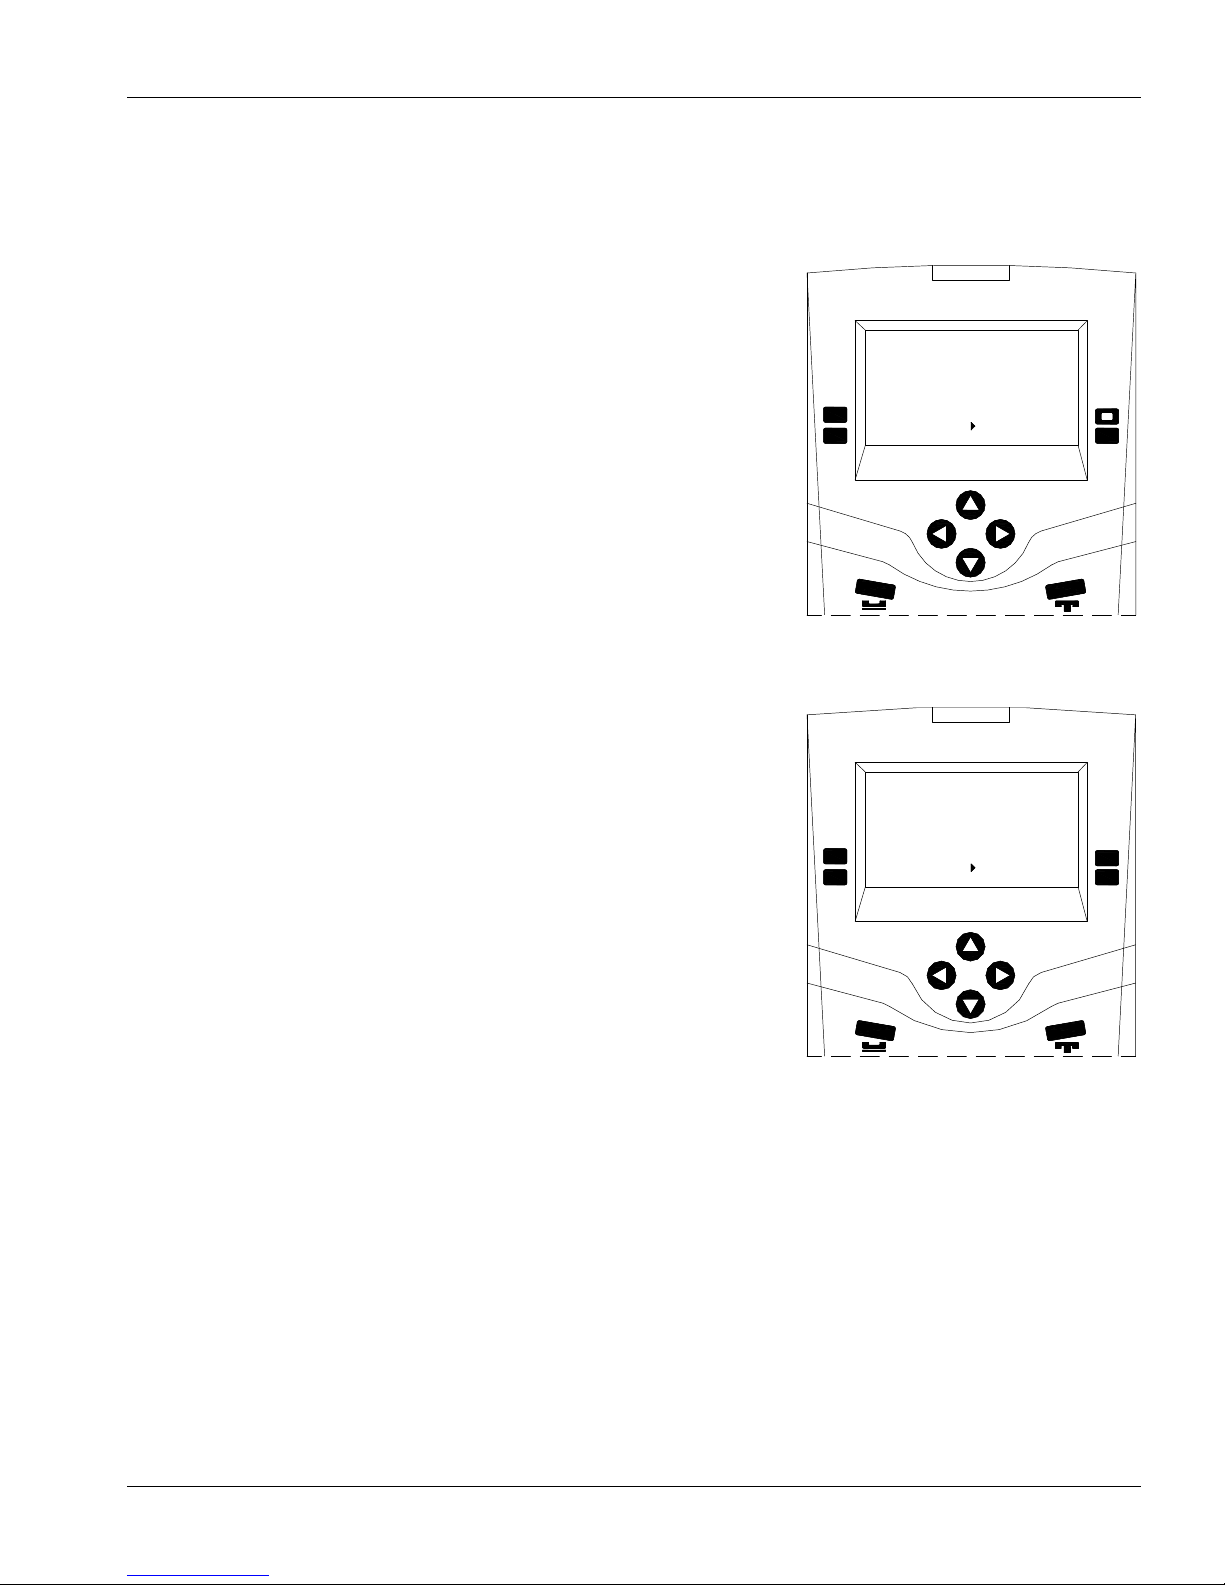
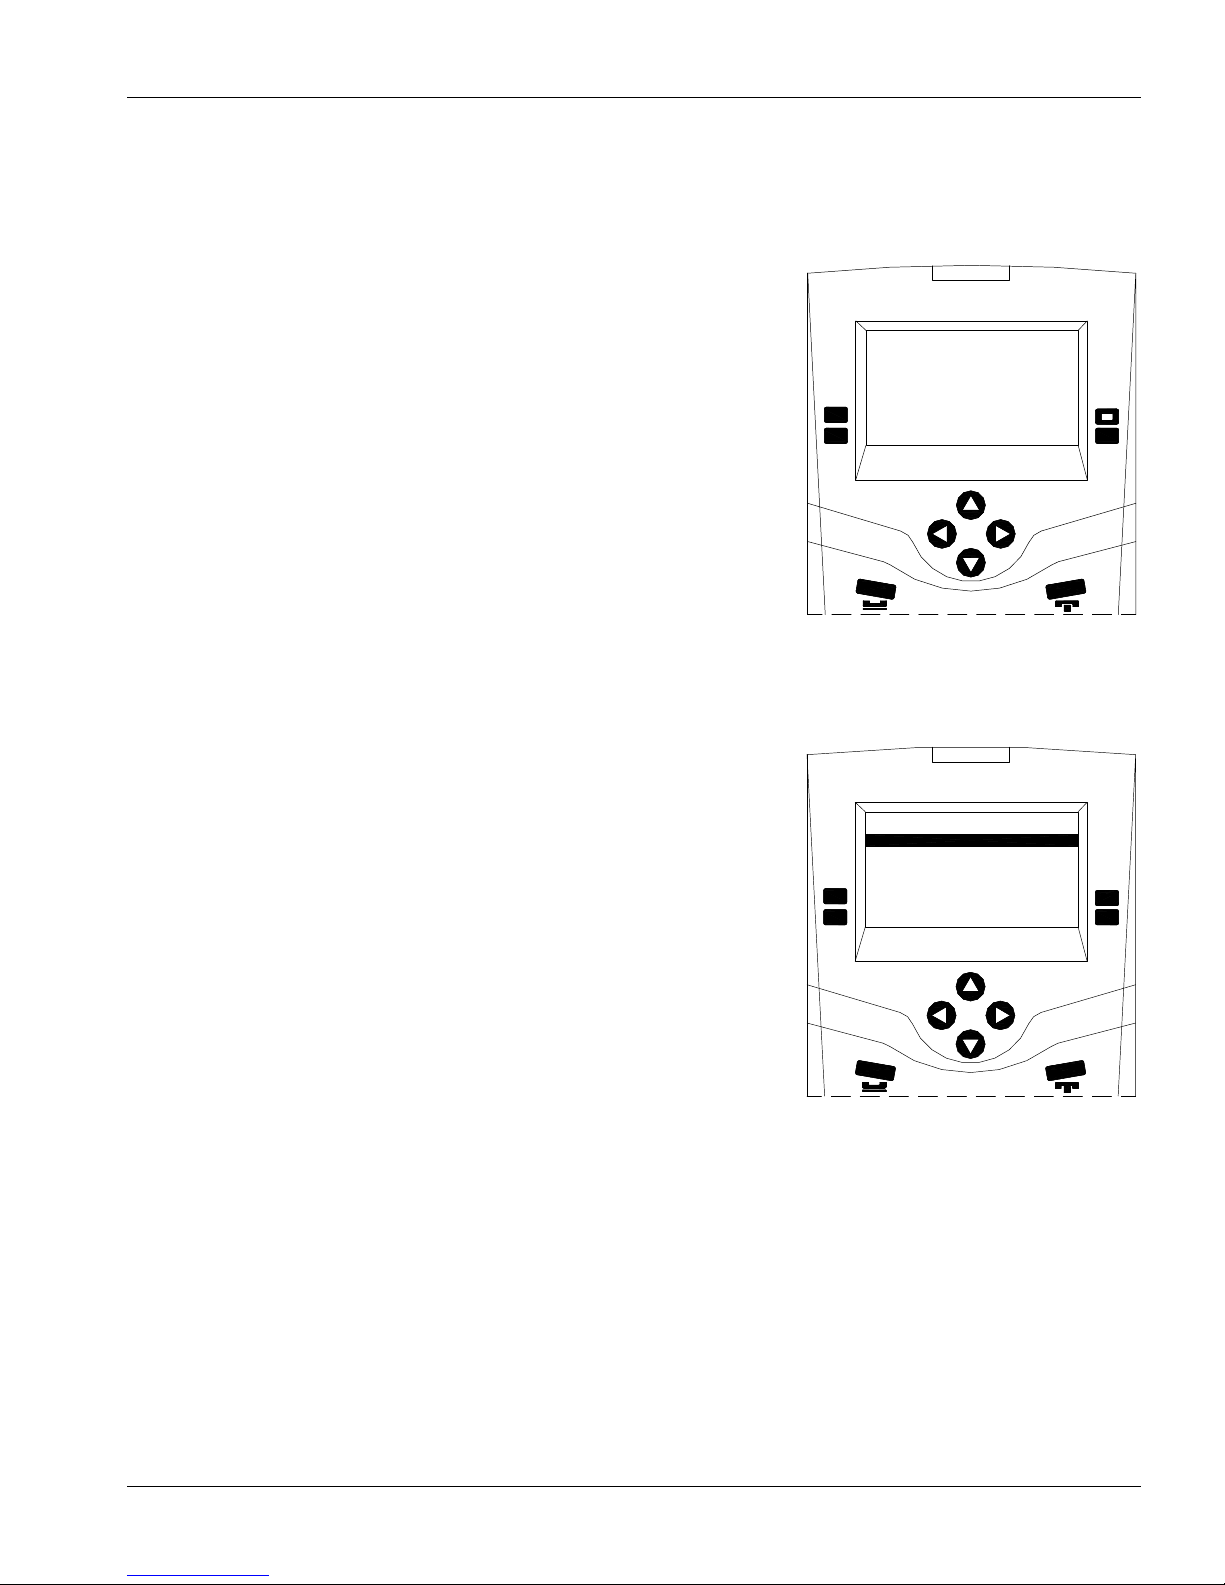
You can select a list through the Call, Signal, Control, and Monitor
functions on the “idle” menu. Which function key you choose is based
upon the operation you wish to perform.
Once you select one of the functions you wish to perform, the list of
available devices you can select is displayed.
Master Station #20
01:51 PM 0
Jul 8, 2008
Answer Next
Master Setup
0
0
Call
Unman
Master Station “Idle”
menu.
For example, if you select the Call function, you can then select whether
you wish to call a Master Station, Paging Zone, Intercom Station or
Visiting Booth.
Master Station #20
01:51 PM 0
Jul 8, 2008
Master
Zone
0
0
Last
Station
When “Call” is pressed, the above
choices appear
.
If you decide to call an Intercom Station, press the Station function key to display the Intercom Stations that are
available for your master station.
Page 21 MN-DXL-IMS-640-Pv1
Page 28
IMS-640 VoIP Intercom Master Station Operating Instructions MicroComm DXL
How to Select a Station
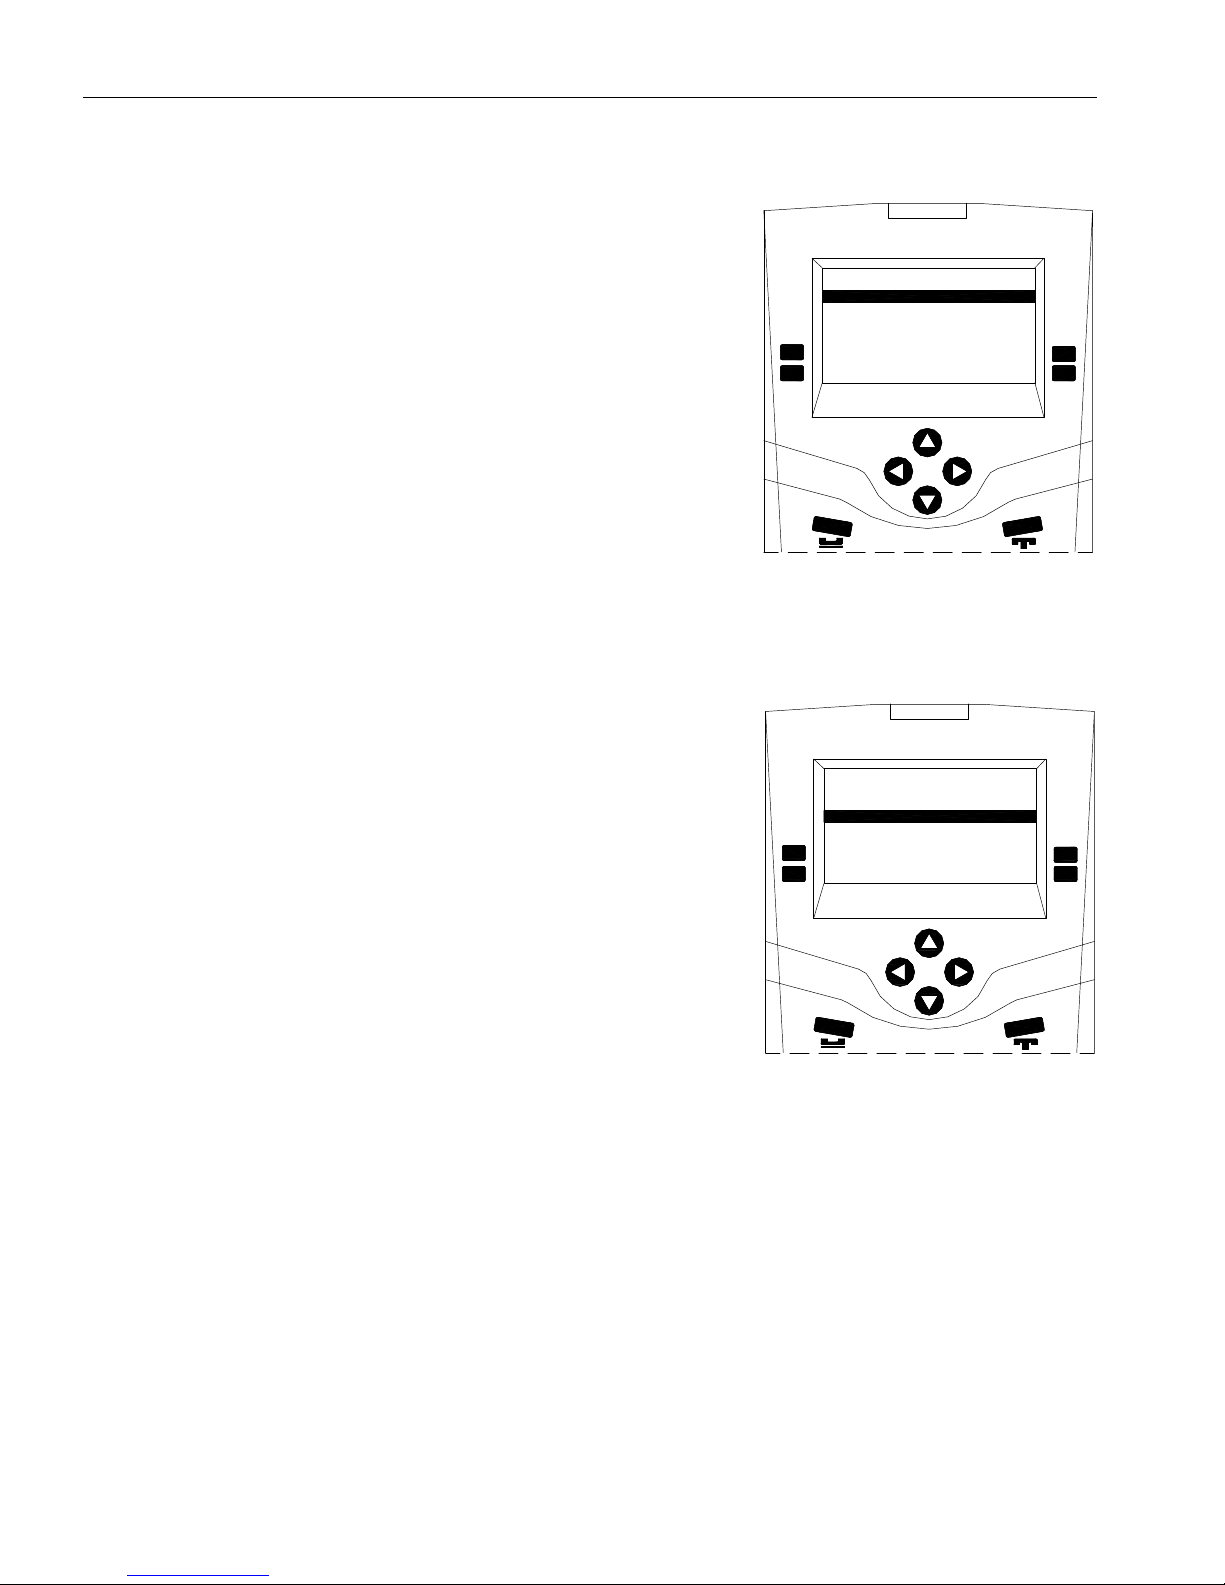
Before you perform a function, the station you want must be selected. The
selected station will be displayed with a dark background
If you station you want is not currently selected, you can scroll through
the Station List to the station you want - see the next heading for scrolling.
As shown on the right the top station is currently selected
Master Station #20
2001 Housing1Entry 0
2001 Housing1Exit 0
2003 UnitAEntry 0
Station :131
Reject
Accept
Scrolling
If the station you want is not selected, you can use the Up-Arrow key
(“”) and Down-Arrow key (“") to scroll up or down the list. Each time
you press the arrow key, you will move up or down the list by one station.
When “Station” is pressed, the list of
Intercom Stations appears.
Master Station #20
2001 Housing1Entry 0
2002 Housing1Exit 0
2003 UnitAOuterEntry 0
Station :131
Reject
Accept
The second Station is selected
If you know the ID Number of the Station
If you know the ID Number, you can select the station directly by simply typing in the Station ID Number. For
example if you press “2” “0” “0”; “2” you will be connected to the Station with ID Number 2002.
MN-DXL-IMS-640-Pv1 Page 22
Page 29
IMS-640 VoIP Intercom Master Station Operating Instructions MicroComn DXL
A Shortcut to Help With Long Lists
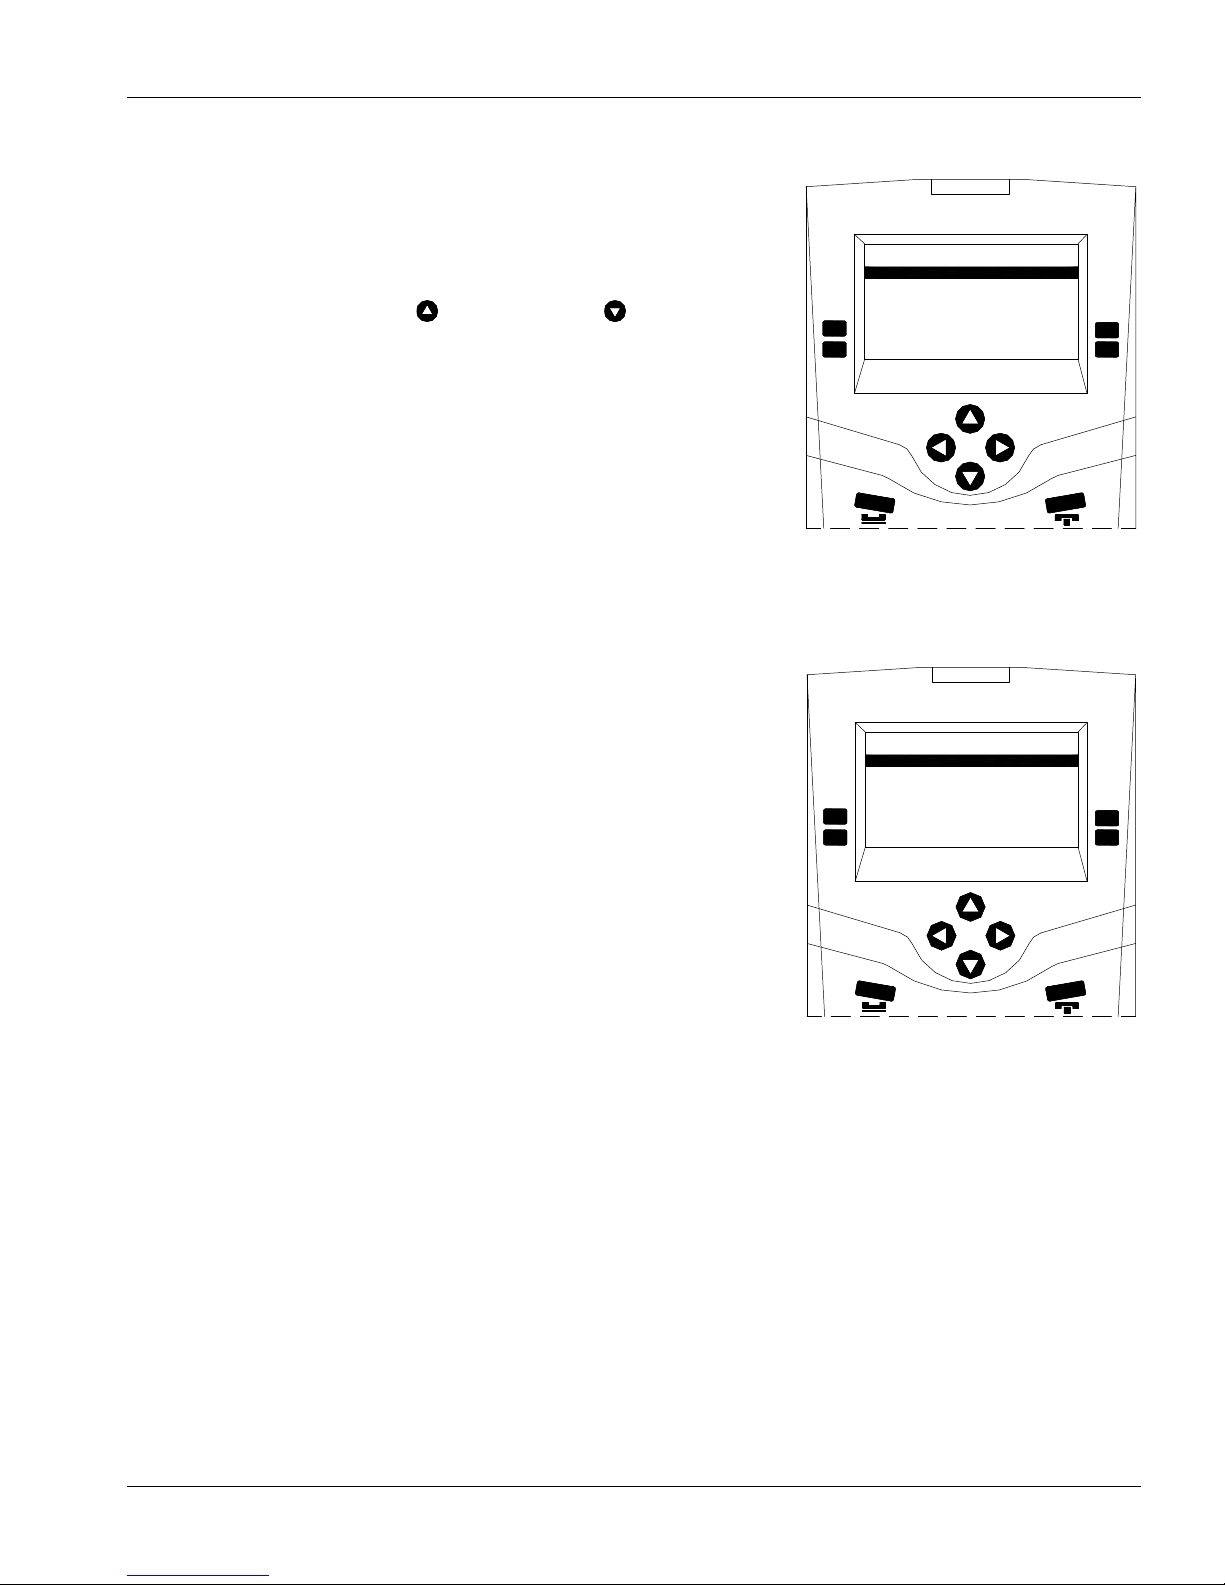
For lists that are sorted by ID Number you can sometimes shorten the list
of displayed stations by typing in the first number of the station i.e. by
typing in a “2” only the stations with ID numbers that start with “2” will
be displayed.
Now you can use the Up-Arrow
and Down-Arrow keys to scroll
through the shortened list to make your final selection.
Let’s say the ID Number of the station you want starts with a “2”. Press
“2” and only those stations beginning with ID Numbers beginning with
“2” will be displayed - this would include “2”, “20 …29”, “200 …299”,
“2000”, “2001” … “2999”, etc.
At any point you can stop and use the Up-Arrow and Down-Arrow keys
Master Station #20
2001 Housing1Entry 0
2002
Housing1Exit 0
2003 UnitAEntry 0
Station :131
Reject
Accept
to make your final selection.
If you know the second digit typing it in will further reduce
Station List – only those Stations whose ID
numbers begin with “2” are displayed
the displayed list of stations. In this example the list contains
131 stations.
If you now type in a “0” only those stations with ID numbers that start
with “20” will be displayed. In this example the displayed list is shortened
and contains only 32 stations.
Station List – only those stations whose ID
numbers begin with “20” are displayed
Master Station #20
2001 Housing1Entry 0
2002
Housing1Exit 0
2003 UnitAEntry 0
Station :32
Reject
Accept
To Back Out of Your Selection
If you press “RELEASE”, you will “back out” of your selection - in the reverse order in which you enter the
digits. Each time you press “RELEASE”, you go back one key stroke.
Example: Let’s say you enter “2” “0”. The list will display only stations whose ID Numbers begin with
“20”. If you now press “RELEASE” once, the list will display only those stations whose ID Numbers
begin with “2”. If you press “RELEASE” again, the entire list will be displayed. If you press
“RELEASE” again you will return to a previous menu.
Page 23 MN-DXL-IMS-640-Pv1
Page 30
IMS-640 VoIP Intercom Master Station Operating Instructions MicroComm DXL
Making a Call to a Station
This procedure is used for making a call to an Intercom Station.
You may call an Intercom Station from any list on which it appears.
Reminder: When you acknowledge a call request from the Event Queue, you will automatically be
connected to the Intercom Station.
Caution: If you call a station from the Station List or from the Disabled List and that station is also listed
on the Event Queue, the system will treat your call as though you had acknowledged the call request.
In this example, we will make a call from the Station List.
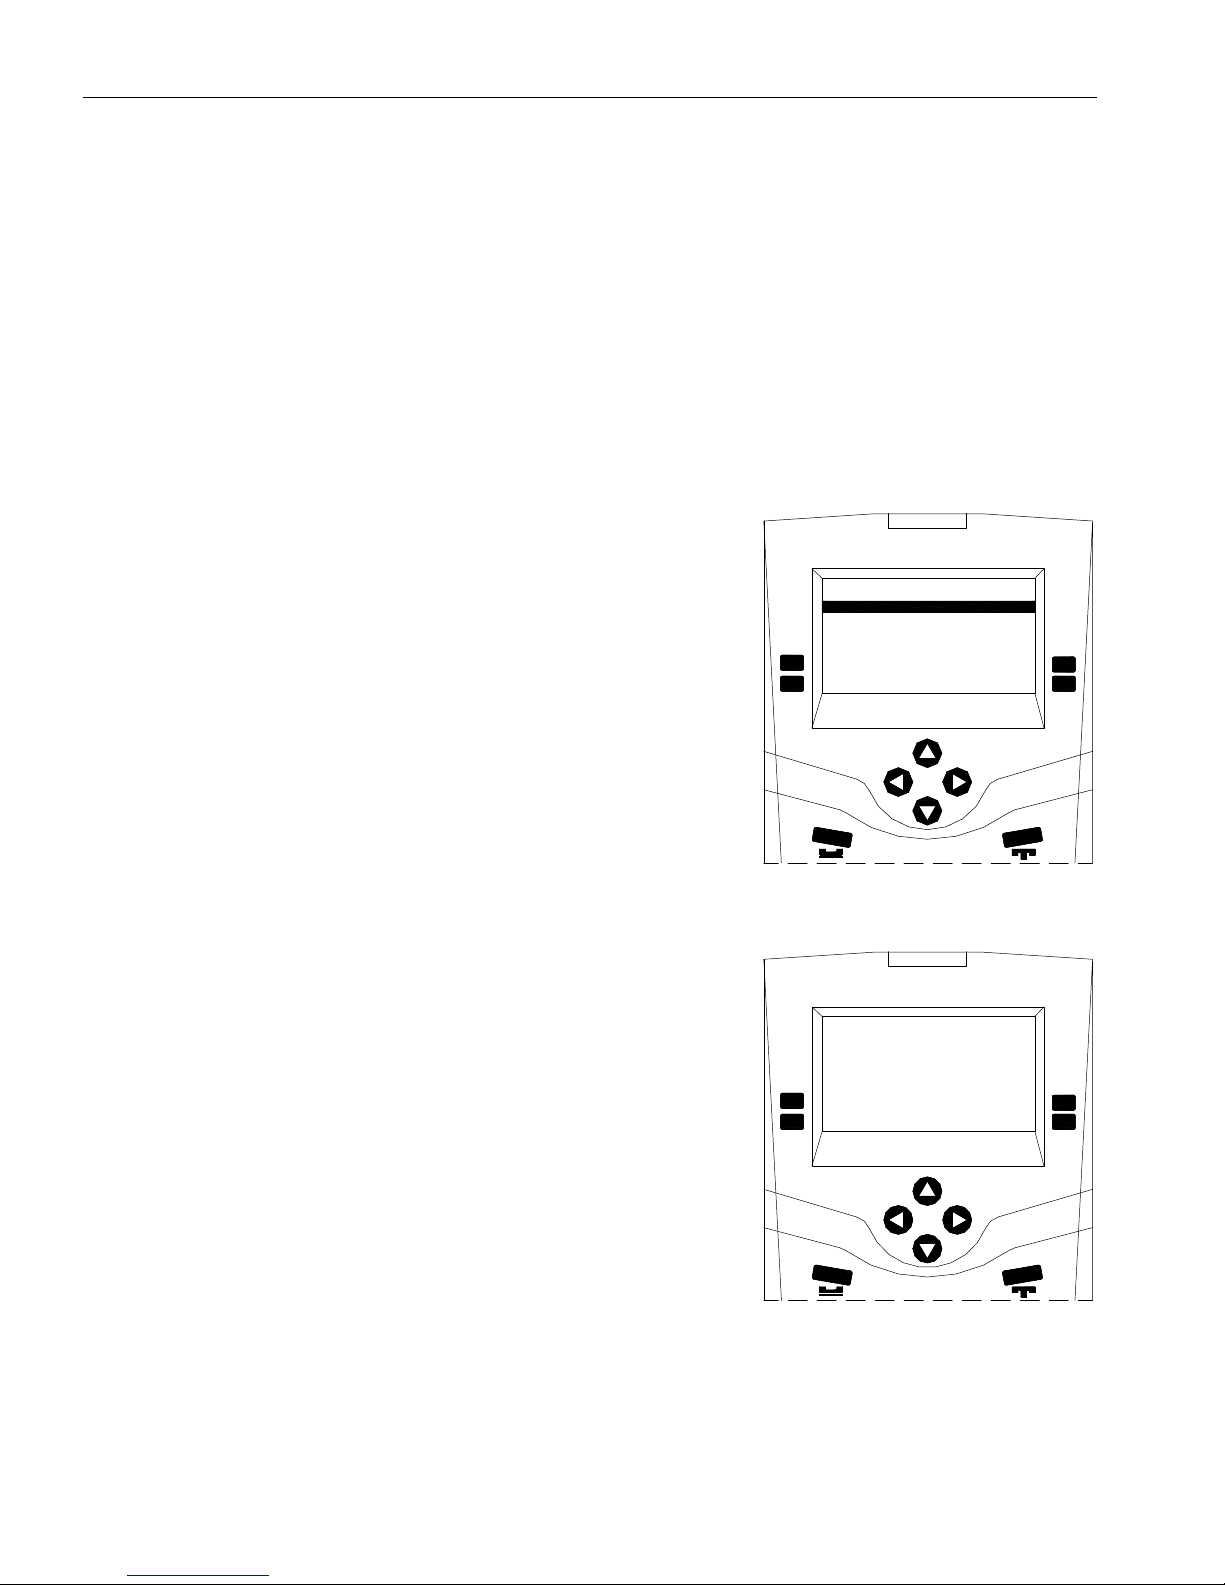
To access the Station List press Call
followed by Station. Now select the Station
you want from the Station List.
Master Station #20
2001 Housing1Entry 0
2002
Housing1Exit 0
2003 UnitAEntry 0
Station :131
Reject
Accept
When you press the Accept function key the screen displays the ID
Number and Name of the station you are calling. You are now connected
to the station.
Through the loudspeaker, handset, or headset, you will be able to hear the
audio at the station.
To speak to the intercom, use the station mic (located next to the
loudspeaker), the handset, or the headset.
When you have finished your conversation, press the End Call function
key. You will return to the Main Menu.
Station List
Master Station #20
Connected to: 0
Station #2001
Housing1Entry
End Call
My Volume
Their Volume
0
0
MN-DXL-IMS-640-Pv1 Page 24
Press “End Call”’ when you have
completed the call
Page 31
IMS-640 VoIP Intercom Master Station Operating Instructions MicroComn DXL
Functions Available When You are Making a Call
The following functions are available for you to use during a call:
End Call This key will terminate the call and return you to the ‘Idle menu’.
My Volume This key allows you to adjust the sound volume at your Master Station.
Their Volume This key allows you to adjust the sound volume at the Intercom Station to which you are
connected.
Note: When you change the sound volume at an Intercom Station, the new value can be saved and is re-used
on subsequent calls to that station.
See Level Setting Adjustments below.
Level Setting Adjustments
This procedure is used to adjust sound volume at the Master Station (“My Volume”), and the sound volume at the
Intercom Station (“Their Volume”).
The current setting is displayed as a bar (on the bottom line of the display), replacing the function menu.
There are two ways to adjust the setting:
You may use the Up-Arrow key
and Down-Arrow key to adjust the level of the Master Volume or
Station Volume, or
You may press the numbers on the keypad - a “0” gives you the lowest setting; a “7”, “8” or “9” gives
you the maximum setting. Other numbers give settings in between.
Note: If at any time, you want to return to your initial setting,
press “RELEASE”.
After you have adjusted the setting press the Accept function key to save
your setting. You will return to the display from which you started. The
function menu will once again be displayed on the bottom line of the
display.
The display at the right is appears when you select My Volume function
Master Station #20
Connected to: 0
Station #2001
Housing1Entry
l l l l
Vol:
Cancel
key while you are connected to a Station. If you press the Accept function
key the setting will be saved, if you press the Cancel function key you
will return to the original setting.
Display while adjusting incoming volume
levels.
0
0
Accept
Page 25 MN-DXL-IMS-640-Pv1
Page 32

IMS-640 VoIP Intercom Master Station Operating Instructions MicroComm DXL
Call Requests
When a call request is received, the Master Station will beep and the Intercom Station initiating the call request
will be added to the Event Queue (according to priority and order received).
You may ignore the call request for the time being, or you may acknowledge it immediately.
Caution: If you do not respond promptly to the call request:
a call request reminder beep will sound periodically to remind you that the call request has not been
acknowledged, and
after an interval, a call request time-out alarm may be annunciated at the Secondary Master Station.
Responding to a Call Request
If you are in the Idle menu and the Event Queue is empty the display will show the current time and date. As soon
as a call is received the Event Queue will be displayed (The Event Queue will always be displayed in the ‘Idle
menu’ if there are unacknowledged events). If the incoming call request is the only entry in the event queue it will
be selected you can respond to the call by pressing the Answer Next function key.
Acknowledging the Call Request
To acknowledge the top call request in the queue, press the Answer Next function key.
To acknowledge a call request that is selected, press the Accept function key.
You will be connected to the Intercom Station that you have selected. A tone will sound at the Intercom Station,
and the call indicator light (if present) will go on to indicate that your Master Station is connected to the Intercom
Station.
You may now speak to the Intercom Station, if you wish.
Ending the Call
To end a call with which you have been communicating with, press the End Call function key. This will
disconnect you from the Intercom Station that you were communicating with. A tone will sound at the Intercom
Station, and the call indicator light (if present) will turn off to indicate that your Master Station is no longer
connected to the Intercom Station.
MN-DXL-IMS-640-Pv1 Page 26
Page 33
IMS-640 VoIP Intercom Master Station Operating Instructions MicroComn DXL
Section 5 – Enabling and Disabling Stations
Enabling/Disabling Intercom Stations
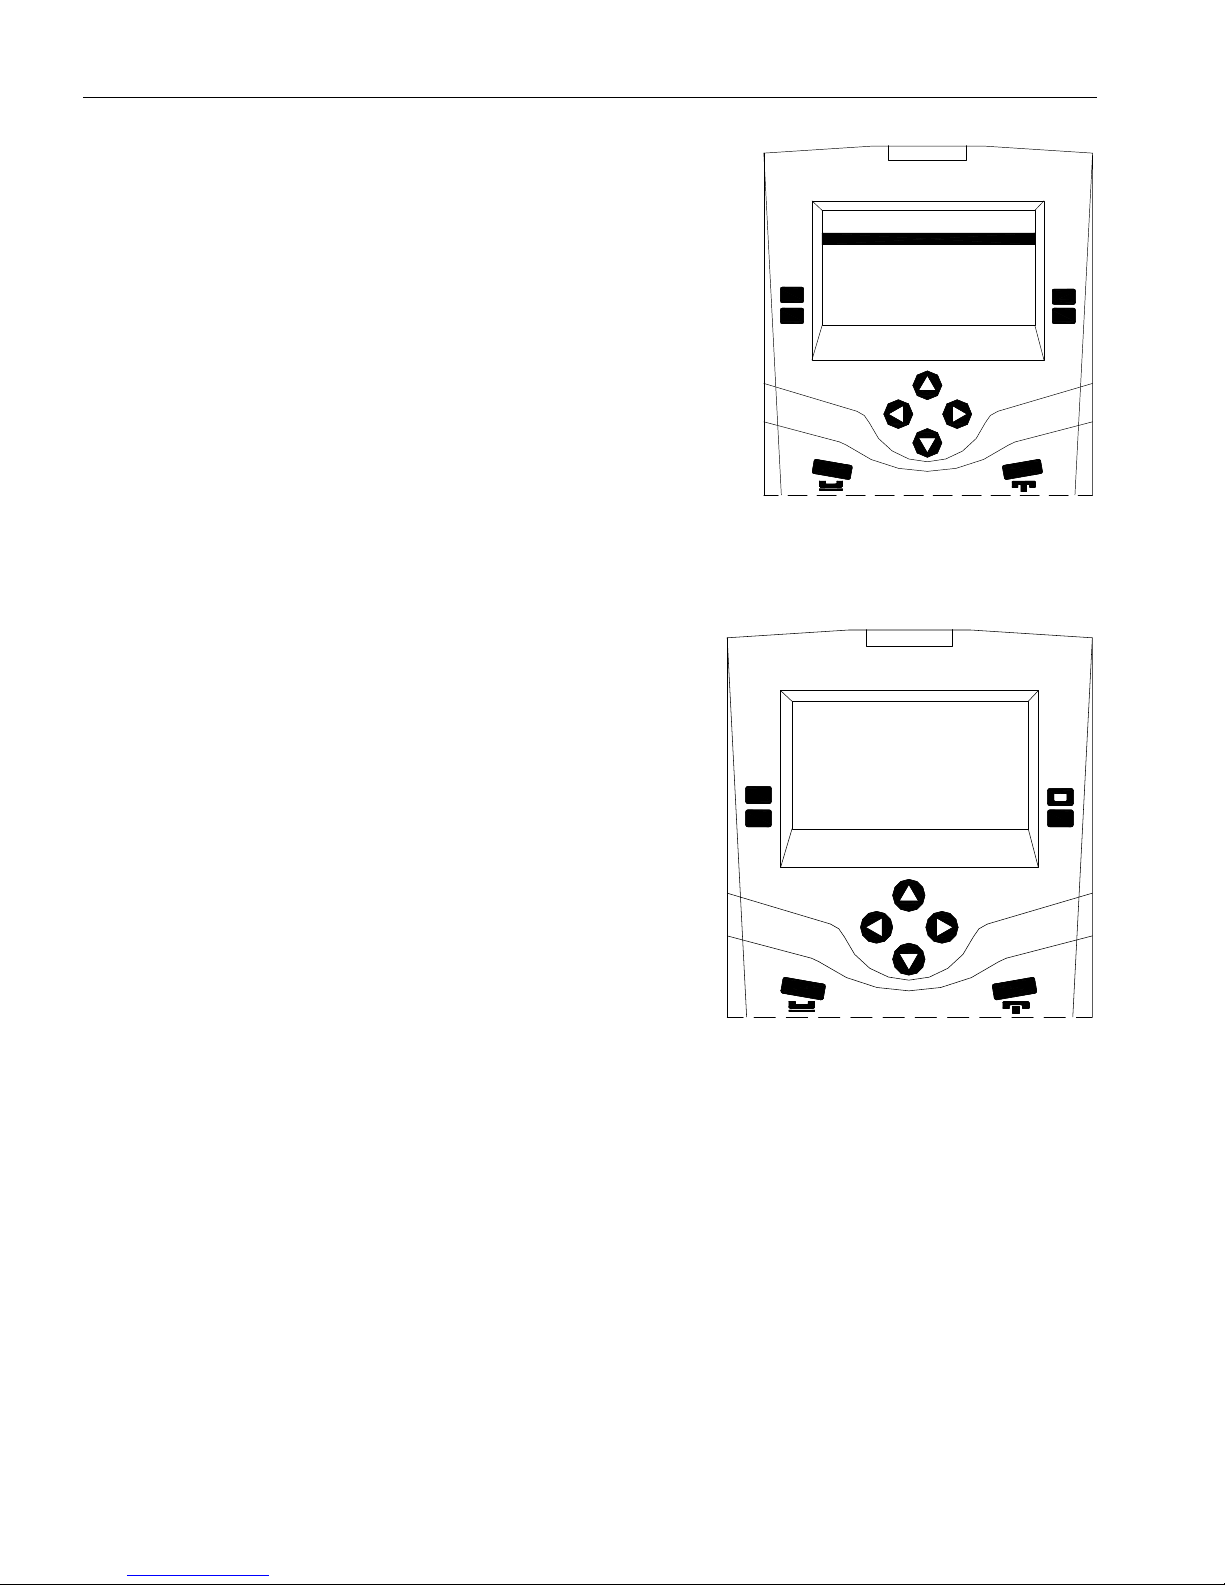
If, during the operation of the system, there is the need to disable a station
or parts of a station this can be accomplished from the Master Station.
These functions include:
Call Request Switch
Tamper Alarm Switch
Program Music Button
Change Audio Level Alarm Threshold
Enabling/Disabling these functions is carried out by first pressing the
Control function key on the second page of the “Idle menu”. A new menu
appears. Press the Station function key to bring up a new menu as shown
on the right.
Operations that can be Enabled/Disabled
Master Station #20
01:51 PM
Jul 8, 2008
Call Request
Tamper
at a Station
0
0
0
Music
Audio Level
Enabling/Disabling Call Request Switch at an Intercom Station
Even though a Station may have its call request switch disabled, you can
still place calls to that Station and communicate with it from your Master
Station.
Enabling/Disabling an Intercom Station’s call request switch is carried out
by first pressing the Control function key on the “Idle menu”, followed
by selecting Station function key on the new menu. This will bring up a
new menu, select the Call Request function key; this will bring up a list
of stations. Sort through the list and select the desired Station. Press the
Disable function key to disable the station.
Master Station #20
2001 Housing1Entry
2002 Housing1Exit
2003 UnitAEntry
0
0
0
Disable
The Call Request switch at Station
#2001 can now be Disabled
Page 27 MN-DXL-IMS-640-Pv1
Page 34
IMS-640 VoIP Intercom Master Station Operating Instructions MicroComm DXL
The display will now change with the Enable function key will now
displayed.
Master Station #20
2001 Housing1Entry
2002 Housing1Exit
2003 UnitAEntry
Enable
0
0
0
Enabling Call Request Switch from the Disabled list
A second method of enabling a disabled station is to display the
Disabled list.
Selecting the Control function key from the “Idle menu” will bring
up a new menu. Selecting the Disabled function key on the new menu
will bring up the disabled list. Scroll to the station you wish to Enable
and select the Accept function key to change to the selected station to
an enabled state
The Call Request Switch at Station #2001
can be Enabled
Master Station #20
I 2001 Housing1Entry
Hit Accept to Enable
Cancel
0
0
1
Accept
Enabling/Disabling Tamper Alarm at an Intercom Station
The Tamper Alarm switch can be Enabled/Disabled following the same procedure used to Enable/Disable the Call
Request switch.
Enabling/Disabling Music at an Intercom Station
The Music switch can be Enabled/Disabled following the same procedure used to Enable/Disable the Call
Request switch.
Setting the Audio Level Alarm Thresholds for an Intercom Station
The audio level alarm setting at as is station is Enabled/Disabled using a similar procedure to that used to
Enable/Disable the Call Request switch. The main difference is that when a station’s audio level alarm is enabled
it can be set to one of four possible predefined ALA filter settings.
MN-DXL-IMS-640-Pv1 Page 28
Page 35
IMS-640 VoIP Intercom Master Station Operating Instructions MicroComn DXL
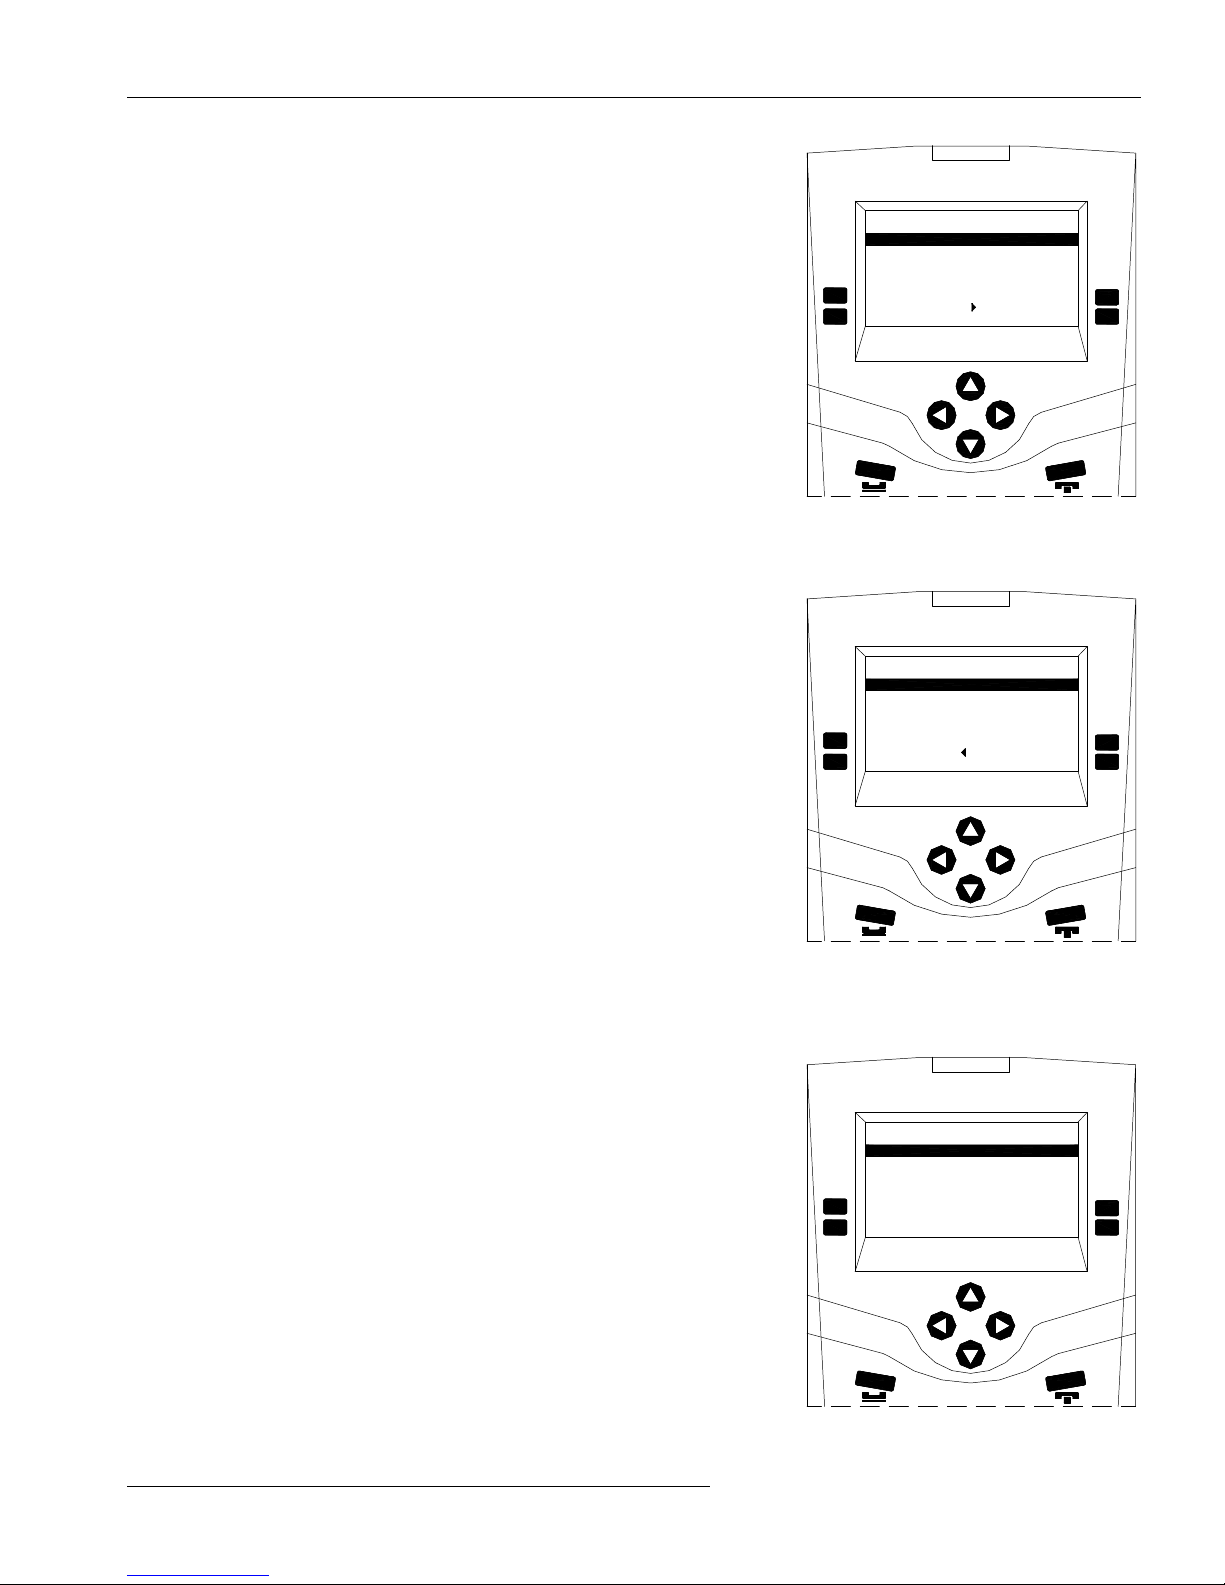
From the second page of the “Idle menu” press the Control, function key
this brings up a new menu the “Control menu”. On this menu press the
Station function key this brings up a new menu. Press the Audio Alarm
function key to bring up the list of stations whose audio level alarm can be
Enabled/Disabled by this master station. Scroll through the list to select
Master Station #20
2008 Cell A101
2009 Cell A102
2010 Cell A103
0
0
0
the appropriate station. The Level 1 and Level 2 function keys are shown
Level
on the first page of the menu.
Level 1
2
On the second page of the menu the Level 3 and Level 4 function keys are
displayed.
If we select one of the four levels as our ALA setting the function key we
selected will disappear and be replaced by the Disable function key (The
Disable function key entry will appear on both menu pages).
Level 1 and Level 2 are displayed on
first page of menu.
Master Station #20
2008 Cell A101
2009 Cell A102
2010 Cell A103
Level 3
Level 3 and Level 4 are displayed on the
second page of the menu
Master Station #20
2008 Cell A101
2009 Cell A102
2010 Cell A103
Disable
0
0
0
Level 4
0
0
0
Level 4
Page 29 MN-DXL-IMS-640-Pv1
Menu displayed after Level 3 has been
selected as the active ALA setting
Page 36

IMS-640 VoIP Intercom Master Station Operating Instructions MicroComm DXL
MN-DXL-IMS-640-Pv1 Page 30
Page 37
IMS-640 VoIP Intercom Master Station Operating Instructions MicroComn DXL
Section 6- Monitoring Procedures
A Master Station operator can monitor the audio from Intercom Stations and Visitor Booths. A Master Station can
also be pre-programmed (by the System Administrator) to continuously monitor a predefined configuration of
Stations and time the master station is not busy making calls or monitoring individual stations it will be
monitoring in the predefined configuration.
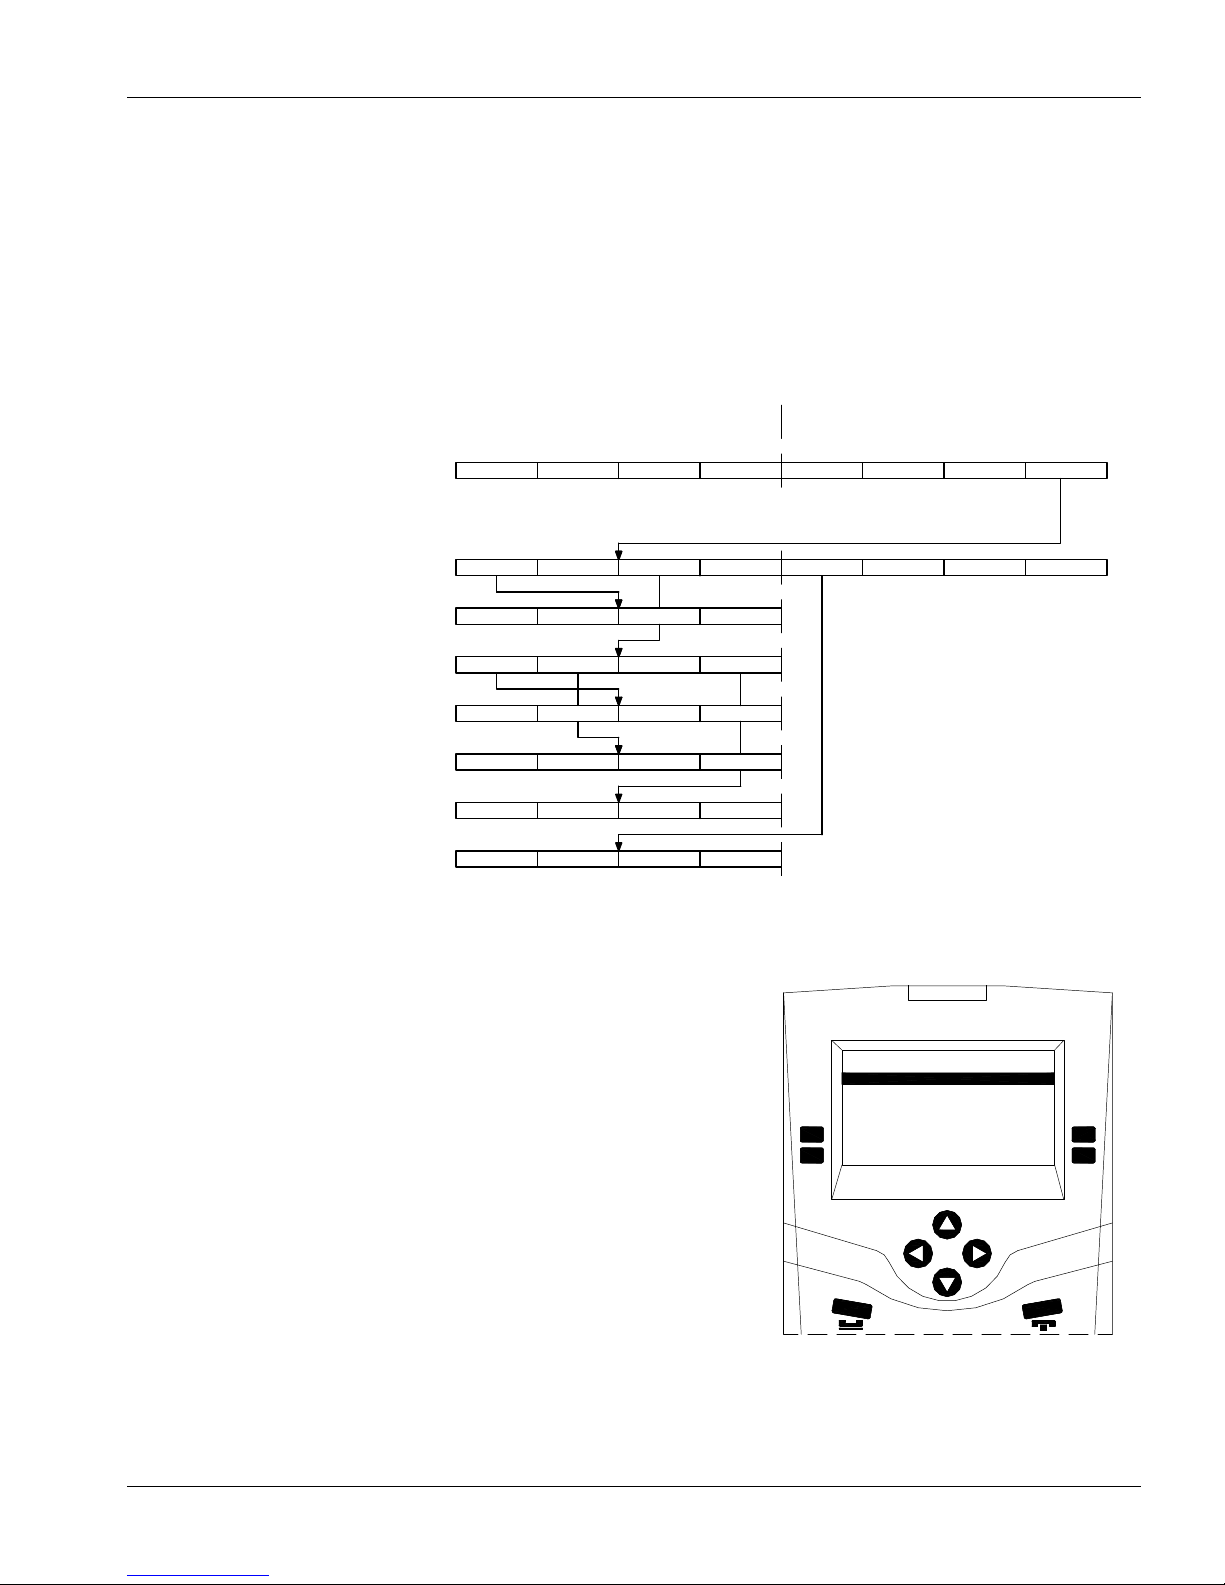
The following tree structure shows the navigation paths that can be followed after pressing Monitor.
First Page of Menu Second Page of Menu
Idle Menu
Monitor Menu
Monitor/Station Menu
Monitor/Background Menu
Monitor/Background/Monitoring Rate Menu
Monitor/Background/Delete Station
or Station Group Menu
Monitor/Background/Add Station
or Station Group Menu
Monitor/Visiting Booth Menu
Answer Next
Station
Monitor Rate
Master Setup
Cancel
Delete
Cancel
Station
Station
Cancel
Unman
Background
Accept
Accept
StationGroup
StationGroup
Accept
Call
Add
Tree Structure for Monitor Function
Monitoring a Station
From the “Idle menu” when you press the Monitor function key a new
menu appears with three function keys; Station, Background and
Visiting Booth. If you press the Station function key the list of stations
that you can monitor (the same list of stations that you can call) will
appear. Scroll through the list of stations and select the one you wish to
monitor. Press the Accept function key and you will start to monitor the
selected Station.
Visiting Booth
Signals
Master Station # 20
2008 Cell A101
2009 Cell A102
2010 Cell A103
Station :64
Cancel
MonitorControl
0
0
0
Accept
Page 31 MN-DXL-IMS-640-Pv1
Selecting a Station to Monitor
Page 38
IMS-640 VoIP Intercom Master Station Operating Instructions MicroComm DXL
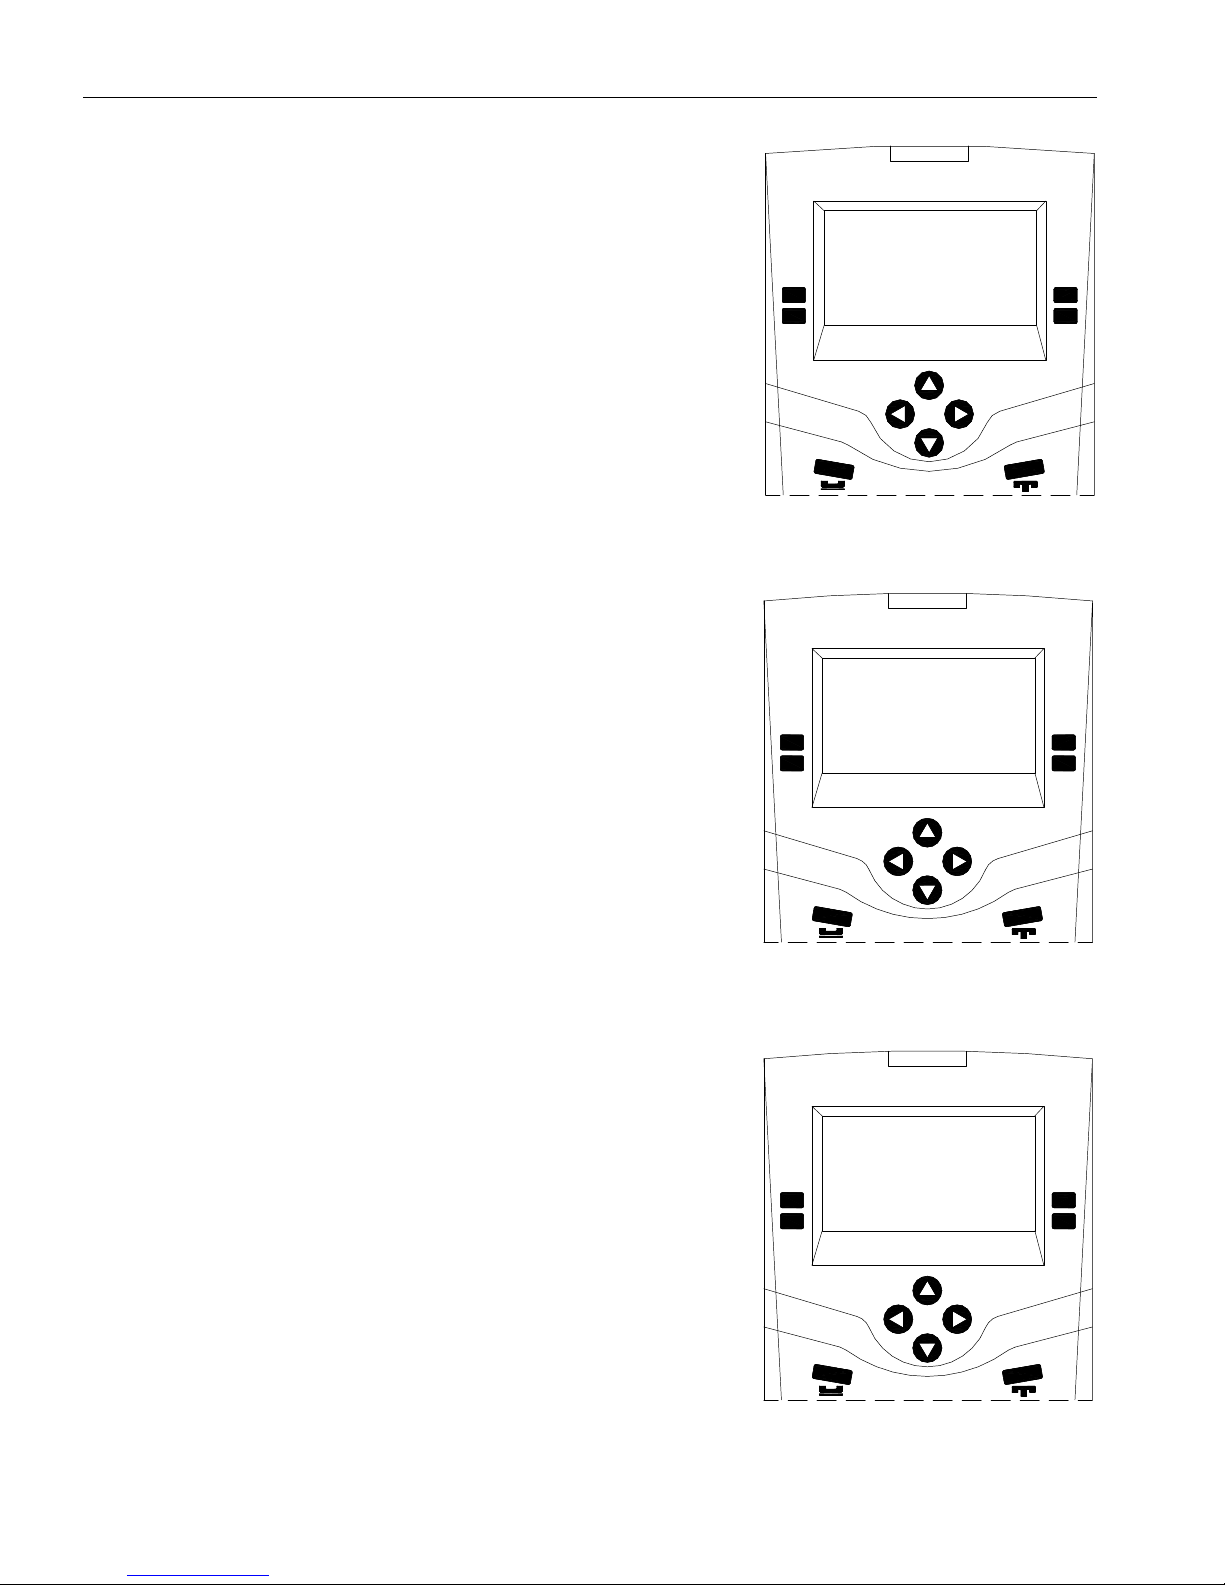
At this time the display will appear as shown on the right. If you press the
End Call function key the monitoring will stop and you will return to the
“Idle menu”. You can then make or answer calls or carry out other
operations. You can change the audio volume level if you select the My
Volume function key.
Master Station # 20
Monitor of:
Station #2008
Cell A101
End Call
My Volume
0
0
0
Background Monitoring
Background monitoring allows a master station to continuously monitor a
station, stations or a pre-defined group of stations. Each Station in the
group is monitored for a preset time. The monitoring continues in a cyclic
fashion.
From the “Idle menu” pressing the Monitor function key brings up a new
menu. Pressing the Background function key on this new menu brings up
the following display with three function key options.
The monitoring rate specifies how long an individual station will be
monitored before cycling to the next station in the monitoring list. If we
press the Monitoring Rate function key the following menu will appear.
The monitor rate can now be adjusted using the up () and down ()
arrow keys. The value can be adjusted from 1-3600 (seconds), i.e. from 1
second to 1 hour. This is the amount of time that the Master Station will
stay at one particular station during monitoring. If the monitoring rate is
decreased to 0 the monitoring will be DISABLED. This allows you to turn
off the background monitoring without altering the monitoring list. Once
you have set the monitoring rate you can either press the Accept function
key or the Cancel function key to return to the previous rate. In either
case you will return to the previous menu
Display while Monitoring Station #2008
Master Station # 20
No Stations
In Monitor List
Monitor Rate
Delete
0
0
0
Add
Menu after Selecting Background
Monitoring
Master Station # 20
Monitoring Rate
5 seconds
Hit Accept to Save
Cancel
0
0
0
Accept
MN-DXL-IMS-640-Pv1 Page 32
Setting the Monitoring Rate
Page 39
IMS-640 VoIP Intercom Master Station Operating Instructions MicroComn DXL
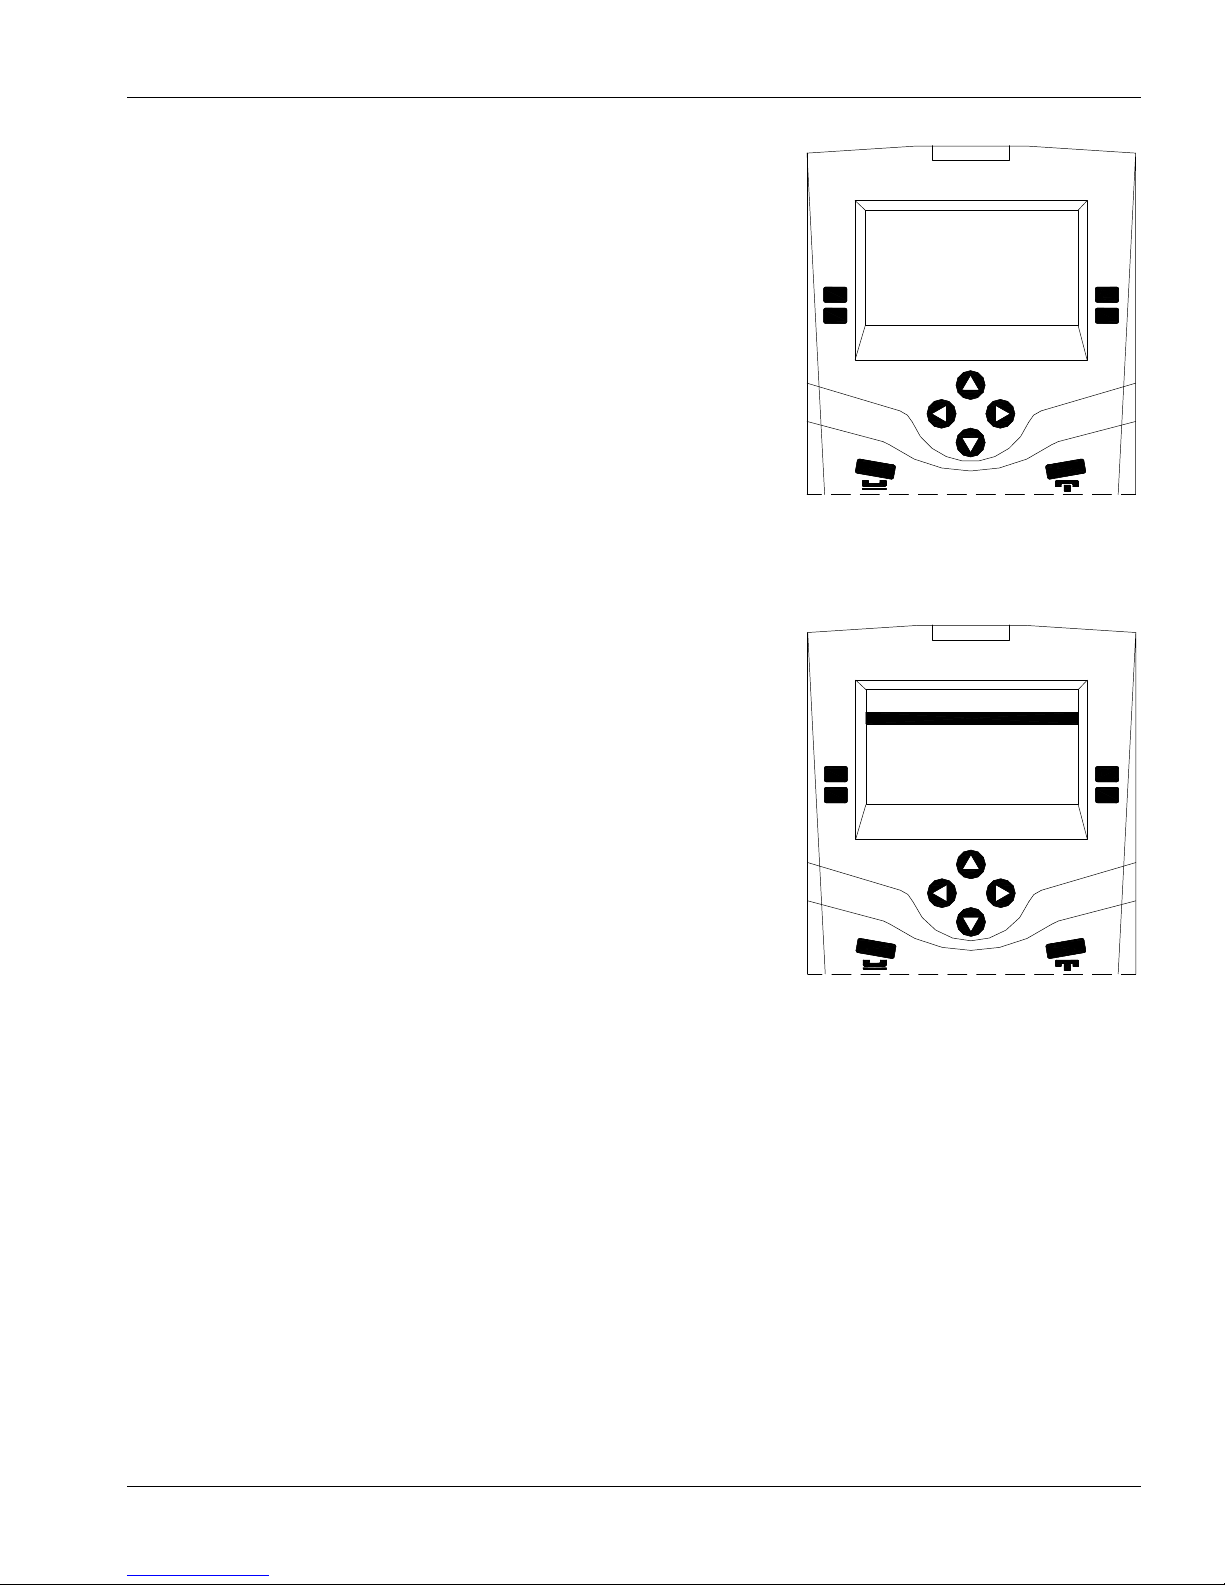
If we now press the Add function key you can add a Station or a Station
Group to the list of stations to be monitored. Pressing the StationGroup
function key brings up the list of pre-defined station groups that this
master station can monitor while pressing the Station function key brings
up a list of stations that this station can monitor. In either case once you
select a station or station group you can press either the Accept function
Master Station # 20
No Stations
In Monitor List
Station
0
0
0
Station Group
key to select the entry or press the Cancel function key to return to the
previous menu.
You can expand the list of stations in the background monitoring list by
adding several stations or station groups to the list.
Menu to Add Stations to the Background
Monitoring a Visiting Booth
From the “Idle menu” when you press the Monitor function key a new
menu appears with three Station function key Background and Visiting
Booth. If you press the Visiting Booth function key, the list of Visiting
Booths that you can monitor will appear. Scroll through the list of visiting
booths and select the one you wish to monitor. Press the Accept function
key and you will start to monitor the selected visiting booth.
Monitoring List
Master Station # 20
1
VisitingBooth 1
2
Visiting Booth 2
3
Visiting Booth 3
Cancel
Vbooth :8
0
0
0
Accept
Selecting a Visiting Booth to Monitor
Page 33 MN-DXL-IMS-640-Pv1
Page 40

Page 41
IMS-640 VoIP Intercom Master Station Operating Instructions MicroComn DXL
Section 7 –Alarm Handling Procedures
In the “Idle menu” the Event List (Alarm List) is always displayed. If the list is empty the time and date will be
displayed. If there are any incoming Events that have not been acknowledged they will be displayed, and the
reminder beep will sound periodically.
If a single Event is displayed (or the Event that is highlighted if there are more than one Event in the Alarm List)
you can respond to it by pressing the Next function key. If it is a call request an audio channel will be established
between the Master Station and the Station that generated the call request. If it is some other type of alarm and
you press the Next function key the use of the function keys will change to indicate the possible actions you can
make.
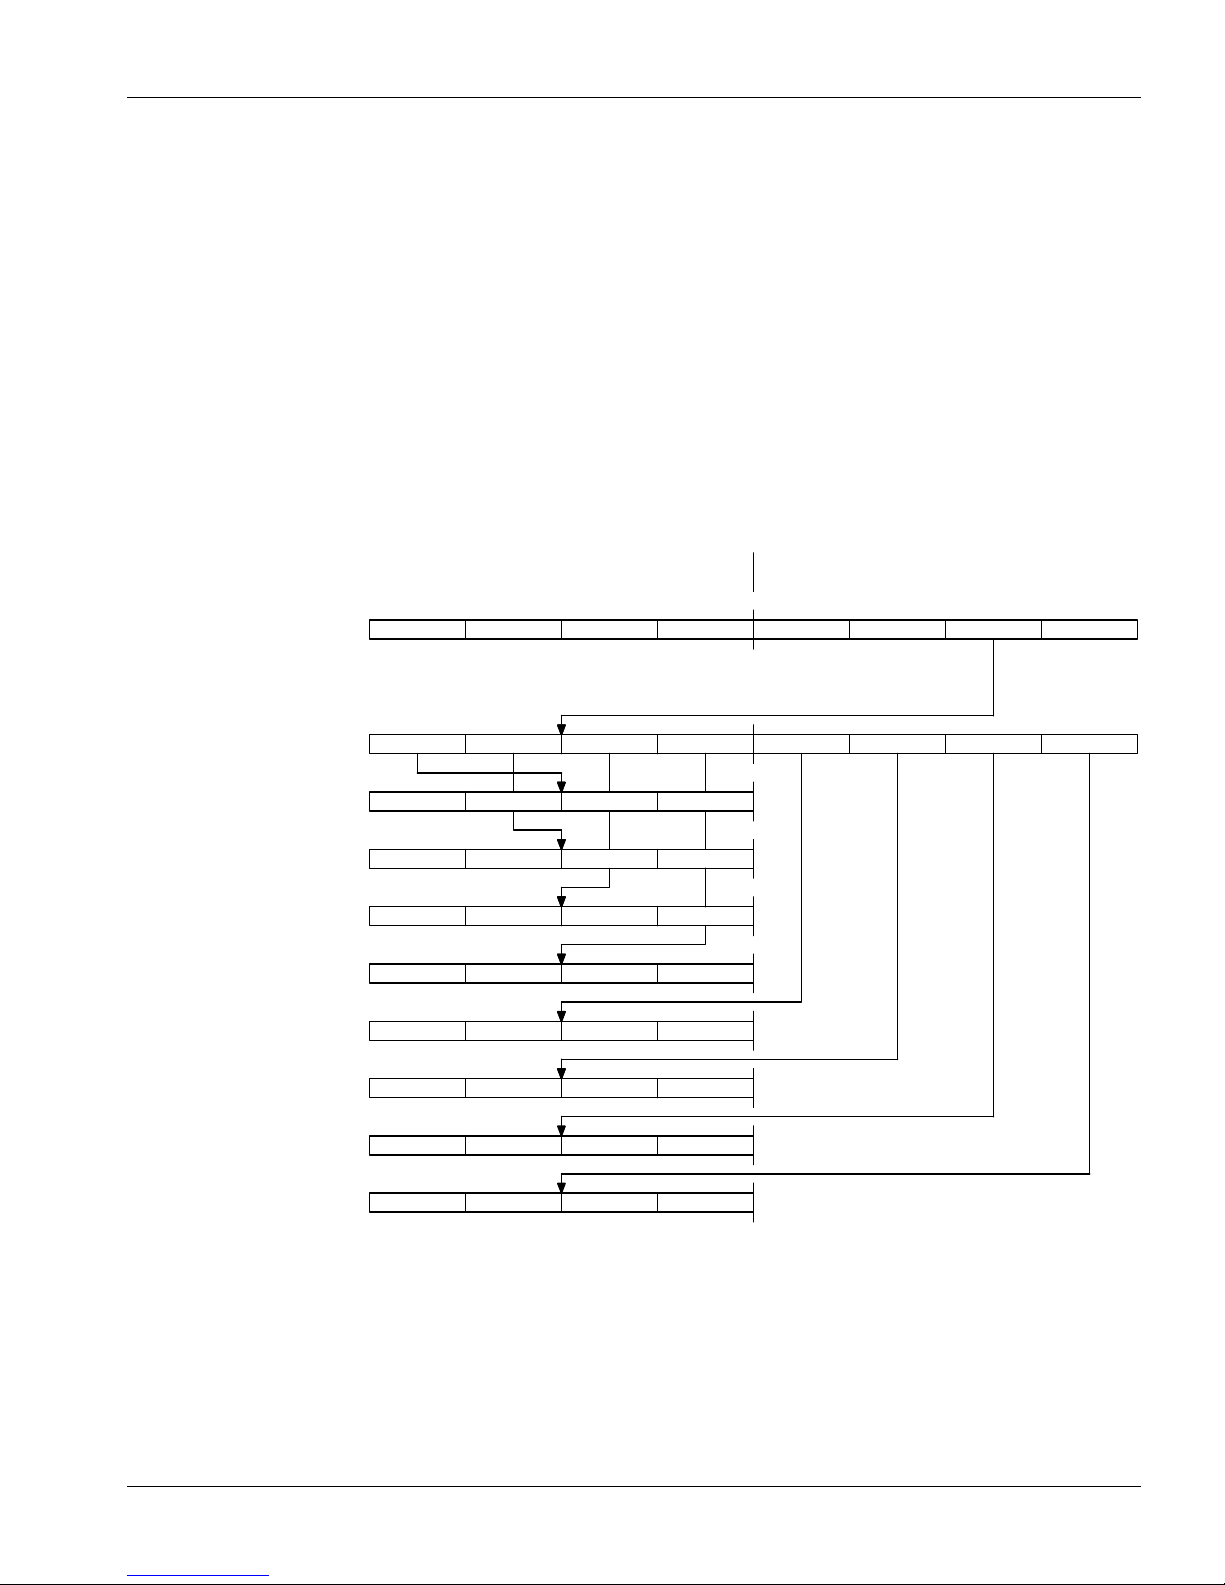
From the second page of the “Idle menu” you can select the Control function key to bring up a menu that will
allow you to select the three active lists: the Alarm List Event, the Acknowledged List Acknowledged or the
Disabled List Disabled. The tree structure for Control is shown on the following diagram.
First Page of Menu Second Page of Menu
Idle Menu
Control Menu
Control/Station Menu
Control/Music Menu
Control/Master Menu
Control/StationGroup Menu
Events List Menu
Disabled List Menu
Control/Visiting Booth Menu
Acknowledge List Menu
Answer Next
Station
Call Request
Station
Call Request
Answer Next
Start
Master Setup
Music
Tamper
Zone
Tamper
Cancel
Cancel
Unman
Master
Audio Level
UnmanMan
Audio Level
Accept
Accept
Call
StationGroup
Music
StationGroup
Music
Events
Signals
Disabled
Control
Monitor
AcknowledgedVisiting Booth
Page 35 MN-DXL-IMS-640-Pv1
Tree Structure for Control Option
Page 42
IMS-640 VoIP Intercom Master Station Operating Instructions MicroComm DXL
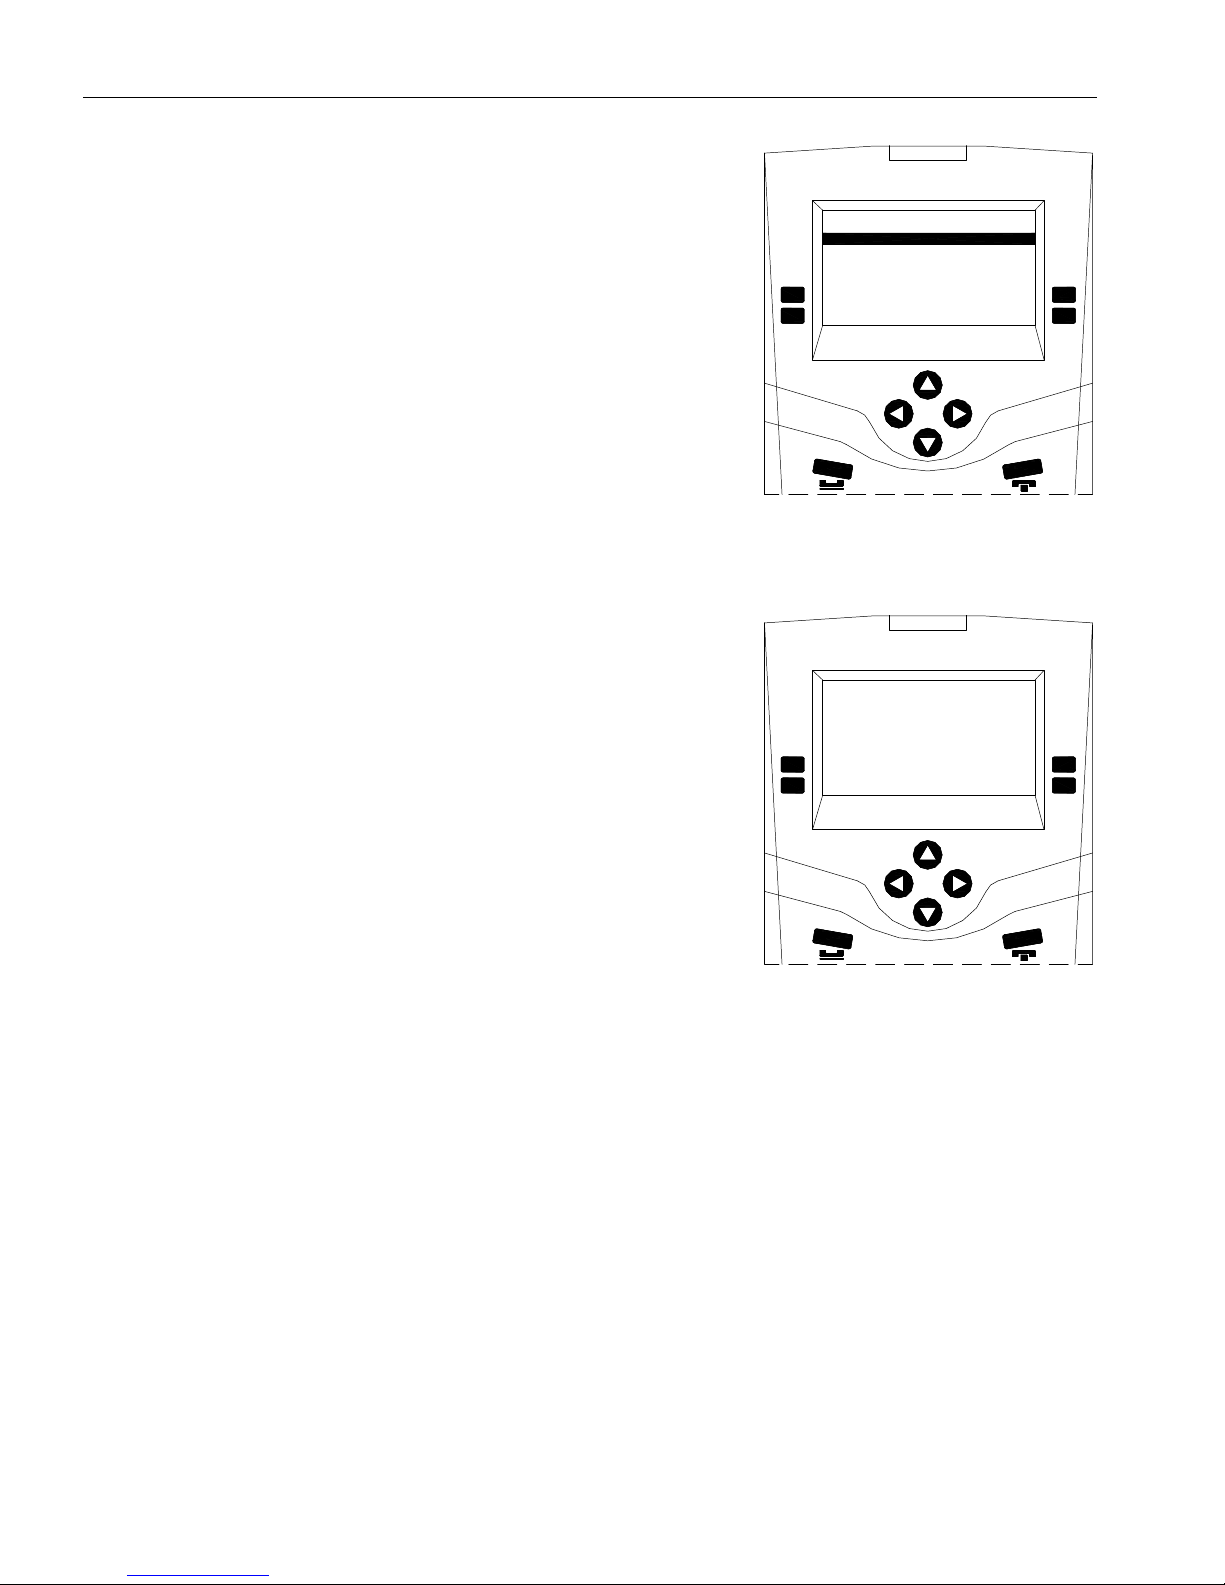
The screen on the right shows a typical Events List, with one of the
Alarms corresponding to a hardware fault (F) and two of the Alarms
corresponding to Intercom requests (I). If you select one of the Intercom
requests and press the Accept function key you will establish an audio
channel between your Master Station and the selected Station.
Master Station # 20
F 102 East Door
I 2010 Cell A103
I 2016 Cell A118
Events :12
Cancel
12
0
0
Accept
If you respond to a hardware fault alarm (F) by selecting the Alarm and
pressing the Accept function key the display will change as shown. You
can then press the Acknowledge function key and the fault will be moved
to the Acknowledge List (and turn off the reminder beep if it is the only
current unacknowledged alarm). If the fault has been repaired you press
the Cancel function key to cancel the alarm. This will remove it from all
lists. If the Event is generated from a switch you can disable the switch.
Any subsequent faults will not cause an alarm.
Display showing Alarm List
Master Station # 20
Active Alarm
F 102 East Door
Acknowledge
Cancel
12
0
0
Disable
Selecting a Fault alarm.
MN-DXL-IMS-640-Pv1 Page 36
Page 43
IMS-640 VoIP Intercom Master Station Operating Instructions MicroComn DXL
Section 8 - Other Master Station Procedures
Changing Master Station Display and Sound Volume Settings
Changing Clock Display Mode
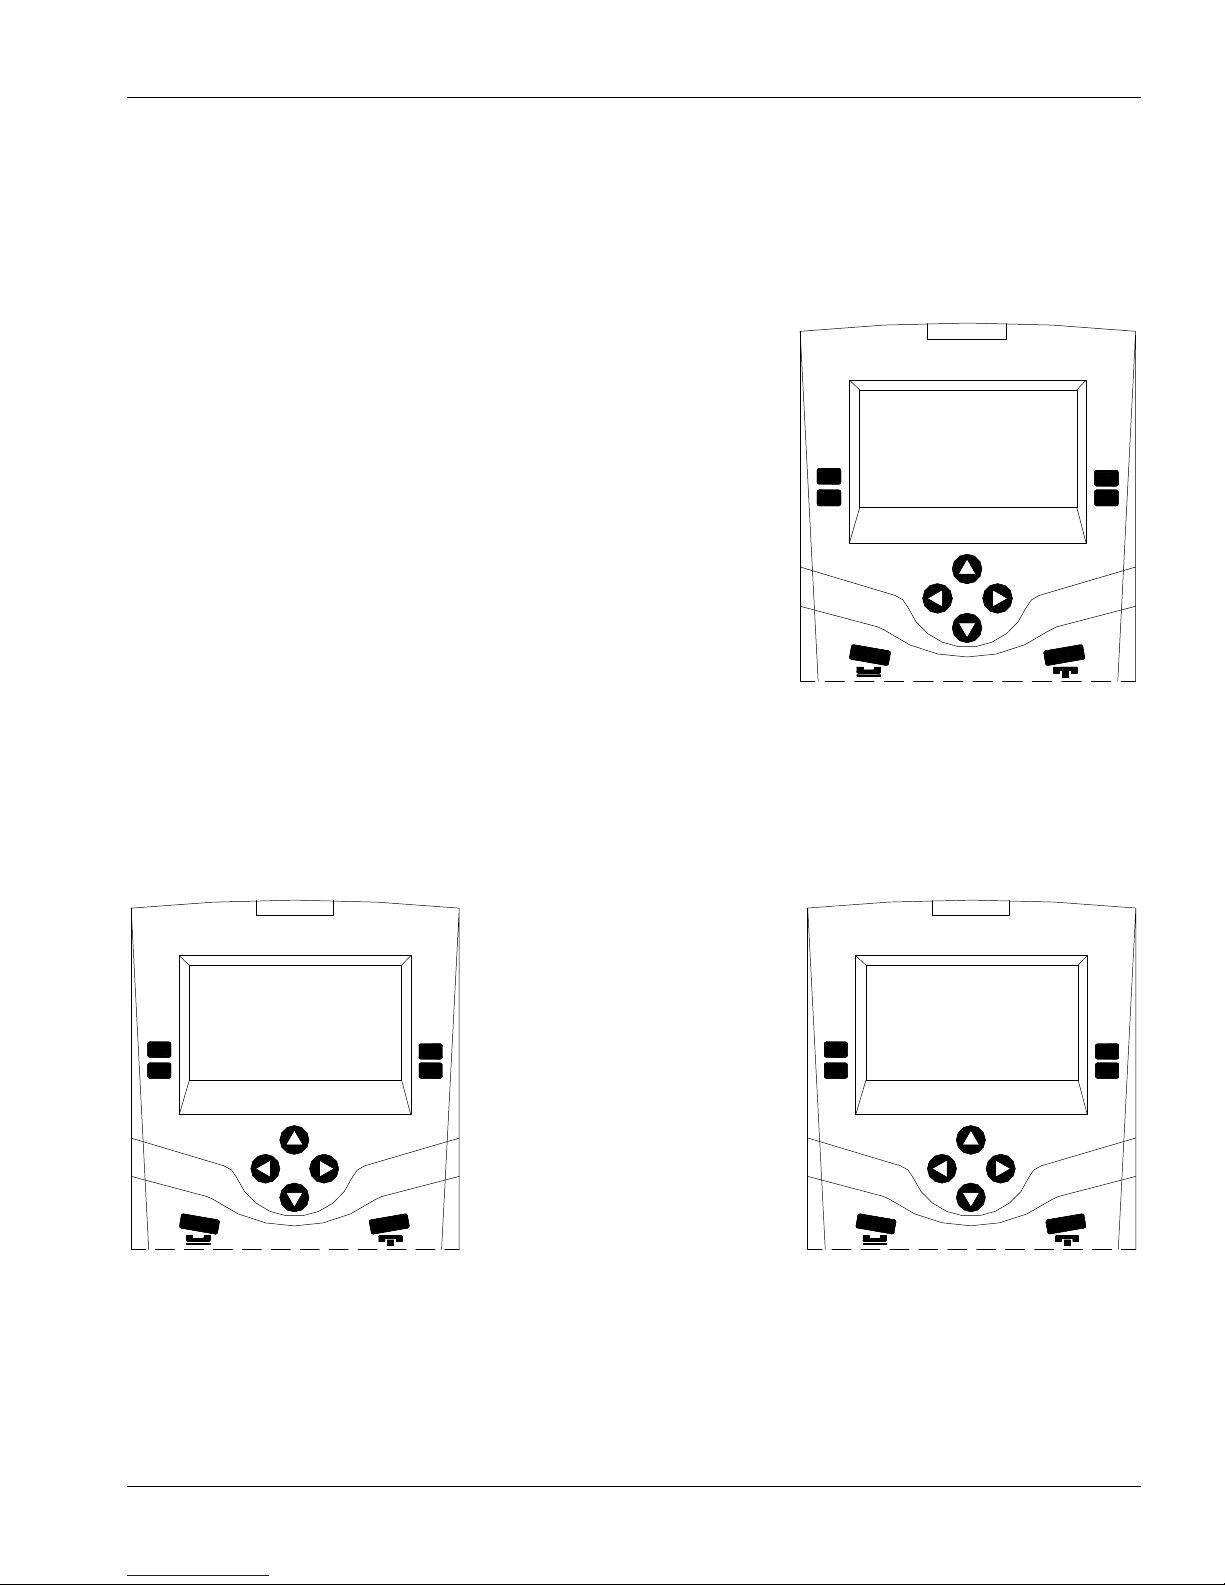
To change clock mode from between 12HR and 24HR time notation from
the “Idle menu” press the Master Setup function key and a new menu
shown on the right will be displayed. Press the Clock Mode function
key.
Master Station #20
01:51 PM
Jul 8, 2008
Music
0
0
0
Clock Mode
Master Setup Menu
If you are in the AM/PM mode the Military function key will be displayed. Pressing this function key will
change the time display to military (i.e. 24 hours) and the time will be displayed followed with an ML. The
display will now change to allow you to select AM/PM.
Master Station #20
01:51 PM 0
Jul 8, 2008
Military
0
0
Master Station #20
13:51 ML 0
Jul 8, 2008
0
0
AM/PM
Time Displayed in AM/PM mode Time Displayed in Military Mode
Page 37 MN-DXL-IMS-640-Pv1
Page 44

IMS-640 VoIP Intercom Master Station Operating Instructions MicroComm DXL
To Change Programming (Music)
To turn on the music playing at your master station from the “Idle menu” press the Master Setup function key. In
the new menu press the Music function key. A new menu will list all the available music sources. Select the
desired music source and press the Accept function key.
Activating a Signal
A Signal is a tone that can be broadcast to specified Intercom Stations and/or Master Station(s). The signal may
be:
immediately and for a set length of time, or
immediately and continue until you press the Stop function key.
The characteristics (exact sound qualities) of the tone are setup in the administrator software. In the software
configuration the System Administrator specifies:
the tone that will be broadcast, and
the list of Intercom Stations and Master Stations that will receive the tone.
From the “Idle menu” when you press the Signal function key a list of Signals available to your Master Station
will be displayed. Use the scroll keys (“”) and (“”) to select the Signal you wish to activate. Once you have
selected the appropriate Signal press the Accept function key. The Signal will now be activated. The menu will
change so that you can select Stop function key. If the Signal has been programmed to continue for a set length of
time at the end of that time interval the Signal will stop. If the Signal has not been programmed for a specified
length then it will continue until you press the Stop function key.
MN-DXL-IMS-640-Pv1 Page 38
 Loading...