

Page 1
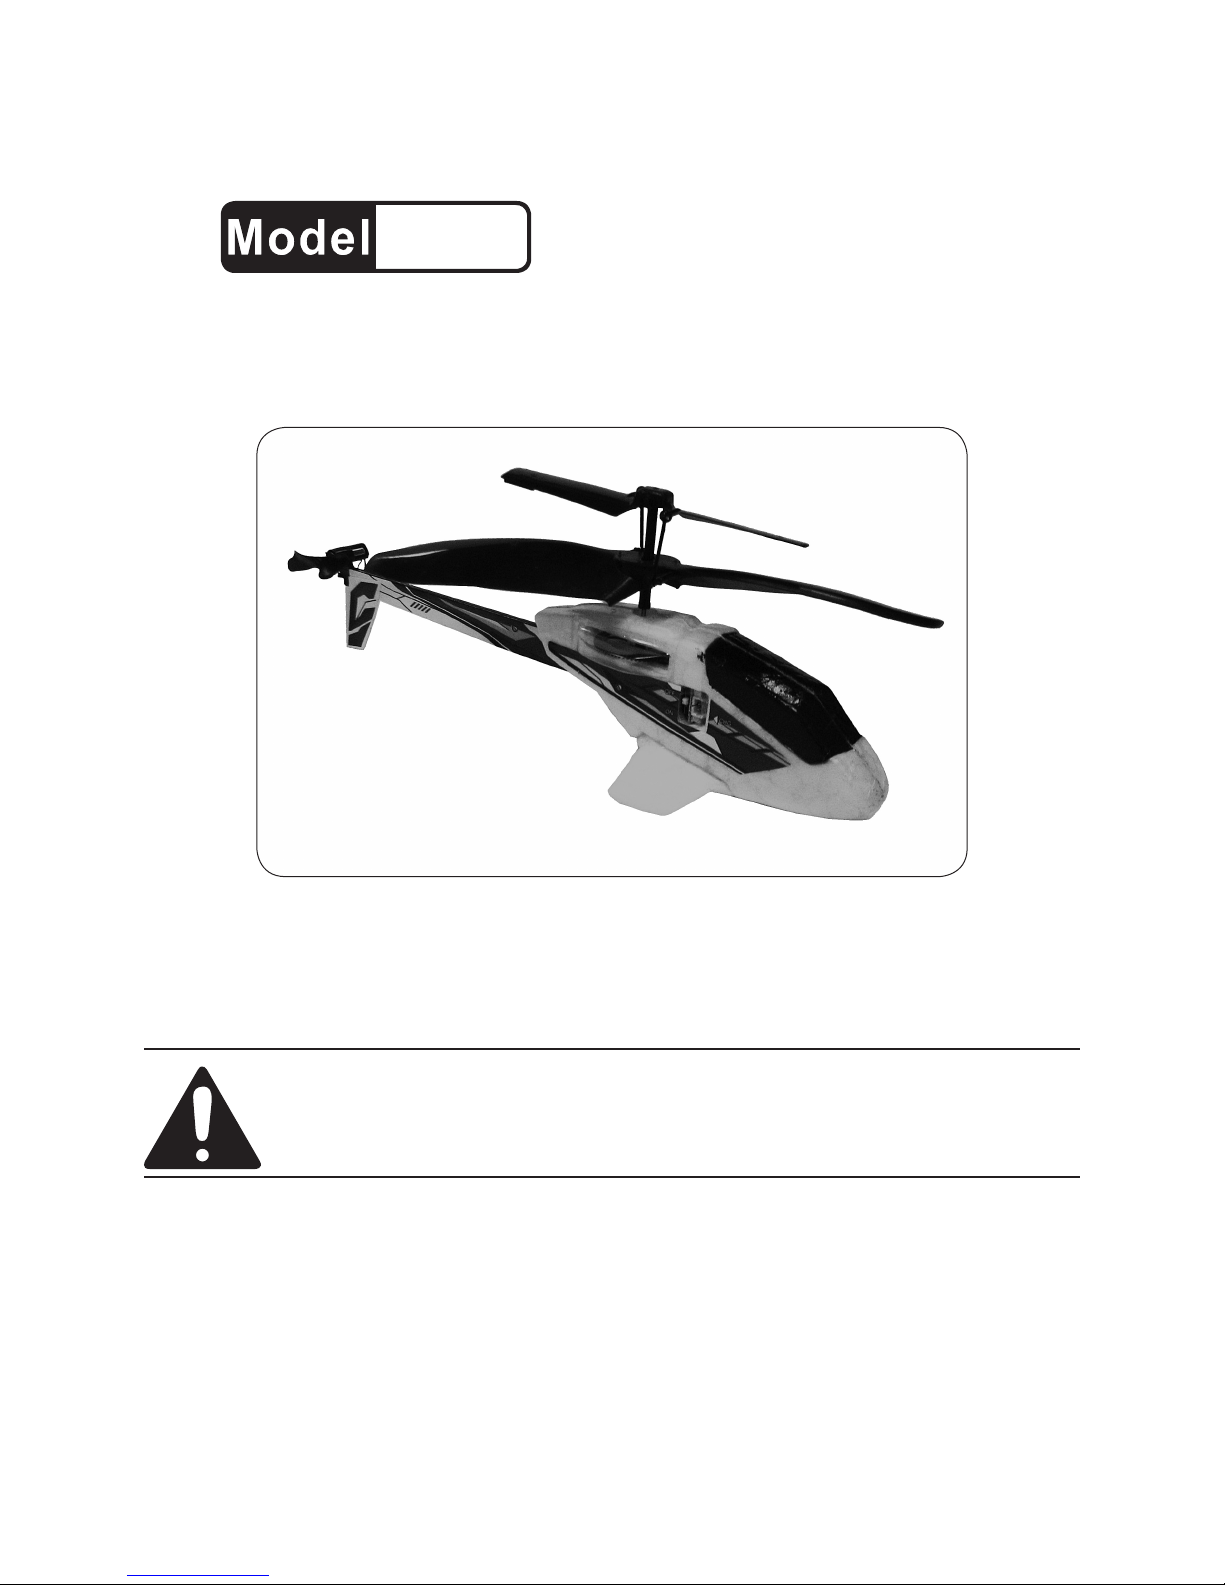
AIR PIXIE
98177
HELICOPTER
SET UP AND OPERATING INSTRUCTIONS
Distributed exclusively by Harbor Freight Tools®.
3491 Mission Oaks Blvd., Camarillo, CA 93011
Visit our website at: http://www.harborfreight.com
Read this material before using this product.
Failure to do so can result in serious injury.
SAVE THIS MANUAL.
Copyright© 2008 by Harbor Freight Tools®. All rights reserved. No portion of this manual or any artwork
contained herein may be reproduced in any shape or form without the express written consent of
Harbor Freight Tools. Diagrams within this manual may not be drawn proportionally. Due to continuing
improvements, actual product may differ slightly from the product described herein. Tools required for
assembly and service may not be included.
For technical questions or replacement parts, please call 1-800-444-3353.
Page 2

CONTENTS
IMPORTANT SAFETY INFORMATION .......................................................3
ASSEMBLY PRECAUTIONS .....................................................................................3
USER PRECAUTIONS ...............................................................................................3
BATTERY PRECAUTIONS: .......................................................................................3
SAFETY WARNING: ..................................................................................................4
SPECIFICATIONS ........................................................................................4
UNPACKING ................................................................................................4
LIST OF CONTENTS ...................................................................................4
ASSEMBLY INSTRUCTIONS ......................................................................5
ASSEMBLY.................................................................................................................5
OPERATING INSTRUCTIONS ....................................................................6
CHARGING HELICOPTER (RECHARGEABLE BATTERY PACK): .........................6
FLYING YOUR HELICOPTER ....................................................................................6
FLIGHT CONTROL ....................................................................................................7
TAKE OFFS ................................................................................................................7
FLIGHT LOCATION ....................................................................................................8
FLIGHT TIPS .............................................................................................................. 8
CARE AND MAINTENANCE: ...................................................................... 8
TROUBLE SHOOTING: ...............................................................................9
TROUBLESHOOTING CHART ................................................................................10
PARTS LIST & ASSEMBLY DIAGRAM .....................................................11
SKU 98177 For technical questions, please call 1-800-444-3353. Page 2
Page 3

IMPORTANT SAFETY
INFORMATION
Assembly Precautions
Assemble only according to these instruc-1.
tions. Improper assembly can create hazards.
Wear ANSI-approved safety goggles and 2.
heavy-duty work gloves during assembly.
Keep assembly area clean and well lit.3.
Keep bystanders out of the area during as-4.
sembly.
Do not assemble when tired or when under 5.
the inuence of drugs or medication.
User Precautions
This product is not designed for a child under 1.
the age of 9 years old. Children using this
product must be carefully supervised by a
responsible adult.
Use for intended purpose(s) only.2.
Inspect before use; do not use if parts are 3.
loose or damaged.
Maintain product labels and nameplates. 4.
These carry important safety information.
If unreadable or missing, contact Harbor
Freight Tools for a replacement.
Changes or modications to this unit not ap-5.
proved by the party responsible for compliance could void the user’s authority to operate the equipment.
Keep hands, hair and loose clothing away 6.
from the propeller when power switch is
turned ON.
Additional points of safety:
Turn off transmitter and helicopter when not 1.
in use.
Remove battery from transmitter when not in 2.
use.
Keep your helicopter in your sight so that you 3.
can supervise it all the time.
New alkaline batteries are recommended for 4.
use in transmitter for maximum performance.
You are advised to replace with new batteries 5.
as soon as they become weak.
Users should keep and retain this information 6.
for future reference.
Users should keep strict accordance with 7.
the instruction manual while operating this
product.
Your Transmitter charger is tailor-made for 8.
the rechargeable battery used in helicopter.
Do not use it to charge any battery other than
that in the helicopter.
Do not touch the spinning propeller!9.
Do not y above someone’s head! 10.
Regularly examine for damage to the plug 11.
enclosure and other parts. In the event of
any damage, the plane must not be used
with the transmitter charger until the damage
has been repaired.
This plane must only be used with the recom-12.
mended charger.
Do not try to charge other batteries with this 13.
transmitter charger.
Battery Precautions:
Before recharging the helicopter battery, you 1.
must wait for 10 to 15 minutes to let the battery pack cool down. Helicopter is equipped
with a rechargeable battery pack.
Please also pay attention to the following 2.
cautions for safety use:
Do not dispose the battery in re or heat.a.
Do not use or leave the battery near a heat b.
source such as re or room heater.
Do not strike or throw the battery against c.
hard surface.
Do not immerse the battery in water. Keep d.
the battery in a cool dry location.
When recharging, only use the battery char-e.
ger specically for that purpose.
Do not over-discharge the battery.f.
Do not connect the battery to an electrical g.
outlet.
Do not directly solder the battery or pierce h.
the battery with a nail or other sharp object.
Do not transport or store the battery togeth-i.
er with metal objects such as necklaces.
Do not disassemble or alter the battery.j.
Charge the battery every 6 months. k.
SKU 98177 For technical questions, please call 1-800-444-3353. Page 3
Page 4

Turn off your equipment power switch after l.
use.
Recycle used batteries after covering bat-m.
tery terminals with insulation, tape or inserting it into an individual poly bag.
Safety warning:
Read through the entire instruction Manual 1.
before attempting to y your helicopter.
This product is designed to be used only 2.
indoors. Do not use it outdoors unless in very
windless days without even the slightest gust
of wind.
Never y in a place cluttered with obstacles 3.
(place full of furniture, people, pets etc.)
Make sure you and other people keep 1-2 4.
meters away from the helicopter while you
start to y.
Always keep an eye on the ying helicopter 5.
and avoid ying, landing or crashing on or
near your head, your body and any other
people.
Never disassemble or attempt to modify the 6.
product. It may damage the product and
cause a dangerous condition.
Never put hands or face close to rotating 7.
parts. Doing so creates the risk of unexpected injury. To avoid such risk, never operate
this product while sitting on the oor or on a
chair. Operate this product while in a posture
that allows you to quickly move out of the
way if necessary.
Always switch off both the helicopter and 8.
transmitter when leaving the transmitter
unattended. If the power switch is left on, it
is possible that unintended stick operation
could occur, when the transmitter is placed
on a oor or a chair.
Never use parts that are damaged or have 9.
been altered.
SPECIFICATIONS
Maximum Range 24' 8"
Electrical Requirement
Charge Time 20-30 Minutes
Run Time Per Charge 6 - 8 Minutes
Transmitter Controls Left, Right, Up, Down
6 “AA” 1.5V Batteries (Not
supplied)
This device complies with part 15 of the
FCC Rules. Operation is subject to the following two conditions: (1) This device may
not cause harmful interference, and (2)
this device must accept any interference
received, including interference that may
cause undesired operation.
UNPACKING
When unpacking, check to make sure a.
that the item is intact and undamaged. If
any parts are missing or broken, please call
Harbor Freight Tools at the number shown
on the cover of this document as soon as
possible.
LIST OF CONTENTS
Item qty
Helicopter 1
Transmitter 1
Spare tail rotor 1
Package of aluminum stickers 1
SAVE THESE
INSTRUCTIONS.
SKU 98177 For technical questions, please call 1-800-444-3353. Page 4
Page 5

Fig. 1 Fig 2 Fig 3
ASSEMBLY INSTRUCTIONS
Read the ENTIRE IMPORTANT
SAFETY INFORMATION section at the
beginning of this document including
all text under subheadings therein
before set up or use of this product.
Assembly
Battery installation:
Use a Phillips head (Cross-Head) screw-1.
driver to loosen screw on the transmitter’s
battery cover by turning the screw in a
counter-clockwise direction. (See Fig.1.)
The screw has a ber retaining washer on it 2.
so that it does not fall out of the hole in the
battery compartment cover. But loosening
this screw allows the cover to be removed for
battery insertion.
Insert 6 “AA” 1.5V size batteries in the bat-3.
tery compartment according to the marked
polarity directions shown inside the compartment. (See Fig. 2.)
The batteries of choice would be new alka-4.
line batteries.
Replace the cover and tighten the screw in a 5.
counter-clockwise direction. (See Fig.3.)
You can use either rechargeable or non-6.
rechargeable batteries in transmitter.
Do not mix different types of batteries and do 7.
not mix new and used batteries.
Non-rechargeable batteries are not to be 8.
recharged.
Rechargeable batteries are to be removed 9.
from the transmitter and recharged in their
own battery charger.
Rechargeable batteries are only to be 10.
charged by a responsible adult.
Only batteries of the same or equivalent type 11.
as recommended, are to be used at any one
time.
Batteries are to be inserted properly accord-12.
ing to polarity instructions.
SKU 98177 For technical questions, please call 1-800-444-3353. Page 5
Transmitter Layout
Page 6

OPERATING INSTRUCTIONS
Charging helicopter (rechargeable
battery pack):
Turn off the power on helicopter and trans-1.
mitter.
Slide the cover on the front of the transmitter 2.
down and pull out the charging wire. (See
Fig. 4)
Fig. 4 Fig. 5 Fig. 6
Insert the charging plug into the socket on the 3.
helicopter. (See Fig. 5) Turn the power on.
The green LED lights up while charging, and 4.
turns off when completed. (See Fig. 6)
Pull the plug out of the socket on helicopter.5.
The helicopter will have about 5-6 minutes of 6.
ight time after 20-30 minutes charging.
When recharging is complete, unplug the 7.
recharging cable, place the wire back into its
compartment and slide the cover closed.
Flying your helicopter
Select the Infra-Red band on the transmitter 1.
to match the band marked on the helicopter.
The helicopter is set up to respond to this
band so that up to 3 units can y in the same
room at the same time. Each helicopter must
work on a different band.
Set the Power switch on the helicopter to ON 2.
and you will see a blue light inside the “cab-
in” of the helicopter ashing. BE SURE THE
Spirals clockwise Turns clockwise
Fig. 7 Fig. 8 Fig. 9
Spirals counter-clockwise Turns counter-clockwise
POWER SWITCH ON THE TRANSMITTER
IS “OFF” when turning on the helicopter.
Place the helicopter on the ground with the 3.
tail pointing towards you and the nose facing
away from you.
The throttle stick on the transmitter auto-4.
matically sets to MINIMUM throttle. Turn the
Power Switch on.
In the case of unwanted turning, trim the he-5.
licopter by pushing the right or left side of the
trim button as shown. (See Figs. 7 - 12.)
Left trim button
Right trim button
Fig. 10 Fig. 11 Fig. 12
SKU 98177 For technical questions, please call 1-800-444-3353. Page 6
Page 7

Gently push the throttle up, or forward, to 6.
raise your helicopter about 2' - 3' high.
When the helicopter spirals clockwise (see a.
Fig.7) or keeps turning clockwise (see
Fig.8), push and release the left side of trim
repeatedly untill the turning stops and heli-
copter ies straight.
When the helicopter spirals counter-clock-b.
wise (see Fig.10) or keeps turning counterclockwise (see Fig.11), push and release
the right side of the trim repeatedly until the
turning stops and the helicopter straightens
out and ies straight. (See Fig.12.)
Fig. 13
Flight control
Ascending and descending: (hover up and down)
When the helicopter ies steadily, you can 1.
Turn counter clockwise and clockwise:
Fig. 15
Hold the helicopter at steady altitude. Push 1.
the rudder stick toward left to turn counterclockwise (See Fig. l5), and push the rudder
stick toward right to turn clockwise. (See Fig.
16.)
Acceleration and deceleration:
If you turn the helicopter slowly counter 1.
clockwise, the helicopter will decelerate; If
you turn the helicopter slowly clockwise, the
helicopter will accelerate.
Fly forward and stop:
The helicopter will take a slow forward speed 1.
when a gentle clockwise turn is made. A
short counter-clockwise turn command will
Fig. 14
slowly push the throttle stick up to make
helicopter y higher, or release the stick a
bit to make helicopter y lower. Only small
amounts of stick position change are re-
quired for smooth ying. (See Figs.13,14)
Fig. 16
stop the forward movement. By adopting
this ight technique, the helicopter can be
directed to go anywhere and come back to
its starting position.
Take offs
Put the helicopter on a smooth surface. Un-1.
even oor surface will affect its lifting off.
Slowly increase the throttle.2.
DO NOT look at the transmitter but focus on 3.
the helicopter.
As soon as the helicopter leaves the ground, 4.
reduce the throttle slightly. (as a worst case,
helicopter will descend back to the oor, but
is preferable over crashing into the ceiling)
SKU 98177 For technical questions, please call 1-800-444-3353. Page 7
Page 8

VERY gently add the throttle if the helicopter 5.
goes down.
VERY gently reduce the throttle if helicopter 6.
goes up.
Do not over control the helicopter; give short 7.
and small movement to the direction stick.
Flight location
Choose a location that meets the following 1.
conditions:
Indoor with calm air condition, beware of air a.
current from air-conditioner.
Ample ying space area, we recommend a b.
room size of over 10' width 16.5' length and
8' in height.
Safety area: c.
It is highly recommended that there is no •
electric fan, air-conditioner, reading lamp or
other potential dangerous objects.
Flight tips
For the control sticks on the transmitter, try 1.
not to push the sticks immediately to the
extreme position. It should be like steering a
bicycle rather than pressing computer game
controls.
For the novice pilot (after the trimming proce-2.
dure was completed), it is highly recommended to focus exclusively on learning to control
the throttle stick rst. Even if the helicopter
may turn around a bit by itself, there is no
immediate need to keep it straight.
For the rst ight, it is important to learn to 3.
keep the helicopter at a constant altitude of
around 3' - 3.5' with small movements of the
throttle stick. Once the pilot masters this, he
may start learning to take control with the
direction stick.
The helicopter usually survives most a.
crashes because it is so light, with a styrofoam body. You will need to switch the “ON/
OFF” button to “ON” again to restart the
helicopter.
Don’t operate the helicopter in the sun or b.
strong light; it will affect the control system
of your helicopter
Don’t cover the lens of the transmitter. c.
Signals will NOT be sent while the lens is
covered.
Don’t stick any other label on the helicopter; d.
they might block the IR signal.
CARE AND MAINTENANCE:
Always remove batteries from the transmitter 1.
when not being used for long periods of time.
Wipe the plane gently with a clean damp 2.
cloth.
Keep the plane away from direct heat.3.
Do not submerge the plane into water that 4.
can damage the electronic assemblies.
Parental guidance is recommended when 5.
children are installing or replacing batteries.
Because this helicopter uses an Infra-Red 6.
guidence system, in an environment having electrostatic discharge, the sample may
malfunction and require the user to reset the
sample.
Examine regularly for damage to the plug 7.
enclosure and other parts. In the event of
any damage, the plane must not be used
with the transmitter charger until the damage
has been repaired.
This plane is not intended for children under 8.
3 years old.
This plane must only be used with the recom-9.
mended charger.
Do not try to charge other batteries with this 10.
transmitter charger.
SKU 98177 For technical questions, please call 1-800-444-3353. Page 8
Page 9

TROUBLE SHOOTING:
The helicopter can be out of trim after some
severe or multiple crashes, improper storage or
If the helicopter takes too much forward speed by itself:
Fig. 17 Fig. 18 Fig. 19
Take the tail between ngers. (as shown above)
If the helicopter takes too much backward speed by itself:
Twist the tail counterclockwise for about 30
degrees (as above)
changing of temperature etc. You can solve this
problem following the procedure below. (See Figs.
17-22.)
Release it (as above)
Fig. 20 Fig. 21 Fig. 22
Take the tail between ngers. (as shown above)
Twist the tail clockwise for
about 30 degree (as above)
Release it (as above)
SKU 98177 For technical questions, please call 1-800-444-3353. Page 9
Page 10

Troubleshooting Chart
Symptom Cause Fix
Propeller won’t move. ON/OFF switch is off Turn on switch
Weak battery Battery pack low Recharge battery pack
Helicopter suddenly stops and falls Weak battery power Recharge battery pack
Helicopter does not react
Lack of control
Channel selection on transmitter is not
correct
Another infrared control device using the 1.
same channel
Affected by strong light2.
Select the correct channel
Avoid the situation if possible, or 1.
change location to operate the
helicopter
Change location to avoid strong 2.
light
PLEASE READ THE FOLLOWING CAREFULLY
THE MANUFACTURER AND/OR DISTRIBUTOR HAS PROVIDED THE PARTS LIST AND ASSEMBLY
DIAGRAM IN THIS MANUAL AS A REFERENCE TOOL ONLY. NEITHER THE MANUFACTURER OR
DISTRIBUTOR MAKES ANY REPRESENTATION OR WARRANTY OF ANY KIND TO THE BUYER THAT
HE OR SHE IS QUALIFIED TO MAKE ANY REPAIRS TO THE PRODUCT, OR THAT HE OR SHE IS
QUALIFIED TO REPLACE ANY PARTS OF THE PRODUCT. IN FACT, THE MANUFACTURER AND/
OR DISTRIBUTOR EXPRESSLY STATES THAT ALL REPAIRS AND PARTS REPLACEMENTS SHOULD
BE UNDERTAKEN BY CERTIFIED AND LICENSED TECHNICIANS, AND NOT BY THE BUYER. THE
BUYER ASSUMES ALL RISK AND LIABILITY ARISING OUT OF HIS OR HER REPAIRS TO THE
ORIGINAL PRODUCT OR REPLACEMENT PARTS THERETO, OR ARISING OUT OF HIS OR HER
INSTALLATION OF REPLACEMENT PARTS THERETO.
SKU 98177 For technical questions, please call 1-800-444-3353. Page 10
Page 11

PARTS LIST & ASSEMBLY
DIAGRAM
Part Description Qty.
1 Stabilizer 1
2 Shaft 1
3 Main Rotor 1
4 Driving Gear 1
5 Tail Rotor 1
6 Landing Gear 1
7 Transmitter 1
8 Fuselage 1
9 Aluminum Sticker 1
10 Spare Tail Rotor (See “Replace Tail
Rotor” below)
11 3.7V Rechargeable Battery (Not
shown)
1
1
Transmitter
Caution: Spare tail rotor must be replaced by an adult.
Record Product’s Serial Number Here:
Note: If product has no serial number, record month and year of purchase instead.
Note: Some parts are listed and shown for illustration purposes only, and are not available individually as
replacement parts.
SKU 98177 For technical questions, please call 1-800-444-3353. Page 11
 Loading...