

Page 1
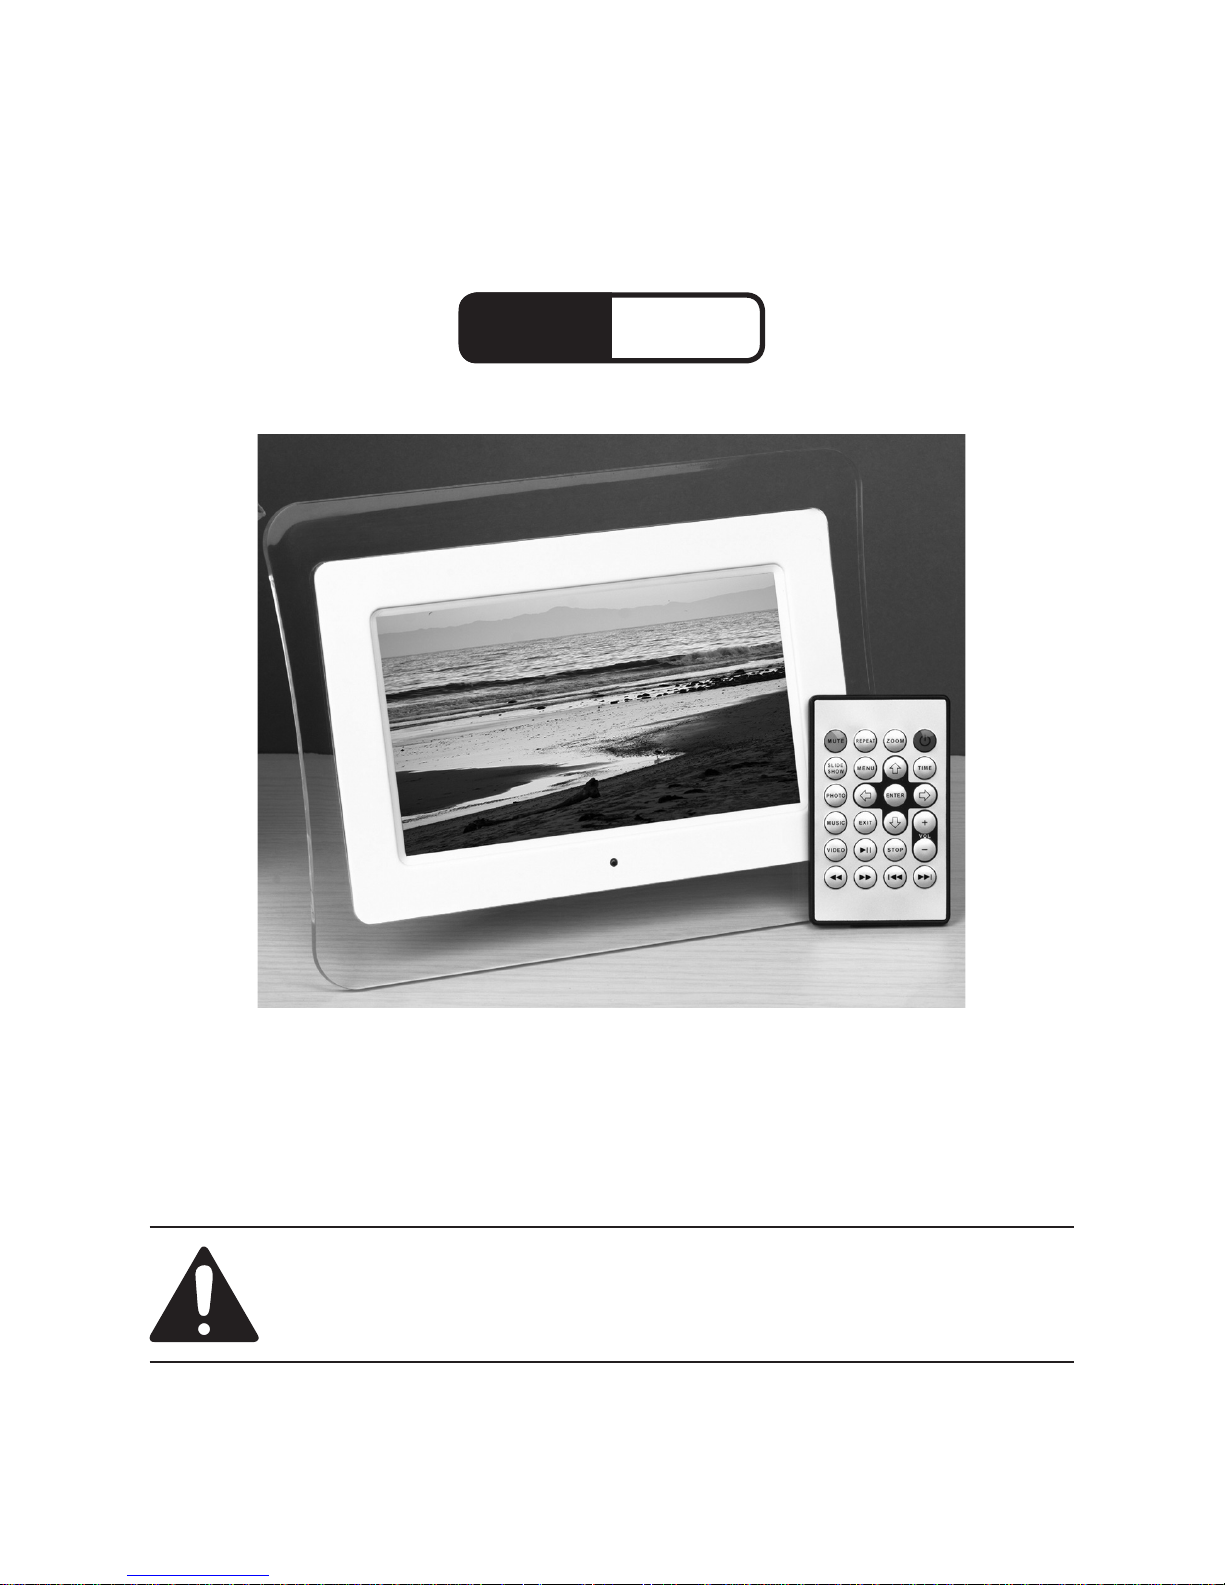
7” DIGITAL LCD PHOTO
FRAME
Model
97267
OPERATING INSTRUCTIONS
Diagrams within this manual may not be drawn proportionally.
Due to continuing improvements, actual product may differ slightly from the product described herein.
Distributed exclusively by Harbor Freight Tools®.
3491 Mission Oaks Blvd., Camarillo, CA 93011
Visit our website at: http://www.harborfreight.com
Read this material before using this product.
Failure to do so can result in serious injury.
SAVE THIS MANUAL.
Copyright© 2007 by Harbor Freight Tools®. All rights reserved. No portion of
this manual or any artwork contained herein may be reproduced in any shape
or form without the express written consent of Harbor Freight Tools.
For technical questions or replacement parts, please call 1-800-444-3353.
Page 2

Page 2SKU 97267 For technical questions, please call 1-800-444-3353.
SAVE THIS MANUAL
Keep this manual for the safety warnings and precautions, assembly, operating,
inspection, maintenance and cleaning procedures. Write the product’s serial number in
the back of the manual near the assembly diagram (or month and year of purchase if
product has no number). Keep this manual and the receipt in a safe and dry place for
future reference.
GENERAL SAFETY RULES
WARNING! Read all instructions
Failure to follow all instructions listed below may result in electric shock,
re, and/or serious injury.
SAVE THESE INSTRUCTIONS
Do not expose the LCD Frame to rain or wet conditions. Indoor use only.
Water entering this product will increase the risk of electric shock.
Do not abuse the cord. Never use the cord for carrying, pulling or
unplugging the LCD Frame. Keep cord away from heat, oil, sharp edges
or moving parts. Damaged or entangled cords increase the risk of electric
shock.
Do not use the LCD Frame if the switch does not turn it on and off. Any product
that cannot be controlled with the switch is dangerous and must be repaired.
Disconnect the plug from the power source from the LCD Frame before
making any adjustments, changing accessories, or storing the LCD Frame.
Store idle products out of the reach of children and do not allow persons
unfamiliar with the product or these instructions to operate it.
Maintain the LCD Frame. Check for breakage of parts and any other condition
that may affect the product’s operation. If damaged, have the product repaired
before use.
Use the LCD Frame in accordance with these instructions and in the manner
intended for the particular type of product, taking into account the working
conditions and the work to be performed. Use of the product for operations
different from those intended could result in a hazardous situation.
Have the LCD Frame serviced by a qualied repair person using only identical
replacement parts. This will ensure that the safety of the product is maintained.
Maintain labels and nameplates on the product. These carry important safety
information. If unreadable or missing, contact Harbor Freight Tools for a
replacement.
Do not leave the LCD Frame unattended when it is plugged into an electrical
outlet. Turn it off, and unplug it from the electrical outlet before leaving.
1.
2.
3.
4.
5.
6.
7.
8.
9.
10.
Page 3
Page 3SKU 97267 For technical questions, please call 1-800-444-3353.
Do not open the Display Housing.
This product is not a toy. It contains small parts that could pose a choking
hazard. Keep it out of reach of children.
Only use provided power adapter.
The warnings, precautions, and instructions discussed in this instruction manual
cannot cover all possible conditions and situations that may occur. It must be
understood by the operator that common sense and caution are factors which
cannot be built into this product, but must be supplied by the operator.
SAVE THESE INSTRUCTIONS.
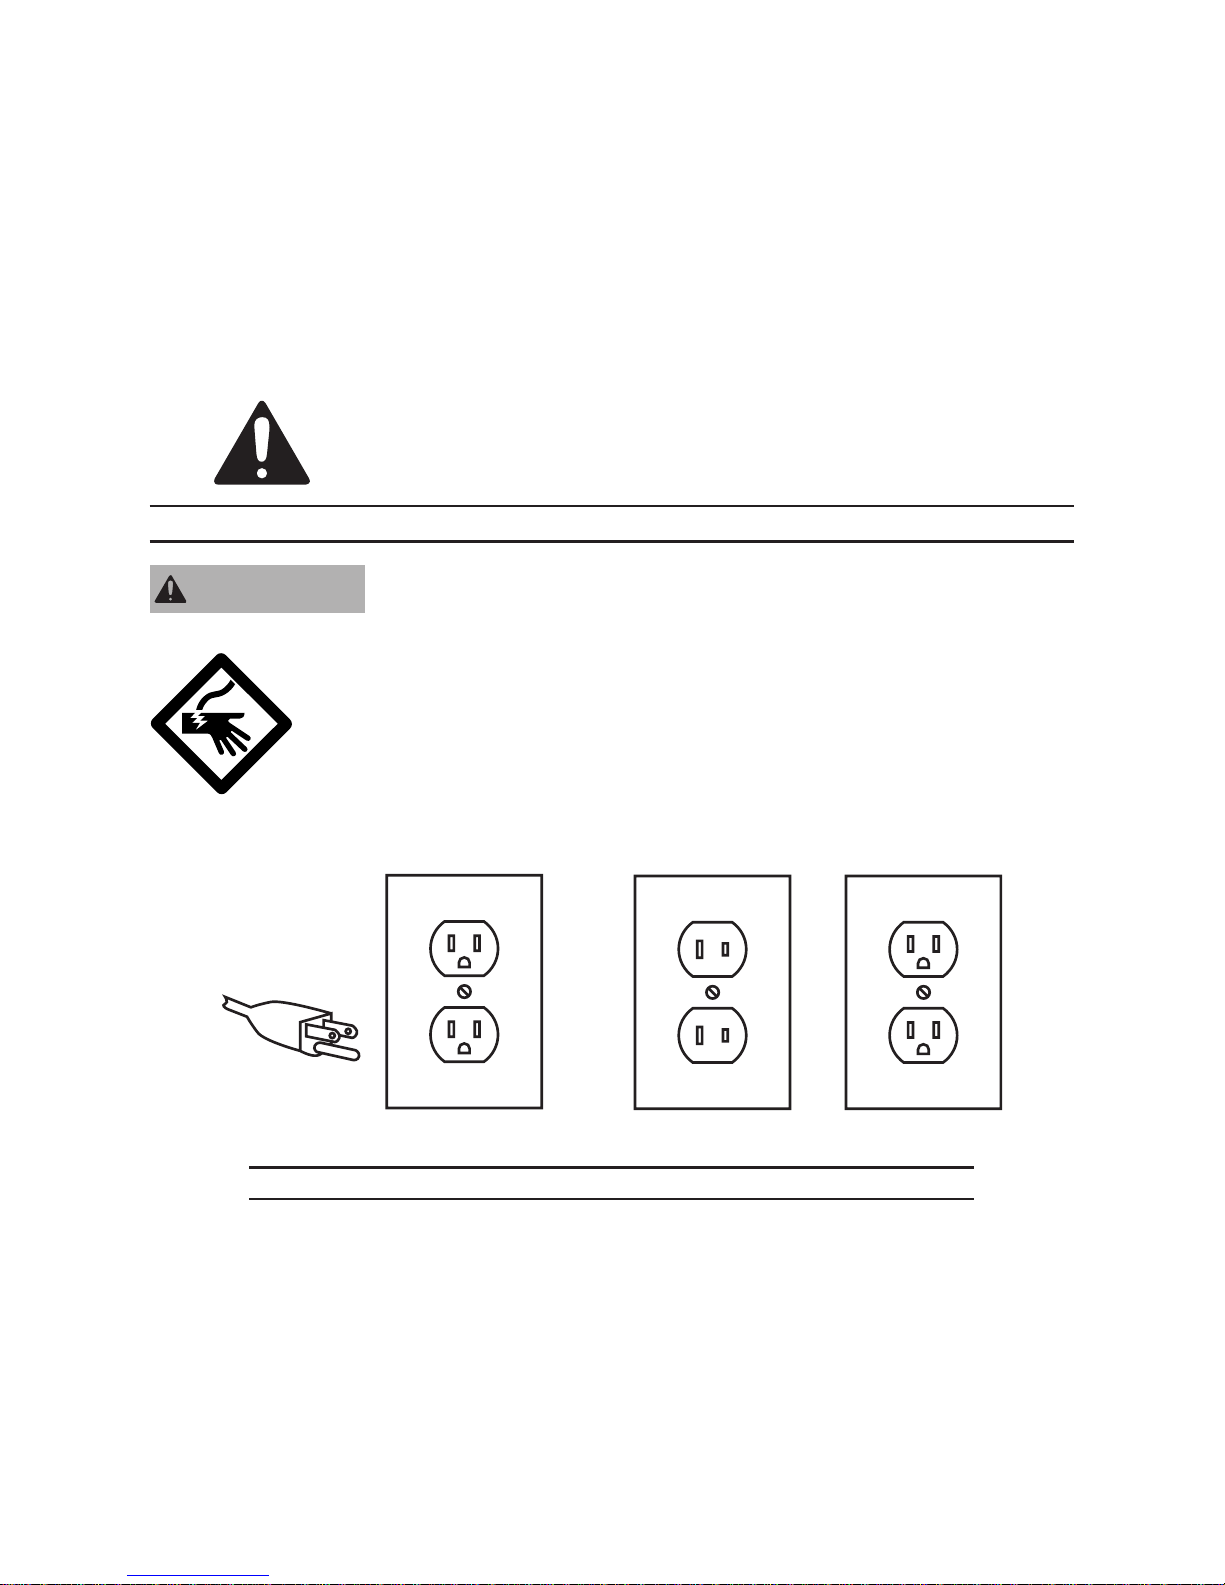
GROUNDING
Improperly connecting the grounding wire can result in
electric shock.
Check with a qualied electrician if you are in doubt as to
whether the outlet is properly grounded. Do not modify
the power cord plug provided with the LCD Frame. Never
remove the grounding prong from the plug. Do not use
the LCD Frame if the power cord or plug is damaged. If
damaged, have it repaired by a service facility before use. If
the plug will not t the outlet, have a proper outlet installed
by a qualied electrician.
3-Prong Plug and Outlet
Outlets for 2-Prong Plug
Double Insulated Tools: Tools with Two Prong Plugs
Tools marked “Double Insulated” do not require grounding. They have a special
double insulation system which satises OSHA requirements and complies
with the applicable standards of Underwriters Laboratories, Inc., the Canadian
Standard Association, and the National Electrical Code.
(See Outlets for 2-Prong Plug.)
11.
12.
13.
14.
1.
WARNINGWARNING
Page 4

Page 4SKU 97267 For technical questions, please call 1-800-444-3353.
Double insulated tools may be used in either of the 120 volt outlets shown in the
preceding illustration. (See Outlets for 2-Prong Plug.)
Extension Cords
Grounded tools require a three wire extension cord. Double Insulated tools
can use either a two or three wire extension cord.
As the distance from the supply outlet increases, you must use a heavier gauge
extension cord. Using extension cords with inadequately sized wire causes a
serious drop in voltage, resulting in loss of power and possible tool damage.
(See Table A.)
The smaller the gauge number of the wire, the greater the capacity of the cord.
For example, a 14 gauge cord can carry a higher current than a 16 gauge cord.
(See Table A.)
When using more than one extension cord to make up the total length, make
sure each cord contains at least the minimum wire size required. (See Table A.)
If you are using one extension cord for more than one tool, add the nameplate
amperes and use the sum to determine the required minimum cord size.
(See Table A.)
If you are using an extension cord outdoors, make sure it is marked with the
sufx “W-A” (“W” in Canada) to indicate it is acceptable for outdoor use.
Make sure the extension cord is properly wired and in good electrical condition.
Always replace a damaged extension cord or have it repaired by a qualied
electrician before using it.
Protect the extension cords from sharp objects, excessive heat, and damp or
wet areas.
RECOMMENDED MINIMUM WIRE GAUGE FOR EXTENSION CORDS* (120 VOLT)
NAMEPLATE
AMPERES
(at full load)
EXTENSION CORD LENGTH
25 Feet 50 Feet 75 Feet 100 Feet 150 Feet
0 – 2.0 18 18 18 18 16
2.1 – 3.4 18 18 18 16 14
3.5 – 5.0 18 18 16 14 12
5.1 – 7.0 18 16 14 12 12
7.1 – 12.0 18 14 12 10 -
12.1 – 16.0 14 12 10 - -
16.1 – 20.0 12 10 - - -
TABLE A
* Based on limiting the line voltage drop to ve volts at 150% of the rated amperes.
2.
1.
2.
3.
4.
5.
6.
7.
8.
Page 5

Page 5SKU 97267 For technical questions, please call 1-800-444-3353.
Symbology
Double Insulated
V~
Volts Alternating Current
Canadian Standards Association
A
Amperes
Underwriters Laboratories, Inc.
n0 xxxx/min.
No Load Revolutions per Minute
(RPM)
Page 6

Page 6SKU 97267 For technical questions, please call 1-800-444-3353.
SPECIFICATIONS
Electrical Requirements 120 V~ / 60 Hz
Energy Consumption 15 W
AC/DC Adaptor Input 9VDC, 1.0 A
LCD Resolution 480 X 234,16:9 Setting
Video System Supports NTSC/PAL
File Formats
Audio: MP3
Photo: JPEG
Video: MPEG 1/2/4, AVI
Battery for Remote One CR2025 (included)
UNPACKING
When unpacking, check to make sure that the item is intact and undamaged. If
any parts are missing or broken, please call Harbor Freight Tools at the number shown
on the cover of this manual as soon as possible.
OPERATING INSTRUCTIONS
Read the ENTIRE IMPORTANT SAFETY INFORMATION section at the
beginning of this manual including all text under subheadings therein
before set up or use of this product.
Exit
Menu
Enter
Support
On/Off
Switch
Navigation
Arrows
Plug the Adaptor into the LCD Frame and then into a grounded 120V electrical
outlet.
1.
Page 7

Page 7SKU 97267 For technical questions, please call 1-800-444-3353.
Adjust the Support so that the unit stands freely and lightly tighten the support
knob.
Turn the switch on the back of the unit to the ON position.
Secure Digital,
Multimedia Card,
& Memory Stick
Slot
Compact Flash
Slot
TV Port
Headset
Mini USB Port
USB Port
Power
Adapter
Connection
Insert the media source (i.e. portable USB Drive or memory card) into the
appropriate port, as shown above.
Using the AVI cable the LCD Frame can be connected to a television to display
pictures and play music or movies from the LCD Frame to a television.
A Menu will appear on the screen offering a variety of options. Options can be
navigated to by using either the buttons on the back of the Frame or using the
Remote. Push the “Select” button the choose an
option.
Photo allows photos from a media source to be browsed or
used in a slide show. The directional keys can be used
to rotate a photo. Pushing enter will save the changes.
Music allows music from a media source to be played on the
LCD Frame.
Photo + Music allows music and photos to be played at the
same time.
Movie allows a movie to be played from a media source.
Setup allows options to be set affecting how photos display.
Photo Setting options include:
Interval Time is the amount of time a photo displays on the screen before
moving to the next photo.
Transition Effect is the manner in which each new photo is presented on the
Display.
Browse allows the choice between thumbnails and le manager.
2.
3.
4.
5.
6.
•
RemoteRemote
Page 8

Page 8SKU 97267 For technical questions, please call 1-800-444-3353.
Auto-play options include:
On/off toggles for automatically starting Photo, Music, and Movie when the
media is introduced to the LCD Frame.
Display Setup options:
These options allow the user to set the visual parameters of the Display, such as
brightness and contrast.
Custom Setup options:
OSD Language allows the user to choose which language the Display’s text is
presented in.
Style allows the user to choose different presentation styles.
Repeat Mode allows the user to choose where the media is drawn from.
Default sets the default settings for the LCD Frame
Exit closes the window and returns to the main menu.
Calendar allows the user to set the date.
Clock allows the user to set the time.
Alarm allows the user to set an alarm. Press any button to turn alarm off.
Auto-Power allows the user to choose automatic shutoff options.
Edit mode allows the user to Copy les from media sources into the memory of the
LCD Frame, or delete photos, movies, or music that are stored in memory.
Choose Copy, select the media source, and use enter to highlight media to
be moved into the LCD Frame’s memory.
Choose Delete, thumbnails will display, use the navigation arrows to highlight
the le to be deleted and push enter to select it, select the “Delete it” option
at the bottom of the Display, or select “Delete All”.
Push the Exit button when done.
When options are selected, the LCD Frame will automatically detect where
media is stored, both within its own memory or in a portable media source that is
connected to the unit.
To prevent accidents, turn off the product and disconnect its power supply after
use. Clean, then store the LCD Frame indoors out of children’s reach.
•
•
•
•
a.
b.
c.
7.
8.
Page 9

Page 9SKU 97267 For technical questions, please call 1-800-444-3353.
MAINTENANCE AND SERVICING
Risk of serious personal injury from electric shock. Turn
the Power Switch of the LCD Frame Off and unplug the
adapter from the electrical outlet before performing any
inspection, maintenance, or cleaning procedures.
Damaged equipment can fail, causing serious personal
injury. Do not use damaged equipment. If abnormal noise
or vibration occurs, have the problem corrected before
further use.
Cleaning, maintenance, and lubrication
BEFORE EACH USE, inspect the general condition of the product. Check for
loose screws, cracked or broken parts, damaged electrical wiring, and any other
condition that may affect its safe operation.
AFTER USE, clean external surfaces of the LCD Frame with clean, moist cloth.
WARNING! If the supply cord of this product is damaged, it must be
replaced only by a qualied service technician.
Dispose of the battery in a manner consistant for its type according to all State,
local, and Federal laws and regulations.
1.
2.
3.
4.
WARNINGWARNING
Record Product’s Serial Number Here:
Note: If product has no serial number, record month and year of purchase instead.
Note: Some parts are listed and shown for illustration purposes only, and are not
available individually as replacement parts.
Page 10

Page 10SKU 97267 For technical questions, please call 1-800-444-3353.
PLEASE READ THE FOLLOWING CAREFULLY
THE MANUFACTURER AND/OR DISTRIBUTOR HAS PROVIDED THE PARTS LIST AND
ASSEMBLY DIAGRAM IN THIS MANUAL AS A REFERENCE TOOL ONLY. NEITHER THE
MANUFACTURER OR DISTRIBUTOR MAKES ANY REPRESENTATION OR WARRANTY OF
ANY KIND TO THE BUYER THAT HE OR SHE IS QUALIFIED TO MAKE ANY REPAIRS TO THE
PRODUCT, OR THAT HE OR SHE IS QUALIFIED TO REPLACE ANY PARTS OF THE PRODUCT.
IN FACT, THE MANUFACTURER AND/OR DISTRIBUTOR EXPRESSLY STATES THAT ALL
REPAIRS AND PARTS REPLACEMENTS SHOULD BE UNDERTAKEN BY CERTIFIED AND
LICENSED TECHNICIANS, AND NOT BY THE BUYER. THE BUYER ASSUMES ALL RISK AND
LIABILITY ARISING OUT OF HIS OR HER REPAIRS TO THE ORIGINAL PRODUCT. THERE ARE
NO REPLACEMENT PARTS FOR THIS PRODUCT.
PARTS LIST & ASSEMBLY DIAGRAM
Part Description Qty
1 Display 1
2 Remote 1
Part Description Qty
3 Power Adapter 1
4 AVI Cable (for television) 1
1
2
3 4
 Loading...