

Page 1
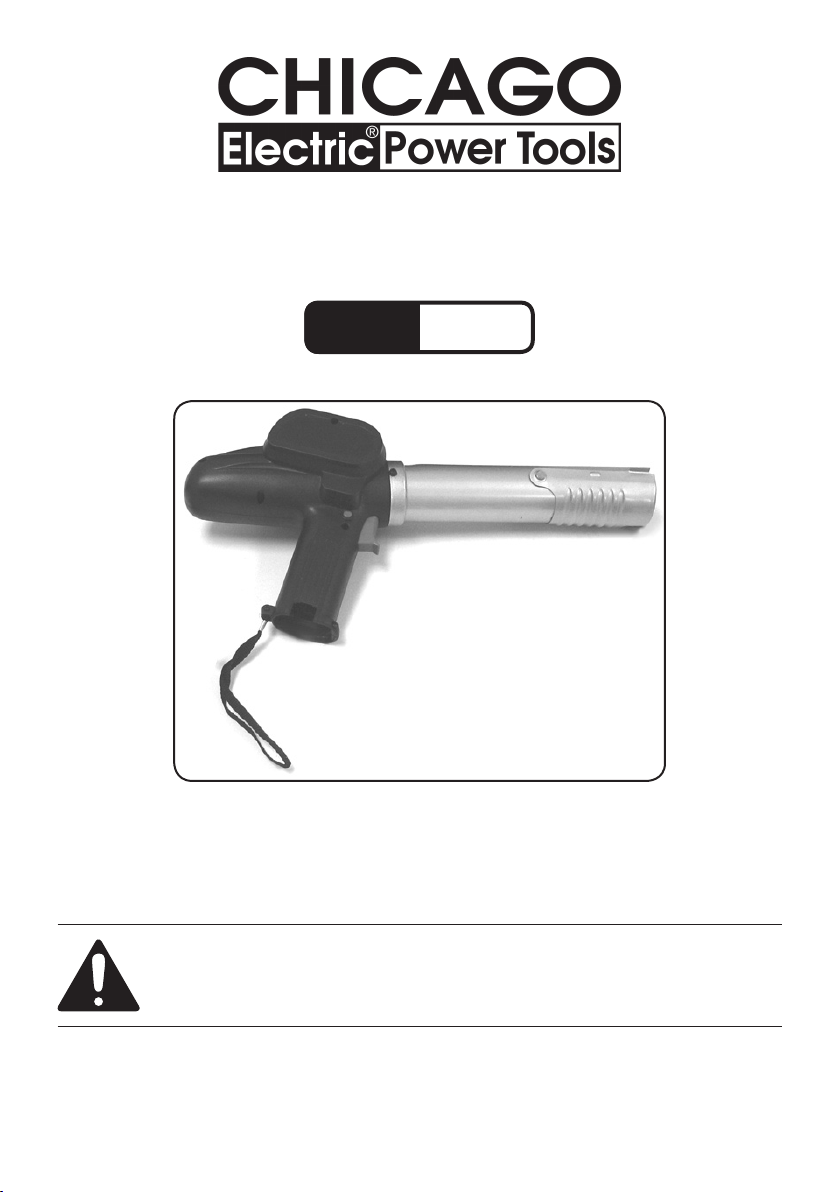
4.8 V CORDLESS
Model
94849
CAULKING GUN KIT
SET UP AND OPERATING INSTRUCTIONS
Diagrams within this manual may not be drawn proportionally.
Due to continuing improvements, actual product may differ slightly from the product described herein.
Distributed exclusively by Harbor Freight Tools®.
3491 Mission Oaks Blvd., Camarillo, CA 93011
Visit our website at: http://www.harborfreight.com
Read this material before using this product.
Failure to do so can result in serious injury.
SAVE THIS MANUAL.
Copyright© 2006 by Harbor Freight Tools®. All rights reserved. No portion of this
manual or any artwork contained herein may be reproduced in any shape or form
without the express written consent of Harbor Freight Tools.
For technical questions or replacement parts, please call 1-800-444-3353.
Cover revised 07i
Page 2

Specications
Functions
Power Supply
Safety Clutch Protects tool from overload
Caulk Type Standard Cartridge up to 10.5 oz.
Cordless rechargeable battery
powered caulking gun
Rechargeable 4.8 VDC NiCd
Battery
Construction
Charging Unit 120 V~ 7-9 hour Charger
Variable
Speed
ABS Gun Housing, Steel Tube,
Alloy Steel Pusher
6 speeds Rotary Selector
Save This Manual
You will need the manual for the safety warnings and precautions, assembly
instructions, operating and maintenance procedures, parts list and diagram. Keep
your invoice with this manual. Write the invoice number on the inside of the front
cover. Keep the manual and invoice in a safe and dry place for future reference.
Safety Warnings and Precautions
WARNING: When using tool, basic safety precautions should always be followed to reduce the risk of personal injury and damage to equipment.
Read all instructions before using this tool!
1. Keep work area clean. Cluttered areas invite injuries.
2. Observe work area conditions. Do not use machines or power tools in
damp or wet locations. Don’t expose to rain. Keep work area well lit. Do
not use electrically powered tools in the presence of ammable gases or
liquids.
3. Keep children away. Children must never be allowed in the work area. Do
not let them handle machines, tools, or extension cords.
4. Store idle equipment. When not in use, tools must be stored in a dry
location to inhibit rust. Always lock up tools and keep out of reach of
children.
5. Use the right tool for the job. Do not attempt to force a small tool or
attachment to do the work of a larger industrial tool. There are certain
applications for which this tool was designed. It will do the job better
and more safely at the rate for which it was intended. Do not modify this
tool and do not use this tool for a purpose for which it was not intended.
6. Dress properly. Do not wear loose clothing or jewelry as they can be
caught in moving parts. Protective, electrically non-conductive clothes and
nonskid footwear are recommended when working. Wear restrictive hair
covering to contain long hair.
REV 08f
SKU 94849 For technical questions please call 1-800-444-3353 Page 2
Page 3

7. Use eye and ear protection. Always wear ANSI-approved impact safety
goggles and full face shield. Wear an ANSI-approved dust mask or respirator
when working around metal, wood, and chemical dusts and mists.
8. Do not overreach. Keep proper footing and balance at all times. Do not
reach over or across running machines.
9. Maintain tools with care. Keep tools maintained and clean for better
and safer performance. Follow instructions for lubricating and changing
accessories. Inspect tool cords periodically and, if damaged, have them
repaired by an authorized technician. The handles must be kept clean, dry,
and free from oil and grease at all times.
10. Disconnect power. Unplug Battery Charger when not in use.
11. Remove adjusting keys and wrenches. Check that keys and adjusting
wrenches are removed from the tool or machine work surface before using
the tool.
12. Avoid unintentional starting. Be sure the switch is in the Off position when
not in use. Do not carry any tool with your nger on the trigger, whether the
battery is installed or not.
13. Stay alert. Watch what you are doing, use common sense. Do not operate
any tool when you are tired.
14. Check for damaged parts. Before using any tool, any part that appears
damaged should be carefully checked to determine that it will operate
properly and perform its intended function. Check for alignment and binding
of moving parts; any broken parts or mounting xtures; and any other
condition that may affect proper operation. Any part that is damaged should
be properly repaired or replaced by a qualied technician.
15. Guard against electric shock. Prevent body contact with grounded
surfaces such as pipes, radiators, ranges, and refrigerator enclosures.
16. Replacement parts and accessories. When servicing, use only identical
replacement parts. Use of any other parts will void the warranty. Only use
accessories intended for use with this tool. Approved accessories are
available from Harbor Freight Tools.
17. Do not operate tool if under the inuence of alcohol or drugs. Read
warning labels on prescriptions to determine if your judgment or reexes are
impaired while taking drugs. If there is any doubt, do not operate the tool.
18. Maintenance. For your safety, service and maintenance should be
performed regularly by a qualied technician.
SKU 94849 For technical questions please call 1-800-444-3353 Page 3
Page 4

Using the Battery Charger
NOTE: Battery will not reach full charge the rst time it is charged. Allow several
cycles (operation followed by recharging) before the Battery will become fully
charged.
Note: Performance of the charger may vary depending on variations in local line
voltage. Extension cord usage may also affect tool performance.
NOTE: During recharging, the Battery will become slightly warm to the touch.
This is normal and not a cause for concern. Do not keep the Battery or
charger in an environment of extreme heat or cold. They will work best at
room temperature.
Battery Temperature Warning:
WARNING: Battery explosion may cause serious personal or property injury in-
cluding death. Charge the Battery only within a 50° to 100° F. temperature range.
Lower temperatures may inhibit charging. Higher temperatures increase chance
of battery failure, including explosion.
Always allow a battery that is warm from use to cool before charging.
Battery Charger Safety:
1. Charge the Battery only with the included charger. Use of other chargers
may cause battery failure including explosion.
2. Ensure that the Battery Charger is connected only to a 120 VAC, 60 Hz
power supply that includes a circuit breaker.
Cordless Tool Safety:
1. Before inserting the Battery Pack into the tool, check to be sure that the
Trigger operates properly, and returns to the OFF position when released.
2. Use only fully charged Battery Pack specically designed for this tool. Insert
the Battery Pack into the handle. Ensure that the Battery Lock is engaged
securely holding the Battery Pack in place.
Warning: The warnings, cautions, and instructions discussed in this instruction
manual cannot cover all possible conditions and situations that may occur.
It must be understood by the operator that common sense and caution are
factors which cannot be built into this product, but must be supplied by the
operator.
SKU 94849 For technical questions please call 1-800-444-3353 Page 4
Page 5

Unpacking
When unpacking, check to make sure that the product is intact and undamaged,
and all accessories listed below are included.
Cordless Caulk Gun
4.8 VDC Rechargeable Battery
Larger Diameter Caulk Tube
Recharging Base and Power Supply
(4) Caulk Tube Screw Caps
If any parts are missing or broken, please call Harbor Freight Tools at the number
on the cover of this manual.
FIGURE 1
6-Speed Selector
Locking Button
Recharging Base and
Power Supply
Cordless Caulk Gun
4.8 VDC Rechargeable Battery
Gate
Caulk Tube Screw
Trigger
SKU 94849 For technical questions please call 1-800-444-3353 Page 5
07j
Page 6

Working with the Rechargeable Battery
Charging the Battery:
Batteries are normally shipped with low or no charge to prevent potential problems 1.
during shipment. Before use, you must charge your new Battery. Charge time is approximately 7-9 hours.
Plug the battery charger into a 120 VAC, 60 Hz power outlet. 2.
Insert the Battery into the charger by aligning the rib on the Battery with the groove 3.
in the charger. Press the Battery into place. The Red LED will illuminate indicating
that a Battery is charging.
The Red LED will remain on while the Battery charges. The Battery Charger will 4. not
automatically turn off when the Battery is fully charged. The charging indicator light
will remain on until the Battery Charger is disconnected from the electrical outlet.
Recharging the Battery more than 9 hours can cause damage to the Battery cells.
When the Battery is fully charged, remove the charged battery from the charger, and 5.
unplug the charger from its power source. Put the charger away for safekeeping. Do
not leave the Battery in the charger indenitely.
Always dispose of or recycle used batteries properly. Contact your local Hazardous 6.
Waste Authority for proper battery disposal guidelines.
Installing the Battery:
Slide the Battery into the base of the handle. 1. CAUTION: Do not press the battery
into the handle if it is not properly
aligned, as this may damage the
body of the tool, and will not secure
the battery.
Be sure the Battery is properly in-2.
stalled before using the tool.
Using the Battery Locks and Removing the Battery:
After placing the Battery in the tool, 1.
the battery locks on the side of the
Battery engage to prevent the battery
from coming out accidentally.
To remove the Battery, depress the 2.
locks and remove the Battery by pulling straight out.
SKU 94849 For technical questions please call 1-800-444-3353 Page 6
REV 08f
Page 7

About Caulk, Adhesives and Fillers
Selecting the right caulk:
This tool may be used to apply several different types of material that are packaged in
a cartridge. In addition to caulk, this tool may be used to apply various adhesives, llers and
similar materials. No caulk or other material is supplied with this tool.
Caulk is a semi-viscous material used to ll holes and gaps in seams of building materials.
Some types of caulk are also useful as adhesives. There are three basic types of caulk:
Latex caulk1. is a water soluble material useful for indoor uses, such as painting
preparation and texturing under paint. Latex caulk is not waterproof and should not
be used outdoors or in applications near water, such as baths and kitchens. It has
low adhesive strength. Its main advantages include usefulness in paint preparation,
low price and water cleanup.
Silicone caulk2. is ideal for outdoor uses such as around doors and windows and for
applications around water such as baths and kitchens. Silicone caulk has moderate
to high adhesive strength. Silicone caulk is not water soluble, so care must be used
during application to prevent need for cleanup. Check the product package for the
manufacturer’s recommended solvent. Use any chemical solvents carefully, following manufacturer’s directions.
Combination caulk3. is a mixture of silicone and latex. It may be cleaned up with
water, yet offers good water resistance after curing. It is ideal for use in protected
outdoor areas, such as under ashing around doors and windows, or for caulking
outdoors prior to painting. It is also useful for indoor paint preparation where a more
durable caulk is desired. It has low to moderate adhesive strength.
Adhesives are glues which are packaged in cartridges and may be applied with this tool.
Silicone caulk1. may be considered an adhesive because of its moderate to high
adhesive strength. Silicone Caulk is an ideal material for installing laminate counter
tops in kitchens, baths and laundry rooms. While the counter top should be screwed
in place from underneath, the side splashes may be glued in place using only
silicone caulk. All seams, including contact edges with the wall should be caulked. It
is good practice to apply a line of caulk under the counter edge and splashes before
installation, and to apply caulk to the seam after installation. In this way the seam is
lled and is water tight.
Panel adhesive2. is sold under various brand names. It is ideal for gluing wall panels
and other large at surfaces. Some panel adhesive will damage plastic, such as
ber reinforced panels or plastic trim edges. If using plastic materials be sure to use
an adhesive labeled for use with plastic.
Construction adhesive3. is a high tack material used to ll gaps and increase
holding power of joints made during construction. There are many different kinds
designed for use with paneling, foam board, pressure treated wood, etc. Be sure to
select the proper adhesive for your particular application.
SKU 94849 For technical questions please call 1-800-444-3353 Page 7
Page 8

Fillers:
Fillers are designed to ll large gaps and provide a exible and waterproof joint
between large surfaces. Typical uses include around chimneys, masonry joints and
sections of concrete. Fillers are often sold in larger sized cartridges. To reduce cost,
joints are often partially lled with “caulk rod” or sand before being topped with ller.
How to apply caulk, adhesive or llers:
Select the proper caulk, adhesive or ller for your application. Have the correct 1.
clean up materials ready, including scrapers, rags and solvent.
Prepare your work materials before applying caulk. Your project should have been 2.
test tted or assembled. Have clamps or any other needed tools available. Caulk,
adhesive or llers are a nal step in construction. They are not designed to be
removed once applied.
If using caulk in a seam3. , apply painter’s tape along both sides of all seams before
applying the caulk. Leave a very small space, usually less than 1/8” between the
edge of the painter’s tape and the seam. This is the amount of caulk that will be visible on completion of the job.
If using caulk, next apply a small bead of caulk along the seam for no more than a
few feet. Using a spreader, rub along the seam to smooth the caulk into the seam.
Excess caulk will be on the tape. Using the spreader, rub excess caulk from the
tape into the seam. Continue until all seams have been lled.
Before the caulk has dried, remove all painter’s tape from the project, and dispose
of it properly. Using painter’s tape will result in a neat, consistent seam with little or
no clean up required.
If using adhesive4. , test t your work materials before applying the adhesive.
If adhesive will be applied to seams or edges of your work material, apply painter’s
tape to all edges to prevent squeeze-out from getting on the surface.
Apply the adhesive to the work materials where they will be joined. Apply plenty of
adhesive in a spiral or zigzag pattern and along all edges.
If edge trim is being used, install it now. Press the workpiece into place. If necessary, brads, nails, screws, clamps or bracing may be used to hold the workpiece in
place until the adhesive dries.
If using llers5. , secure the proper ller for the job at hand.
Remove any dirt, water or debris from the seam before starting work. Compressed
air may be used for this.
If lling a vertical seam such as in a cement wall, insert caulk rod as needed in the
seam. If lling a horizontal seam, such as a concrete oor, insert caulk rod or sand
as needed.
Caulk rod is a foam rope-like product that is available in various diameters. Select
the proper caulk rod for your application. If using sand, be sure it is clean dry sand.
Caulk rod and sand are used to reduce the amount of ller needed for a given job.
However, lling usually requires a lot of material. This is why llers are often sold in
larger cartridges. It is a good idea to buy more than you think you will need.
When applying caulk rod or sand, leave enough open space in the seam for the ller to
adhere to both sides of the joint and be thick enough to form a strong seal.
SKU 94849 For technical questions please call 1-800-444-3353 Page 8
Page 9

Start at one end of the seam, and apply a heavy bead of the ller continuously until
you reach the other end. The ller must adhere to both sides of the seam and form
a heavy, continuous bead of material.
Operation
Testing your Cordless Caulking Gun
NOTE: Follow the procedure below to test the operation of your Caulking Gun before using
it for the rst time.
Install a charged battery as discussed on page 6.1.
Set the 6-speed Selector (11) at position 3, or above, when rst running the Caulk-2.
ing Gun. Once the motor is running, any of the 6 speeds can be selected.
While holding the caulking gun in your right hand, push the Locking Button (7) in. 3.
(If you are holding the gun in your right hand, the Locking Button (7) will be next to
your thumb. Push it in until it pops out on the opposite side of the gun housing). Test
the operation of the tool by squeezing the trigger. The Plunger (46) should move
forward. See the Figure 1 on page 5.
To retract the Plunger (46), push the Locking Button (7) back in until it protrudes 4.
from the left side of the housing. Using your nger, push the Plunger (46) all the way
back to it’s starting location.
Installing a cartridge and using your Cordless Caulking Gun
Cut off the tip of a standard 10.5 oz. cartridge (not included) to open it. Pull down 1.
the Gate at the end of the Cartridge Holder (43), and slide the cartridge, base end
rst, into the Cartridge Holder and onto the Plunger (46). Press the Gate back into
place. Make sure the Plunger (47) is completely retracted before doing this.
Apply the tip of the cartridge to the work material. Squeeze the Trigger (15) to begin 2.
applying material, and move the tip of the cartridge along the seam. Move the 6Speed Selector (11) to adjust the rate the material is being applied.
Release the Trigger (15) to stop applying material. Attach on of the Calking Tube 3.
Screw Caps to the end of the cartridge when nished. Remove the cartridge form
the Cartridge Holder (43), see paragraph below.
CAUTION: DO NOT leave the cartridge in the Cordless Caulking Gun when you are nished using it. The material in the cartridge could harden; making it very difcult or impos-
sible to remove it from the Caulking Gun.
Removing the cartridge from your Cordless Caulking Gun
Push the Locking Button (7) back in until it protrudes from the left side of the housing. Firmly press the cartridge in, as far as it will go, toward the handle. Swing the
Gate open. Pull the cartridge from the Cartridge Holder (43). Swing the Gate to it’s
closed position. See the Parts List and Assembly Diagram on pages 11 and 12.
REV 07j, 08f, 08g
SKU 94849 For technical questions please call 1-800-444-3353 Page 9
Page 10

Troubleshooting
Tool will not operate or operates slowly:
Battery may need to be charged. Recharge the Battery.1.
Too great a load is being placed on the tool. Try a slower speed on the 6-Speed 2.
Selector. The caulk may be dried up in the tube, or the tip may be plugged. Check
condition of cartridge and caulk, replace if necessary.
Battery loses charge quickly:
A new Battery will not hold a charge as long as older ones. Completely deplete and
recharge Battery Pack several times to extend its charge life.
Caulk squirts out back of cartridge:
The caulk may be dried up in the tube, or the tip may be plugged. Check condition
of cartridge and caulk, replace if necessary.
The trigger is locked in place and won’t move:
The Locking Button (7) may be in the wrong position. Push it in, and try squeezing
the trigger again. See Figure 1 page 5.
Maintenance
Keep your tool clean and dry. Wipe dirt and grease from it if it becomes dirty. Re-1.
move any excess caulk, adhesive or ller while it is still wet. Do not use solvents on
the plastic parts of this tool.
Do not allow your tool, Battery or Charger to become wet. 2.
Do not leave Battery in Charger unattended for long periods of time.3.
When not in use, remove the Battery and store both Tool and Battery in a dry, se-4.
cure location.
SKU 94849 For technical questions please call 1-800-444-3353 Page 10
07j
Page 11

Parts List
Part Description QTY.
1 Screw ST 2.9 x 15 4
2 Screw ST 2.9 x 8 1
3 Right Housing 1
4 Battery Terminal 1
5 Screw ST 2.9 x 18 4
6 Battery 1
7 Locking Button 1
8 Screw ST 2.6 x 9.5 5
9 PCB 1
10 Screw ST 2.6 x 9.5 4
11 6-Speed Selector 1
12 Strap 1
13 Left Housing 1
14 Spring 1
15 Trigger 1
16 Spring 2
17 Gear 2
18 Bronze Axle 2
19 Gear Box 1
20 Gear Tray 1
21 Star Gear 6
22 Gear Tray 1
23 Washer 1
24 Screw M 3 x 8 2
25 Gear Housing 1
26 Motor Gear 1
27 Motor 1
28 Screw ST 2.9 x 6.5 1
29 Main Body 1
30 Bushing Case 1
31 Gear Tray 1
Part Description QTY.
32 Bronze Axle 1
33 Gear Axle 1
34 Inner Gear 1
35 Star Gear 6
36 Gear Tray 1
37 Bearing 1
38 Gear 1
39 Bronze Bushing 1
40 Gear 1
41 Wave Washer 1
42 Washer 2
43 Cartridge Holder 2
44 Clamp 1
45 Screw M 3 x 8 1
46 Plunger 1
47 Screw ST 4.2 x 13 2
48 Washer 2
49 Rack 1
50 Pin 1
51 Spring 1
52 Pin 1
53 Gear Bushing 1
54 Spring 1
55 Clutch Pin 1
56 Clutch Pin 1
57 Pin 2
58 Switch 1
59 Bracket 1
60 Switch 1
61 Screw ST 2.6 x 16 2
62 Screw ST 2.6 x 19 2
NOTE: Some parts are listed and shown for illustration purposes only and are not available
individually as replacement parts.
SKU 94849 For technical questions please call 1-800-444-3353 Page 11
Page 12

Assembly Drawing
Gate
PLEASE READ THE FOLLOWING CAREFULLY
THE MANUFACTURER AND/OR DISTRIBUTOR HAS PROVIDED THE PARTS DIAGRAM IN THIS MANUAL AS A
REFERENCE TOOL ONLY. NEITHER THE MANUFACTURER NOR DISTRIBUTOR MAKES ANY REPRESENTATION
OR WARRANTY OF ANY KIND TO THE BUYER THAT HE OR SHE IS QUALIFIED TO MAKE ANY REPAIRS TO THE
PRODUCT OR THAT HE OR SHE IS QUALIFIED TO REPLACE ANY PARTS OF THE PRODUCT. IN FACT, THE
MANUFACTURER AND/OR DISTRIBUTOR EXPRESSLY STATES THAT ALL REPAIRS AND PARTS REPLACEMENTS
SHOULD BE UNDERTAKEN BY CERTIFIED AND LICENSED TECHNICIANS AND NOT BY THE BUYER. THE BUYER
ASSUMES ALL RISK AND LIABILITY ARISING OUT OF HIS OR HER REPAIRS TO THE ORIGINAL PRODUCT
OR REPLACEMENT PARTS THERETO, OR ARISING OUT OF HIS OR HER INSTALLATION OF REPLACEMENT
PARTS THERETO.
REV 08g
SKU 94849 For technical questions please call 1-800-444-3353 Page 12
 Loading...