

Page 1
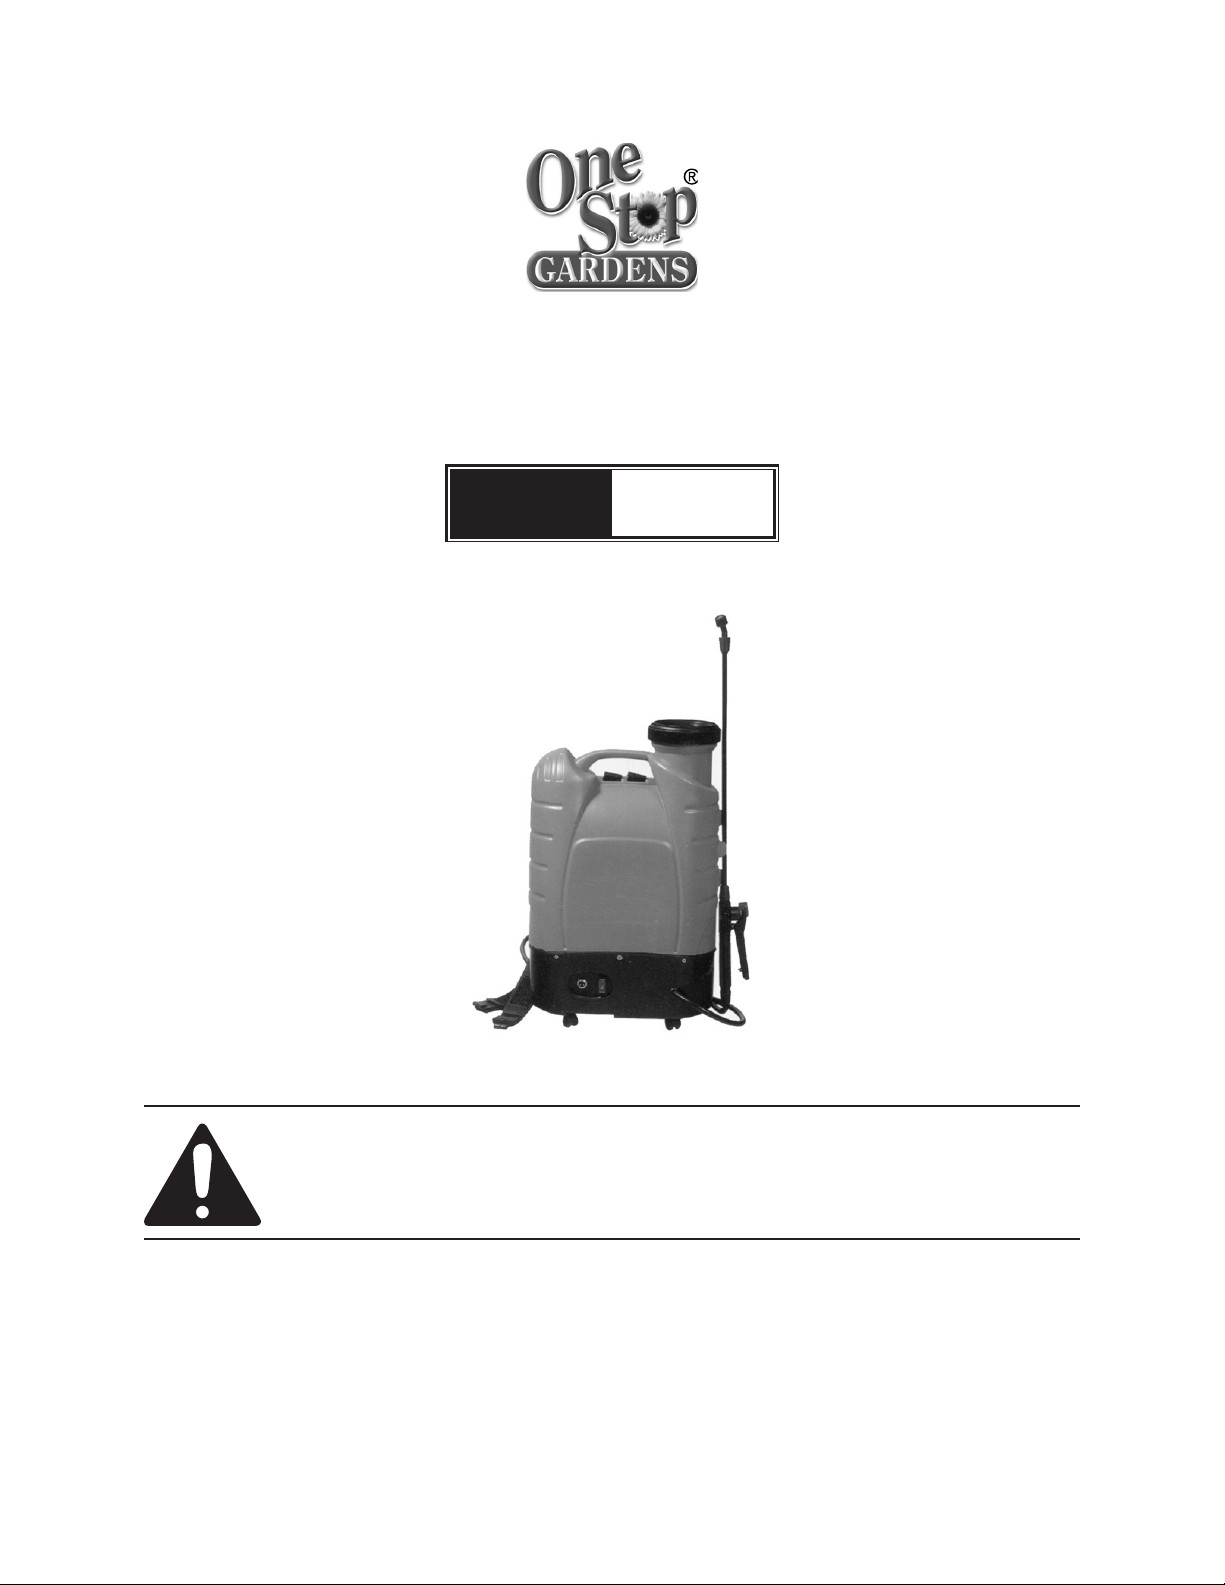
BACKPACK SPRAYER
12 VOLT - 4.8 GAL. CAPACITY
Model
94573
SET UP AND OPERATING INSTRUCTIONS
Visit our website at: http://www.harborfreight.com
Read this material before using this product.
Failure to do so can result in serious injury.
SAVE THIS MANUAL.
Copyright© 2006 by Harbor Freight Tools®. All rights reserved. No portion of this manual or any artwork
contained herein may be reproduced in any shape or form without the express written consent of
Harbor Freight Tools. Diagrams within this manual may not be drawn proportionally. Due to continuing
improvements, actual product may differ slightly from the product described herein. Tools required for
assembly and service may not be included.
For technical questions or replacement parts, please call 1-800-444-3353.
Manual Revised 10d
Page 2
SAVE THIS MANUAL
Keep this manual for the safety warnings
and precautions, assembly, operating,
inspection, maintenance and cleaning
procedures. Write the product’s serial number
in the back of the manual near the assembly
diagram (or month and year of purchase if
product has no number). Keep this manual
and the receipt in a safe and dry place for
future reference.
IMPORTANT SAFETY
INFORMATION
In this manual, on the labeling, and
all other information provided with
this product:
This is the safety alert
symbol. It is used to alert
you to potential personal
injury hazards. Obey all
safety messages that follow
this symbol to avoid possible
injury or death.
DANGER indicates a
hazardous situation
which, if not avoided, will result
in death or serious injury.
WARNING indicates a
hazardous situation
which, if not avoided, could
result in death or serious injury.
CAUTION, used with
the safety alert
symbol, indicates a hazardous
situation which, if not avoided,
could result in minor or moderate
injury.
NOTICE is used to
address practices not
related to personal injury.
CAUTION, without the
safety alert symbol, is
used to address practices not
related to personal injury.
GENERAL SAFETY RULES
WARNING Read all safety warnings
and instructions. Failure to follow the
warnings and instructions may result
in electric shock, re and/or serious
injury.
Save all warnings and instructions
for future reference.
WORK AREA
Keep your work area clean and well 1.
lit. Cluttered and dark work areas invite
accidents.
Keep bystanders, children, and 2.
visitors away while operating the
Sprayer. Distractions can cause you to
lose control.
PERSONAL SAFETY
Stay alert. 1. Watch what you are doing,
and use common sense when operating
a power tool. Do not use the Sprayer
while tired or under the inuence of
drugs, alcohol, or medication. A moment
of inattention while operating power tools
may result in serious personal injury.
Dress properly. 2. Do not wear loose
clothing or jewelry. Contain long hair.
Keep your hair, clothing, and gloves
away from moving parts. Loose clothes,
jewelry, or long hair can be caught in
moving parts.
Page 2 For technical questions, please call 1-800-444-3353. SKU 94573
Page 3

Do not overreach. 3. Keep proper footing
and balance at all times. Proper footing
and balance enables better control of the
Sprayer in unexpected situations.
Wear eye, breathing, and skin 4.
protection. Wear ANSI approved safety
impact goggles, a NIOSH-approved
respirator, latex gloves, and proper
safety clothing when using this product.
TOOL USE AND CARE
Do not force the Sprayer. 1. Use the
correct product for your application. The
correct product will do the job better and
safer at the rate for which it is designed.
SERVICE
Product service must be performed 1.
only by qualied service technician.
Service or maintenance performed by
unqualied personnel could result in a
risk of injury.
When servicing the Sprayer, use 2.
only identical replacement parts.
Follow instructions in the “Inspection,
Maintenance, And Cleaning” section
of this manual. Use of unauthorized
parts or failure to follow maintenance
instructions may create a risk of electric
shock or injury.
Store idle tools and equipment out of 2.
reach of children and other untrained
people. Tools and equipment are
dangerous in the hands of untrained
users.
Maintain the Sprayer with care. 3.
Keep this product clean. A properly
maintained tool is easier to control. Do
not use damaged tools and equipment.
Tag damaged tools and equipment “Do
not use” until repaired.
Check for misalignment or binding 4.
of moving parts, loose or broken
parts, and any other condition that
may affect the Sprayer’s operation.
If damaged, have the Sprayer serviced
before using. Many accidents are
caused by poorly maintained tools and
equipment.
Use only accessories that are 5.
recommended by the manufacturer
for your model. Accessories that may
be suitable for one product may become
hazardous when used on another
product.
SPECIFIC SAFETY RULES
Maintain labels and nameplates on 1.
the Sprayer. These carry important
information. If unreadable or missing,
contact Harbor Freight Tools for a
replacement.
Use the right product for the job. 2.
There are certain applications for which
this product was designed. Do not use
small tools, equipment, or attachments
to do the work of larger industrial tools,
equipment, or attachments. Do not use
this product for a purpose for which it
was not intended.
Industrial applications must follow 3.
OSHA requirements.
Store idle tools. 4. When not in use, store
the Sprayer in a clean, dry, safe location
out of reach of children.
This Sprayer is intended to be used 5.
only with water, liquid fertilizers,
liquid herbicides, and liquid
pesticides. Never attempt to spray
ammable, combustible, or corrosive
liquids with the Sprayer.
Page 3For technical questions, please call 1-800-444-3353.SKU 94573
Page 4

Always follow all chemical label 6.
precautions and local EPA regulations
when using liquid chemicals. Do
not touch harmful chemicals. After
use, clean the Sprayer thoroughly with
agents recommended by the chemical
manufacturer.
the tool to make sure ice has not
formed. Do not store the Sprayer
where the temperature will fall below 32°
Fahrenheit.
Do not keep water or any liquid 16.
chemicals in the Sprayer after use.
Never point the nozzle of the Spray 7.
Gun Assembly at yourself, other
people, pets and animals, or property.
A note on Chemicals disposal: 8. Never
attempt to burn unused fertilizers,
herbicides, pesticides, or any other types
of chemicals. Make sure to check with
your local solid waste authorities for
proper disposal procedures.
Always make sure children and 9.
animals do not have access to
chemically treated areas.
Dry running will cause damage to 10.
the inner seals. Make sure the water
or liquid chemical supply used for the
Sprayer is not dirty or sandy.
Do not pull or carry the Sprayer by its 11.
Spray Gun Assembly. Use the Handle
on the Sprayer to move the tool from one
location to another.
The work area should have adequate 12.
drainage to reduce the possibility of a
fall due to slippery surfaces.
Make sure to clean the Filter of the 17.
Sprayer before each use.
Never leave the Sprayer unattended.18.
When nished using the Sprayer, empty
the unit. Thoroughly clean the unit and
store it in a clean, dry, safe location out
of reach of children.
The warnings and cautions discussed 19.
in this manual cannot cover all possible
conditions and situations that may occur.
It must be understood by the operator
that common sense and caution are
factors which cannot be built into this
product, but must be supplied by the
operator.
People with pacemakers should consult 20.
their physician(s) before using this
product. Electromagnetic elds in close
proximity to a heart pacemaker could
cause interference to or failure of the
pacemaker.
SAVE THESE INSTRUCTIONS
GROUNDING
This product is designed for outdoor 13.
use only.
Keep the Cap and Spray Gun 14.
Assembly of the Sprayer connected
to the tool while the system is
pressurized. Prior to relling or
emptying the Tank, squeeze the
Trigger on the Spray Gun Assembly to
completely depressurize the system.
Prior to starting the Sprayer in cold 15.
weather, check all of the parts of
Page 4 For technical questions, please call 1-800-444-3353. SKU 94573
TO PREVENT
ELECTRIC SHOCK
AND DEATH FROM INCORRECT
GROUNDING WIRE
CONNECTION:
Check with a qualied electrician
if you are in doubt as to whether
the outlet is properly grounded.
Do not modify the power cord
plug provided with the tool.
Never remove the grounding
prong from the plug. Do not use
Page 5

the tool if the power cord or plug
is damaged. If damaged, have it
repaired by a service facility
before use. If the plug will not t
the outlet, have a proper outlet
installed by a qualied
electrician.
Double Insulated Tools: Tools with
Two Prong Plugs
V~
Symbology
Double Insulated
Canadian Standards Association
Underwriters Laboratories, Inc.
Volts Alternating Current
Outlets for 2-Prong Plug
Tools marked “Double Insulated” do 1.
not require grounding. They have a
special double insulation system which
satises OSHA requirements and
complies with the applicable standards
of Underwriters Laboratories, Inc., the
Canadian Standard Association, and the
National Electrical Code. (See Outlets
for 2-Prong Plug.)
Double insulated tools may be used in 2.
either of the 120 volt outlets shown in the
preceding illustration. (See Outlets for
2-Prong Plug.)
A
n0 xxxx/min.
Amperes
No Load Revolutions per Minute
(RPM)
Extension Cords
Note: Extension cords must not be used with
this item’s charger.
Page 5For technical questions, please call 1-800-444-3353.SKU 94573
Page 6

SPECIFICATIONS
Charger Input 120 V~ / 60 Hz
Charger Output 12 VDC
Battery Type Rechargeable 12V / 10 Ah
Charge Time 8 Hours
Charger Cord/Plug 58-1/2” L, 2-Prong
Spray Time Output Approximately 9 to 10 Hours
(Full Charge)
Tank Capacity 4.8 Gallons
Flow Rating 0.7 Gallons Per Minute
Maximum
Pressure
Unit Dimensions 7” Long x 15” Wide x 23-5/8” High
Spray Rod
Dimensions
Unit Weight
(Empty)
Accessories Conical Mist Nozzle
Additional
Features
65 PSI
28” Long x 3/8” Diameter
17.5 lb.
Four Hole Adjustable Nozzle
Mist Nozzle / 30° Dual Nozzle
Diaphragm Pump
Triple Screen Water Filtration
FIGURE E
CHARGER
(63)
CHARGING
PLUG
CHARGE FOR 8 HOURS
(DO NOT OVERCHARGE)
2. To charge the Battery (51), Turn the
Power Switch (58) to its “OFF” position.
(See Figure E.)
Insert the chrome Charging Plug of 3.
the Charger (63) into the Charging
Receptacle of the Sprayer. Make sure
to screw the chrome Charging Plug onto
the Receptacle rmly. (See Figure E.)
POWER
SWITCH
(58)
UNPACKING
When unpacking, make sure all that the
item is intact and undamaged. If any parts
are missing or broken, please call Harbor
Freight Tools at 1-800-444-3353 as soon as
possible.
CHARGING INSTRUCTIONS
The Battery (51) for the Sprayer must 1.
be fully charged before using the tool.
When charging for the rst time, and all
subsequent charges, the charge time is
8 hours. Never charge the Battery (51)
for longer than 8 hours, as damage to
the Battery and/or Sprayer will occur.
Plug the Power Cord Plug of the Charger 4.
(63) into the nearest, 120 volt, grounded,
electrical outlet. (See Figure E.)
Charge the Battery (51) for 5. 8 hours.
IMPORTANT: The Charger (63) will not
automatically shut off when the Battery
(51) is fully charged. Avoid Battery/
tool damage by removing power to the
Charger at the end of 8 hours charge
time. (See Figure E.)
Keep children and pets away from the 6.
Battery while it is charging. Regularly
check the Battery to make sure it is
charging properly.
When nished charging, disconnect the 7.
Charger (63) from the electrical outlet.
Then, unscrew and remove the chrome
Charging Plug of the Charger (63) from
the Charging Receptacle of the Sprayer.
(See Figure E.)
On a full charge, the Sprayer will operate 8.
approximately 9 to 10 hours.
REV 06j
Page 6 For technical questions, please call 1-800-444-3353. SKU 94573
Page 7

ASSEMBLY AND OPERATING
INSTRUCTIONS
CAUTION! Wear eye, breathing, and skin
protection. Wear ANSI-approved safety
impact goggles, a NIOSH-approved
respirator, latex gloves, and proper
safety clothing when using this product.
Nozzle Selection And Assembly:
The Sprayer is equipped with the 1.
following Nozzle types:
30° DUAL NOZZLE
(60)
FIGURE F
a. 30° Dual Nozzle (60): Designed
for wider spray areas on short crops
and the spraying of herbicides and
pesticides. Follow the wind and move
in a parallel manner on one side while
spraying. (See Figure F.)
FOUR HOLE
ADJUSTABLE
NOZZLE (62)
FIGURE H
c. Four Hole Adjustable Nozzle (62):
Designed for spraying high crops
and fruit trees and the spraying of
pesticides. However, the Adjustable
Nozzle may result in signicant
overspray of pesticides.
(See Figure H.)
CONICAL MIST
NOZZLE (65)
FIGURE I
d. Conical Mist Nozzle (65): Designed
for spraying low crops and the spraying
of herbicides and pesticides. Allows for
a conical spray pattern. Follow the wind
and move in a parallel manner on one
side while spraying. (See Figure I.)
NOZZLE
(60, 61, 62, 65)
NOZZLE
NUT (1)
MIST
NOZZLE
(61)
FIGURE G
b. Mist Nozzle (61): Designed for narrow
spray areas on low crops and the
spraying of herbicides and pesticides.
Follow the wind and move in a parallel
manner on one side while spraying.
(See Figure G.)
NOZZLE GASKET
RING (4)
FIGURE J
SPRAY GUN ASSY.
2. To attach a Nozzle (60, 61, 62, 65) to
the Spray Gun, check to make sure
the Nozzle Gasket Ring (4) is properly
seated in the Nozzle Nut (1). Then,
screw the desired Nozzle into the Nozzle
Nut. (See Figure J.)
Page 7For technical questions, please call 1-800-444-3353.SKU 94573
Page 8

TANK
CAP (41)
TANK
FILTER (42)
FIGURE K
To Fill The Tank:
TANK
(64)
be sprayed. Then, squeeze the Trigger
to begin spraying. (See Figure L.)
NOTE: The Trigger (17) of the Spray Gun
Assembly may be locked in a continuous
run position with the Trigger Lock
(16). To do so, move the Trigger Lock
backward toward the Handle (21). To
return to manual operation, move the
Trigger Lock forward toward the Spray
Rod (9). (See Figure L.)
1. Prior to lling the Tank (64) of the
Sprayer with liquid, remove the Tank
Cap (41) and check to make sure the
Tank Filter (42) is clear of dirt and debris.
If necessary, remove the Filter and
thoroughly clean. (See Figure K.)
Next, insert the Tank Filter back into the 2.
opening of the Tank.
Fill the Tank with up to 4.8 gallons of 3.
liquid. Then, replace the Tank Cap on
the Tank.
To Operate The Sprayer:
CAUTION! Make sure other adults, children,
and animals do not have access to the
spray area(s).
NOTE: The Sprayer is heavy when
completely lled with liquid. Strap the
Sprayer on with assistance. Adjust the
Back Strap (45) as needed.
TRIGGER
TRIGGER
LOCK (16)
SPRAY
ROD (9)
FIGURE L
1. Grip the Handle (21) of the Spray Gun
Assembly rmly. Then, turn the Power
Switch (58) to its “ON” position.
(See Figures E and L.)
Point the Nozzle (60, 61, 62) of the 2.
Spray Gun Assembly toward the area to
(17)
HANDLE
(21)
As you spray, the system will begin to 3.
depressurize. When the distance of the
spray diminishes you will need to stop
spraying momentarily. Allow the Sprayer
to re-pressurize its system before
spraying again.
If it becomes necessary to rell the 4.
Tank (64) of the Sprayer, turn the Power
Switch (58) to its “OFF” position.
Continue squeezing the Trigger (17) on
the Spray Gun Assembly to completely
de-pressurize the system. Remove the
Tank Cap (41) from the Tank. Check to
make sure the Tank Filter (42) is clear
of dirt and debris. Rell the Tank with
liquid, and replace the Tank Cap. Turn
the Power Switch to its “ON” position
to pressurize the system, and continue
spraying. (See Figures E and K.)
When nished spraying, turn the Power 5.
Switch (58) to its “OFF” position.
Continue squeezing the Trigger (17) on
the Spray Gun Assembly to completely
depressurize the system. Remove the
Tank Cap (41) from the Tank (64), and
empty any remaining liquid into a safe
and secure container. Clean the Sprayer
thoroughly with agents recommended
by the chemical manufacturer. Allow the
unit to air-dry. Replace the Tank Cap
(41), and store the Sprayer in a clean,
dry, safe location out of reach of children
and other unauthorized people.
Page 8 For technical questions, please call 1-800-444-3353. SKU 94573
Page 9

INSPECTION, MAINTENANCE,
AND CLEANING
CAUTION! Make sure the Power Switch
(58) is in its “OFF” position and
unplugged from its Charger (63).
Then, de-pressurize the system
before performing any inspection,
maintenance, or cleaning of the
Sprayer.
Before each use,1. inspect the general
condition of the Sprayer. Check for
misalignment or binding of moving parts,
damaged or loose parts, dirt or debris in
the Filter and Nozzle, damaged electrical
wiring, and any other condition that
may affect the tool’s safe operation. If
abnormal noise or vibration occurs, have
the problem corrected before further use.
Do not use damaged equipment.
To clean: 2. If using liquid chemicals,
ush the interior and clean the exterior
of the Sprayer and its Spray Gun
Assembly thoroughly with cleaning
agents recommended by the chemical
manufacturer. Then, allow to air-dry. Do
not use solvents.
When storing: 3. Always completely
empty the Sprayer of liquid. Frost will
damage the Sprayer if the unit contains
liquid. Store the Sprayer in an indoor
area such as a garage or shed. Make
sure to store the Sprayer and any
chemicals in a safe, dry, clean
location out of reach of children and
other unauthorized people.
CAUTION! 4. All maintenance, service,
and repairs not discussed in this manual
should only be performed by a qualied
service technician.
TROUBLESHOOTING
Problem Possible Solution
Unit does not spray. Fully charge the battery.1.
Fill the tank.2.
Firmly tighten the Tank Cap and secure all connections on the tank and 3.
the spray gun assembly.
Clear the Nozzle on the Spray Gun assembly of dirt and debris.4.
The spray pattern is
undesirable.
Use the proper Nozzle for the job at hand.1.
Clear the Nozzle on the Spray Gun assembly of dirt and debris.2.
PLEASE READ THE FOLLOWING CAREFULLY
THE MANUFACTURER AND/OR DISTRIBUTOR HAS PROVIDED THE PARTS LIST AND
ASSEMBLY DIAGRAM IN THIS MANUAL AS A REFERENCE TOOL ONLY. NEITHER THE
MANUFACTURER OR DISTRIBUTOR MAKES ANY REPRESENTATION OR WARRANTY
OF ANY KIND TO THE BUYER THAT HE OR SHE IS QUALIFIED TO REPLACE ANY PARTS
OF THE PRODUCT. IN FACT, THE MANUFACTURER AND/OR DISTRIBUTOR EXPRESSLY
STATES THAT ALL REPAIRS AND PARTS REPLACEMENTS SHOULD BE UNDERTAKEN
BY CERTIFIED AND LICENSED TECHNICIANS, AND NOT BY THE BUYER. THE BUYER
ASSUMES ALL RISKS AND LIABILITY ARISING OUT OF HIS OR HER REPAIRS TO THE
ORIGINAL PRODUCT OR REPLACEMENT PARTS THERETO, OR ARISING OUT OF HIS
OR HER INSTALLATION OF REPLACEMENT PARTS THERETO.
Page 9For technical questions, please call 1-800-444-3353.SKU 94573
Page 10

PARTS LIST
Part Description Qty.
1 Nozzle Nut 1
2 Conical Mist Spraying Sheet 1
3 Splitting Sheet 1
4 Nozzle Gasket Ring 1
5 Elbow 1
6 Spray Rod O-Ring 2
7 Opening Cover 2
8 Spray Rod Nut 3
9 Spray Rod 1
10 Switch Main Unit 1
11 Switch Gasket 1
12 Valve Cartridge O-Ring 1
13 Valve Cartridge 1
14 Spring 1
15 Switch Nut 1
16 Trigger Lock 1
17 Trigger 1
18 Switch Pin 1
19 Handle Gasket Ring 1
20 Switch Filter Screen 1
21 Handle 1
22 Opening Cover 1
23 Tube Sleeve 1
24 Hose 1
25 Caster 4
26 Screw (M5 x 20) 4
27 Flat Washer (#5) 4
28 Nut (M5) 4
29 Protection Cover 1
30 Base 1
31 Countersink Screw (M5 x 15) 1
32 Tube Clamp 1
33 Inlet Tube 1
Part Description Qty.
34 Mini-Pump 1
35 Tube Coupling 1
36 O-Ring 1
37 Inlet Coupling 1
38 Screen Frame 1
39 Screen Cover 1
40 Vent Valve 1
41 Tank Cap 1
42 Tank Filter 1
43 Barrel 1
44 Strap Clamp 2
45 Back Strap 2
46 Shoulder Cushion 2
47 Strap Button 2
48 Strap Hook 2
49 Self Tapping Screw (3.7 x 10) 1
50 Alarm 1
51 Battery 1
52 Anchor Ear 1
53 Self Tapping Screw (3.7 x 18) 2
54 Power Cable 7
55 Nylon Tier 3
56 Countersink Screw (M3 x 10) 2
57 Nut (M3) 2
58 Power Switch 1
59 Socket 1
60 Dual Nozzle 1
61 Mist Nozzle 1
62 Adjustable Nozzle 1
63 Charger 1
64 Tank 1
65 Conical Mist Nozzle 1
Page 10 For technical questions, please call 1-800-444-3353. SKU 94573
Page 11

ASSEMBLY DIAGRAM
40
65
60
61
62
63
48
46
47
59
50
58
49
45
44
51
52
55
57, 56
54
53
41
33
42
43
31
38
37
36
35
39
32
29
34
30
64
10
1
2
3
4
5
6
7
8
9
14
12
11
18
19
20
21
22
23
24
13
15
16
17
25
28, 27, 26
NOTE: Some parts are listed and shown for illustration purposes only, and are not available
individually as replacement parts.
Rev 10d
Page 11For technical questions, please call 1-800-444-3353.SKU 94573
 Loading...