

Page 1
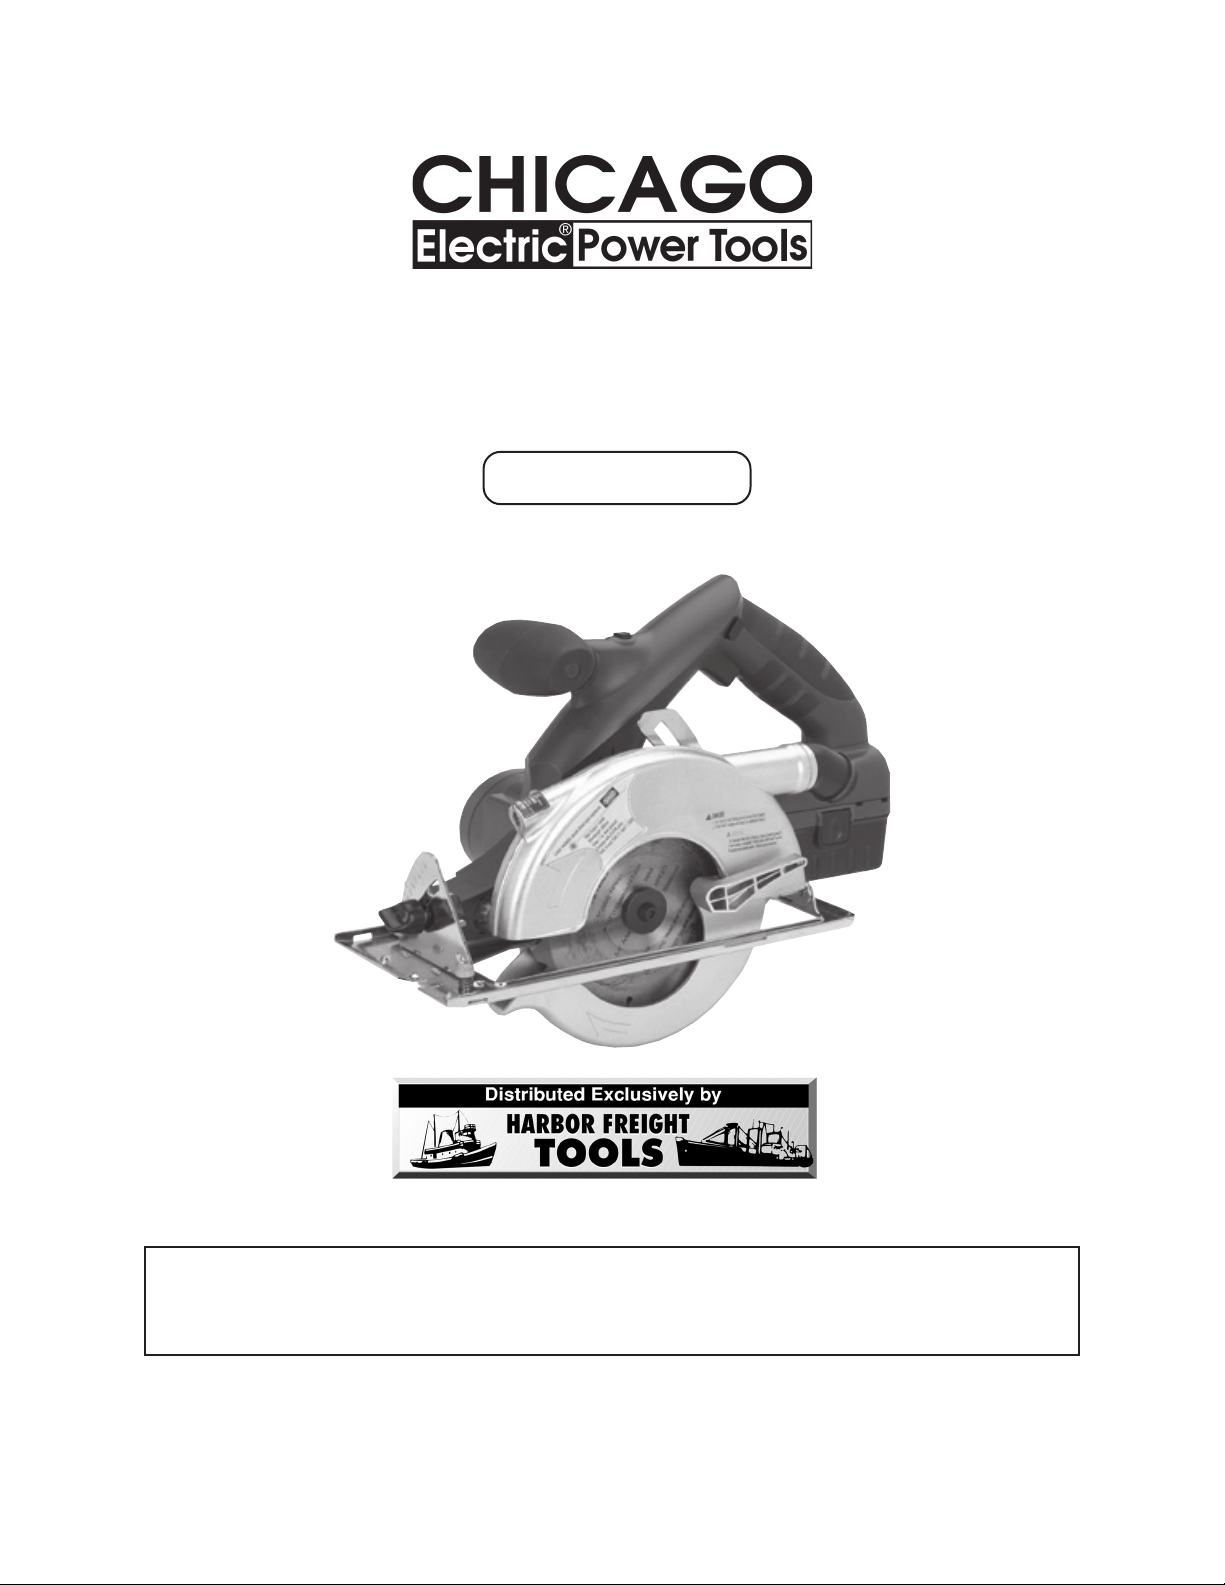
CORDLESS 18V CIRCULAR SAW
®
WITH LASER
Model 93808
ASSEMBLY AND OPERATING INSTRUCTIONS
Due to continuing improvements, actual product may differ slightly from the product described herein.
3491 Mission Oaks Blvd., Camarillo, CA 93011
Visit our Web site at http://www.harborfreight.com
TO PREVENT SERIOUS INJURY,
READ AND UNDERSTAND ALL WARNINGS
AND INSTRUCTIONS BEFORE USE.
Copyright© 2005 by Harbor Freight Tools® . All rights reserved. No portion of this manual or
any artwork contained herein may be reproduced in any shape or form without the express
written consent of Harbor Freight Tools.
For technical questions and replacement parts, please call 1-800-444-3353.
Page 2
PRODUCT SPECIFICATIONS
rotoMtloV81,MPR0024
snoitacificepSedalB
selgnAdnashtpeDgnittuC
yrettaB
thgieWyrettaBhtiw.sbl5.9
tupnIesaBregrahCz
1
6
/
2
5
xretemaiD"
/
1
1;°09@"2
8
/
4
H06,CAV011
°54@"
leveBmumixaM°05
,yrettaBhMiNtloV81
emiTegrahCruoHenO
/MPR0005/piTedibraCT42
robrA"
E194601
SAVE THIS MANUAL
You will need this manual for the safety warnings and precautions, assembly,
operating, inspection, maintenance and cleaning procedures, parts list and assembly
diagram. Keep your invoice with this manual. Write the invoice number on the inside of the
front cover. Keep this manual and invoice in a safe and dry place for future reference.
GENERAL SAFETY RULES FOR ALL BATTERY OPERATED TOOLS
WARNING!
READ AND UNDERSTAND ALL INSTRUCTIONS
Failure to follow all instructions listed below may
result in electric shock, fire, and/or serious injury.
SAVE THESE INSTRUCTIONS
WORK AREA
1. Keep your work area clean and well lit. Cluttered benches and dark areas invite
accidents.
2. Do not operate power tools in explosive atmospheres, such as in the presence
of flammable liquids, gases, or dust. Power tools create sparks which may ignite
the dust or fumes.
3. Keep bystanders, children, and visitors away while operating a power tool.
Distractions can cause you to lose control.
SKU 93808 For technical questions, please call 1-800-444-3353.
Page 2
English
Page 3

ELECTRICAL SAFETY
1. Do not abuse the cord. Never use the cord to carry the tool. Keep cord away
from heat, oil, sharp edges, or moving parts. Replace damaged cords
immediately. Damaged cords may create a fire.
2. A battery operated tool with integral batteries or a separate battery pack must
be recharged only with the specified charger for the battery. A charger that may
be suitable for one type of battery may create a risk of fire when used with another
battery.
3. Use battery operated tool only with specifically designated battery pack. Use
of any other batteries may create a risk of fire.
PERSONAL SAFETY
1. Stay alert, watch what you are doing, and use common sense when operating
a power tool. Do not use tool while tired or under the influence of drugs, alcohol,
or medication. A moment of inattention while operating power tools may result in
serious personal injury.
2. Dress properly. Do not wear loose clothing or jewelry. Contain long hair. Keep
your hair, clothing, and gloves away from moving parts. Loose clothes, jewelry,
or long hair can be caught in moving parts.
3. Avoid accidental starting. Be sure switch is in the locked or off position before
inserting battery pack. Carrying tools with your finger on the switch or inserting
the battery pack into a tool with the switch on invites accidents.
4. Remove adjusting keys or wrenches before turning the tool on. A wrench or a
key that is left attached to a rotating part of the tool may result in personal injury.
5. Do not overreach. Keep proper footing and balance at all times. Proper footing
and balance enable better control of the tool in unexpected situations.
6. Use safety equipment. Always wear eye protection. Dust mask, nonskid safety
shoes, hard hat, or hearing protection must be used for appropriate conditions.
TOOL USE AND CARE
1. Use clamps or other practical way to secure and support the workpiece to a
stable platform. Holding the work by hand or against your body is unstable and
may lead to loss of control.
2. Do not force tool. Use the correct tool for your application. The correct tool will
do the job better and safer at the rate for which it is designed.
3. Do not use tool if switch does not turn it on or off. A tool that cannot be controlled
with the switch is dangerous and must be repaired.
SKU 93808 For technical questions, please call 1-800-444-3353.
Page 3
English
Page 4

4. Disconnect battery pack from tool or place the switch in the locked or off
position before making any adjustments, changing accessories, or storing
the tool. Such preventive safety measures reduce the risk of starting the tool
accidentally.
5. Store idle tools out of reach of children and other untrained persons. Tools are
dangerous in the hands of untrained users.
6. When battery pack is not in use, keep it away from other metal objects like:
paper clips, coins, keys, nails, screws, or other small metal objects that can
make a connection from one terminal to another. Shorting the battery terminals
together may cause sparks, burns, or a fire.
7. Maintain tools with care. Keep cutting tools sharp and clean. Properly maintained
tools with sharp cutting edge are less likely to bind and are easier to control.
8. Check for misalignment or binding of moving parts, breakage of parts, and
any other condition that may affect the tool’s operation. If damaged, have the
tool serviced before using. Many accidents are caused by poorly maintained tools.
9. Use only accessories that are recommended by the manufacturer for your
model. Accessories that may be suitable for one tool may create a risk of injury
when used on another tool.
SERVICE
1. Tool service must be performed only by qualified repair personnel. Service or
maintenance performed by unqualified personnel may result in a risk of injury.
2. When servicing a tool, use only identical replacement parts. Follow instructions
in the Maintenance section of this manual. Use of unauthorized parts or failure to
follow Maintenance Instructions may create a risk of shock or injury.
SKU 93808 For technical questions, please call 1-800-444-3353.
Page 4
English
Page 5

SPECIFIC SAFETY RULES
1. DANGER! Keep hands away from cutting area and blade. Keep your second
hand on auxiliary handle or motor housing. If both hands are holding the saw,
they cannot be cut by the blade.
Keep your body positioned to either side of the saw blade, but not in line with
the saw blade. KICKBACK could cause the saw to jump backwards. (See
KICKBACK)
Do not reach underneath the work. The guard can not protect you from the blade
below the work.
2. Check lower guard for proper closing before each use. Do not operate saw if
lower guard does not move freely and close instantly. Never clamp or tie the
lower guard into the open position. If saw is accidentally dropped, lower guard
may be bent. Raise the lower guard with the Retracting Handle and make sure it
moves freely and does not touch the blade or any other part, in all angles and depths
of cut.
3. Check the operation and condition of the lower guard spring. If the guard and
the spring are not operating properly, they must be serviced before use. Lower
guard may operate sluggishly due to damaged parts, gummy deposits, or a buildup
of debris.
4. Lower guard should be retracted manually only for special cuts such as
“Pocket Cuts” and “Compound Cuts.” Raise lower guard by Retracting Handle.
As soon as blade enters the material, lower guard must be released. For all
other sawing, the lower guard should operate automatically.
5. Always observe that the lower guard is covering the blade before placing saw
down on bench or floor. An unprotected, coasting blade will cause the saw to
walk backwards, cutting whatever is in its path. Be aware of the time it takes for the
blade to stop after switch is released.
6. NEVER hold piece being cut in your hands or across your leg. It is important to
support the work properly to minimize body exposure, blade binding, or loss of
control.
7. Hold tool by insulated gripping surfaces when performing an operation where
the cutting tool may contact hidden wiring. Contact with a “live” wire will also
make exposed metal parts of the tool “live” and shock the operator.
8. When ripping always use a rip fence or straight edge guide. This improves the
accuracy of cut and reduces the chance for blade binding.
9. Always use blades with correct size and shape (diamond vs. round) arbor
holes. Blades that do not match the mounting hardware of the saw will run
eccentrically, causing loss of control.
SKU 93808 For technical questions, please call 1-800-444-3353.
Page 5
English
Page 6

10. Never use damaged or incorrect blade washers or bolts. The blade washers
and bolt were specially designed for your saw, for optimum performance and safety
of operation.
11. Causes and Operator Prevention of Kickback:
Kickback is a sudden reaction to a pinched, bound, or misaligned saw blade, causing
an uncontrolled saw to lift up and out of the workpiece toward the operator. When
the blade is pinched or bound tightly by the kerf closing down, the blade stalls and
the motor reaction drives the unit rapidly back toward the operator. If the blade
becomes twisted or misaligned in the cut, the teeth at the back edge of the blade
can dig into the top surface of the wood causing the blade to climb out of the kerf
and jump back toward the operator.
Kickback is the result of tool misuse and/or incorrect operating procedures or
conditions and can be avoided by taking proper precautions as given below:
12. Maintain a firm grip on the saw and position your body and arm in a way that
allows you to resist KICKBACK forces. KICKBACK forces can be controlled by
the operator, if proper precautions are taken.
13. When blade is binding, or when interrupting a cut for any reason, release the
trigger and hold the saw motionless in the material until the blade comes to a
complete stop. Never attempt to remove the saw from the work or pull the saw
backward while the blade is in motion or KICKBACK may occur. Investigate
and take corrective actions to eliminate the cause of blade binding.
14. When restarting a saw in the workpiece, center the saw blade in the kerf and
check that teeth are not engaged into the material. If saw blade is binding, it
may walk up or KICKBACK from the workpiece as the saw is restarted.
15. Support large panels to minimize the risk of blade pinching and KICKBACK.
Large panels tend to sag under their own weight. Supports must be placed under
the panel on both sides, near the line of cut and near the edge of the panel.
16. Do not use dull or damaged blade. Unsharpened or improperly set blades produce
narrow kerf causing excessive friction, blade binding, and KICKBACK.
17. Blade depth and bevel adjusting locking levers must be tight and secure before
making cut. If blade adjustment shifts while cutting, it will cause binding and
KICKBACK.
18. Use extra caution when making a “Pocket Cut” into existing walls or other
blind areas. The protruding blade may cut objects that can cause KICKBACK.
19.
20.
WARNING! People with pacemakers should consult their physician(s) before
using this product. Operation of electrical equipment in close proximity to a heart
pacemaker could cause interference or failure of the pacemaker.
WARNING! Some dust created by power sawing, grinding, drilling, and other
construction activities, contain chemicals known (to the State of California) to cause
cancer, birth defects or other reproductive harm. Some examples of these chemicals
SKU 93808 For technical questions, please call 1-800-444-3353.
Page 6
English
Page 7
are: lead from lead-based paints, crystalline silica from bricks and cement or other
masonry products, arsenic and chromium from chemically treated lumber. Your risk
from these exposures varies, depending on how often you do this type of work. To
reduce your exposure to these chemicals: work in a well ventilated area, and work
with approved safety equipment, such as those dust masks that are specially
designed to filter out microscopic particles. (California Health & Safety Code §
25249.5,
et seq.
)
21.
WARNING! The warnings, precautions, and instructions discussed in this manual
cannot cover all possible conditions and situations that may occur. The operator
must understand that common sense and caution are factors which cannot be built
into this product, but must be supplied by the operator.
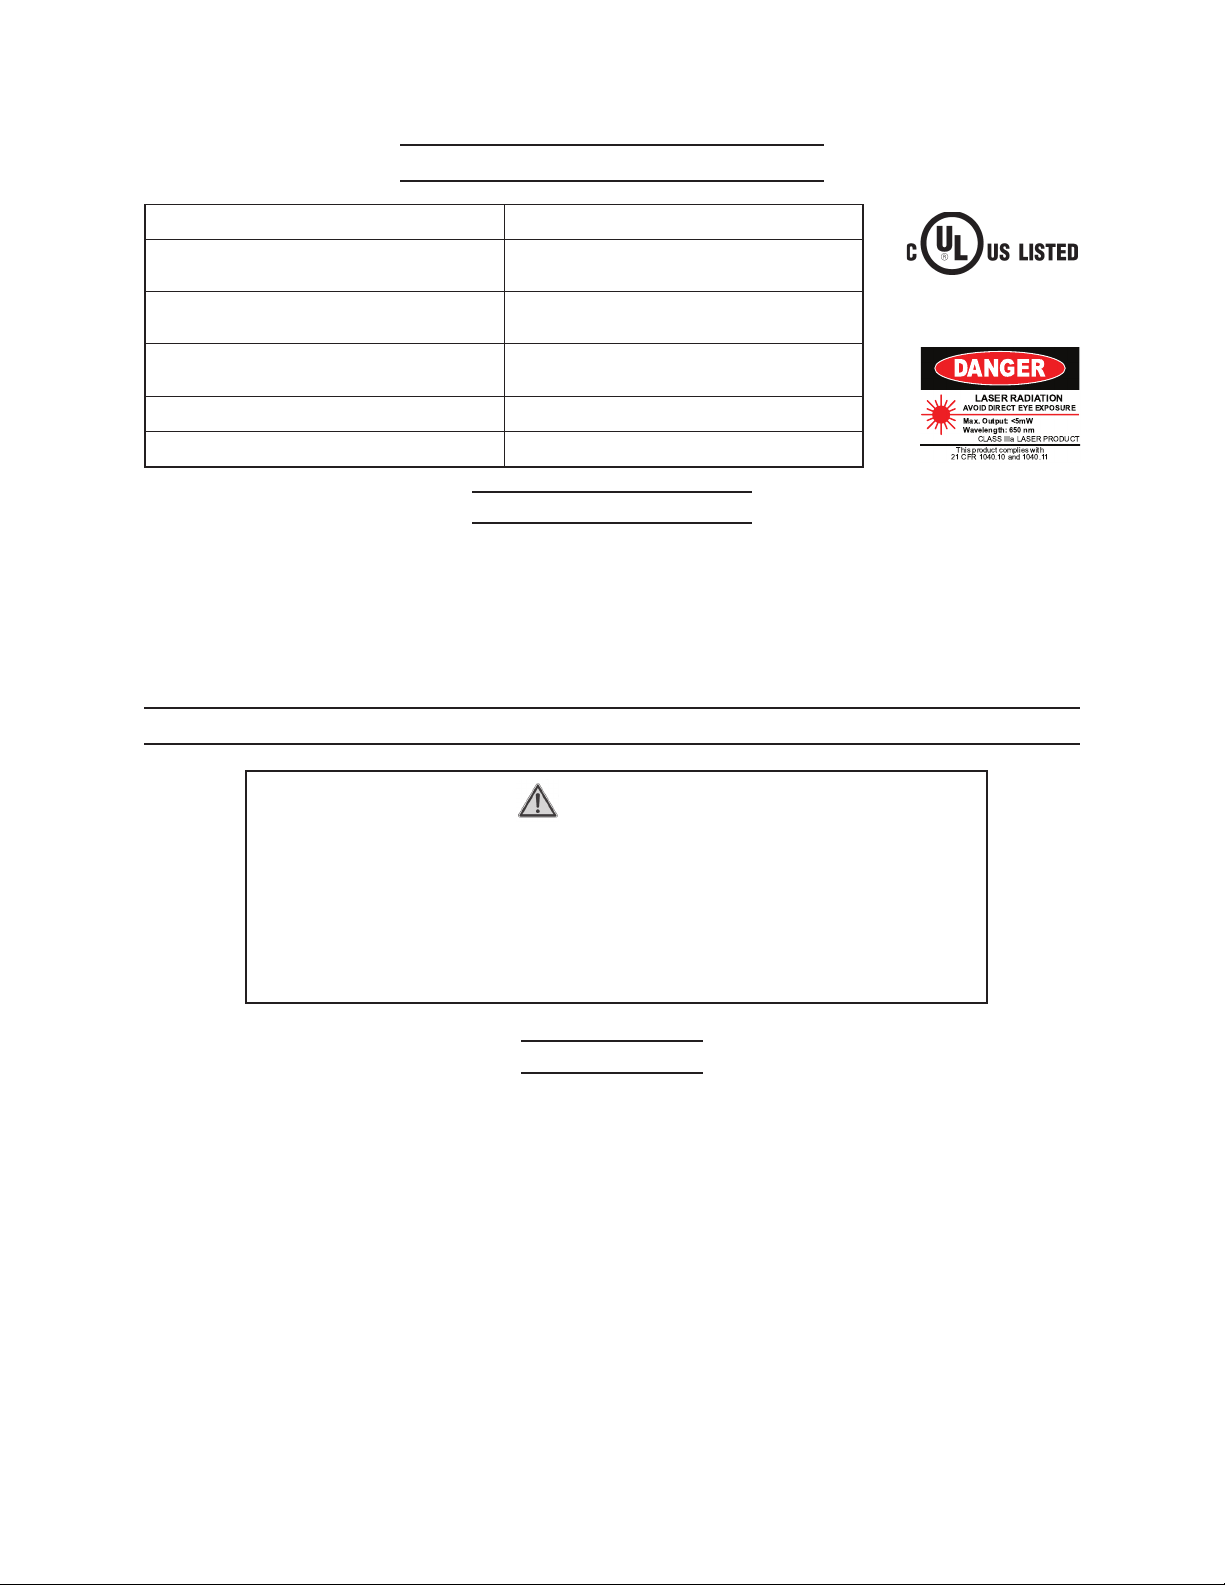
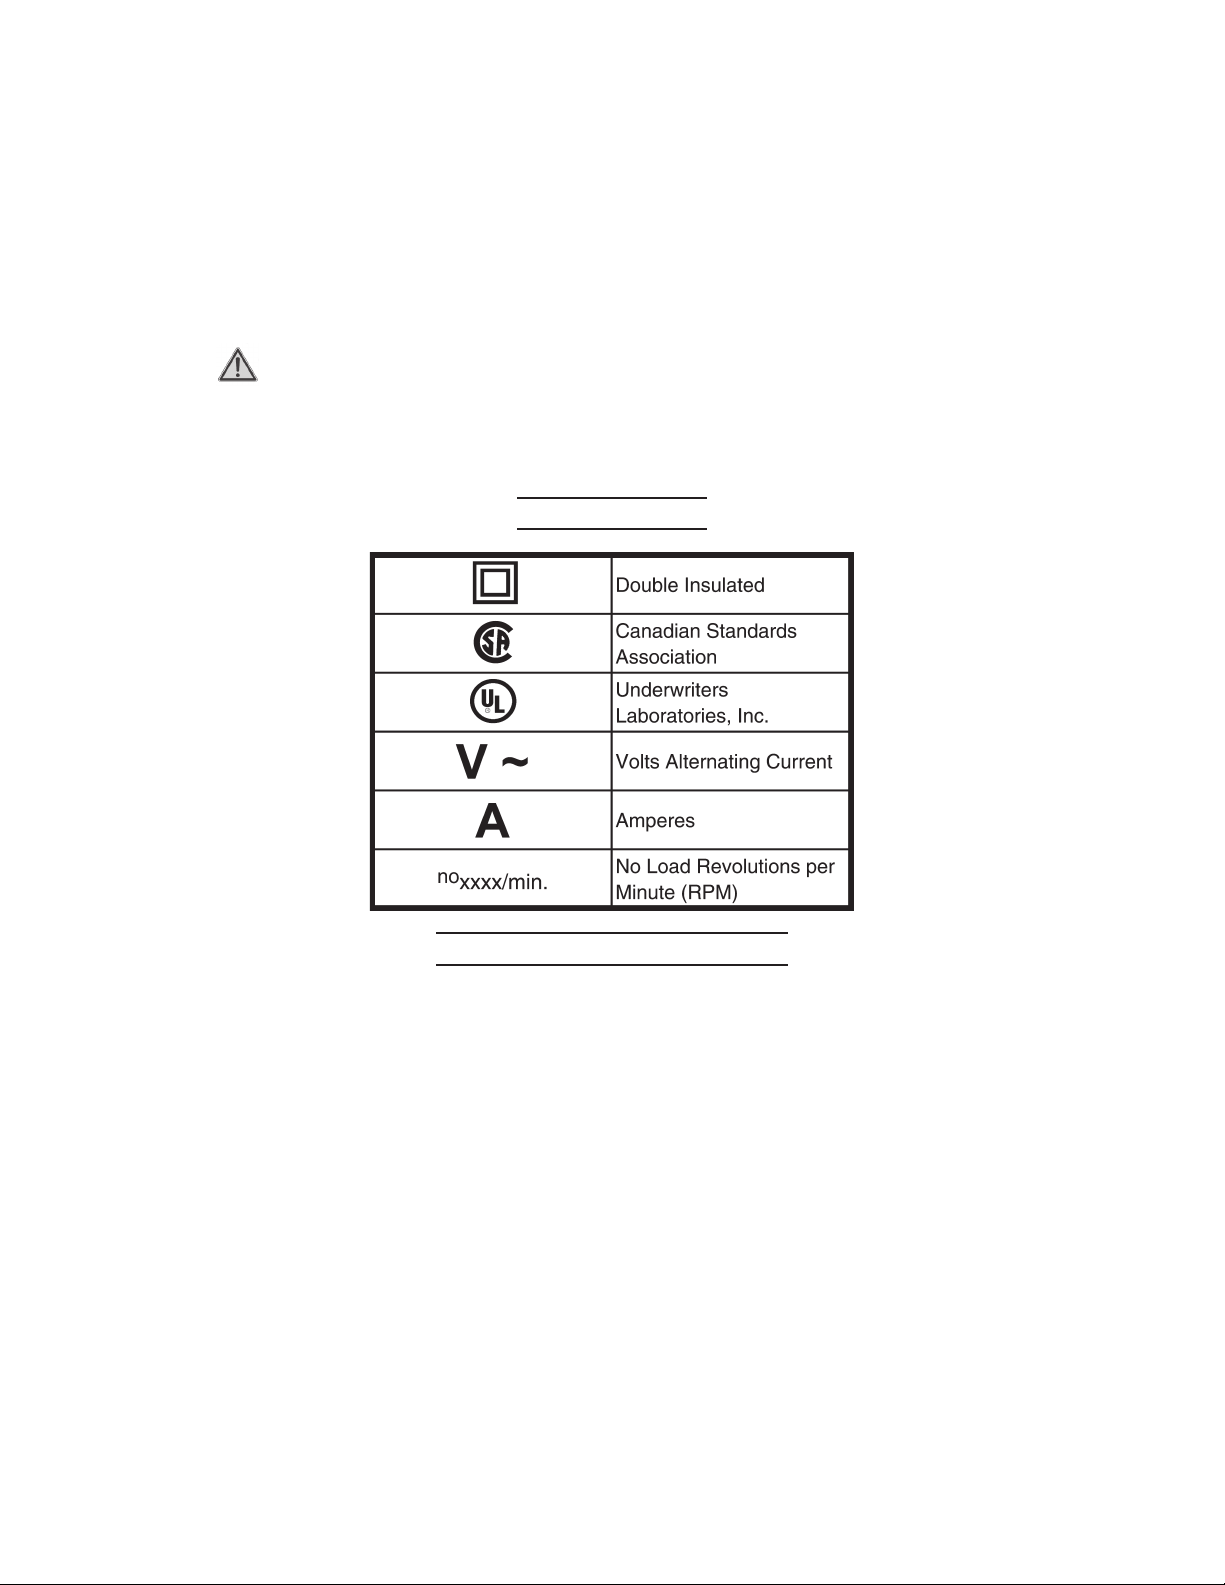
SYMBOLOGY
BATTERY PRECAUTIONS
1. Proper Battery Care: Battery (H) leakage may occur under extreme usage or
temperature conditions. If Battery fluid comes in contact with skin, wash with soap
and water and rinse with lemon juice and vinegar. If the fluid comes in contact with
eyes, flush with water for several minutes and contact a doctor immediately. Never
burn the Battery, as it can explode in a fire. Do not attempt to charge a leaking
Battery. Contact local solid waste authorities for instructions on correct disposal or
recycling of the Battery.
2. Do not allow children to handle or play with these products.
3. Industrial applications must follow OSHA requirements.
4. Check for damaged parts. Before using these products, carefully check that they
will operate properly and perform their intended function. Check for damaged parts
and any other conditions that may affect the safe operation of these products. Replace
or repair damaged or worn parts immediately.
SKU 93808 For technical questions, please call 1-800-444-3353.
Page 7
English
Page 8

5. Replacement parts and accessories: When servicing, use only identical
replacement parts. Only use accessories intended for use with this product.
6. Use the right tool or attachment for the right job. There are certain applications
for which this product was designed. It will do the job better and more safely at the
rate for which it was intended. Do not modify this product, and do not use this product
for a purpose for which it is not intended.
7. NEVER charge the Battery (H) more than
8. Always switch to a fresh Battery when tool performance begins to diminish.
Severe heat is most destructive to a Battery. The more heat generated, the faster the
Battery loses power. A Battery that gets too hot can be permanently damaged. Never
over-discharge a Battery by using the tool even after tool performance is decreasing.
Never attempt to discharge a tool’s Battery by continuing to pull the tool trigger.
When tool performance begins to diminish stop the tool, recharge the Battery and
use the fresh Battery for optimal performance.
9. Read all instructions and warnings on the battery before charging the battery.
10. To avoid accidents, charge the supplied battery only. Do not use a different
charger with this battery.
11. Do not expose the battery to rain or wet conditions.
12. To avoid damage of cable and plug, never pull the cable to disconnect the
charger.
13. Do not use the charger if the cable or plug are damaged.
14. Repairs should be carried out only by qualified service technicians.
15. Do not touch the battery poles with any conductive source.
two hours continuously.
16. Do not store the battery in a box with other metal objects.
17. NiMh Battery must be recycled or disposed of properly. Do not throw the battery
in a fire.
UNPACKING
When unpacking, check to make sure all the parts shown on the Parts List and the
assembly diagram on page 21 and 22 are included. If any parts are missing or broken,
please call Harbor Freight Tools at the number listed on the front cover of this manual.
SKU 93808 For technical questions, please call 1-800-444-3353.
Page 8
English
Page 9
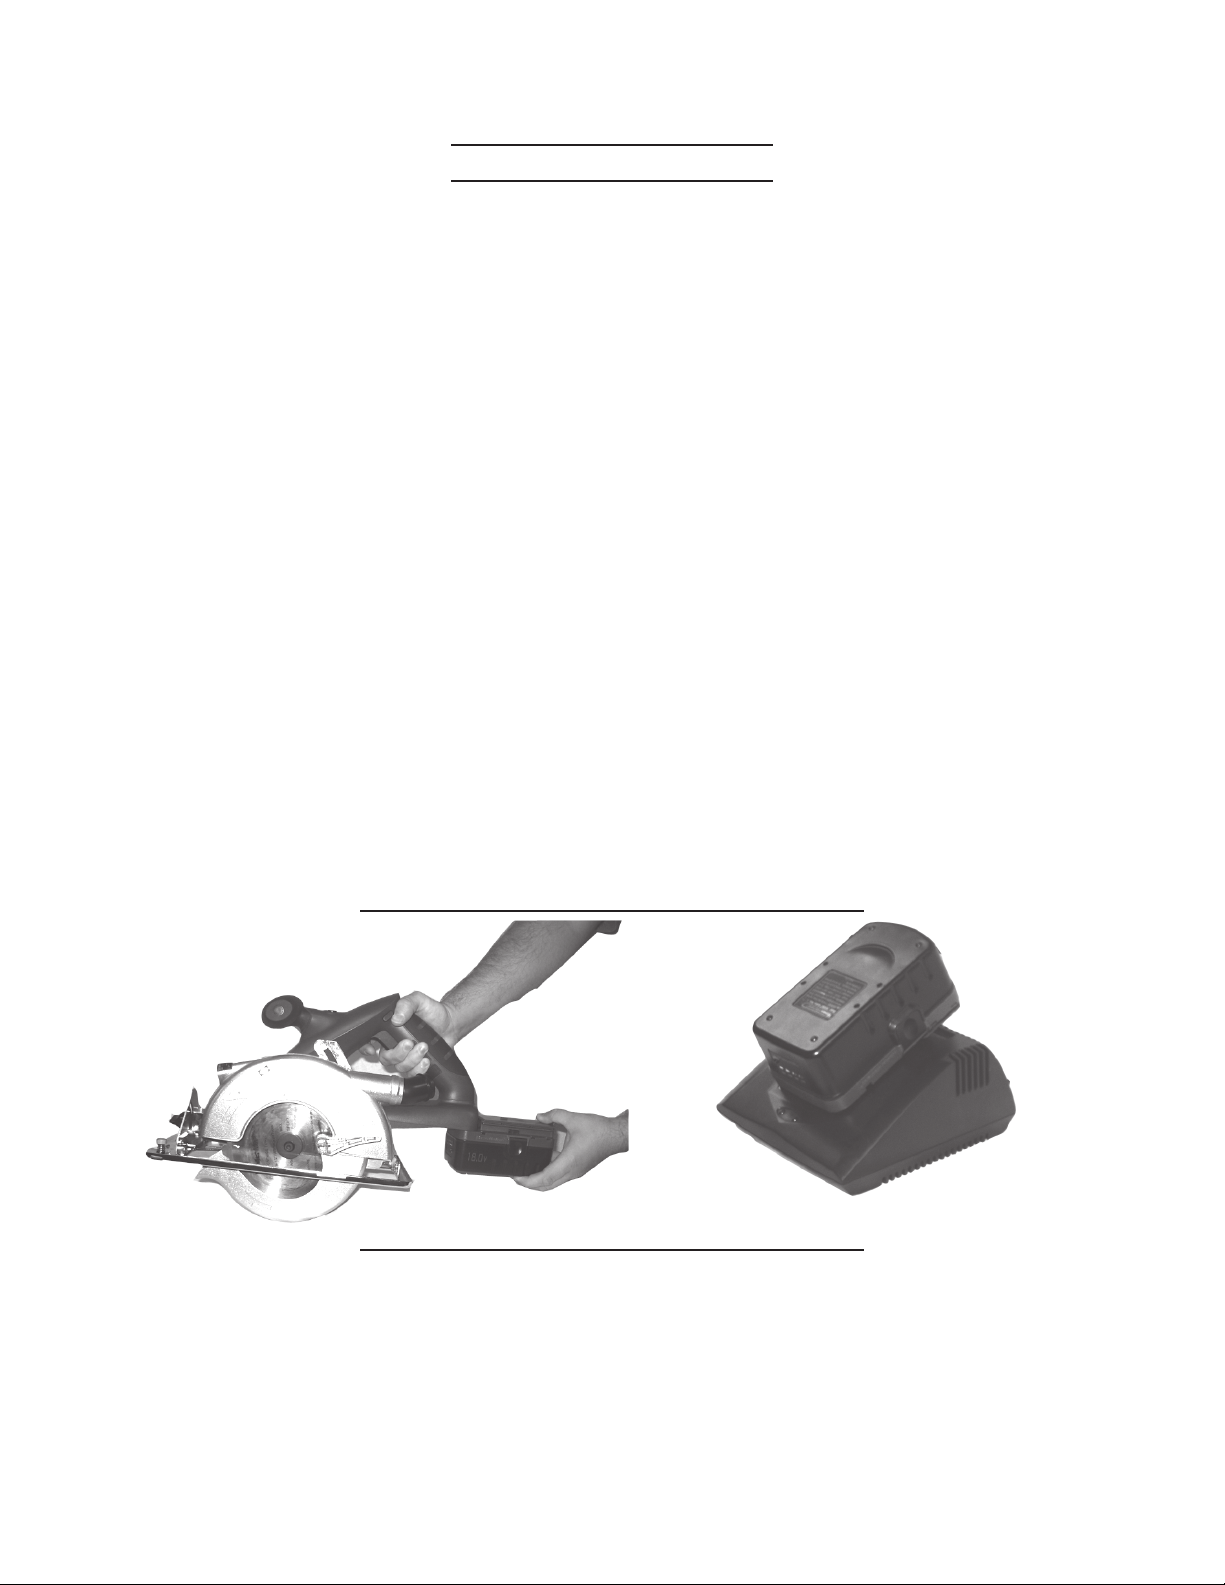
CHARGING BATTERY
NOTE: Refer to page 18, Figure 3 to help identify parts discussed below. Use the
part numbers in the Parts List on page 21 and shown on the Assembly Diagram
on page 22 to identify and order replacement parts.
NOTE: The Battery does not come charged from the factory. Charge before using.
Charging room temperature: 50°
1. Plug the Charger Base (O) into a wall socket. Note: The Charger Base (O) has both
an ON red light, and an OFF green light.
2. When the Charger Base (O) is plugged into a wall socket, the RED light will come
on and stay on steadily. This shows that all circuitry is working properly and the
Charger Base is ready to charge.
3. Slide the Battery (H) forward until it firmly seats into the Charger Base (O). The
GREEN light will go on and begin to flash. This indicates the battery is charging.
4. The charging period takes approximately one hour for a fully discharged battery
and less for a battery not fully discharged. When the Battery (H) has been fully
charged the Charger Base (O) will beep once and the GREEN light will stay on
steadily.
F - 104° F.
5. Remove the Battery (H) from the Charger Base (O) and insert the Battery (H) into
the base of the tool.
6. Press the test button on the Battery (H) to verify the battery is fully charged.
7. All four lights lit represent a full charge of the Battery.
FIGURE 1 FIGURE 2
Charger Base
INSTALLING & REMOVING THE BATTERY PACK
Warning! Do not touch the Trigger Switch (B) or the Trigger Release Button (A) while
installing the Battery.
Insert the Battery (H) into the saw body as shown in Fig. 1. Fig. 2 shows the Battery (H)
correctly inserted in the Charger Base (O).
SKU 93808 For technical questions, please call 1-800-444-3353.
Page 9
English
Page 10

NOTE: When removing the Battery Pack from the saw body, press in on the two locking
tabs located on each side of the Battery Pack and pull straight out from the body.
Warning! If two or more batteries are to be charged, allow the Charging Base time
to cool down between charges.
WORK LIGHT AND LASER GUIDE
Your 18 Volt Cordless Circular Saw has an integrated Work Light and a Laser Guide.
The Work Light (F) is activated and deactivated by depressing the Work Lamp Switch (C)
located on the top of the saw. The Laser Guide (E) is activated by pulling the trigger and
can be activated no other way.
NOTE: The Work Light and Laser Guide are aids and are not intended to function in
any manner other than that described in this manual.
SKU 93808 For technical questions, please call 1-800-444-3353.
Page 10
English
Page 11

OPERATION
Install the Saw Blade. Prepare and secure the material to be cut before turning on
saw. The Battery (H) should have a full charge before using saw. Remove battery before
making any adjustments. Refer to Figure 3, on page 18.
INSTALLING CUTTING BLADE
NOTE: The Lock Bolt is a reverse thread.
1. Remove The Battery (O) before making any adjustments.
2. Press on the Spindle Lock Button (J) to keep the Saw Blade from moving while
turning the Blade Bolt (I).
3. Using the Hex Key (P), loosen and remove Lock Bolt (I) and Outer Flange (I).
4. Rotate the Lower Blade Guard (K), counterclockwise to allow entry of the Saw Blade.
5. Insert Saw Blade through the Base Plate (M) until blade fits on the motor spindle.
Notice the arrow on the Lower Blade Guard (K) and the arrow on the Saw
Blade. They should be pointing in the same direction.
6. Replace the Outer Flange (I) and Blade Bolt (I). Tighten with the Hex Key (P) while
pressing on the Spindle Lock Button (J). Verify that the Spindle Lock Button (J) is
in the up (unlocked) position.
7. Replace the Hex Key (P) to its storage hole in the housing of the saw.
ADJUSTING THE SAW PRIOR TO CUTTING
1. To adjust the angle of blade, loosen the Bevel Cut Adjustment Knob (G) and move
Base Plate (M) while observing the degree scale located next to the Bevel Cut
Adjustment Knob (G).
2. To adjust the depth of the cut, loosen the Depth Adjustment Knob (N), which is
located next to the motor housing, and move the Base Plate (M) while observing the
amount of Saw Blade exposed under Base Plate. Tighten the Depth Adjustment
Knob (N) after making the adjustment.
3. Rip Fence installation and adjustment:
The Rip Fence can be inserted into either the left or right side at the toe of the Base
Plate (M). Insert the Rip Fence into the fence guides until it contacts the Retention
Bolt (Q). Loosen the Retention Bolt (Q) until the fence can slide through then secure
it by turning the Retention Bolt (Q) clockwise. The Rip Fence is adjustable from 0”5”. ( Refer to Page 18, Fig. 3)
SKU 93808 For technical questions, please call 1-800-444-3353.
Page 11
English
Page 12

FUNCTIONS
The 18 Volt Cordless Circular Saw has the following features, as shown
in Fig. 3 below.
(A) Trigger Release Button
(B) Trigger Switch
(C) Work Lamp Switch
(D) Off hand handle
(E) Laser Guide
(F) Work Light
(G) Bevel Cut Adjustment Knob
(H) 18 volt NiMh Battery
(I) Blade Flange and bolt
(J) Spindle Lock for blade change
(between saw body and upper
blade guard)
D
(K) Lower Blade Guard
(L) Light Holder
(M) Base Plate
(N) Depth Adjustment Knob
(next to the motor of the saw
not shown)
(O) Charger Base (shown on
page 16)
(P) Hex Key (Inserted in Saw
Body next to motor)
(Q) Retention Bolt
(R) Dust Port
C
N
A
B
Figure 3
J
P
E
L
G
Q
I
F
SKU 93808 For technical questions, please call 1-800-444-3353.
K
R
H
Page 12
English
Page 13

PREPARE MATERIAL BEFORE CUTTING
1. Support large panels to minimize risk of blade pinching and saw kickback.
2. Use a rip fence or secured straight edge guide when ripping material.
3. Securely clamp material to be cut to work bench.
4. Make sure saw does not cut into supports or workbench.
5. Use the appropriate type of blade for the material you are cutting.
CUTTING
Warning: The user can be seriously injured if the tool is not used properly.
Read this entire manual before using. Verify that the Saw Blade is securely
tightened and both angle and height adjustment knobs are tight before
proceeding. See Page 17.
1. Mark the line you will be cutting.
2. Place the Base Plate (M) on material to be cut. Align the front notch of the Base
Plate (right edge aligns with saw blade) on the cut line. Make Sure the Saw Blade
is NOT touching the material you will be cutting at this point or the saw will
kickback!
3. To start the saw, depress the Trigger Release Button ( A) and squeeze the Trigger
Switch (B).
4. With the saw at full speed, move the saw slowly forward to complete the cut.
5. When the cut is complete, release the Trigger Switch (1) and the electric brake will
stop the blade instantly. Do not set the saw down until the blade stops turning.
6. Once the blade stops and work is complete, remove the battery and store the Circular
Saw in a safe location, out of reach of children.
SKU 93808 For technical questions, please call 1-800-444-3353.
Page 13
English
Page 14

INSPECTION, MAINTENANCE, AND CLEANING
PLEASE READ THE FOLLOWING CAREFULLY
THE MANUFACTURER AND/OR DISTRIBUTOR HAS PROVIDED THE PARTS DIAGRAM IN THIS
MANUAL AS A REFERENCE TOOL ONLY. NEITHER THE MANUFACTURER NOR DISTRIBUTOR MAKES
ANY REPRESENTATION OR WARRANTY OF ANY KIND TO THE BUYER THAT HE OR SHE IS QUALIFIED TO MAKE ANY REPAIRS TO THE PRODUCT OR THAT HE OR SHE IS QUALIFIED TO REPLACE
ANY PARTS OF THE PRODUCT. IN FACT, THE MANUFACTURER AND/OR DISTRIBUTOR EXPRESSLY
STATES THAT ALL REPAIRS AND PARTS REPLACEMENTS SHOULD BE UNDERTAKEN BY CERTIFIED AND LICENSED TECHNICIANS AND NOT BY THE BUYER. THE BUYER ASSUMES ALL RISK
AND LIABILITY ARISING OUT OF HIS OR HER REPAIRS TO THE ORIGINAL PRODUCT OR REPLACEMENT PARTS THERETO, OR ARISING OUT OF HIS OR HER INSTALLATION OF REPLACEMENT PARTS
THERETO.
WARNING! Always make sure the Trigger Switch (2) is in its “OFF” position,
and remove the Battery before performing any inspection, adjustments,
maintenance, or cleaning.
1. Keep the Circular saw clean; remove all sawdust that has accumulated.
2. Regularly inspect all mounting screws and knobs to ensure that they are properly
tightened.
3. Keep saw blades clean and sharp. Sharp blades minimize stalling and kickback.
4. Keep guards in good working order.
5. Keep motor air vent clean of dust and debris. Vacuum periodically.
6. If the tool is not operating normally, making unusual noises, appears defective or if
any other problem with the tool exists, stop using it immediately and get it repaired
by a qualified service technician.
7. Clean tool with a damp cloth and light detergent. Do not use solvents as they can
damage and crack the plastic parts.
8. If the tool does not start or operate at full power with a fully charged battery pack,
contacts on the battery pack may need to be cleaned.
9. Check for cracks or damage to the tool before using it.
SKU 93808 For technical questions, please call 1-800-444-3353.
Page 14
English
Page 15

PARTS LIST
traPnoitpircseD.ytQtraPnoitpircseD.ytQ
1wercSkcoL144bonKhsuP2
2egnalFedistuO154ydoBtfeL1
3edalB164kcaRhsurBnobraC1
nI174ecneFediuG1
4egnalFedis
5revoCdrauGdexiF184eriWkcalB1
6gnirpS194revoC1
7drauGedalBrewoL105draoBBCP1
8gnirpS115nottuBthgiL1
9rebbuRelffaB125no
01eveelSrebbuR135hctiwS1
11thgiLresaL145nottuBkcoLeldnipS1
21drauGedalBreppU155kcoLeldnipS1
31wercS465eriWdeR1
S475eriWkcalB1
41werc
51etalPeriW185kcaPyrettaB1
61wercS195gnirpS2
71wercS406esaBnoitcennoC1
81revoCxoBraeG116eloPrebbuR1
91gniraeB126etalPed
02sixAtuptuO136noiP1
12revoCthgiL146esaBthgiL1
22thgiL156wercS1
32wercSkcoL166rennapSmm61
42rehsaW176raeGgiB2
52bonK186nottuBsi
62wercS196troPtsuD1
72tuN107wercS1
82wercS117DEL1
92etalPesaB127thgiLrotatS1
03wercS137gnirpS1
13tuN147lebaLraeR1
23gniraeB157lebaLpoT1
3naFrotoM167eriW1
3
43rotoRrotoM177eriWkcalB1
53gniraeB187erIWdeR1
63reffuBrebbuR197etalPtnorF1
73rebbuR/wydoBthgiR108etalPediuG1
rcS518lebaLtfeL1
83we
93wercS228lebaLtfeL1
04revoCkcaB138rebbuR/wydoBtfeL1
14bonK148ebuT1
24hsurBnobraCroFrotatS258pirGtfoSthgiR1
34werc
SydoB868pirGtfoStfeL1
ttuBresaL1
onAthgiL1
xAkcoL1
SKU 93808 For technical questions, please call 1-800-444-3353.
Page 15
English
Page 16

ASSEMBLY DIAGRAM
NOTE: Some parts are listed and shown for illustration purposes only, and are not avail-
able individually as replacement parts.
SKU 93808 For technical questions, please call 1-800-444-3353.
Page 16
English
Page 17

SANS CORDON 18V LE SCIER
®
CIRCULAIRE A VEC LE LASER
Modèle 93808
ASSEMBLAGE ET MODE DE FONCTIONNEMENT
En raison des améliorations continuantes, le produit réel peut différer légèrement du produit décrit ici.
3491 Mission Oaks Blvd., Camarillo, CA 93011
Visitez notre Site Internet à http://www.harborfreight.com
PRÉVENIR LA BLESSURE SÉRIEUSE,
LISEZ ET COMPRENEZ TOUS LES AVERTISSEMENTS
ET LES INSTRUCTIONS AVANT L’UTILISATION.
Le Copyright © 2005
de n’importe quel travail d’art contenu ici ne peut être reproduite dans aucune forme ou formulaire sans le
consentement rapidement écrit de Harbor Freight Tools.
Pour les questions techniques et les pièces détachées, appelez-vous s’il vous
par le Harbor Freight Tools ®. Tous droits réservés. Aucune portion de ce manuel ou
plaît 1-800-444-3353.
Page 18

SPÉCIFICATIONS DE PRODUIT
ruetoMstlov81,nim-rt0024
emaLedsnoitacificépS
selgnAsedtesruednoforPsederupuoCaL
eirettaB
sdioPeirettaBalcevagk3.4
ruegrahCedesaBednoitcudorpedruetcaFH06,CAV011
mm561
°54mm23;°09mm05
etuaesiBmumixaM°05
,stlov81edhMiN
egrahCedspmeTnU
erueH'd
SAUVEZ CE MANUEL
Vous aurez besoin de ce manuel pour les avertissements de sécurité et les
précautions, l’assemblage, le fait de faire marcher, l’inspection, la maintenance et le
nettoyage des procédures, la liste de parties et le diagramme d’assemblage. Gardez votre
facture avec ce manuel. Écrivez le nombre de facture sur l’intérieur de la couver ture de
dev ant. Gardez ce manuel et f acture dans un coffre-f ort et un endroit sec pour la référence
future.
/nim-rt0005/tneDederubraCedtuoB42
ellennoTal"8/5xertèmaiDel
E194601
RÈGLES DE SÉCURITÉ GÉNÉRALES POUR TOUS LES
OUTILS À BATTERIE
AVERTISSEMENT ! VOUS DEVEZ LIRE ET COMPRENDRE
TOUTES LES INSTRUCTIONS.
Le non-respect, même partiel, des instructions ci-après
entraîne un risque de choc électrique, d’incendie et/ou de
blessures graves.
CONSERVEZ CES INSTRUCTIONS
Aire de travail
1. Veillez à ce que l’aire de travail soit propre et bien éclairée. Le désordre et le
manque de lumière favorisent les accidents.
2. N’utilisez pas d’outilsélectriques dans une atmosphère explosive, par exemple
en présence de liquides, de gaz ou de poussières inflammables. Les outils
électriques créent des étincelles qui pourraient enflammer les poussières ou les
vapeurs.
3. Tenez à distance les curieux, les enfants et les visiteurs pendant que vous
travaillez avec un outil électrique. Ils pourraient vous distraire et vous faire faire
une fausse manoeuvre.
Modèle
93808
Pour les questions techniques, appelez-vous s’il vous plaît 1-800-444-3353.
Page 2
Français
Page 19

Sécuritéélectrique
1. Ne maltraitez pas le cordon. Ne transportez pas l’outil par son cordon.
N’exposez pas le cordonà la chaleur , à des huiles, à des arêtes vives ou à des
pièces en mouvement. Remplacez immédiatement un cordon endommagé.
Un cordon endommagé peut constituer un risque d’incendie.
2. Un outil à bloc-batterie amovible ou à batterie intégrée ne doitêtre rechargé
qu’avec le chargeur prévu pour la batterie. Un chargeur qui convient à tel type
de batterie peut présenter un risque d’incendie avec tel autre type de batterie.
3. N’utilisez un outil qu’avec un bloc-batterie conçu spécifiquement pour lui.
L’emploi d’un autre b loc-batterie peut créer un risque d’incendie.
Sécurité des personnes
1. Restez alerte, concentrez-v ous sur v otre travail et faites preuve de jugement.
N’utilisez pas un outil électrique si vous êtes fatigué ou sous l’influence de
drogues, d’alcool ou de médicaments. Un instant d’inattention suffit pour entr aîner
des blessures graves.
2. Habillez-vous convenablement. Ne portez ni vêtements flottants ni bijoux.
Confinez les cheveux longs. N’approchez jamais les cheveux, les vêtements
ou les gants des pièces en mouvement. Des vêtements flottants, des bijoux ou
des cheveux longs risquent d’être happés par des pièces en mouvement.
3. Méfiez-vous d’un démarrage accidentel. Avant d’insérer un bloc-batterie,
assurez-vous que l’interrupteur de l’outil est sur ARRÊT. Le fait de transporter
un outil avec le doigt sur la détente ou d’insérer un b loc-batterie alors que l’interrupteur
est en position MARCHE peut mener tout droit à un accident.
4. Enlevez les clés de réglage ou de serra ge avant de démarrer l’outil. Une clé
laissée dans une pièce tournante de l’outil peut provoquer des blessures.
5. Ne vous penchez pas trop en avant. Maintenez un bon appui et restez en
équilibre en tout temps. Un bonne stabilité vous permet de mieux réagirà une
situation inattendue.
6. Utilisez des accessoires de sécurité. Portez toujours des lunettes ou une
visière. Selon les conditions , portez aussi un masque antipoussière, des bottes de
sécurité antidérapantes, un casque protecteur et/ou un appareil antibruit.
Utilisation et entretien des outils
1. Immobilisez le matériau sur une surface stable au moyen de brides ou de
toute autre façon adéquate. Le fait de tenir la pièce a vec la main ou contre votre
corps offre une stabilité insuffisante et peut amener un dérapage de l’outil.
Modèle
93808
Pour les questions techniques, appelez-vous s’il vous plaît 1-800-444-3353.
Page 3
Français
Page 20

2. Ne forcez pas l’outil. Utilisez l’outil approprié à la tâche. L’outil correct fonctionne
mieux et de façon plus sécuritaire. Respectez aussi la vitesse de travail qui lui est
propre.
3. N’utilisez pas un outil si son interrupteur est bloqué. Un outil que vous ne
pouvez pas commander par son interrupteur est dangereux et doit être réparé.
4. Retirez le bloc-batterie ou mettez l’interrupteur sur ARRÊT ou en position
verrouillée avant d’eff ectuer un réglage, de changer d’accessoire ou de ranger
l’outil. De telles mesures préventives réduisent le risque de démarrage accidentel
de l’outil.
5. Rangez les outils hors de la portée des enfants et d’autres personnes
inexpérimentées. Les outils sont dangereux dans les mains d’utilisateurs novices .
6. Lorsque le bloc-batterie n’est pas en service, tenez-le à l’écart d’autres objets
métalliques (trombones, pièces de monnaie, c lés, c lous, vis, etc.) susceptibles
d’établir un contact électrique entre les deux bornes. La mise en court-circuit
des bornes de la batterie peut produire des étincelles et constitue un risque de
brûlures ou d’incendie.
7. Prenez soin de bien entretenir les outils. Les outils de coupe doivent être
toujours bien affûtés et propres. Des outils bien entretenus, dont les arêtes sont
bien tranchantes, sont moins susceptibles de coincer et plus faciles à diriger.
8. Soyez attentif à tout désalignement ou coincement des pièces en mouvement,
à tout bris ou à toute autre condition préjudiciable au bon fonctionnement de
l’outil. Si vous constatez qu’un outil est endommagé, faites-le réparer avant
de vous en ser vir. De nombreux accidents sont causés par des outils en mauvais
état.
9. N’utilisez que des accessoires que le fabricant recommande pour votre modèle
d’outil. Certains accessoires peuvent conv enir à un outil, maisêtre dangereux avec
un autre.
Réparation
1. La réparation des outils électriques doit être confiée à un réparateur qualifié.
L’entretien ou la réparation d’un outilélectrique par un amateur peut avoir des
conséquences grave s.
2. Pour la réparation d’un outil, n’employez que des pièces de rechange d’origine.
Suivez les directives données à la section « Réparation» de ce manuel. L’emploi
de pièces non autorisées ou le non-respect des instructions d’entretien peut créer
un risque de choc électrique ou de blessures.
Modèle
93808
Pour les questions techniques, appelez-vous s’il vous plaît 1-800-444-3353.
Page 4
Français
Page 21

Règles de Sécurité Particulières
1. DANGER ! N’approchez pas les mains de la zone de coupe ou de la lame.
Gardez l’autre main sur la poignée auxiliaire ou sur le carter du moteur. En
tenant l’outil avec vos deux mains, vous mettez celles-ci à l’abri de la lame.
Placez-vous d’un côté ou de l’autre de la lame, mais non vis-à-vis celle-ci. En
cas de RECUL, la scie pourrait sauter vers l’arrière. (Voir «RECUL».)
N’étendez pas la main sous le matériau à scier. Le protecteur inférieur de l’outil
est inopérant à cet endroit.
2. Av ant chaque utilisation, assurez-v ous que le protecteur inférieur se referme
correctement. N’utilisez pas la scie si le protecteur inférieur ne bouge pas
librement et ne se referme pas instantanément. Ne bloquez jamais le pr otecteur
inférieur en position ouverte. Si la scie tombe par terre accidentellement, le
protecteur inférieur peut être gauchi : escamotez le protecteur inférieur avec sa
manette et assurez-vous qu’il bouge librement et qu’il ne touche pas la lame ni
aucun autre élément de l’outil, quels que soient les réglages d’angle et de profondeur
de coupe.
3. Vérifiez l’état et le bon fonctionnement du ressort du protecteur inférieur. Si
le protecteur ou son ressort ne fonctionnent pas correctement, il faut les
réparer av ant d’utiliser l’outil. Le protecteur inférieur peut être lent à se refermer
à cause de pièces endommagées, de dépôts collants ou d’une accumulation de
débris.
4. V ous ne devez escamoter manuellement le protecteur inférieur que pour des
opérations spéciales comme le défonçage d’ouvertures en plein bois et les
coupes de rainurage ou à onglets. Escamotez le protecteur inférieur au mo yen
de sa manette puis, dès que la lame attaque le matériau, lâchez le protecteur.
Pour toute autre tâche de sciage, laissez le protecteur inférieur fonctionner
automatiquement.
5. Assurez-vous toujours que le protecteur inférieur couvre bien la lame avant
de déposer l’outil sur l’établi ou sur le sol. Si la lame n’est pas protégée et n’a
pas fini de tourner, elle entraînera la scie vers l’arrière en coupant tout sur son
passage. Soyez conscient du temps nécessaire pour que la lame s’arrête après
que vous avez lâché la détente.
6. Ne maintenez jamais le matériau à scier dans vos mains ou sur v otre jambe. Il
importe de soutenir le matériau correctement, afin de ne pas vous e xposer inutilement
et de réduire le risque de coincement de la lame ou de dérapage de l’outil.
7. Tenez l’outil par ses surfaces de prise isolées pendant toute opération où
l’outil de coupe pourrait venir en contact avec un câblage dissimulé. En cas
de contact avec un conducteur sous tension, les pièces métalliques à découv ert de
l’outil transmettraient un choc électrique à l’utilisateur.
Modèle
93808
Pour les questions techniques, appelez-vous s’il vous plaît 1-800-444-3353.
Page 5
Français
Page 22

8. Lorsque que vous refendez, utilisez toujours un guide longitudinal. Cela
améliore la précision de la coupe et réduit le risque de coincement de la lame.
9. Employez toujours une lame de diamètre approprié et dont le trou central est
de forme correcte (angulaire ou ronde). Une lame dont le trou ne correspond pas
à la forme du moyeu de fixation de la scie risque de tourner de façon excentrique et
de vous faire perdre la maîtrise de l’outil.
10. N’utilisez jamais un boulon ou une rondelle de lame endommagé ou incorrect.
Les boulons et rondelles de fixation de la lame sont conçus spécialement pour
votre scie et jouent un rôle essentiel dans le bon fonctionnement et la sécurité de
l’outil.
11. Causes du retour d’outil et prévention par l’utilisateur :
Le « retour d’outil » est une brusque réaction au pincement, au coincement ou au
désalignement de la lame de scie, qui amène la scie à sauter hors du matériau vers
l’utilisateur.
Lorsque la lame est pincée ou coincée par le rétrécissement du trait de scie, la
lame se bloque et la réaction du moteur projette l’outil avec force vers l’utilisateur.
Si la lame se trouve désalignée dans le trait de scie, ses dents arrière peuvent
mordre dans le dessus du matériau, ce qui amène la lame à sortir brutalement du
trait de scie en direction de l’utilisateur.
Le RECUL résulte d’une utilisation incorrecte de l’outil ou de mauvaises conditions
d’utilisation. On peut le prévenir en prenant les précautions adéquates ci-après:
12. T enez fermement la scie et placez votre corps et v os bras de manière à pouvoir
résister à la force d’un RECUL éventuel. L’utilisateur est capable de maîtriser un
RECUL s’il a pris les précautions adéquates.
13. Lorsque la lame se coince ou que vous interrompez une coupe pour une
raison quelconque, lâchez la détente et maintenez la scie immobile dans le
trait de scie jusqu’à ce que la lame s’arrête complètement. Ne cherc hez jamais
à sortir la scie du matériau ou à reculer la scie pendant que la lame est encore
en mouvement, car vous vous exposeriez à un RECUL. Si la lame a tendance à
se coincer, recherchez-en la cause et apportez les correctifs appropriés.
14. Lorsque vous redémarrez l’outil dans un trait de scie, centrez la lame dans
celui-ci et assurez-vous que les dents de la lame ne mordent pas dans le
matériau. Si lame est coincée, l’outil risque de reculer ou de sauter en arrière au
moment du démarrage de l’outil.
15. Soutenez adéquatement les grands panneaux afin de réduire au minimum le
risque de pincement de la lame et de RECUL. Les grands panneaux ont tendance
à s’affaisser sous leur propre poids. Placez des points d’appui sous le panneau des
deux côtés, près de la ligne de coupe et près des bords du panneau.
16. N’utilisez jamais une lame émoussée ou endommagée. Une lame mal affûtée
ou mal avo yée produit un trait de scie étroit qui donne lieu à un frottement excessif ,
au coincement de la lame età un RECUL.
Modèle
93808
Pour les questions techniques, appelez-vous s’il vous plaît 1-800-444-3353.
Page 6
Français
Page 23

17. Les manettes de profondeur et d’angle de coupe doivent être bien bloquées .
Si ces manettes se débloquent pendant la coupe, il peut en résulter un coincement
et un retour d’outil.
18. Soyez particulièrement prudent lorsque vous découpez une ouverture dans
une cloison existante ou tout autre matériau dont l’arrière n’est pas visible.
La lame pourrait rencontrer un objet dur, ce qui provoquerait un RECUL.
19.
20. AVERTISSEMENT! Un peu de poussière créée par le sciage de pouvoir, le
21.
AVERTISSEMENT! Les gens avec les stimulateurs cardiaques devraient
consulter leur docteur (s) avant le f ait d’utiliser ce produit. L’opération d’équipement
électrique dans la proche proximité à un stimulateur cardiaque du cœur pourrait
causer l’interférence ou l’échec du stimulateur cardiaque.
grincement, le forage et d’autres activités de construction, contient des produits
chimiques connus (à l’État de Californie) pour causer le cancer, les anomalies
congénitales ou d’autre mal reproducteur. Quelques exemples de ces produits
chimiques sont : le plomb des peintures à base de plomb, la silice cristalline des
briques et le ciment ou d’autres produits de maçonnerie, l’arsenic et le chrome du
bois de construction chimiquement traité. Votre risque de ces expositions vari e,
selon combien de fois vous faites ce type de travail. Réduire v otre exposition à ces
produits chimiques : le travail dans une région bien aérée et un travail avec
l’équipement de sécurité approuvé, comme ces masques de poussière qui sont
spécialement conçus pour éliminer des particules microscopiques. (Le Code de
Sécurité et de Santé de Califo rnie § 25249.5
AVERTISSEMENT! Les avertissements, les précautions et les instructions
discutées dans ce manuel ne peuv ent pas couvrir toutes les conditions possibles et
les situations qui peuvent se produire. L’opérateur doit comprendre que le sens
commun et la prudence sont des facteurs qui ne peuvent pas être introduits dans
ce produit, mais doivent être fournis par l’opérateur.
et seq.
)
Modèle
93808
SYMBOLOGY
Double Isolé
Association de Normes
Canadienne
Underwriters L abora tories,
Inc.
V ~
A
no
xxxx/min.
Pour les questions techniques, appelez-vous s’il vous plaît 1-800-444-3353.
Cou r ant alt er nat if de Volts
Ampères
A ucune Révolut ion de Charge
par Minute (TR-MIN)
Page 7
Français
Page 24

PRÉCAUTIONS DE BATTERIE
1. Soin de Batterie Nécessaire : la Batterie (H) la fuite peut se produire dans l’usage
extrême ou les conditions de tempér ature . Si le liquide de Batterie entre en contact
avec la peau, se laver av ec le sav on et l’eau et le rinçage av ec le jus jaune citron et
le vinaigre. Si le liquide entre en contact avec les yeux, la rougeur av ec l’eau depuis
plusieurs minutes et contact un docteur immédiatement. Ne brûlez jamais la Batterie,
comme il peut exploser dans un f eu. N’essayez pas de charger une Batterie qui fuit.
Contactez des autorités inutilisées solides locales pour les instructions sur la
disposition correcte ou le recyclage de la Batterie.
2. Ne permettre pas aux enfants de manipuler ou jouer avec ces produits.
3. Les applications industrielles doivent suivre des exigences d’OSHA.
4. Vérifier pour les parties nuies. Avant le fait d’utiliser ces produits, vérifiez
soigneusement qu’ils opèrent correctement et exécuteront leur fonction voulue.
Vérifiez pour les parties nuies et autres conditions qui peuvent affecter l’opération
sûre de ces produits. Remplacez ou réparez des parties nuies ou portées
immédiatement.
5. Pièces détachées et accessoires: en assurant l’entretien, utilisez des pièces
détachées seulement identiques. Utilisez seulement des accessoires destinés de
l’utilisation avec ce produit.
6. Utiliser l’instrument bon ou l’attachement pour l’emploi bon. Il y a de certaines
applications auxquelles ce produit a été conçu. Il fera le tr av ail mieux et plus bien au
taux pour lequel il a été destiné. Ne modifiez pas ce produit et n’utilisez pas ce
produit d’un but pour lequel il n’est pas destiné.
7. Ne chargez JAMAIS la Batterie (H) plus de deux heures constamment.
8. Échangez toujours à une Batterie fraîche quand la performance d’instrument
commence à diminuer. La chaleur sévère est la plus destructive à une Batterie.
Plus de chaleur a produit, plus vite la Batterie perd le pouvoir. Une Batterie qui
devient trop chaude peut être en permanence nuie. Ne surrenvoyez jamais une
Batterie en utilisant l’instrument même après que la performance d’instrument
diminue. N’essa yez jamais de renvo yer la Batterie d’un instrument en continuant à
tirer la manette d’instrument. Quand la performance d’instrument commence à
diminuer l’arrêt l’instrument, recharger la Batterie et utiliser la Batterie fraîche de la
performance optimale.
9. Lire toutes les instructions et les avertissements sur la batterie avant le fait
de charger la batterie.
10 . Pour éviter des accidents, c hargez la batterie fournie seulement. N’utilisez pas
de différent chargeur avec cette batterie.
11 . N’exposer pas la batterie pour pleuvoir ou les conditions mouillées.
Modèle
93808
Pour les questions techniques, appelez-vous s’il vous plaît 1-800-444-3353.
Page 8
Français
Page 25

12. Pour éviter le dommage de câble et de prise de courant, ne tirez jamais le
câble pour débrancher le c hargeur.
13. N’utiliser pas le chargeur si le câble ou la prise de courant sont nuis.
14. Les réparations devraient être réalisées seulement par les techniciens de
service qualifiés.
15 . Ne toucher pas les pôles de batterie a vec aucune source conductrice.
16 . Ne garder pas la batterie dans une boîte avec d’autres objets en métal.
17. La Batterie de NiMh doit être recyclée ou disposée correctement. Ne lancez
pas la batterie dans un feu .
Défaisant
En défaisant, vérifiez pour v ous assurer que toutes les parties montrées sur la Liste
de Parties et le diagramme d’assemblage sur la page 21 et 22 sont incluses. Si des parties
manquent ou cassées, appelez s’il vous plaît le Harbor Freight Tools au nombre énuméré
sur la couverture première de ce manuel.
Modèle
93808
Pour les questions techniques, appelez-vous s’il vous plaît 1-800-444-3353.
Page 9
Français
Page 26

Le fait de Charger la Batterie
NOTEZ: Faites allusion à la page 18, le chiffre 3 pour aider à identifier des parties
discutées ci-dessous. Utilisez les nombres de partie dans la Liste de Parties
sur la page 21 et montré sur le Diagramme d’Assemblage sur la page 22 pour
identifier et ordonner des pièces détachées.
NOTEZ: La Batterie ne vient pas chargée de l’usine. Charge av ant l’utilisation. Le fait
de charger la température de pièce : 10° - 40° C.
1. Brancher la Base de Chargeur (O) à une douille murale . Notez : la Base de Chargeur
(O) a tant un SUR le feu rouge, qu’UN de la lumière verte.
2. Quand la Base de Chargeur (O) est branchée dans une douille murale, le FEU
ROUGE prendra et rester a constamment. Cela montre que tout l’ensemble de circuits
travaille correctement et la Base de Chargeur est prête à charger.
3. F aire glisser la Batterie (H) en avant jusqu’à ce qu’il prenne fermement place dans
la Base de Chargeur (O). La lumière VERTE prendr a et commencera à briller. Cela
indique que la batterie charge.
4. La période chargeante prend environ une heure pour une batterie complètement
renv oyée et moins pour une batterie pas complètement renvoyée . Quand la Batterie
(H) a été complètement chargée la Base de Chargeur (O) bipera une fois et la
lumière VERTE prendra constamment.
5. Enlever la Batterie (H) de la Base de Chargeur (O) et insérer la Batterie (H) dans la
base de l’instrument.
6. Appuyer sur le bouton d’essai sur la Batterie (H) pour vérifier que la batterie est
complètement chargée.
7. T outes les quatre lumières allumées représentent une charge complète de la Batterie.
CHIFFRE
1
LE FAIT D’INSTALLER ET LE FAIT D’ENLEVER LE PAQUET DE BATTERIE
Avertissement! Ne touchez pas le Changement de Manette (B) ou le Bouton de
Libération de Manette (A) en installant la Batterie.
CHIFFRE
2
Base de
Chargeur
Modèle
93808
Pour les questions techniques, appelez-vous s’il vous plaît 1-800-444-3353.
Page 10
Français
Page 27

Insérez la Batterie (H) dans le corps de scier comme montré dans le chiffre 1. Le chiffre 2
montre la Batterie (H) correctement inséré dans la Base de Chargeur (O).
NOTEZ : En enlevant le P aquet de Batterie du corps de scier, appuyez dans sur les deux
étiquettes se bloquant trouvées sur chaque côté du Paquet de Batterie et tirez
directement du corps.
Av ertissement! Si au moins deux batteries doivent être char gés, permettent au temps
Basé Chargeant de refroidir entre le fait de charger.
TRAVAILLEZ LE GUIDE CLAIR ET À LASER
V otre Scier Circulaire Sans cordon de 18 volts a une Lumière de Tra vail intég rée et
un Guide À laser. La Lumière de Travail (F) est allumée et désamorcée en déprimant le
Changement de Lampe de Travail (C) trouvé sur le haut du scier. Le Guide À laser (E) est
allumé en tirant la manette et ne peut être allumé aucune autre voie.
NOTEZ: La Lumière de Travail et le Guide À laser sont des outils et ne sont pas
destinés pour fonctionner dans n’importe quelle manière autre que cela décrit
dans ce manuel.
OPÉRATION
Installez la Lame de Scier. Préparez et protégez la matière à être coupée avant le
fait d’allumer le scier . La Batterie (H) de vrait av oir une charge complète av ant le fait d’utiliser
le scier. Enlevez la batterie avant le fait de faire n’importe quels ajustages. Faites allusion
au chiffre 3, sur la page 18.
LE FAIT D’INSTALLER LA LAME COUPANTE
NOTEZ : Le Verrou de Serrure est un fil contraire.
1. Enlever la Batterie (O) avant le fait de faire n’importe quels ajustages.
2. Appuyer sur le Bouton de Serrure de Fuseau (J) pour empêcher la Lame de Scier
de bouger en tournant le Verrou de Lame (I).
3. L’utilisation de la Clé d’Hexagone (P), desserrez et enlevez le Verrou de Serrure (I)
et la Bride Extérieure (I).
4. F aire tourner la Garde de Lame Plus basse (K), en sens inverse des aiguilles d’une
montre permettre l’entrée de la Lame de Scier.
5. La Lame de Scier d’Insertion par la Plaque de fond (M) jusqu’à la lame va sur le
fuseau automobile. Remarquez la flèche sur la Garde de Lame Plus basse (K)
et la flèche sur la Lame de Scier. Ils devraient être orientés dans la même
direction.
Modèle
93808
Pour les questions techniques, appelez-vous s’il vous plaît 1-800-444-3353.
Page 11
Français
Page 28

6. Remplacer la Bride Extérieure (I) et le Verrou de Lame (I). Serrez-vous avec la Clé
d’Hexagone (P) en appuyant sur le Bouton de Serrure de Fuseau (J). Vérifiez que
le Bouton de Serrure de Fuseau (J) est dans la position en haut (déverrouillée).
7. Remplacer la Clé d’Hexagone (P) à son trou de stoc kage dans l’habitation du scier .
LE RÉGLAGE DU SCIER AVANT LA COUPURE
1. Pour régler l’angle de lame, desserrez le Bouton d’Ajustage de Coupe Biseaute
(G) et déplacez la Plaque de fond (M) en observant l’échelle de degré trouvée à
côté du Bouton d’Ajustage de Coupe Biseaute (G).
2. Pour régler la profondeur de la coupe, desserrez le Bouton d’Ajustage de
Profondeur (N), qui est trouvé à côté de l’habitation automobile et du mouvement la
Plaque de fond (M) en observant la quantité{le montant} de Lame de Scier exposée
sous la Plaque de fond. Serrez le Bouton d’Ajustage de Prof ondeur (N) après le fait
de faire l’ajustage.
3. Installation de Clôture d’Accroc et ajustage :
La Clôture d’Accroc peut être insérée dans le laissé ou dans le côté droit à l’ortei l
de la Plaque de fond (M). Insérez la Clôture d’Accroc dans les guides de clôture
jusqu’à ce qu’il contacte le V errou de Rétention (Q). Desserrez le Verrou de Rétention
(Q) jusqu’à ce que la clôture puisse glisser le protègent par alors en tournant le
V errou de Rétention (Q) dans le sens des aiguilles d’une montre. La Clôture d’Accroc
est ajustable de 0–127mm. (Faites allusion à la Page 18, le chiffre 3.)
Modèle
93808
Pour les questions techniques, appelez-vous s’il vous plaît 1-800-444-3353.
Page 12
Français
Page 29

Fonctions
Le Scier Circulaire Sans cordon de 18 volts a les caractéristiques suivantes,
comme montré dans le chiffre 3 ci-dessous.
(A) Bouton de Libér ation de Manette
(B) Changement de Manette
(C) Changement de Lampe de T r avail
(D) De la poignée de mains
(E) Guide À laser
(F) Lumière de travail
(G) Biseauter le Bouton d’Ajustage
de Coupe
(H) Batterie de NiMh de 18 volts
(I) Bride de Lame et verrou
(J) La Serrure de Fuseau pour le
changement de lame
(entre le corps de scier et la garde
de lame supérieure)
(K) Garde de Lame Plus basse
(L) Titulaire Clair
D
(M) Plaque de fond
(N) Bouton d’Ajustage de Prof ondeur
(à côté du moteur du scier non
montré)
(O) La Base de Chargeur (montré sur
la page 16)
(P) La Clé d’Hexagone
(Inséré dans le Scier Le corps à
côté du moteur)
(Q) Verrou de Rétention
(R) Port de Poussière
Chiffre 3
J
P
L
G
Q
Modèle
93808
Pour les questions techniques, appelez-vous s’il vous plaît 1-800-444-3353.
N
E
F
C
A
B
R
H
K
I
Page 13
Français
Page 30

PRÉPAREZ LA MATIÈRE AVANT LA COUPURE
1. Soutenir de grands panneaux pour minimiser le risque de lame serrante et de recul
de scier.
2. Utiliser une clôture d’accroc ou un guide de bord droit protégé en déchirant la matière.
3. Serrez solidement la matière à être coupée pour travailler le banc.
4. Assurer que le scier n’a pas coupé dans les soutiens ou l’établi.
5. Utiliser le type approprié de lame pour la matière que vous coupez.
COUPURE
Av ertissement : l’utilisateur peut être sérieusement blessé si l’instrument n’est
pas utilisé correctement. Lisez ce manuel entier avant l’utilisation. Vérifiez
que la Lame de Scier est solidement serrée et tant angle que les boutons
d’ajustage de hauteur sont serrés avant la procédure. Voir la Page 17.
1. Marquer la ligne que vous couperez.
2. Placer la Plaque de fond (M) sur la matière à être coupée. Mettez en ligne l’entaille
première de la Plaque de fond (le bord bon met en ligne avec la lame de scier) sur
la ligne de coupe.
que vous couperez à ce point ou le scier ira faire recul!
Assurez-vous que la Lame de Scier ne touc he pas la matière
3. Pour commencer le scier , déprimez le Bouton de Libération de Manette (A) et serrez
le Changement de Manette (B).
4. Avec le scier à la vitesse complète , bougez le scier envoient lentement pour accomplir
la coupe.
5. Quand la coupe est complète, libérez le Changement de Manette (1) et le breake
électrique arrêtera la lame immédiatement. Ne déposez pas le scier jusqu’à ce que
la lame arrête de tourner.
6. Une fois les arrêts de lame et le trav ail est complet, enlever la batterie et conserver
le Scier Circulaire dans un endroit sûr, loin des enfants.
Modèle
93808
Pour les questions techniques, appelez-vous s’il vous plaît 1-800-444-3353.
Page 14
Français
Page 31

L’INSPECTION, LA MAINTENANCE ET LE NETTOYAGE
LISEZ S’IL VOUS PLAÎT LE SUIVANT SOIGNEUSEMENT
LE FABRICANT ET-OU LE DISTRIBUTEUR A FOURNI LE DIAGRAMME DE PARTIES DANS
CE MANUEL COMME UN INSTRUMENT DE RÉFÉRENCE SEULEMENT. NI LE FABRICANT NI LE
DISTRIBUTEUR NE FONT AUCUNE REPRÉSENTATION OU GARANTIE DE N’IMPORTE QUELLE
SORTE À L’ACHETEUR QU’IL OU ELLE EST AUTORISÉ POUR FAIRE N’IMPORTE QUELLES
RÉPARATIONS AU PRODUIT OU QU’IL OU ELLE EST AUTORISÉ POUR REMPLACER N’IMPORTE
QUELLES PARTIES DU PRODUIT. EN FAIT, LE FABRICANT ET-OU LE DISTRIBUTEUR DÉCLARE
EXPRESSÉMENT QUE TOUTES LES RÉPARATIONS ET LES REMPLACEMENTS DE PARTIES
DEVRAIENT ÊTRE ENTREPRIS PAR LES TECHNICIENS DIPLÔMÉS ET AGRÉÉS ET PAS PAR
L’ACHETEUR. L’ACHETEUR SUPPOSE TOUT LE RISQUE ET L’OBLIGATION SURVENANT DU FAIT
DE SES RÉPARATIONS AU PRODUIT ORIGINAL OU AUX PIÈCES DÉTACHÉES Y, OU SURVENANT
DU FAIT DE SON INSTALLATION DE PIÈCES DÉTACHÉES Y.
A VERTISSEMENT! Assurez-v ous toujours que le Changement de Manette
(2) est dans son de la position et enlever la Batterie avant le fait d’exécuter
n’importe quelle inspection, ajustages, maintenance, ou nettoya ge.
1. Garder le scier Circulaire propre; enlevez toute la sciure qui a accumulé.
2. Inspectez régulièrement toutes les vis montantes et les boutons pour garantir qu’ils
sont correctement serrés.
3. Garder des lames de scier propres et pointu. Les lames pointues minimisent le fait
de caler et recul.
4. Garder des gardes en bon état de marche.
5. Garder la bouche aérienne automobile propre de poussière et de débris. Vide
périodiquement.
6. Si l’instrument n’opère pas normalement, en faisant des bruits inhabituels, semble
vicié ou si autre problème a vec l’instrument existe, arrêtez de l’utiliser immédiatement
et le faire réparer par un technicien de service qualifié.
7. L’instrument propre avec un tissu humide et un détersif doux. N’utilisez pas de
solvants comme ils peuvent nuire et faire craquer les parties de plastique.
8. Si l’instrument ne commence pas ou opère à la pleine puissance avec un paquet
de batterie complètement chargé, les contacts sur le paquet de batterie peuvent
dev oir être nettoyés.
9. Vérifier pour les craquements ou le dommage à l’instrument avant le fait de l’utiliser.
Modèle
93808
Pour les questions techniques, appelez-vous s’il vous plaît 1-800-444-3353.
Page 15
Français
Page 32

LISTE DE PARTIES
traPnoitpircseD.ytQtraPnoitpircseD.ytQ
1erurreSedsiV144eéssuoPednotuoB2
2edirBaledrueirétxe'lÀ154ehcuaGsproC1
3emaL164enobr
4edirBaledrueirétni'lÀ174ediuGederutôlC1
5eéxiFedraGederutrevuoC184rioNliF1
6spmetnirP194erutrev
7essabsulPemaLededraG105BCPedehcnalP1
8spmetnirP115xuenimulnotuoB1
9cuohctuoaCudretneiroséD125resalÀnotuoB1
01cuohctu
11resalàerèimuL145uaesuFederurreSednotuoB1
21erueirépuSemaLededraG155uaesuFederurreS1
31siV46
41siV475rioNliF1
51euqillatéMeuqalP185eirettaBedteuqaP1
61siV195spmetnirP2
71siV406noixennoCedesaB1
81leirétaMedetîoBe
91troppaR126erialCedonA'deuqalP1
02noitcudorPedexA136noiP1
12erialCerutrevuoC146erialCesaB1
22erèimuL156siV1
32erurreSedsiV166sertèmillim6edegarresedélC1
42revalàenihcaM176leirétaMdnarG2
52notuoB186erurreSedexA'dnot
62siV196erèissuoPedtroP1
72xioN107siV1
82siV117DEL1
92dnofedeuqalP127rotatsederèimuL1
03siV137spmetnirP1
13xioN147erèirrAetteuqitÉ1
23t
33elibomotuAnaF167liF1
43elibomotuArotoR177rioNliF1
53troppaR187eguorLIF1
63cuohctuoaCednopmate
73cuohctuoaCelcevatiorDsproC108ediuGedeuqalP1
83siV518ehcuaGetteuqitÉ1
93siV228ehcuaGetteuqitÉ1
04er
14notuoB148ebuT1
24enobraCedessorBalruoProtatS258etiorDelloMesirP1
34sproCedsiV868ehcuaGelloMesirP1
roppaR157erueirépuSetteuqitÉ1
rioméM197erèimerPeuqalP1
oaCedettehcoP135tnemegnahC1
5eguoRliF1
derutrevuoC116cuohctuoaCedelôP1
utrevuocedemèirtauQ138cuohctuoaCelcevaehcuaGsproC1
uoC1
uoB1
aCedessorBedriottuogÉ1
Modèle
93808
Pour les questions techniques, appelez-vous s’il vous plaît 1-800-444-3353.
Page 16
Français
Page 33

DIAGRAMME D’ASSEMBLAGE
NOTEZ : Quelques parties sont énumérées et montrées pour les buts d’illustration
seulement et ne sont pas disponibles individuellement comme les pièces détachées .
Modèle
93808
Pour les questions techniques, appelez-vous s’il vous plaît 1-800-444-3353.
Page 17
Français
 Loading...