

Page 1
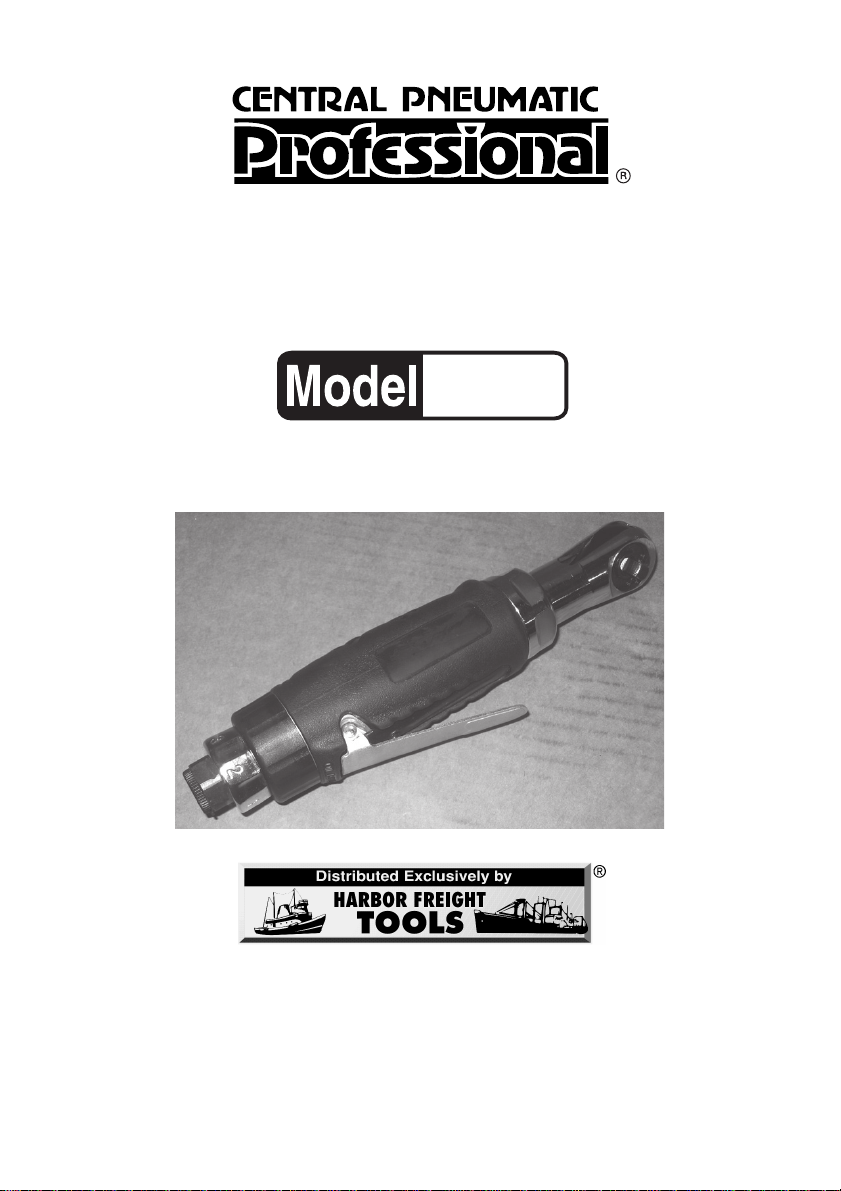
1/4” Air Ratchet Wrench1/4” Air Ratchet Wrench
1/4” Air Ratchet Wrench
1/4” Air Ratchet Wrench1/4” Air Ratchet Wrench
92849
ASSEMBLY AND OPERATING INSTRUCTIONS
3491 Mission Oaks Blvd., Camarillo, CA 93011
Visit our W eb site at http://www.harborfreight.com
Copyright © 2005 by Harbor Freight Tools®. All rights reserved. No por tion of this
manual or any artwork contained herein may be reproduced in any shape or form
without the express written consent of Harbor Freight Tools.
For technical questions and replacement parts, please call 1-800-444-3353
Page 2

Specifications
:noitcurtsnoC
:noitpmusnoCriAMFCS5.31:euqroT).W.C.C(sbl/tf13).W.C(sbl/tf33
:eziStelnIriATPN81-"4/1:evirDerauqS"4/1
:snoisnemiDllarevO.aiD"2/1-1xH"4/1-2xL"2/1-8:thgieWteN.sbL6.1
:erusserPgnikroW.xaMisp09:noitceriDgnitarepOelbisreveR
htiwydoBmunimulatsaC
tehctaRleetSdenihcaM
deepSgnitarepO
:euqroTdna
isp09tampr052
euqrotdellortnoCrotalugeR
Save This Manual
You will need the manual for the safety w arnings and precautions, assembly
instructions, operating and maintenance procedures, parts list and diagram. K eep
your invoice with this man ual. Write the invoice number on the inside of the front
cover. Keep the manual and inv oice in a safe and dry place for future reference .
Safety Warnings and Precautions
WARNING: When using tool, basic safety precautions should always be followed to reduce the risk of personal injury and damage to equipment.
Read all instructions before using this tool!
1. Keep work area clean . Cluttered areas invite injuries.
2. Observe work area conditions. Do not use machines or po w er tools in
damp or wet locations. Don’t expose to rain. Keep work area well lit. Do not
use electrically powered tools in the presence of flammable gases or liquids.
3. Keep children away . Children must never be allowed in the work area. Do
not let them handle machines, tools, or extension cords .
4. Store idle equipment. When not in use, tools must be stored in a dry
location to inhibit rust. Always lock up tools and keep out of reach of children.
5. Use the right tool for the job. Do not attempt to force a small tool or
attachment to do the work of a larger industrial tool. There are certain
applications for which this tool was designed. It will do the job better
and more safely at the rate f or which it w as intended. Do not modify this
tool and do not use this tool for a purpose for which it was not intended.
SKU 92849 Page 2
Page 3

6. Dress properly while working. Do not wear loose clothing or jewelry as
they can be caught in moving parts. Protective, electrically non-conductive
clothes and non-skid footwear are recommended when working. Wear
restrictive hair covering to contain long hair .
7. Use eye and ear protection. Always wear ANSI approved impact safety
goggles. Wear a full face shield if you are producing metal filings or wood
chips. Wear an ANSI approved dust mask or respirator when working around
metal, wood, and chemical dusts and mists.
8. Do not overreach. Keep proper footing and balance at all times. Do not
reach over or across running machines.
9. Maintain tools with care. Keep tools clean and in good condition for better
and safer performance. Follow instructions for lubricating and changing
accessories. Inspect tool fittings and hoses periodically and, if damaged, have
them repaired by an authorized technician. The handles must be kept clean,
dry , and free from oil and grease at all times.
10. Disconnect power. Disconnect from air pressure source when not in use.
11. Remove adjusting keys and wrenches. Check that keys and adjusting
wrenches are removed from the tool or machine work surface before
connecting it.
12. Avoid unintentional starting. Be sure the switch is in the Off position when
not in use and before attaching to pressure source. Do not carry any tool with
your finger on the trigger, whether it is attached or not.
13. Stay alert. Watch what you are doing, use common sense. Do not operate
any tool when you are tired.
14. Check for damaged parts. Before using any tool, any part that appears
damaged should be carefully checked to determine that it will operate
properly and perform its intended function. Chec k for alignment and binding
of moving parts; any broken parts or mounting fixtures; and an y other
condition that may affect proper oper ation. Any part that is damaged should
be properly repaired or replaced by a qualified technician. Do not use the tool
if any switch does not turn On and Off properly .
15. Guard against electric shock when working on electrical equipment.
Prevent body contact with grounded surfaces such as pipes, radiators,
ranges, and refrigerator enclosures.
SKU 92849 Page 3
Page 4
16. Replacement parts and accessories. When servicing, use only identical
replacement parts. Use of any other parts will void the warranty. Only use
accessories intended for use with this tool. Approved accessories are
available from Harbor F reight T ools.
17. Do not operate tool if under the influence of alcohol or drugs. Read
warning labels on prescriptions to determine if your judgment or reflexes are
impaired while taking drugs. If there is any doubt, do not operate the tool.
18. Use proper size and type air pressure line and fittings. The recommended
air line for this tool is 3/8” delivering no more than 90 psi. Recommended air
inlet size is 1/4” - 18 npt.
19. Maintenance. F or your saf ety , service and maintenance should be performed
regularly by a qualified technician.
20. You should maintain a proper regulator and moisture trap in your air
line at all times.
21. Use compressed air only . N ev er use combustib le gas as a power source .
Note: P erformance of this tool may v ary depending on variations in local air pressure.
Warning: The warnings, cautions, and instructions discussed in this instruction
manual cannot cover all possible conditions and situations that may occur. It
must be understood by the operator that common sense and caution are factors
which cannot be built into this product, but m ust be supplied by the operator .
Air Pressure Supply
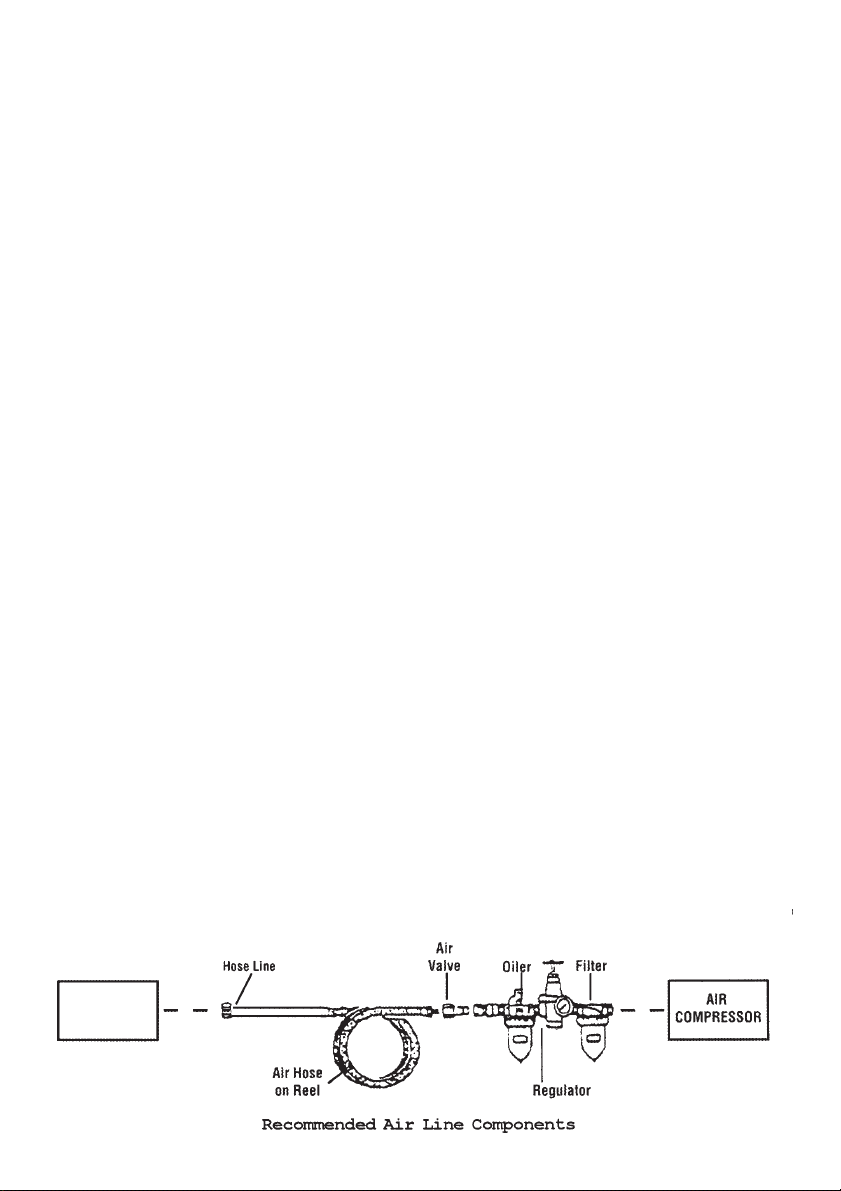
We recommend that you use both a filter and an in-line oiler in your air supply
system as illustrated in the diagram below . These components are not included
with this tool, abut are av ailable from Harbor Freight Tools.
We recommend that you install a quick-release nipple (not included) into the Inlet
Connector (15). Quick release connectors at all points that a hose attaches to your
compressor set up and your tools make working with air powered tools easier and
more convenient.
Air Impact
Wrench
SKU 92849 Page 4
Page 5
Operation
1. Install a standard 1/4” Air Connector (not included) to the Air Inlet (15). First
wrap the threaded portion of the 1/4” air connector with pipe thread seal tape
before threading it into the Air Inlet (15). Tighten securely.
2. Attach a standard quick connector (not included) to your 3/8” i.d. air pressure
source hose. Then attach the air hose to the Air Ratchet Wrench.
NOTE: If you are not using an automatic in-line oiler , add a f ew drops of pneumatic
oil to the Air Inlet (15) before attaching the air hose. Add a few more drops of oil
after every hour of continual use.
2. Set the air pressure regulator of your air compressor at 90 psi.
WARNING: Do not e xceed the recommended pressure of 90 psi. Damage to your
tool, and possible personal injury may result.
3. Check the air line and its connections for air leaks. Make note of these, and
repair them before using this tool.
NOTE: Turn off your air compressor and disconnect the air pressure hose before
changing sockets or making any adjustments to this tool. Severe injury or property
damage may otherwise result.
WARNING: This tool generates considerab le torque when in use. Always hold the
tool with both hands when using, and brace yourself to resist the torque which will
be delivered to the work piece.
4. Select the appropriate size 1/4” square drive impact socket (not included) for
your needs. Push and snap the socket onto the Ratchet Anvil (42). Caution:
Use only impact sockets. Standard sockets are not strong enough.
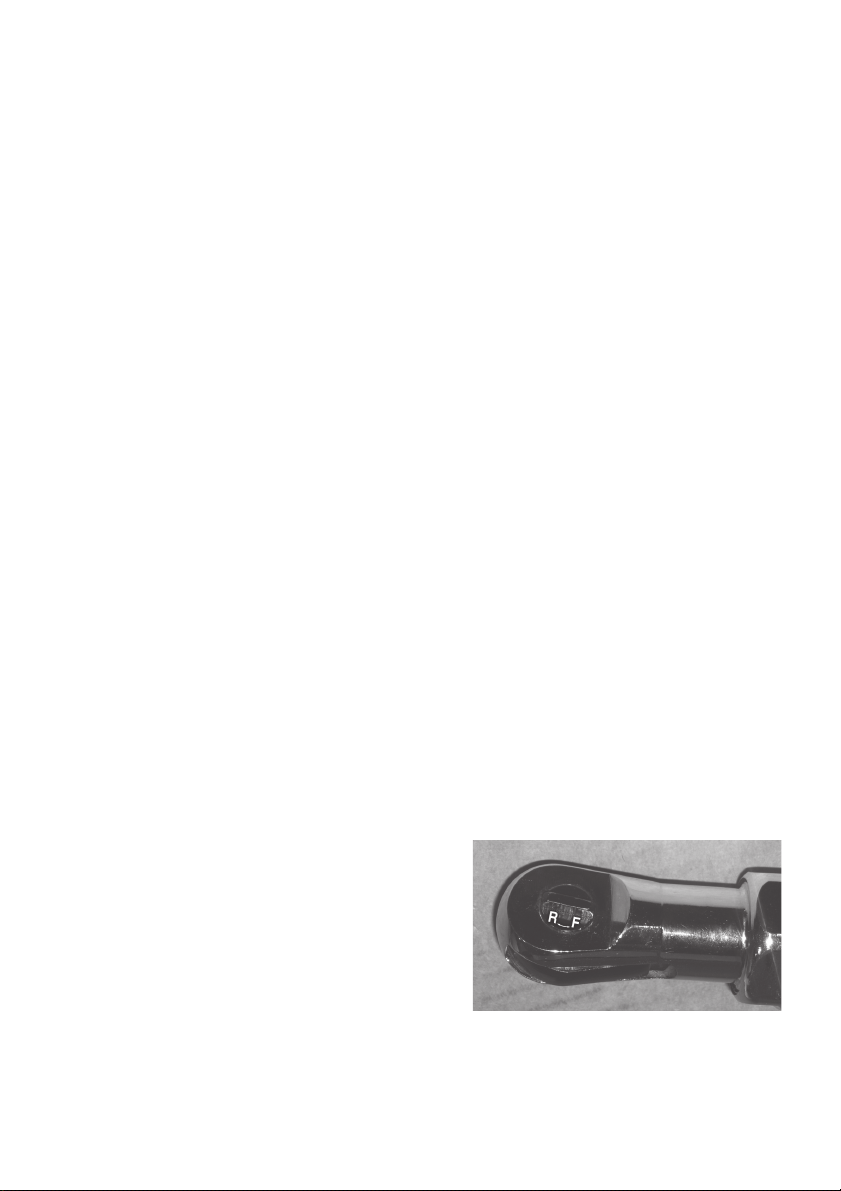
5. Set the direction of the Air Impact Wrench to “F” (forward) or “R” (reverse).
Please see photo. By rotating the Reverse Button (38) to the right, you are
setting the tool to operate FORWARD.
NOTE: In this booklet, “FORWARD” refers to
clockwise rotation, and “REVERSE” refers to
counterclockwise rotation. Always be aware
of the direction of the threading of the
fastener you are working on. While most
fasteners install with clockwise rotation,
some threads are intentionally the opposite
of this standard.
SKU 92849 Page 5
Page 6
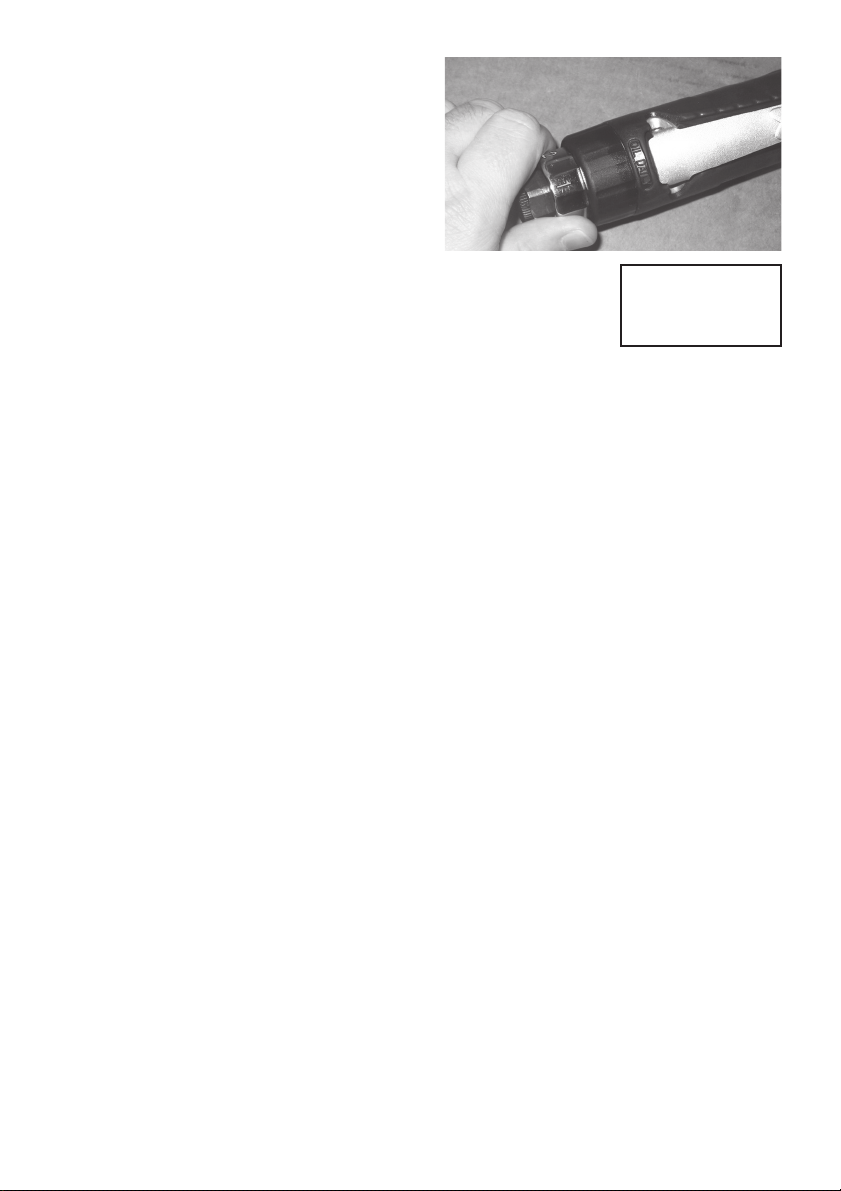
6. Adjust the Air Regulator (13) to the
desired torque setting. NOTE: The
actual torque delivered at each of the
several torque settings will depend
on the air pressure supplied to the
tool. We suggest that you test the
actual torque by tightening a nut or
bolt on a test piece using each
setting, then observing the resultant
torque by using a mechanical torque wrench (not supplied).
7. If installing a nut or bolt, set it as tight as possible by hand.
Note: Never overtighten the nut or bolt;
damage may result
from over-tightening.
8. Place the impact socket (not included) o ver the f astener . Grip the Air Ratchet
Wrench tightly with both hands, and squeeze the trigger (8). The tool will
operate and tighten the fastener .
9. When the fastener is tightened, release the Trigger (8), and remove the tool
from the fastener .
10. If possible, check the actual torque applied to the fastener with a mechanical
torque wrench (not supplied). If additional torque is required beyond what is
delivered by using air pressure, the fastener may be further tightened using
this tool in the manner of a standard ratchet wrench.
11 . If removing a fastener , rotate the Rev erse Button (38) counterclockwise,
assuming that the fastener is a standard right-hand thread. Always check to
be sure of the thread direction of any fastener before attempting to install or
remove it. If the fastener is a left-hand thread, turn the Reverse Button (38) to
the right for removal.
12. Place an appropriate impact socket (not included) over the f astener. Holding
the Air Ratchet Wrench with both hands, squeeze the Trigger (8). The fastener
should come off.
W ARNING: If the fastener will not come off, fir st chec k to be sure of the
direction of the thread. If you have the thread direction correct and the
fastener will not come off, DO NOT INCREASE THE AIR PRESSURE to the
tool beyond 90 psi. This may damage the tool. You may have to use penetrating oil, heat, or a mechanical wrench to remove the fastener.
13. When you are done using this tool, turn off the air compressor, and disconnect
the air hose. Put the Air Ratchet Wrench away in its proper storage place.
SKU 92849 Page 6
Page 7
Maintenance
1. Your Air Ratchet Wrench should be k ept clean, dry and lightly oiled.
2. When not in use, store your tool in a suitable place where it will not be
exposed to water , corrosive materials, or undue banging around.
3. If you are not using an in-line oiler , you should inject a f ew drops of pneumatic
oil into the air inlet of the tool after every hour of continuous use.
4. If your tool loses power, or you notice air leaks, take it to a certified technician
for service.
Parts List
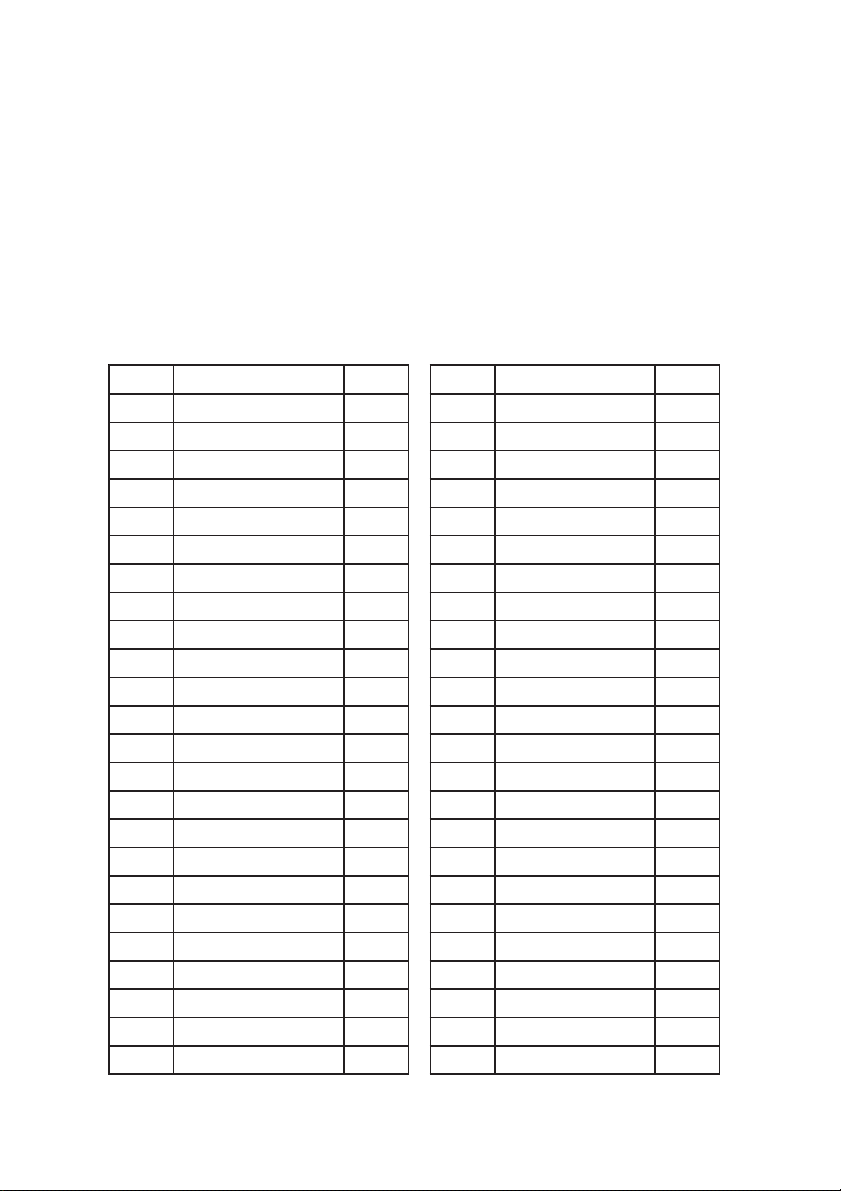
#traPnoitpircseD.ytQ#traPnoitpircseD.ytQ
1gnisuoH152niP1
2gnihsuBevlaV162gniR1
3metSevlaV172gniraeB1
4gnir-O182niP3
5gnirpS192raeG3
6gnir-O103etalPraeG1
7gulPevlaV113raeGgniRdaerhT1
8reggirT123paC1
9niPreggirT133gniraeBeldeeN1
01revoCeldnaH143tfahsknarC1
11revoCrelffuM153gnihsuBevirD1
21gnir-O163gnisuoHtehctaR1
31rotalugeRriA173ekoYtehctaR1
41gnir-O183nottuBesreveR1
51telnIriA193gnirpS1
61niPteS104niPteS1
71gnirpS114rehsaW1
81gniraeB124livnAtehctaR1
91etalPdnE134niP1
02niP244lwaPtehctaR1
12rednilyC154gnirpS2
22rotoR164llaBleetS2
32edalBrotoR474rehsaW1
42etalPtnorF184gniRreniateR1
NOTE: Some parts are listed and shown for illustration purposes only and are not
available individually as replacement parts.
SKU 92849 Page 7
Page 8
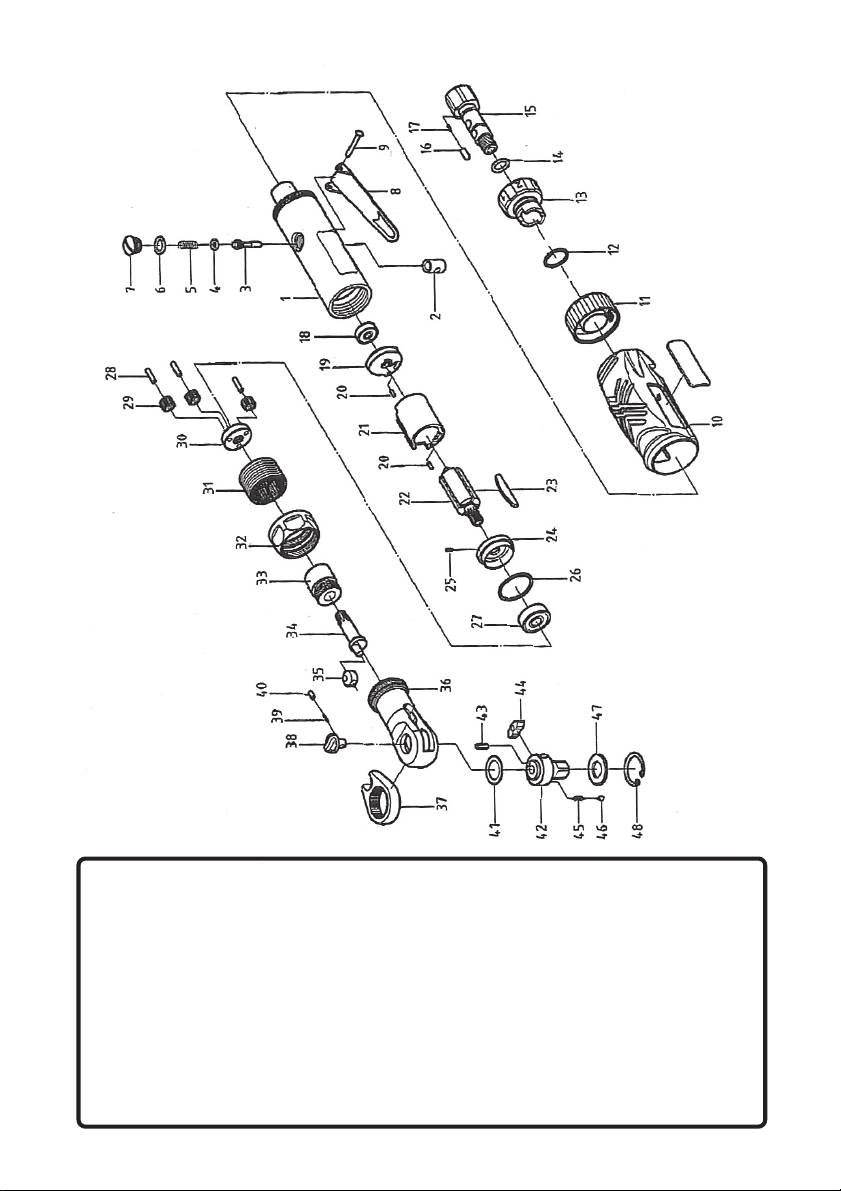
Assembly Drawing
PLEASE READ THE FOLLOWING CAREFULLY
THE MANUFACTURER AND/OR DISTRIBUTOR HAS PROVIDED THE PARTS DIAGRAM
IN THIS MANUAL AS A REFERENCE TOOL ONLY. NEITHER THE MANUFACTURER
NOR DISTRIBUTOR MAKES ANY REPRESENTATION OR WARRANTY OF ANY KIND TO
THE BUYER THAT HE OR SHE IS QUALIFIED TO MAKE ANY REPAIRS TO THE
PRODUCT OR THAT HE OR SHE IS QUALIFIED TO REPLACE ANY PARTS OF THE
PRODUCT. IN FACT, THE MANUFACTURER AND/OR DISTRIBUTOR EXPRESSLY
ST A TES THA T ALL REP AIRS AND PARTS REPLACEMENTS SHOULD BE UNDER T AKEN BY
CERTIFIED AND LICENSED TECHNICIANS AND NOT BY THE BUYER. THE BUYER ASSUMES ALL RISK AND LIABILITY ARISING OUT OF HIS OR HER REP AIRS T O THE ORIGINAL PRODUCT OR REPLACEMENT P AR TS THERET O, OR ARISING OUT OF HIS OR HER
INST ALLA TION OF REPLACEMENT PARTS THERETO.
SKU 92849 Page 8
 Loading...