

Page 1
92580
OPERATION INSTRUCTIONS
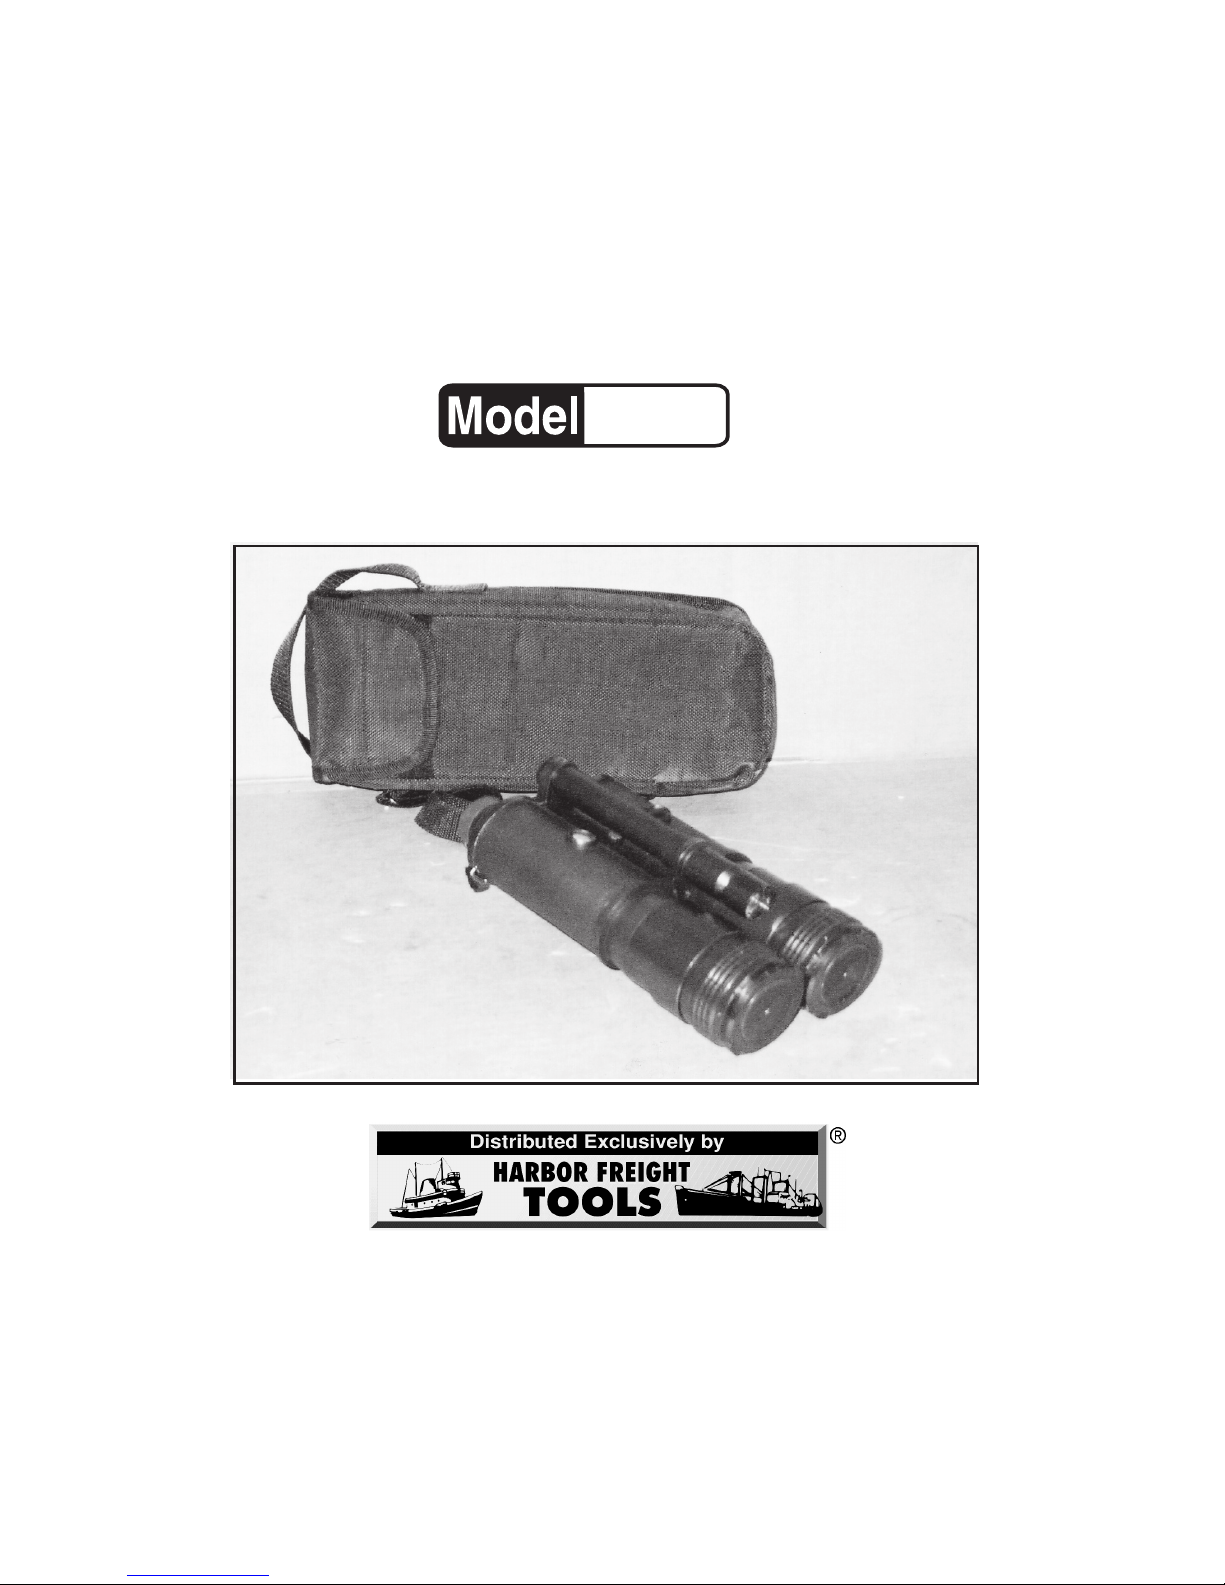
NIGHT VISION
BINOCULARS
WITH LISTENING DEVICE
3491 Mission Oaks Blvd., Camarillo, CA 93011
Visit our Web site at http://www.harborfreight.com
Copyright© 2004 by Harbor F reight Tools®. All rights reserved.
No portion of this manual or any artwork contained herein may be
reproduced in any shape or form without the express written consent
of Harbor Freight Tools.
For technical questions and replacement parts, please call 1-800-444-3353
Page 2

SKU 92580 For technical questions, call 1-800-444-3353 Page 2
Save This Manual
You will need the manual for the safety warnings and
precautions, assembly instructions, operating and maintenance
procedures, parts list and diagram. Keep your invoice with this
manual. Write the invoice number on the inside of the front cover.
Keep the manual and invoice in a safe and dry place for future
reference.
Safety Warnings and Precautions
WARNING: When using this product, basic safety precautions
should always be followed to reduce the risk of personal
injury and damage to equipment.
Read all instructions before using this product!
1. Failure to follow these warnings and the following instructions
completely can result in damage to the product and/or severe
ear damage. Read the directions carefully and completely before
use and do not allow inexperienced individuals or children to use this
equipment.
2. Do not remove the Lens Cap in daylight or under bright
illumination such as automobile headlights. This may cause
permanent damage to the unit.
3. Stay alert. Watch what you are doing, use common sense. Do not
use any product when you are tired.
4. Maintenance. For your safety, service and maintenance should be
performed regularly by a qualified technician.
Range of View
Magnification
Power Source
Eye Piece Optic Dia.
Weight
Features
490 ft.
4X
(2) 1.5V AA Cell Batteries (not included)
16MM
2.85 lbs.
Includes Tape Fastener for Sound Amplifer
Sound Amplifier-Super Ear™-SKU 4334Personal amplifier included in separate box.
Nylon Carrying Bag w/Shoulder Strap
Specifications
Page 3

SKU 92580 For technical questions, call 1-800-444-3353 Page 3
5. Protect the unit from moisture, dust, and sunlight. When not in
use, this product should be stored in a dry location to inhibit rust. If this
unit is used in a cold environment and then brought into a warm area
or if condensation is visible on the unit, wait five hours before using it
again.
6. Av oid storing this product where sudden changes of temperature
occur. Keep it away from air conditioning or heating vents.
7. Maintain products with care. Keep products clean for better and
safer performance. Follow instructions for changing accessories.
8. Keep children aw ay. Do not let them handle or pla y with this product.
9. Replacement parts and accessories. When servicing, use only
identical replacement parts. Use of any other parts will void the
warranty. Only use accessories intended for use with this product.
Approved accessories are available from Harbor Freight Tools.
10. Do not setup the product if under the influence of alcohol or drugs.
Read warning labels if taking prescription medicine to determine if
your judgment or reflexes are impaired while taking drugs. If there is
any doubt, do not setup or use the product.
11. Check for damaged parts. Before using any product, any part that
appears damaged should be carefully checked to determine that it will
operate properly and perform its intended function. Check for any
broken parts or mounting fixtures; and any other condition that may
affect proper operation. Any part that is damaged should be properly
repaired or replaced by a qualified technician.
12. Do not expose this product to any light, such as headlights, for
an extended period of time. This product is equipped with a flash
protection system, but long-term exposure can still damage the
Binoculars.
13. Avoid dropping or jarring the unit. This device has sensitive
precision instruments inside, sudden shocks can damage them.
14. Clean the lenses only with professional lens cleaning products.
See Maintenance section for proper cleaning instructions.
15. Dispose of used batteries in a hazardous waste disposal area.
Contact your local Waste Disposal Authority f or proper disposable guide
lines.
Page 4

SKU 92580 For technical questions, call 1-800-444-3353 Page 4
Warning: The warnings, cautions, and instructions discussed in this
instruction manual cannot cover all possible conditions and
situations that may occur . It must be understood by the operator
that common sense and caution are factors which cannot be
built into this product, but must be supplied by the operator.
General information on Night Vision devices.
This electro-optical device assists in viewing in near darkness or
complete darkness. It works by amplifying the already existing light of the
moon or the stars. If no light is present the illuminator acts as an external
light source. When viewing an object through the night vision scope, you
are actually seeing an image that comes from the intensifier tube within the
device.
The objective lens captures the light and directs it to the front of the
intensifier tube, which is the electro-optical component. The two 1.5V AA
Cell batteries then pass energy through the intensifier tube causing electrons
to strike the phosphor screen. The image in the intensifier tube is then
magnified by the eyepiece.
This device is excellent for wildlife viewing, search and rescue
operations, boating safety, home security, and camping.
Tube Screen Appearance
Light and dark spots caused by image
converter tube may be visible in the field
of view. These are normal and not
considered imperfections by image
intensifier standards. Most of the
distortion will occur in the peripheral
area, not in the center.
Unpacking
When unpacking, check to make sure the parts shown in the parts
list and assembly diagram on page 8 are included. If any parts are
missing or broken, please call Harbor Freight Tools at the number on the
cover of this manual.
Page 5

SKU 92580 For technical questions, call 1-800-444-3353 Page 5
Operation
Battery Installation/Replacement
1. Open the Battery Cover (5) by unscrewing cap.
See Figure A.
2. Insert the two 1.5V AA batteries (not included) in the Battery
Compartment (4).
3. Twist on the Battery Cover (5) and close the Battery Compartment.
Operation Without Illuminator
1. IMPORTANT: IF YOU ARE NOT IN A DARK AREA, DO NO T REMOVE
THE LENS CAP (7) (NOT SHOWN).
2. While in a darkened area, remove the Lens Cap (7) and check the
scope operation by pushing the “Green” Night Vision Button (10),
depressing it for 2 to 3 seconds and then releasing it.
(See Figure B).
3. Look through the Eyepiece. You should see a green glow if the scope
is working properly. The image will gradually fade out, as the Night
Vision Binoculars shut off automatically. Press the “Green” Button (10)
again to refresh, if the image fades before you are done viewing. When
done viewing, replace the Lens Caps (7) immediately.
Figure A
Battery
Cover (5
)
Battery
Compartment
(4)
Eyepiece
Page 6

SKU 92580 For technical questions, call 1-800-444-3353 Page 6
Operation With Illuminator
1. Remove the Lens Caps (7) and turn on and refresh the “Green” Night
Vision Button (10).
2. When operating in total darkness use the built in Illuminator:
Continually press the “Red” Illuminator Button (11).
(See Figure B)
.
(Note: The Illuminator uses more battery power, so battery will
not last as long with the Illuminator ON).
When finished viewing, stop pressing the Illuminator
Button (11).
3. When finished, replace the Lens Caps (9) immediately and store the Night
Vision Binoculars (1) in the Nylon Carrying Bag (3).
Figure B
Lens
Cap (7)
“Green”
Night Vision
Button (10)
“Red”
Illuminator
Button (11)
Scope
Eyepiece
Connecting the Adapter Rail for Sound Amplifier
(included in a separate box)
1. Be sure “Green” Power Button (10) is OFF and that the Lens Caps (7)
stay on during this procedure.
2. Connect the Amplifier to the bottom of the Binoculars (1), using the
piece of included double sided tape. Peel off one side of paper on
tape and adhere to the underside of the Binoculars (1).
See Figure C
on page 7.
3. Peel off the second sheet of protectiv e paper and attach the Amplifier
to the tape.
(See Figure D on page 7).
4. For setup and use of the Amplifier , read and understand the instruction
sheet provided with the Super Ear™ Amplifier.
Page 7

SKU 92580 For technical questions, call 1-800-444-3353 Page 7
Troubleshooting
1. If the screen will not glow while in the ON position:
Check the batteries. Make sure they are charged and installed properly .
2. If the image fades or disappears completely:
a. If you are in complete darkness, the Binoculars need some light.
Activate the Illuminator (11).
b. It is also possible that you pointed the device at an intense light
source which might have shut down the unit to protect the intensifier
tube. Turn the power off and wait five minutes before turning it
back on.
3. If unable to properly focus:
Try adjusting the focus on both the Eyepiece and the objectiv e lens on
the front of the Binoculars (1). Also, try cleaning the lens with
professional supplies.
Figure C
Figure D
Note: You can attach the Night Vision Binoculars (1) to a tripod (not included),
using the Screw (9) and Washer (8) (not shown).
Note: A tripod cannot be attached when the Amplifier is positioned below
the Binosulars.
Adapter
Rail (2)
Maintenance
1. Always clean the lenses with professional supplies. Never wipe dirt or
dust off the lenses with a dry cloth. You may use dry, compressed air .
2. Clean the housing with a dry, soft cloth.
3. Store in a dry, well ventilated area. Never store near a heater, air
conditioner, or in direct sunlight.
4. Remove both batteries when storing for more than two weeks.
Tape (b)
Page 8

SKU 92580 For technical questions, call 1-800-444-3353 Page 8
PLEASE READ THE FOLLOWING CAREFULLY
THE MANUFACTURER AND/OR DISTRIBUTOR HAS PROVIDED THE PARTS
DIAGRAM IN THIS MANUAL AS A REFERENCE TOOL ONLY. NEITHER THE
MANUFACTURER NOR DISTRIBUTOR MAKES ANY REPRESENTATION OR
WARRANTY OF ANY KIND T O THE BUYER THAT HE OR SHE IS QUALIFIED T O MAKE
ANY REPAIRS TO THE PRODUCT OR THAT HE OR SHE IS QUALIFIED TO REPLACE
ANY PARTS OF THE PRODUCT. IN FACT, THE MANUFACTURER AND/OR
DISTRIBUTOR EXPRESSLY ST A TES THAT ALL REP AIRS AND P ARTS REPLA CEMENTS
SHOULD BE UNDERTAKEN BY CERTIFIED AND LICENSED TECHNICIANS AND NO T
BY THE BUYER. THE BUYER ASSUMES ALL RISK AND LIABILITY ARISING OUT OF
HIS OR HER REPAIRS TO THE ORIGINAL PRODUCT OR REPLACEMENT PARTS
THERETO, OR ARISING OUT OF HIS OR HER INSTALLATION OF REPLACEMENT
PARTS THERETO.
Part # Description
1 Night Vision Binocular
3 Nylon Carrying Bag
4 Battery Compartment
5 Battery Cover
6 Illuminator
7 Lens Cap
8 Washer (not shown)
9 Screw (not shown)
10 “Green” Night Vision Button
11 “Red” Illuminator Button
Parts List
Assembly Diagram
Part 1
Part 3
Part 4
Part 5
Part 7
Part 11
Part 10
Part 6
 Loading...