

Page 1
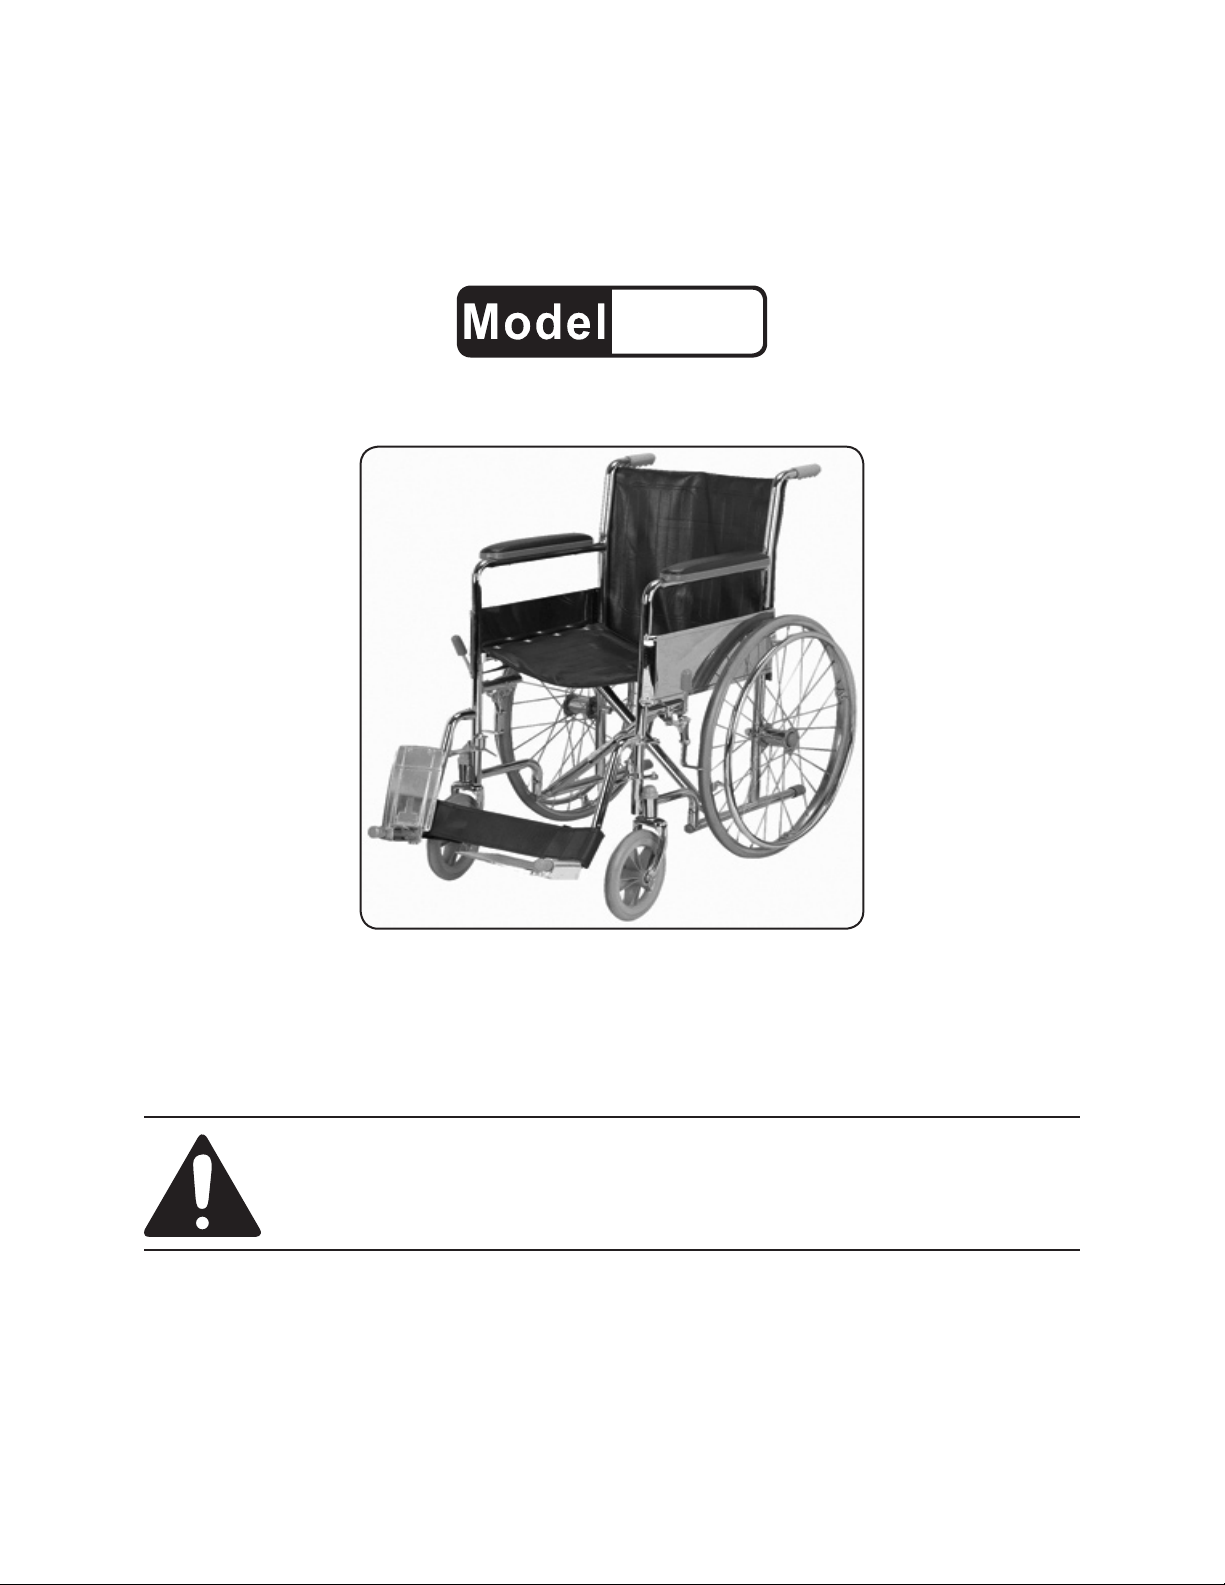
24” FOLDABLE WHEELCHAIR
67437
SET UP AND OPERATING INSTRUCTIONS
Distributed exclusively by Harbor Freight Tools®.
3491 Mission Oaks Blvd., Camarillo, CA 93011
Visit our website at: http://www.harborfreight.com
Read this material before using this product.
Failure to do so can result in serious injury.
SAVE THIS MANUAL.
Copyright© 2009 by Harbor Freight Tools®. All rights reserved. No portion of this manual or any artwork
contained herein may be reproduced in any shape or form without the express written consent of
Harbor Freight Tools. Diagrams within this manual may not be drawn proportionally. Due to continuing
improvements, actual product may differ slightly from the product described herein. Tools required for
assembly and service may not be included.
For technical questions or replacement parts, please call 1-800-444-3353.
Page 2

SAVE THIS MANUAL
Keep this manual for the safety
warnings and precautions, assembly,
operating, inspection, maintenance and
cleaning procedures. Write the product’s
serial number in the back of the manual
near the assembly diagram (or month
and year of purchase if product has no
number). Keep this manual and the
receipt in a safe and dry place for future
reference.
IMPORTANT SAFETY
INFORMATION
In this manual, on the labeling,
and all other information
provided with this product:
This is the safety alert
symbol. It is used to alert
you to potential personal
injury hazards. Obey all
safety messages that
follow this symbol to avoid
possible injury or death.
CAUTION, used
with the safety
alert symbol, indicates a
hazardous situation which, if
not avoided, could result in
minor or moderate injury.
NOTICE is used to
address practices
not related to personal injury.
CAUTION, without
the safety alert
symbol, is used to address
practices not related to
personal injury.
General Safety Warnings
WARNING Read all safety
warnings and instructions.
Failure to follow the warnings and
instructions may result in electric
shock, re and/or serious injury.
Save all warnings and
instructions for future reference.
Do not exceed 250 lb. maximum 1.
weight capacity of Wheel Chair.
DANGER indicates
a hazardous
situation which, if not
avoided, will result in death or
serious injury.
WARNING
indicates a
hazardous situation which, if
not avoided, could result in
death or serious injury.
Before using Wheelchair, check 2.
with physician(s) to make sure this
Wheelchair is appropriate for the
user’s needs.
The position of the Front Casters, 3.
and Rear Wheels directly affect
the Wheelchair’s stability. Any
modication to Casters or Wheels
may cause Wheelchair to decrease
in stability. Any adjustments must
Page 2For technical questions, please call 1-800-444-3353.SKU 67437
Page 3

be made by a qualied service
technician.
Before riding, have a physician or 4.
health care advisor train you in
safe use of Wheelchair.
Do not try a maneuver on your 5.
own until you are sure it can be
done safely.
Do not lean forward out of the 6.
Wheelchair further than the length
of the armrests. Doing so may
cause the Wheelchair to tip over.
Other guidelines to prevent tipping
include:
Do not attempt to reach objects a.
by moving forward on the
Wheelchair seat.
Do not attempt to reach objects b.
by reaching between your knees.
Do not lean over the top of the c.
backrest.
Do not attempt to stand on 7.
Wheelchair or the Wheelchair’s
frame.
Do not attempt to slow down or 8.
stop a moving Wheelchair with the
Wheel Locks.
When transferring to or from 9.
the Wheelchair, do not stand or
put weight on the footplates or
footrests. Doing so can cause the
Wheelchair to tip and lead to potential
injury
Do not sit or transfer into 10.
Wheelchair unless it is fully
unfolded.
themselves and be careful not to
pinch ngers and hand in wheel
spokes.
Use the Wheel Locks on both 12.
Rear Wheels whenever entering or
exiting the Wheelchair.
People with limited strength and 13.
mobility will need assistance when
moving in and out of Wheelchair.
Stay alert, watch what you are 14.
doing and use common sense
when operating Wheelchair. The
attendant should not push this
Wheel Chair while tired or under
the inuence of drugs, alcohol or
medication. A moment of inattention
while operating Wheelchair may
result in serious personal injury.
Dress properly. Do not wear loose 15.
clothing, jewelry or any items that
could get caught in the wheels
during use.
Keep proper footing and balance 16.
at all times when pushing the
Wheelchair. Proper footing and
balance enables better control of
Wheelchair in unexpected situations.
Keep children who are not patients 17.
away from Wheelchair. Do not
allow children to ride in, on, or
push the Wheelchair without adult
supervision.
Consult health care advisor 18.
before making any modication
to the Wheelchair. Unauthorized
modications or use of unauthorized
parts may change the Wheelchair
When propelling the Wheelchair, 11.
carefully use the wheel hand
rails. Do not grip the rear wheel
Page 3For technical questions, please call 1-800-444-3353.SKU 67437
Page 4

structure, leading to possible
personal injury and property damage.
climb high steps can lead to loss of
balance and potential tip over.
Use extra care when using 19.
Wheelchair on a wet, icy or oilslicked surface. Do not use
Wheelchair in shower, pool or other
body of water. Dry Wheelchair as
soon as possible if it does get wet.
Do not operate Wheelchair in sand, 20.
loose soil or over rough terrain.
Doing so may damage wheels or
axles or loosen the fasteners.
When using Wheelchair outside 21.
and at night, use reective tape on
Wheelchair and on clothing. Be
sure to make eye-contact with drivers
and adhere to crosswalks. It may
be difcult for some drivers to spot
Wheelchair at certain intersections;
use extra caution during street use.
Do not use Wheelchair on busy 22.
roads, streets or highways. Use
only on pedestrian walking areas.
Scan area well ahead of 23.
Wheelchair during use. Avoid
obstacles when possible and make
sure oor areas at home and work
are level. Remove or cover threshold
strips between rooms.
Do not use Wheelchair on stairs 26.
without assistance. Doing so can
lead to loss of balance and a fall,
leading to potential serious injury.
Be aware that regular and 27.
intensive impact of dropping down
from a high curb or step can cause
damage to fasteners and lead to
potential Wheelchair damage.
Do not use Wheelchair on an 28.
escalator, even with assistance.
Doing so will most likely lead to a fall
and potential serious injury.
Install and use ramps at entry and 29.
exit doors whenever possible.
Make sure no drop off points are at
bottom of ramps.
Do not use Wheelchair on slope 30.
steeper than 9% (one foot in
elevation per every nine feet of
slope length.)
Go straight up and straight down 31.
ramps; do angle or cut corners on
ramps. Stay in center of ramp and
do not change Wheelchair direction
or stop while on slope or ramp.
Do not attempt to climb or descend 24.
curbs or steps alone or without
assistance unless procient
enough to make such maneuvers
on your own.
Do not attempt to climb a high 25.
curb or step 4” or higher unless
you have assistance. Attempting to
Do not use rear Wheel Locks to 32.
slow down or stop Wheelchair
while on a slope or ramp.
Verify that ramps at home 33.
and work meet all local legal
requirements.
Do not push or pull on stationary 34.
objects (such as furniture or
doorjamb) to propel Wheelchair.
Use assistance when moving into 35.
vehicle until you are safely able
Page 4For technical questions, please call 1-800-444-3353.SKU 67437
Page 5

to transfer yourself without injury.
Lock rear wheels before transfer
and move Wheelchair as close as
possible to vehicle seat.
Do not allow feet to catch in the 36.
space between footrests during
transfer in and out of Wheelchair.
Keep footrests at least 2” off the 37.
ground. If footrests are set lower,
they may get caught against objects
on oor.
creates a “tip-point,” which can lead
to a fall.
Firmly grip a rear wheel or armrest 44.
when reaching for something.
Doing so will help reduce the risk of a
fall.
Verify both rear Rear Wheels are 45.
locked before using Wheelchair. An
unlocked axle may come off during
use and potentially lead to a fall,
causing serious personal injury.
Do not lift Wheelchair by armrest 38.
pads or footrests. Lift Wheelchair
only by non-detachable parts of the
frame.
Do not sit in Wheelchair while in a 39.
moving vehicle. Sit in an approved
handicapped seating area and secure
yourself with proper seat belts and/or
vehicle restraints.
Do not transport Wheelchair in the 40.
front seat of vehicle. It may shift
and interfere with the driver. Secure
wheelchair in proper location to avoid
rolling or shifting.
Do not reach or lean if you must 41.
shift weight sideways or rise up
out of the Wheelchair. Always keep
your buttocks in contact with the
backrest.
Verify Push Handle grips do not 46.
rotate or slip before use.
Do not modify or alter the Seat or 47.
any other part of the Wheelchair.
Maintain labels and nameplates on 48.
Wheelchair. These carry important
safety information. If unreadable or
missing, contact Harbor Freight Tools
for a replacement.
The warnings, precautions, and 49.
instructions discussed in this
instruction manual cannot cover
all possible conditions and
situations that may occur. It must
be understood by the operator that
common sense and caution are
factors which cannot be built into this
product, but must be supplied by the
operator.
Do not reach out for something 42.
with both hands. Doing so will keep
you from catching yourself should the
chair tip.
Do not lock the rear wheels when 43.
reaching for an object. Doing so
SAVE THESE
INSTRUCTIONS.
Page 5For technical questions, please call 1-800-444-3353.SKU 67437
Page 6

SPECIFICATIONS
Weight Capacity 250 lb.
Wheelchair Width 24”
Weight 40 lb.
Wheels
Seat Width 20-1/4” x 16-5/8” Deep
Solid Rubber Tires and
360° Swivel Casters
Swivel Footplates (2) so they are 4.
horizontal.
To fold the Wheelchair, lock the Rear 5.
Wheels and fold Footplates up.
Pull up on the Seat and push 6.
Armrest closer together, folding the
Wheelchair.
Installing Foot Rests
UNPACKING
When unpacking, make sure item
is intact and undamaged. If parts are
missing or broken, call Harbor Freight
Tools at 1-800-444-3353.
ASSEMBLY/OPERATIONS
INSTRUCTIONS
Read the ENTIRE IMPORTANT
SAFETY INFORMATION
section at the beginning of this
manual including all text under
subheadings therein before set
up or use of this product.
For additional information
regarding the parts listed in the
following pages, refer to Assembly
Diagram near the end of manual.
Unfolding/Folding
Slide the Footplates (2) to the side 1.
(so that they are perpendicular to the
Wheelchair. See Figure 1, below.
Figure 1
Foot Rest (1)
Tab
Control
Handle
Footplate (2)
Install the end of each Detachable 2.
Footrest (1) onto the tab extending
from the Wheelchair Frame (9). See
Figure 1, above.
Before unfolding Wheelchair, make 1.
sure Rear Wheels (3) are in the
locked position.
Hold the Armrests (10) and pull them 2.
away from one another, unfolding the
Wheelchair.
As Wheelchair unfolds, press down 3.
on Seat (6).
Swivel the Footrest towards the 3.
inside of the Wheel Chair until it locks
into place.
Please note: When properly installed, 4.
Footplate will be on the inside of the
Wheel Chair when locked into place.
To remove, push the Control Handle 5.
out and lift the Foot Rest off the
Wheelchair. See Figure 1, above.
Page 6For technical questions, please call 1-800-444-3353.SKU 67437
Page 7

Adjusting Foot Rests
To adjust the Foot Rests, loosen but 1.
don’t remove the bolt that secures the
lower section of each Foot Rest to
the upper half. See Figure 2, below.
Figure 2
Upper Foot
Rest
Lower Foot
Rest
Bolt
Reposition lower section of Foot Rest 2.
to desired height. Tighten bolt until
upper section is secured at spot.
NOTE:3. The Wheelchair may be used
without Foot Rests by persons able to
use their feet to self-propel chair.
Replacing Seat
Wheelchair uses ten screws and 1.
washers to secure Seat (6) to frame.
Screws and
Washers
Remove the eight screws and 1.
washers that secure the Back Pad (7)
to the back of the Handles (8).
Remove upholstery from Wheelchair 2.
and, using the screws and washers,
securely fasten the new back
upholstery to the back of the Handles.
See Figure 4, below.
Back Pad
(7)
Screws
Replacing Back Pad
Handles
Figure 4
Washers
Figure 3
Seat
To replace the Seat, remove the 2.
screws and washers that secure the
Seat to the cross braces. See Figure
3, above. Please Note: Seat height
cannot be adjusted.
Remove plate from Seat sleeve.3.
To install new Seat, insert plate into 4.
sleeve and fasten Seat to cross bars
using ten screws and washers.
Adjust and Replacing Front
Wheels
Should the Casters need to be 1.
adjusted, rst tip back of Wheelchair
to oor.
To tighten or loosen Casters, remove 2.
the Dust Cover from the top of the
Caster Head tube and adjust Locknut
allowing for looser or tighter Caster
Page 7For technical questions, please call 1-800-444-3353.SKU 67437
Page 8

swing (Casters should swing down
to one side and immediately rest
after being held straight at the top of
the arc.) Too much swing indicates
Casters need to be tightened; not
enough swing means Casters should
be loosened. See Figure 5, below.
Dust
Cover
Figure 5
Locknut
Caster
Headtube
Washer
Yoke
Front
Caster (5)
Test Wheelchair for maneuverability. 3.
Once both Casters are properly
readjusted, snap Dust Cover back
into place over Locknut.
To replace Casters, remove Hex 4.
Screws, Washers, and Locknut
holding each Caster in place in the
Yoke.
Set new Wheel in the Yoke and 5.
fasten in place using Hex Screws,
Washers and Locknuts. See Figure
6, above.
Figure 6
Dust
Cover
Yoke
Hex
Screw
Caster (5)
Adjusting Rear Wheel Locks
WARNING!1. Do not attempt to stop a
moving Wheelchair with Wheel Locks
(4). Wheel Locks are NOT brakes.
To adjust Wheel Locks, disengage 2.
lock and loosen bolt and locknut that
secure Rear Wheel (3) to frame.
Reposition Wheel Lock so that when 3.
brake is engaged, lock shoe presses
down 1/8” onto Rear Wheel, holding
Wheelchair in place. See Figure 7.
Figure 7
Bolt and
Locknut
Wheel
Lock (4)
Wheel
Lock Shoe
Tire
Front
Page 8For technical questions, please call 1-800-444-3353.SKU 67437
Page 9

Securely tighten the bolt and locknut, 4.
securing the Wheel Lock to the
frame.
MAINTENANCE AND
SERVICING
Repeat the above steps until BOTH 5.
Wheel Locks engage the lock shoe
at least an 1/8” into the tire when the
Wheel Lock handle is pulled, and
HOLDS the occupied Wheelchair in
place when used.
If the 1/8” measurement cannot be 6.
reached, contact a qualied service
technician.
Procedures not specically
explained in this manual
must be performed only by a
qualied technician.
TO PREVENT
SERIOUS INJURY
FROM WHEELCHAIR
FAILURE:
Do not use damaged
equipment. If abnormal noise
or vibration occurs, have the
problem corrected before
further use.
Cleaning, Maintenance, and
Lubrication
BEFORE EACH USE,1. inspect the
general condition of the Wheelchair
Check for loose hardware,
misalignment or binding of moving
parts, cracked or broken parts, and
any other condition that may affect
its safe operation. DO NOT USE A
DAMAGED WHEELCHAIR.
BEFORE EACH USE,2. examine the
Wheel Locks for proper operation.
Make sure to adjust both Wheel
Locks evenly. DO NOT USE A
WHEELCHAIR WITH DAMAGED
OR MALFUNCTIONING WHEEL
LOCKS.
Keep the rubber Rear Wheels free 3.
of oil grease, dirt and debris at all
times.
To clean: 4. Wipe with clean, warm
water and a mild detergent. Then dry.
Do not use solvents.
Page 9For technical questions, please call 1-800-444-3353.SKU 67437
Page 10

WHEN STORING,5. fold the
Wheelchair according to the
instructions detailed in this manual
and store in a safe, secure location
out of reach of children and non-
6. WARNING! All maintenance,
service or repairs must be
performed only by a qualied
service technician.
authorized users.
Troubleshooting
Problem Possible Causes Likely Solutions
Wheel Lock not
functioning properly.
Wheel Chair is
turning too far to
right/left.
Not enough support
to occupant’s back.
Wheelchair not
folding properly.
Follow all safety precautions whenever diagnosing or servicing the
Wheelchair.
Proper 1/8” distance between Wheel
Lock Shoe and Tire cannot be
achieved.
Front Wheel Casters not adjusted
properly.
Back Pad is torn or damaged. Replace Back Pad
Footrests are not raised.1.
Seat is damaged or torn.2.
Adjustment to Wheel Lock required.
Contact qualied service technician.
Adjust Front Wheel Casters and Nut until
they swivel properly with equal free play.
Raise the Footrests. 1.
Replace Seat.2.
PLEASE READ THE FOLLOWING CAREFULLY
THE MANUFACTURER AND/OR DISTRIBUTOR HAS PROVIDED THE PARTS LIST AND ASSEMBLY
DIAGRAM IN THIS MANUAL AS A REFERENCE TOOL ONLY. NEITHER THE MANUFACTURER OR
DISTRIBUTOR MAKES ANY REPRESENTATION OR WARRANTY OF ANY KIND TO THE BUYER THAT
HE OR SHE IS QUALIFIED TO MAKE ANY REPAIRS TO THE PRODUCT, OR THAT HE OR SHE IS
QUALIFIED TO REPLACE ANY PARTS OF THE PRODUCT. IN FACT, THE MANUFACTURER AND/
OR DISTRIBUTOR EXPRESSLY STATES THAT ALL REPAIRS AND PARTS REPLACEMENTS SHOULD
BE UNDERTAKEN BY CERTIFIED AND LICENSED TECHNICIANS, AND NOT BY THE BUYER. THE
BUYER ASSUMES ALL RISK AND LIABILITY ARISING OUT OF HIS OR HER REPAIRS TO THE
ORIGINAL PRODUCT OR REPLACEMENT PARTS THERETO, OR ARISING OUT OF HIS OR HER
INSTALLATION OF REPLACEMENT PARTS THERETO.
Record Product’s Serial Number Here:
Note: If product has no serial number, record month and year of purchase instead.
Note: Some parts are listed and shown for illustration purposes only, and are not
available individually as replacement parts.
Page 10For technical questions, please call 1-800-444-3353.SKU 67437
Page 11

PARTS LIST AND ASSEMBLY DIAGRAM
Part Description Qty.
1 Detachable Footrest 2
2 Footplate 2
3 Rear Wheel 2
4 Wheel Lock 2
5 Front Casters 2
4
1
2
Part Description Qty.
6 Seat 1
7 Back Pad 1
8 Handles 2
9 Frame 1
10 Armrest Pad 2
10
8
3
5
9
6
7
Page 11For technical questions, please call 1-800-444-3353.SKU 67437
Page 12

LIMITED 1 YEAR WARRANTY
Harbor Freight Tools Co. makes every effort to assure that its products meet
high quality and durability standards, and warrants to the original purchaser that
this product is free from defects in materials and workmanship for the period of one
year from the date of purchase (90 days if used by a professional contractor or if
used as rental equipment). This warranty does not apply to damage due directly or
indirectly, to misuse, abuse, negligence or accidents, repairs or alterations outside
our facilities, normal wear and tear, or to lack of maintenance. We shall in no event be
liable for death, injuries to persons or property, or for incidental, contingent, special
or consequential damages arising from the use of our product. Some states do not
allow the exclusion or limitation of incidental or consequential damages, so the above
limitation of exclusion may not apply to you. THIS WARRANTY IS EXPRESSLY IN
LIEU OF ALL OTHER WARRANTIES, EXPRESS OR IMPLIED, INCLUDING THE
WARRANTIES OF MERCHANTABILITY AND FITNESS.
To take advantage of this warranty, the product or part must be returned to us
with transportation charges prepaid. Proof of purchase date and an explanation of the
complaint must accompany the merchandise. If our inspection veries the defect, we
will either repair or replace the product at our election or we may elect to refund the
purchase price if we cannot readily and quickly provide you with a replacement. We will
return repaired products at our expense, but if we determine there is no defect, or that
the defect resulted from causes not within the scope of our warranty, then you must
bear the cost of returning the product.
This warranty gives you specic legal rights and you may also have other rights
which vary from state to state.
3491 Mission Oaks Blvd. • PO Box 6009 • Camarillo, CA 93011 • (800) 444-3353
Page 12For technical questions, please call 1-800-444-3353.SKU 67437
 Loading...