

Page 1
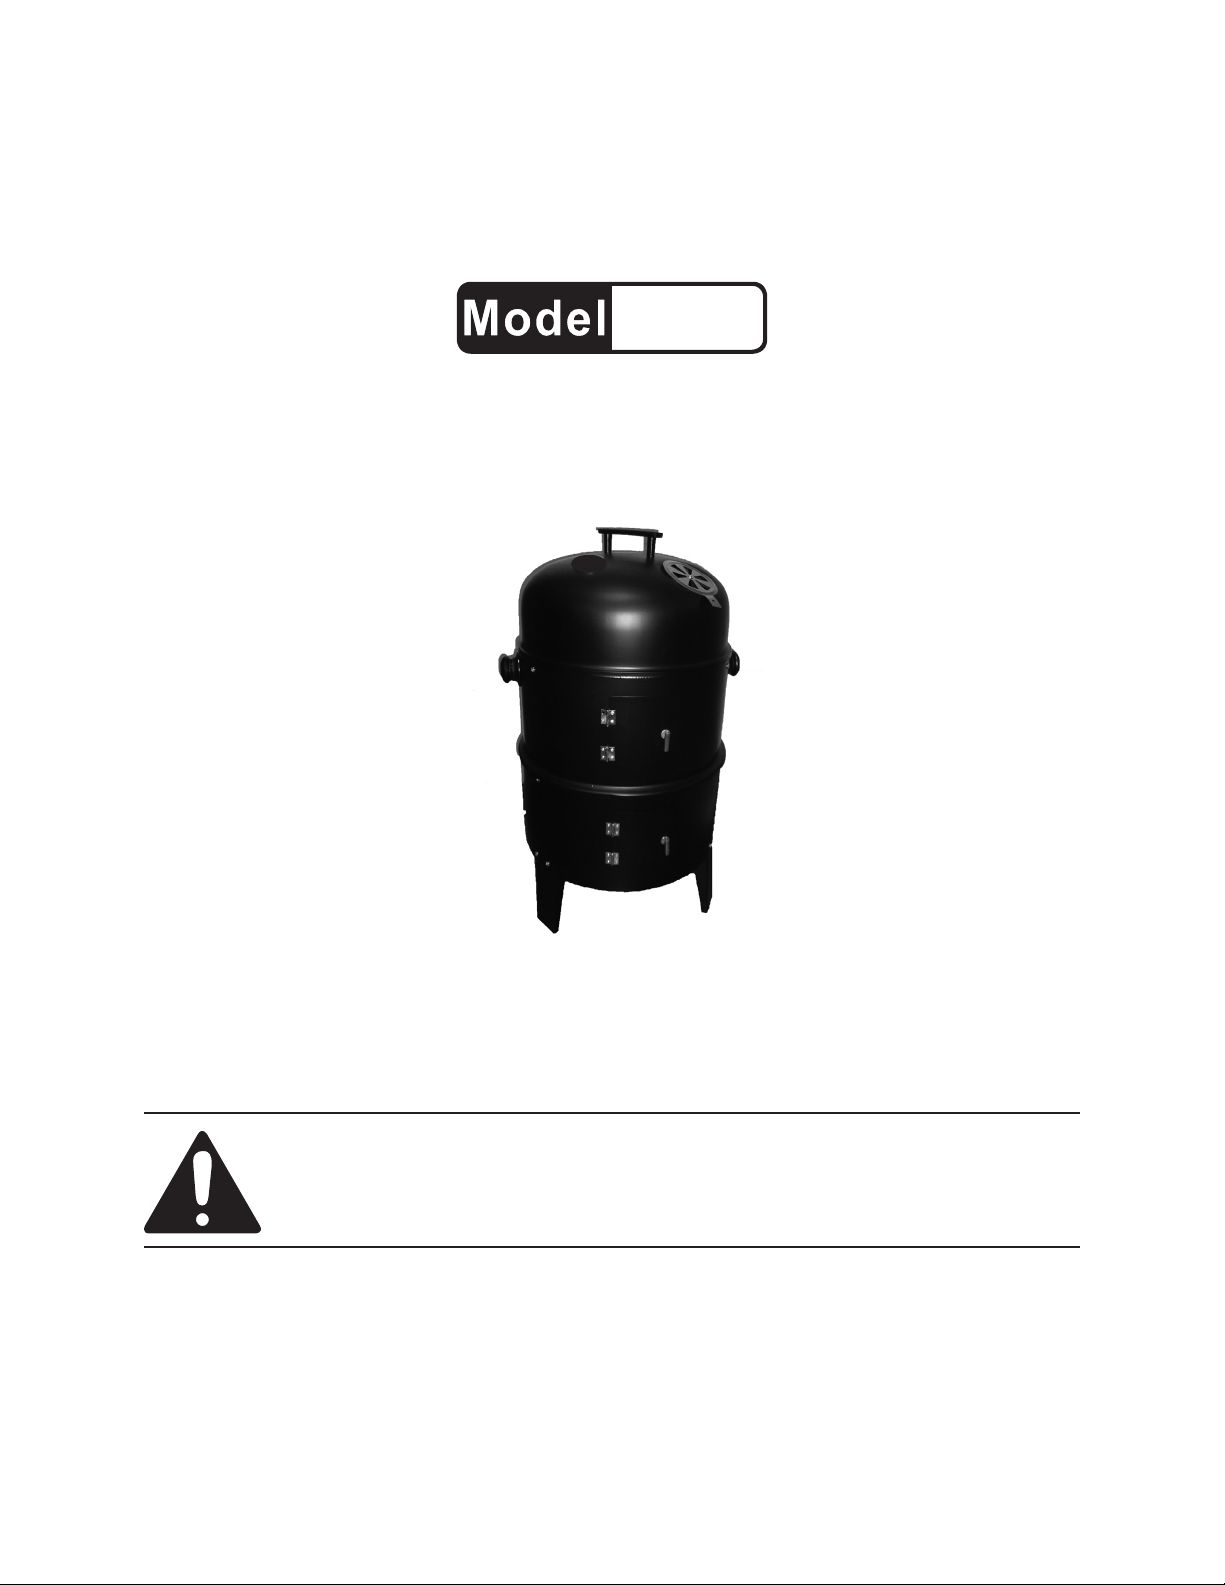
SMOKER HOUSE GRILL
66927
CLEANING, ASSEMBLY, AND OPERATION
INSTRUCTIONS
Distributed exclusively by Harbor Freight Tools®.
3491 Mission Oaks Blvd., Camarillo, CA 93011
Visit our website at: http://www.harborfreight.com
Read this material before using this product.
Failure to do so can result in serious injury.
SAVE THIS MANUAL.
Copyright© 2009 by Harbor Freight Tools®. All rights reserved. No portion of this manual or any artwork
contained herein may be reproduced in any shape or form without the express written consent of
Harbor Freight Tools. Diagrams within this manual may not be drawn proportionally. Due to continuing
improvements, actual product may differ slightly from the product described herein. Tools required for
assembly and service may not be included.
For technical questions or replacement parts, please call 1-800-444-3353.
REV09e
Page 2

SAVE THIS MANUAL
Keep this manual for the safety warnings and precautions, assembly, operating, inspection, maintenance and cleaning
procedures. Write the product’s serial
number in the back of the manual near the
assembly diagram (or month and year of
purchase if product has no number). Keep
this manual and the receipt in a safe and
dry place for future reference.
IMPORTANT SAFETY
INSTRUCTIONS
In this manual, on the labeling,
and all other information provided with this product:
This is the safety alert
symbol. It is used to alert
you to potential personal
injury hazards. Obey all
safety messages that
follow this symbol to avoid
possible injury or death.
DANGER indicates
a hazardous
situation which, if not
avoided, will result in death or
serious injury.
WARNING
indicates a
hazardous situation which, if
not avoided, could result in
death or serious injury.
CAUTION, used
with the safety
alert symbol, indicates a
hazardous situation which, if
not avoided, could result in
minor or moderate injury.
NOTICE is used to
address practices
not related to personal injury.
CAUTION, without
the safety alert
symbol, is used to address
practices not related to
personal injury.
READ AND UNDERSTAND ALL
INSTRUCTIONS
When using wood, or charcoal
burning products, safety precautions should always be followed
including the following:
Work Area Safety
Do not use indoors. 1. Using this
Smoker House Grill in unventilated, (or areas with poor ventilation),
will produce Carbon Monoxide
accumulation which can cause
drowsiness, illness and/or death.
Close supervision is necessary 2.
when used near children. Do not
allow children or pets to play near this
Smoker House Grill at any time. This
product is not a toy.
Extreme caution must be used 3.
when moving this Smoker House
Grill. The charcoal, or wood inside
may still be hot even after a day without use.
Make sure there is adequate empty 4.
space surrounding the Smoker
House Grill. Keep the work area
free of obstructions and other debris.
Hot Surface Safety
Do not touch hot surfaces.1. Use
heat resistant gloves, or oven mittens
SKU 66927 For technical questions, please call 1-800-444-3353. Page 2
Page 3

to touch handles or knobs. After use,
allow Smoker House Grill to cool at
least 30 minutes before putting on or
taking off parts.
Do not operate this Smoker House 2.
Grill near ammable materials.
There is always a chance of re if
ammable materials are stored, or
positioned temporarily nearby.
Keep multiple ABC class re ex-3.
tinguishers nearby. Monitor the
Smoker House Grill while in use.
Food borne Illness Safety
Before every use, thoroughly clean 1.
the Smoker House Grill - (see
“Cleaning” section for instructions),
and wash your hands.
Follow Food and Drug Adminis-2.
tration (FDA) food safety recommendations for cooking and food
handling (www.fda.gov). Also, refer
to the following safety information,
taken from FDA’s website:
Cooking times (if provided) are a.
estimated. Verify that all food is
properly cooked. All meat should
be cooked to an internal temperature
of at least 160° F1.
Keep hot food hot (above 140° b.
F) and cold food cold (below 40°
F). Do not let perishable food sit out
longer than 2 hours (1 hour in temperatures above 90° F).
Specic Safety
DO NOT pour (or squirt) lighter 1.
uid onto burning coals. Doing
so can cause re and/or explosion
resulting in severe personal injury, or
death.
Never use charcoal that has been 2.
pre-treated with lighter uid. Use
only high grade plain charcoal, or
charcoal/wood mixture.
Use only approved charcoal lighter 3.
uid to ignite charcoal. DO NOT
use gasoline, kerosene, or alcohol.
Use of these (or similar) products
may cause an explosion possibly
leading to severe personal injury and/
or death.
Use this Smoker House Grill out-4.
doors only. Never use inside
your house, or in any conned
space. Never use under canopies,
or trees. Used without adequate
ventilation, this product can cause
carbon monoxide buildup leading to drowsiness, illness and/or
death.
Place Smoker House Grill on a 5.
stable, level surface, away from
wooden fences, shrubs, trees and/
or sheds. The surface must be capable of supporting at least 85 lbs.
An adult must always be in charge 6.
of this Smoker House Grill when
it is being used. Keep children and
pets a safe distance at all times.
1 Poultry should be cooked to an internal
temperature of at least 165° F. For whole
poultry, temperature measurement should
be taken in the thigh. To gauge shellsh
doneness, refer to FDA food safety guidelines.
Grill may have sharp edges. Always wear heavy duty work gloves if
necessary when handling this product.
SKU 66927 For technical questions, please call 1-800-444-3353. Page 3
Some parts of this Smoker House 7.
Page 4
Use heat resistant gloves, oven 8.
mittens, and/or hot pads for handling the “hot” Grill and/or implements (not supplied) for use with
the Smoker House Grill.
SPECIFICATIONS
Insure that there is at least 3 feet 9.
clearance around all sides of this
Smoker House Grill when it is being used.
The use of accessory attachments 10.
not recommended by the manufacturer may cause injuries. Do not
use the Smoker House Grill for other
than intended use.
Maintain labels and nameplates on 11.
the appliance. These carry impor-
tant safety information. If unreadable
or missing, contact Harbor Freight
Tools for a replacement.
Do not store anything other than 12.
the manufacturer’s recommended
accessories in this unit when not
in use.
The warnings, precautions, and 13.
instructions discussed in this
instruction manual cannot cover
all possible conditions and situations that may occur. It must be
understood by the operator that
common sense and caution are
factors which cannot be built into
this product, but must be supplied
by the operator.
SAVE THESE
INSTRUCTIONS.
Food Capacity Up to 50 lb
UNPACKING
When unpacking, make sure that the
item is intact and undamaged. If any parts
are missing or broken, please call Harbor
Freight Tools at 1-800-444-3353 as soon
as possible.
CLEANING
Read the ENTIRE IMPORTANT
SAFEGUARDS section at
the beginning of this manual
including all text under
subheadings therein before set
up or use of this product.
TO
PREVENT
SERIOUS
INJURY:
Before cleaning, make sure
the unit has cooled
completely.
To prevent food borne illness,
wash the unit before
assembly in hot, soapy water,
taking care to rinse
completely. Wipe with a soft
rag. Allow Smoke House Grill
to dry completely before
assembly or use.
ASSEMBLY
Read the ENTIRE IMPORTANT
SAFEGUARDS section at
the beginning of this manual
REV09e
SKU 66927 For technical questions, please call 1-800-444-3353. Page 4
Page 5

including all text under
subheadings therein before set
up or use of this product.
TO PREVENT
SERIOUS INJURY:
Before assembly or
adjustment, make sure the
unit has cooled completely.
NOTE: For additional
information regarding the parts
listed in the following pages,
refer to the Assembly Diagram
near the end of this manual.
Tools needed (not supplied), are
a phillips head screwdriver and
a small adjustable wrench.
Vent (I) on the Dome Lid (C), and the
Handle Bases (J), and Handle Knobs
(K) to the Upper Body (B). All other
parts need to be assembled. See
Figure 1 and see also the “Assimbly
Diagram” on page 10 of this manual.
Attach three Legs (G) to the Lower 2.
Body (A) using Bolts (1), and Nuts
(2).
Attach three Supports (L) to inside of 3.
Lower Body (A) using Bolts (1), and
Nuts (2).
Place Water Pan (D) onto the three 4.
Supports (L), then lay a Charcoal
Grate (F) into the Water Pan (D).
Figure 1
Lower Body (A) Water Pan (D)
Charcoal
Grate (F)
Supports
(L)
Leg (G) Door (H) Leg (G)
NOTE: There are three Legs (G),
and three Supports (L).
Place a Cooking Grill (E) on the up-5.
per lip of the Water Pan.
This nishes the Lower Body assem-6.
bly.
For the Upper Body (B), attach three 7.
Supports (L) to inside of the Upper
Body (B) using Bolts (1), and Nuts
(2). Then place Water Pan (D) onto
the supports. Now lay a Cooking Grill
over the Water Pan (D).
Stack the Smoker House Grill for 8.
use as follows:
Set the Lower Body (A) onto a level, a.
at area able to support the Smoker
House Grill, it’s maximum load of
charcoal (16 to 20 lbS. per level),
and it’s maximum food capacity of
50 lbS.
1. Clean the Smoke House Grills before
assembly as explained in the “Cleaning” section.
NOTE: The Doors (H) on the Lower Body
(A), and the Upper Body (B) are riveted in place. Attached also is the Air
SKU 66927 For technical questions, please call 1-800-444-3353. Page 5
Next: A Water Pan (D) with Char-b.
coal Grate (F) inserted should be
placed on the three Supports (L) of
the Lower Body (A).
Next: A Cooking Grill (E) will rest on c.
the upper lip of the Water Pan (D).
Page 6

Now, place the Upper Body (B) on d.
top of the Lower Body (A). Then:
Insert the other Water Pan (D) into
the Upper Body (B).
Place the last Cooking Grill (E) onto e.
the lip of the Water Pan (D).
Lastly, place the Dome Lid (C) on f.
top of the Upper Body (B).
NOTE: The Smoke House Grill may be
used with only the Lower Body (A),
Water Pan (D), Charcoal Grate (F),
and Cooking Grill. (Use of the Dome
Lid (C) is optional if open grilling is
desired).
smell or taste the rst time you cook
food.
Remove Dome Lid (C) and Upper a.
Body (B) from Smoker House Grill.
Do not put water into the Water Pans b.
(D) at this time.
Place fresh charcoal briquettes onto c.
the Charcoal Grate (F) in the Lower
Body (A). Lay the briquettes at (do
not stack) in square pattern leaving
approximately 1/2” between each
briquette.
Apply an ample amount of lighter d.
uid to briquettes and let it soak in
for about three minutes.
OPERATION
Read the ENTIRE IMPORTANT
SAFEGUARDS section at
the beginning of this manual
including all text under
subheadings therein before set
up or use of this product.
Clean the appliance before each use 1.
as explained in the “Cleaning” section.
NOTE: Before rst use (and after 2.
cleaning), apply a light coat of vegetable oil, or vegetable cooking spray
to interior of the Dome Lid (C), the
Upper (B), and Lower Body (A), and
the Cooking Grills (E). This will help
reduce interior rusting. Do not apply
oil to the Water Pans (D).
Place the Upper Body (B) onto the e.
Lower Body (A). Light the charcoal
in the Upper Body from the top, using a long wooden match, or long
neck butane lighter.
Open the side Door (H) (for ventila-f.
tion). Light the charcoal briquettes
on the grate in the Lower Body (A)
using either a long wooden match,
or a long neck butane lighter. Leave
the side Door (H) open.
It is very important to leave the g.
Dome lid (C) off, and the Doors
(H) open until the lighter uid has
completely burned off. This usually
takes about 10 minutes.
Close the two Doors (H), and place h.
the Dome Lid (C) onto the Smoker
House Grill. Open the Vent (I), on
top of the Dome Lid (C), all the way.
Curing the Smoker House Grill: 3.
NOTE: Curing is a “breaking in” step,
and is useful for ridding your Smoke
House Grill of any “new” smell that
may accompany a brand new product. It also prevents any foreign
SKU 66927 For technical questions, please call 1-800-444-3353. Page 6
NOTE: Let the charcoal completely burn
out before emptying the charcoal ash
into a metal ash storage container
with a tight metal cover.
To prevent accidents, let the Smoker 4.
House Grill cool completely before
Page 7

emptying, cleaning, or storing. Always store the Smoker House Grill
away from ammable materials, and
out of children’s reach.
Using your Smoker House Grill:5.
Remove the Dome Lid (C), and the a.
Upper Body (B) and set aside.
There are two options for placing b.
the Water Pan (D) in the lower body.
The Water Pan can be placed low in
the lower Layer Body (A) by resting Water Pan on the inside Leg
(G) supports, or the Water Pan can
rest on 3 upper Supports (L). Now
center the Charcoal Grate (F) in the
middle of the Water Pan (D).
Stack 8 to 10 lb of fresh (non pre-c.
treated) charcoal on top of the Charcoal Grate (F).
Saturate charcoal with lighter uid d.
that is approved for lighting charcoal
ONLY. NEVER use gasoline, kerosene, alcohol, or any other non-approved starter.
Wait 2 to 3 minutes for lighter uid to e.
soak in. Store the unused charcoal
and lighter uid a safe distance from
the Smoker House Grill.
Place a Cooking Grill (E) onto the f.
top lip of the Water Pan (D).
a Water Pan (D) securely onto the
Supports (L) within the Upper Body
(B).
Carefully ll the Water Pan (D) with i.
warm water, or marinade to 1” below
the top of the pan rim. NOTE: A full
Water Pan (D) will hold one gallon of
water and should last 2 to 3 hours.
Place a Cooking Grill (E) onto the j.
top of the Water Pan (D) in the
Upper Body (B).
Place your food onto the Cooking k.
Grill (E) in the Lower Body (A).
Spread the food in one layer
throughout the Chrome Cooking
Grill (E), allowing at least 1/2 inch of
space between the various pieces of
food. This will allow the smoke and
moist heat to circulate around and
through all the food evenly.
Additional food can be added to the l.
top cooking Grill (E).
Place the Dome Lid (C) onto the m.
Smoker House Grill and allow the
food to cook.
NOTE: The Smoker House Grill may be
used without the Upper Body (A)
and it’s associated Water Pan, and
Cooking Grill if less food cooking is
required.
Open the Door (H) on the side of the g.
Lower Body (A) (for ventilation), and
carefully light the stack of charcoal
using a long wooden match, or a
long neck butane lighter.
NOTE: Let the charcoal burn until it is
covered with a light gray ash before
closing the side Door (H).
As soon as the lower charcoal is h.
burning, place the Upper Body (B)
onto the Lower Body (A) and place
SKU 66927 For technical questions, please call 1-800-444-3353. Page 7
Adding Charcoal and/or Wood dur-6.
ing cooking:
Remove the Dome Lid (C) by grasp-a.
ing handle (use hot pad, or heat
resistant gloves, not included), tilting
it towards you to allow heat and
smoke to escape away from your
face. NOTE: Use caution as ames
can are up when fresh air suddenly
comes in contact with the charcoal
and/or wood re.
Page 8

Carefully open side Door (H). When b.
the Smoker House Grill is being
used, the Doors (H) will become
very hot.
Use a exible funnel or spout (not g.
supplied) and carefully add water to
within one inch of the Water Pan (D)
lip.
Use long cooking tongs (not in-c.
cluded) to lightly brush ashes off hot
coals before using the tongs to add
more charcoal and/or wood.
Leave Door (H) open until the char-d.
coal and/or wood is burning, and
then it may be closed.
Replace the Dome Lid (C). e.
Adding Water during Cooking: 7.
Option 1a. - Adding water through the
top of the Smoker House Grill.
Remove the Dome Lid (C) by grasp-b.
ing handle (use hot pad, or heat
resistant gloves, not included), tilting
it towards you to allow heat and
smoke to escape away from your
face. NOTE: Use caution as ames
can are up when fresh air suddenly
comes in contact with the charcoal
and/or wood re.
If the water is low, add water by c.
moving the food on the upper Cooking Grill (E) aside with a large fork,
or cooking tongs (not supplied)
and pouring water carefully down
through the slats in the Cooking Grill
(E). Pour slowly to avoid splashing
or over lling.
Re-position the food for proper cook-d.
ing and replace the Dome Lid (C).
Option 2e. - Adding water through the
upper side Door (H).
Carefully open the upper side Door f.
(H). Use caution because ames
may suddenly are up when fresh air
is exposed to burning coal or wood.
Pour water slowly to avoid splashing h.
or over-lling.
Close upper side Door (H) and allow i.
food to continue cooking.
Cooking Tips: 8.
Before starting to cook, prepare all a.
food in advance.
Ensure that all food is completely b.
cooked before being consumed.
Cut fat off of meat before grilling to c.
avoid it dripping onto hot re and
causing are-ups.
If marinade is used, let meat dry d.
completely before grilling as oily
meat can cause are-ups and tends
to burn.
Herbs and spices should be used e.
before meat is placed on the grill.
Aluminum foil is most suitable for f.
cooking vegetables.
During smoking, avoid the tempta-g.
tion to lift the Dome Lid (C) to check
the food. Lifting the lid allows heat
to escape making additional cooking
time necessary.
INSPECTION AND
MAINTENANCE
TO PREVENT
SERIOUS INJURY:
Before inspection or
maintenance, make sure the
unit has cooled completely.
SKU 66927 For technical questions, please call 1-800-444-3353. Page 8
Page 9

TO PREVENT SERIOUS
INJURY FROM PRODUCT
FAILURE:
Do not use damaged a
damaged Smoker House Grill.
If anything abnormal occurs,
have the problem corrected
before further use.
BEFORE EACH USE, inspect any condi-
tion that may affect its safe operation.
Clean this Smoker House Grill and 1.
all of it’s various parts with hot soapy
water, inside and out.
Dry with a soft rag and apply a light 2.
coat of vegetable oil to inhibit rust.
If rust appears on the exterior of your 3.
Smoker House Grill, use steel wool,
or ne sand paper to rst clean off the
rust, then, touch up these areas with
high heat resistant spray paint.
Try to keep the Smoker House Grill 4.
out of direct weather when not being used. If this is not possible, use
a good quality BBQ cover (not supplied) to prevent product from being
exposed to harsh weather.
PLEASE READ THE FOLLOWING
CAREFULLY
THE MANUFACTURER AND/OR DISTRIBUTOR
HAS PROVIDED THE PARTS LIST AND
ASSEMBLY DIAGRAM IN THIS MANUAL AS
A REFERENCE TOOL ONLY. NEITHER THE
MANUFACTURER OR DISTRIBUTOR MAKES
ANY REPRESENTATION OR WARRANTY OF
ANY KIND TO THE BUYER THAT HE OR SHE
IS QUALIFIED TO MAKE ANY REPAIRS TO THE
PRODUCT, OR THAT HE OR SHE IS QUALIFIED
TO REPLACE ANY PARTS OF THE PRODUCT.
IN FACT, THE MANUFACTURER AND/OR
DISTRIBUTOR EXPRESSLY STATES THAT
ALL REPAIRS AND PARTS REPLACEMENTS
SHOULD BE UNDERTAKEN BY CERTIFIED
AND LICENSED TECHNICIANS, AND NOT BY
THE BUYER. THE BUYER ASSUMES ALL RISK
AND LIABILITY ARISING OUT OF HIS OR HER
REPAIRS TO THE ORIGINAL PRODUCT OR
REPLACEMENT PARTS THERETO, OR ARISING
OUT OF HIS OR HER INSTALLATION OF
REPLACEMENT PARTS THERETO.
Record Product’s Serial Number Here:
_____________________________.
Note: If product has no serial number,
record month and year of purchase
instead.
Note: Some parts are listed and shown for
illustration purposes only, and are not
available individually as replacement
parts.
SKU 66927 For technical questions, please call 1-800-444-3353. Page 9
Page 10

PARTS LIST
Part Description Q’ty
A Lower Body 1
B Upper Body 1
C Dome Lid 1
D Water Pan 2
E Stainless Steel Cooking Grill 2
F Charcoal Grate 1
G Leg 3
H Door 2
I Air Vent 1
J Handle Base 2
K Handle Knobs 2
L Support 6
M Handle 1
Part Description Q’ty
1 Bolt (M5x10) 12
2 Nut (M5) 12
3 Bolt (M3x6) 8
4 Nut (M3) 8
5 Bolt (M6x25) 2
6 Bolt (M5x10) 1
7 Nut (M5) 1
8 Bolt (M6x15) 2
SKU 66927 For technical questions, please call 1-800-444-3353. Page 10
Page 11

ASSEMBLY DIAGRAM
6
Bolt
M
Handle
D
Charcoal Pan
& Water Pan
L
Support
J
Handle Base
K
Handle Knob
REV09e
D
Charcoal Pan
& Water Pan
8
Bolt
5
Bolt
7
Nut
J
Handle Base
I
Air Vent
C
Dome Lid
E
Stainless Steel Cooking
Grill
K
Handle Knob
1 Bolt
& 2 Nuts
B
Upper Body Layer
H
Door
E
Stainless Steel Cooking
Grill
F
Charcoal Grate
1
Bolt
A
Lower Layer
Body
1
Bolt
G
Leg
2
Nut
2
Nut
4
Nut
3
Bolt
L
Support
H
Door
G
Leg
REV09e
SKU 66927 For technical questions, please call 1-800-444-3353. Page 11
 Loading...