

Page 1

DIGITAL PHOTO SENSOR
TACHOMETER
66632
SET UP AND OPERATING INSTRUCTIONS
Distributed exclusively by Harbor Freight Tools®.
3491 Mission Oaks Blvd., Camarillo, CA 93011
Visit our website at: http://www.harborfreight.com
Read this material before using this product.
Failure to do so can result in serious injury.
SAVE THIS MANUAL.
Copyright© 2009 by Harbor Freight Tools®. All rights reserved. No portion of this manual or any artwork
contained herein may be reproduced in any shape or form without the express written consent of
Harbor Freight Tools. Diagrams within this manual may not be drawn proportionally. Due to continuing
improvements, actual product may differ slightly from the product described herein. Tools required for
assembly and service may not be included.
For technical questions or replacement parts, please call 1-800-444-3353.
Page 2
SPECIFICATIONS
Display LCD 5 Digits
RPM Range 6 - 99999 RPM
Accuracy ± 0.05% plus 1 RPM
(4) 1.5 VDC (AA) Batteries
Power Source
Operating
Environment
(not included) or AC adapter
(not included)
32° - 104° F, < 85% Humidity
UNPACKING
When unpacking, check to make sure that
the item is intact and undamaged. If any parts are
missing or broken, please call Harbor Freight Tools
at the number shown on the cover of this document
as soon as possible.
IMPORTANT SAFETY
INFORMATION
When in use, this tool is near rotating parts.1.
Do not touch rotating parts. Do not wear 2.
loose clothing when working with rotating
parts. Contain hair, jewelry and any item that
may become entangled in rotating part.
This product is not a toy. Do not allow chil-3.
dren to play with or near this item.
Position batteries in proper polarity and do 4.
not install batteries of different types, charge
levels, or capacities together.
Use as intended only.5.
Inspect before every use; do not use if parts 6.
are loose or damaged.
Always wear ANSI approved safety goggles 7.
when working.
Maintain product labels and nameplates. 8.
These carry important safety information.
If unreadable or missing, contact Harbor
Freight Tools for a replacement.
SET UP
Before rst use, remove the clear protective
covering from face of Display.
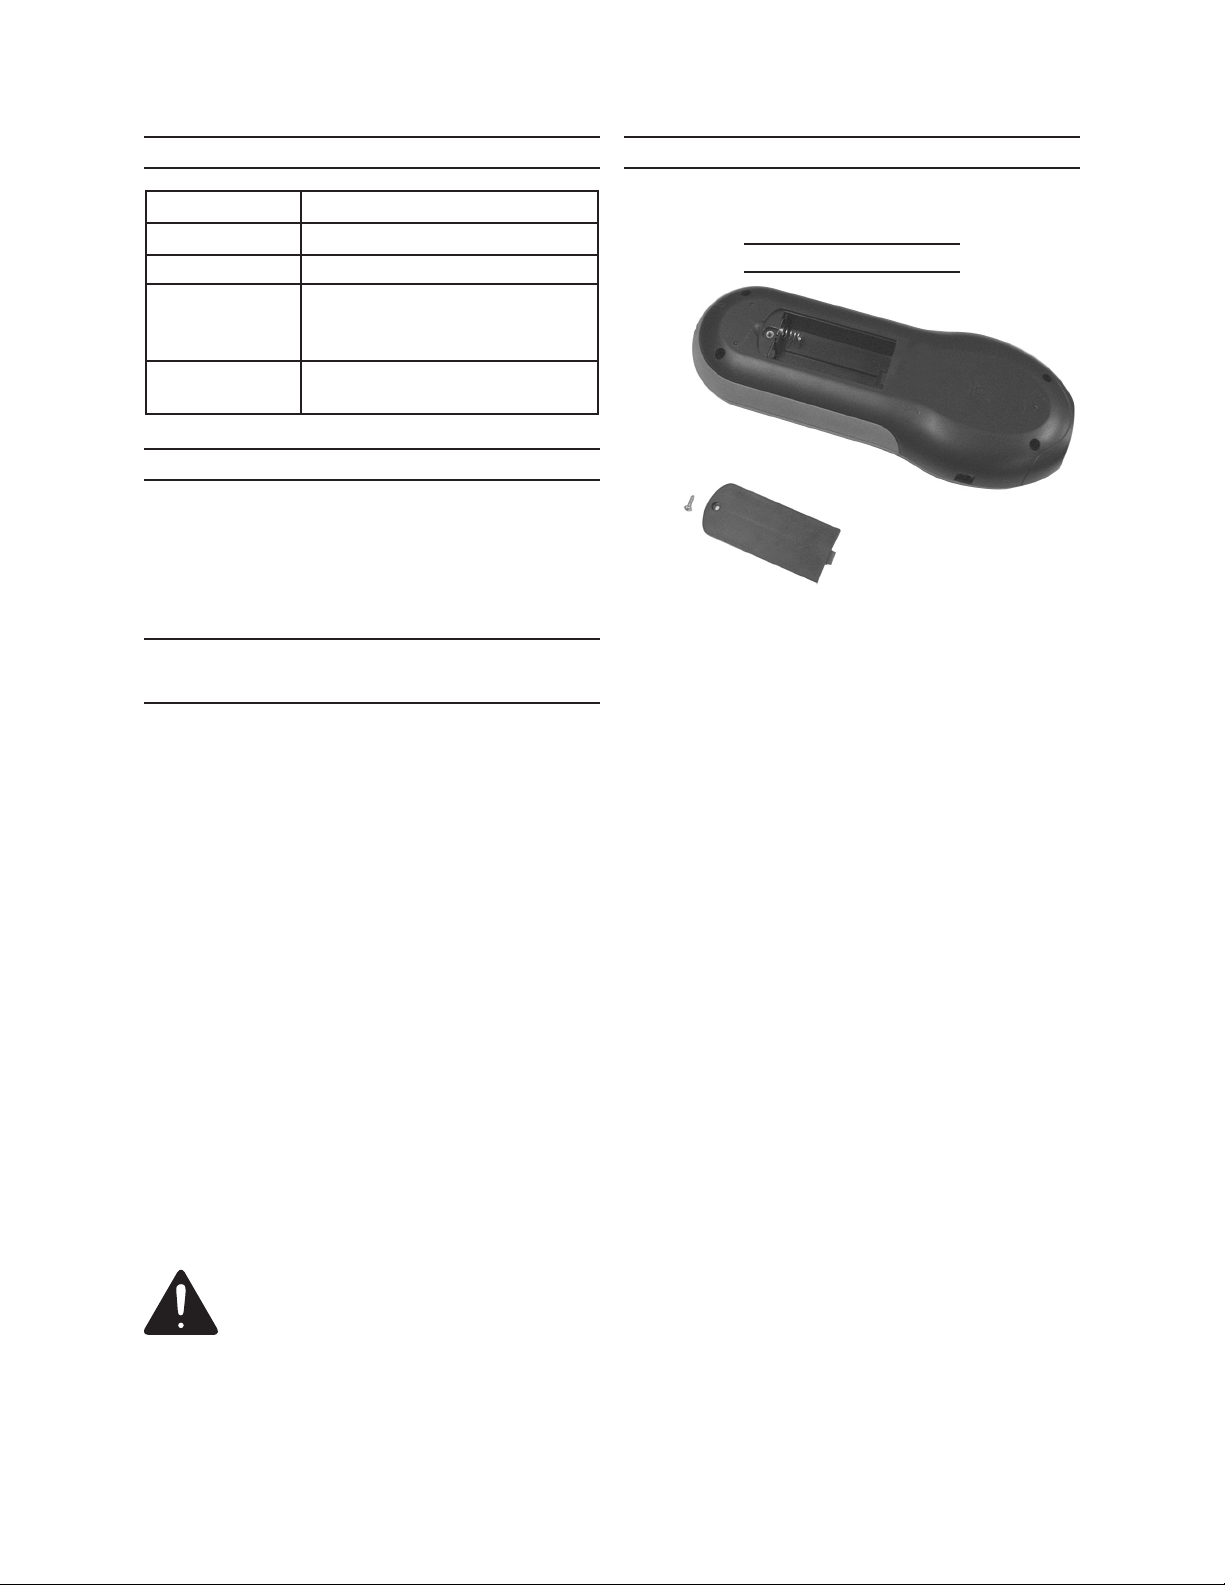
Battery Installation
1.
Before use or when the Low Battery Indicator Symbol appears (See Figure 4, page 3),
install (4) new 1.5 VDC “AA” batteries (not
included).
To install batteries, remove Screw and Bat-2.
tery Cover on back of Tachometer.
Install 4 “AA” batteries in battery compart-3.
ment. Be sure to match polarity of batteries
to markings inside battery case.
Replace Battery Cover and Screw. Do not 4.
overtighten.
Whenever the Low Battery Indicator appears, 5.
replace the batteries.
Do not short the battery terminals together 6.
when replacing batteries.
Do not dispose of old batteries in re. 7.
Always dispose of batteries in accordance
with guidelines provided by local authority.
Note: This tool may be used with AC power.
Plug adapter (not included) into adapter
Socket and into a 120 VAC outlet.
Figure 1
Read the IMPORTANT SAFETY
INFORMATION above before set up
or use of this product.
SKU 66632 For technical questions, please call 1-800-444-3353. Page 2
Page 3

OPERATION
Photo Source
adjust the distance between the Tachometer
and the reective tape.
After the test button is released, the maxi-6.
mum, minimum and last readings of the
measurements are stored.
Socket for
AC Adapter
Memory Button
Display
Test Button
Figure 2
1. Cut a 3/4” length of reective tape (included), peel off the backing and attach the
reective tape to the object to be measured.
Note: The longer the piece of reective tape, the
easier it is to make the measurement.
Point the Tachometer’s Photo Source at the 2.
reective tape on the object, holding the tool
approximately 2” to 8” away.
Start the object turning.3.
Reective Tape
Symbol Key
Low Battery Indicator:
-Batteries are low and need replacing
Maximum reading is displayed
Minimum reading is displayed
Photoelectricity mode symbol
Revolutions per minute (RPM)
Figure 4
7. To access the readings, press and release
the Memory Button repeatedly to cycle
through the readings on the Display. The
indicators above the digits will appear as
described in Figure 4.
Turning
Figure 3
4. Press and hold the Test Button, keeping the
beam of light perpendicular to the reective
tape surface.
After several seconds, a reading will appear 5.
on the Display. When the reading is stable, or
near stable, note the reading on the Display
and then release the Test Butoon.
Note: If the reading fails to appear, adjust the
Tachometer’s angle so that it is perpendicu-
lar to the reective tape on the object and/or
SKU 66632 For technical questions, please call 1-800-444-3353. Page 3
Page 4

PLEASE READ THE FOLLOWING CAREFULLY
THE MANUFACTURER AND/OR DISTRIBUTOR HAS PROVIDED THE PARTS LIST AND ASSEMBLY DIAGRAM IN
THIS DOCUMENT AS A REFERENCE TOOL ONLY. NEITHER THE MANUFACTURER OR DISTRIBUTOR MAKES ANY
REPRESENTATION OR WARRANTY OF ANY KIND TO THE BUYER THAT HE OR SHE IS QUALIFIED TO MAKE ANY REPAIRS
TO THE PRODUCT, OR THAT HE OR SHE IS QUALIFIED TO REPLACE ANY PARTS OF THE PRODUCT. IN FACT, THE
MANUFACTURER AND/OR DISTRIBUTOR EXPRESSLY STATES THAT ALL REPAIRS AND PARTS REPLACEMENTS SHOULD
BE UNDERTAKEN BY CERTIFIED AND LICENSED TECHNICIANS, AND NOT BY THE BUYER. THE BUYER ASSUMES ALL
RISK AND LIABILITY ARISING OUT OF HIS OR HER REPAIRS TO THE ORIGINAL PRODUCT OR REPLACEMENT PARTS
THERETO, OR ARISING OUT OF HIS OR HER INSTALLATION OF REPLACEMENT PARTS THERETO.
LIMITED 90 DAY WARRANTY
Harbor Freight Tools Co. makes every effort to assure that its products meet high quality and durability standards, and warrants to the original purchaser that this product is free from defects in materials
and workmanship for the period of 90 days from the date of purchase. This warranty does not apply to
damage due directly or indirectly, to misuse, abuse, negligence or accidents, repairs or alterations outside
our facilities, criminal activity, improper installation, normal wear and tear, or to lack of maintenance. We
shall in no event be liable for death, injuries to persons or property, or for incidental, contingent, special
or consequential damages arising from the use of our product. Some states do not allow the exclusion or
limitation of incidental or consequential damages, so the above limitation of exclusion may not apply to
you. THIS WARRANTY IS EXPRESSLY IN LIEU OF ALL OTHER WARRANTIES, EXPRESS OR IMPLIED, INCLUDING THE WARRANTIES OF MERCHANTABILITY AND FITNESS.
To take advantage of this warranty, the product or part must be returned to us with transportation
charges prepaid. Proof of purchase date and an explanation of the complaint must accompany the mer-
chandise. If our inspection veries the defect, we will either repair or replace the product at our election
or we may elect to refund the purchase price if we cannot readily and quickly provide you with a replacement. We will return repaired products at our expense, but if we determine there is no defect, or that the
defect resulted from causes not within the scope of our warranty, then you must bear the cost of returning
the product.
This warranty gives you specic legal rights and you may also have other rights which vary from
state to state.
3491 Mission Oaks Blvd. • PO Box 6009 • Camarillo, CA 93011 • (800) 444-3353
Record Serial Number Here:
Note: If product has no serial number, record month and year of purchase instead.
Note: Some parts are listed and shown for illustration purposes only, and are not available individually as
replacement parts.
SKU 66632 For technical questions, please call 1-800-444-3353. Page 4
 Loading...