

Page 1
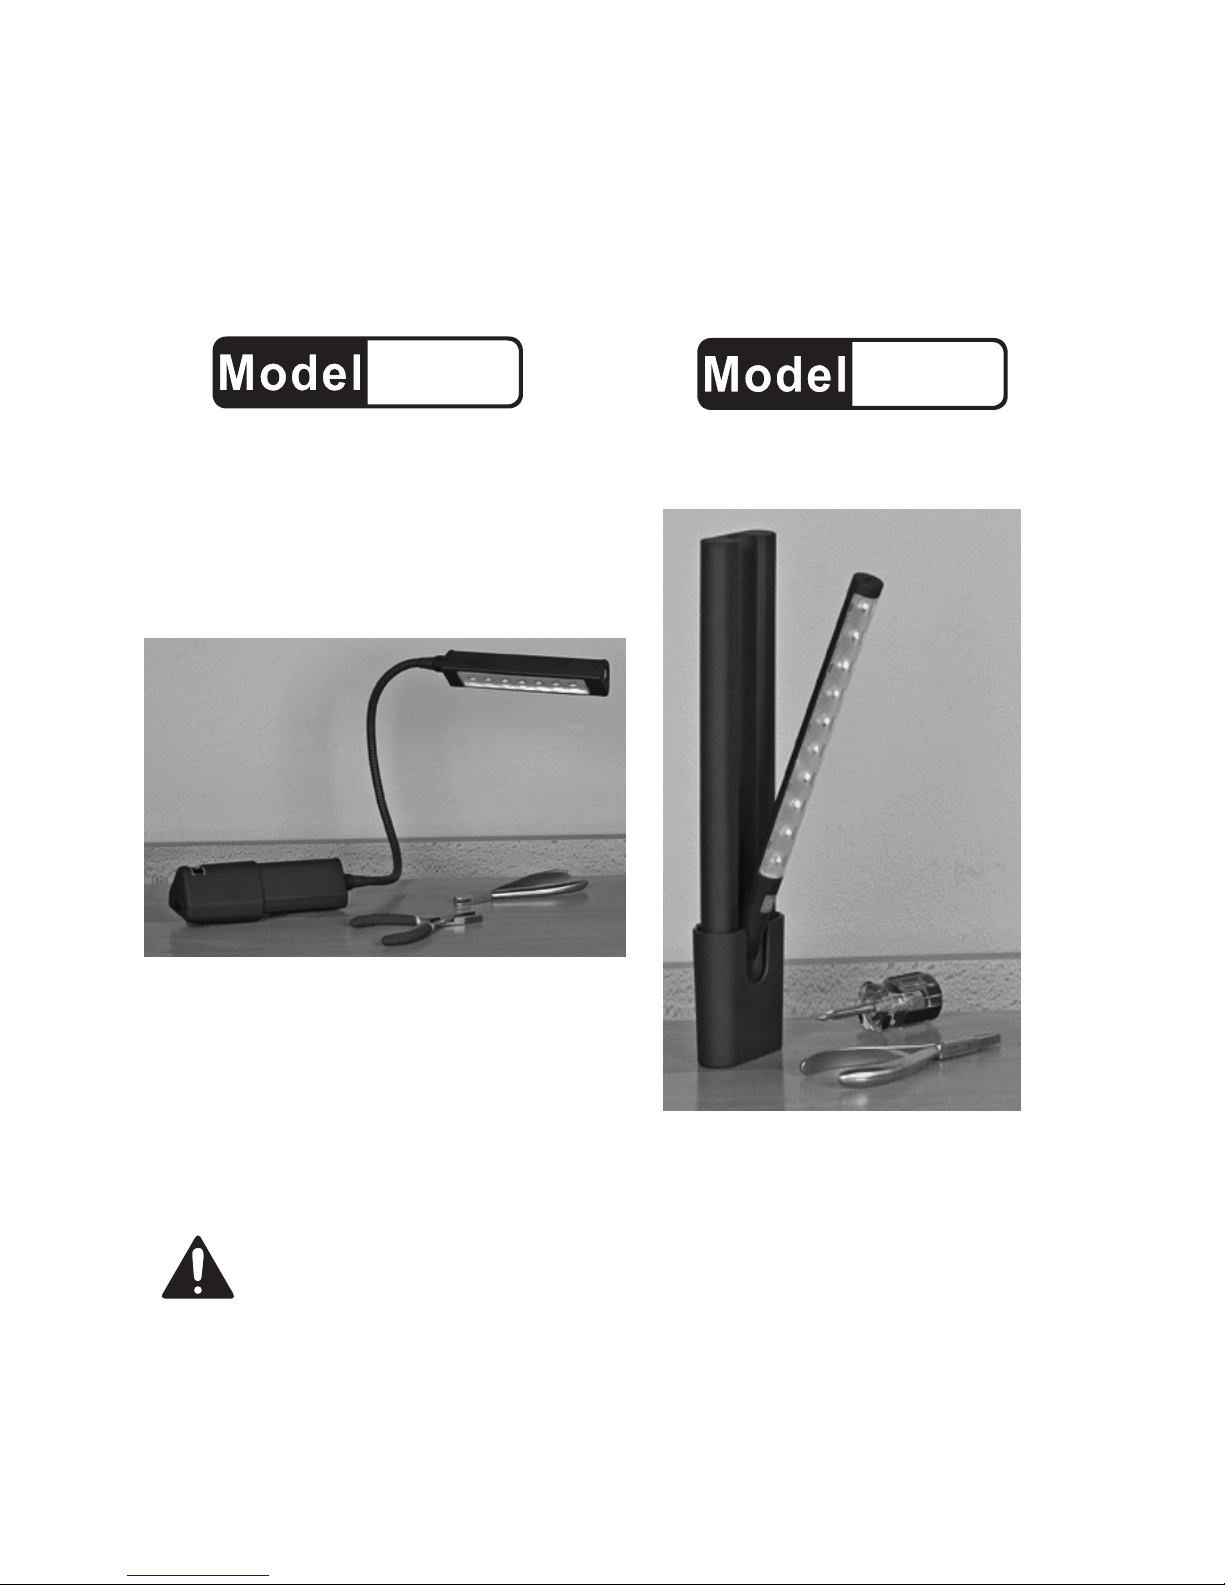
FLEXIBLE LED
WIRELESS LED
WORKLIGHT
66322
INSTRUCTIONS AND PRECAUTIONS
LIGHT BAR
66323
(Hand tools not included)
Distributed exclusively by Harbor Freight Tools®.
3491 Mission Oaks Blvd., Camarillo, CA 93011
Visit our website at: http://www.harborfreight.com
SAVE THESE INSTRUCTIONS. READ ALL
PRECAUTIONS AND INSTRUCTIONS.
Copyright© 2009 by Harbor Freight Tools®. All rights reserved. No portion of this document or any artwork contained
herein may be reproduced in any shape or form without the express written consent of Harbor Freight Tools.
Diagrams within this document may not be drawn proportionally. Due to continuing improvements, actual product
may differ slightly from the product described herein. Tools required for assembly and service may not be included.
For technical questions or replacement parts, please call 1-800-444-3353.
Page 2
SPECIFICATIONS
66322 LED Flexible Worklight
Batteries (6) “AA” Batteries (sold separately)
LEDs 15
Switch On/Off Push Button with Dimmer
66323 Wireless LED Light Bar
Batteries (6) “AA” Batteries (sold separately)
LEDs 10
Switch On/Off Push Button with Dimmer
UNPACKING
When unpacking, make sure the item is
intact and undamaged. If parts are missing or broken, call Harbor Freight Tools at 1-800-444-3353.
IMPORTANT SAFETY
INFORMATION
(FOR BOTH 66322 AND 6632)
Mount only according to these instructions. 1.
Improper assembly can create hazards.
Wear ANSI-approved safety goggles and 2.
heavy-duty work gloves during mounting.
Position batteries in proper polarity and do 3.
not install batteries of different types, charge
levels, or capacities together.
Verify that mounting surface has no hidden 4.
utility lines before drilling or driving screws.
People with pacemakers should consult their 5.
physician(s) before use. Electromagnetic
elds in close proximity to heart pacemaker
could cause pacemaker interference or pace-
maker failure.
This product is not a toy. Do not allow chil-6.
dren to play with or near this item.
Use as intended only.7.
Mount only on solid, at surface able to sup-8.
port weight of Light Disc.
Properly dispose of all used batteries.9.
Inspect before every use; do not use if parts 10.
loose or damaged.
Maintain product labels and nameplates. 11.
These carry important safety information.
If unreadable or missing, contact Harbor
Freight Tools for a replacement.
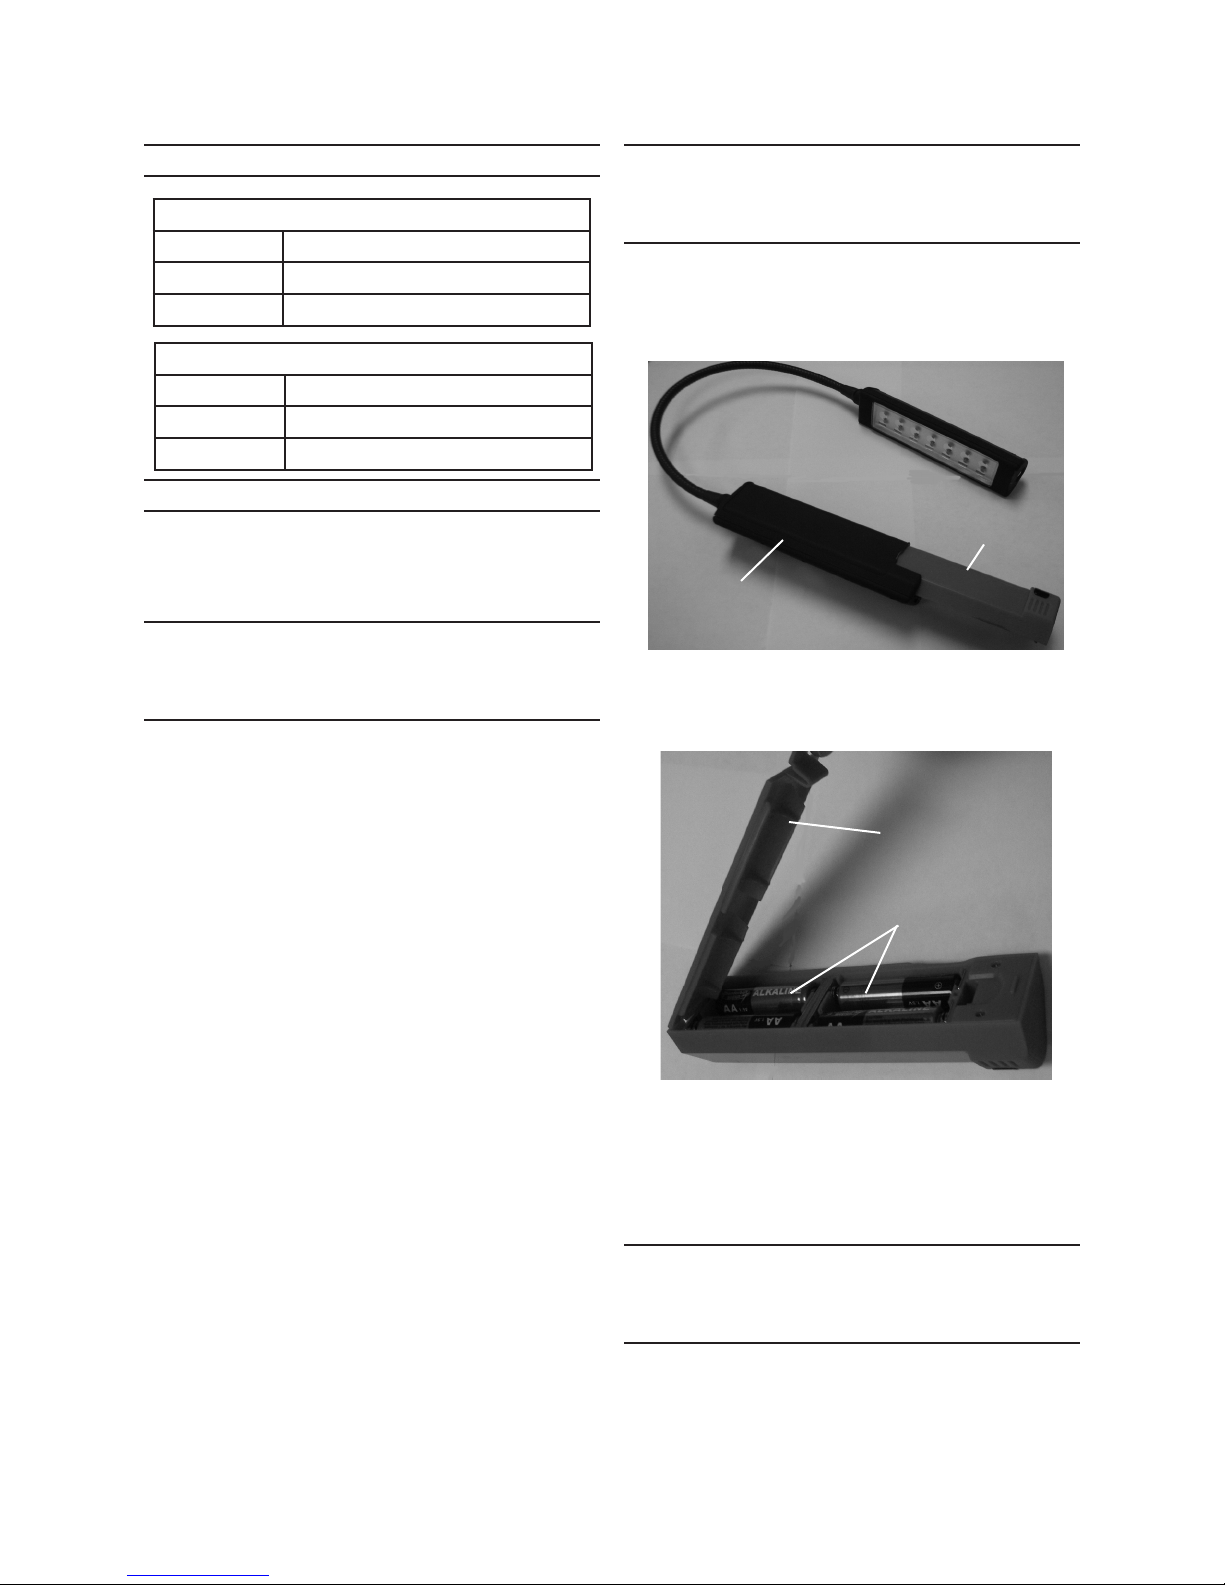
BATTERY INSTALLATION
INSTRUCTIONS
(FOR 66322 WORKLIGHT)
To install batteries, press down on tab locat-1.
ed at bottom of Worklight base and slide out
red battery cartridge. See Figure 1, below.
Worklight
Base
Once battery cartridge is removed, pull up on 2.
tab on the back of the cartridge and remove
battery cover. See Figure 2, below.
Insert six “AAA” batteries, making sure to fol-3.
low indicated polarity.
Replace back cover and slide battery car-4.
tridge back into Worklight base until it snaps
back into place.
Battery Cover
Batteries
Figure 1
Battery
Cartridge
Figure 2
MOUNTING / OPERATION
INSTRUCTIONS (FOR 66322
WORKLIGHT)
The Worklight can be mounted via the 1.
magnetic base or by installing it’s mounting
frame.
SKU 66322 66323 For technical questions, please call 1-800-444-3353. Page 2
Page 3

For temporary magnetic mounting, attach the 2.
Worklight’s magnetic base to metallic surface
of desired mounting area.
For permanent mounting, set Worklight’s 3.
mounting frame against desired mounting
area. Use pencil (not included) to mark
mounting holes. Use drill and screws (not
included) to install mounting frame, making
sure area is clear of any hidden wiring. Once
mounting frame is securely fasten to surface,
slide Worklight base into mounting frame.
To turn on Worklight, press button on front of 4.
battery back. Press again to dim lights and
press a third time to turn off lights.
BATTERY INSTALLATION
INSTRUCTIONS
(FOR 66323 LIGHT BAR)
To install batteries, press down on tabs locat-1.
ed on back of Light Bar and remove battery
compartment cover. See Figure 3, below.
Battery
Compartment
Once battery compartment cover is removed, 2.
insert six “AAA” batteries, making sure to fol-
low indicated polarity. Then replace battery
compartment cover, snapping it back into
place.
Battery Compartment
Cover
Figure 3
MOUNTING / OPERATION
INSTRUCTIONS
(FOR 66323 LIGHT BAR)
The Light Bar can be mounted via the mag-1.
netic base or by its fold-out swiveling hook.
It can then be permanently stored into its wall
mounting receiver.
Attach the Light Bar’s magnetic back to me-2.
tallic surface of desired mounting area. Or
use fold-out hook to hand above work area.
To mount the Light Bar’s holding case, set 3.
the case against desired mounting area.
Use pencil (not included) to mark mounting
holes. Use drill and screws (not included) to
install case, making sure area is clear of any
hidden wiring. Once holding case is securely
mounted to surface, slide Light Bar into case
for storing.
To turn on Light Bar, press button front of 4.
Light Bar. The Light Bar has a swivel base
so the LED lights can be rotated during use.
Press button again to dim lights and press a
third time to turn off lights.
CLEANING & MAINTENANCE
(FOR BOTH 66322 AND 66323)
BEFORE EACH USE,1. inspect the general
condition of the tool. Check for loose hardware, misalignment or binding of moving
parts, cracked or broken parts, damaged
electrical wiring, and any other condition that
may affect its safe operation.
AFTER USE,2. wipe external surfaces of the
tool with clean cloth.
Record Serial Number Here:
Note: If product has no serial number, record month
and year of purchase instead.
Note: Some parts are listed and shown for illustra-
tion purposes only, and are not available
individually as replacement parts.
SKU 66322 66323 For technical questions, please call 1-800-444-3353. Page 3
 Loading...