

Page 1
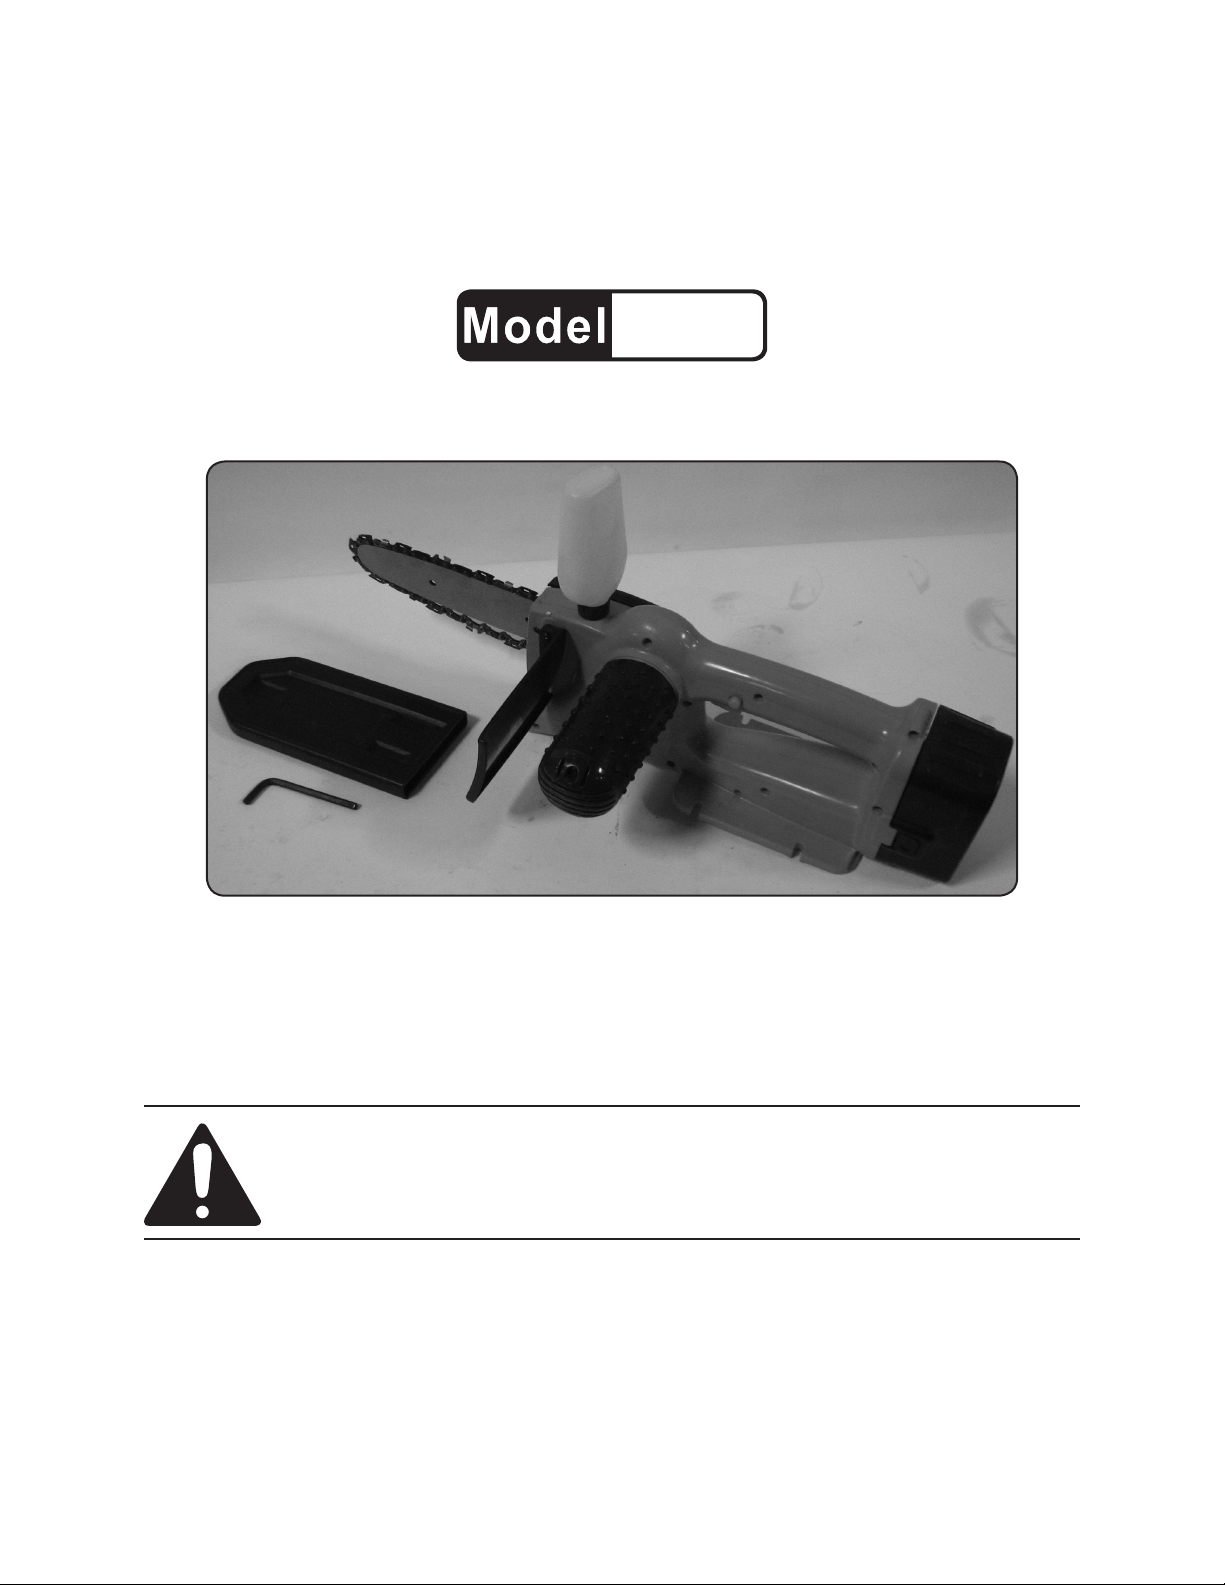
18V CORDLESS CHAIN SAW
65512
SET UP AND OPERATING INSTRUCTIONS
Distributed exclusively by Harbor Freight Tools®.
3491 Mission Oaks Blvd., Camarillo, CA 93011
Visit our website at: http://www.harborfreight.com
Read this material before using this product.
Failure to do so can result in serious injury.
SAVE THIS MANUAL.
Copyright© 2008 by Harbor Freight Tools®. All rights reserved. No portion of this manual or any artwork
contained herein may be reproduced in any shape or form without the express written consent of
Harbor Freight Tools. Diagrams within this manual may not be drawn proportionally. Due to continuing
improvements, actual product may differ slightly from the product described herein. Tools required for
assembly and service may not be included.
For technical questions or replacement parts, please call 1-800-444-3353.
Page 2
SAVE THIS MANUAL
Keep this manual for the safety warnings and precautions, assembly, operating, inspection, maintenance and cleaning
procedures. Write the product’s serial
number in the back of the manual near the
assembly diagram (or month and year of
purchase if product has no number). Keep
this manual and the receipt in a safe and
dry place for future reference.
IMPORTANT SAFETY
INSTRUCTIONS
In this manual, on the labeling,
and all other information
provided with this product:
This is the safety alert
symbol. It is used to alert
you to potential personal
injury hazards. Obey all
safety messages that
follow this symbol to avoid
possible injury or death.
DANGER indicates
a hazardous
situation which, if not
avoided, will result in death or
serious injury.
WARNING
indicates a
hazardous situation which, if
not avoided, could result in
death or serious injury.
CAUTION, used
with the safety
alert symbol, indicates a
hazardous situation which, if
not avoided, could result in
minor or moderate injury.
NOTICE is used to
address practices
not related to personal injury.
CAUTION, without
the safety alert
symbol, is used to address
practices not related to
personal injury.
When using
electric gardening
appliances, basic safety
precautions should always be
followed to reduce the risk of
re, electric shock, and
personal injury, including the
following:
READ ALL INSTRUCTIONS
Battery Precautions
Do not charge appliance in rain or in 1.
wet locations.
Do not charger Battery Pack (1) in 2.
temperature below 40°F or above
105°F.
Do not use battery-operated appli-3.
ance in rain or allow any liquid to get
inside Charger (25.)
Use only the included battery pack or 4.
an identical replacement.
Do not dispose of the battery in a 5.
re. The cell may explode. Check
with local codes for possible special
disposal instructions.
Do not open or mutilate the battery. 6.
Released electrolyte is corrosive and
may cause damage to the eyes or
skin. It may be toxic if swallowed.
SKU 65512 For technical questions, please call 1-800-444-3353. Page 2
Page 3

Exercise care in handling batteries 7.
in order not to short the battery with
conducting materials such as rings,
and keys. The battery or conductor
may overheat and cause burns.
Tool Use and Care
Avoid Dangerous Environment - 1.
Do not use tool in rain or in damp
or wet locations.
Personal Safety
Dress Properly - Do not wear loose 1.
clothing or jewelry. They can be
caught in moving parts. Use of rubber gloves and substantial footwear is
recommended when working outdoors. Wear protective hair covering
to contain long hair.
2. Wear ANSI-approved safety
goggles and heavy-duty
work gloves. Use face or
dust mask if operation is dusty.
Do not Overreach - Keep proper foot-3.
ing and balance at all times.
Stay Alert - Watch what you are 4.
doing. Use common sense. Do not
operate appliance when you are tired.
5. Do not grasp the exposed
cutting blades or cutting
edges when picking up or
holding the appliance.
6. Keep hands and feet away
from cutting area.
7. Keep hands away from
blades.
8. Wear thick jeans and
steel-toed work boots to
help prevent injury
caused by ying debris.
Keep children and visitors a safe 2.
distance from work area.
Only use Chain Saw to cut wood. 3.
Never attempt to cut masonry, metal
or any other material with this Chain
Saw.
Clear the work area before beginning 4.
a cutting project, and plan a path of
retreat to avoid falling branches.
Only use this tool while standing on 5.
a rm, level surface. Do not use this
tool while mounted on a ladder or
standing on any unstable platform.
Do not stand directly underneath the 6.
branch being cut. Always cut at no
more than a 60° angle to the branch.
Be mindful of where the branch 7.
will fall. Do not cut above anything
that could be damaged by falling
branches.
Use extreme caution when cutting 8.
branches. Branches under tension
could spring back and cause severe
injury. Slender branches can catch in
the chain and whip back towards the
operator.
Do not address the tip of the Chain 9.
Saw to the material being cut, as
it can kick back violently causing
severe injury.
Maintain labels and nameplates on 10.
the tool. These carry important safety
information. If unreadable or missing,
SKU 65512 For technical questions, please call 1-800-444-3353. Page 3
Page 4

contact Harbor Freight Tools for a
replacement.
Avoid unintentional starting. Prepare 11.
to begin work before turning on the
tool.
Do not lay the tool down until it has 12.
come to a complete stop. Moving
parts can bite into the surface and
pull the tool out of your control.
When using the Chain Saw, maintain 13.
a rm grip on the tool with both hands
to resist torque when cutting.
This product is not a toy. Keep it out 14.
of reach of children.
DANGER!15. People with pacemakers
should not use chain saws. Chain
saws produce strong electromagnetic
elds that can cause pacemaker
interference or pacemaker failure.
People with pacemakers should
consult their physician(s) for advice.
Maintain Chain Saw With Care - 16.
Keep cutting edge sharp and clean
for best performance and to reduce
the risk of injury. Follow instructions
for lubricating and changing accessories. Inspect cord periodically, and
if damaged, have it repaired by an
authorized service facility. Inspect extension cords periodically and replace
if damaged. Keep handles dry, clean,
and free from oil and grease.
Check Damaged Parts - Before 17.
further use, a guard or other part
that is damaged should be carefully
checked to determine that it will operate properly and perform its intended
function. Check for alignment of moving parts, binding of moving parts,
breakage of parts, mounting, and any
other condition that may affect its op-
eration. A guard or other part that is
damaged should be properly repaired
or replaced by a qualied technician
unless indicated elsewhere in this
manual.
Kickback Precautions
Kickback is a dangerous reaction that 18.
can lead to serious injury. Kickback
may occur when the moving Chain
contacts an object at the upper portion of the tip of the Guide Bar (11) or
when the wood closes in and pinches
the Saw Chain (10) in the cut. Contact at the upper portion of the tip of
the Guide Bar can cause the Chain
to dig into the wood and stop the
Chain for an instant. The result is a
quick, reverse reaction which kicks
the Guide Bar up and back toward
the operator. If the Chain is pinched
along the top of the Guide Bar, the
Guide Bar can be driven rapidly back
toward the operator. Either of these
reactions can cause loss of Chain
Saw control which can result in serious injury. Do not rely only upon the
safety devices built into the Chain
Saw. As an operator, you should take
several steps to keep the cutting job
free from accident or injury:
Make sure the area in which you •
are cutting is free from obstructions.
Do not allow the nose of the Guide
Bar to contact a log, branch, fence,
or any other obstruction while you
are operating the tool.
Always cut with the motor running •
at full speed.
Always keep the Chain clean and •
sharp.
Keep Chain Cover (13) and any •
other guards and safety devices in
SKU 65512 For technical questions, please call 1-800-444-3353. Page 4
Page 5

proper working order and properly
adjusted.
Never use the Chain Saw on a •
ladder or unstable support.
Before starting, make sure the •
Chain is not contacting any object.
Shut off and make sure the Saw •
Chain has stopped before setting
the tool down.
Vibration Hazard
This appliance vibrates during use.
Repeated or long-term exposure to vibration may cause temporary or permanent
physical injury, particularly to the hands,
arms and shoulders. To reduce the risk of
vibration-related injury:
Use appliances with the lowest vibra-4.
tion when there is a choice between
different processes.
Include vibration-free periods each 5.
day of work.
Grip handle as lightly as possible 6.
(while still keeping safe control of it).
Let the Chain Saw do the work.
To reduce vibration, maintain the 7.
Chain Saw as explained in this manual. If any abnormal vibration occurs,
stop use immediately.
General Safety
Do not use Chain Saw for other than 1.
intended use.
Anyone using vibrating tools regu-1.
larly or for an extended period should
rst be examined by a doctor and
then have regular medical check-
ups to ensure medical problems are
not being caused or worsened from
use. Pregnant women or people who
have impaired blood circulation to
the hand, past hand injuries, nervous
system disorders, diabetes, or Ray-
naud’s Disease should not use this
appliance. If you feel any medical or
physical symptoms related to vibra-
tion (such as tingling, numbness, and
white or blue ngers), seek medical
advice as soon as possible.
Do not smoke during use. Nico-2.
tine reduces the blood supply to the
hands and ngers, increasing the risk
of vibration-related injury.
Maintain labels and nameplates on 2.
the Chain Saw. These carry important safety information. If unreadable
or missing, contact Harbor Freight
Tools for a replacement.
When not in use, always place Cover 3.
(13) over Guide Bar (11).
The warnings, precautions, and in-4.
structions discussed in this instruction
manual cannot cover all possible conditions and situations that may occur.
It must be understood by the operator
that common sense and caution are
factors which cannot be built into this
product, but must be supplied by the
operator.
SAVE THESE
INSTRUCTIONS.
Wear suitable gloves to reduce the 3.
vibration effects on the user.
SKU 65512 For technical questions, please call 1-800-444-3353. Page 5
Page 6

SPECIFICATIONS
Charging Battery Pack
Voltage 18V DC
Charger Input 120 V~ / 60 Hz
Charger Output 20VDC, 400mA
Cutting Capacity 7”
Charging Time 5-6 hr.
Guide Bar Length 7”
Battery NiCd, 1.2V, SC 1700mAh
Oil Capacity 4 oz.
Noise Level 88 dBA @ 3 ft.
UNPACKING
When unpacking, make sure that the
item is intact and undamaged. If any parts
are missing or broken, please call Harbor
Freight Tools at the number shown on the
cover of this manual as soon as possible.
Charge Battery Pack (1) only with the 1.
18V charger provided. Charge indoors only. Allow time for the Battery
to cool before and after cooling.
Battery
Pack
(1)
Charger Stand (24)
Figure A
Insert Battery Pack into Charger 2.
Stand (24). Plug Charger (25) into
appropriate AC 120V, 60 Hz power
outlet. See Figure A, above. The red
LED light on Charger Stand will activate, indicating battery is charging.
Charger
(25)
SET UP INSTRUCTIONS
Read the ENTIRE IMPORTANT
SAFETY INSTRUCTIONS
section at the beginning of this
manual including all text under
subheadings therein before set
up or use of this product.
TO PREVENT
SERIOUS INJURY
FROM ACCIDENTAL
OPERATION: Turn the Power
Switch of the appliance to its
“OFF” position and unplug
the appliance from its
electrical outlet before
assembling or making any
adjustments.
Note: For additional information regarding
the parts listed in the following pages,
refer to the Assembly Diagram near
the end of this manual.
The initial charging time is 3-5 hours, 3.
after which the Battery Pack should
be removed. Please note: The
green LED light will activate when the
Charger is plugged in, even without
the Battery Packet being installed.
The Red LED light will activate once
the Battery Pack is installed and
charging. The Red LED light will
NOT deactivate or changed color
when fully charged. Do not charger
for over 5 hours.
After each subsequent use, 3 hours 4.
of charging time is need for Battery
Pack to be full charged. However,
the Battery Pack can be left to charge
for 5 hours to ensure longer running
time for Chain Saw.
If the Battery Pack delivers an abnor-5.
mal performance, discharge batteries
by holding Trigger (3) down in “ON”
position until Chain Saw slows. Do
SKU 65512 For technical questions, please call 1-800-444-3353. Page 6
Page 7

not completely discharge batteries.
Remove Battery Pack from tool, allow
it to cool, and charge for 3-5 hours,
making sure not to exceed 5 hours of
charging time.
When not charging, unplug Charger 6.
from outlet and store in secure location.
Installing/Removing Saw Chain
Use of any
accessory or
attachment other than those
listed below may increase the
risk of serious injury.
Make sure Battery Pack (1)
has been pulled out and
Trigger (3) is “OFF” before
installing or removing Saw
Chain (10).
Use a screwdriver (not included) to 1.
loosen Pan Head Screws (23) and
remove Housing Cover (20). See
Figure B, below.
Use screwdriver to remove Tip Guard 2.
(12) from end of Guide Bar (11).
Tip Guard (12)
Pan Head
Screws (23)
Housing Cover (20)
Figure B
Guide Bar (11)
Head Bolt (19)
Spring (8)
Hex Wrench (2)
Figure C
Fit Saw Chain (10) over Guide Bar. 4.
Please note: The Saw Chain cutters
must face the directions shown by the
arrow below. See Figure D, below.
Saw Chain Cutter
Saw Chain (10)
Guide Bar (11)
Figure D
WARNING!5. Wear ANSI-approved
safety goggles and heavy-duty work
gloves when adjusting or installing
Saw Chain.
Continue tting the Saw Chain over 6.
the Guide Bar. Use the Hex Wrench
to fasten Guide Bar back onto Chain
Saw housing, making sure the concave part of the Guide Bar touches
the Spring. Tighten Head Bolt (19).
Once the Guide Bar is fastened 7.
securely, replace the Housing Cover
and the Tip Guard.
Adjusting Saw Chain Tension
Loosen the Head Bolt (19) with 3.
the Hex Wrench (2) and remove
the Guide Bar (11). See Figure C,
Before initial use and after each 1.
subsequent use, check Saw Chain
tension.
above.
SKU 65512 For technical questions, please call 1-800-444-3353. Page 7
Page 8

WARNING!2. Wear ANSI-approved
safety goggles and heavy-duty work
gloves when adjusting or installing
Saw Chain.
Grasp the Saw Chain at the middle 3.
of the Guide Bar and lift up. The gap
between the Guide Bar and the Saw
Chain should about 1/16” to 1/8”.
See Figure E, below.
1/16" - 1/8"
Figure E
Saw Chain (10)
If the Saw Chain tension needs to 4.
be adjusted, use Hex Wrench (2) to
loosen the Head Bolt (19). The Spring
(8) will automatically adjust the gap
to the correct 1/16” - 1/8” distance.
Tighten Head Bolt to make sure gap
remains at that distance. See Figure
F, below.
Head Bolt (19)
Hex Wrench (2)
subheadings therein before set
up or use of this product.
Before operating the Chain Saw, 1.
wear ANSI-approved safety goggles
and heavy-duty work gloves. Safety
goggles and other safety gear are
sold separately.
To Lubricate, oil the whole Saw Chain 2.
evenly before each use. Also lubricate whenever replacing a fully discharged battery pack with a charged
one. You can also insert the Oil
Bottle (27) into the Oil Fill Hole (9).
Press Bottle to inject oil into Saw
Chain. Always use Chain oil.
Hold the Rubber Handle (5) and set 3.
the Tip Guard (12) or Housing Guard
(26) against the branch to be cut. See
Figure G, below.
WARNING! Cutting a branch without
the Tip Guard or Housing Guard set
against the branch may cause the
Guide Bar to wobble, resulting in serious injury and/or property damage.
Branch
Guide Bar (11)
Tip Guard (12)
Figure G
Branch
Housing
Guard (26)
Figure F
GENERAL OPERATING
To start the Chain Saw, depress the 4.
Lock Button (4) and press down on
the Trigger (3).
INSTRUCTIONS
Read the ENTIRE IMPORTANT
SAFETY INFORMATION section
at the beginning of this manual
including all text under
SKU 65512 For technical questions, please call 1-800-444-3353. Page 8
WARNING! 5. While cutting or pruning
branches, keep all body parts away
from Saw Chain during operation.
Page 9

Hold Chain Saw rmly with both 6.
hands during use. Never use one
hand to operate Chain Saw.
Keep proper footing and balance dur-7.
ing operation.
When cutting thicker branches, rst 8.
makes a shallow undercut at the
base of the branch and then nish the
cut from the top of the branch.
WARNING! 9. Trying to cut thicker
branches from the bottom up may
cause the branch to close in and
pinch the Chain Saw during the cut.
Trying to cut off thick branches from
the top without a shallow undercut
may cause the branch to splinter.
If you cannot cut the branch through 10.
with a single stroke, do the following:
A. Apply light pressure to the Rubber
Handle (5).
B. Draw the Chain Saw back.
C. Apply the lower portion of the Saw
Chain down.
D. Finish cut by raising Handle.
When nished, release the Trigger 11.
to stop the Chain Saw. Press Lock
Button and disconnect Battery Pack.
Clean the tool and slide Chain Cover
over Saw Chain and store the Chain
Saw in secure location out of children’s reach.
MAINTENANCE AND
SERVICING
TO PREVENT
SERIOUS INJURY
FROM ACCIDENTAL
OPERATION: Make sure Lock
Button is in the “OFF”
position and remove Battery
Pack before performing any
inspection, maintenance, or
cleaning procedures.
TO PREVENT SERIOUS
INJURY FROM TOOL
FAILURE: Do not use
damaged equipment. If
abnormal noise or vibration
occurs, have the problem
corrected before further use.
Filing Cutters and Depth Gauges
During regular use, the Saw Chain 1.
cutters and depth gauges may need
to be led in order to maintain sufcient performance.
Use a round, 1/16” le to le the cut-2.
ters. Apply it so that it will be angled
30° to guide bar.
Hold the le level and push it away 3.
from you while ling. Do not touch
the cutters with the le when pulling
it back towards you. See Figure H,
below.
Cutter
Depth
Gauge
Figure H
Procedures not specically
explained in this manual
must be performed only by a
qualied technician.
SKU 65512 For technical questions, please call 1-800-444-3353. Page 9
To le depth gauges, use a at, round 4.
le. Hold the le level when ling.
Round off the front corner of the 5.
depth gauge to maintain the original
shape. See Figure I, on next page:
Page 10

Depth Gauge
Figure I
After ling Saw Chain, immerse it in 6.
oil and wash off any chips and sawdust.
AFTER USE,2. clean external surfaces
of the tool with clean cloth. Do not
use water or solvents to clean Chain
Saw. Make sure no water enters
Chain Saw.
See 3. Figure H, below.
The batteries contained in the Battery 4.
Pack are nickel-cadmium (Ni-CD).
Do not dispose of Ni-CD batteries in
household waste.
Cleaning and Lubrication
BEFORE EACH USE,1. inspect the
general condition of the tool. Check
for loose screws, misalignment or
binding of moving parts, cracked or
broken parts, and any other condition
that may affect its safe operation.
Record Serial Number Here:
Note: If product has no serial number, record month and year of purchase instead.
Note: Some parts on Parts List and Diagram are listed and shown for illustration purposes
only, and are not available individually as replacement parts.
Follow all local regulations regarding 5.
the proper disposal of Ni-CD batteries.
6. WARNING! If the Charger cord
is damaged, it must be replaced
only by a qualied service technician.
PLEASE READ THE FOLLOWING CAREFULLY
THE MANUFACTURER AND/OR DISTRIBUTOR HAS PROVIDED THE PARTS LIST AND ASSEMBLY DIAGRAM
IN THIS MANUAL AS A REFERENCE TOOL ONLY. NEITHER THE MANUFACTURER OR DISTRIBUTOR MAKES
ANY REPRESENTATION OR WARRANTY OF ANY KIND TO THE BUYER THAT HE OR SHE IS QUALIFIED
TO MAKE ANY REPAIRS TO THE PRODUCT, OR THAT HE OR SHE IS QUALIFIED TO REPLACE ANY PARTS
OF THE PRODUCT. IN FACT, THE MANUFACTURER AND/OR DISTRIBUTOR EXPRESSLY STATES THAT
ALL REPAIRS AND PARTS REPLACEMENTS SHOULD BE UNDERTAKEN BY CERTIFIED AND LICENSED
TECHNICIANS, AND NOT BY THE BUYER. THE BUYER ASSUMES ALL RISK AND LIABILITY ARISING OUT OF
HIS OR HER REPAIRS TO THE ORIGINAL PRODUCT OR REPLACEMENT PARTS THERETO, OR ARISING OUT
OF HIS OR HER INSTALLATION OF REPLACEMENT PARTS THERETO.
SKU 65512 For technical questions, please call 1-800-444-3353. Page 10
Page 11

PARTS LIST
PARTS LIST
Part Description Q’ty
1 Battery Pack 1
2 Hex Wrench 1
3 Trigger 1
4 Lock Button 1
5 Rubber Handle 1
6 Handle 1
7 Hand Shield 1
8 Spring 1
9 Oil Fill Hole 1
10 Saw Chain 1
11 Guide Bar 1
12 Tip Guard 1
13 Cover 1
14 Washer 1
ASSEMBLY DIAGRAM
7
6
5
4
3
1
2
14
15
8
14
16
Part Description Q’ty
15 Sprocket Gear 1
16 Elastic Collar 1
17 Small Washer 1
18 Spring Washer 1
19 Head Bolt 1
20 Housing Cover 1
21 Washer 1
22 Spring Washer 3
23 Pan Head Screw 3
24 Charger Stand 1
25 Charger 1
26 Housing Guard 1
27 Oil Bottle 1
9
26
10
20
11
17
18
12
19
13
21
22
23
Please Note: Charger (25), Charging Stand (24) and Oil Bottle (27) not shown
Record Product’s Serial Number Here:
Note: If product has no serial number, record month and year of purchase instead.
Note: Some parts are listed and shown for illustration purposes only, and are not avail-
able individually as replacement parts.
SKU 65512 For technical questions, please call 1-800-444-3353. Page 11
 Loading...