

Harbor Freight Tools 63797 Owner's Manual & Safety Instructions

Owner’s Manual & Safety Instructions
Save This Manual Keep this manual for the safety warnings and precautions, assembly,
operating, inspection, maintenance and cleaning procedures. Write the product’s serial number in the
back of the manual near the assembly diagram (or month and year of purchase if product has no number).
Keep this manual and the receipt in a safe and dry place for future reference. 17e
Visit our website at: http://www.harborfreight.com
Email our technical support at: productsupport@harborfreight.com
When unpacking, make sure that the product is intact
and undamaged. If any parts are missing or broken,
please call 1-888-866-5797 as soon as possible.
Copyright© 2017 by Harbor Freight Tools®. All rights reserved.
No portion of this manual or any artwork contained herein may be reproduced in
any shape or form without the express written consent of Harbor Freight Tools.
Diagrams within this manual may not be drawn proportionally. Due to continuing
improvements, actual product may differ slightly from the product
described herein. Tools required for assembly and service may not be included.
Read this material before using this
product. Failure to do so can result in
serious injury. SAVE THIS MANUAL.
IMPORTANT SAFETY INFORMATION
1. Disconnect welder power and discharge
electrode to ground before installing.
2. Install only according to these instructions.
Improper installation can create hazards.
3. Wear ANSI-approved safety goggles and
heavy-duty work gloves during installation.
4. Keep installation area clean and well lit.
5. Keep bystanders out of the area during installation.
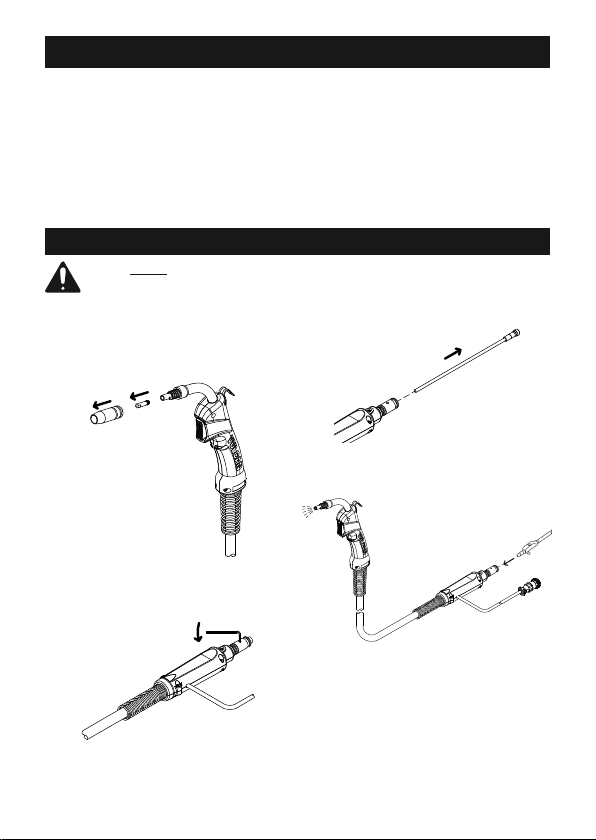
Installation Instructions
Read the ENTIRE IMPORTANT SAFETY INFORMATION section at the beginning of this document
before set up or use of this product.
1. Disconnect welder power supply and
discharge electrode to ground.
2. Disconnect MIG Gun Cable from welder.
3. Remove the Nozzle and Tip from
the end of the MIG Gun.
4. Lay the MIG Gun Cable straight on a flat surface.
5. Remove small Set Screw in the
side of the MIG Connector.
6. Do not install when tired or when under the
influence of alcohol, drugs or medication.
7. This product is not a toy. Do not allow
children to play with or near this item.
8. Use as intended only.
9. Inspect before installing; do not use
if parts are loose or damaged.
6. Grab the plug at the end of the old Liner
and slide it out of the MIG Gun Cable.
7. Wear ANSI-approved safety goggles and a dust
mask. Then, blow compressed air through the
MIG Connector to clean out the MIG Gun Cable.
Page 2 For technical questions, please call 1-888-866-5797. Item 63797
 Loading...