

Hanwei GD Operation Manual

GD Series
Gas Alarm Operation Manual
Hanwei Electronics Co.,Ltd
Hanwei Electronics Co., Ltd www.hwsensor.com
sales@hwsensor.com Fax: 86-371-67169090 Tel: 86-37167169070/80
1
Precautions:
To avoid personal safety injury, Instrument damage and potential dangerous accident; do
not use the product before reading this manual.
1. Description
GD gas alarm is a kind of wall-mounted household gas alarm designed to detect the
concentration of combustible and toxic gases or vapors using high quality air-sensitive
component and manufactured with advanced technology. It provides visual and audible
signals when the gas concentration reaches the presetting range, and reminds you to take
prompt favorable action.
2 Specifications
Model
□GD401 □GD601
Operating Power
AC220V/110V±15%/DC24V/DC12V ≤3W
Operating Conditions
Temperature: 0℃~55℃ Humidity:<95%
Response time
≤30s(GD701≤2.5min ) resume automatically
Gas Sampling
Diffuse naturally
Alarm Level
GD401: for natural gas 10%LEL
GD601: for propane 10%LEL
Alarm Method
Visual and audible
Sound level
≥80dB
Weight
270g
Dimension
l×b×h,mm:126×72×47.5
Optional function
□Gas shut off valve □relay output
Note: the power and the alarming level can be specified.
Hanwei Electronics Co., Ltd www.hwsensor.com
sales@hwsensor.com Fax: 86-371-67169090 Tel: 86-37167169070/80
2
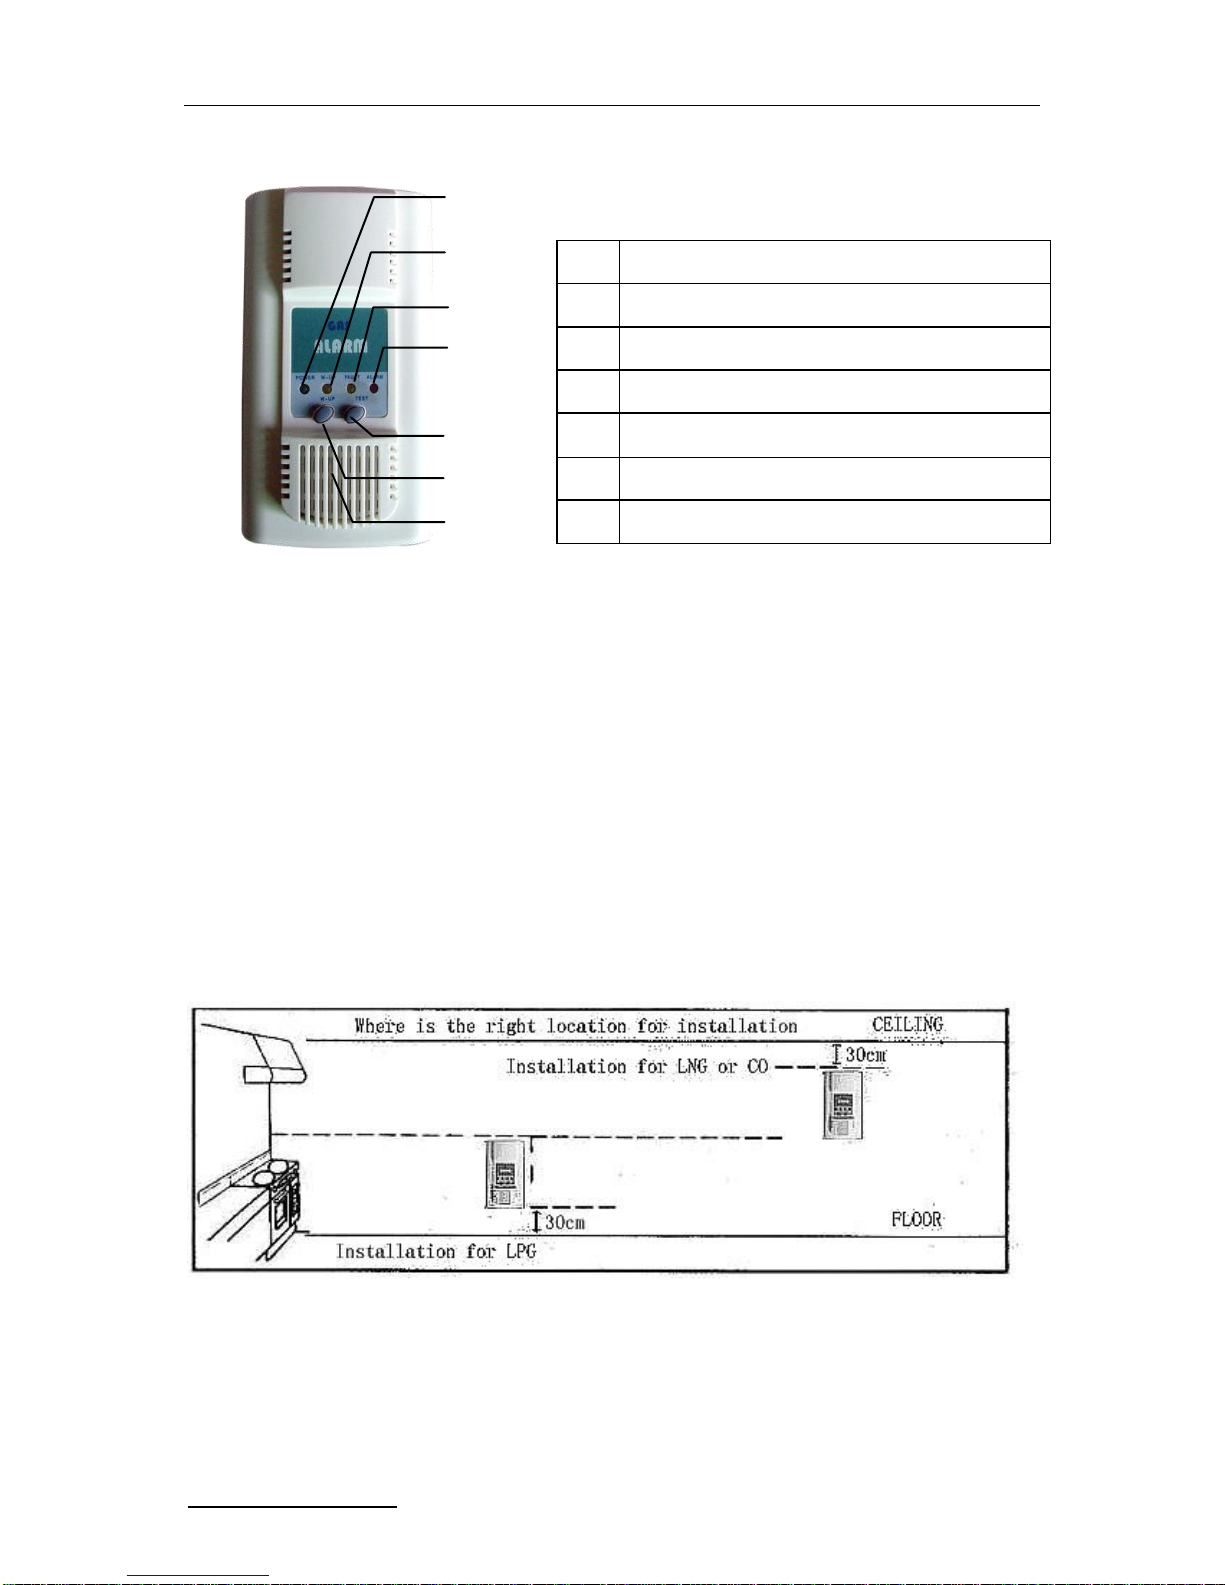
3 Functions and Indications
4. Installation
4.1 Fix the appliance on the wall at a horizontal distance as 2~4m from the cooker or gas
source;
4.2 The vertical location of the appliance should be decided according to the type of gas
sort:
LPG:Fix it within 0.3 meters above the ground;
Natural Gas:Fix it within 0.3 meters below the Roof
Such location should be avoided:
Near the windows or passage with strong wind,
Water fog and drop or such moist place;
Easy polluted or high tem environment near Oven,
Covered by other things.
4.3 Choosing a proper installation way per conditions above.
Installation 1: Choose a suitable wall or place per the above 4.1, 4.2 requests. Fix the
hanging plate onto the wall with M5 or M3 screw through the screw hole (as the
following drawing, two optional types φ5 and φ3), then connect the appliance with the
hanging plate.
1
POWER Light (Green)
2
W-UP Light (Yellow)
3
FAULT Light (Yellow)
4
ALARM Light (Red)
5
TEST Button: press to test alarm function
6
W-UP Button: press to stop the warm up.
7
Air vents
1
3
4
5
6
 Loading...