

Page 1
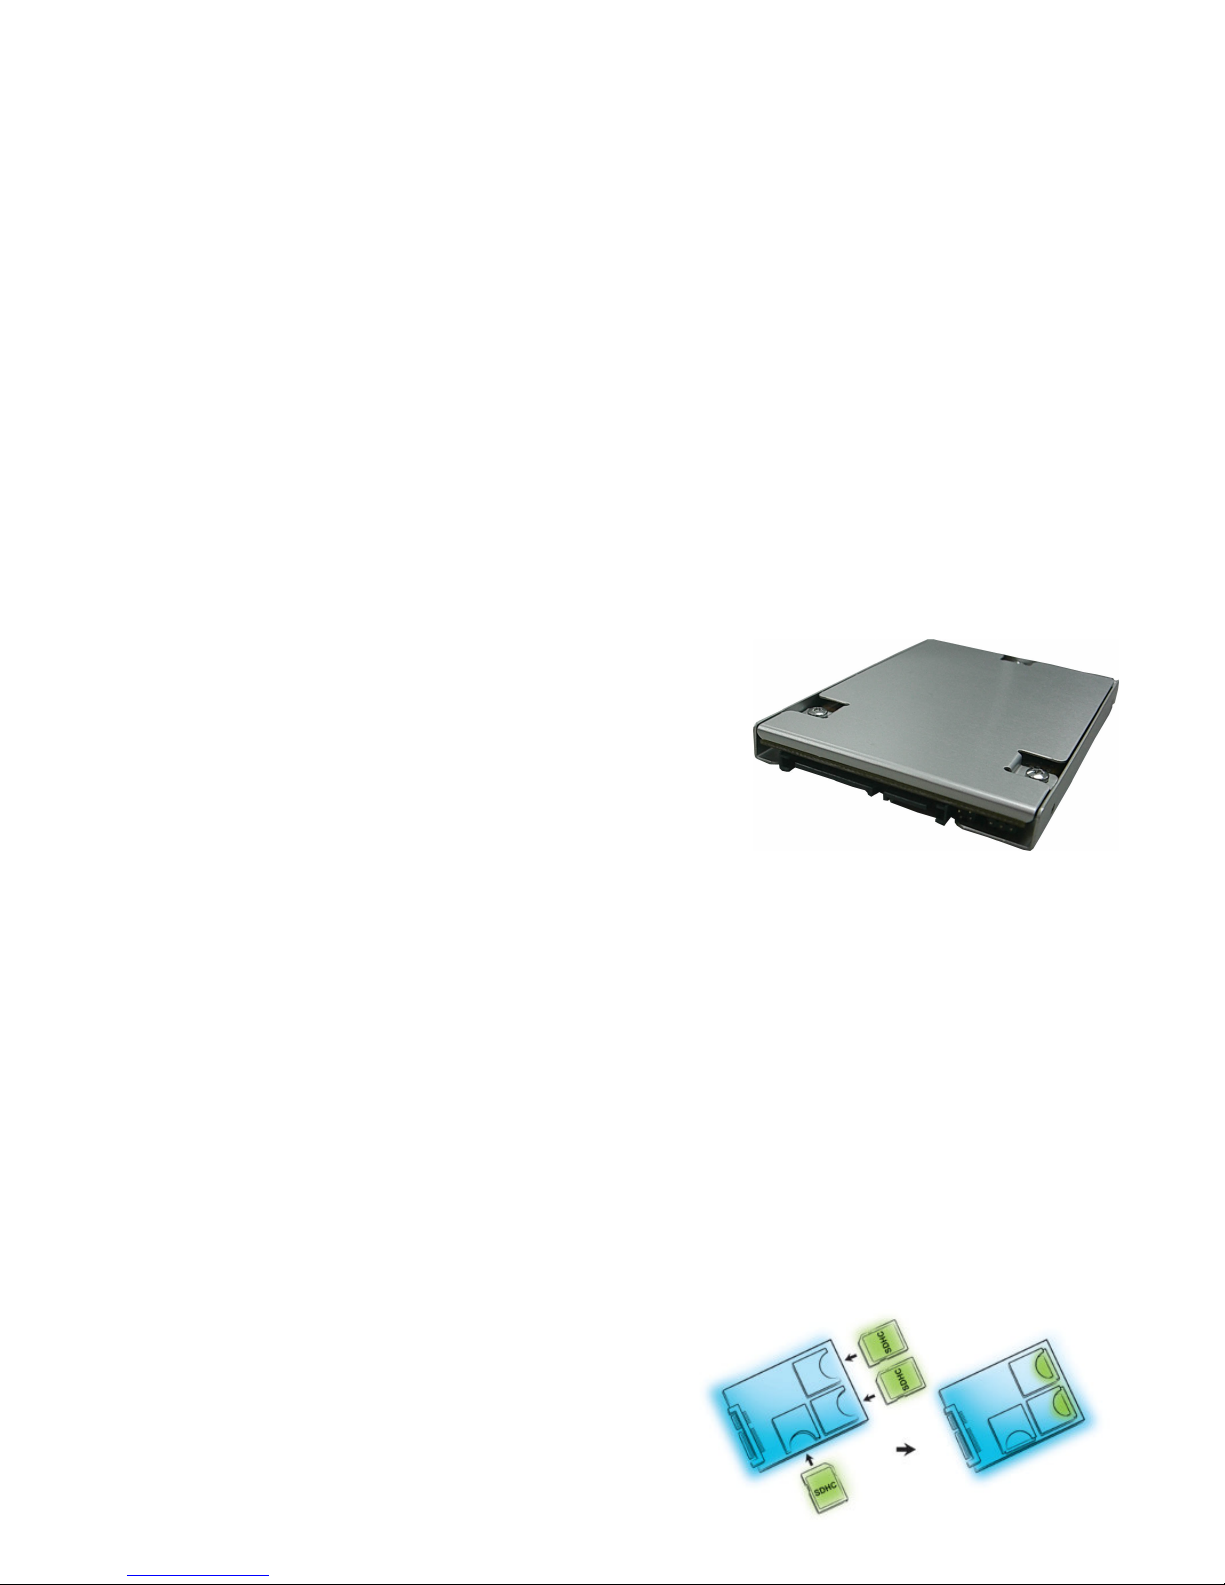
The ANS-9012 Flash Disk uses SDHC (Secure Digital High Capacity)
memory
cards in a 2.5" SATA HDD form-factor to act as a solid state disk. Its
advantages include lightness, compactness, better transfer rates and shock
resistance compared to conventional hard disks, lower power consumption,
less noise during operation and better tolerance for temperature changes. The
ANS-9012 offers practically unlimited scalability depending on the SDHC
capacity. As SDHC is relatively inexpensive compared to the solid state drives
now in the market, it offers a very competitive solution in terms of price, speed
and capacity. For industrial and military computers that must operate for long
periods of time in special working environments, the ANS-9012 can replace
conventional HDDs for better reliability and meet more types of usage
requirements.
●
ACARD Chip: ANC772
●
Supports SATA 1.5/3Gbps interface in host
●
Offers 6 expansion slots. Each slots supports a 4/8/16/32GB SDHC card
●
Supports SLC NAND Flash memory
●
Maximum capacity: Depends on SDHC capacity
●
Supported operating systems include Windows, Linux and Mac OS X
●
Standard 2.5" SATA HDD interface
●
Offers a fast and low-cost replacement to expensive solid state drives.
●
Offers solid state drives' advantages such as zero noise and low power
consumption.
●
Offers stable and reliable performance.
●
Offers better read/write access performance, shock resistance and
operating temperature range than conventional HDD.
●
No drivers or software required.
Chapter 1: Introduction
SolidD2.5 ANS-9012 Flash Disk
Installation Guide
1.1 Product Overview
1.2 Specification
1.3 Features
Page 2

1
2
3
2.2.2 Carefully remove the PCB from the external casing
2.2.3 Each slot on the PCB is marked with their identifying number
(SD1 ~ SD6)
Chapter 2: Installation
Before installation, check that the product packaging contains all of the required
accessories and that the required installation tools are at hand (e.g. screwdriver and
anti-static gloves)
2.1 Remove the ANS-9012 from the anti-static bag. We recommend wearing
anti-static gloves during installation/removal of equipment and parts. The
environment should be free of static as well.
2.2.1 Use the screwdriver to slowly remove the three screws marked as 1, 2
and 3 on the front of the HDD casing and keep them in a safe place
Page 3
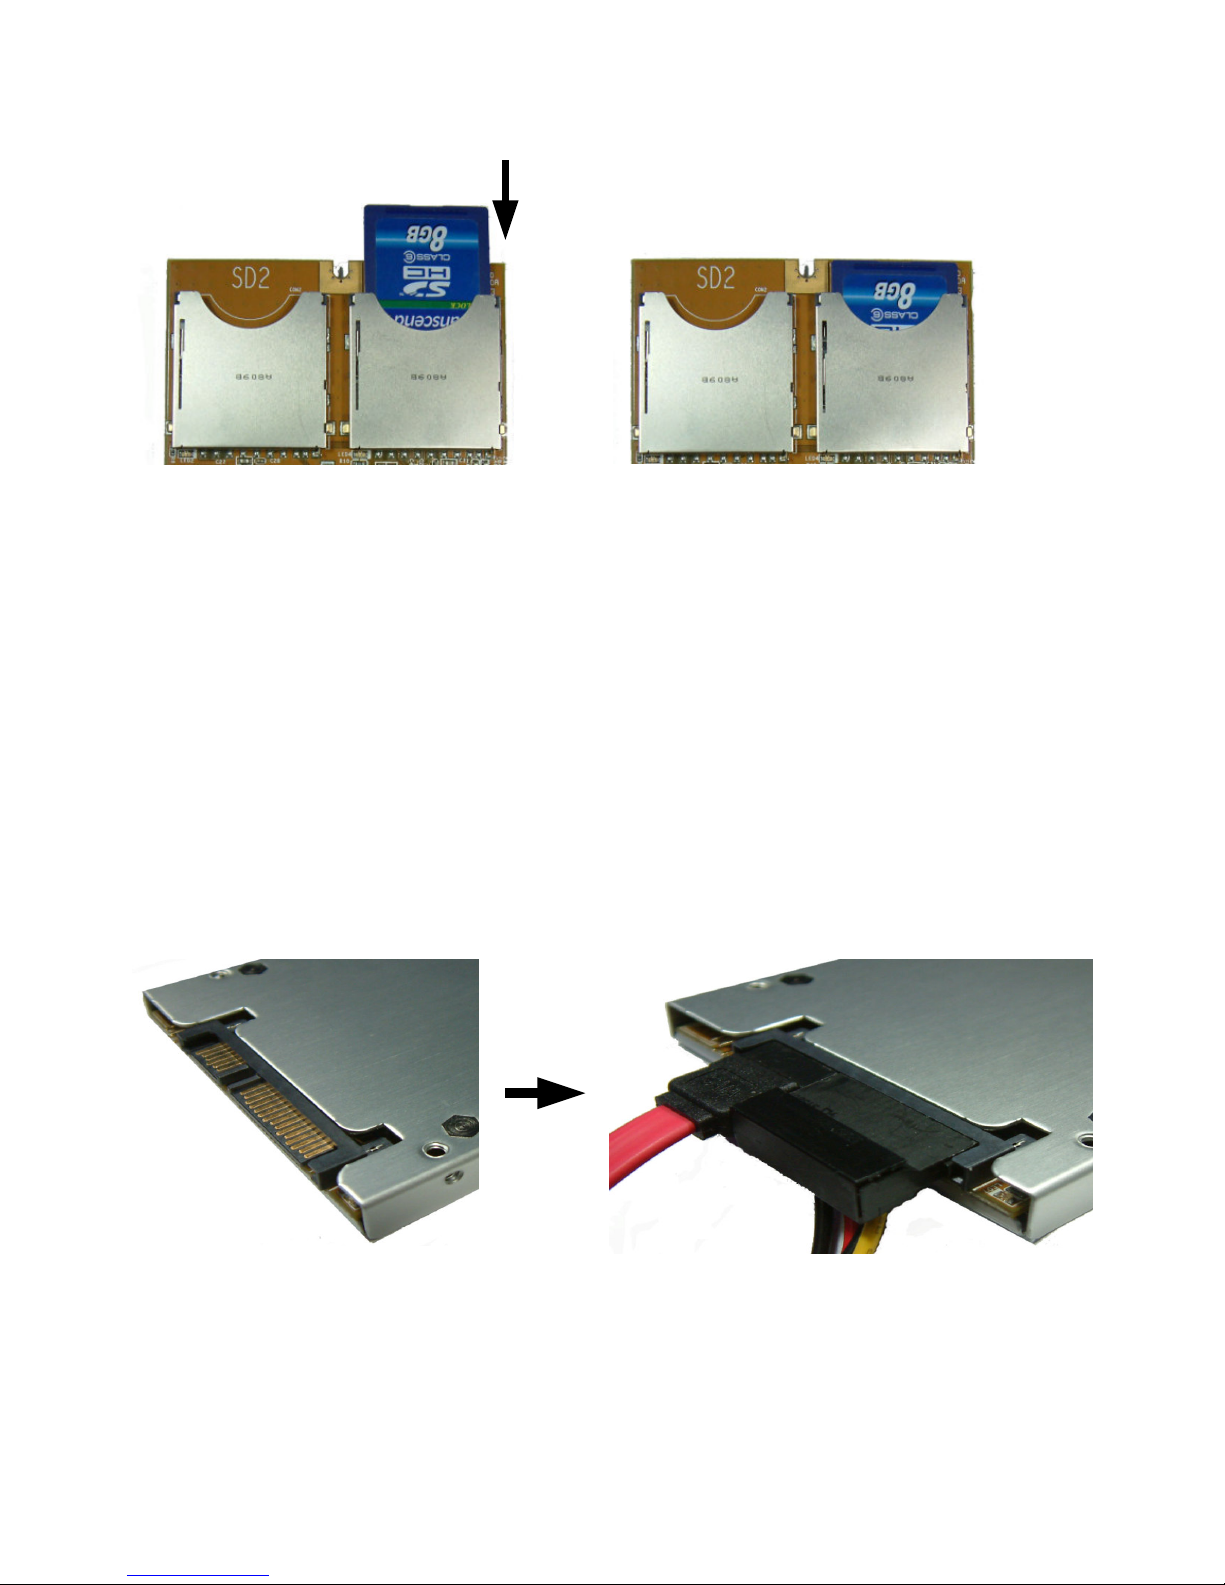
2.2.4 Insert the SD cards into the SD slots in the order indicated
(SD1→SD2… SD6)
B. Push SD card firmly into slot
A. Insert SD card into slot
2.3 Once the SD cards have been properly installed, carefully place the
PCB back in the external casing and secure in place with screws 1, 2
and 3.
2.4 Follow the instructions of the host computer (e.g. notebook) or device
and carefully install the ANS-9012.
※Attention: If SD cards are not inserted into the PCB in the proper
order they will not be detected properly
Page 4
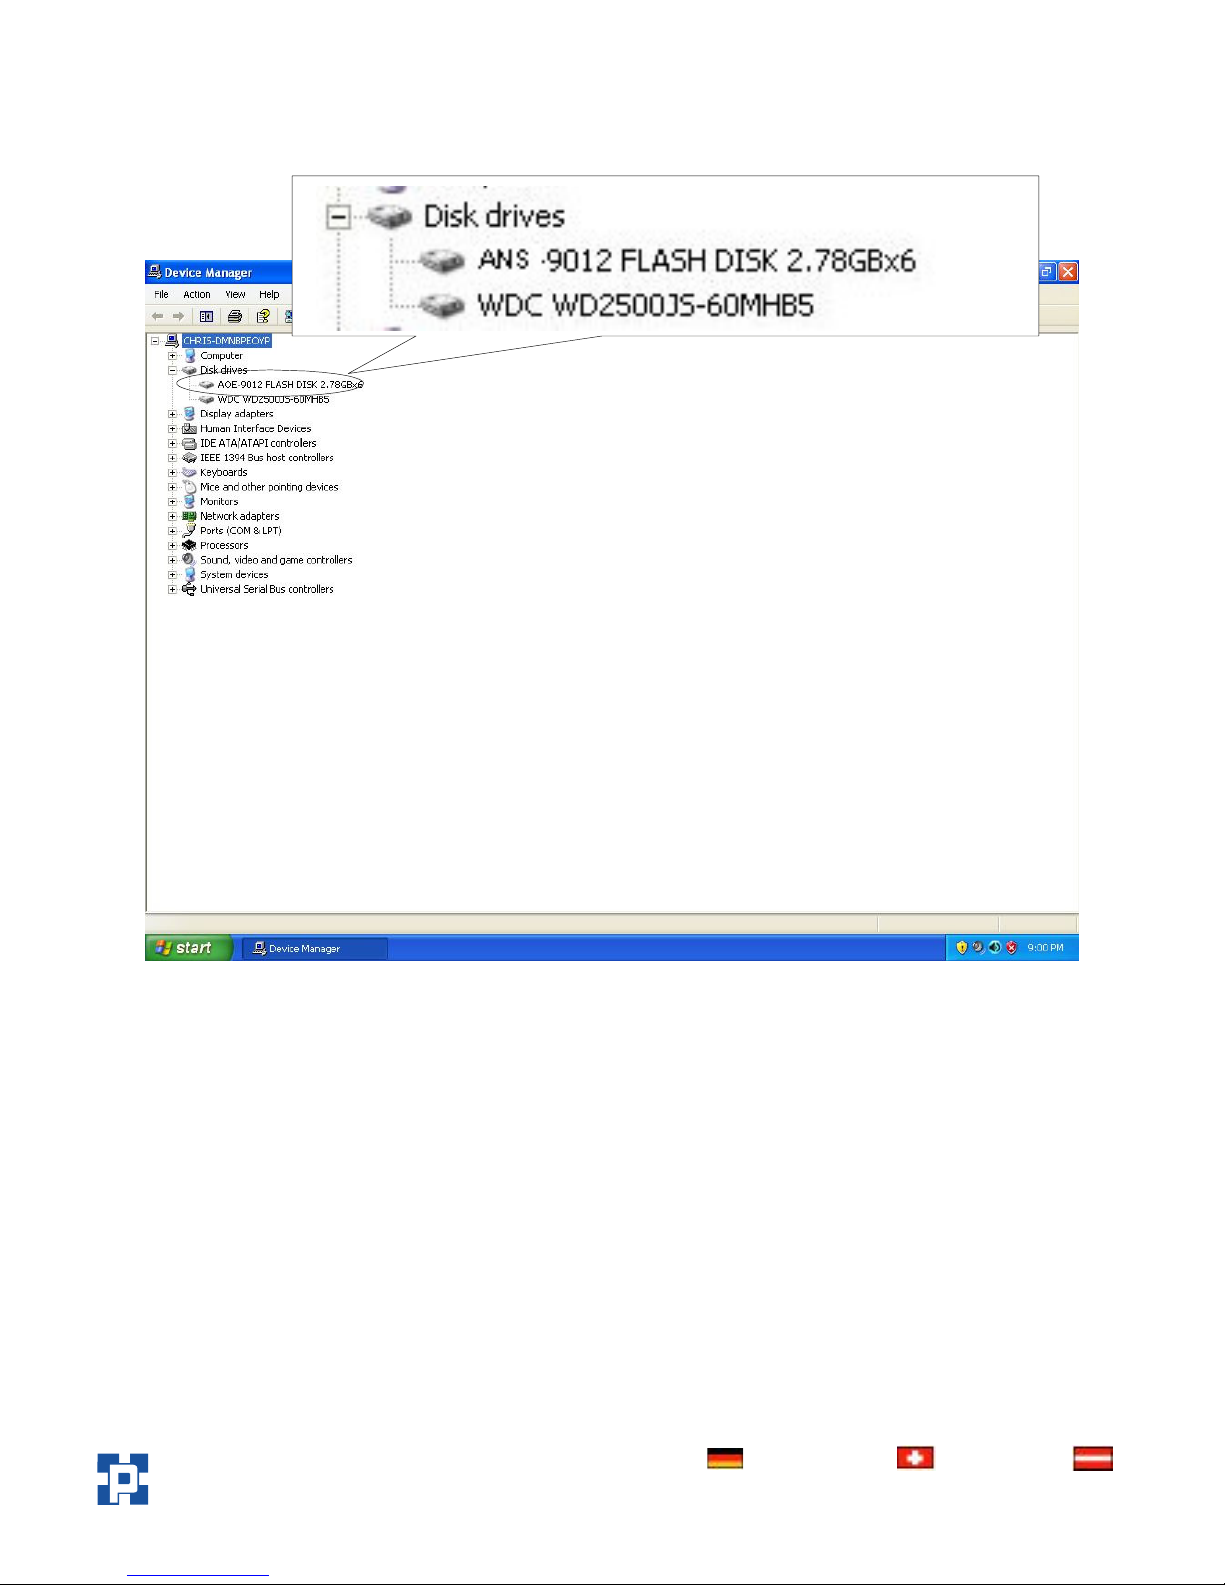
2.5 Start the host computer and boot into the operating system. The
ANS-9012 Flash Disk device will appear under Device Manager – Disk
Drives
2.6 The operating system will display the detected ANS-9012 model, the
capacity used by each SD card (e.g. 2.78GB) and the number of active
cards (e.g. 6)
Österreich:
Tel.: 01 / 58 55 430
Fax: 01 / 58 55 460
Deutschland:
Tel.: 0761 / 59 21 00
Fax: 0761 / 58 52 28
Schweiz:
Tel.: 061 / 27 311 - 31
Fax: 061 / 27 311 - 39
HANTZ + PARTNER
The Upgrade Company! www.hantz.com
 Loading...