

Page 1
1
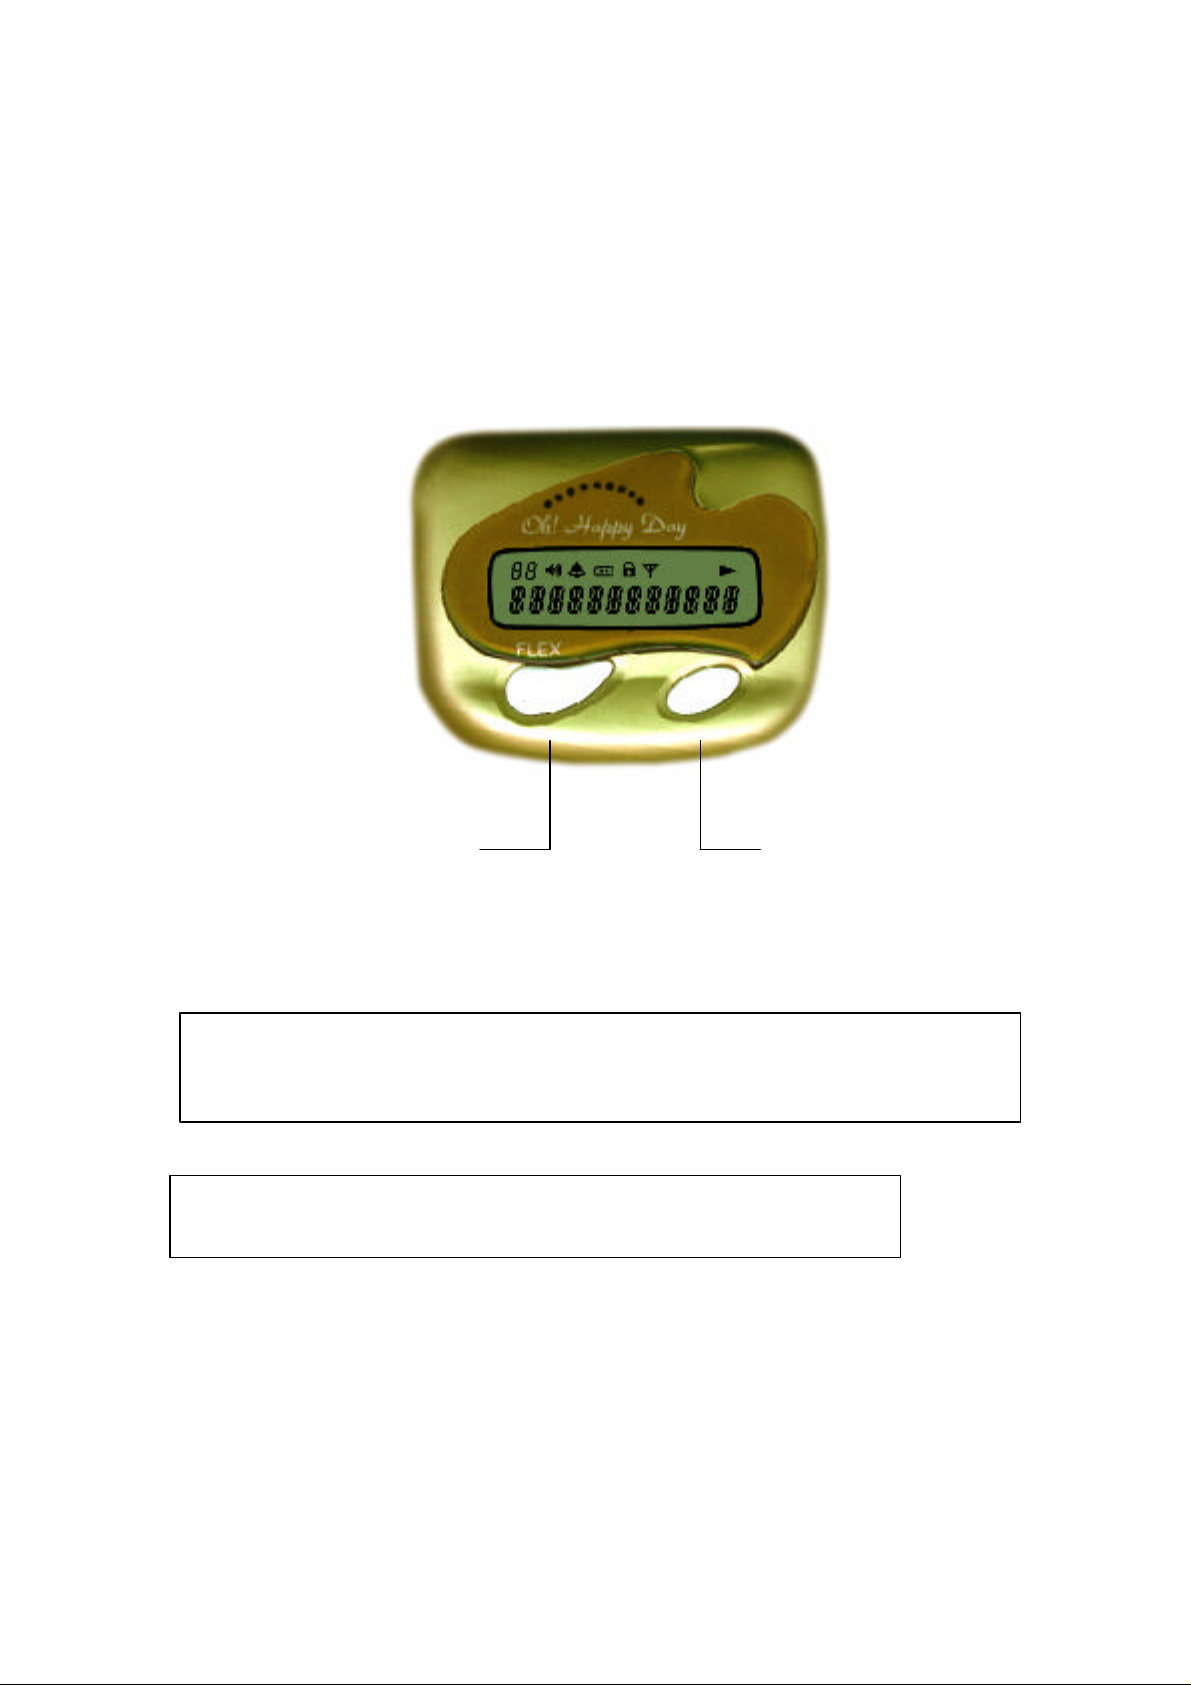
HANTEL FLEX PAGER
Function button Read button
Caution : Any changes or modifications in construction of this device which are not expressly
approved by responsible for compliance could void the user’s authority to operate
the equipment.
This device complies with part 15 of the FCC Rules.
Operation is subject to the condition that device does not harmful interference.
Page 2

2
USER MANUAL
1.Controls
The. PERCOMM has 2 push buttons ( Read and Function buttons ) for the pager controls and
operations.
A. Read button
. Used to read the received messages
. Used to exit to current function mode
. Used to select functions
. Used to delete a message
B. Function button
. Used to select functions
. Used to set the lock and unlock the message
2. LCD & Icons
Audio alert mode enabled icon
Alarm activated icon
Low battery icon
Message locked icon
In service area icon
Message continuation icon
Page 3
3
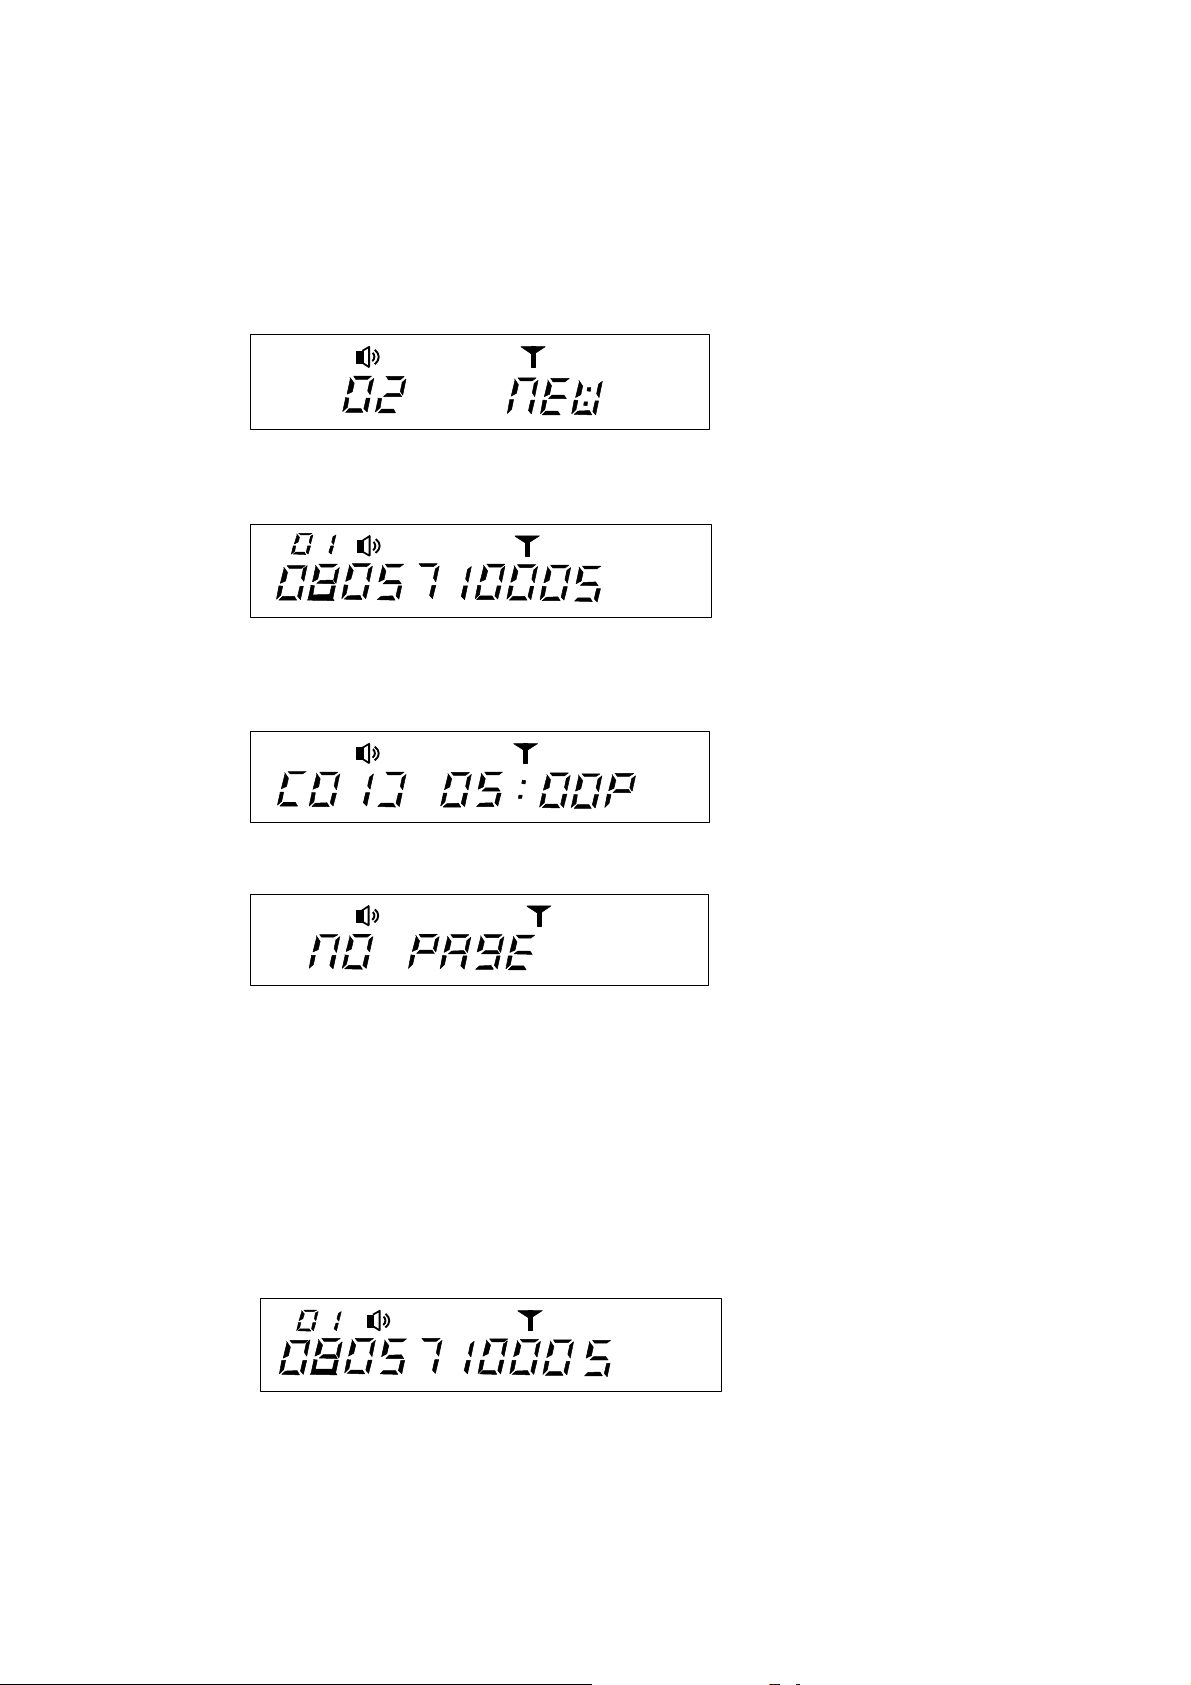
3. Message display and read message
When a message is received, the pager alerts with either audio or vibration (depending on alert mode set).
The word "1 NEW" is displayed. If there are 2 unread messages, the word "2 NEW"
Ê While the standby screen is displayed, press the read button to display the first received message.
Ë Pager automatically stores incoming messages, along with the time each message is received.
Press the read button to display next message.
Ì In case of no message, "NO PAGE" is displayed.
4. Lock/Unlock message
Up to 5 messages can be selectively locked in the memory so that they cannot be overwritten by
incoming messages or erased if CLEAR function is selected.
Ê Select the message you want to lock.
Page 4

4
Ë Press the function button to display "LOCK"
Ì Press the read button to lock the message,. "LOCKED" is displayed.
When you read a message and try to lock it, if the number of the locked message received is
more than 5, "LOCK FULL" is displayed on the LCD.
A locked message can be unlocked in the same way. when the locked message is confirmed,
"Lock icon" is displayed in the upper part of screen.
Ê Select the locked message to want to unlock.
Ë Press the function Button : "UNLOCK?" is displayed.
Ì Press the read button : "Lock icon" is disappeared.
5. Clear individual message
Press the function button while the message desired to be deleted is on screen. Then "CLEAR ?"
will be displayed.
Ê Select the message to erase through Read button
Page 5

5
Ë Press twice the function button . "CLEAR ?" will be displayed.
Vibration/
Power off
Set alarm
Set alert
Clear all
Set time
Escape
Ì Press the read button. "CLEARED" will be displayed. After that the message will be
deleted.
6. Power on
Insert battery into the battery compartment and close the battery door. The pager alerts with full
display lit. and it will go into standby mode which is a state of capable of receiving a message.
7. Select function menu.
To enter Function menu ;
Ê At standby screen , press the function button for over 2 seconds to scroll through the function
menu, which enables the user to access various features of the pager through a series of icons
and prompts.
Ë Every time press the function button, pager enter next mode. Then press the read button, you
can select the wanted function
Ì Pager is at standby, if you don't press any button for 8 seconds.
8. Set VIBRATION/AUDIO
Page 6

6
There are two alert modes ; vibration/audio
¶ While in standby mode, press Function button for more than 2 seconds.
Screen shows "AUDIO ?" or "VIBRATION ?" This screen shows unselected mode.
< State of audio mode >
< State of vibration mode >
· Press the read button to enter the displayed mode
< State of vibration mode >
< State of audio mode >
9. PAGER OFF
While in pager off, pager shows only date and time. It can't receive message at this mode. But
alarm feature is operating normally.
¶ While in pager standby, press the function button for 2 seconds. After that select
function mode until pager shows "POWER OFF?" .
· Press the read button. Pager is in Power Off.
10. ALARM on/off
Page 7

7
Select alarm on
¶While in standby mode , press the function button for more than 2 seconds. and choose "SET
ALARM ?"
· Press the read button, pager shows "ALARM ON"
¸ Press the function button , pager is in alarm setting mode.. The hour digits blink.
¹ To press the read button enables you to set time.
º To repeat above procedure enables you to set time, minute and AM/PM
» After setting your desired time, pager is in standby.
Select alarm off
¶ While in standby mode press the function button for more than 2 seconds then pager enters in
function mode. Press button until "SET ALARM?" appears
· Press the read button "ALARM ON" appears.
Page 8

8
¸ Press the read button one more time "ALARM OFF" appears.
¹ Press the function button pager is in standby as well as select alarm off mode.
11. SELECT SILENT/AUDIO/MELODY
You can choose the alert mode, audio or melody, according to your preference . Silent mode is
useful in sleeping or meeting.
¶ While in standby mode, press the function button for more than 2 seconds choose the
wanted function mode. Press until pager shows " SET ALERT ?"
· Press the read button pager shows present chosen mode.
¸ Press the read button until pager shows melody/ audio mode you want.
Page 9

9
¹ Press any button then stop melody/audio . After that press Function button, chosen melody is
decided.
12. CLEAR ALL
This function mode is capable if only all received messages are more than 2 ones.
¶ While in standby mode, press the function button for more than 2 seconds choose the
wanted Function mode. Press until pager shows " CLEAR ALL ?"
· Press the read button, all received messages are cleared. But unread or locked ones are not
cleared.
13. Set Time manually
You can set up present time, date, and year
¶ While in standby mode, press the function button for more than 2 seconds choose the
wanted function mode. Press until pager shows " SET TIME ?"
· Press Read button, the year digit blinks. Press the read button continually to increment. year's
digit.
¸ Press the function button, the date digit blinks.
Page 10

10
¹ Set up the date you desired
º Repeat the procedure for minute , hour and AM/PM field.
» Press Read button, "GPS ON" appears.
¼ Press Read button, select "GPS ON/OFF "
½ Press Function button, setting is over. Pager is in standby mode.
14. ADDITIONAL FUNCTION
Display of low battery
Display of full message
 Loading...