

Page 1
19Inch (Viewable size 18 )
High Resolution Color Monitor
(D19AL)
Printed on the recyclable paper
Printed in Korea
Part No. 942179060001 - 01
User s Manual
Page 2

User’s Manual 3
FCC Information
This equipment has been tested and found to comply with limits for a class B digital device,
pursuant to Part 15 of the FCC Rules. These limits are designed to provide reasonable
protection against harmful interference in a residential installation.
This equipment generates, uses, and can radiate radio frequency energy and, if not installed
and used in accordance with the instructions, may cause harmful inteference to radio
Communications. However, there is no guarantee that interference will not occur in a particular
installation.
If this equipment does cause unacceptable interference to radio and television reception, which
can be determined by turning the equipment off and on, the user is encouraged to try to correct
the interference by one or more of the following measures.
Reorient or relocate the receiving antenna.
Increase the separation between the equipment and receiver.
Connect the equipment into an outlet on a circuit different from that to which the
receiver is connected.
Consult the dealer or an experienced Radio/TV technician for help.
DECLARA TION OF CONFORMITY
PRODUCT NAME : 19" COLOR MONITOR
MODEL NUMBER : D19AL
FCC RULES : TESTED TO COMPLY WITH FCC PART 15, CLASS B
OPERATING ENVIRONMENT : FOR HOME OR OFFICE USE
FCC COMPLIANCE STATEMENT :
This device complies with part 15 of FCC Rules. Operation is subject to the following two
conditions : (1) This device may not cause harmful interference, and (2) this device must accept
any interference received, including interference that may cause undesired operation.
THE PARTY RESPONSIBLE FOR PRODUCT COMPLIANCE
HANSOL MULTITECH, INC.
7001, VILLAGE DRIVE, SUITE 255, BUENA PARK, CA. 90621, USA
TEL : (714)562-5151
User’s Manual2
Introduction
Package 4
Features 5
Safety Information 6
Power Management System 7
Installation
Connection to your computer 7
Pin assignment table D-Sub mini 15 pin connector 8
Controls
Function of controls 8
OSD Menu 9
Troubleshooting
Troubleshooting Guide 13
Specifications
Electrical specifications 14
Mechanical specifications 14
Environmental specifications 14
Appendix
Preset timings 15
English
Page 3

Introduction
User’s Manual4
Caution
Changes or modifications not expressly approved by the party responsible for compliance
could void the user’s authority to operate the equipment.
Warning
If this equipment has more than one interface connector, do not leave cables connected to
unused interfaces.
Canadian Notice
This Class B digital apparatus meets all requirements of the Cannadian Interference Causing
Equipment Regulations.
Avis Canadien
Cet appareil numérique de la classe B respecte toutes les exigences du Règlement sur le
matériel brouilleur du Canada.
Notice
The information contained in this document is subject to change without notice.
Package
First, we would like to thank you for your purchase of this monitor. This monitor is 19inch, high
resolution, color display monitor. This manual covers the use, and points of caution, when
operating this monitor.
Please take the time to read this manual so that you will obtain the best performance and most
use from your monitor. After reading the manual, store it in a safe place for future reference.
This items illustrated below are contained in the carton.
First, be sure that your carton includes the following items.
If any items are missing or damaged, please contact your local dealer or supplier.
D19AL
- Color Monitor
- AC Power input cable
- User’s Manual (Warranty Registration Card)
- Signal Cable (15pin 3layer D-sub)
Introduction
User’s Manual 5
ENGLISH
Features
19-inch(18 inch visual)high performance display color monitor
Automatically scans frequencies from
- Horizontal frequency: 30 to 110KHz
- Vertical frequency: 47 to 160Hz
Compatible with VGA, SVGA, VESA, MAC Standards and maximum resolution modes up to
1600 1200 and BNC cable is optional.
Supports VESA flicker free modes including 85Hz refresh rate.
On Screen menu fingertip control system to visually select and adjust screen images using
Encode S/W on front panel and on screen menus.
Power supply operates on AC100~240Volt 60/50Hz for use all over the world.
Equipped with DDC 1/2B for Plug & Play capability.
Equipped with an energy-saving feature.
Power management circuit signaled by the computer system, will reduce power consumption
when the computer system is not in use.
Monitors with nonglare/antistatic screens are compliant with MPR
1990 Emissions standards and meets requirements for CE Marking.
TCO : (option)
Page 4
Introduction
User’s Manual6
Safety information
Provided with this monitor is a detachable power supply cord with IEC320 style terminations.
It may be suitable for connection to any UL listed personal computer with similar
configuration. Before making the connection ensure that the voltage rating of the computer
convenience outlet is the same as the monitor and that the ampere rating of the computer
convenience outlet is equal to or exceeds the monitor current rating.
For 120Volt applications use only UL listed detachable power cord with NEMA configuration
5-15P type(parallel blades) plug cap.
For 240Volt applications use only UL listed detachable power cord with NEMA configuration
6-15P type(tandem blades) plug cap.
Use only a power source and connection appropriate for the monitor as indicated on the
marking label.
Slots and openings in the cabinet are provided for ventilation;
these openings must not be blocked or covered. Never push objects of any kind into cabinet
slots or other openings.
Never insert anything metallic into the monitor openings.
Doing so may create a danger of electric shock.
To avoid electric shock, never touch the inside of the monitor.
Only a qualified technician should open the monitor s case.
Unplug the monitor from the wall outlet before cleaning. Do not use liquid cleaners or aerosol
cleaners. Use a damp, lint-free cloth for cleaning.
Install the monitor near an outlet that you can reach easily. Disconnect the product by
grasping the plug firmly and pulling in from the outlet.
Never disconnect it by pulling the cord.
Introduction / Installation
User’s Manual 7
ENGLISH
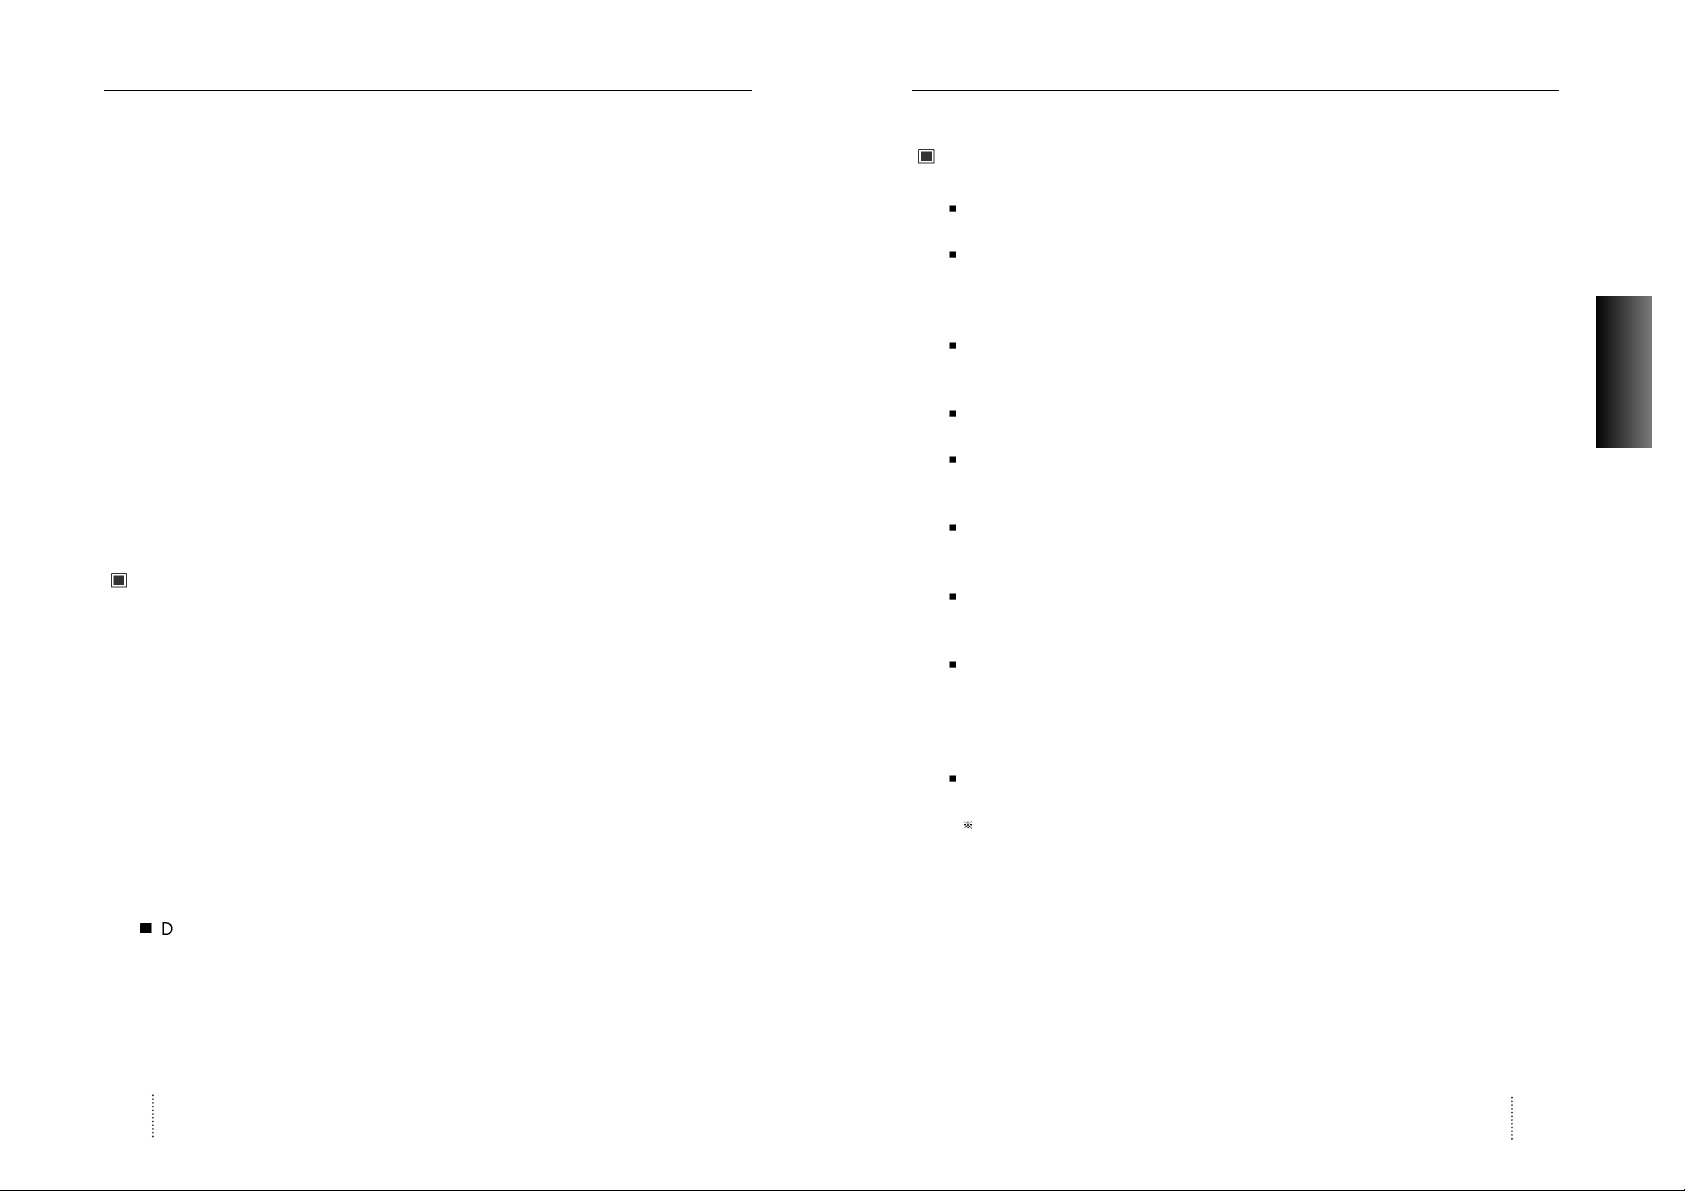
Power management system
This monitor meets VESA(Video Electronics Standards Association) DPMS(Display Power
Management Signalling)standards. In order for the monitor
s power saving feature to function,
the video board or computer must also meet VESA
®
DPMSTMstandards.
Power management table
Note : The monitor automatically goes through the DPMS steps when it is idle.
To release the monitor from the DPMS condition, press any key on the keyboard.
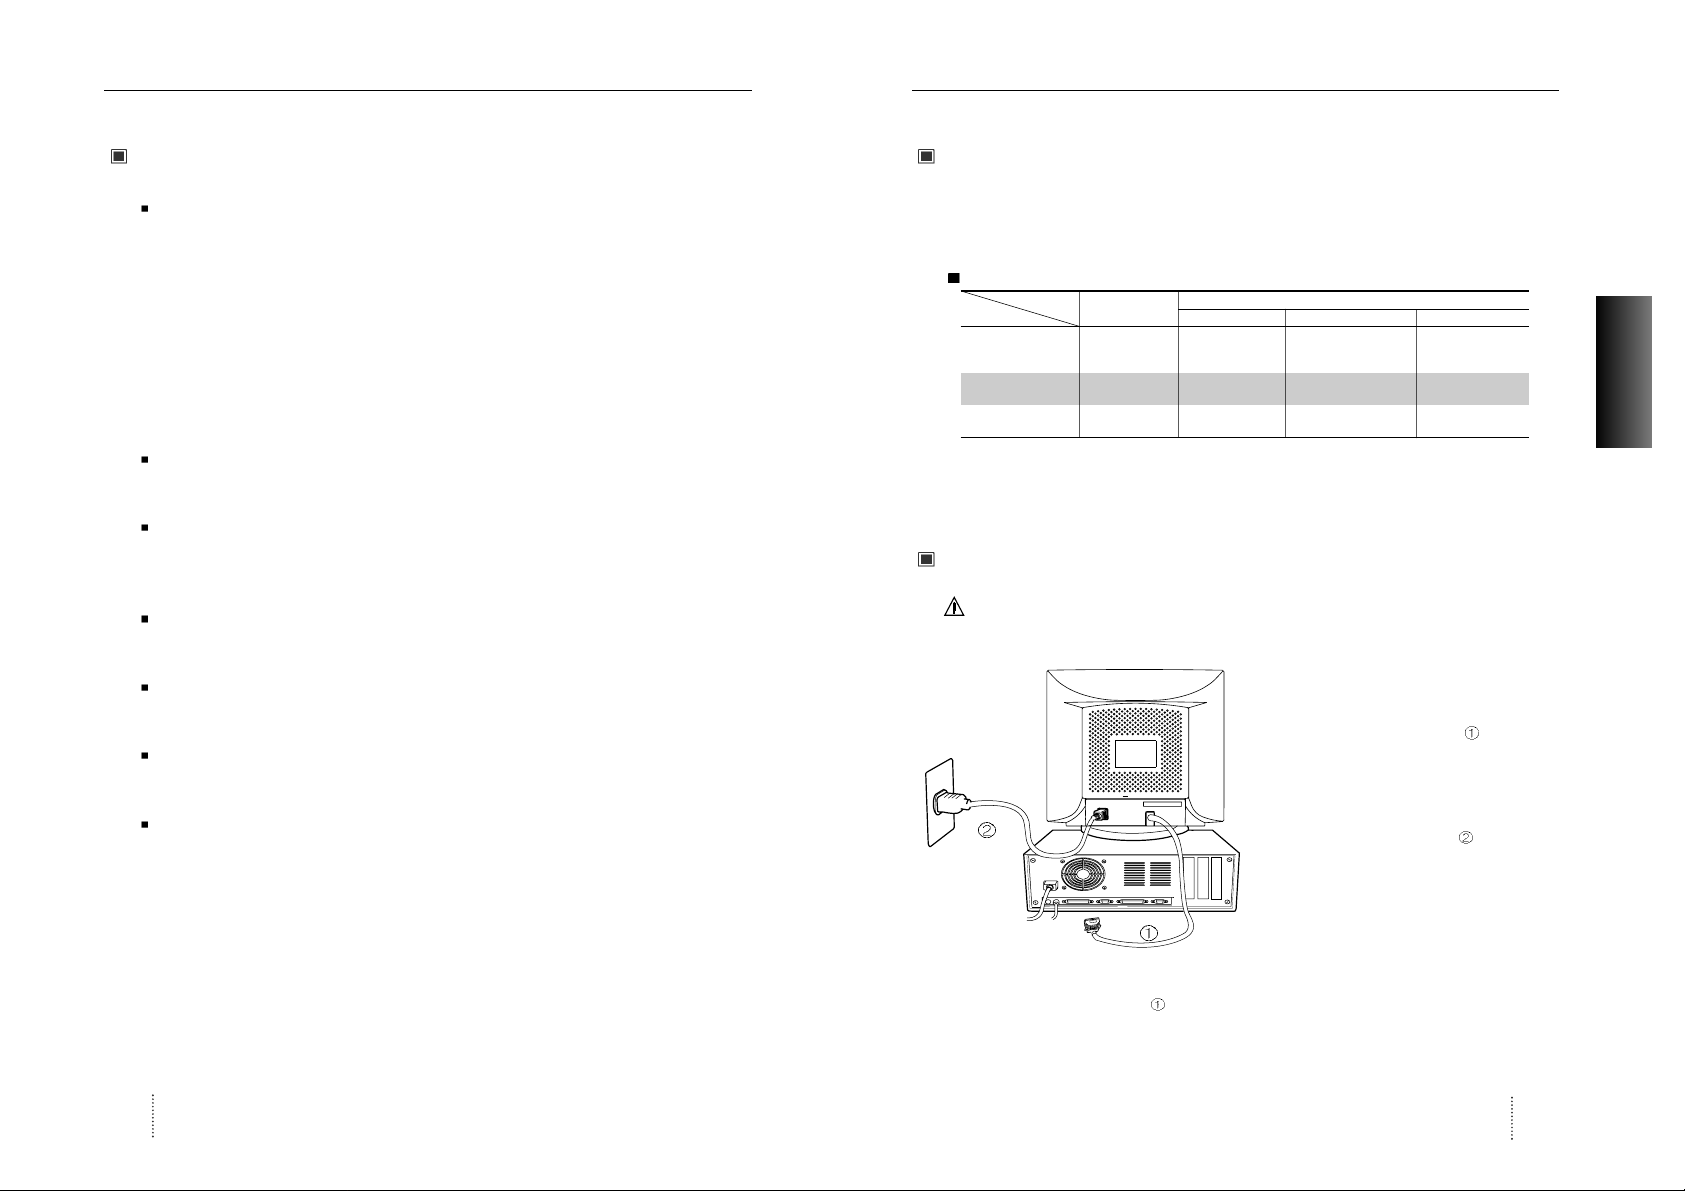
Connection to your computer
CAUTION
Ensure that both the PC and the display monitor are switched off.
To attach the monitor to your system, as shown in
the following illustrations.
1. Connect the signal cable to the 15pin
graphics connector of the system and tighten
the fastening screws.
2. Insert the AC power cord into monitor and
then into an AC power outlet.
3. To turn on the monitor, push the power switch.
Note : To attach the monitor to the Macintosh system, please contact the signal cable to the
2layer 15pin graphics connector of the system. (
The connecting direction of signal
cable is opposite to the IBM compatible system)
Normal
Operation
Standby Suspend Mode Power-Off Mode
Horizontal Active Inactive Active Inactive
Vertical Active Active Inactive Inactive
Video Active Blanked Blanked Blanked
LED Color Green Green/AMBER AMBER AMBER Blinking
Power
110W
Less than Less than Less than
Consumption 80% of MAX 15W 5W
Power saving function mode
State
Sync
Page 5

User’s Manual8
Installation / Controls
Pin assignment table D-Sub Mini 15pin connector
Function of controls
OSD Controls
The OSD apears on the screen when you press MENU ( ) button.
“ON SCREEN MENU” controls include the following extended controls such as Size, Position,
Geometry Distortion, Color temp, Degauss, Moire on & off, Language, OSD-Position, Recall,
Cont & Brt, etc.
Function of OSD buttons on the front of the monitor
Pin No. Assignment
1 Red Video
2 Green Video
3 Blue Video
4 Frame Ground (brown)
5 Ground (blue)
6 Red Video Ground
7 Green Video Ground
8 Blue Video Ground
9 N.C
10 ID (green)
11 N.C
12 SDA (orange)
13 H-Sync (black)
14 V-Sync (yellow)
15 SCL (red)
(15 Pin D-Sub)
15
11 15
6
10
User’s Manual 9
ENGLISH
Additional front controls
Power Switch : Turn the monitor power on or off, When the power is on, the LED is lit.
Accessing OSD
Press MENU( ) Button.
: Direct Brightness access.
: Direct Contrast access.
EXIT from OSD
: Press this ( ) button in the main menu and submenu.
OSD Menus
Main Menu
OSD main menu allows you to adjust user controls.
Use the / : Control buttons to scroll through all of the menus.
Main Menu control guide
: Exits the OSD controls.
/ : Move the function to choose.
: Proceed to the selected menu.
Controls
Position Size Geometry Moire Language
OSD position Color-Temp Degauss Recall Zoom
The 15-Pin D-sub connector (male)
of the signal cable (IBM Systems)
Page 6

User’s Manual10
Controls
Contrast Menu
: Exits the Contrast menu.
/ : Increase or decrease the Contrast.
Brightness Menu
: Exits the Brightness menu.
/ : Increase or decrease the Brightness .
Position Menu
After choosing , Push MENU( ) button.
MEUN( ) : Push this button again & again to change the H/V-position.
: Moves the image vertically up or down.
: Moves the image horizontally left or right.
Size Menu
After choosing , Push MENU( ) button.
MENU ( ) : Push this botton again & agiain to change the H/V-size.
: Increases or Decreases the vertical size of the image.
: Decreases or Increases the horizontal size of the image.
User’s Manual 11
ENGLISH
Controls
Position and size Menu control guide
: Exit to the main menu.
: Refer to
MENU( ) : Toggle position and menu directly.
Geometry Menu
The Geometry controls allow you to adjust the
curvature or angle of displayed image.
Atfer choosing , push MENU( ) button.
Pincushion : Increase or decrease the curvature of the sides either inward or outward.
Parallelogram : Increase or decrease the tilt of the sides either to the left or right.
Trapezoid : Increase or decreases the bottom of the screen to be the same as the top.
Pin Balance : Increase or decrease the curvature of the sides.
Top Corner : Increase or decreases the curvature of the top sides.
Bottom Corner : Increase or decrease the curvature of the bottom sides.
Rotation : Rotate the entire display to clockwise or counterclockwise.
Geometry Menu control guide
: Exit to the main menu.
: Move the function to choose.
MENU( ) : Function to choose.
: Move the bow in the or direction to increase or decrease the adjustment.
Moire Menu
After choosing , Push MENU( ) button.
Select ON or OFF with / key.
Select H.MOIRE or V.MOIRE with / key.
: Adjust the Moire.
BRIGHTNESS
PP
50%
31.5KHz 60Hz
50%
GEOMETRY
PINCUSHION
PARALLELOGRAM
TRAPEZOID
PINBALANCE
TOP CORNER
BOTTOM CORNER
ROTATION
Page 7
User’s Manual 13
ENGLISH
User’s Manual12
Troubleshooting
Troubleshooting guide
If your monitor is not performing properly, please use the following troubleshooting chart for
quick solutions to common problems.
Controls
Problem
No Picture
Picture is
unstable
The display
image is not
centered, too
small or large.
The color of
image on screen
is abnormal.
Is the power cord connected?
Is the power switch on?
Is the signal cable properly
connected?
Is the monitor in the power save
mode?
Is the signal cable properly
connected?
Are there signals, which are
outside of the required frequency
range?
Is the signal connector pin
assigments correct?
Are there signals, which are
outside of the required frequency
range?
Is the magnetic object nearby?
Is the pin arrangement of the
signal connector correct?
Possible cause
Connect power cord.
Turn on power switch.
Connect signal cable properly
Press any key on the keyboard or
move the mouse.
Connect signal cable properly
Input signals which are within the
range of the monitor.
Use correct signal connector.
Use correct signal which within the
frequency range of the monitor(If
the signal is correct, adjust the
controls to desired image.)
Move object far away.
Use correct signal cable.
Use degauss control.
Remedy
Language Menu
After choosing , Push MENU( )button.
: Select the language.
OSD Position Menu
After choosing , Push MENU( )button.
MENU ( ): Push this button again & again to
change the H/V-position.
: Move the OSD menu Vertical bottom or
Horizontal left.
: Move the OSD menu Vertical top or
Horizontal right.
Color Temp Menu
Presetting Select the desired color setting. The bar is replaced by the color setting choice.
" USER, 6500K, 9300K "
Color adjustment is available only in USER mode.
/ : Move the bar with or key to select the user
MENU( ) : Press MENU button for 5 seconds.
/ : Increcse or decrease the selected coldr adjustment.
: Exit to the main menu.
LANGUAGE
PRESS DO KEY
POSITION
PRESS KEY
Page 8
Appendix
User’s Manual 15
User’s Manual14
Specifications
Preset Timings
This Monitor D19AL has preset modes for the 14 most popular industry standards for
Plug and
Play capability.
Video
Sync
Vertical
Video
Sync
Horizontal
Electrical Specifications
Mechanical Specifications
Environmental Specifications
ITEM 920eF
CRT Type 19 , 90 deflection
CRT Dot pitch 0.25mm (0.20 in Hor.)
CRT Surface Non-glare, ARASC
H/V Separate, TTL, positive/negative
H/V Composite, TTL, positive/negative
RGB Analog (0.7Vp-p), positive
75 Terminated
30KHz~110KHz (Automatically)
47Hz~160Hz (Automatically)
Maximum Resolution 1792Dots 1344Lines (Non-interlace)
Pixel Clock(Max.) 270 MHz
Display Size (Standard) Horizontal 350mm, Vertical 262mm
Power Consumption 110 W
Power Supply AC 100~240Volt 60/50Hz
3Hz
Input Connector D-Sub, 15Pin Connectors (3layer)
Display Colors Unlimited
ITEM 920eF
18.5
(W) 18.4 (D) 18.3 (H)
470mm(W)
466.5mm(D) 466mm(H)
21.1 (W) 24.4 (D) 22.2 (H)
537mm(W)
620mm(D) 564mm(H)
23.3Kg (51.3Ibs)
26.7Kg (58.7Ibs)
ITEM 920eF
32
F to 104 F(0C to 40 C)
-4 F to 140 F (-20 C to 60 C)
10% to 85% R.H. Non-condensing
Input
Signal
Dimension
Sync
Video
Carton
Unit
Horizontal
Net
Vertical
Gross
Operating
Storage
Humidity
Scanning
frequency
Weight
Temperature
ENGLISH
VGA/70Hz VGA/60Hz 640/85Hz 800/75Hz 800/85Hz 1024/75Hz 1024/85Hz
720
400 640 480 640 480 800 600 800 600 1024 768 1024 768
A
sec 31.777 31.777 23.111 21.333 18.631 16.660 14.561
B
sec 3.813 3.813 1.556 1.616 1.138 1.219 1.016
C
sec 1.907 1.907 2.222 3.232 2.702 2.235 2.201
D
sec 25.422 25.422 17.778 16.162 14.222 13.003 10.836
E
sec 0.636 0.636 1.556 0.323 0.569 0.203 0.508
Omsec 14.268 16.684 11.764 13.333 11.756 13.328 11.765
Pmsec 0.064 0.064 0.069 0.064 0.056 0.050 0.044
Qmsec 1.08 1.048 0.578 0.448 0.503 0.466 0.524
Rmsec 12.711 15.253 11.093 12.8 11.179 12.795 11.183
Smsec 0.413 0.318 0.023 0.021 0.019 0.017 0.015
H-Polarity Negative Negative Negative Positive Positive Positive Positive
V-Polarity Positive Negative Negative Positive Positive Positive Positive
Resolution
Timing
H-Freq 31.469 31.469 43.269 46.875 53.674 60.023 68.677
V-Freq 70.09 59.94 85.008 75 85.061 75.029 84.997
Pixel rate 28.322 25.175 36 49.5 56.25 78.750 94.5
IBM
VESA
1280/75Hz 1280/85Hz 1600/75Hz 1600/85Hz 640/67Hz 832/75Hz 1152/75Hz
1280
1024 1280 1024 1600 1200 1600 1200 640 480 832 624 1152 870
A
sec 12.504 10.971 10.667 9.412 28.571 20.11 14.560
B
sec 1.067 1.016 0.948 0.279 2.116 1.117 1.280
C
sec 1.837 1.422 1.501 1.325 3.175 3.91 1.440
D
sec 9.481 8.127 7.901 6.972 21.164 14.524 11.520
E
sec 0.119 0.406 0.316 0.279 2.116 0.559 0.320
Omsec 13.329 11.761 13.333 11.765 15 13.414 13.322
Pmsec 0.038 0.033 0.032 0.028 0.086 0.06 0.044
Qmsec 0.475 0.579 0.491 0.433 1.114 0.784 0.568
Rmsec 12.804 11.235 12.800 11.294 13.714 12.549 12.667
Smsec 0.013 0.011 0.011 0.009 0.086 0.02 0.044
H-Polarity Positive Positive Positive Positive Negative Negative Negative
V-Polarity Positive Positive Positive Positive Negative Negative Negative
VESA
MACINTOSH
H-Freq 79.976 91.146 93.75 106.250 35 49.726 68.681
V-Freq 75.025 85.024 75.000 85.000 66.667 74.551 75.062
Pixel rate 135 157.5 202.5 229.500 30.24 57.284 100
Resolution
Timing
Page 9

Memo
User’s Manual16
Bedienungsanleitung 17
Einleitung
Lieferumfang 18
Merkmale
19
Sicherheitshinweise
20
Powermanagement-System 21
Installation
Anschluß an den Computer 21
Belegung des 15-Pin-Mini-D-Sub-Steckers 22
Regler
Steuerungen 22
OSD Menü 23
Problemlösungen
Tips zur Lösung von Problemen 27
T echnische Daten
Elektrische Daten 28
Mechanische Daten 28
Betriebsbedingungen 28
Anhang
Timing-Tabelle 29
Deutsch
Page 10
Einleitung
Bedienungsanleitung 19
Einleitung
Bedienungsanleitung18
Merkmale
Hochleistungsmonitor der 19-Zoll-Klasse mit einer sichtbaren Diagonalen von 45.6cm
Automatisch erkannte Frequenzen:
- Horizontalfrequenz: 30 bis 110 kHz
- Vertikalfrequenz: 47 bis 160 Hz
Der Monitor ist kompatibel zu den Standards VGA, SVGA, VESA und Macintosh; er bietet
verschiedene Auflösungsmodi bis hinauf zu einem Maximum von 1600 x 1200.
Es werden die flimmerfreien VESA-Modi - auch mit 85 Hz Bildwiederholrate - unterstützt.
Leicht einstellbares On Screen-Menü-Kontrollsystem für visuelle Auswahl und Einstellung des
Monitorbiles.
Mit Onscreen-Menüs und drei leicht erreichbaren Reglern an der Monitorfront lassen sich alle
Darstellungsparameter mit wenigen Tastendrücken leicht einstellen.
Das Netzteil arbeitet mit 100 bis 240 Volt Wechselspannung bei 60/50 Hz und ist daher
weltweit einsetzbar.
Der Monitor ist mit Plug & Play-Funktionalität nach DDC 1/2B ausgestattet.
Der Monitor verfügt über einen Stromsparmodus.
Ein Powermanagement-Schaltkreis minimiert automatisch den Stramverbrauc entsprechend
den VESA-Standards.
Die Modelle mit antistatischer Entspiegelungsbeschichtung erfüllen die Emissionsschutznorm
MPR (1990) sowie die CE-Bestimmungen.
TCO : (optional)
Achtung
Mit dem optionalen Dreh-Kippfuß kann der Monitor aus verschiedenen Blickwinkeln
betrachtet werden.
Warnung
Wenn die Ausrüstung mehr als einen Schnittstellenanschluß besitzt, dürfen keine Kabel
and unbenutzte Schnittstellen angeschlossen sein.
Canadian Notice
This Class B digital apparatus meets all requirements of the Canadian Interference
Causing Equipment Regulations.
Avis Canadien
Cet appareil numÈrique de la classe B respecte toutes les exigences du Rëglement sur le
matÈrial brouilleur du Canada.
Hinweis
Alle Daten in dieser Anleitung können sich ohne besondere Ankündigung ändern.
Lieferumfang
Zunächst möchten wir uns dafür bedanken, daß Sie sich für diesen Monitor entschieden haben,
einen hochauflösenden Farbmonitor der 19-Zoll-Klasse. Diese Anleitung erläutert seine
Bedienung und enthält Sicherheitshinweise, die bei der Verwendung des Monitors zu beachten
sind.
Bitte nehmen Sie sich die Zeit, diese Anleitung sorgfältig zu lesen. So können Sie den größten
Nutzen aus Ihrem neuen Monitor ziehen. Verwahren Sie diese Anleitung nach dem Lesen gut,
um auch später darin nachschlagen zu können.
In der Verpackung sind folgende Artikelposttionen enthalten (Abbildungen siehe unten).
Vergewissern Sie sich zunächst, daß der Ihnen gelieferte Karton sämtliche Artikelposttionen
enthält. Falls Artikel fehlen oder beschädigt sind, wenden sie sich bitte an ihren ’drtlichen
Händler oder Lieferanten.
19AL
- Farbmonitor
- Netzkabel
- Bedienungsanleitung (Garantiekarte)
- Signal Kabel (15 Pin 3 Schicht D-Sub)
DEUTSCH
Page 11
Einleitung
Bedienungsanleitung 21
DEUTSCH
Powermanagement-System
Dieser Monitor erfüllt die DPMS- (Display Power Management Signaling) Standards der VESA
(Video Electronics Standards Association). Zur Aktivierung der Stromsparfunktion des Monitors
muß die Videokarte bzw. der Computer ebenfalls den VESA®DPMSTMStandard erfüllen.
Powermanagement-Tabelle
Hinweis : Der Monitor durchläuft die DPMS-Modi automatisch, sobald er eine bestimmte Zeit
lang nicht benutzt wird. Um den Monitor wieder zu aktivieren, müssen Sie eine
beliebige Taste auf der Computertastatur betätigen.
Anschluß an den Computer
VORSICHT
Vergewissern Sie sich, daß sowohl der Computer als auch der Monitor ausgeschaltet sind.
Befolgen Sie beim Anschließen des Monitors
an Ihren Computer die folgenden Hinweise.
1. Stecken Sie das Videokabel in den 15poligen Videoausgang des Computers
und ziehen Sie die Befestigungsschrauben
an.
2. Stecken Sie das Netzkabel in die
Buchse am Monitor und dann in eine
Netzsteckdose.
3. Schalten Sie den Monitor mit dem
Netzschalter ein.
Hinweis : Wenn Sie den Monitor an ein Macintosh-System anschließen wollen, verbinden Sie
bitte das Signalkabel mit dem 15pin-Graphik-Stecker des Computers
(Der Anschluß des Signalkabels ist spiegelbildlich zu IBM-kompatiblen Personal
Computer durchzuführen.)
Einleitung
Bedienungsanleitung20
Sicherheitshinweise
Mit diesem Monitor wird ein separates Netzkabel mit IEC320-Stecker geliefert. Es kann
zusammen mit jedem UL-geprüften Computer verwendet werden, der entsprechend
ausgerüstet ist. Vergewissern Sie sich vor dem Anschluß, daß an der
Netzstromausgangsbuchse des Computers eine für den Monitor geeignete Spannung
anliegt und daß der angegebene Amperewert der Leistungsaufnahme des Monitors
entspricht bzw. sie übersteigt.
Für den Anschluß an 120V-Stromquellen dürfen nur UL-geprüfte steckbare Netzkabel mit
einem 5-15P-NEMA-Stecker (mit Parallelkontakten) verwendet werden. Für den Anschluß an
240V-Stromquellen dürfen nur UL-geprüfte steckbare Netzkabel mit einem 6-15P-NEMAStecker (Doppelkontakte) verwendet werden.
Verwenden Sie nur für den Monitor geeignete Stromquellen und Kabel wie auf dem
Typenschild angegeben.
Die Schlitze und Gehäuseöffnungen gewährleisten die Luftzirkulation im Monitor. Sie dürfen
nicht verschlossen oder verdeckt werden. Stecken Sie auf keinen Fall Fremdkörper durch
die Schlitze im Gehäuse oder in andere Öffnungen.
Stecken Sie keine metallenen Gegenstände in die Monitoröffnungen. Dabei können Sie einen
elektrischen Schlag erleiden.
Zur Vermeidung von elektrischen Schlägen sollten Sie keine Bauteile im Inneren des
Monitors berühren. Nur qualifizierte Techniker dürfen den Monitor öffnen.
Ziehen Sie vor der Reinigung des Monitors den Netzstecker. Verwenden Sie zur Reinigung
keine Flüssigreiniger oder Sprays, sondern ein feuchtes, fusselfreies Tuch.
Stellen Sie den Monitor in der Nähe einer gut zugänglichen Netzsteckdose auf. Trennen Sie
den Monitor vom Netz, indem Sie das Kabel am Stecker fassen und aus der Steckdose
ziehen; ziehen Sie niemals am Kabel selbst.
Normaler
Betrieb Standby
Abgeschaltet(Suspend)
Aus
Horizontal Aktiv Inaktiv Aktiv Inaktiv
Vertikal Aktiv Aktiv Inaktiv Inaktiv
Bild Aktiv Keines Keines Keines
LED-Farbe Grün
Grün
Bernsteinfarbe
Bernsteinfarbe
Bernsteinfarbe Blinkend
Leistung-
110W
Weniger als Weniger als Weniger als
saufnahme 80% of Max 15W 5W
Stromsparmodus
Status
Sync
Page 12

Bedienungsanleitung 23
DEUTSCH
Regler
Bedienungsanleitung22
Belegung des 15-Pin-Mini-D-Sub-Steckers
Steuerungen
OSD-Steuerungen
"ON SCREEN MENU"-Steuerungen schließen die folgenden erweiterten Funktionen ein: Größe,
Position, Geometrie, Farbjustierung, Degauss, Moire ein & aus, Sprache, OSD-Position, Reset,
Helligkeit und Kontrasteigenschaften.
Funktion der OSD-Drucktasten an der Vorderseite des Monitors
Regler
Zus tzliche Vorderseiten-Steuerungen
Stromschalter : Schaltet den Monitor ein oder aus. Wenn der Stromm eingeschaltet ist,
leuchtet eine LED
Zugriff auf das Bildschirm-Menüs
Drücken Sie “Menü( )” Taste
: Greift die Helligkeit zu.
: Greift die Kontrast zu.
Abschalten des Bildschirm-Menüs
Wenn Sie sich in einer der Untermenüs befinden, drücken Sie die Taste zweimal.
OSD Menüs
Das On-Screen-Hauptmenü
OSD-Menue dient zum justieren der Bedienungsfunktionen
Benutzen Sie
: Rollt durch alle Menüs
Hauptmenü-Steuerungsführung
: Verläßt die OSD-Steuerungen.
: Springt zur ausgewählten Funktionsauswahl.
Menü( ): Springt zur ausgewählten Menüauswahl.
(15 Pin D-Sub)
15
11 15
6
10
Pin Nr. Belegung
1 Rot Video
2 Grün Video
3 Blau Video
4 Rahmen-Erde
5 Erde
6 Rot Video Erde
7 Grün Video Erde
8 Blau Video Erde
9 N/C
10 Erde
11 Erde
12 SDA
13 H.Sync
14 V. Sync
15 SCL
Der 15polige D-Sub-Stecker
des Signalkabels (IBM-Systeme) :
TASTE MEN BET TIGEN
LAGE
Page 13

Lage und Größen-Menü Steuerungsführung
: Springt zum Hauptmen .
: Bezieht sich auf .
Menü( ) : Springt zwischen Positions- und Größen-Menü hin und her.
Geometrie-Steuerungsmenü
Die Geometriesteuerungen gestatten Ihnen, eine
Justierung der Rundungen oder Winkel an den Ecken
Ihres Bildschirmes vorzunehmen.
Nach Auswahl , Druecken der Menüetaste ( )
Kissenverz : Erhöht oder verringert die Rundung der Seiten entweder nach innen oder nach außen.
Parallelogram : Erhöht oder verringert die Neigung der Seiten entweder nach links oder rechts.
Trapez : Erhöht oder verringert den unteren Bildschirm, damit er genauso groß ist wie der
obere Bildschirm.
Kissenausgl. : Dieser Regler verändert die Geometrie des Bildschirms nach links oder nach rechts.
Topp Ecken : Erhöht oder verringert den oberen Bildschirm.
Ebene Ecken : Erhöht oder verringert den unteren Bildschirm.
Drehung : Dreht den gesamten Bildschirm im Uhrzeigersinn oder gegen den Uhrzeigersinn.
Geometriemenü-Steuerungsf hrung
: Springt zum Hauptmenü.
: Bewegt zu der ausgewählten Funktionsauswahl.
Menü( ) Bewegt zu der ausgewählten Funktionsauswahl.
: Bewegt den Balken in der oder Richtung, um die Justierung zu erhöhen oder zu
verringern.
Moire Menü
Nach Auswahl , Druecken der Menüetaste ( ).
Auswahl von ON oder OFF mit / Funktionstaste.
Auswahl von H-Moire oder V-Moire mit /
Funktionstaste.
Bewegt den Balken, um Moire einzustellen.
Bedienungsanleitung 25
DEUTSCH
Bedienungsanleitung24
Regler
Regler
Kontrast Menü
: Aufruf des Kontrast-Menües.
/ : erhoehen/erniedrigen des Kontrastes.
Helligkeits Menü
: Aufruf des Helligkeit.-Menües.
/ : erhoehen/erniedrigen des Helligkeit.
Position Menü
Nach Auswahl , Druecken der Menüetaste ( )
Menü( ) : Druecken Sie die Taste zum justieren der H/V-Position.
: Bewegt das Bild nach unten und nach links.
: Bewegt das Bild nach oben und nach unten.
Größen-Menü
Nach Auswahl , Druecken der Menüetaste ( )
Menü( ) : Druecken Sie die Taste zum justieren der H/V-size.
: Vergrößert oder verkleinert die vertikale Größe des Bildes.
: Vergrößert oder verkleinert die horizontale Größe des Bildes.
CONTRAST
99%
HELLIGKEIT
50%
H. LAGE
32%
V. LAGE
74%
H. GR §EN
43%
V. GR §EN
42%
50%
GEOMETRIE
KISSENVERZ
PARALLELOGRAM
TRAPEZ
KISSENAUSGL.
TOPP ECKEN
EBENE ECKEN
DREHUNG
50%
MOIRE STEUERUNG
H. MOIRE STEUERUNG
V. MOIRE STEUERUNG
Page 14

Tips zur Lösung von Problemen
Bedienungsanleitung 27
DEUTSCH
Bedienungsanleitung26
Tips zur Lösung von Problemen
Wenn Ihr Monitor nicht korrekt arbeitet, konsultieren Sie bitte die folgende Tabelle, in der
einfachen Lösungen zur häufig auftretenden Problemen aufgeführt sind.
Problemlösungen
Problem
Kein Bild
Bild ist instabil
Bild ist nicht
zentriert oder zu
klein bzw. zu
groß
Falsche Farben
Ist das Netzkabel eingesteckt?
Ist der Netzschalter eingeschaltet?
Ist das Videokabel korrekt
eingesteckt?
Befindet sich der Monitor im
Stromsparmodus?
Ist das Videokabel korrekt
eingesteckt?
Liegen Signale außerhalb des
zulässigen Frequenzbereiches an?
Ist die Pinbelegung der Buchse
korrekt?
Liegen Signale außerhalb des
zulässigen Frequenzbereiches an?
Befinden sich Gegenstände mit
einem starken Magnetfeld in der
Nähe des Monitors?
Ist die Pinbelegung der Buchse
korrekt?
Mögliche Ursache
Stecken Sie das Netzkabel ein.
Schalten Sie den Netzschalter ein.
Stecken Sie das Videokabel korrekt ein.
Drücken Sie eine beliebige Taste auf der
Tastatur, oder bewegen Sie die Maus.
Stecken Sie das Videokabel
korrekt ein.
Sorgen Sie für ein Signal, das für
den Monitor geeignet ist.
Verwenden Sie eine geeignete
Buchse.
Sorgen Sie für ein Signal, das für den
Monitor geeignet ist. (Falls das
anliegende Signal korrekt ist, stellen
Sie das Bild mit den entsprechenden
Reglern wie gewünscht ein.)
Entfernen Sie den Gegenstand.
Verwenden Sie ein geeignetes
Videokabel.
Entmagnetisieren Sie den Monitor
manuell mit der
Entmagnetisierungstaste.
Lösung
Sprache Menü
Nach Auswahl , Druecken der Menüetaste ( ).
: Bewegt den Balken in der oder Richtung, um die
Sprachauswahl zu treffen.
OSD-Positions Menüe
Nach Auswahl , Druecken der Menüetaste ( ).
Menü ( ): Druecken Sie die Taste zum justieren der
H/V-OSD-Position.
: Bewegt das OSD-Menue nach unten und nach links.
: Bewegt das OSD-Menue nach oben und nach unten.
Farbjustierungsmenü-Steuerungsf hrung
: Bewegt den Balken in der oder Richtung, um die gew nschte Farbauswahl zu treffen
(USER, 6500K, 9300K).
Menü( ) : Springt zum ausgewählten Untermenü
(Drücken sie den Menü( ) knopf für 5 sekunden).
: Erhöht oder verringert die Justierung der ausgewählten Farbeinstellung.
:Springt zum Hauptmenü.
Voreinstellung : Wählt die gew nschte Farbeinstellung aus. Der Balken wird ersetzt durch die
Farbeinstellungswahl “USER, 6500K oder 9300K”. Jede Farbeinstellung ist im
Anwendungsmodus justiert, um Grad Kelvin auszuwählen.
SPRACHE
TASTE DO BET TIGEN
POSICIóN
POLSAR TECAL
50%
RB GB BB RG GG BG
USER
FARBE
USER 6500K 9300K
Page 15

Bedienungsanleitung28
Elektrische Daten
Mechanische Daten
Betriebsbedingungen
T echnische Daten
Merkmal 920eF
CRT-TYP 19 , 90 Ablenkung, FST
CRT Lochabstand 0.25mm (0.20 horizontal)
CRT-Beschichtigung Entspiegelt, ARASC
H/V separat, TTL, positiv/negativ
H/V composite, TTL, positiv/negativ
RGB analog (0.7 Vp-p), positiv
mit 75 terminiert
30 kHz~110 kHz (Automatisch)
47 Hz~160 Hz (Automatisch)
Maximale Auflösung 1792Pixel
1344Linien (Non-interlaced)
Pixelfrequenz (max.) 270 MHz
Die Größe von Bildschirm (Standard)
Horizontal 350mm, Vertikal 262mm
Leistungsaufnahme 110 Watt
Stromversorgung AC 100-240V 60/50Hz ±3Hz
Eingangsstecker D-Sub-15-Pin-Stecker (3 Schicht, 2 Schicht)
Farbspektrum Unbegrenzt
Eingangssignal
Synchronisation
Video
Horizontal
Vertikal
Scanfrequenzen
Merkmal 920eF
23.3Kg (51.3Ibs)
26.7Kg (58.7Ibs)
Abmessungen
Verpackung
Gerät
18.5
(L) x 18.4 (P) x 18.3 (H)
470 mm (B) x 466.5 mm (T) x 466 mm (H)
21.1
(L) x 24.4 (P) x 22.2 (H)
537 mm (B) x 620 mm (T) x 564 mm (H)
Netto
Brutto
Gewicht
Merkmal 920eF
32 F bis 104 F (0 C bis 40 C)
-4 F bis 140 F (-20 C bis 60 C)
10 % bis 85 % relative Luftfeuchtigkeit, nicht kondensierend
Betrieb
Lagerung
Luftfeuchtigkeit
Temperatur
Bedienungsanleitung 29
DEUTSCH
Anhang
Voreingestellte Timings
Dieser Monitor D19AL verfügt über voreingestellte Modi für die 14 am häufigsten verwendeten
Standardauflösungen. So ist die “Plug and Play” - Kompatibilität gewährleistet.
Video
Synchronisation
Vertikal
Video
Synchronisation
Horizontal
VGA/70Hz VGA/60Hz 640/85Hz 800/75Hz 800/85Hz 1024/75Hz 1024/85Hz
720
400 640 480 640 480 800 600 800 600 1024 768 1024 768
A
sec 31.777 31.777 23.111 21.333 18.631 16.660 14.561
B
sec 3.813 3.813 1.556 1.616 1.138 1.219 1.016
C
sec 1.907 1.907 2.222 3.232 2.702 2.235 2.201
D
sec 25.422 25.422 17.778 16.162 14.222 13.003 10.836
E
sec 0.636 0.636 1.556 0.323 0.569 0.203 0.508
Omsec 14.268 16.684 11.764 13.333 11.756 13.328 11.765
Pmsec 0.064 0.064 0.069 0.064 0.056 0.050 0.044
Qmsec 1.08 1.048 0.578 0.448 0.503 0.466 0.524
Rmsec 12.711 15.253 11.093 12.8 11.179 12.795 11.183
Smsec 0.413 0.318 0.023 0.021 0.019 0.017 0.015
H-Polarity Negative Negative Negative Positive Positive Positive Positive
V-Polarity Positive Negative Negative Positive Positive Positive Positive
H-Freq 31.469 31.469 43.269 46.875 53.674 60.023 68.677
V-Freq 70.09 59.94 85.008 75 85.061 75.029 84.997
Pixel rate 28.322 25.175 36 49.5 56.25 78.750 94.5
IBM
VESA
1280/75Hz 1280/85Hz 1600/75Hz 1600/85Hz 640/67Hz 832/75Hz 1152/75Hz
1280
1024 1280 1024 1600 1200 1600 1200 640 480 832 624 1152 870
A
sec 12.504 10.971 10.667 9.412 28.571 20.11 14.560
B
sec 1.067 1.016 0.948 0.279 2.116 1.117 1.280
C
sec 1.837 1.422 1.501 1.325 3.175 3.91 1.440
D
sec 9.481 8.127 7.901 6.972 21.164 14.524 11.520
E
sec 0.119 0.406 0.316 0.279 2.116 0.559 0.320
Omsec 13.329 11.761 13.333 11.765 15 13.414 13.322
Pmsec 0.038 0.033 0.032 0.028 0.086 0.06 0.044
Qmsec 0.475 0.579 0.491 0.433 1.114 0.784 0.568
Rmsec 12.804 11.235 12.800 11.294 13.714 12.549 12.667
Smsec 0.013 0.011 0.011 0.009 0.086 0.02 0.044
H-Polarity Positive Positive Positive Positive Negative Negative Negative
V-Polarity Positive Positive Positive Positive Negative Negative Negative
VESA
MACINTOSH
H-Freq 79.976 91.146 93.75 106.250 35 49.726 68.681
V-Freq 75.025 85.024 75.000 85.000 66.667 74.551 75.062
Pixel rate 135 157.5 202.5 229.500 30.24 57.284 100
Auflösung
Timing
Auflösung
Timing
Page 16

Memo
Bedienungsanleitung30
Manuel de l’utilisateur 31
Introduction
Conditionnement 32
Caractéristiques
33
Informations de sécurité
34
Système d’économie d’énergie 35
Installation
Raccordement à l’ordinateur 35
Tableau d’affectation du connecteur mini sub-D 15 broches
36
Commandes
Fonctions des commandes 36
Menus d’OSD 37
Dépannage
Guide de dépannage 41
Spécifications
Spécifications électriques 42
Spécifications mécaniques 42
Spécifications de l’environnement 42
Annexe
Tableaux des modes graphiques 43
Français
Page 17

Introduction
Manuel de l’utilisateur 33
Introduction
Manuel de l’utilisateur32
Caractéristiques
Moniteur haute performance 19 pouces (affichage 18 pouces)
Balaie automatiquement les fréquences suivantes :
- Fréquence horizontale : 30 à 110 kHz
- Fréquence verticale : 47 à 160 kHz
Compatible avec les normes VGA, SVGA, VESA, MAC et les modes de résolution maximale
allant jusqu’à 1600 x 1200.
Supporte les modes VESA sans scintillement, y compris à un taux de rafraîchissement de 85 Hz.
Système de contôle pour sélectionner visuellement et régler l’image en utilisant le “Encode”
sur le panneau et au menus à l’écran.
Sur l’écran, le menu “Contrôle Système pour visionner” fait sélectionner et ajuster des images
en utilisant 3 boutons se trouvant en face de panneau et au menu sur l’écran.
L’alimentation électrique fonctionne en AC 100-240 V 60/50 Hz pour une utilisation dans le
monde entier.
Equipé de DDC 1/2B pour la Prise de courant & la Marche.
Equipé d’une fonction d’économie d’énergie.
A la demande de l’ordinateur, le circuit de gestion d’alimentation réduit la consommation
d’énergie quand l’ordinateur n’est pas utilisé.
Les moniteurs à écrans anti-reflets / antistatiques sont conformes aux normes d’émissions
MPR 1990 et répondent aux exigences du label CE.
TCO : (en option)
Attention
Vous pouvez installer le socle de pivotement et d inclinaison en option pour fournit toute
une variété d angles de visualisation.
Avertissement
Si cet appareil a plus d’une prise interface, ne pas laisser de câbles branchés sur des
interfaces inutilisées.
Canadian Notice
This class B digital apparatus meets all requirements of the Canadian Interference Causing
Equipment Regulations.
Avis Canadien
Cet appareil numérique de la classe B respecte toutes les exigences du Règlement sur le
matériel brouilleur du Canada.
NB
Les informations contenues dans ce document peuvent être modifiées sans avis préalable.
Conditionnement
Tout d’abord, nous vous remercions d’avoir acheté ce moniteur. Il s’agit d’un moniteur couleur
haute performance. Ce manuel concerne à la fois l’utilisation et les précautions à prendre pour
utiliser ce moniteur.
Veuillez prendre le temps de lire ce manuel afin d’exploiter au mieux les performances de votre
moniteur et de l’utiliser de manière optimale. Après l’avoir lu, conservez ce manuel dans un
endroit sûr afin de pouvoir vous y reporter ultérieurement.
Ce détail expliqué ci-dessous est contenu dans la boîte.
D’abord, assurez-vous si votre boîte incluye les détails suivantes.
19AL
- Moniteur couleur Hansol
- Cordon d’alimentation AC
- Manuel de l’utilisateur(Carte d’enregistrement de la garantic)
- Câble de signal de vidéo (15 broches 3couches D-sub)
FRANçAIS
Page 18

Introduction
Manuel de l’utilisateur 35
FRANçAIS
Système d’économie d’énergie
Ce moniteur est conforme aux normes VESA (Video Electronics Standards Association) DPMS
(Display Power Management Signaling). Pour que le système d’économie d’énergie du
moniteur fonctionne, la carte graphique ou l’ordinateur doivent aussi être conformes aux
normes VESA DPMSTM.
Tableau de gestion d’énergie
NB : Le moniteur passe automatiquement par les phases DPMS quand il est inactif.
Pour sortir le moniteur de l’état DPMS, appuyez sur n’importe quelle touche du clavier.
Raccordement à l’ordinateur
ATTENTION
Assurez-vous que l’ordinateur et le moniteur sont mis hors tension.
Pour raccorder le moniteur à votre système,
suivez les instructions ci-dessous :
1. Connectez le câble de signal vidéo au
connecteur vidéo 15 broches du système
et serrez les vis de fixation.
2. Fixez le cordon d’alimentation au
moniteur et branchez-le ensuite sur une
prise de courant.
3. Mettez le moniteur sous tension en
appuyant sur l’interrupteur d’alimentation.
NB : Pour lier le moniteur au système Macintosh, connectez le câble de signal vidéo au
2layer connecteur vidéo 15 broches du systèmes. ( la direction de connecter du câble
de signal est opposé au système IBM)
Introduction
Manuel de l’utilisateur34
Informations de sécurité
Ce moniteur est fourni avec un cordon d’alimentation détachable muni de fiches de type
IEC320. Il convient au raccordement de tout micro-ordinateur agréé UL de configuration
similaire. Avant de procéder au raccordement, vérifiez que la tension secteur de la prise de
courant de l’ordinateur est la même que celle du moniteur et que la puissance nominale de
la prise de courant de l’ordinateur est identique ou supérieure à celle du moniteur.
Pour des applications en 120 V, utilisez uniquement un cordon d’alimentation détachable
agrée UL avec une fiche de configuration NEMA 5-15P (lames parallèles).
Pour des applications en 240 V, utilisez uniquement un cordon d’alimentation détachable
agréé UL avec une fiche de configuration NEMA 6-15P (lames tandem).
Utilisez uniquement une alimentation et un raccordement adéquats pour le moniteur comme
indiqué sur l’étiquette de fabrication.
Les fentes et ouvertures du boîtier sont prévues pour l’aération; ces ouvertures ne doivent
pas être obturées ni fermées. Ne jamais introduire d’objets dans les fentes ou autres
ouvertures du boîtier.
N’insérez jamais d’objet métallique dans les ouvertures du moniteur. Ceci peut créer un
risque d’électrocution.
Pour éviter tout électrochoc, ne touchez jamais l’intérieur du moniteur. Seul un technicien
qualifié doit ouvrir le boîtier du moniteur.
Débranchez le moniteur de la prise secteur avant le nettoyage. N’utilisez pas de nettoyants
liquides ou de nettoyants en aérosol. Utilisez un linge humide, non pelucheux pour le
nettoyage.
Installez le moniteur près d’une prise de courant facile d’accès. Déconnectez l’appareil en
saisissant fermement la fiche et en la sortant de la prise. Ne déconnectez jamais l’appareil
en tirant sur le cordon.
Fonctionnement
normal Attente Veille Hors tension
Horizontale Active Inactive Active Inactive
Verticale Active Active Inactive Inactive
Vidéo Active Vide Vide Vide
Coleur LED Vert Vert/AMBRE AMBRE Clignotement
Consommation
110W
Moins de Moins de Moins de
d’énergie 80% of Max 15W 5W
Mode d’économie d’énergie
Etat
Synchronisation
Page 19

Manuel de l’utilisateur 37
FRANçAIS
Commandes
Manuel de l’utilisateur36
Tableau d’affectation du connecteur mini sub-D 15 broches
Fonction des commandes
Commande OSD
Les commandes OSD incluent les commandes etendues suivantes, telles que des utilitaires pour
la taille, la position, la distorsion geometrique, le reglage des couleurs, la demagnetisation, les
Marche/Arret moire, le langage, la position d’OSD, la reinitialisation, le contraste & luminosite, etc.
Fonction des boutons d'OSD en facade du moniteur
Commandes
Autre commande en facade
Interrupteur : Tourner le moniteur en marche ou en arret. Quand l'interruupteur est en
marche, le LED est alume.
Acceder au menu sur l’ecran
Appuyez sur le bouton "Menu( )".
: Acces direct a la luminosite.
: Acces direct au contraste.
Eteindre le menu sur l’ecran
Quant aux sous-menus, appuyez deux fois sur le bouton .
Menus d’OSD
Menu principal
osd menu principal permet à l'utilisateur d'ajuster le contrôle
Utilisez ou : Boutons de commande pour se passer dans tous les menus.
Guide de commandes du menu principal
: Sortir des commandes OSD
: Mouvoir la fonction a choisir.
Menu( ) : Aller a la selection du menu choisi.
(15 Pin D-Sub)
15
11 15
6
10
No. Sub-D 15 broches
1 Vidéo rouge
2 Vidéo vert
3 Vidéo bleu
4 Terre de protection
5 Terre
6 Terre rouge
7 Terre vert
8 Terre bleu
9NC
10 Terre synch.
11 Terre
12 SDA
13 Synch. H
14 Synch. V
15 SCL
La prise á 15 broches D-Sub
(mâble) du cáble de signal
(systémes IBM) :
APPUYER TOUCHE MENU
LANGUE
Page 20

Manuel de l’utilisateur 39
FRANçAIS
Manuel de l’utilisateur38
Commandes
Commandes
Menu de contraste
: Entrer dans le menu de contraste.
/ : baisser ou augmenter le degré de
contraste.
Menu d'Eclat
: Entrer dans le menu de eclat.
/ : baisser ou augmenter le degré de
eclat.
Menu de Position
Aprés avoir choisi , Appuyez le boutton ( ).
Menu( ) : Appuyez ce boutton pour ajuster la position-H/V.
: mouvoir l'image en bas à gauche.
: mouvoir l'image en haut à droite.
Menu de taille
Aprés avoir choisi , Appuyez le boutton ( ).
Menu ( ) : Appuyez ce boutton pour ajuster la taille-H/V.
: Augmenter ou reduire la taille de l’image en vertical.
: VAugmenter ou reduire la taille de l’image en horizonta.
CONTRASTE
99%
50%
LUMINOSIT
32%
POSITION H.
32%
POSITION H.
H. TAILLE
43%
H. TAILLE
43%
Menu de position et de taille
: Sortir au menu principal.
: Regler /
Menu( ) : Fermer directement le menu de position et de taille..
Menu de réglage de la géométrie
Le réglage de la géométrie vous permet de mettre au
point la courbe ou l´angle des côtés de votre image.
Aprés avoir choisi , Appuyez le boutton ( ).
Coussins : Augmente ou diminue la courbure des côtés soit vers l´intérieur soit vers l´extérieur.
Parallele : Augmente ou diminue l´inclinaison des côtés soit vers la gauche soit vers la droite.
Trapeze : Augmente ou diminue le bas de l´image pour le rendre identique au haut.
Equilibre : Augumenter ou diminuer la courbure des faces gauche ou dr oite.
Ford Coins : Augumenter ou diminuer la courbure des faces hautes.
Comble Coins : Augumenter ou diminuer la courbure des faces basses.
Rotation : Fait tourner l ensemble de lécran dans le sens des aiguilles d´une montre ou dans
le sens inverse.
Guide de menu des commandes geometriques
: Sortir au menu principal.
: Mouvoir la fonction a choisir.
fonction a choisir.
: Mouvoir la barre a la direction ou pour augmenter ou reduire le reglage
Menu d’Ondulation
Aprés avoir choisi , Appuyez le boutton ( ).
selectionner ON ou OFF avec la touche de
fonction / .
selectionner ondulation-H ou ondulation-V avec la
touche de fonction / .
: Adjust the Moire.
50%
G OM TRIE
COUSSINS
PARALLELE
TRAPEZE
EQUILIBRE
FORD COINS
COMBLE COINS
ROTATION
50%
CONTR LE MOIRE
CONTR LE MOIRE H.
CONTR LE MOIRE V.
Page 21

Manuel de l’utilisateur 41
FRANçAIS
Manuel de l’utilisateur40
Dépannage
Guide de dépannage
Si votre moniteur ne fonctionne pas correctement, veuillez consulter le tableau de dépannage
ci-dessous pour trouver une solution rapide aux problèmes courants.
Commandes
PROBLEME
Pas d’image
L’image est
instable
L’image affichée
n’est pas
centrée, trop
petite ou trop
grande.
La couleur de
l’image est
anormale.
Le cordon d’alimentation est-il
branché ?
L’interrupteur d’alimentation est-il
sous tension ?
Le câble de signal vidéo est-il
connecté correctement?
Le moniteur se trouve-t-il en mode
d’économie d’énergie ?
Le câble de signal vidéo est-il
connecté correctement?
Y a-t-il des signaux qui se trouvent
en dehors de la plage de
fréquences autorisée ?
L’affectation du connecteur vidéo
est-elle correcte ?
Y a-t-il des signaux qui se trouvent
en dehors de la plage de
fréquences autorisée ?
Y a-t-il un objet magnétique à
proximité ?
L’affectation du connecteur vidéo
est-elle correcte ?
CAUSE POSSIBLE
Raccordez le cordon
d’alimentation.
Mettez l’interrupteur d’alimentation
sous tension.
Connectez correctement le câble
de signal vidéo.
Appuyez sur une touche du
clavier ou déplacez la souris.
Connectez correctement le câble
de signal vidéo.
Entrez des signaux qui se trouvent
dans la limite de la gamme du
moniteur.
Utilisez un connecteur vidéo
adéquat.
Entrez des signaux qui se trouvent
dans la gamme de fréquences du
moniteur. (Si le signal est correct,
réglez l’image à l’aide des
commandes)
Eloignez l’objet.
Utilisez un câble de signal vidéo
correct.
Utilisez la commande de
démagnétisation.
REMEDE
Menu du langage
Aprés avoir choisi , Appuyez le boutton ( ).
: Selectionner le langage en utilisant les boutons .
Menu de position d’OSD
Aprés avoir choisi , Appuyez le boutton ( ).
Menu ( ): Appuyez ce boutton pour ajuster la
position-osd H/V.
: mouvoir le menu osd verticalement en bas ou
horizontalement à gauche.
: mouvoir le menu osd verticalement en haut ou
horizontalement à droit
Menu de commandes pour reglage de couleur
: Mouvoir la barre a la direction ou pour selectionner le reglage de couleur
(USER, 6500K ou 9300K).
Menu( ) : Aller a l’option du sous-menu selectionne
(Appuyez sur le bouton Menu( ) pendant 5 secondes).
: Augmenter ou reduire le reglage des couleurs selectionnees.
: Sortir au menu principal.
Prereglage : Selectionner le reglage de couleur souhaite. La barre est deplace par le reglage de
couleur “USER, 6500K ou 9300K”. Chque reglage de couleur est regle a la mode
de l’utilisateur pour choisir le degre ou Kelvin.
LANGUE
APPUYER TOUCHE DO
POSITION
APPUYER TOUCHE
50%
RB GB BB RG GG BG
USER
USER 6500K 9300K
COULEURS
Page 22

Annexe
Manuel de l’utilisateur 43
FRANçAIS
Manuel de l’utilisateur42
Spécification
Modes préréglés
Ce moniteur D19AL dispose de modes préréglés pour les 14 normes industrielles les plus répandues
afin d’assurer une fonction “Plug & Play” (prêt-à-brancher).
Vidéo
Synch
Vertical
Vidéo
Synch
Horizontal
Spécification électrique
Spécifications mécaniques
Spécifications de l’environnement
Détail 920eF
Type de TRC 19
, 90 déflexion FST
Pas de masque de TRC 0.25mm (0.20mm in Hot)
Surface de TRC anti-reflet
H/V séparée, TTL, positive/ négative
H/V composite, TTL, positive/négative
RVB analogique (0.7 Vp-p), positive
terminaison 75
30 kHz ~ 110 kHz (Automatique)
47 Hz ~ 160 Hz (Automatique)
Résolution Maximale 1792 points x 1344 lignes (Non Entrelacée)
Fréquence d’horloge Maximale 270 MHz
Talle de l’écran (Norme) Horizontale 350mm, Verticale 262mm
Consommation 110 W
Alimentation CA 100-240V, 60/50 Hz
3 Hz
Connecteur d’entrée Connecteurs sub-D, 15 broches (3 couches, 2 couches)
Couleurs Affichées Illimitées
Signal
d’entrée
Synch.
Vidéo
Horizontale
Verticale
Fréquence
de balayage
Détail 920eF
23.3Kg (51.3Ibs)
26.7Kg (58.7Ibs)
Dimension
Carton
Unité
18.5
(L) 18.4 (P) 18.3 (H)
470mm(L) 466.5mm(P) 466mm(H)
21.1
(L) 24.4 (P) 22.2 (H)
537mm(W)
620mm(D) 564mm(H)
Net
Brut
Poids
Détail 920eF
32 F à 104 F (0 C à 40 C)
-4 F to 140 F (-20 C to 60 C)
10% à 85% d’humidité relative, sans condensation
Utilisation
Stockage
Humidité
Température
VGA/70Hz VGA/60Hz 640/85Hz 800/75Hz 800/85Hz 1024/75Hz 1024/85Hz
720
400 640 480 640 480 800 600 800 600 1024 768 1024 768
A
sec 31.777 31.777 23.111 21.333 18.631 16.660 14.561
B
sec 3.813 3.813 1.556 1.616 1.138 1.219 1.016
C
sec 1.907 1.907 2.222 3.232 2.702 2.235 2.201
D
sec 25.422 25.422 17.778 16.162 14.222 13.003 10.836
E
sec 0.636 0.636 1.556 0.323 0.569 0.203 0.508
Omsec 14.268 16.684 11.764 13.333 11.756 13.328 11.765
Pmsec 0.064 0.064 0.069 0.064 0.056 0.050 0.044
Qmsec 1.08 1.048 0.578 0.448 0.503 0.466 0.524
Rmsec 12.711 15.253 11.093 12.8 11.179 12.795 11.183
Smsec 0.413 0.318 0.023 0.021 0.019 0.017 0.015
H-Polarity Negative Negative Negative Positive Positive Positive Positive
V-Polarity Positive Negative Negative Positive Positive Positive Positive
H-Freq 31.469 31.469 43.269 46.875 53.674 60.023 68.677
V-Freq 70.09 59.94 85.008 75 85.061 75.029 84.997
Pixel rate 28.322 25.175 36 49.5 56.25 78.750 94.5
IBM
VESA
1280/75Hz 1280/85Hz 1600/75Hz 1600/85Hz 640/67Hz 832/75Hz 1152/75Hz
1280
1024 1280 1024 1600
1200 1600 1200 640
480 832 624 1152 870
A
sec 12.504 10.971 10.667 9.412 28.571 20.11 14.560
B
sec 1.067 1.016 0.948 0.279 2.116 1.117 1.280
C
sec 1.837 1.422 1.501 1.325 3.175 3.91 1.440
D
sec 9.481 8.127 7.901 6.972 21.164 14.524 11.520
E
sec 0.119 0.406 0.316 0.279 2.116 0.559 0.320
Omsec 13.329 11.761 13.333 11.765 15 13.414 13.322
Pmsec 0.038 0.033 0.032 0.028 0.086 0.06 0.044
Qmsec 0.475 0.579 0.491 0.433 1.114 0.784 0.568
Rmsec 12.804 11.235 12.800 11.294 13.714 12.549 12.667
Smsec 0.013 0.011 0.011 0.009 0.086 0.02 0.044
H-Polarity Positive Positive Positive Positive Negative Negative Negative
V-Polarity Positive Positive Positive Positive Negative Negative Negative
VESA
MACINTOSH
H-Freq 79.976 91.146 93.75 106.250 35 49.726 68.681
V-Freq 75.025 85.024 75.000 85.000 66.667 74.551 75.062
Pixel rate 135 157.5 202.5 229.500 30.24 57.284 100
Résolution
Synchronisation
Résolution
Synchronisation
Page 23

Memo
Manuel de l’utilisateur44
Manuale Utente 45
Introduzione
Contenuto della confezione 46
Caratteristiche 47
Informazioni sulla sicurezza 48
Sistema di gestione dell’alimentazione 49
Installazione
Collegamento al computer 49
Configurazione dei pin del mini connettore D-Sub a 15 pin
50
Controlli
Controlli dei Funzioni 50
Menu OSD 51
Soluzione dei problemi
Guida alla soluzione dei problemi 55
Caratteristiche tecniche
Caratteristiche elettriche 56
Caratteristiche meccaniche 56
Caratteristiche ambientali 56
Appendice
Sincronizzazioni predefinite 57
Italiano
Page 24

Introduzione
Manuale Utente 47
Introduzione
Manuale Utente46
Caratteristiche
Schermo ad alte prestazioni da 19 pollici (18 pollici visibili).
Scansione automatica delle frequenze
- Frequenza orizzontale: da 30 a 110 kHz
- Frequenza verticale: da 47 a 160 Hz
Compatibilità con gli standard VGA, SVGA, VESA, MAC e risoluzioni massime fino a
1600 x 1200.
Supporta le modalità anti-sfarfallio VESA, compresa la frequenza di refresh di 85 Hz.
Il menu sul schermo polpastrello controllo la sistema a visuale scelto e regolare i’imagine
usando Encorde S/W sul pannelo frontale e il menu sul schermo.
Sistema di controllo basato su menu On Screen per selezionare e regolare visivamente
l’immagine utilizzando 3 pulsanti sul pannello frontale e tramite menu visualizzati sullo
schermo.
Alimentazione a 100-240 Volt AC, 60/50 Hz, per un utilizzo universale.
Dotato di tecnologia DDC 1/2B per compatibilità Plug & Play.
Dotato di funzionalità di risparmio energia.
Il circuito di gestione dell’alimentazione, una volta attivato dal computer, ridurrà il consumo di
energia del monitor quando il computer non è in uso.
I monitor dotati di schermi antiriflesso/antistatici sono conformi agli standard sulle basse
emissioni MPR 1990 e rispondono ai requisiti previsti per il Marchio CE.
Specifiche TCO : (OPZIONALI)
Attenzione
Il monitor potrebbe disporre del piedistallo basculante girevole opzionale che consente di
orientarlo con vari angoli di visualizzazione.
Attenzione
Se questo apparecchio dovesse avere più di un connettore per interfacce, non lasciare
cavi collegati alle interfacce non utilizzate.
Avvertenza
Nel caso questa apparecchiatura fosse dotata di più connettori di interfaccia, non lasciare
alcun cavo collegato alle interfacce non utilizzate.
Avis Canadien
Cet appareil mumÈrique de la classe B respecte toutes les exigences du Règlement sur le
matÈriel brouilleur du Canada.
Avviso
Le informazioni contenute in questo documento sono soggette a modifica senza preavviso.
Contenuto della confezione
Grazie innanzitutto per aver acquistato questo monitor con schermo a colori ad alta risoluzione
da 17 pollici. Questo manuale fornisce le istruzioni e le avvertenze per l’uso del monitor.
Si raccomanda di leggere attentamente questo manuale al fine di ottenere le migliori prestazioni
ed il massimo vantaggio dal monitor e di conservarlo al termine in un luogo sicuro per poterlo
consultare in seguito.
Questi items illustrati a sotto sono contenuti nel imballo.
Prima, sicuramente che suo imballo incluso seguito items.
D19AL
- Monitor a colori
- Cavo di alimentazione AC
- Manuale utente (Scheda di garanzia)
- I cavi segnali (15spillo 3layer D-Sub)
ITALIANO
Page 25

Introduzione
Manuale Utente 49
ITALIANO
Sistema di gestione dell’alimentazione
Questo monitor è conforme alle specifiche VESA (Video Electronics Standards Association)
DPMS (Display Power Management Signalling). La funzione di risparmio energetico del monitor
funziona solo quando viene collegato ad una scheda video o ad un computer conforme alle
specifiche VESA
®
DPMSTM.
Caratteristiche del sistema di gestione energia
Nota : Il monitor entra automaticamente in modalità DPMS quando è inattivo.
Per riattivare il monitor dallo stato DPMS, premere un tasto qualsiasi sulla tastiera.
Collegamento al computer
ATTENZIONE
Assicurarsi che sia il PC che il monitor siano spenti.
Per collegare il monitor al sistema, procedere
come segue.
1. Collegare il cavo del segnale video al
connettore video a 15 pin del sistema e
stringere le viti di fissaggio.
2. Inserire il cavo di alimentazione nel
monitor e collegarlo ad una presa elettrica.
3. Per accendere il monitor, premere
l’interruttore di accensione.
Nota : Per attaccare il monitore alla sistema Macintosh, per favore connettere il cavo del
segnale
2Layer 15Pin della sistema del connettore grafici. ( Il cavo del segnale
della direzione connettendo è opposito alla sistema compatibile IBM.)
Introduzione
Manuale Utente48
Informazioni sulla sicurezza
Questo monitor viene fornito in dotazione con un cavo di alimentazione staccabile dotato di
terminali standard IEC320. Questo cavo può essere utilizzato per il collegamento a
qualunque personal computer omologato UL con configurazione simile. Prima di effettuare il
collegamento, assicurarsi che la tensione nominale della presa elettrica passante del
computer sia la stessa del monitor e che l’amperaggio massimo della presa elettrica
passante del computer sia uguale o superiore a quello del monitor.
Per applicazioni da 120 Volt, utilizzare esclusivamente un cavo di alimentazione staccabile
omologato UL con spina tipo NEMA 5-15P (con spinotti piatti in parallelo). Per applicazioni
da 240 Volt, utilizzare esclusivamente un cavo di alimentazione staccabile omologato UL con
spina tipo NEMA 6-15P (con spinotti piatti in serie).
Impiegare esclusivamente una fonte di alimentazione ed un cavo adatti al monitor, secondo
quanto indicato sulla targhetta.
Il cabinet del monitor è dotato di fessure ed aperture di ventilazione; queste aperture non
devono essere ostruite o coperte. Non introdurre assolutamente oggetti di alcun tipo nelle
fessure del cabinet o nelle altre aperture.
Non inserire mai alcun oggetto metallico nelle aperture del monitor.
Ciò può creare rischi di scosse elettriche.
Per evitare scosse elettriche, non toccare mai i componenti interni del monitor.
L’involucro esterno del monitor deve essere aperto esclusivamente da un tecnico qualificato.
Prima di procedere con la pulizia, scollegare il monitor dalla presa elettrica. Non usare
detergenti liquidi o aerosol. Pulire utilizzando un panno inumidito privo di sfilacciature.
Installare il monitor in prossimità di una presa elettrica facilmente accessibile. Scollegare
l’apparecchio dalla presa afferrando saldamente e tirando la spina, non il cavo.
Funzionamento
normale Stand-by
Modo Sospensione
Modo Disattivato
Orizzontale Attivo Inattivo Attivo Inattivo
Verticale Attivo Attivo Inattivo Inattivo
Video Attivo Oscurato Oscurato Oscurato
Colore LED Verde Verde/AMBRA AMBRA
AMBRA
lampeggiando
Potenza Meno che 80% Meno che Meno che
Consumo
110W
del Massimo 15W 5W
Modo risparmio energia
Stato
Sincronizzazione
Page 26

Manuale Utente 51
ITALIANO
Controlli
Manuale Utente50
Configurazione dei pin del mini connettore D-Sub a 15 pin
Controlli dei Funzioni
Controlli OSD
“Menu On schermo” controlli inclusa il seguento esteso controlli come Misura, Posizione,
Geometria Distorsione, Tempo di Colore, Degauss, Moire On e Off, Lingua, Posizioine OSD,
Richiamo, Contrasto e Luce ecc.
Funzione del bottone OSD sul schermo anteriore
Controlli
Addizionale su controlo anteriore.
Interruttore Power : Girate il monitore power On o Off, quando il power è On, LED è lit.
Accendendo sullo schermo menu
Premere il bottone Menu( ).
: Luce diretto accesso.
: Contarsto diretto accesso.
Girando Off sullo schermo menu
Quando in sotto-menu, premere il bottone di uscita due volte .
Menu OSD
Menu principale
il menu principale osd permette di regolare i comandi principali
Usare i : I bottoni di controllo per cartoccio attraverso tutti di menu.
Guida Menu principale per controlli
: Uscire il controllo OSD.
/ : Muovere il funzione per scegliere.
Menu( ) : Procedere per il menu scelezionato
(15 Pin D-Sub)
15
11 15
6
10
N pin D-Sub a 15 pin
1 Rosso, video
2 Verde, video
3 Blu, video
4 Massa telaio
5 Massa
6 Rosso, massa
7 Verde, massa
8 Blu, massa
9 N.C.
10 Sync, massa
11 Massa
12 SDA
13 H-Sync
14 V-Sync
15 SCL
Page 27

Manuale Utente 53
ITALIANO
Manuale Utente52
Controlli
Controlli
Guida Menu controllo per Misura e Posizione
: Uscire a il menu principale.
: Riferire a /
Menu( ) : Posizione Toggle e Menu misura diretto.
Geometry Controls Menu
I comandi di questo menu permettono di aggiustare
la curvatura oppure l´angolo dei lati dello schermo.
Dopo aver scelto , premere il tasto menu ( )
Pincushion : Aumenta o diminuisce la curvatura dei lati verso l´interno o verso l´esterno.
Parallelogram : Aumenta o diminuisce l´inclinazione dei lati verso sinistra o verso destra.
Trapezoid : Aumenta o dimuisce la grandezza della parte inferiore dello schermo affinché sia
uguale alla parte superiore.
Pinbalance : Aumentare o diminuire il curvante del lati entrambi alla sinistra o alla destra.
Top Corner : Aumentare o diminuire il Curvante dei lati della cima.
Bottom Corner : Aumentare o diminuire il curvante dei lati dei fondi.
Rotation : Ruota l´intero schermo in senso orario o antiorario.
Guida Controllo Menu di Geometria
: Uscire al menu principale.
: Muovere la funzione per scegliere.
Menu Funzione per scegliere.
: Muovere il bar o direzione per aumentare o diminuire il aggiustamento.
Menu Lingua
Dopo aver scelto , premere il tasto menu ( )
Selezionare ON o OFF con la chiave /
Selezionare H.moire o v.moire con la chiave / .
Aggiustare il Moire.
50%
GEOMETRY
PINCUSHION
PARALLELOGRAM
TRAPEZOID
PINBALANCE
TOP CORNER
BOTTOM CORNER
ROTATION
Menu Contrasto
: aprire il menu Contrasto.
/ : aumenta / diminuisce il contrasto.
Menu Luce
: aprire il menu Luce.
/ : aumenta / diminuisce il Luce.
Menu Posizione
Dopo aver scelto , premere il tasto menu ( )
Menu( ) : premere questo tasto piu volte per cambiare la posizione dell' H/V.
: muovere l'immagine per sistemare il fondo dello schermo e il lato sinistro.
: muovere l'immagine per sistemare il top dello schermo e il lato destro.
Menu Formato
Dopo aver scelto , premere il tasto menu ( )
Menu( ) : premere questo tasto piu volte per cambiare la sizedell' H/V.
: diminuisce il formato H/V dell'immagine.
: aumenta il formato H/V dell'immagine.
.
BRIGHTNESS
PP
50%
31.5KHz 60Hz
Page 28

Manuale Utente 55
ITALIANO
Manuale Utente54
Soluzione dei problemi
Guida alla soluzione dei problemi
Nel caso il monitor funzionasse in modo anomalo, consultare la seguente tabella per cercare
una soluzione rapida ai problemi più comuni.
Controlli
Problema
Nessuna
immagine.
Immagine
instabile.
L’immagine sullo
schermo non è
centrata, è
troppo piccola o
troppo grande.
Il colore
dell’immagine
sullo schermo è
anormale.
Il cavo di alimentazione è collegato?
L’interruttore di accensione è
acceso?
Il cavo del segnale video è
collegato correttamente?
Il monitor si trova in modalità di
risparmio energia?
Il cavo del segnale video è
collegato correttamente?
Vi sono segnali di ingresso al di
fuori dell’intervallo delle frequenze
richiesto?
Il collegamento dei pin del
connettore video è corretto?
Vi sono segnali di ingresso al di
fuori dell’intervallo delle frequenze
richiesto?
Nelle vicinanze si trova un oggetto
che genera campi magnetici?
La disposizione dei pin del
connettore video è corretta?
Causa possibile
Collegare il cavo di alimentazione.
Premere l’interruttore di
accensione.
Collegare correttamente il cavo
del segnale video.
Premere un tasto qualsiasi sulla
tastiera o spostare il mouse.
Collegare il cavo del segnale
video correttamente.
Verificare che i segnali di ingresso
rientrino nell’intervallo delle
frequenze del monitor.
Utilizzare il connettore video di
tipo corretto.
Verificare che il segnale di
ingresso rientri nell’intervallo delle
frequenze del monitor (se il
segnale è corretto, regolare i
controlli fino ad ottenere
l’immagine desiderata).
Allontanare l’oggetto.
Utilizzare un cavo video di tipo
corretto.
Richiamare la funzione di
smagnetizzazione.
Rimedio
Menu Lingua
Dopo aver scelto , premere il tasto menu ( )
/ : Selezionare la lingua usando key.
Menu Posizione OSD
Dopo aver scelto , premere il tasto menu ( )
MENU ( ): premere questo tasto piu volte per
cambiare la posizione dell' H/V
: muovere il menu OSD verticale in basso oppure
orizzontale sinistro
: muovere il menu OSD verticale in alto oppure
orizzontale destro
Menu Controlli per aggiustare il colore.
: Muovere il bar nel o direzione per sceglire il colore setting.
( USER, 6500K, 9300K )
Menu( ) : Procedere per il sottomenu desiderato scegliere
(Premere il bottone ‘Menu( )’, per 5 secondi).
: Aumentare o diminuire il colore scelto agiustamento.
: Uscire al menu principale.
Presetting : Selezionare il colore desiderato setting. Questo bar è rimesso oltre il colore
setting scegliere. “ USER, 6500K o 9300K” Ogni colori setting è agiustato al
modo user per scegliere il grado o Kelvin.
50%
RB GB BB RG GG BG
COLOR - TEMP
USER
USER 6500K 9300K
OSD
LANGUAGE
PRESS DO KEY
POSITION
PRESS KEY
Page 29

Sincronizzazioni predefinite
Questo monitor D19AL dispone di 14 modi predefiniti corrispondenti agli standard industriali più
diffusi di compatibilità “Plug & Play”.
Appendice
Manuale Utente 57
ITALIANO
Manuale Utente56
Caratteristiche tecniche
Video
Sync
Verticale
Video
Sync
Orizzontale
Caratteristiche elettriche
Caratteristiche meccaniche
Caratteristiche ambientali
ITEM 920eF
Tipo CRT 19 ,90 deflessione FST
Dot pitch CRT 0.25mm (0.20 in Hot)
Superficie CRT Antiriflesso, ARASC
H/V separata, TTL, positivo/negativo
H/V composita, TTL, positivo/negativo
Analogico RGB (0.7 Vp-p), positivo
75 Terminato
30KHz~110KHz (Automatica)
47Hz~160Hz (Automatica)
Risoluzione massima 1792punti 1344linee (non interlacciata)
Frequenza pixel (max) 270 MHz
Misura de Display (Standard) Orizzontale 350mm, Verticale 262mm
Consumo potenza 110 Watt
Alimentazione 100~240 Volt AC, 60/50 Hz, ±3 Hz
Connettore di ingresso D-Sub, 15 pin
Colori visualizzabili illimitati
Segnale di
ingresso
Sincronizzazione
Video
Orizzontale
Verticale
Frequenza
di scansione
ITEM 920eF
18.5
(L) x 18.4 (P) x 18.3 (A)
470mm(L) x 466.5mm(P) x 466mm(A)
21.1 (L) x 24.4 (P) x 22.2 (A)
537mm(L) x 620mm(P) x564mm(A)
23.3Kg (51.3lbs)
26.7Kg (58.7lbs)
Dimensioni
Imballo
Unità
Netto
Lordo
Peso
ITEM 920eF
32
F ~ 104 F (0 C ~ 40
C)
-4
F ~ 140 F (-20 C ~ 60 C)
10% ~ 85% U.R. senza condensa
Funzionamento
Immagazzinamento
Umidità
Temperatura
VGA/70Hz VGA/60Hz 640/85Hz 800/75Hz 800/85Hz 1024/75Hz 1024/85Hz
720
400 640 480 640 480 800 600 800 600 1024 768 1024 768
A
sec 31.777 31.777 23.111 21.333 18.631 16.660 14.561
B
sec 3.813 3.813 1.556 1.616 1.138 1.219 1.016
C
sec 1.907 1.907 2.222 3.232 2.702 2.235 2.201
D sec 25.422 25.422 17.778 16.162 14.222 13.003 10.836
E
sec 0.636 0.636 1.556 0.323 0.569 0.203 0.508
Omsec 14.268 16.684 11.764 13.333 11.756 13.328 11.765
Pmsec 0.064 0.064 0.069 0.064 0.056 0.050 0.044
Qmsec 1.08 1.048 0.578 0.448 0.503 0.466 0.524
Rmsec 12.711 15.253 11.093 12.8 11.179 12.795 11.183
Smsec 0.413 0.318 0.023 0.021 0.019 0.017 0.015
H-Polarity Negative Negative Negative Positive Positive Positive Positive
V-Polarity Positive Negative Negative Positive Positive Positive Positive
H-Freq 31.469 31.469 43.269 46.875 53.674 60.023 68.677
V-Freq 70.09 59.94 85.008 75 85.061 75.029 84.997
Pixel rate 28.322 25.175 36 49.5 56.25 78.750 94.5
IBM
VESA
1280/75Hz 1280/85Hz 1600/75Hz 1600/85Hz 640/67Hz 832/75Hz 1152/75Hz
1280
1024 1280 1024 1600 1200 1600 1200 640 480 832 624 1152 870
A
sec 12.504 10.971 10.667 9.412 28.571 20.11 14.560
B
sec 1.067 1.016 0.948 0.279 2.116 1.117 1.280
C
sec 1.837 1.422 1.501 1.325 3.175 3.91 1.440
D
sec 9.481 8.127 7.901 6.972 21.164 14.524 11.520
E
sec 0.119 0.406 0.316 0.279 2.116 0.559 0.320
Omsec 13.329 11.761 13.333 11.765 15 13.414 13.322
Pmsec 0.038 0.033 0.032 0.028 0.086 0.06 0.044
Qmsec 0.475 0.579 0.491 0.433 1.114 0.784 0.568
Rmsec 12.804 11.235 12.800 11.294 13.714 12.549 12.667
Smsec 0.013 0.011 0.011 0.009 0.086 0.02 0.044
H-Polarity Positive Positive Positive Positive Negative Negative Negative
V-Polarity Positive Positive Positive Positive Negative Negative Negative
VESA
MACINTOSH
H-Freq 79.976 91.146 93.75 106.250 35 49.726 68.681
V-Freq 75.025 85.024 75.000 85.000 66.667 74.551 75.062
Pixel rate 135 157.5 202.5 229.500 30.24 57.284 100
Risoluzione
Sincronizzazione
Risoluzione
Sincronizzazione
Page 30

Memo
Manuale Utente58
Manual del Usuario 59
Introducción
Embalaje 60
CaracterÍsticas 61
Información de Seguridad 62
Sistema de Control de Alimentación de EnergÍa 63
Instalación
Conexión a su ordenador 63
Tabla de asignación de patillas del Miniconector D-Sub de 15 patillas
64
Controles
Función de controles 64
Menús OSD 65
Localización y reparación de averÍas
GuÍa de localización y reparación de averÍas 69
Especificaciones
Especificaciones eléctricas 70
Especificaciones técnicas 70
Condiciones Ambientales 70
Apéndice
Temporizaciones preestablecidas 71
Español
Page 31

Introducción
Manual del Usuario 61
ESPAñOL
Introducción
Manual del Usuario60
CaracterÍsticas
Monitor de elevadas prestaciones de 19 pulgadas (área visible de 18 pulgadas)
Explora automáticamente:
- Frecuencia Horizontal: de 30 a 110 KHz
- Frecuencia Vertical: de 47 a 160 Hz
Compatible con estándares VGA, SVGA, VESA, MAC y modos de resolución máxima hasta
1600X1200
Sistema de control manual en pantalla para seleccionar y ajustar visualmente las imágenes
en pantalla utilzando el botón “Encode” del panel frontal y menús de pantalla.
Admite modos sin fluctuación de voltaje VESA, incluyendo la velocidad de regeneración de
85 Hz.
Sistema de control manual en pantalla para seleccionar y ajustar visualmente las imágenes
en pantalla utilizando 3 botones del panel frontal y menús de pantalla.
La fuente de alimentación funciona en 100-240V AC a 60/50Hz en todo el mundo.
Equipado con la función Plug and Play DDC 1/2B (utilización inmediata).
Equipado con una función de ahorro de energÍa.
Una vez activado el circuito de control de alimentación de energÍa en el sistema del
ordenador, éste reducirá el consumo eléctrico cuando el ordenador no esté en uso.
Los monitores que dispongan de pantallas antireflectantes/antiestáticas cumplen con las
normas de Emisiones MPR 1990 y con las exigencias aplicables al Mercado de la
Comunidad Europea.
TCO : (OPCIÓN)
Precaución
Los cambios o modificaciones, sin la expresa aprobación de la parte responsable del
cumplimiento de las normas, podrían desautorizar al usuario a operar el equipo.
Aviso
Si este equipo lleva más de un conector de interfaz, no dejar cables conectados a
interfaces sin utilizar.
Notificación de Canadá
Este aparato digital Clase B cumple todos los requisitos de las Normas Canadienses sobre
Equipos que Producen Interferencias.
Avis Canadien
Cet appareil numérique de la classe B respecte toutes les exigences du Reglément sur le
materiel brouilleur du Canada.
Aviso
La información contenida en este documento está sujeta a cambios sin previo aviso.
Embalaje
Muchas gracias por haber adquirido este monitor de 17 pulgadas a color y de alta resolución.
El presente manual describe, en términos generales, el modo de utilización y las medidas de
precaución a la hora de manipular este monitor.
Lea detenidamente este manual para poder obtener una prestación máxima y utilizar el monitor
de la mejor manera posible. Después de leer este manual, guárdelo en un sitio adecuado para
poder consultarlo oportunamente.
Estos elementos explicados siguientes está en el carton.
Primero, confirme que su carton incluye los elementos siguientes.
D19AL
- Monitor a Color
- Cable de Alimentación AC
- Manual del Usuario (Tarjeta de Registro de GarantÍa)
- Cable signal (15alfileres 3lechos D-Sub)
Page 32

Sistema de control de alimentación de energÍa
Este monitor cumple con las normas DPMS (Señalización de Control de Alimentación de
Dispositivos de Visualización) de VESA (Asociación de Normalización de Dispositivos
Electrónicos de VÍdeo). Para que el dispositivo de ahorro de energÍa del monitor pueda
activarse, la tarjeta de vÍdeo o el ordenador también deben cumplir con las normas DPMS
de VESATM.
Tabla de control de alimentación de energÍa
Nota : Cuando está inactivo, el monitor ejecuta automáticamente las funciones DPMS.
Para que el monitor salga del estado DPMS, pulse cualquier tecla del teclado.
Conexión a su ordenador
PRECAUCIÓN
Verifique que el PC y el monitor estén desconectados.
Para conectar el monitor a su sistema, siga la
instrucciones que se indican a continuación:
1. Conecte el cable de señal de vÍdeo al
conector para gráficos de 15 patillas del
sistema y ajuste los tornillos
correspondientes.
2. Inserte el cable de alimentación de AC
en el monitor y luego en una toma de
corriente de AC.
3. Para encender el monitor, presione el
interruptor de alimentación.
Nota : Para conectar el monitor a un sistema Macintosh, conecte el cable signal al conector
de la imagen 2lechos 15alfileres del sistema. ( La direción del cable signal oposita
con el sistema comparible IBM)
Introducción
Manual del Usuario 63
ESPAñOL
Introducción
Manual del Usuario62
Información de Seguridad
Este monitor se entrega con un cable de alimentación eléctrica desmontable con
terminaciones tipo IEC320. Puede resultar adecuado para la conexión a cualquier
ordenador personal de la Lista UL que dispongan de configuraciones similares. Antes de
efectuar la conexión, verifique que el voltaje de la toma de corriente del ordenador sea la
misma que la del monitor y que el voltaje en amperes de la toma de corriente del ordenador
sea igual o superior al voltaje de la corriente del monitor.
Para aplicaciones de 120 V utilice solamente el cable de alimentación desmontable de la
Lista UL con la configuración NEMA.
Clavija de conexión tipo 5-15P (cuchillas en paralelo). Para aplicaciones de 240 V utilice
solamente el cable de alimentación desmontable de la Lista UL con clavija de conexión tipo
6-15P con configuración NEMA (cuchillas en serie).
Utilice solamente una fuente de alimentación y conexión apropiadas para el monitor tal
como se indica en la etiqueta de marca.
Las ranuras y aberturas de la carcasa se utilizan para ventilación; dichas aberturas no
deben estar bloqueadas o tapadas. No debe introducir nunca ningún objeto dentro de las
ranuras o aberturas de la carcasa.
Nunca inserte ningún objeto metálico dentro de las aberturas del monitor. De lo contrario,
podrÍa producirse una descarga eléctrica.
Para evitar la descarga eléctrica, no debe tocar nunca el interior del monitor. Únicamente un
técnico autorizado debe abrir la carcasa del monitor.
Desenchufe el monitor de la toma de corriente de la pared antes de efectuar la limpieza. No
debe utilizar ningún limpiador lÍquido o en aerosol. Para realizar la limpieza, utilice un paño
húmedo sin pelusa.
Instale el monitor cerca de una toma de corriente a la que pueda acceder fácilmente.
Desconecte el equipo sujetando firmemente el enchufe y quitándolo de la toma de corriente.
Nunca desconecte el equipo tirando del cable.
Funcionamiento
Normal Modo Espera
Modo Suspendido
Modo Apagado
Horizontal Activo Inactivo Activo Inactivo
Vertical Activo Activo Inactivo Inactivo
Video Activo
Con impulso de extinción Con impulso de extinción Con impulso de extinción
Color de LED Verde Verde/áMBRA áMBRA áMBRA(pestañeo)
Consumo
110W
Menos de Menos de Menos de
de EnergÍa 80% of MAX 15W 5W
Modo de función de ahorro de energÍa
Estado
Sinc.
Page 33

Controles adicionales frontales
Interruptor eléctrico : Activa o desactiva la alimentación eléctrica del monitor cuando está
activado, se ilumina el LED.
Acceso a la función del menú en pantalla
Pulsar la tecla “Menú( ) botón ”
: Acceso directamente al Brillo.
: Acceso directamente al Contraste.
Desactivación del menú en pantalla
Cuando se encuentra en el submenú, pulse dos veces el botón .
Menús OSD
Menú Principal
El menú OSD le permite ajustar los controles del usuario.
.
Utilizar
: Botones de control para pasar por todos los menús.
Guía de Control del Menú Principal
: Salir de los controles OSD.
: Mover la función para seleccionar uno de las opciones.
Menú( ) : Proceder a la selección del menú elegido.
Manual del Usuario 65
ESPAñOL
Controles
Manual del Usuario64
Tabla de asignación de patillas del Miniconector D-Sub de 15 patillas
El conector D-Sub de 15 Patillas
(macho) del cable de señal
(sistemas IBM) :
Función de Controles
Controles OSD
Los controles del “MENU EN PANTALLA” incluyen los siguientes controles ampliados como
Tamaño, Posición, Distorsión de Geometria, Color temp, Desmagnetización, Moire on & off,
Idioma, OSD-Posición, Reinicializaci n, Contraste y Brillo, etc.
Función de los botones OSD en la parte frontal del monitor
Controles
(15 Pin D-Sub)
15
11 15
6
10
N patilla D-Sub de 15 patillas
1 VÍdeo Rojo
2 VÍdeo Verde
3 VÍdeo Azul
4 Tierra del bastidor
5 Tierra
6 Tierra Rojo
7 Tierra Verde
8 Tierra Azul
9NC
10 Sinc. Tierra
11 Tierra
12 SDA
13 Sinc. H
14 Sinc. V
15 SCL
PULSAR TECAL MEN
POSICI N
Page 34

Menú de Contraste
: Selecciona el menú de Contrast.
/ : Aumenta o decrece el Contraste.
Menú de Brillo
: Selecciona el menú de Brillo .
/ : Aumenta o decrece el Brillo.
Menú de Posición
Tras escoger , Aprete el botón ( ) del menú
Menú( ) : Mantenga apretado este botón para cambiar la orientacion H/V.
: Mover la imagen verticalmente en arriba o abajo.
: Mover la imagen horizontalmente a la izquierda o a la derecha.
Menú de Tamaño
Tras escoger , Aprete el botón ( ) del menú
Menú ( ) : Mantenga apretado este botó npara cambiar la orientacion H/V-size.
: Disminuye el tamañode imagen H/V.
: Aumenta el tamañoH/V- de la imagen.
CONTRASTE
99%
LUMINOSIDAD
50%
32%
POSICI N H.
74%
POSICI N V.
H. TAMA O
43%
V. TAMA O
42%
Manual del Usuario 67
ESPAñOL
Manual del Usuario66
Controles
Controles
Guía de Control para en Menú de Posición y Tamaño
: Salir al menú principal
: Se refiere a
Menú( ) : Introducir directamente al menú de posición y tamaño.
Menú de Controles para Geometría
Los controles de Geometría le permiten ajustar la
curvatura o el ángulo de los lados de su
representación visual.
Tras escoger , Aprete el botón ( ) del menú.
Acerico : Incrementa o disminuye la curvatura de los lados, tanto hacia adentro como afuera.
Paralelogramo : Incrementa o disminuye la inclinación de los lados tanto hacia la izquierda
como la derecha.
Trapezoide : Incrementa o disminuye la parte inferior de la pantalla para ser igual a la parte
superior.
Equilibrio : Aumenter o diminuir la curvidad de las caras a la izquierda ua la derecha.
Parte Angulo : Aumenter o diminuir la curvidad de las caras bajas.
Abajo Angulo : Aumenter o diminuir la curvidad de las caras bajas.
Rotación : Gira la representación visual entera en el sentido de las agujas del reloj o en
sentido inverso.
Gu a de Control del Menú de Geometría
: Salir al menú principal
: Mover la funci n para seleccionar uno de las opciones.
Menú( ) : Funci n para seleccionar uno de las opciones.
: Mover la barra en la dirección para incrementar o disminuir el ajuste.
Menú de Idioma
Tras escoger , Aprete el botón ( ) del menu.
Seleccionar ON o OFF con los botones /
Seleccionar definicion Horizontal o Vertical con los
botónes / .
Ajustar la Moire
50%
GEOMETRŒA
ACERICO
PARALELOGRAMO
TRAPEZOIDE
EQUILIBRIO
PARTE ANGULO
ABAJO ANGULO
ROTACI N
50%
CONTROL MUAR
CONTROL MUAR H.
CONTROL MUAR V.
Page 35

Manual del Usuario 69
ESPAñOL
Manual del Usuario68
Localización y reparación de averÍas
GuÍa de localización y reparación de averÍas
Si su monitor no funciona correctamente, utilice el siguiente cuadro de localización y reparación
de averÍas para solucionar de forma rápida los problemas comunes.
Controles
Problema
Sin Imagen
Imagen
inestable
La imagen no
está centrada,
es muy pequeña
o muy grande.
El color de la
imagen en la
pantalla es
anormal.
Está conectado el cable de alimentación?
Está activado el interruptor de
alimentación?
Está el cable de señal de vÍdeo
conectado correctamente?
Está el monitor en el modo de
ahorro de energÍa?
Está el cable de señal de vÍdeo
conectado correctamente?
Existen señales de vÍdeo que
estén fuera del rango de
frecuencia requerido?
Es correcta la asignación de
patillas del conector de señal de
vÍdeo?
Existen señales de vÍdeo que
estén fuera del rango de
frecuencia requerido?
Hay algún objeto magnético cerca?
Es correcta la disposición de las
patillas del conector de señal de
vÍdeo?
Causa Probable
Conecte el cable de alimentación.
Active el interruptor de
alimentación.
Conecte correctamente el cable
de señal de vÍdeo.
Pulse cualquier tecla del teclado o
mueva el ratón.
Conecte correctamente el cable
de señal de vÍdeo.
Utilice las señales que estén
dentro del rango de frecuencia
del monitor.
Utilice el conector de señal de
vÍdeo correcto.
Utilice las señales que estén dentro del
rango de frecuencia del monitor. (Si la
señal es correcta, ajuste los controles
hasta obtener la imagen deseada).
Aleje el objeto.
Utilice el conector de señal de
vÍdeo correcto.
Utilice el control de
desmagnetización.
Solución
Menú de Idioma
Tras escoger , Aprete el botón ( ) del menú.
Seleccionar el idioma
Menú de situacion del menu OSD
Tras escoger , Aprete el botón ( ) del menú.
Menú( ): Presionar para modificar la posicion
H/V.
:el menú OSD del fondo vertical o a
la izquierda horizontalmente.
:Situa el menú osd vertical arriba o vertical
a la izquierda.
Menú de Controles para Ajustar el Color
: Mover el bar a la dirección para seleccionar el ajuste de color
(USER, 6500K, 9300K)
Menú( ): Proceeder para la selección de Submenú elegido
(Presione el botón menú durante 5 segundos).
: Aumentar o diminuir al ajuste de color seleccionado
: Salir al menú principal
Preajustar : Seleccionar el ajuste de color deseado. La barra se reemplaza por elegir el
ajuste de color “USER, 6500K o 9300K”. Cada ajuste de color se hace en el
modo de usuario para elegir el grado de Kelvin.
IDIOMA
POLSAR TECAL DO
POSICI N
POLSAR TECAL
50%
RB GB BB RG GG BG
USER
USER 6500K 9300K
COLOR
Page 36

Apéndice
Manual del Usuario 71
ESPAñOL
Manual del Usuario70
Especificaciones
Temporizaciones preestablecidas
Este monitor D19AL dispone de modos preestablecidos correspondientes a los 14 estándares
más difundidos del sector en lo que a función “Plug and Play” se refiere.
Video
Sync
Vertical
Video
Sync
Horizontal
Especificaciones Eléctricas
Especificaciones Técnicas
Condiciones Ambientales
Elemento 920eF
Tipo de Rayos Catódicos 19 90 desviación FST
Paso de Puntos del Tubo 0.25mm (0.20 in HOT)
Superficie del Tubo Antireflectante
H/V Separada, TTL, positiva/negativa
H/V Compuesta, TTL, positiva/negativa
Analógico RGB (0.7 Vp-p), positivo rminaison
75 de Impedancia Final
30KHz~110KHz (Automáticamente)
47Hz~150Hz (Automáticamente)
Resolución Máxima 1792 Puntos 1344 LÍneas (Sin exploración entrelazada)
Reloj de Pixels (Máx.) 270 MHz
Tamaño de la Pantalla (Estandar) Horizontal 350mm, Vertical 262mm
Consumo de Alimentación 110 Watts
Fuente de EnergÍa 100~240V AC, 60/50 Hz 3Hz
Conector Interno D-Sub, 15Patillas Connector (3lechos, 2lechos)
Colores Ilimitados
Elemento 920eF
18.5
(A) 18.4 (P) 18.3 (A)
470mm(A) 466.5mm(P) 466mm(A)
22.1 (A) 24.4 (P) 22.2 (A)
537mm(A) 620mm(P) 568mm(A)
23.3Kg (51.3lbs)
26.7Kg (58.7lbs)
Elemento 920eF
De 32
F a 104 F (de 0 C a 40 C)
De -4 F a 140 F (de -20 C a 60 C)
De 10% a 85%, sin condensación
Señal de Entrada
Dimensiones
Sinc.
VÍdeo
Embalaje
Equipo
Horizontal
Neto
Vertical
Bruto
Funcionamiento
Almacenamiento
Humedad
Frecuencia
de Rastreo
Peso
Temperatura
VGA/70Hz VGA/60Hz 640/85Hz 800/75Hz 800/85Hz 1024/75Hz 1024/85Hz
720 400 640 480 640 480 800 600 800 600 1024 768 1024 768
A
sec 31.777 31.777 23.111 21.333 18.631 16.660 14.561
B
sec 3.813 3.813 1.556 1.616 1.138 1.219 1.016
C
sec 1.907 1.907 2.222 3.232 2.702 2.235 2.201
D sec 25.422 25.422 17.778 16.162 14.222 13.003 10.836
E
sec 0.636 0.636 1.556 0.323 0.569 0.203 0.508
Omsec 14.268 16.684 11.764 13.333 11.756 13.328 11.765
Pmsec 0.064 0.064 0.069 0.064 0.056 0.050 0.044
Qmsec 1.08 1.048 0.578 0.448 0.503 0.466 0.524
Rmsec 12.711 15.253 11.093 12.8 11.179 12.795 11.183
Smsec 0.413 0.318 0.023 0.021 0.019 0.017 0.015
H-Polarity Negative Negative Negative Positive Positive Positive Positive
V-Polarity Positive Negative Negative Positive Positive Positive Positive
H-Freq 31.469 31.469 43.269 46.875 53.674 60.023 68.677
V-Freq 70.09 59.94 85.008 75 85.061 75.029 84.997
Pixel rate 28.322 25.175 36 49.5 56.25 78.750 94.5
IBM
VESA
1280/75Hz 1280/85Hz 1600/75Hz 1600/85Hz 640/67Hz 832/75Hz 1152/75Hz
1280
1024 1280 1024 1600 1200 1600 1200 640 480 832 624 1152 870
A
sec 12.504 10.971 10.667 9.412 28.571 20.11 14.560
B
sec 1.067 1.016 0.948 0.279 2.116 1.117 1.280
C
sec 1.837 1.422 1.501 1.325 3.175 3.91 1.440
D
sec 9.481 8.127 7.901 6.972 21.164 14.524 11.520
E sec 0.119 0.406 0.316 0.279 2.116 0.559 0.320
Omsec 13.329 11.761 13.333 11.765 15 13.414 13.322
Pmsec 0.038 0.033 0.032 0.028 0.086 0.06 0.044
Qmsec 0.475 0.579 0.491 0.433 1.114 0.784 0.568
Rmsec 12.804 11.235 12.800 11.294 13.714 12.549 12.667
Smsec 0.013 0.011 0.011 0.009 0.086 0.02 0.044
H-Polarity Positive Positive Positive Positive Negative Negative Negative
V-Polarity Positive Positive Positive Positive Negative Negative Negative
VESA
MACINTOSH
H-Freq 79.976 91.146 93.75 106.250 35 49.726 68.681
V-Freq 75.025 85.024 75.000 85.000 66.667 74.551 75.062
Pixel rate 135 157.5 202.5 229.500 30.24 57.284 100
Resolución
Temporización
Resolución
Temporización
Page 37

Memo
Manual del Usuario72
 Loading...