

Page 1
2F, No.362, Ruei-Guang Rd., Neihu District,
U
R
CE
L
Taipei City 114, Taiwan, R.O.C.
TEL: 886-2-87520000
FAX: 886-2-87527092
www.hannspree.com
NTSCTVTWEN0804
MAC-001226
23" Liquid Crystal Display
Television
LT13-23A1
User's Manual
Page 2

Table of Contents
1. Warranty and Service .................................................... 4
2. Preface ......................................................................... 5
3. Description of Warning Symbols..................................... 6
4. Safety Notices ............................................................... 7
5. Regulatory Information ................................................ 15
6. Introducing the TV ....................................................... 17
Features.................................................................. 18
7. Checking Package Contents ........................................ 19
8. Getting to Know Your TV ............................................. 20
Front View Controls ................................................ 20
Front View Ports ..................................................... 22
Rear Panel Input and Output Ports ........................... 23
9. Getting Started ............................................................ 25
Making Connections................................................. 25
Connecting to an Antenna or Cable TV ..................... 26
Connecting to AV Devices ........................................ 27
Connecting to a VCR, VCD or DVD Player using
component video................................................. 27
Connecting to a Video Camera using S-Video ...... 28
Connecting to a VCR, VCD or DVD Player using
composite video .................................................. 29
Connecting Earphone............................................... 30
Connecting an Amplifier or Speakers ........................ 31
Connecting to a PC .................................................. 32
Connecting the Power Adapter ................................. 33
10. Using the TV .............................................................. 34
Using the Remote Control ........................................ 34
Turning the TV On and Off ....................................... 35
Selecting Channels .................................................. 35
Adjusting the Volume ............................................... 36
Switching Source Signals ......................................... 36
Using PIP and POP.................................................. 37
1
Page 3

Table of Contents
11. Adjusting On-Screen Display (OSD) Settings ............... 39
OSD Setting Menus ................................................. 39
Picture Settings ....................................................... 40
Brightness .......................................................... 41
Contrast ............................................................. 42
Backlight (PC mode) ........................................... 43
Hue .................................................................... 44
Saturation ........................................................... 45
Sharpness .......................................................... 46
Black Level ......................................................... 47
Color Temperature .............................................. 48
Preset ................................................................ 49
Audio Settings ......................................................... 50
Treble................................................................. 51
Bass ................................................................... 52
Balance .............................................................. 53
BBE, TruSurround, and EALA .............................. 53
Earphone ............................................................ 54
Preset ................................................................ 55
TV Settings ............................................................. 56
TV/CATV ............................................................ 57
MTS ................................................................... 58
Auto Scan ........................................................... 59
Channel Add/Erase ............................................. 60
Favorite Channel................................................. 61
PC Settings ............................................................. 62
Phase ................................................................. 63
Clock .................................................................. 64
Auto Adjustment.................................................. 65
DOS Mode .......................................................... 65
Horizontal Position .............................................. 66
Vertical Position .................................................. 67
Miscellaneous Settings ............................................ 68
2
Page 4

Table of Contents
Wide................................................................... 69
Language ........................................................... 69
Sleeper............................................................... 70
Time ................................................................... 71
12. Taking Care of Your TV .............................................. 72
13. Troubleshooting .......................................................... 73
14. Specifications ............................................................. 75
PIP Operation Mode................................................. 76
Computer Compatibility Chart................................... 77
15. Glossary .................................................................... 78
3
Page 5

1
Warranty and Service
The instructions on this manual are for the model(s) listed on the front
cover. Before you start reading, check your product number by looking
at the rear of your TV.
Thank you for purchasing our Liquid Crystal Display Television (LCD
TV). With this product, you will be able to enjoy superior audio and
video while enriching your lifestyle with advanced technology.
The Hannspree TV is warranted for one year limited service from the
date the product is received (as shown on the Warranty and Service
Manual); please refer to the "Warranty and Service Manual" for the
detailed warranty information.
Hannspree provides complete service information in the included
"Warranty and Service Manual" or directly from the Hannspree customer service center. Our service representatives will be very happy to
serve you to your satisfaction.
The Hannspree e-mail address:
service@hannspree.com
4
Page 6

2
Preface
This manual is designed to assist users in setting up and using the LCD
TV. Information in this document has been carefully checked for accuracy; however, no guarantee is given to the correctness of the contents.
The information in this document is subject to change without notice.
Copyright
© Copyright 2004 Hannspree, Inc.
All rights reserved. This product and related documentation are protected by copyright and are distributed under licenses restricting their
use, copying, and distribution. No part of this documentation may be
reproduced in any form by any means without prior written authorization
of Hannspree, Inc., and its licensors, if any.
BBE, SRS, EALA Statement
• Manufactured under license from BBE Sound, Inc.
• Licensed by BBE Sound, Inc. under USP4638258, 5510752 and
5736897.
• BBE and BBE symbol are registered trademarks of BBE Sound,
Inc.
• BBE High Definition Sound restores clarity and presence for better speech intelligibility and musical realism.
is a trademark of SRS Labs, Inc. TruSurround
technology is incorporated under license from SRS
Labs, Inc.
EALA is a trademark of New Japan Radio Co., Ltd.
5
Page 7
3
Description of Warning Symbols
Warning
This symbol is used to remind
users to pay attention to
important descriptions regarding usage and maintenance
(repair) or additional important information related to this
product.
This symbol is used to remind
users to pay attention to the
danger of electric shocks due
to dangerous internal noninsulated components.
Caution
Electric Power Notice
Electric power may cause personal injury and mechanical damage if it is
misused. Although safety has been taken into consideration during the
design and production of this product, electric shock or fire can result
when the product is misused. To prevent potential danger, follow the
instructions below when installing, operating and cleaning the product.
In addition, read the following “Safety Notices” on page 7 carefully
before using the product to ensure that your TV’s safety.
6
Page 8
4
Safety Notices
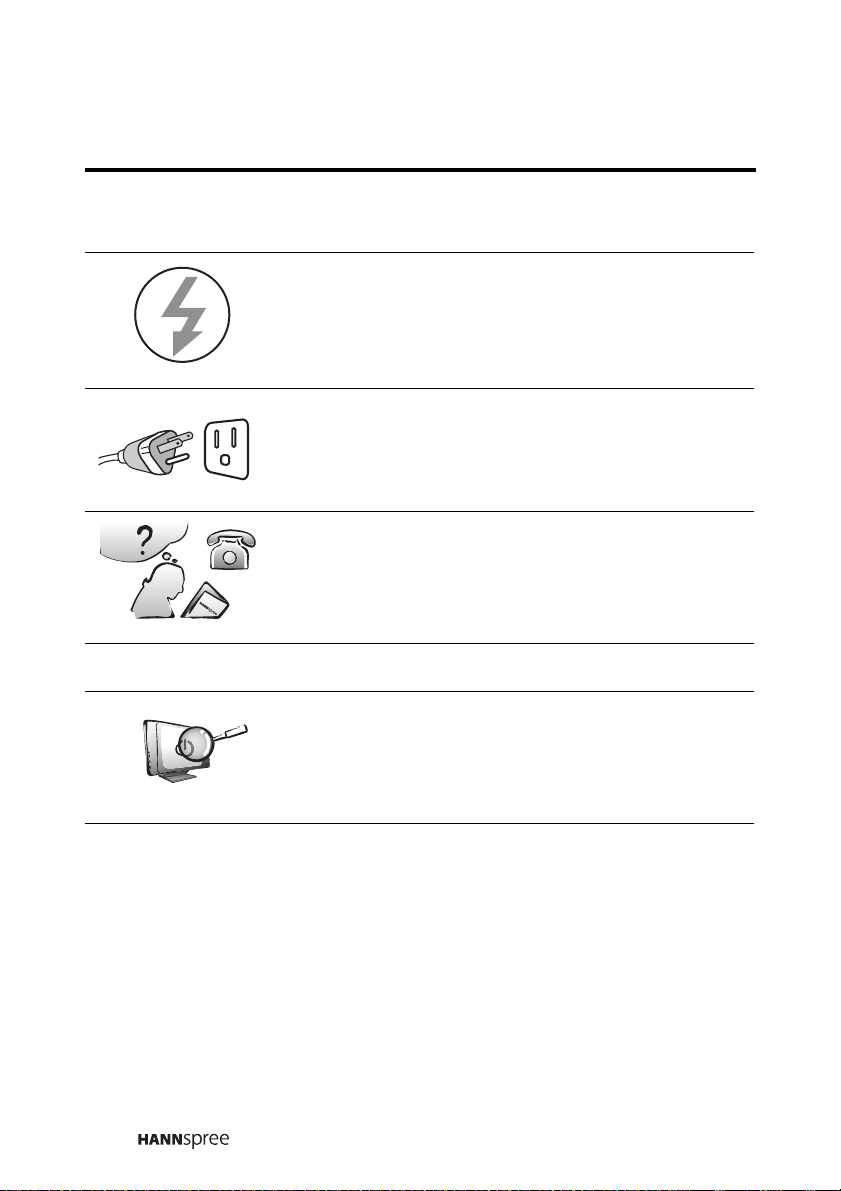
Power Supply Safety Notes
1. To avoid electric shocks, do not use an extended power cord or
an outlet that does not match this product's plug or leaves the
plug exposed.
2. This product has a 3-pin grounded plug. The third pin connects
to ground; do not remove it.
3. If the power cord or plug is damaged or worn, unplug it immediately and contact a qualified service technician for maintenance.
4. To avoid fire or electric shocks, do not overload electric power
outlets.
Installation Safety Notes
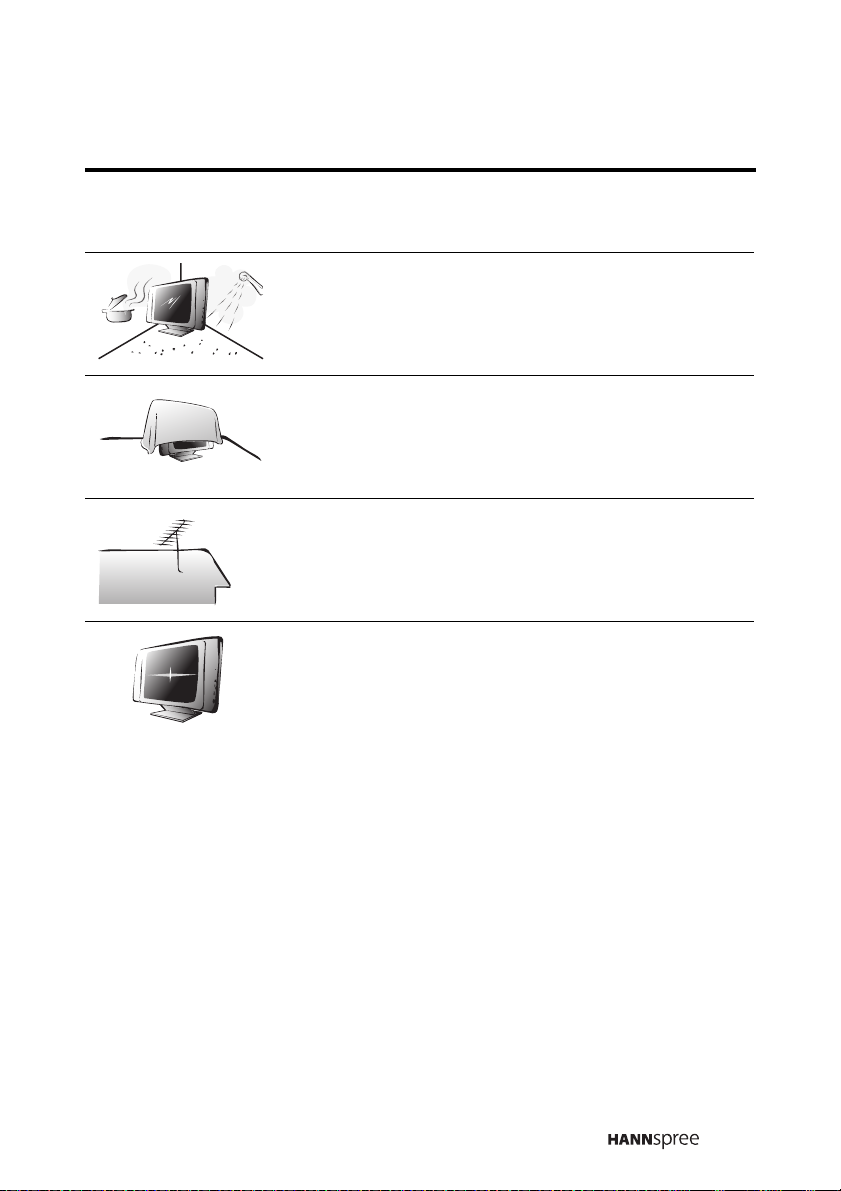
Antenna
We suggest that you use an outdoor antenna to get the best signal
possible, unless you have cable TV or a centralized indoor antenna
system. You may, however, use an antenna indoors if it is placed in
a location free from interference.
Location
Avoid allowing the TV to get prolonged exposure to sunlight or
other strong sources of heat. Leave sufficient distance between the
TV and the wall to provide enough space for the emission of heat.
7
Page 9
Before You Proceed
1. Read the Safety Notices and the User’s Manual carefully
before turning the product on.
2. Keep your User’s Manual in a safe place for future reference.
Keep the box and packaging in case the product needs to be
shipped in the future.
3. Follow the product and warning label instructions.
4. Any changes or modifications that do not follow the instructions
in this manual will void this product's warranty.
Warning
To reduce the risk of fire or electric shock, do not expose this
product to rain or moisture.
Power
To avoid danger of fires or electric shock, make sure that you use a
proper adapter. The TV is compatible with the following adapter:
• LI SHIN INTERNATIONAL ENTERPRISE CORP.:
LSE0226B20150
8
Page 10
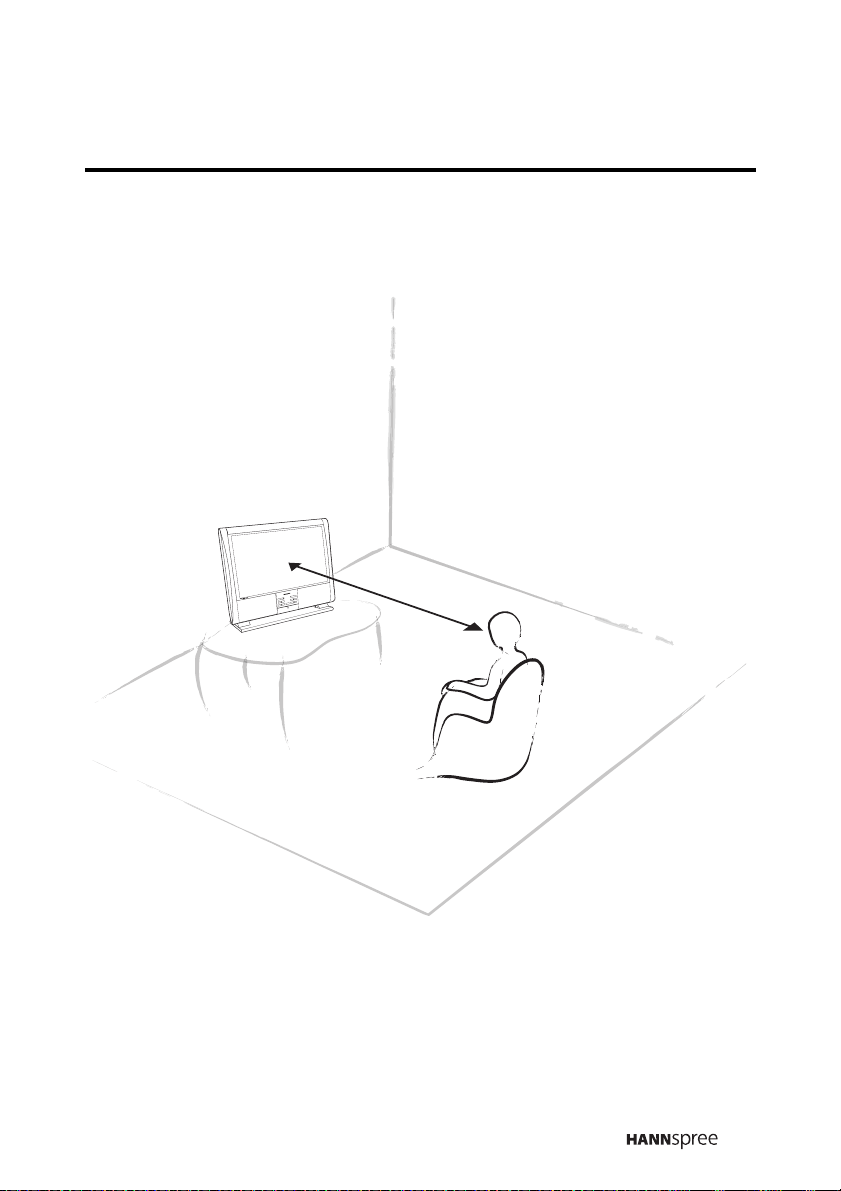
Optimal Viewing Distance
E
C
R
U
O
S
R
E
W
O
P
L
E
N
N
A
H
C
E
M
U
L
O
V
250 c
m
9
Page 11
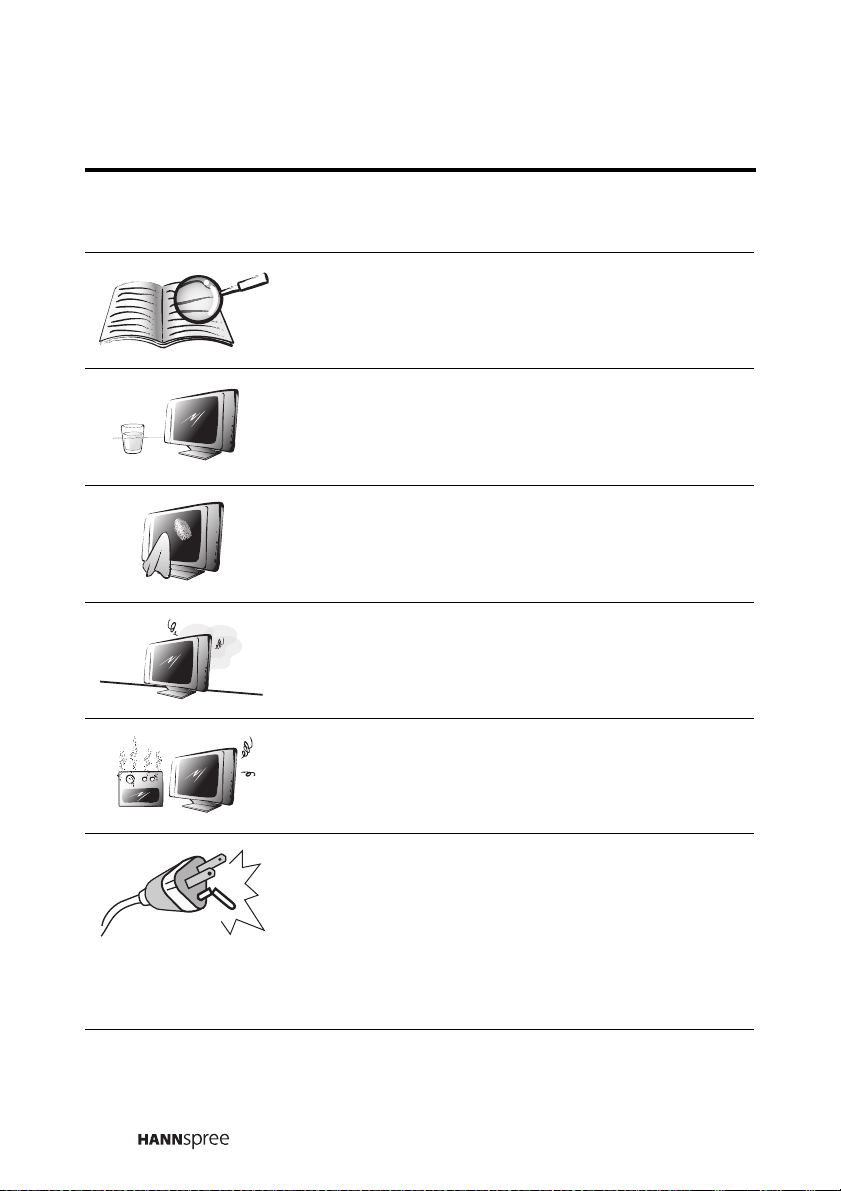
Important Safety Instructions
Read these instructions.
Keep these instructions.
Heed all warnings.
Follow all instructions.
Do not use this apparatus near water.
Clean only with a dry cloth.
Do not block any ventilation openings. Install in
accordance with the manufacturer’s instructions.
Do not install near any heat sources such as
radiators, heat registers, stoves, or other apparatus (including amplifiers) that produce heat.
10
Do not defeat the safety purpose of the polarized
or grounding-type plug. A polarized plug has two
blades with one wider than the other. A grounding type plug has two blades and a third grounding prong. The wide blade or the third prong are
provided for your safety. If the provided plug
does not fit into your outlet, consult an electrician for replacement of the obsolete outlet.
Page 12
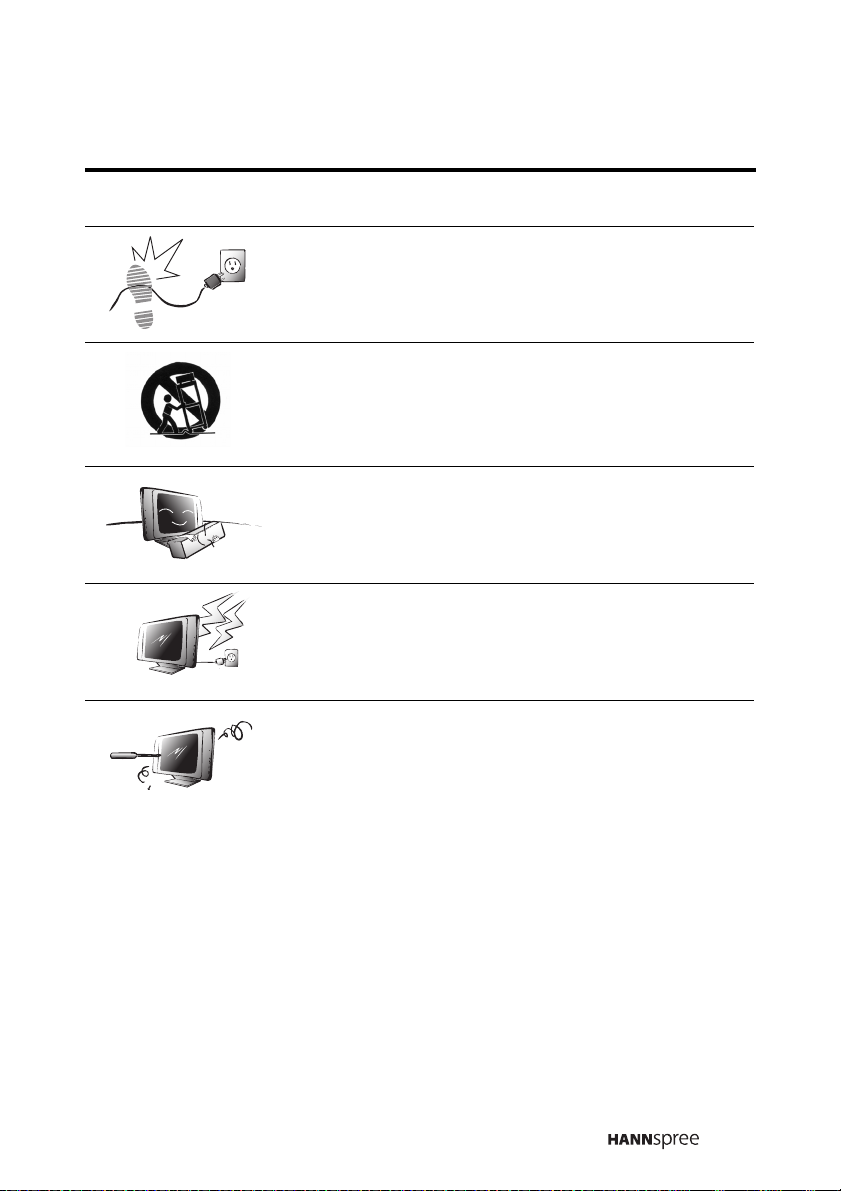
Protect the power cord from being walked on or
pinched, particularly at the plug, convenience
receptacles, and the point where they exit from
the apparatus.
Use only with a cart, stand, tripod, bracket, or
table specified by the manufacturer, or sold with
the apparatus. When a cart is used, use caution
when moving the cart/apparatus combination to
avoid injury from tip-over.
Only use attachments/accessories specified by
the manufacturer.
Unplug this apparatus during lightning storms or
when unused for long periods of time.
Refer all servicing to qualified service personnel.
Servicing is required when the apparatus has
been damaged in any way, such as if the powersupply cord or plug is damaged, liquid has been
spilled or objects have fallen into the apparatus,
the apparatus has been exposed to rain or moisture, does not operate normally, or has been
dropped.
11
Page 13
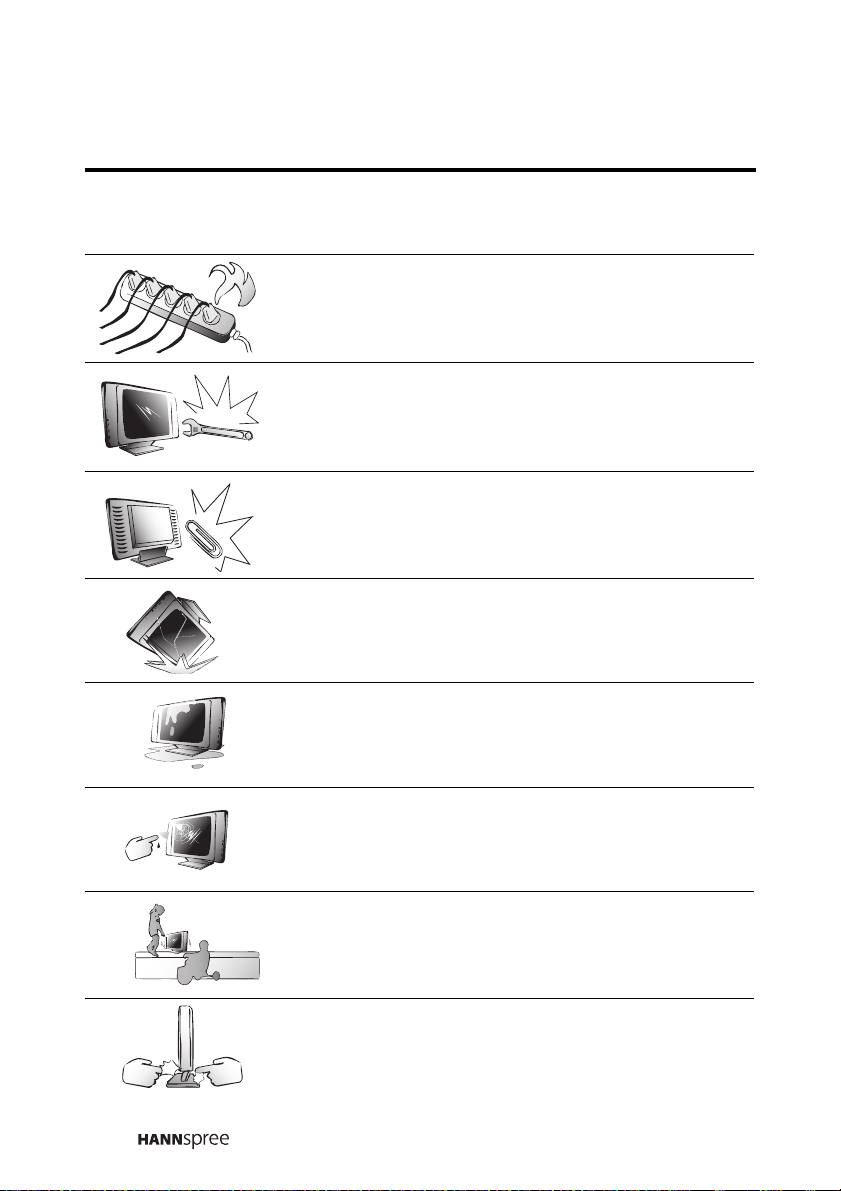
Personal Safety
To avoid overloading the power supply, do not
plug too many electrical devices into an outlet or
extension cable.
Dangerous high-voltage electric power components are located inside the TV. To avoid electric
shock, do not disassemble the casing.
Do not place or drop metals, small objects, or
flammable materials in the vent to avoid an electric shock or a fire.
If the TV is dropped, falls down, or is otherwise
damaged, unplug the power cord immediately
and notify a qualified service technician.
If any fluid is sprayed or dropped into the TV,
remove the power plug immediately and notify a
qualified service technician.
The screen of the TV is made of glass; be careful to avoid hitting or scraping it. If the screen is
broken, avoid cutting yourself on the broken
glass.
12
Do not allow children to use the TV unattended
to avoid accidents caused by improper operation.
Be careful not to your fingers at the hinge when
rotating the TV panel.
Page 14
Installation
To avoid damage to power circuits, do not place
the TV in locations where there is excessive
steam or dust.
Do not place the TV on a bed, sofa, carpet, or in
a sealed cabinet to avoid blocking the product's
vents.
Install the outdoor antenna far from power transmission lines to avoid possible danger.
Remove the power cord and antenna connector
when there is a storm or when the TV is not in
use for a long period to avoid electric shock from
lightning.
13
Page 15
Operation
V
Maintenance
This product is designed for power sources as
labeled on the casing. Avoid using any other
power accessories to avoid electric shock or
other damage.
The plug can be inserted into an outlet in only
one direction. Notify a qualified service technician if you cannot plug it in correctly.
If there is any problem that cannot be resolved
according to the instructions given in this manual, notify a qualified service technician immediately. Do not attempt any methods not covered in
this manual.
Do not attempt to repair the TV by yourself.
Notify a qualified service technician. Ask the service technician to complete a safety inspection
before switching on the power after completing
any maintenance.
14
Page 16

5
Regulatory Information
FCC Compliance Statement
This device complies with part 15 of the FCC Rules. Operation is subject to the following two conditions: (1) This device may not cause harmful interference, and (2) this device must accept any interference
received, including interference that may cause undesired operation.
This equipment has been tested and found to comply with the limits for a
Class B digital device, pursuant to part 15 of the FCC Rules. These limits are designed to provide reasonable protection against harmful interference in a residential installation. This equipment generates, uses and
can radiate radio frequency energy and, if not installed and used in
accordance with the instructions, may cause harmful interference to
radio communications. However, there is no guarantee that interference
will not occur in a particular installation. If this equipment does cause
harmful interference to radio or television reception, which can be determined by turning the equipment off and on, the user is encouraged to try
to correct the interference by one or more of the following measures:
• Reorient or relocate the receiving antenna.
• Increase the separation between the equipment and receiver.
• Connect the equipment to an outlet on a circuit different from that
to which the receiver is connected.
• Consult the dealer or an experienced radio/TV technician for help.
1
Warning: You are cautioned that changes or modifications not
expressly approved by the party responsible for compliance could void
your authority to operate the equipment.
1. applies only to products purchased in the United States of America
15
Page 17

DOC Compliance Notice
This digital apparatus does not exceed the Class B limits for radio noise
emissions from digital apparatus as set out in the Radio Interference
Regulations of the Canadian Department of Communications.This
device complies with Canada ICES-003 Class B.
1
CE Conformity Statement
This device complies with the requirements set out in the Council Directive on the approximation of the Laws of the Member States relating to
Electromagnetic Compatibility (89/336/EEC) and the Amendment Directive (92/31/EEC), Low-Voltage Directive (73/23/EEC) and the Amendment Directive (93/68/EEC).
2
1. applies only to products purchased in Canada
2. applies only to products purchased in the European Union
16
Page 18

6
Introducing the TV
Thank you for purchasing this Liquid Crystal
Display TV. Your TV is designed to be safe,
versatile, and easy to use. Its sturdy design
makes it a decorative addition to your living
room.
You can watch standard NTSC broadcast or
cable television channels, and easily
E
C
R
U
O
S
R
E
W
O
P
L
E
N
N
A
H
C
E
M
LU
O
V
connect a VCR, VCD, or DVD player to the
standard CVBS and S-Video input ports
located at the rear and front of the unit. You can also use the TV as a
monitor for your PC by connecting it through the DVI port.
Convenient control buttons located on the front panel let you change
channels, adjust the volume, and change display settings through an
easy-to-use on-screen menu system. The TV speakers provide full,
rich stereo sound and a convenient audio output port lets you
connect to an external audio system or earphone.
17
Page 19

Features
• 23-inch color TFT LCD TV
• Safe, sturdy construction
• Built-in dual TV tuner
• Audio/video support:
– Stereo audio inputs
– Composite video inputs
– Component video input
– S-Video inputs
– 3.5 mm stereo earphone output
– DVI input
• On-screen display (OSD) menu system
• Multi-channel Television Sound (MTS) with SAP
• Built-in 7.5W+7.5W stereo audio amplifier
• PIP/POP
• Image Enhancement Technology
– 3:2 pull down
– DCDi
– 3 D Y/C comb filter
• Noise Reduction
• De-interlace
• Edge Enhancement
18
Page 20
G
W
A
1
8
3
0
0
V
8
0
C
V
W
-
1
E
7
7
8
7
4
7
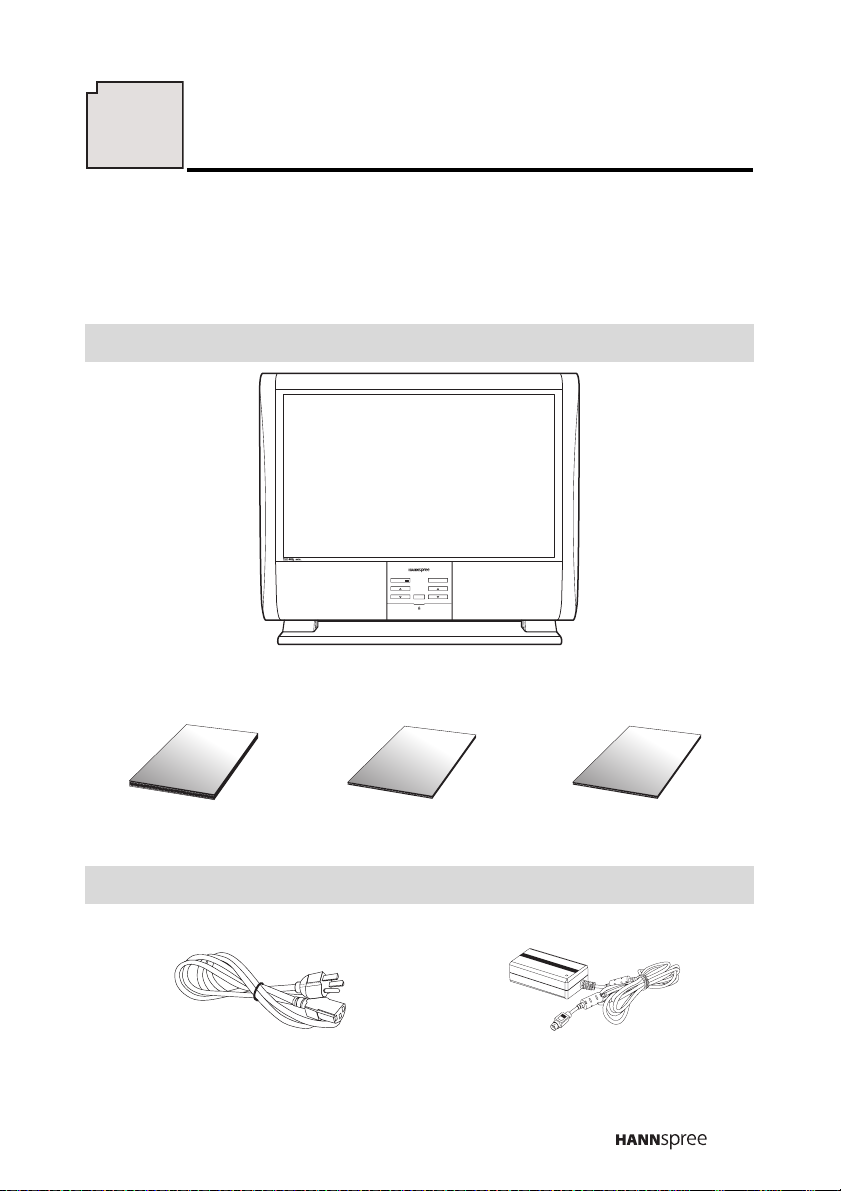
Checking Package Contents
Make sure the following components are included in the box. Contact
your vendor immediately if anything is missing or damaged.
TV
POWER
SOURCE
VOLUME
CHANNEL
User’s Manual Quick Start Guide Warranty and Service
Manual
User's M
anual
Q
uick S
tart
Guide
Warranty and service
manual
Cables
Power Cord Power Adapter
19
Page 21
8
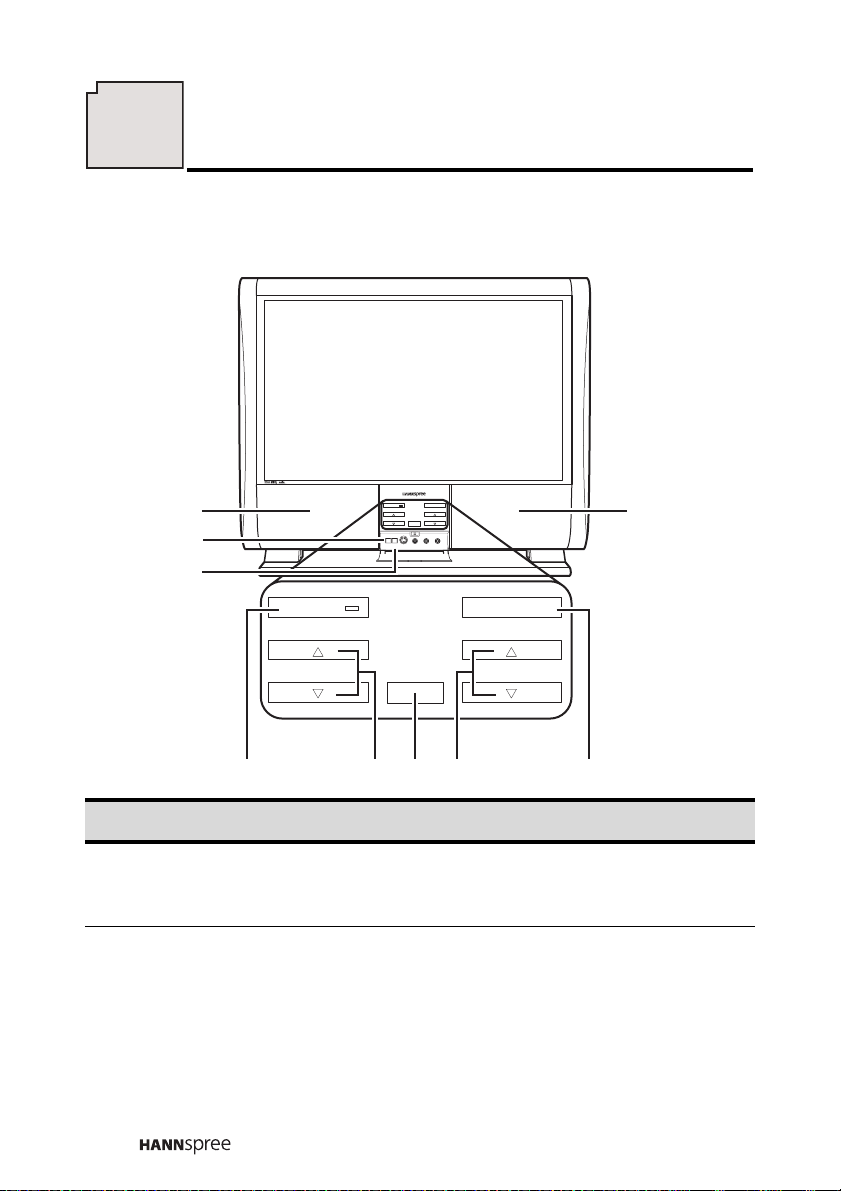
Getting to Know Your TV
Front View Controls
8
7
6
POWER
SOURCE
VOLUME
CHANNEL
MUTE
MENU
S-video
Video
RL
8
Description Function
Power button and
1
LED
2 Adjust volume
20
POWER
VOLUME
SOURCE
CHANNEL
34251
Turns the TV on and off. The green LED
indicates power on. In PC mode,
light
indicates sleep status.
amber
Press the S button to increase the
volume. Press the
the volume.
T button to decrease
These buttons are also used to navigate
OSD menus.
Page 22

Description Function
3 Infrared sensor
Point the remote control towards the
sensor to operate the TV.
Changes the channel. Press S to
increase the channel number. Press T
4 Select channel
5 Source
6 Menu
7 Mute
8 Speakers Produce high quality sound.
to decrease the channel number.
These buttons are also used to navigate
OSD menus.
Selects the input source to be displayed
(TV, AV1, AV2, AV 3, AV4, or P C).
Turns the on-screen display (OSD)
menus on and off.
Press this button to disable sound.
Press this button again or press the
volume adjust buttons directly to restore
sound.
In PC mode, press this button to
automatically adjust the screen for your
PC’s display adapter.
21
Page 23
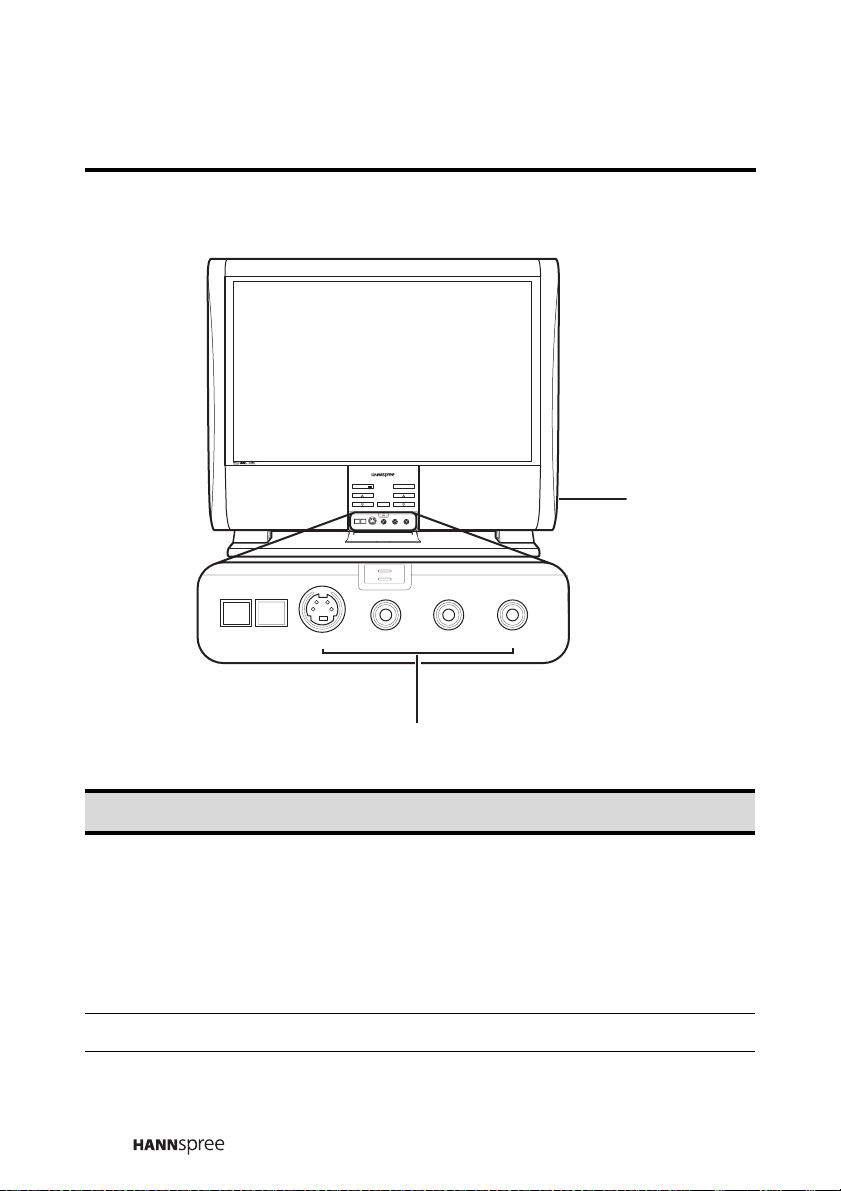
Front View Ports
MUTE
MENU
Description Function
S-video
POWER
VOLUME
MUTE
MENU
S-video
Video
Video L
SOURCE
CHANNEL
RL
R
2
1
1 AV4
2 Earphone line out
22
Use the AV4 input to connect an external
device, such as a VCR or a VCD/DVD
player.
Audio Input (L, R): white and red audio
cables.
Video Input (S-Video or Video): yellow
(video) or S-Video cable.
Connects to earphone.
Page 24
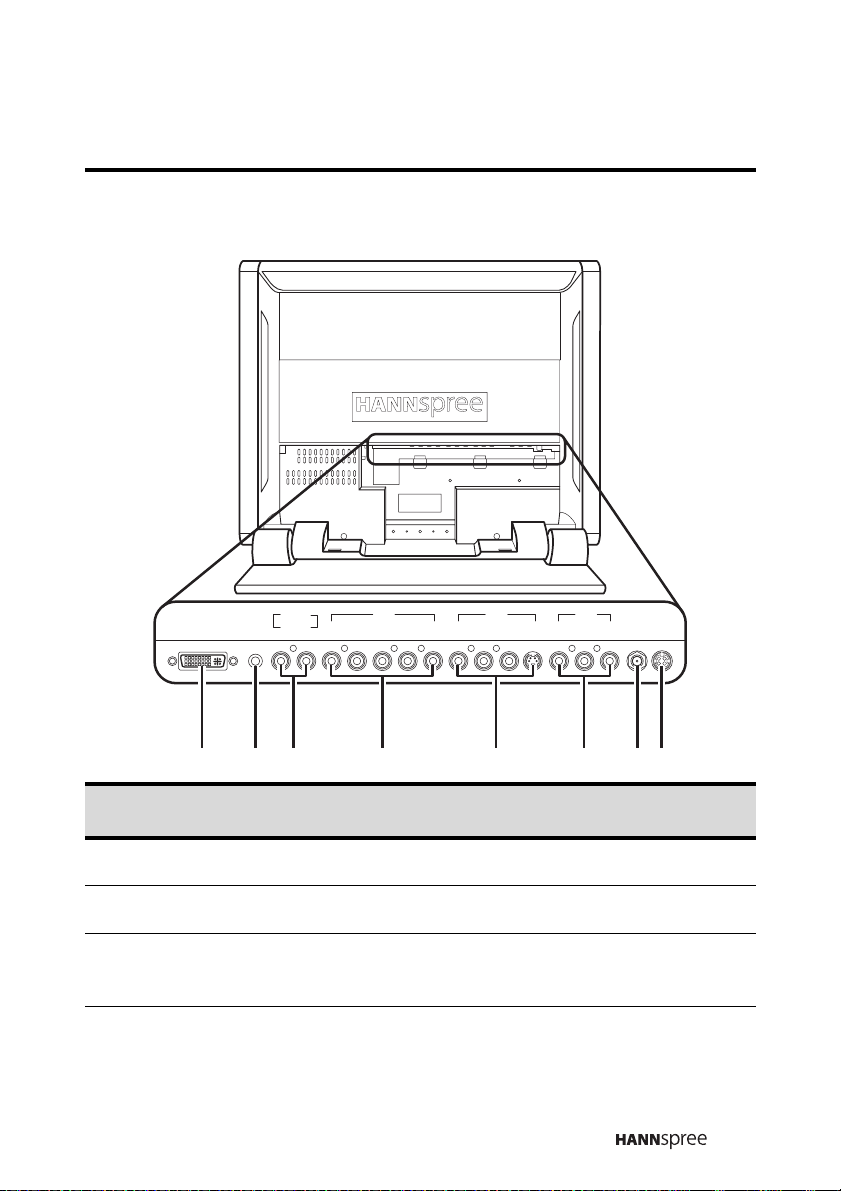
Rear Panel Input and Output Ports
DVI LINE IN
LINE OUT
RL R L R L V SYP
AV 1
R PB
AV 2
AV 3
R L V ANT DC-IN
123 4 5 678
Description Function
1 DVI Connects to a PC’s DVI port.
2 Line in Connects to a PC’s line/audio out port.
3 Line out
Connects to external amplifier or
speakers.
23
Page 25

Description Function
4 AV1
5 AV2
6 AV3
Use the AV1 input to connect an external
device, such as a VCR or a VCD/DVD
player with a component output.
Audio Input (R, L): white and red audio
cables.
Video Input (Y, PB, PR): video cables.
Use the AV2 input to connect an external
device, such as a VCR or a VCD/DVD
player.
Audio Input (R, L): white and red audio
cables.
Video Input (S or V): yellow (video) or
S-Video cable.
Use the AV3 input to connect an external
device, such as a VCR or a VCD/DVD
player with a composite output.
Audio Input (R, L): white and red audio
cables.
Video Input (V): yellow (video) cable.
7
8 DC-IN Connects to the included power adapter.
Antenna/cable TV
line in
Connects to an antenna or CATV cable
television line.
24
Page 26

9
Getting Started
Making Connections
Open the back cover as shown in the following illustration to get
access to the input and output ports.
1. Rotate the cover in
the direction of the
arrow.
2. Pull the cover out.
25
Page 27

Connecting to an Antenna or Cable TV
1
Connect one end of the VHF/UHF (Antenna) or CATV cable to the
ANT Jack (VHF/UHF IN Jack) on the back of the TV.
2 Connect the other end of the VHF/UHF (Antenna) or CATV cable to
the Antenna or CATV socket.
Antenna
DVI LINE IN
LINE OUT
RL R L R L V SYP
AV 1
R PB
AV 2
AV 3
R L V ANT DC-IN
Antenna/CATV
socket
ANT jack
(VHF/UHF IN jack)
Antenna/CATV
coaxial cable
Note:
If you cannot receive channels after connecting to an antenna or cable TV
line, try scanning for channels. See “Auto Scan” on page 59.
26
Page 28
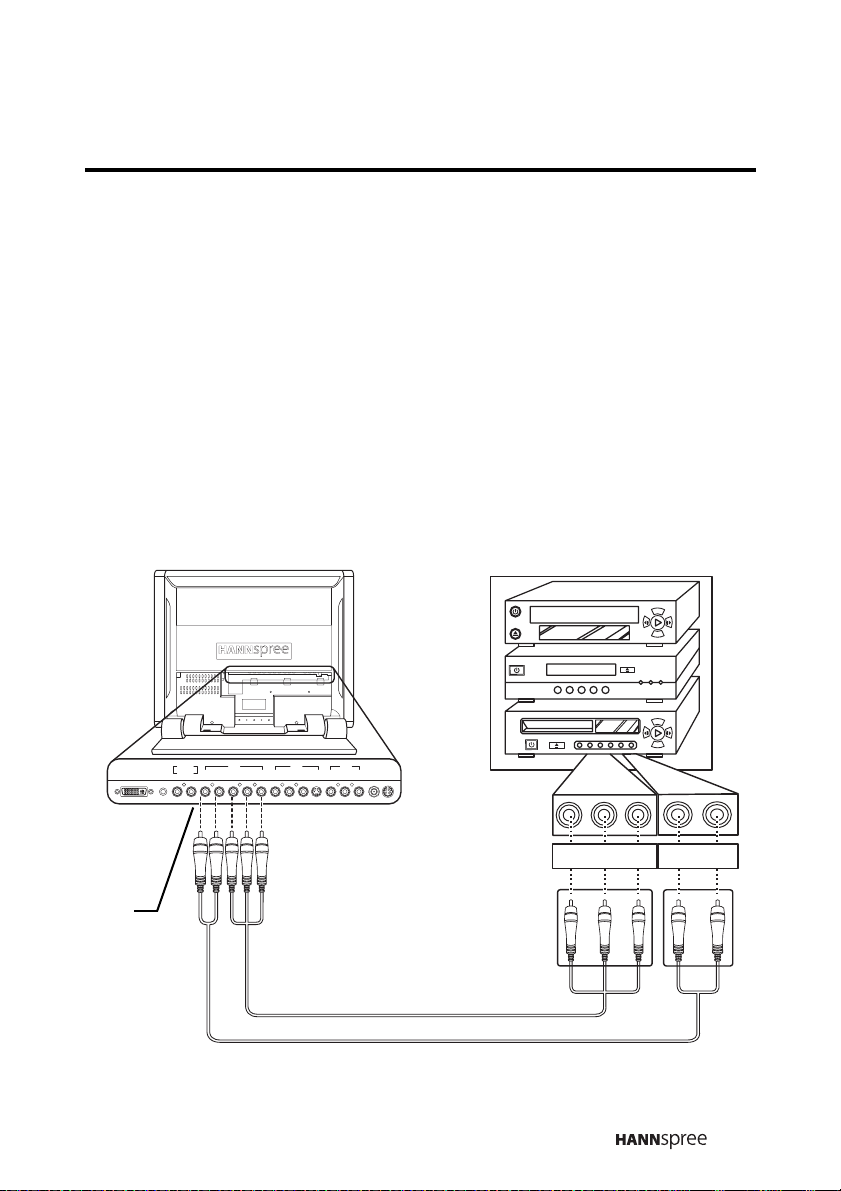
Connecting to AV Devices
Connect external devices such as VCD/DVD players or VCRs to the
TV using the AV1, AV2, AV3, and AV4 ports on the back or front of
the TV.
Connecting to a VCR, VCD or DVD Player using component
video
The illustration presented here shows how to connect your TV to a
VCR, VCD or DVD player using the AV1 component video port.
Actual connections may vary according to the make and model of
your device. Refer to the user’s manual included with the AV device
for more detailed instructions.
VCR
VCD
DVD
DVI LINE IN
LINE OUT
RL R L R L V SYP
AV 1
R PB
AV 2
AV 3
R L V ANT DC-IN
AV1
AV cables
YPbPr
RL
Cables and connectors are colorcoded (red, blue, green).
27
Page 29

Connecting to a Video Camera using S-Video
The following illustration shows how to connect the TV to a
camcorder using the AV2 S-video port. Actual connections may vary
according to the make and model of the device. Refer to the user’s
manual included with the camcorder for more detailed instructions.
S
WB
AV 3
DVI LINE IN
LINE OUT
RL R L R L V SYP
AV2
AV 1
R PB
AV 2
R L V ANT DC-IN
S-Video
connector
S-VIDEO
R
Audio
L
connectors
Video cable
Audio cable
Note: When connecting the S-Video
connector and AV connectors at the
same time, the priority is given to the
S-Video connector.
28
Cables and connectors are colorcoded (red, white, yellow).
Page 30

Connecting to a VCR, VCD or DVD Player using composite
video
The illustration presented here shows how to connect your TV to a
VCR, VCD, or DVD player using the AV3 composite video port.
Actual connections may vary according to the make and model of
your device. Refer to the user’s manual included with the AV device
for more detailed instructions.
VCR
VCD
DVD
DVI LINE IN
LINE OUT
RL R L R L V SYP
AV 1
AV3
AV 2
RPB
AV 3
R L V ANT DC-IN
RVIDEO L
A/V cable
Cables and connectors are colorcoded (red, white, yellow).
29
Page 31

Connecting Earphone
You can use earphone to listen to the TV instead of using the built-in
speakers. Connect
earphone to the earphone line out port as
illustrated.
Earphone
POWER
SOURCE
VOLUME
CHANNEL
Earphone
port
Note: Earphone is not included with the product.
30
Page 32

Connecting an Amplifier or Speakers
Connect an external amplifier or speakers to the line out port to
provide better sound quality. Refer to the following illustration.
Amplifier and speakers
DVI LINE IN
LINE OUT
RL R L R L V SYP
Line out
AV 1
R PB
AV 2
AV 3
R L V ANT DC-IN
RL
31
Page 33

Connecting to a PC
Connect the TV to your PC to use it as the monitor using the DVI port
as shown. Connect the DVI port of the TV to the DVI output of the
PC. Connect the line out port of the PC to the line in port of your TV
to listen to audio from the PC.
Note: When changing
from TV mode to PC
mode, the Power LED
changes to amber,
indicating that the pc
is in sleep status.
32
DVI LINE IN
LINE OUT
RL R L R L V SYP
Line inDVI port
AV 1
R PB
AV 2
AV 3
R L V ANT DC-IN
PC
Page 34

Connecting the Power Adapter
1
Connect the power cord to the power adapter as illustrated.
2 Plug the power adapter connector into the DC-IN on the rear panel of
the TV.
3 Plug the three-pronged plug at the other end of the power cord into a
power outlet.
Power outlet
Three-pronged
plug
DVI LINE IN
LINE OUT
RL R L R L V SYP
AV 1
R PB
AV 2
AV 3
R L V ANT DC-IN
Power cord
DC-IN
Power adapter
33
Page 35

10
Using the TV
Using the Remote Control
For best result, use the remote control within a distance of 6 meters
(20 feet) from the front of the TV’s signal sensor. Do not exceed an
angle of 30 degrees when pointing at the signal sensor. Refer to the
following illustration.
34
E
C
R
U
O
S
R
E
W
O
P
L
E
N
N
A
H
C
E
M
U
L
O
V
4m
30
30
4m
6m
Page 36

Turning the TV On and Off
1
Press the
POWER
button on the
remote control or on the TV control
panel. The power LED indicator on the
front of the TV changes from red to
green, indicating that the power is on.
2 Press the POWER button again. The
power LED changes from green to
red, indicating that the TV
is off.
Selecting Channels
1
Press the
channel number by one.
CH S button to increase the
2 Press the CH T button to decrease
the channel number by one.
3 Enter the specific channel number by
pressing the number buttons on the
remote control. The channel is
displayed on the
screen.
MAIN - CATV CH 033
POWER
SOURCE
VOLUME
CHANNEL
MUTE
MENU
S-video
Video
RL
POWER
VOLUME
SOURCE
CHANNEL
Power button and LED
MAIN - CATV CH 033
POWER
SOURCE
VOLUME
CHANNEL
MUTE
MENU
S-video
Video
RL
POWER
VOLUME
SOURCE
CHANNEL
Channel down
Channel up
35
Page 37

Adjusting the Volume
1
Press the
VOL S button to increase
the volume.
2 Press the VOL T button to decrease
the volume.
3 Press the MUTE button. The word
“MUTE” appears on the bottom right
corner of the screen and sound is
turned off.
4 Press the MUTE button again to
restore the original volume.
Switching Source Signals
Press the SOURCE button repeatedly to
select different source.
Volume down
Vol ume up
MAIN - CATV CH 033
MAIN - CATV CH 033
POWER
VOLUME
MUTE
MENU
S-video
Mute
MUTE
POWER
SOURCE
VOLUME
CHANNEL
MUTE
MENU
S-video
Video
RL
SOURCE
CHANNEL
Video
RL
The selected source – TV, AV1, AV2,
AV3, AV4, and PC – appear on the top
left corner of the screen in that order.
Note:
The TV supports S-Video input in addition
to normal video and audio signals. The TV
detects the signal type automatically and
gives priority to S-video when two signals
are detected at the same time.
36
POWER
VOLUME
POWER
SOURCE
VOLUME
CHANNEL
MUTE
MENU
S-video
Video
RL
SOURCE
CHANNEL
Source
Page 38

Using PIP and POP
The TV features Picture-in-Picture (PIP) and Picture-outsidePicture(POP), enabling you to view two sources at the same time.
Follow these instructions.
1
Turn on the TV and select a
MAIN - TV CH 007
source signal.
2 Press the PIP button on the
remote control.
MAIN - TV CH 007
PIP - CATV CH056
A picture-in-picture window
appears on the display, using the
last selected source signal for the
PIP.
Note:
Refer to “PIP Operation Mode” on page 76 for information on which
sources are compatible with each other in PIP and POP mode.
3 Press the SWAP button on the
MAIN - TV CH 007
remote control to switch the focus
from the PIP to the main source.
The PIP identification line
disappears and the PIP window
border disappears.
37
Page 39

4 Press the POSITION button on
the remote control to move the
PIP window to one of the four
corners of the screen as shown.
5 Press the PIP button to switch to
POP mode.
The two signals are displayed
side-by-side.
6 Press the PIP button again. The
screen displays the main source
signal again.
MAIN - TV CH 007
POP - TV CH 002
MAIN - TV CH 007
38
Page 40

11
Adjusting On-Screen Display (OSD)
Settings
The On-Screen Display (OSD) menu system provides a quick and
simple method to adjust your TV's setting. This chapter describes
how to change each of the available settings. The OSD menu can be
accessed through either the front control panel or the remote control.
Button Descriptions Front Panel Control
Menu MENU
CH Up S
CH Down T
VOL Up S
VOL Down T
The following sections explain how to adjust settings in the OSD
menus using the front panel control.
OSD Setting Menus
MAIN MENU
POWER
VOLUME
SOURCE
CHANNEL
PICTURE
AUDIO
TV
MISCELLANEOUS
EXIT
MUTE
MENU
S-video
Video
RL
Press MENU to enter the OSD
: ENTER
The Main Menu appears.
MENU : CLOSE: SELECT
Main Menu screen.
Notes:
• Press the MENU button to open and close the OSD menu at any time.
• Alternatively, select the CLOSE option in the menu to return to the previous
menu.
39
Page 41

Picture Settings
MAIN MENU
PICTURE
AUDIO
TV
MISCELLANEOUS
EXIT
: ENTER
1
Press CHANNEL S
select PICTURE.
2
Press VOLUME S
the PICTURE Menu.
MENU : CLOSE: SELECT
or T to
or T
to enter
MUTE
POWER
VOLUME
MENU
S-video
Video
SOURCE
CHANNEL
RL
Press MENU to enter the OSD
Main Menu screen.
Note:
• You can control the OSD with either the remote control or the front
panel control.
• PC picture mode and TV picture mode have different menu items; PC
picture mode includes a Backlight adjustment.
40
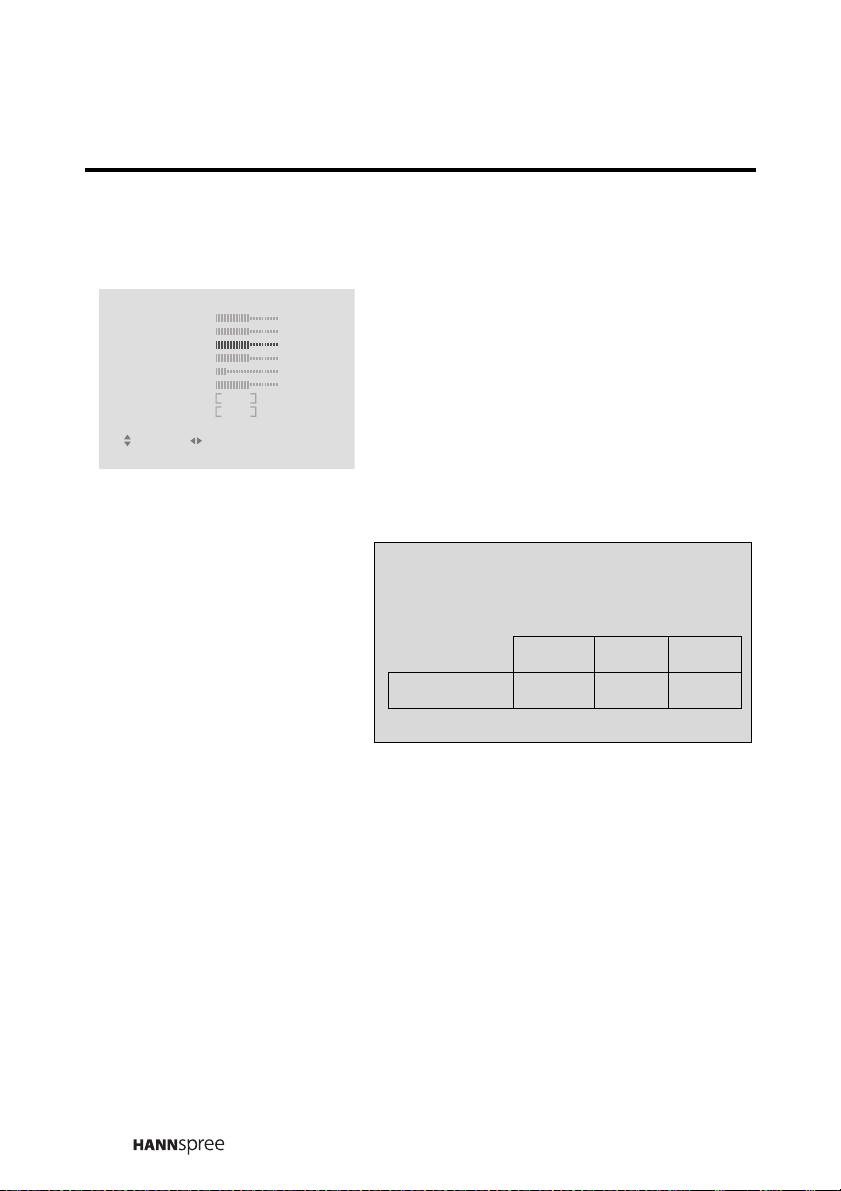
Page 42

Brightness
PICTURE
BRIGHTNESS 50
CONTRAST 50
HUE
SATURATION 50
SHARPNESS 1
BLACK LEVEL
COLOR TEMP STD
PRESET OFF
RETURN
: ADJUST
1
Press the CHANNEL S
or T
button to select BRIGHTNESS.
50
50
MENU : CLOSE: SELECT
The slider bar shows the current
setting.
2 Press the
VOLUME
S button to
increase the brightness.
3 Press the
decrease the brightness.
VOLUME
T button to
Note:
The new setting is confirmed automatically when the OSD times out.
MIN MID MAX
BRIGHTNESS 0 50 100
41
Page 43

Contrast
PICTURE
BRIGHTNESS 50
CONTRAST 50
HUE
SATURATION 50
SHARPNESS 1
BLACK LEVEL
COLOR TEMP STD
PRESET OFF
RETURN
: ADJUST
1
Press the CHANNEL S
or T
button to select CONTRAST. The
50
50
MENU : CLOSE: SELECT
slider bar shows the current
setting.
2 Press the
VOLUME
S button to
increase the contrast.
3 Press the
decrease the contrast.
VOLUME
T button to
Note:
The new setting is confirmed automatically when the OSD times out.
MIN MID MAX
CONTRAST 0 50 100
42
Page 44

Backlight (PC mode)
E
PICTURE
BRIGHTNESS 50
CONTRAST 50
BACKLIGHT
COLOR TEMP STD
PRESET OFF
RETURN
100
1
Press the CHANNEL S or T
button to select BACKLIGHT
The slider bar shows the current
setting.
.
: SELECT : ADJUST
MENU : CLOS
2 Press the
VOLUME
S button to
increase the backlight intensity.
3 Press the
VOLUME
T button to
decrease the backlight
intensity.
Note:
The new setting is confirmed automatically.
MIN MID MAX
BACKLIGHT 050100
43
Page 45
Hue
PICTURE
BRIGHTNESS 50
CONTRAST 50
HUE
SATURATION 50
SHARPNESS 1
BLACK LEVEL 50
COLOR TEMP STD
PRESET OFF
RETURN
: ADJUST
1
Press the CHANNEL S
or T
button to select HUE. The slider
50
MENU : CLOSE: SELECT
bar shows the current setting.
2 Press the
VOLUME
S button to
increase the hue.
3 Press the
decrease the hue.
VOLUME
T button to
Note:
The new setting is confirmed automatically when the OSD times out.
MIN MID MAX
HUE 0 50 100
44
Page 46

Saturation
PICTURE
BRIGHTNESS 50
CONTRAST 50
HUE
SATURATION 50
SHARPNESS 1
BLACK LEVEL
COLOR TEMP STD
PRESET OFF
RETURN
: SELECT
: ADJUST
50
50
MENU : CLOSE
1
Press the CHANNEL S
to select SATURATION
or T
button
.
The slider
bar shows the current setting.
2 Press the
VOLUME
S button to
increase the saturation.
3 Press the
decrease the saturation.
VOLUME
T button to
Note:
The new setting is confirmed automatically when the OSD times out.
MIN MID MAX
SATURATION 0 50 100
45
Page 47

Sharpness
PICTURE
BRIGHTNESS 50
CONTRAST 50
HUE
SATURATION 50
SHARPNESS 1
BLACK LEVEL
COLOR TEMP STD
PRESET OFF
RETURN
: ADJUST
1
Press the CHANNEL S
or T
button to select SHARPNESS. The
50
50
MENU : CLOSE: SELECT
slider bar shows the current
setting.
2 Press the
VOLUME
S button to
increase the sharpness.
3 Press the
decrease the sharpness.
VOLUME
T button to
Note:
The new setting is confirmed automatically when the OSD times out.
MIN MID MAX
SHARPNESS 017
46
Page 48

Black Level
PICTURE
BRIGHTNESS 50
CONTRAST 50
HUE
SATURATION 50
SHARPNESS 1
BLACK LEVEL
COLOR TEMP STD
PRESET OFF
RETURN
: SELECT
: ADJUST
50
50
MENU : CLOSE
1
Press the CHANNEL S
to select BLACK LEVEL
or T
button
.
The slider
bar shows the current setting.
2 Press the
VOLUME
S button to
increase the black level.
3 Press the
decrease the black level.
VOLUME
T button to
Note:
The new setting is confirmed automatically when the OSD times out.
MIN MID MAX
BLACK LEVEL 0 50 100
47
Page 49

Color Temperature
PICTURE
BRIGHTNESS 50
CONTRAST 50
HUE
SATURATION 50
SHARPNESS 1
BLACK LEVEL
COLOR TEMP STD
PRESET OFF
RETURN
: ADJUST
MENU : CLOSE: SELECT
1
Press the CHANNEL S
button to select COLOR TEMP
50
50
2 Press the
VOLUME
to change the color temperature.
or T
.
S or T button
The current setting is shown in
brackets. The following options
are available:
• STD Color – for standard color
settings.
• WARM Color – for color set-
tings with red as the dominant
color.
• COLD Color – for color set-
tings with blue as the dominant
color.
Notes:
• The new setting is confirmed
automatically when the OSD
times out.
• The default color temperature is
STD.
48
Page 50

Preset
PICTURE
BRIGHTNESS 50
CONTRAST 50
HUE
SATURATION 50
SHARPNESS 1
BLACK LEVEL
COLOR TEMP STD
PRESET OFF
RETURN
: ADJUST
1
Press the CHANNEL S
button to select PRESET
50
50
MENU : CLOSE: SELECT
2 Press the
VOLUME
button. “ON” appears in the
brackets. All picture settings are
or T
.
S or T
returned to the factory-set
default values.
Note:
The preset function erases all of your
custom picture settings.
49
Page 51

Audio Settings
MAIN MENU
PICTURE
AUDIO
TV
MISCELLANEOUS
EXIT
: ENTER
1
Press CHANNEL S
select AUDIO.
2
Press VOLUME S
the AUDIO Menu.
MENU : CLOSE: SELECT
or T to
or T
to enter
MUTE
POWER
VOLUME
MENU
S-video
Video
SOURCE
CHANNEL
RL
Press MENU to enter the OSD
Main Menu screen.
Note:
You can control the OSD with either the remote control or the front panel
control.
50
Page 52

Treble
AUDIO
TREBLE 108
BASS 108
BALANCE
BBE
EALA
EARPHONE 20
PRESET OFF
RETURN
: SELECT
: ADJUST
OFF
ONTruSurround
OFF
MENU : CLOSE
1
Press the CHANNEL S
or T
button to select TREBLE. The
slider bar shows the current
setting.
2 Press the
VOLUME
S button to
increase the treble.
3 Press the
decrease the treble.
VOLUME
T button to
Note:
The new setting is confirmed automatically when the OSD times out.
MIN MID MAX
TREBLE 0 108 216
51
Page 53

Bass
AUDIO
TREBLE 108
BASS 108
BALANCE
BBE
TruSurround
EARPHONE 20
PRESET OFF
RETURN
: SELECT
: ADJUST
OFF
ON
OFFEALA
MENU : CLOSE
1
Press the CHANNEL S
or T
button to select BASS. The slider
bar shows the current setting.
2 Press the
VOLUME
S button to
increase the bass.
3 Press the
decrease the bass.
VOLUME
T button to
Note:
The new setting is confirmed automatically when the OSD times out.
MIN MID MAX
BASS 0 108 216
52
Page 54

Balance
AUDIO
TREBLE 108
BASS 108
BALANCE
BBE
TruSurround
EARPHONE 20
PRESET OFF
RETURN
: SELECT
OFF
ON
OFFEALA
: ADJUST
MENU : CLOSE
BBE, TruSurround, and EALA
AUDIO
TREBLE 108
BASS 108
BALANCE
BBE
EALA
EARPHONE 20
PRESET OFF
RETURN
: SELECT
OFF
ONTruSurround
OFF
: ADJUST
MENU : CLOSE
1
Press the CHANNEL S
or T
button to select BALANCE. The
slider bar shows the current
setting.
2 Press the
VOLUME
S button to
shift the balance to the right
speaker.
3 Press the T button to shift the
balance to the left speaker.
Note:
The new setting is confirmed automatically when the OSD times out.
1
Press the CHANNEL
button to select BBE,
T
ruSurround, or EALA
2 Press the
VOLUME
S or T
button to select a setting for
each effect
:
– BBE: off, high, low
–TruSurround: on, off
– EALA: on, off
S or
.
T
Note:
Only one sound effect can be selected at
a time.
53
Page 55
Earphone
AUDIO
TREBLE 108
BASS 108
BALANCE
BBE
EALA
EARPHONE 20
PRESET OFF
RETURN
: SELECT
: ADJUST
OFF
ONTruSurround
OFF
MENU : CLOSE
1
Press the CHANNEL S
or T
button to select EARPHONE. The
slider bar shows the current
setting.
2 Press the
VOLUME
S button to
increase the earphone volume.
3 Press the
decrease the earphone volume.
VOLUME
T button to
Note:
The new setting is confirmed automatically when the OSD times out.
MIN MID MAX
EARPHONE 02050
54
Page 56

Preset
AUDIO
TREBLE 108
BASS 108
BALANCE
BBE
EALA
EARPHONE 20
PRESET OFF
RETURN
: ADJUST
OFF
ONTruSurround
OFF
1
Press the CHANNEL S
button to select PRESET
2 Press the
VOLUME
or T
.
S or T
button. “ON” appears in the
MENU : CLOSE: SELECT
brackets. All audio settings are
returned to the factory-set
default values.
Note:
The preset function erases all of your
custom audio settings.
55
Page 57

TV Settings
MAIN MENU
PICTURE
AUDIO
TV
MISCELLANEOUS
EXIT
: ENTER
1
Press CHANNEL S
select TV.
2
Press VOLUME S
the TV Menu.
MENU : CLOSE: SELECT
or T to
or T
to enter
MUTE
POWER
VOLUME
MENU
S-video
Video
SOURCE
CHANNEL
RL
Press MENU to enter the OSD
Main Menu screen.
Notes:
• Operate the OSD with either the remote control or the front panel control.
• The TV OSD menu is not available if the input source is not TV.
56
Page 58

TV/CATV
TV
TV / CATV
MTS
AUTO SCAN
CH . ADD/ERASE
FAV. CHANNEL
RETURN
CATV
MAIN
OFF
ADD
: ADJUST
1
Press the CHANNEL S
or T
button to select TV/CATV. The
current setting is shown in
brackets.
MENU : CLOSE: SELECT
2 Press the
VOLUME
S button to
select CATV in order to receive
cable TV signals.
3 Press the
VOLUME
T button to
select TV in order to receive
broadcast TV signals.
Note:
The default TV setting is “CATV”.
57
Page 59

MTS
TV
TV / CATV
MTS
AUTO SCAN
CH . ADD/ERASE
FAV. CHANNEL
RETURN
TV
MAIN
OFF
ADD
: ADJUST
1
Press the CHANNEL S
or T
button to select MTS. The
current setting is shown in
brackets.
2 Press the
MENU : CLOSE: SELECT
button to select from the
VOLUME
S or T
various MTS options:
• MAIN – select the main
audio signal.
• SAP – select the secondary
audio signal
• DUAL – enable both primary and secondary audio
signals. The primary signal
is output through the
speakers. The secondary
signal is output through the
earphone.
• EX. DUAL – exchange the
primary and external sec
ondary audio signals for
speakers and earphone.
i.e, the primary signal is
output through the ear
phones and the secondary
signal is output through the
speaker.
58
Note:
If no secondary language is available, the MTS setting is always
set to the main audio signal.
Page 60

Auto Scan
TV
TV / CATV
MTS
AUTO SCAN
CH . ADD/ERASE
FAV. CHANNEL
RETURN
TV
MAIN
OFF
ADD
: ADJUST
1
Press the CHANNEL S
or T
button to select AUTO SCAN. The
current setting is shown in
brackets.
MENU : CLOSE: SELECT
2 Press the
VOLUME
S button to
enable auto scanning. “ON” is
displayed in brackets and the TV
starts scanning automatically for
TV channels.
Note:
The TV screen displays the current
channel that is successfully tuned after
scanning is completed.
59
Page 61

Channel Add/Erase
TV
TV / CATV
MTS
AUTO SCAN
CH . ADD/ERASE
FAV. CHANNEL
RETURN
TV
MAIN
OFF
ADD
: ADJUST
MENU : CLOSE: SELECT
1
Press the CHANNEL S
button to select
CH. ADD/ERASE
or T
The current setting is shown in
brackets.
2 Press the
VOLUME
S button to
add the current channel.
3 Press the
delete the current channel.
VOLUME
T button to
Note:
You can still access the erased channel
by entering the channel number using
the number buttons on the remote
control. Add the channel again if it was
erased accidentally.
.
60
Page 62

Favorite Channel
TV
TV / CATV
MTS
AUTO SCAN
CH . ADD/ERASE
FAV. CHANNEL
RETURN
TV
MAIN
OFF
ADD
: ADJUST
1
Press the CHANNEL S
button to select FAV.CHANNEL
2 Press the
VOLUME
or T
.
S or T
button to enter the
MENU : CLOSE: SELECT
FAV.CHANNEL menu.
FAV. CHANNEL SETTING
CHANNEL 1 XX
RETURN
XXCHANNEL 2
XXCHANNEL 3
XXCHANNEL 4
: ADJUST
3 Press the
CHANNEL S
or T
button to select a favorite
channel number 1 ~ 4.
4 Press the
MENU : CLOSE: SELECT
button to choose a channel to
VOLUME
S or T
assign to the favorite channel
number you selected in step 3.
Note:
Assigning a channel to one of the four
favorite channel numbers replaces a
previously stored channel assignment.
61
Page 63

PC Settings
POWER
VOLUME
SOURCE
CHANNEL
PC
PICTURE
AUDIO
PC
MISCELLANEOUS
EXIT
MUTE
MENU
S-video
Video
RL
Press MENU to enter the OSD
Main Menu screen.
1
Press CHANNEL S
select TV.
2
Press VOLUME S
: ENTER
MENU : CLOSE: SELECT
or T to
or T
to enter
the TV Menu.
Notes:
• Operate the OSD with either the remote control or the front panel control.
• The PC OSD menu is not available if the input source is not PC.
62
Page 64

Phase
PC
PHASE 15
CLOCK 50
DOS MODE
H-POSITION
V-POSITION 15
RETURN
OFFAUTO ADJ .
GRAPHIC
1
Press the
CHANNEL
S or T
button to select PHASE. The
50
slider bar shows the current
setting.
: ADJUST
MENU : CLOSE: SELECT
2 Press the
VOLUME
S button to
increase the phase.
3 Press the
VOLUME
T button to
decrease the phase.
Note:
The new setting is confirmed automatically.
MIN MAX
PHASE 031
63
Page 65

Clock
PC
PHASE 15
CLOCK 50
DOS MODE
H-POSITION
V-POSITION 15
RETURN
OFFAUTO ADJ .
GRAPHIC
1
Press the
CHANNEL
S or T
button to select CLOCK. The
50
slider bar shows the current
setting.
: ADJUST
MENU : CLOSE: SELECT
2 Press the
VOLUME
S button to
increase the clock.
3 Press the
VOLUME
T button to
decrease the clock.
Note:
The new setting is confirmed automatically.
MIN MAX
CLOCK 0 100
64
Page 66

Auto Adjustment
PC
PHASE 15
CLOCK 50
DOS MODE
H-POSITION
V-POSITION 15
RETURN
OFFAUTO ADJ .
GRAPHIC
: ADJUST
DOS Mode
PC
PHASE 15
CLOCK 50
DOS MODE
H-POSITION
V-POSITION 15
RETURN
OFFAUTO ADJ .
TEXT
1
Press the
CHANNEL
S or T
button to select AUTO
50
ADJUSTMENT
2 Press the
MENU : CLOSE: SELECT
enable auto adjustment. The
.
VOLUME
S button to
display is automatically
configured for the attached
computer’s display properties.
1
Press the
button to select DOS MODE
50
The current setting is shown in
CHANNEL
S or T
.
brackets.
: ADJUST
MENU : CLOSE: SELECT
2 Press the
VOLUME
S or T
button to toggle the setting
between TEXT and GRAPHIC.
• TEXT – select this option when
using DOS at the command
line.
• GRAPHIC – select this option
when using DOS based graphi
-
cal programs.
65
Page 67

Horizontal Position
PC
PHASE 15
CLOCK 50
DOS MODE
H-POSITION
V-POSITION 15
RETURN
OFFAUTO ADJ .
GRAPHIC
1
Press the
button to select H POSITION
50
The slider bar shows the
CHANNEL
S or T
.
current setting.
: ADJUST
MENU : CLOSE: SELECT
2 Press the
VOLUME
S button to
move the display to the right.
3 Press the
VOLUME
T button to
move the display to the left.
Note:
The new setting is confirmed automatically.
MIN MID MAX
H POSITION 0 50 100
66
Page 68

Vertical Position
PC
PHASE 15
CLOCK 50
DOS MODE
H-POSITION
V-POSITION 15
RETURN
OFFAUTO ADJ .
GRAPHIC
1
Press the
button to select V POSITION
50
The slider bar shows the
CHANNEL
S or T
.
current setting.
: ADJUST
MENU : CLOSE: SELECT
2 Press the
VOLUME
S button to
move the display upward.
3 Press the
VOLUME
T button to
move the display downward.
Note:
The new setting is confirmed automatically.
MIN MID MAX
V POSITION 01530
67
Page 69

Miscellaneous Settings
MAIN MENU
PICTURE
AUDIO
TV
MISCELLANEOUS
EXIT
: ENTER
1
Press CHANNEL S
MENU : CLOSE: SELECT
or T to
select MISCELLANEOUS.
2
Press VOLUME S
or T
the MISCELLANEOUS Menu.
to enter
MUTE
POWER
VOLUME
MENU
S-video
Video
SOURCE
CHANNEL
RL
Press MENU to enter the OSD
Main Menu screen.
Note:
Operate the OSD with either the remote control or the front panel control.
68
Page 70

Wide
MISCELLANEOUS
WIDE
LANGUAGE
SLEEPER
TIME
RETURN
Language
MISCELLANEOUS
WIDE
LANGUAGE
SLEEPER
TIME
RETURN
16 : 9
ENGLISH
OFF
: ADJUST
16 : 9
ENGLISH
OFF
1
Press the CHANNEL S
or T
button to select WIDE. The
current setting is shown in
brackets.
MENU : CLOSE: SELECT
2 Press the
VOLUME
S or T
button to select the screen format
from the following:
–16:9
–4:3
– Anamorphic
1
Press the CHANNEL S
button to select LANGUAGE. The
current setting is shown in
brackets.
or T
: ADJUST
MENU : CLOSE: SELECT
2 Press the
VOLUME
S or T
button to select the language
from the following:
– English
– Traditional Chinese
Note:
The default language setting is Traditional Chinese
69
Page 71

Sleeper
The sleep timer turns the TV off automatically after a set time.
1
MISCELLANEOUS
WIDE
LANGUAGE
SLEEPER
TIME
RETURN
16 : 9
ENGLISH
OFF
: ADJUST
Press the CHANNEL S
button to select SLEEPER. The
current setting is shown in
brackets.
MENU : CLOSE: SELECT
2 Press the
VOLUME
to select a sleep timer value from
the following: OFF, 30, 60, 90, or
120 minutes
You can also press SLEEP on the
remote control to select OFF, 30, 60,
90 or 120 minutes. Press display; the
setting appears on the TV screen.
The remaining time is updated every
1 minute on the display.
or T
S or T button
70
Page 72

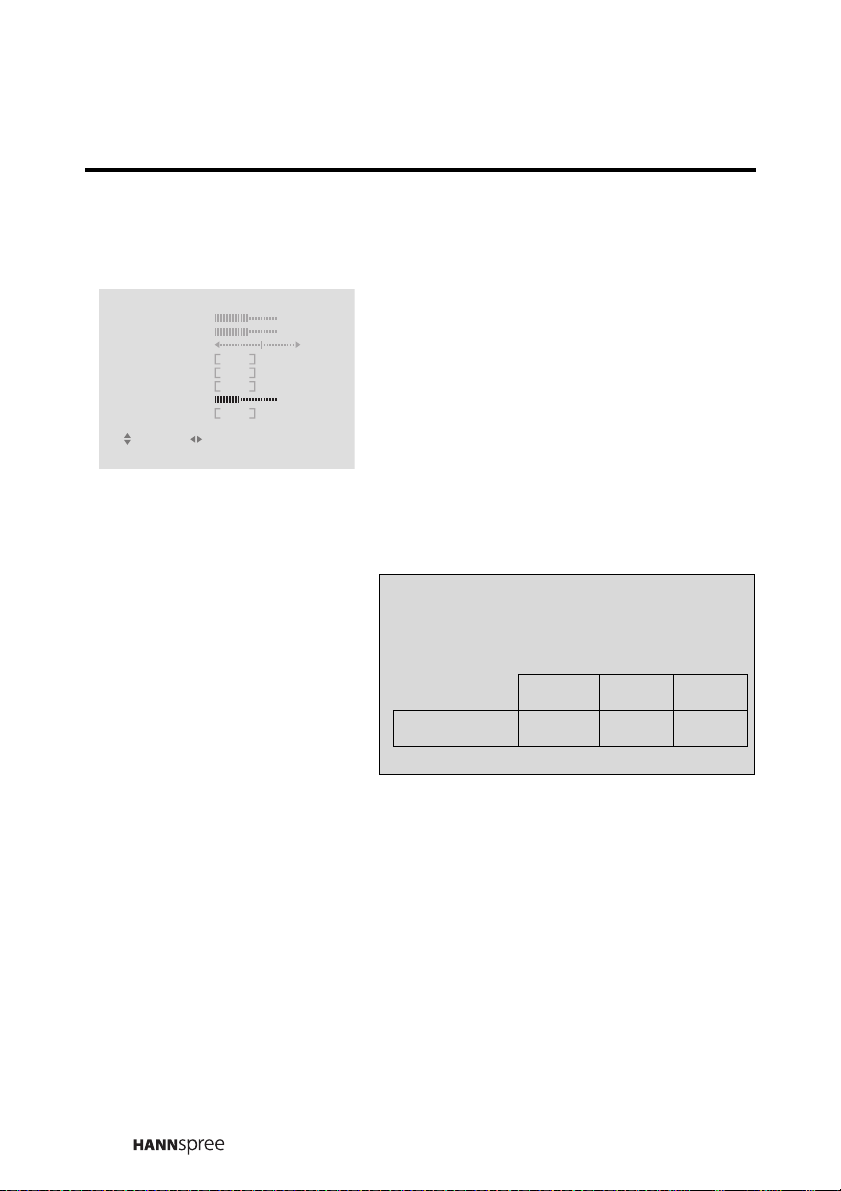
Time
This setting allows you to set the system time.
1
MISCELLANEOUS
WIDE
LANGUAGE
SLEEPER
TIME
RETURN
16 : 9
ENGLISH
OFF
: ADJUST
MENU : CLOSE: SELECT
Press the CHANNEL S
button to select TIME
2 Press the
change the time.
.
VOLUME S
or T
button to
TIME SETTING
HOUR
RETURN
2
12MINUTE
: ADJUST
3 Press the
CHANNEL S or T
button to select HOUR. Press the
VOLUME
S or T button to
increase or decrease the hour.
MENU : CLOSE: SELECT
4 Press the
CHANNEL S or T
button to select MINUTE. Press
the
VOLUME
S or T button to
increase or decrease the
minutes.
71
Page 73

12
Taking Care of Your TV
Turn the power off before you begin cleaning the
TV.
For best results, use a clean lens cloth to
remove dust and fingerprints from the screen.
Do not wipe the shell of the TV with alcohol,
methanol, gasoline or oil products to avoid
GAS
OIL
damaging the finish. Wipe the shell with a dry
soft cloth and use neutral cleaning fluids.
If your TV model has leather components, wipe
the leather parts with a dry cloth and keep the
area dry. Place the TV far from sources of steam
to avoid making the leather wet.
72
Be careful to remove the power plug correctly.
Hold the plug instead of pulling the power cord.
Arrange the power cord with other cords to avoid
knotting or bending which may cause fire due to
damage or electric leakage.
Page 74

13
Troubleshooting
Situation Solution
No picture and sound.
• Connect the power cord properly.
• Press the POWER button on the control panel
or remote control.
• Press the SOURCE button to cycle through
connected video sources.
• Press the CHANNEL UP or CHANNEL DOWN
button to switch to other TV stations.
• Check the TV/CATV OSD settings. See
“TV/CATV” on page 57.
• Make sure all cables are connected properly.
No picture, or poor picture, sound is
OK.
Picture is not in color.
Picture is OK, no sound.
One of the speakers has no sound.
Can’t receive some TV channels
using cable TV.
Want to reset TV settings.
Cannot operate menus.
No image but sound available.
• Check the antenna and cable connections.
• Adjust the brightness in the OSD menus. See
“Brightness” on page 41.
• Adjust the saturation in the OSD menus. See
“Sharpness” on page 46.
• Press the VOLUME UP button on the control
panel or remote control.
• Make sure the MTS option is set to MAIN.
• Adjust the balance in the OSD menus. See
“Balance” on page 53.
• Try the Auto Program function in the TV Settings menu. See “Auto Scan” on page 59.
• Use the Preset function in the OSD Picture and
Audio menu.
• If OSD items are colored light blue, it means
that these settings are not available. For example, TV settings are available in TV mode
(when source is selected to be TV).
• Make sure the video signal cable is connected
properly.
73
Page 75

Situation Solution
No sound but have image.
• Make sure the source device is functioning
properly.
• Set the volume to a higher level.
• Make sure the audio cable is connected
securely.
• Turn the mute off.
Screen image turns over.
Snow appears on the screen.
Blurred or overlapped images.
• Make sure the video signal cable is connected
properly.
• Adjust the location of the antenna, placing it as
far as possible from roads or sources of interference.
• Check the antenna and the video signal line
connections.
• Readjust the sharpness setting.
• Choose programs with high quality signals.
• Adjust the direction of the antenna or change
the video signal cable.
74
Page 76

14
Specifications
LT13-23A1
LCD Panel Size 23-inch TFT
Aspect Ratio 15:9
Panel Best Resolution 1280 (horizontal) x 768 (vertical)
TV System NTSC
Video System AV1: Component Video (RCA jack, YPbPr)
AV2: Composite Video (RCA jack; yellow +
S-Video)
AV3: Composite Video (RCA jack)
AV4: Composite Video (RCA jack; yellow +
S-Video)
Component Format 480i, 480p, 576i, 576p, 720p, 1080i
Audio System AV1, AV2, AV3, AV4: L/R RCA jacks (audio
input)
8 mm line in jack (audio input)
3.5 mm
(audio output)
earphone and L/R line out jacks
Built-in stereo audio
amplifier
Power Supply 100~240V, 50/60 Hz, 20V DC
Power Consumption < 150W
Weight (including base) 16.35 KG
Dimensions (including
base)
7.5W + 7.5W
515 mm (H) x 596 mm (W) x 237.1 mm (D)
75
Page 77

PIP Operation Mode
The following table shows which main sources are compatible with
PIP and POP sources.
Main Source PIP Source POP Source
AV2 —
AV1
(YPbPr or YCbCr)
AV2 (S or CVBS)
AV3(CVBS)
AV4 (S or CVBS) “Front”
TV
PC
AV3 —
AV4 —
TV2 —
AV2 AV2
AV3 AV3
AV4 AV4
TV2 TV2
AV2 AV2
AV3 AV3
AV4 AV4
TV2 TV2
AV2 AV2
AV3 AV3
AV4 AV4
TV2 TV2
AV2 AV2
AV3 AV3
AV4 AV4
TV2 TV2
AV2 AV2
AV3 AV3
AV4 AV4
TV2 TV2
76
Page 78

Computer Compatibility Chart
The following table shows resolution and frequency values supported
by the TV.
Resolution Frequency Remarks
640 X 400 70 Hz —
60 Hz —
67 Hz Mac
640 X 480
72 Hz —
75 Hz —
56 Hz —
800 X 600
60 Hz —
72 Hz —
75 Hz —
832 X 624 75 Hz Mac
60 Hz —
70 Hz —
1024 X 768
75 Hz —
75 Hz Mac
77
Page 79

15
Glossary
Aspect Ratio The ratio of width to height of a film, image or display screen.
BBE A proprietary audio enhancement technology. BBE compensates for distortion
common to loudspeakers.
Broadcast TV Broadcasting video signals using high-frequency electromagnetic
waves to distribute television channels to viewers (standard TV broadcast).
CATV Community Antenna Television, the original name for cable TV. A television
distribution system that uses coaxial cable instead of the traditional radio broadcasting (over-the-air) method to deliver television, FM radio, and other services to
consumers.
Color Temperature Adjusting the color temperature enables you to set the inten-
sity of white light. Color temperature is measured in Kelvin (K). Higher color temperatures result in a blue tint. Lower temperatures result in a red tint.
EALA 3D surround sound enhancement technology that provides a more immer-
sive and realistic soundscape.
Hue Colors in a color system are measured by hue, saturation and luminance.
Hue indicates the predominant color.
LCD Liquid Crystal Display. A display technology that uses rod-shaped molecules
(liquid crystals) that flow like liquid and bend light.
MTS Multi-channel Television Sound. Enables reception of audio other than the
primary (MAIN) audio signal. DUAL enables reception of a stereo audio signal,
while SAP (Second Audio Program) enables reception of a separate channel that
may be a different language or completely different information such as the news.
Saturation Chromatic purity indicating the amount of white contained in a color.
Fully saturated colors are pure colors; less saturated colors appear as pastel
shades.
S-Video Super-video, a video cabling standard used to transmit video by keeping
brightness (Y) and color information (C) on separate channels. Most often used
with camcorders, VCRs, and quality receivers and amplifiers to provide sharper pictures.
TruSurround 3D audio surround technology that delivers virtual surround sound
experience through any two speaker system, including internal television speakers
and earphone.
VCD A compact disk format developed in 1993 by Sony and Philips to capture full-
motion video. A standard Video CD can hold 74 minutes of near VHS-quality video
and CD-quality sound.
78
Page 80

MEMO
Page 81

MEMO
 Loading...