

Page 1
Quick Start Guide
K206-10H1 9.6" Liquid Crystal Display TV
This guide is designed as a reference to help you start using your LCD TV quickly.
Please refer to the User's Manual for more detailed installation and safety instructions.
Other Models
The information in this Quick Start Guide applies to all models shown below.
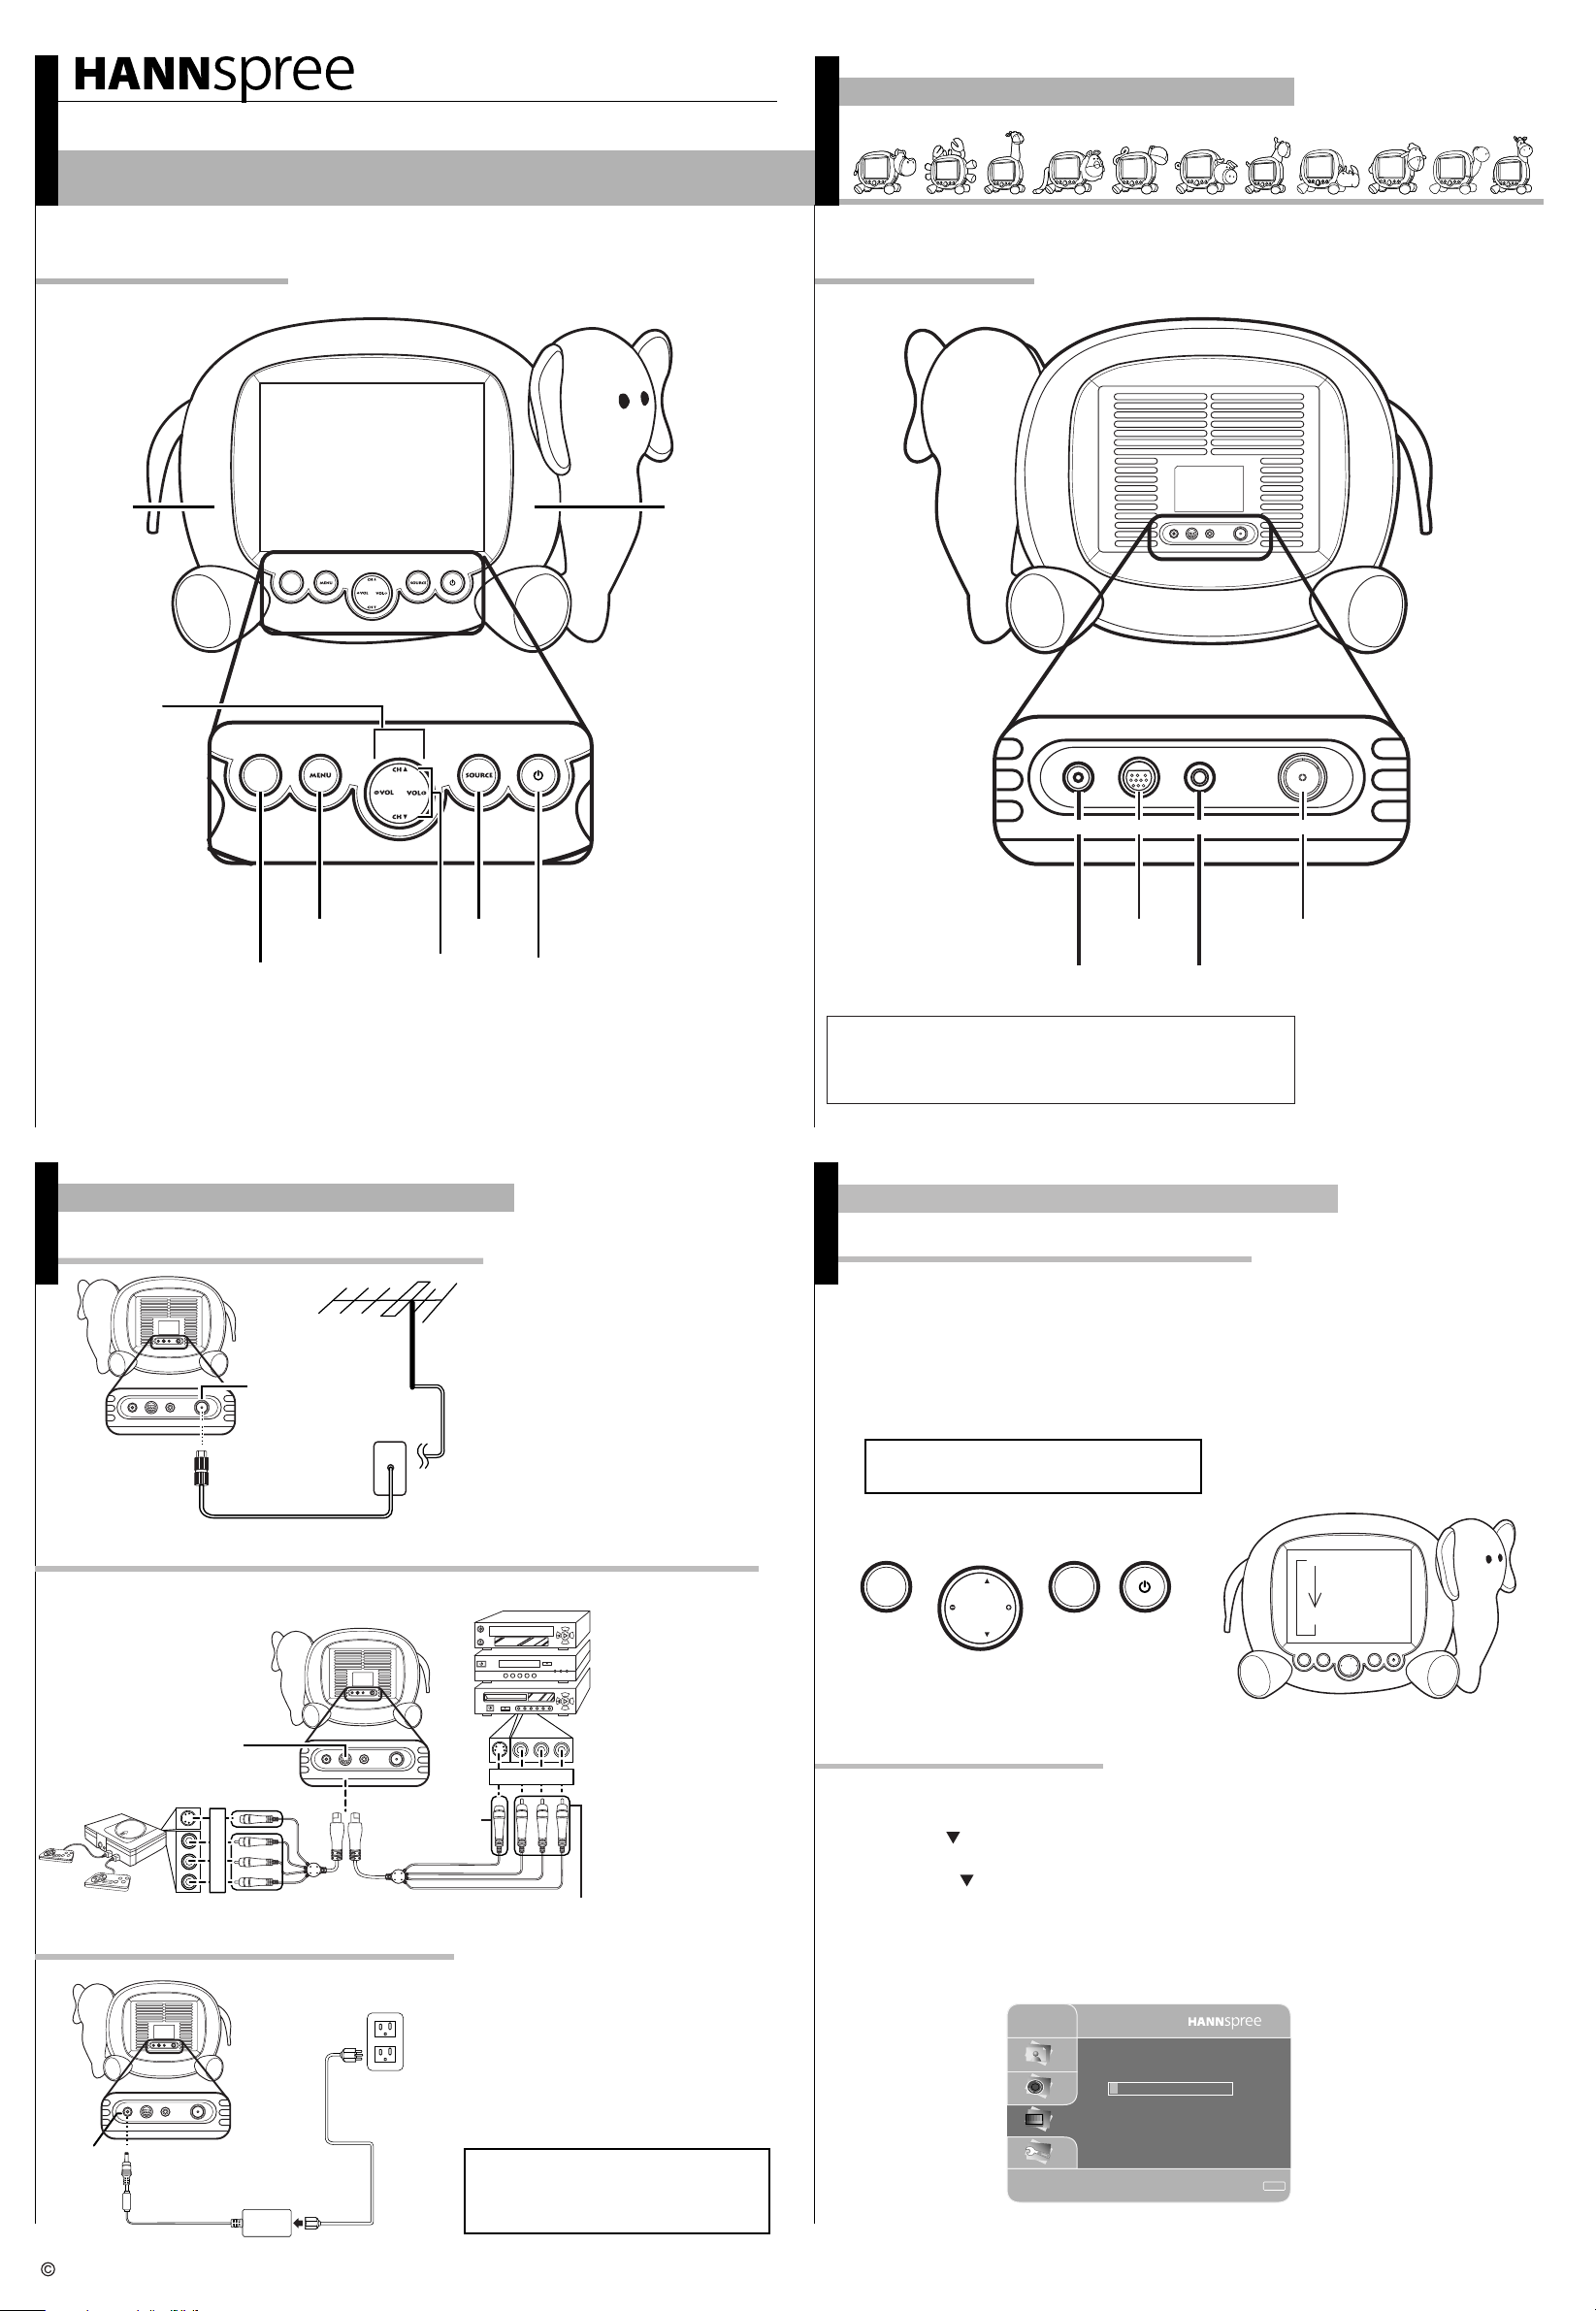
Front ViewFront View
Speaker
Volume
adjust
Speaker
Rear ViewRear View
4-IN-1
DC 12V
HEADPHONE ANT
Menu
Source
Channel
Remote IR sensor
select
Making Connections
Connecting to Antenna/Cable TV
4-IN-1
DC 12V
HEADPHONE ANT
4-IN-1
DC 12V HEADPHONE ANT
ANT jack
(VHF/UHF IN Jack)
Antenna/CATV
coaxial cable
Antenna
Power/
Power indicator LED
1. Connect one end of the VHF/UHF
(Antenna) or CATV cable to ANT Jack
(VHF/UHF IN Jack) on the back of the
TV.
2. Connect the other end of the VHF/UHF
(Antenna) or CATV cable to the Antenna
or CATV socket.
DC 12V
DC 12V
4-IN-1
HEADPHONE ANT
4-IN-1
Headphone jack
Antenna/Cable TV
Note: Do not unzip the plush cover. The plush
cover may only be removed by the qualified
personnel to service the product.
A/V and Channel Setup
Selecting A/V Sources
1. Make sure your TV is turned on and a
device such as a DVD player is connected.
2. Press the SOURCE button on the
control panel to select different source signals.
TV channel number, AV or AVs appear on the screen.
Note : AVs only appears on the screen when
S-Video is connected.
Connecting to a VCR, VCD, DVD Player, or Video Game Console
1. The illustration presented
here shows you how to
VCR
connect your TV to a
VCR, VCD, DVD player
or video game console.
4-IN-1
DC 12V
HEADPHONE ANT
VCD
DVD
2. The cables are
4-IN-1 A/V jack
Video game console
4-IN-1
DC 12V HEADPHONE ANT
B
R
W
Y
S-Video
connector
4-IN-1 A/V cable
B R W
AV connectors
color-coded (black,
red, white, and yellow).
Y
Connect each color coded cable to
the appropriate
connector on your
device.
Connecting the Power Adapter
1. Connect the power cord to the power
adapter as illustrated.
2. Plug the power adapter connector into
the DC-IN input jack on the rear panel
of the TV.
3. Insert the three-pronged plug at the
other end of the power cord into a
power outlet.
Note :
Images are for illustration only and may
vary by model or region.
DC-IN
4-IN-1
DC 12V
HEADPHONE ANT
4-IN-1
DC 12V HEADPHONE ANT
Power outlet
Power cord
Power adapter
TV
menu
CH
VOL
VOL
CH
SOURCE
AV
CH
menu
VOL
VOL
CH
Auto Channel Setup
Please follow the instructions by using the control panel.
1. Press the MENU button to enter the OSD menu.
2. Use the CH button to select "TV".
3. Press the VOL + button to enter the TV setting.
4. Press the CH button until the "Auto Program" feature is selected.
5. Press the VOL + button to begin "Auto Program".
6. Your television will begin automatically memorizing the available channels.
Auto Program
TV
Auto-Programming
093.84 MHz
1 6%
MENU
Return :
SOURCE
Copyright 2005, Hannspree, Inc. All rights reserved.
MAD-001280
Page 2
Quick Start Guide
K206-10X1 9.6" Liquid Crystal Display TV
This guide is designed as a reference to help you start using your LCD TV quickly.
Please refer to the User's Manual for more detailed installation and safety instructions.
Other Models
The information in this Quick Start Guide applies to all models shown below.
1
me
C
H
n
u
S
O
U
R
C
E
V
O
L
V
O
L
C
H
2
m
C
H
e
n
u
S
O
U
R
C
E
V
O
L
V
O
L
C
H
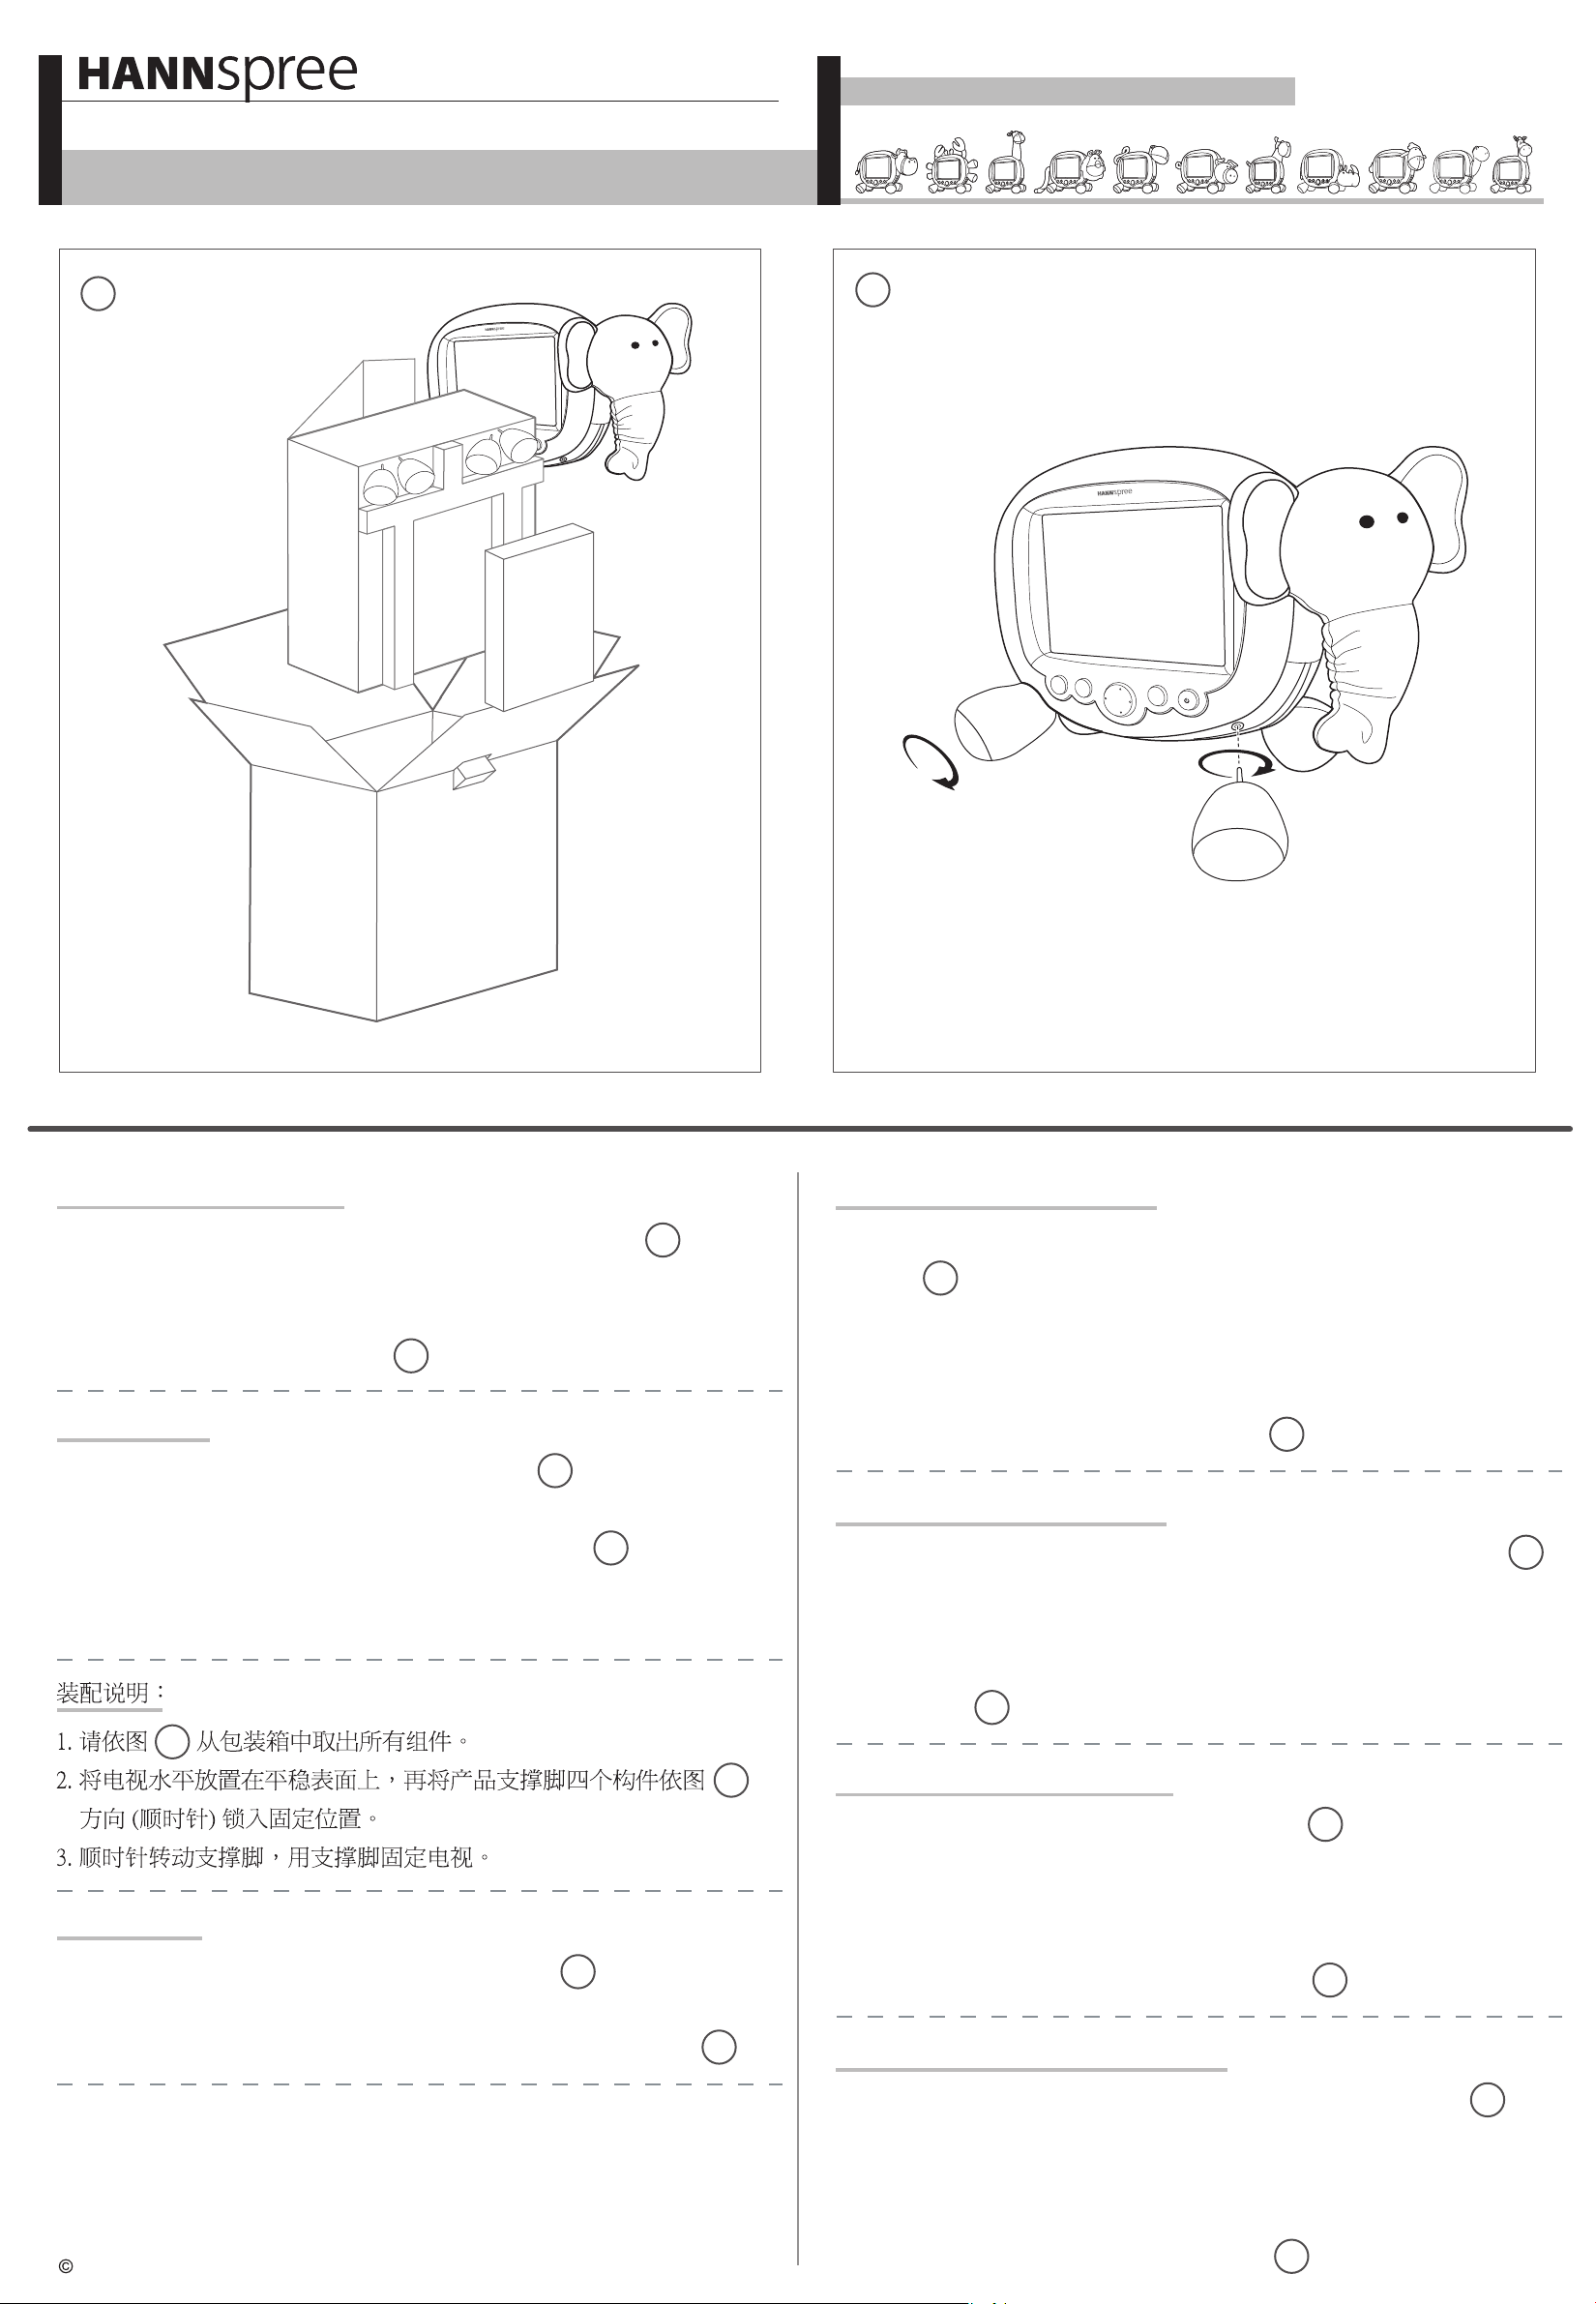
ASSEMBLY INSTRUCTION:
1. REMOVE ALL CONTENTS FROM THE PACKAGING。
1
2. PLACE TV HORIZONTALLY ON A FLAT AND STABLE SURFACE。
3. FASTEN THE FEET TO THE TV UNIT BY TURNING THE FEET IN
2
A CLOCKWISE DIRECTION
。
請依指示操作:
1. 為確保本 Hannspree 產品的完整性,請依圖示 依序取出產品及
1
所有構件。
2. 請將產品本體平放,再將產品腳部四個構件依圖示 方向 (順時針)
2
依序鎖入固定位置。
3. 安裝構件時請務必保持本產品平穩,以防止損傷。
1
ZUSAMMENBAUANLEITUNG:
1. ENTFERNEN SIE DEN GESAMTEN INHALT AUS DER VERPACK
UNG.
1
2. STELLEN SIE DAS TV-GERÄT HORIZONTAL AUF EINER
FLACHEN, STABILEN FLÄCHE AUF.
3. BEFESTIGEN SIE DIE FÜSSE AM TV-GERÄT, INDEM SIE DIE
FÜSSE IM UHRZEIGERSINN DREHEN.
2
INSTRUCTIONS DE MONTAGE:
1. RETIREZ TOUS LES ELEMENTS DU PAQUET D'EMBALLAGE.
1
2. PLACEZ LA TV HORIZONTALEMENT SUR UNE SURFACE
PLANE ET STABLE.
3. FIXEZ LES PATTES SUR LA TV EN LES VISSANT DANS LE SENS
HORAIRE.
2
組み立て指示:
1. パッケージから付属品をすべて取り出します。
1
2. テレビを平らで安定した面に水平に設置し、
脚を時計方向に回して、本体にしっかり固定してください。
Copyright 2004, Hannspree, Inc. All rights reserved.
2
INSTRUCCIONES DE MONTAJE:
1. EXTRAIGA EL CONTENIDO DEL ENVASE.
1
2. COLOQUE LA TV DE FORMA HORIZONTAL SOBRE UNA SUPER
FICIE PLANA Y ESTABLE.
3. ACOPLE LOS PIES AL APARATO DE TV GIRANDO LOS PIES EN
EL SENTIDO DE LAS AGUJAS DEL RELOJ.
2
ISTRUZIONI PER L’ASSEMBLAGGIO:
1. RIMUOVERE TUTTI I CONTENUTI DALLA CONFEZIONE.
2
1
2. COLLOCARE IL TELEVISORE ORIZZONTALMENTE SU DI UNA
SUPERFICIE PIATTA E STABILE.
3. AVVITARE LE ZAMPE ALL’UNITÀ TV GIRANDOLE IN SENSO
ORARIO FINCHÉ SONO BEN STRETTE.
2
 Loading...