

Page 1
Quick Guide
Component wR
Cat. No. : CP-wR
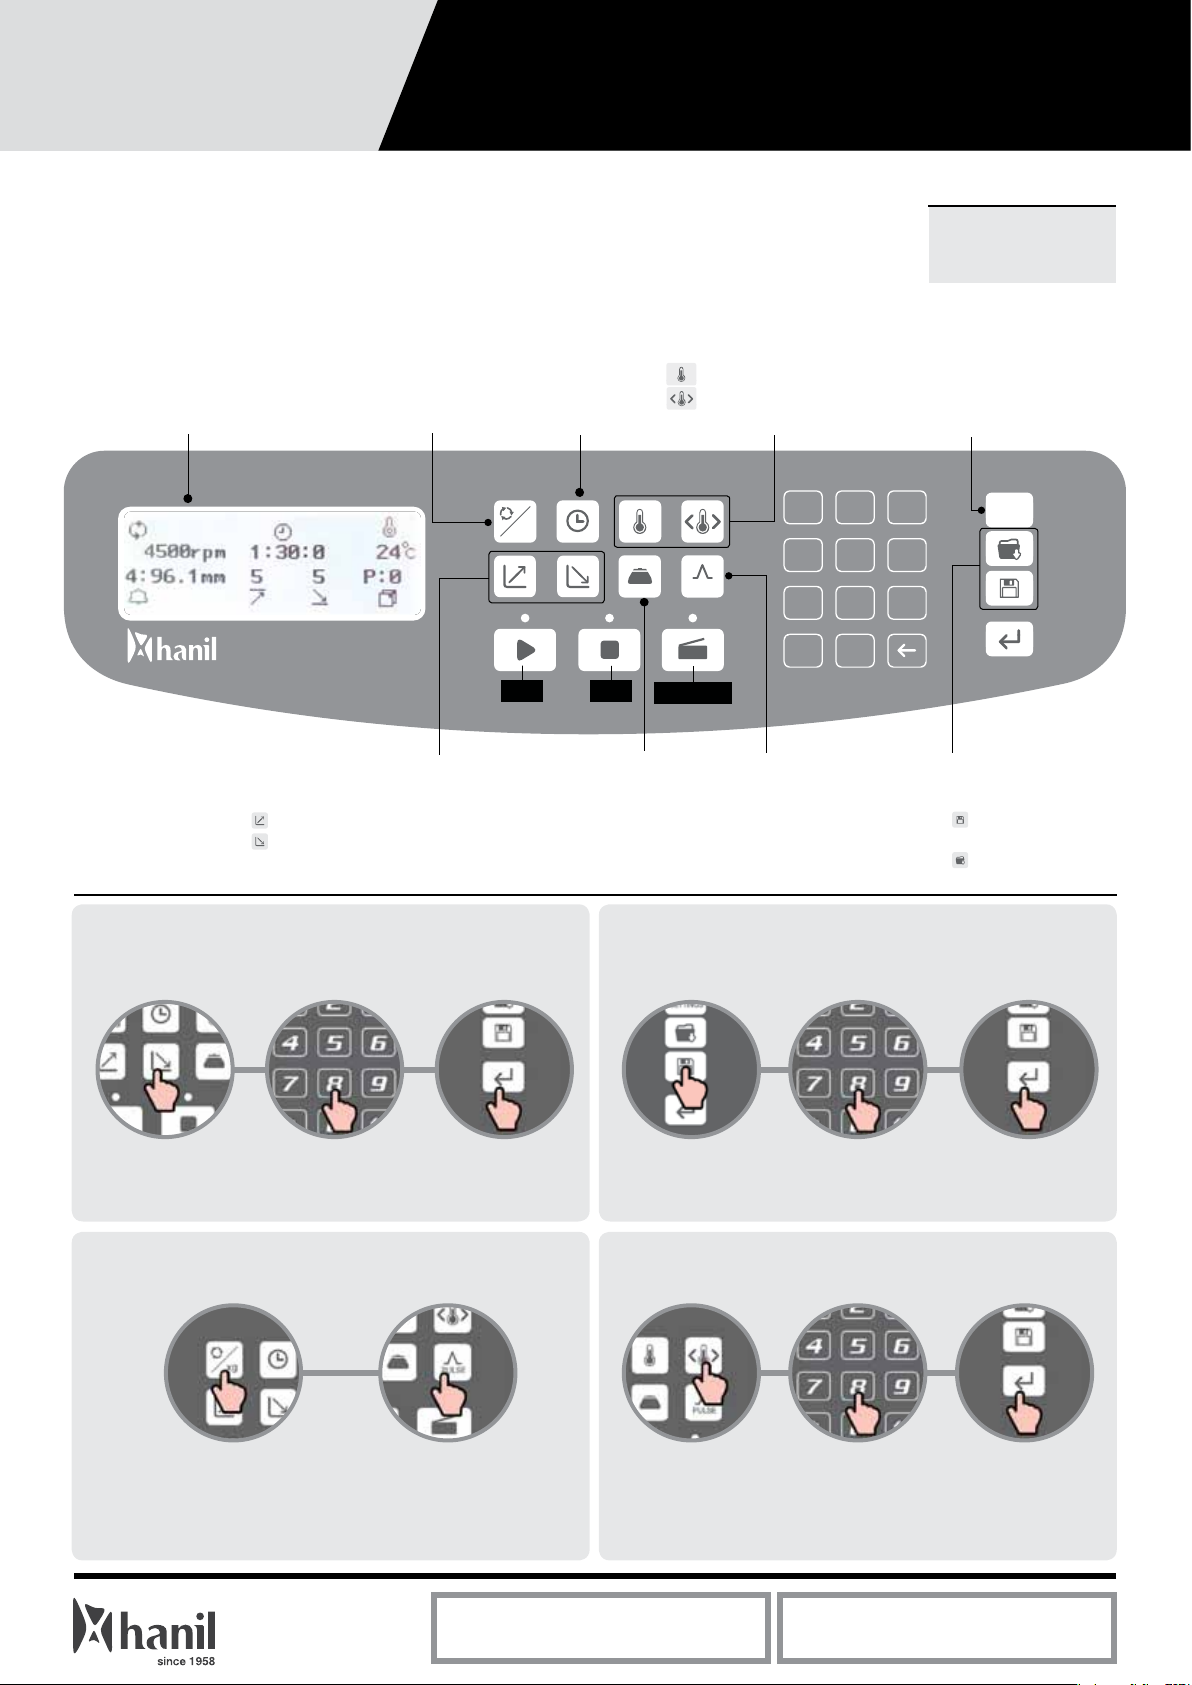
Display & Control Panel
Display Screen
Status of RPM / RCF / Time /
Temperature / Rotor ID /
ACC / DEC / Program
Setting Speed
Press once : Setting RPM
Press twice : Setting RCF
Setting ACC / DEC Rate
ACC (0 ~ 9 steps, Max.9)
DEC (0 ~ 9 steps, Natural DEC.0)
Setting Time
Up < 100 hr
Continuous run (00:00)
xg
Start Stop
Setting Temperature
Setting temperature ( -20℃ ~ 40℃)
Setting temp. limit
Lid Open
Setting the Rotor ID manually
Enter the rotor ID. manually, when
rotor id is not identified automatically
PULSE
2 31
5 64
8 97
±
0
Pulse
After reaching the set
speed, the centrifugation
is decelated and stopped
Max. RPM : 4,500 rpm
Max. RCF : 5,096 xg
View Settings
Verifying the setting
parameters during
centrifugation
VIEW
SETTINGS
Program Save / Call
Saving a program
(up to 100)
Calling up a program
Setting Run Parameters
(RPM / RCF / Time / Temperature / ACC / DEC)
Press a parameter
to be changed
Enter the desired values
on the keypad
Pulse
Enter the desired speed
(See ‘Setting Run Parameters’)
Pulse button
Enter button
Press the
Press the
Saving / Calling Up a Program
Press the
Save or call button
Enter the desired
program number on
the keypad
Setting Temp. Limit
Press the
Temp. limit button
Temperature range that stops operation when the temperature
is lower or higher than the set temperature.
Enter the desired
temperature range
on the keypad
Press the
Enter button
Press the
Enter button
Serial No. Installation Date
Page 2
Quick Guide
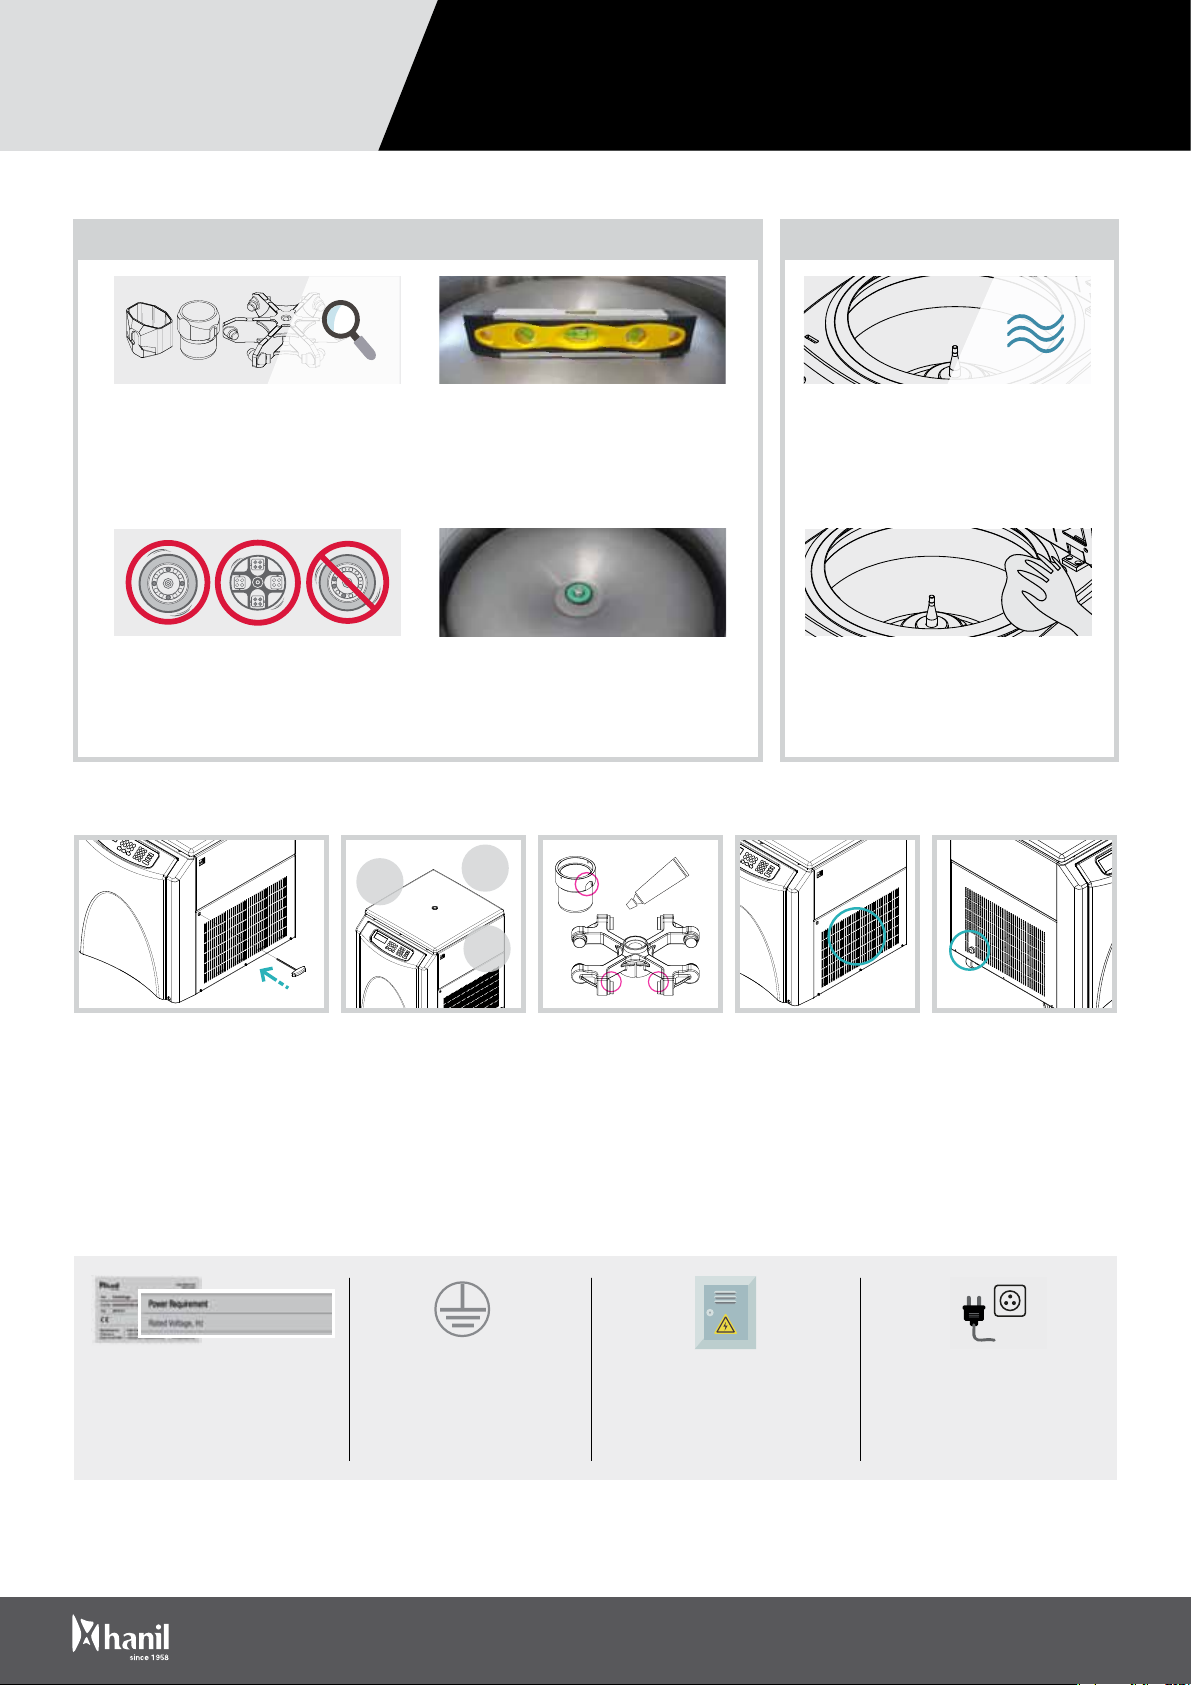
Cautions for Use
Component wR
Cat. No. : CP-wR
Before Operation After Operation
Check the Accessories for Abnormalities
Check the rotor, buckets and tubes are free
of scratch and crack before operation.
Load Tubes Symmetrically
Load tubes symmetrically into the rotor
with identical amount.
Maintenance
30 cm
Balancing the Centrifuge and Rotor
After relocating the device or loading the rotor,
balance them by using a leveler. If necessary,
level the device by adjusting the ‘Leveling foot’
on the bottom of the device.
Check the Lid
Place the lid on the wind shield rotor before
centrifugation.
30 cm
30 cm
Keep the Chamber Dry
Wipe up the moisture in the chamber with a
dry cloth after use. Keep the lid open when
not in use.
Cleaning
Clean the chamber and rotor by wiping with
a cloth soaked in mild detergent and dry
completely.
Emergency Lid Open
If the centrifuge lid cannot be opened,
insert the provided T-wrench into the
emergency release hole on the right side
of the device and press it. (Before activating emergency open, switch off the
device and wait for the rotor to stop.)
Allow a Safety Clearance
of 30 cm
Allow a safety clearance of
30 cm around the centrifuge
during operation and
storage.
Care of Swing-Out
Rotor
Spread the grease lightly
on the bucket where it
contacts the rotor and the
pivot.
Remove Dust Empty the Condensation
Remove any dust from the
ventilation slits on the right
side of the device.
Water
Empty the condensation water
regularly by removing the
drain cap on the left side of the
device.
Electrical Safety
3.0KVA
220~240V 50/60Hz
Check the Line Voltage Grounded Outlet Power Connection Switch Off the Device
Connect the device to voltage
sources, which correspond to the
electrical requirements on the label
attached to the device.
Rotors
WS750-6 6 x 750 mL / Max. 4.5k
Check the wall outlet is earthgrounded, surge-protected and
can supply enough power.
Connect the power cable to the
distribution box, or install the plug
and socket that are packed with
the device.
Switch off the device after use.
Unplug the power plug before
cleaning or unused for a long
period of time.
Order & Inquiry l +82-2-3472-0727 l [email protected] l www.ihanil.com
Service l +82-2-3452-8966 l [email protected]
Proudly made by Jiyoung Shim, Hyewon Jeong
Rev.1
 Loading...