

Page 1
HangarBot Door Controller
INSTALLATION MANUAL
DCN-8000-17-v1
www.hangarbot.com
DCN-8000-17-v1
February 2018
Page 2
1. Introduction 2
2. Overview: 2
3. Installation 4
4. Wiring Installation Steps- For Electrician/Installers 5
5. Housing installation 6
6. HangarBot App 6
7. Recommended Tools/Supplies 8
8. Specifications: 8
www.hangarbot.com
DCN-8000-17-v1
February 2018
1
Page 3
1. Introduction
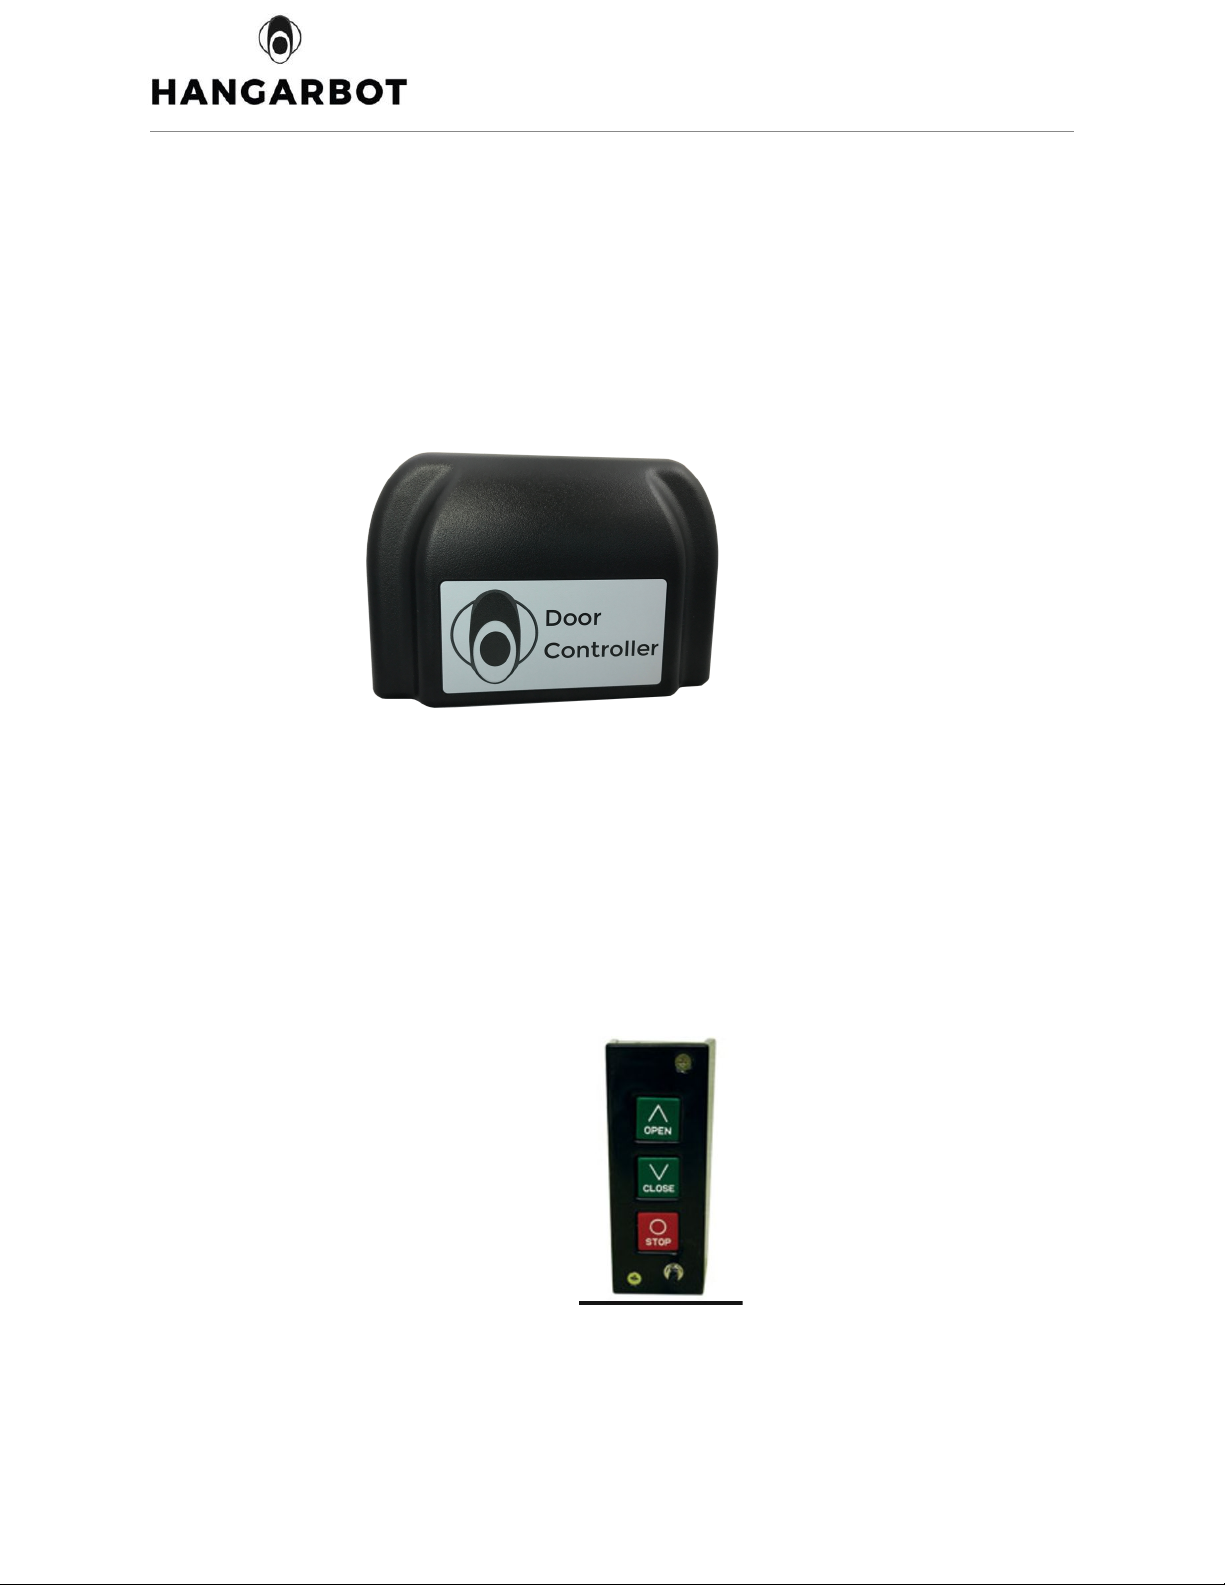
Included in this package:
1. Door Controller unit
2. Power Cord
3. New wires
Figure 1
2. Overview:
The Hangarbot Door controller is used inline with the existing momentary contact three
button control station of the hangar door as shown in Figure 2:
Figure 2
www.hangarbot.com
DCN-8000-17-v1
February 2018
2
Page 4
The hangarbot door controller ensures that no motor load current will pass through, only
low voltage DC for signaling. The controller has 5A relays to control the hangar door motor.
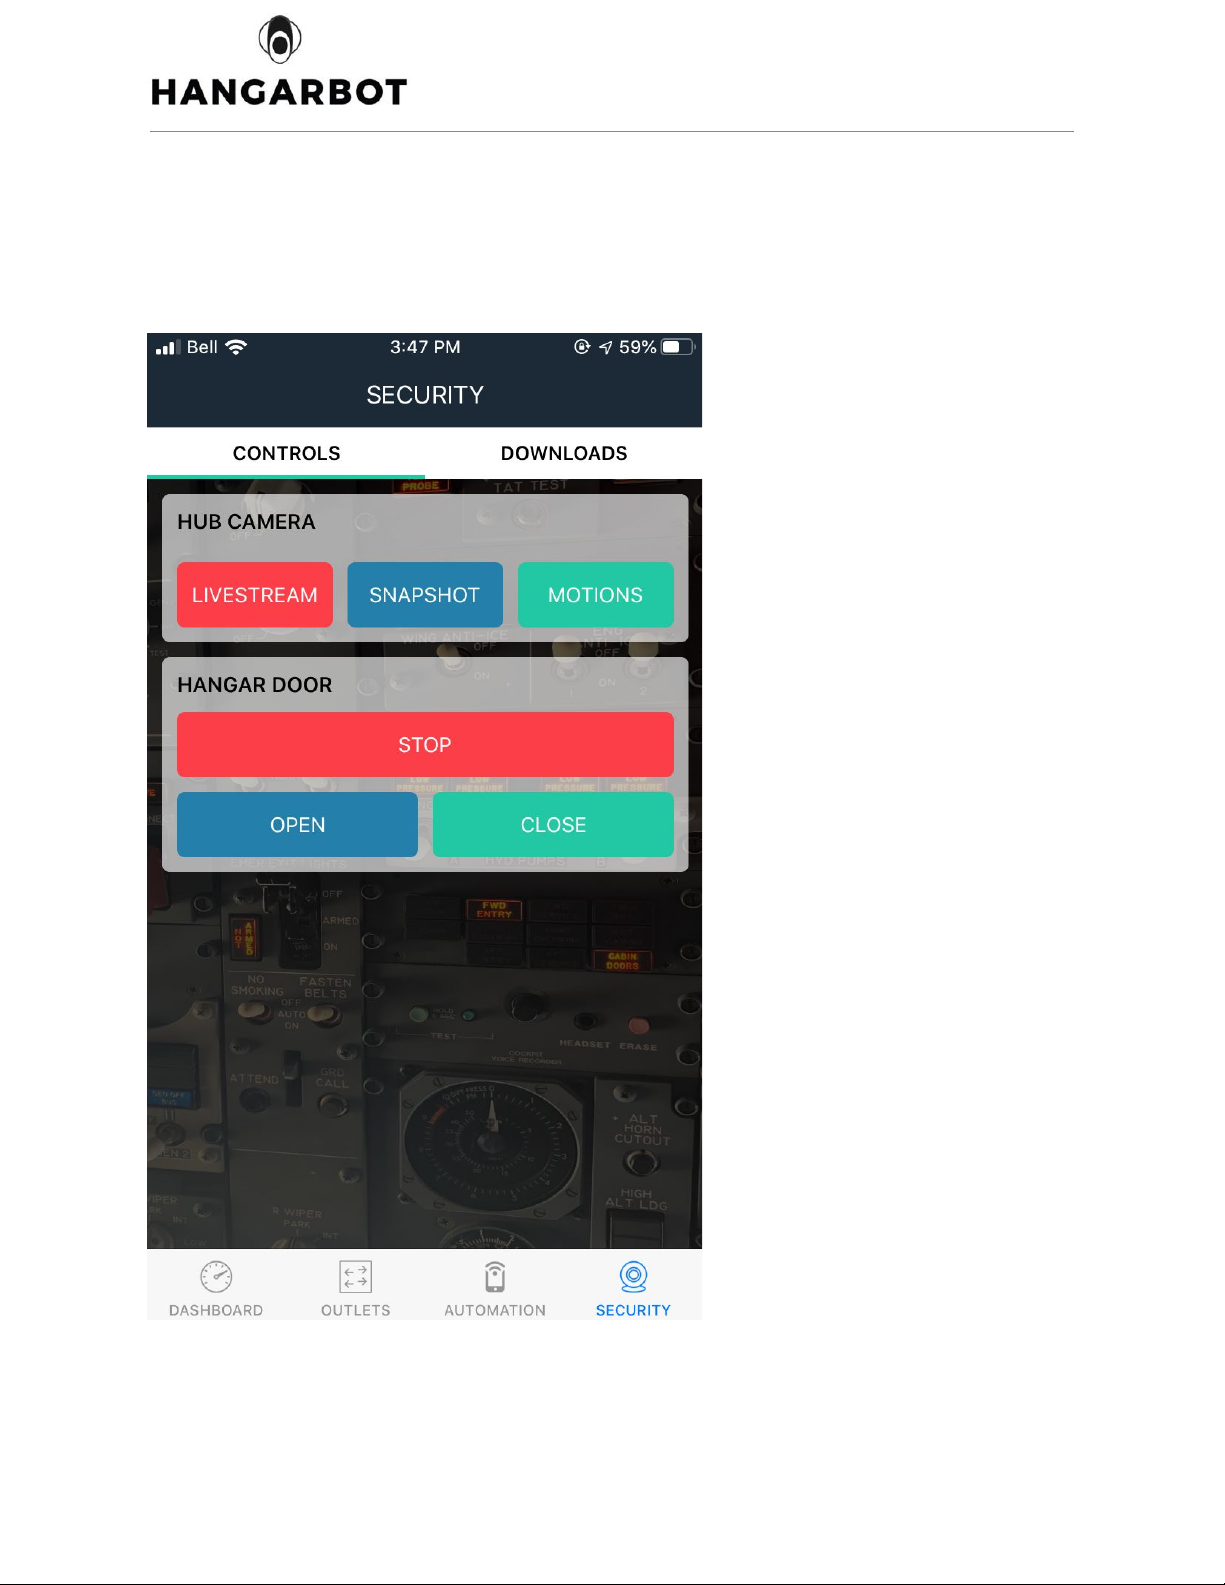
The controller is connected to Hangarbot App through the hangarbot HUB and enables the
operator to do the following directly from the APP: (see section 6 to add to your APP)
Figure 3
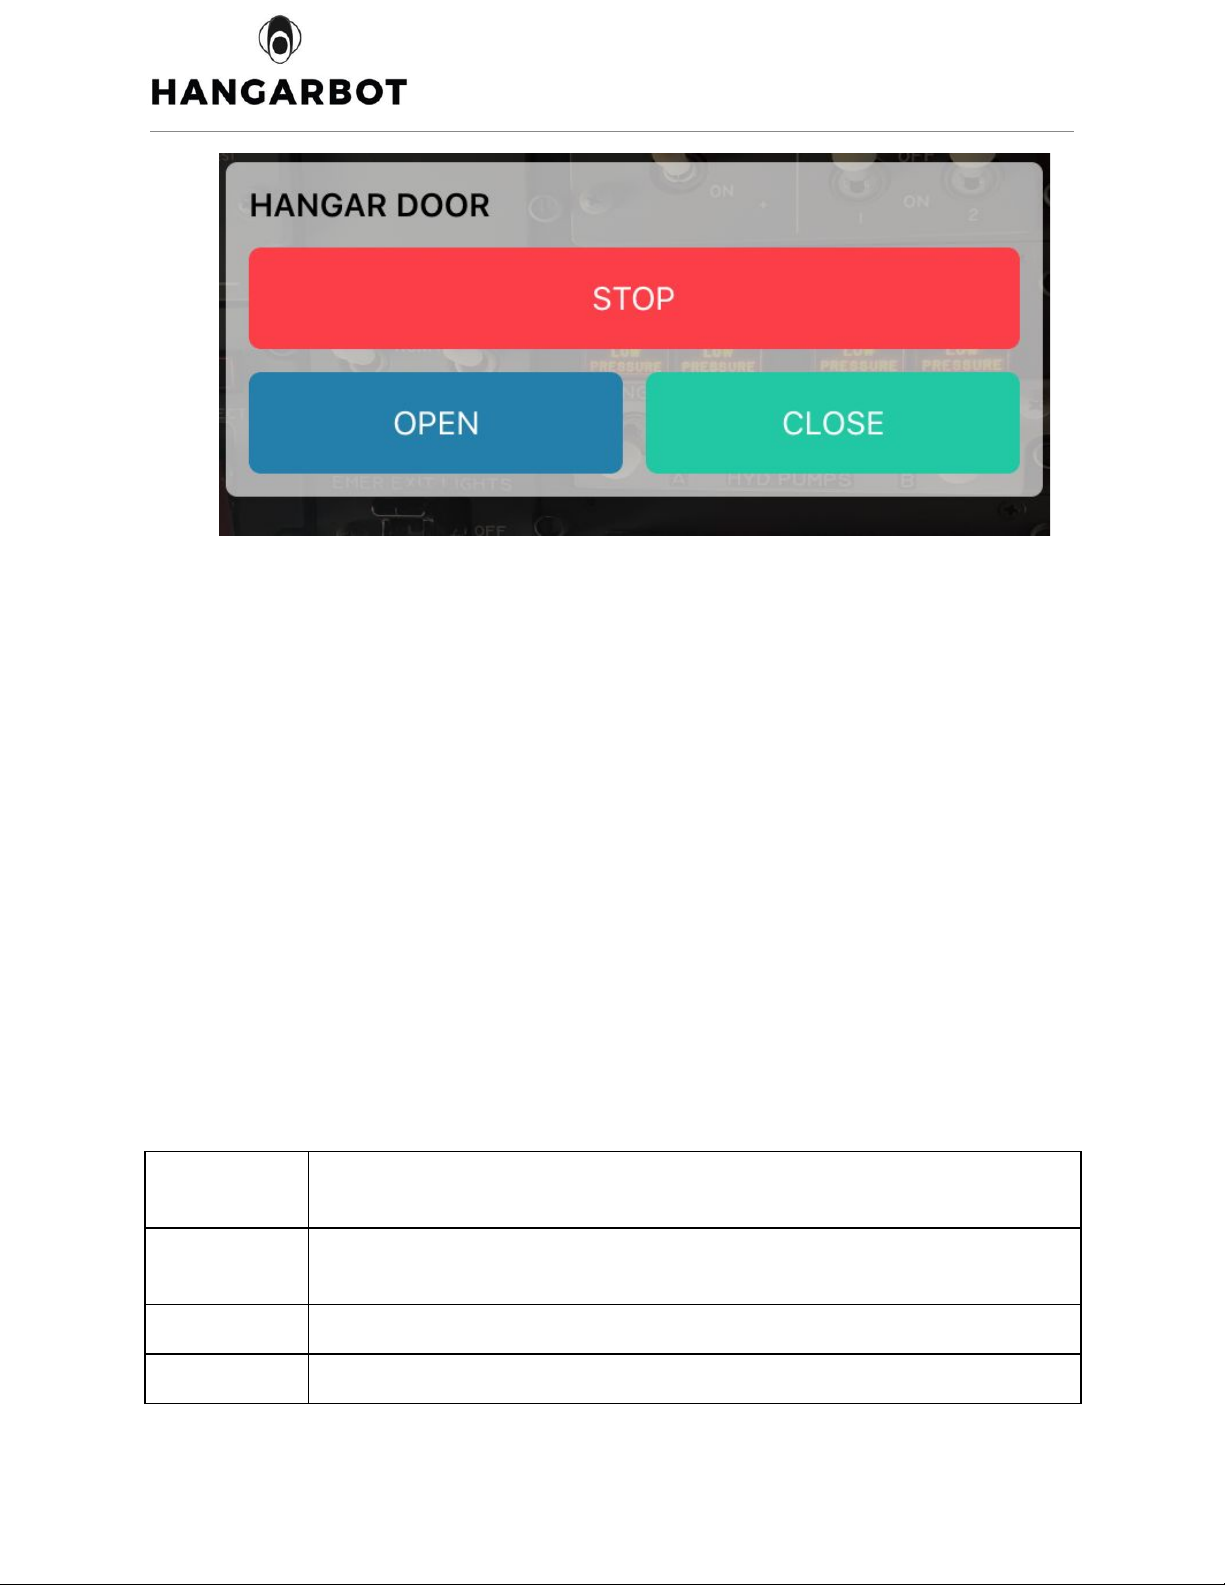
STOP: stop the hangar door (opening or closing)
www.hangarbot.com
DCN-8000-17-v1
February 2018
3
Page 5
OPEN: open the hangar door
CLOSE: close the hangar door
Note1: if the operator sends multiple OPEN/CLOSE/STOP commands, the door controller will
acknowledge the last command only
3. Installation
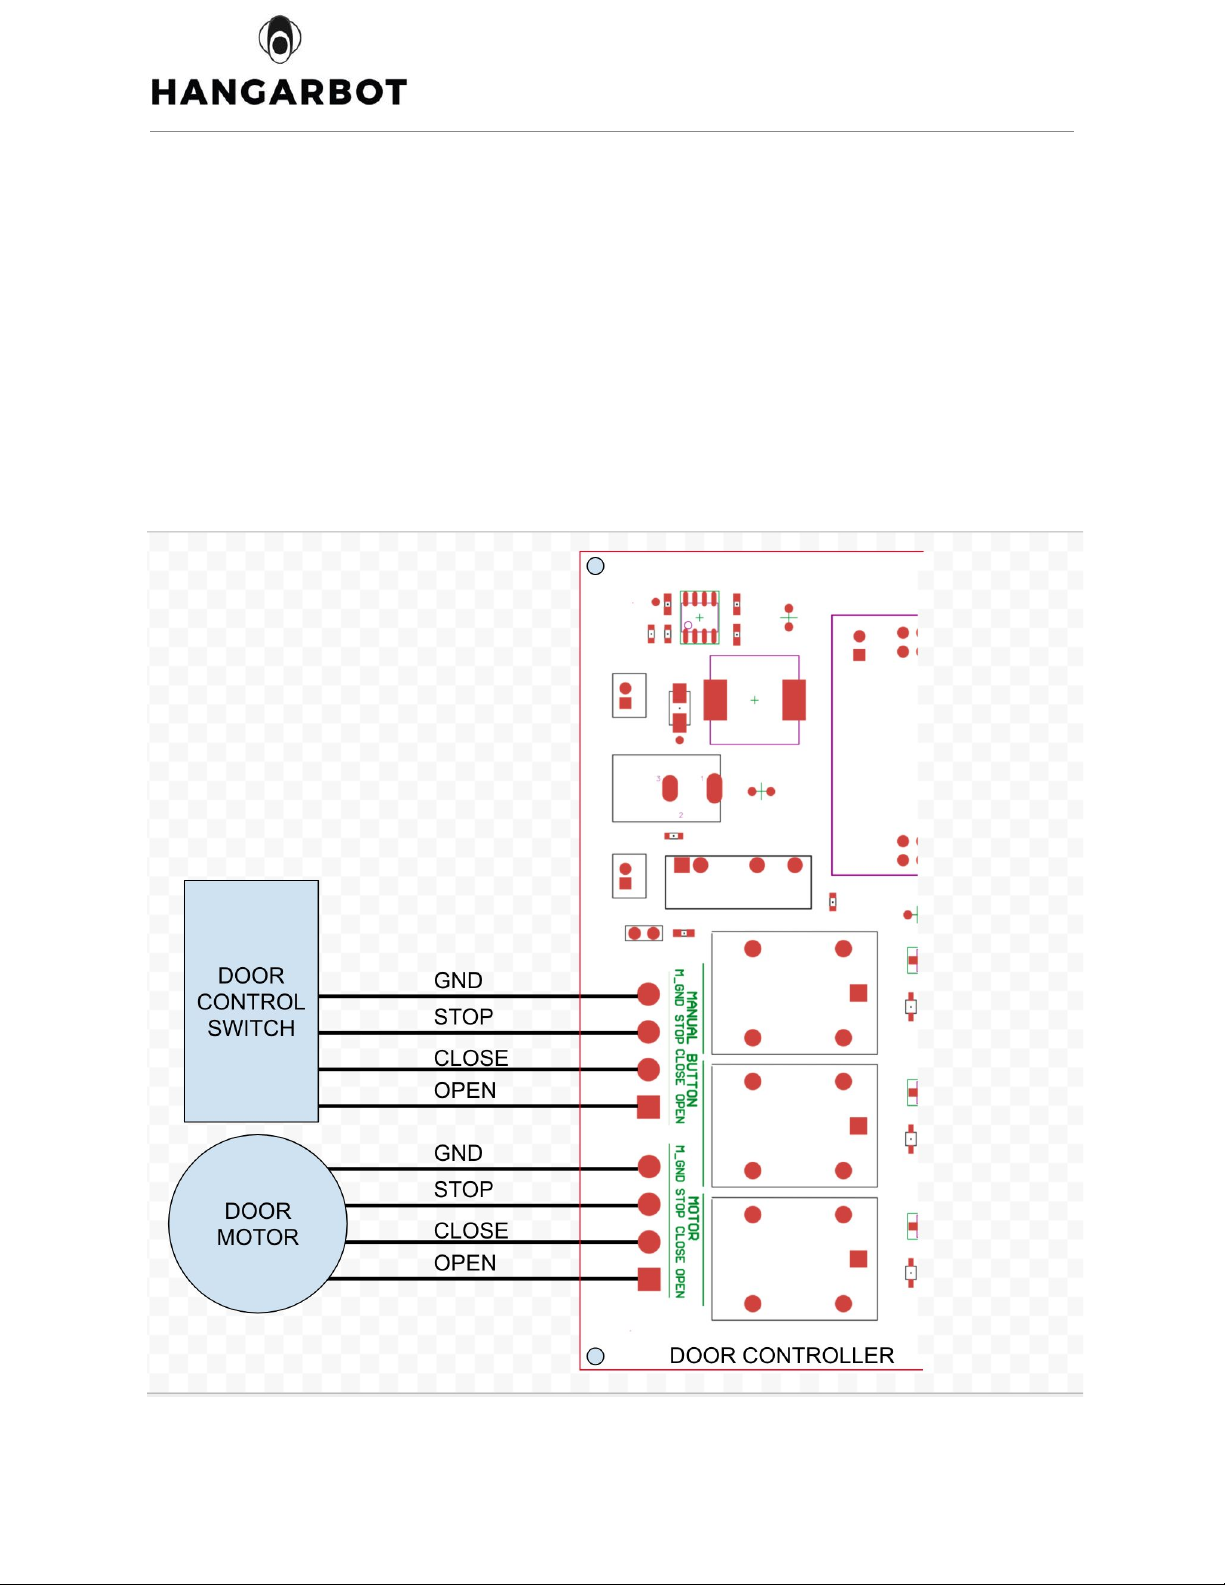
The wiring diagram below (figure1) shows the general wiring configuration, including
connections to existing switch and hangar door motor
www.hangarbot.com
DCN-8000-17-v1
February 2018
4
Page 6
.
Figure 4
4. Wiring Installation Steps- For Electrician/Installers
○ Disconnect all power to the hangar door (breaker, relay ..etc)
○ Open the Hangarbot door controller cover
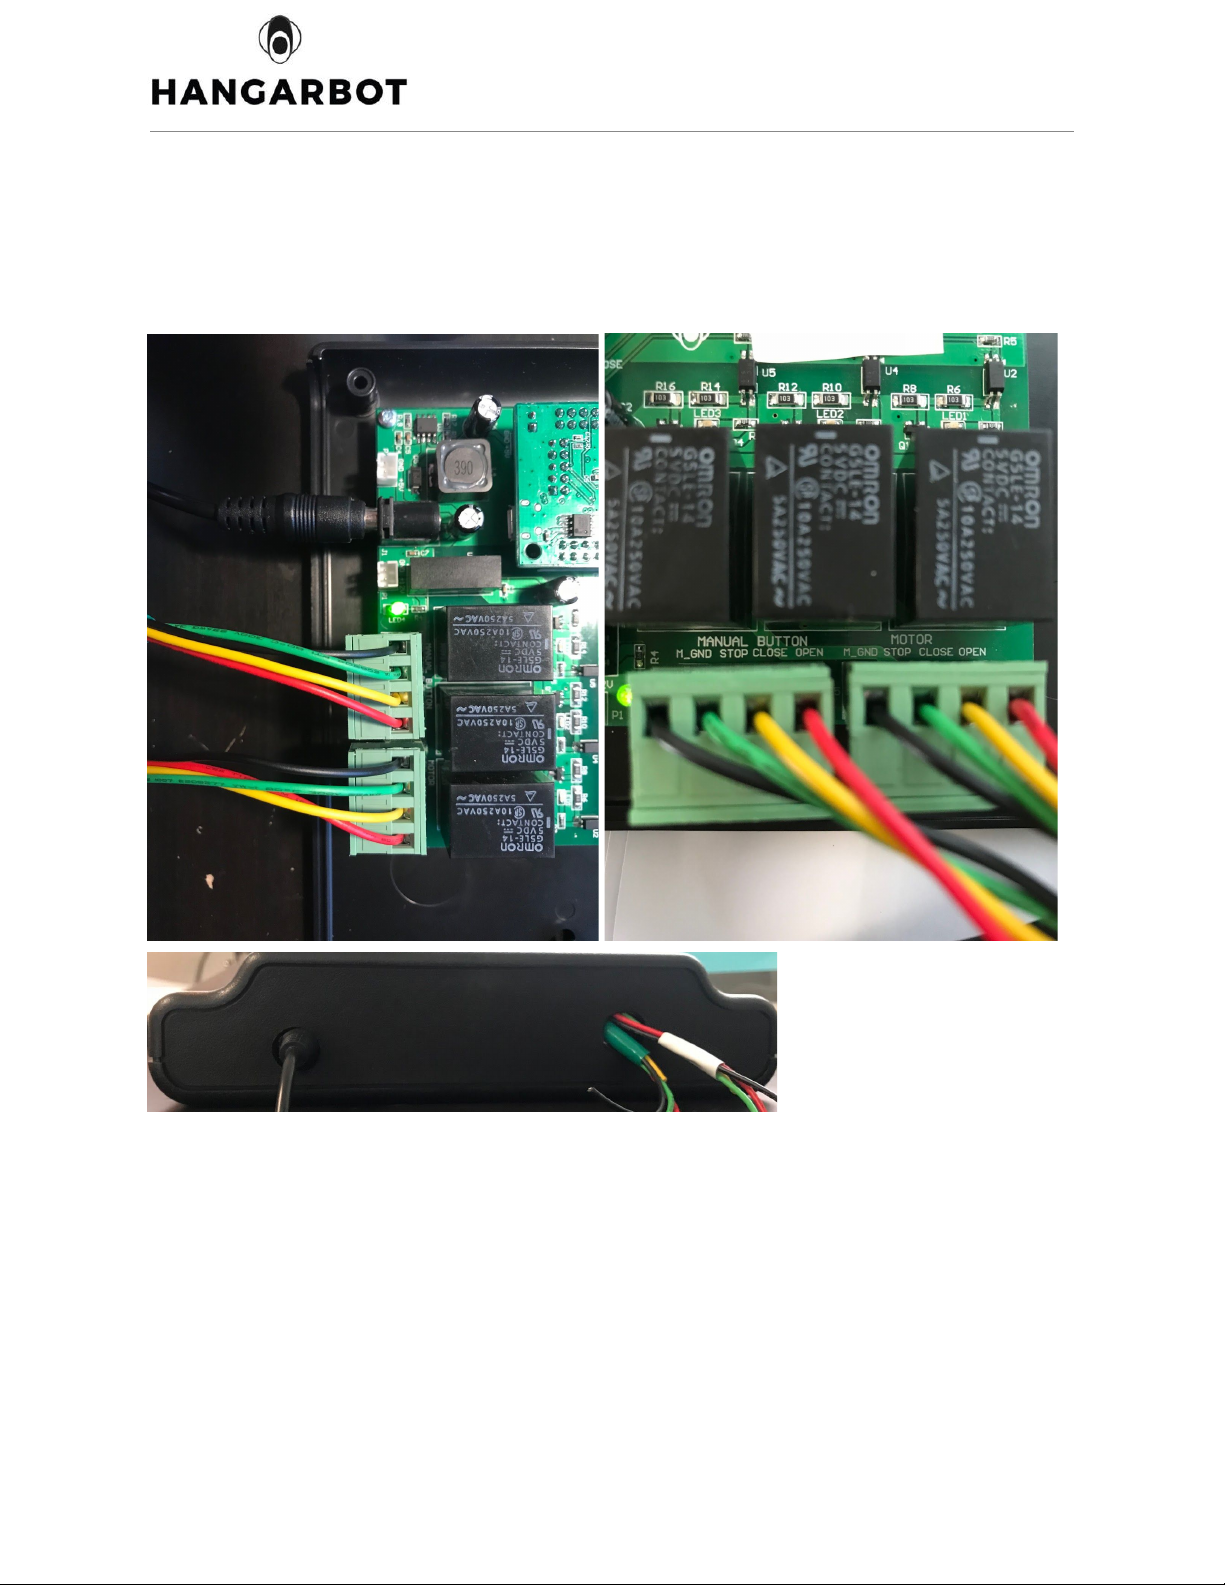
○ Connect M_GND door controller to switch GND terminal using new wire
○ Connect STOP door controller terminal to switch STOP terminal using new wire
(color)
○ Connect CLOSE door controller terminal to switch CLOSE terminal using new
wire
www.hangarbot.com
DCN-8000-17-v1
February 2018
5
Page 7
○ Connect OPEN door controller terminal to switch OPEN terminal using new wire
○ Connect motor GND terminal to M_GND door controller
○ Connect motor STOP terminal to STOP door controller terminal
○ Connect motor CLOSE terminal to CLOSE door controller terminal
○ Connect motor OPEN terminal to OPEN door controller terminal
○ Use the second hole on the right side of plate for wire access
○ Close the hangarbot door controller cover
○ Connect all power to the hangar door
○ Connect power to the door controller using the enclosed power adapter
○ Installers may drill additional hole on the right side of the plate, opposite to the
power cord.
5. Housing installation
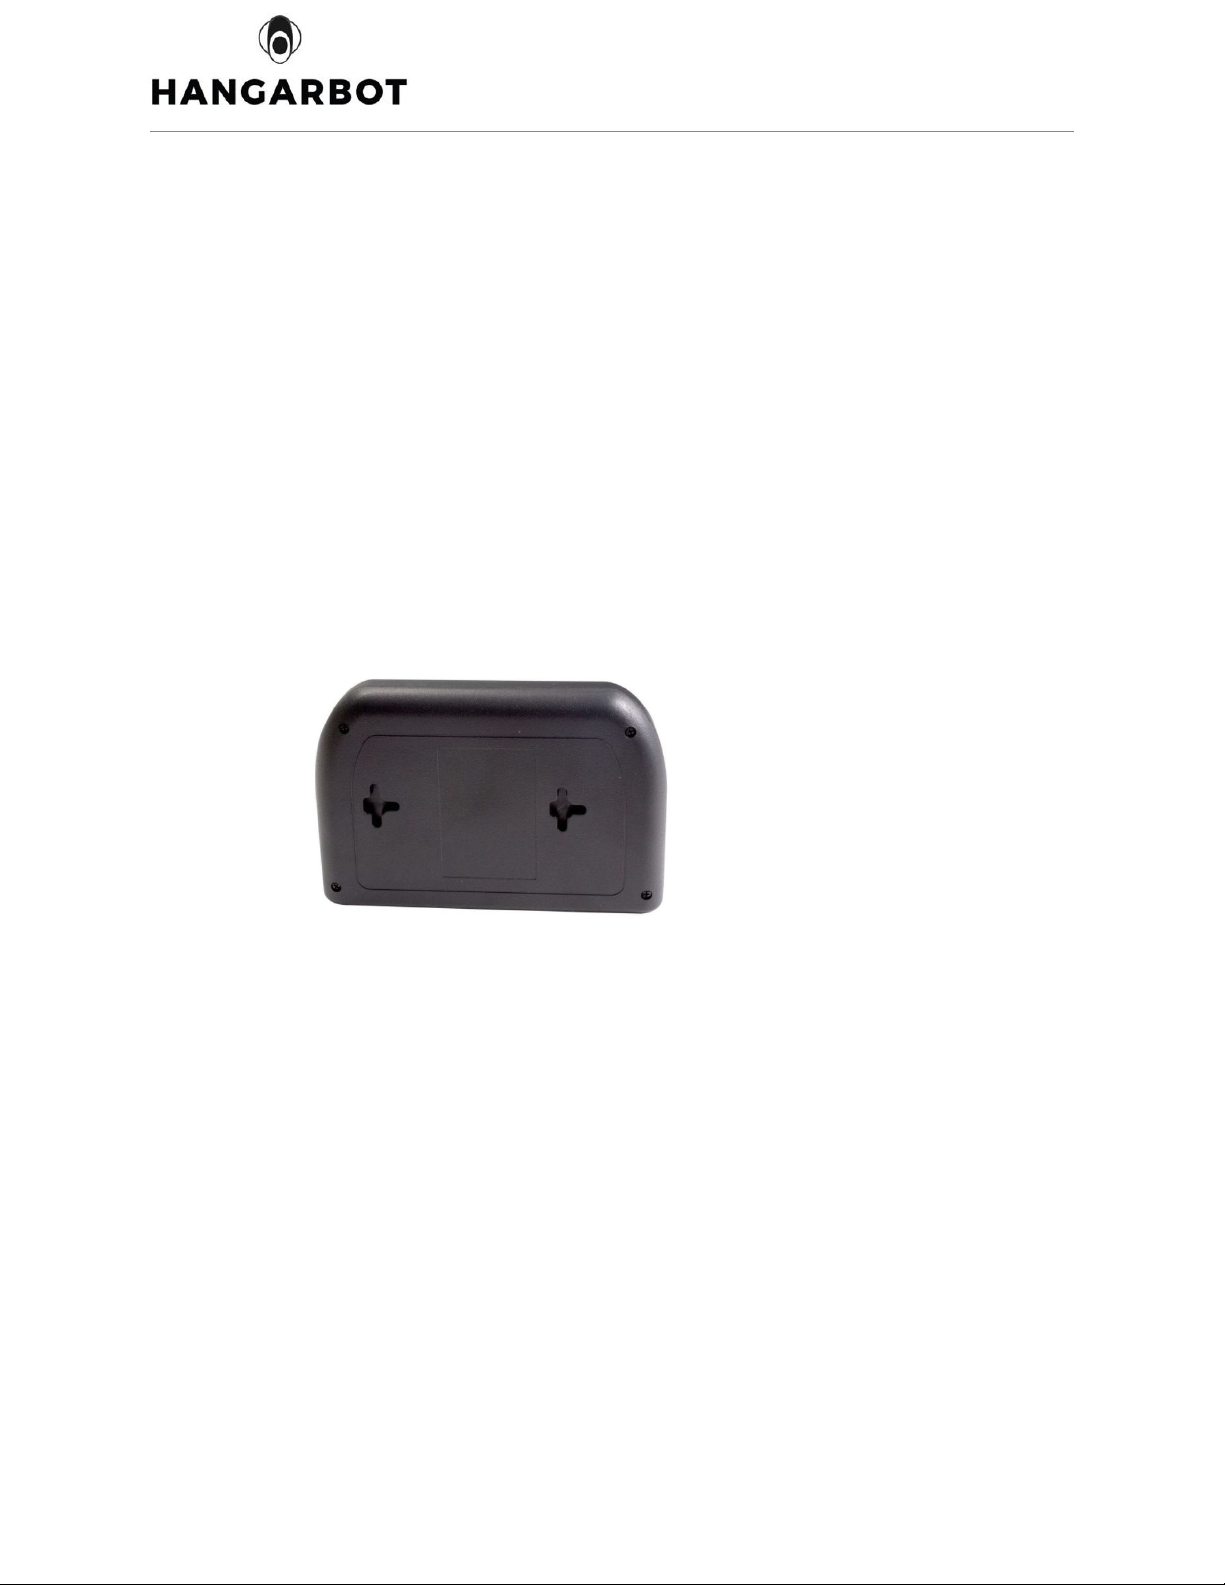
○ If the hangar walls have metal, mount the door controller using the magnets on
the back of the unit
○ If the hangar walls don’t have metal, use the key holes shown below:
Figure 5
6. HangarBot App
○ Add Door controller
■ Door controller and hub needs to be plugged in while pairing the door
controller to hub
■ Add a new device under “DASHBOARD” or “CONTROLS” or MENU
option
■ Type in the device id found on the back of the door controller:
www.hangarbot.com
DCN-8000-17-v1
February 2018
6
Page 8
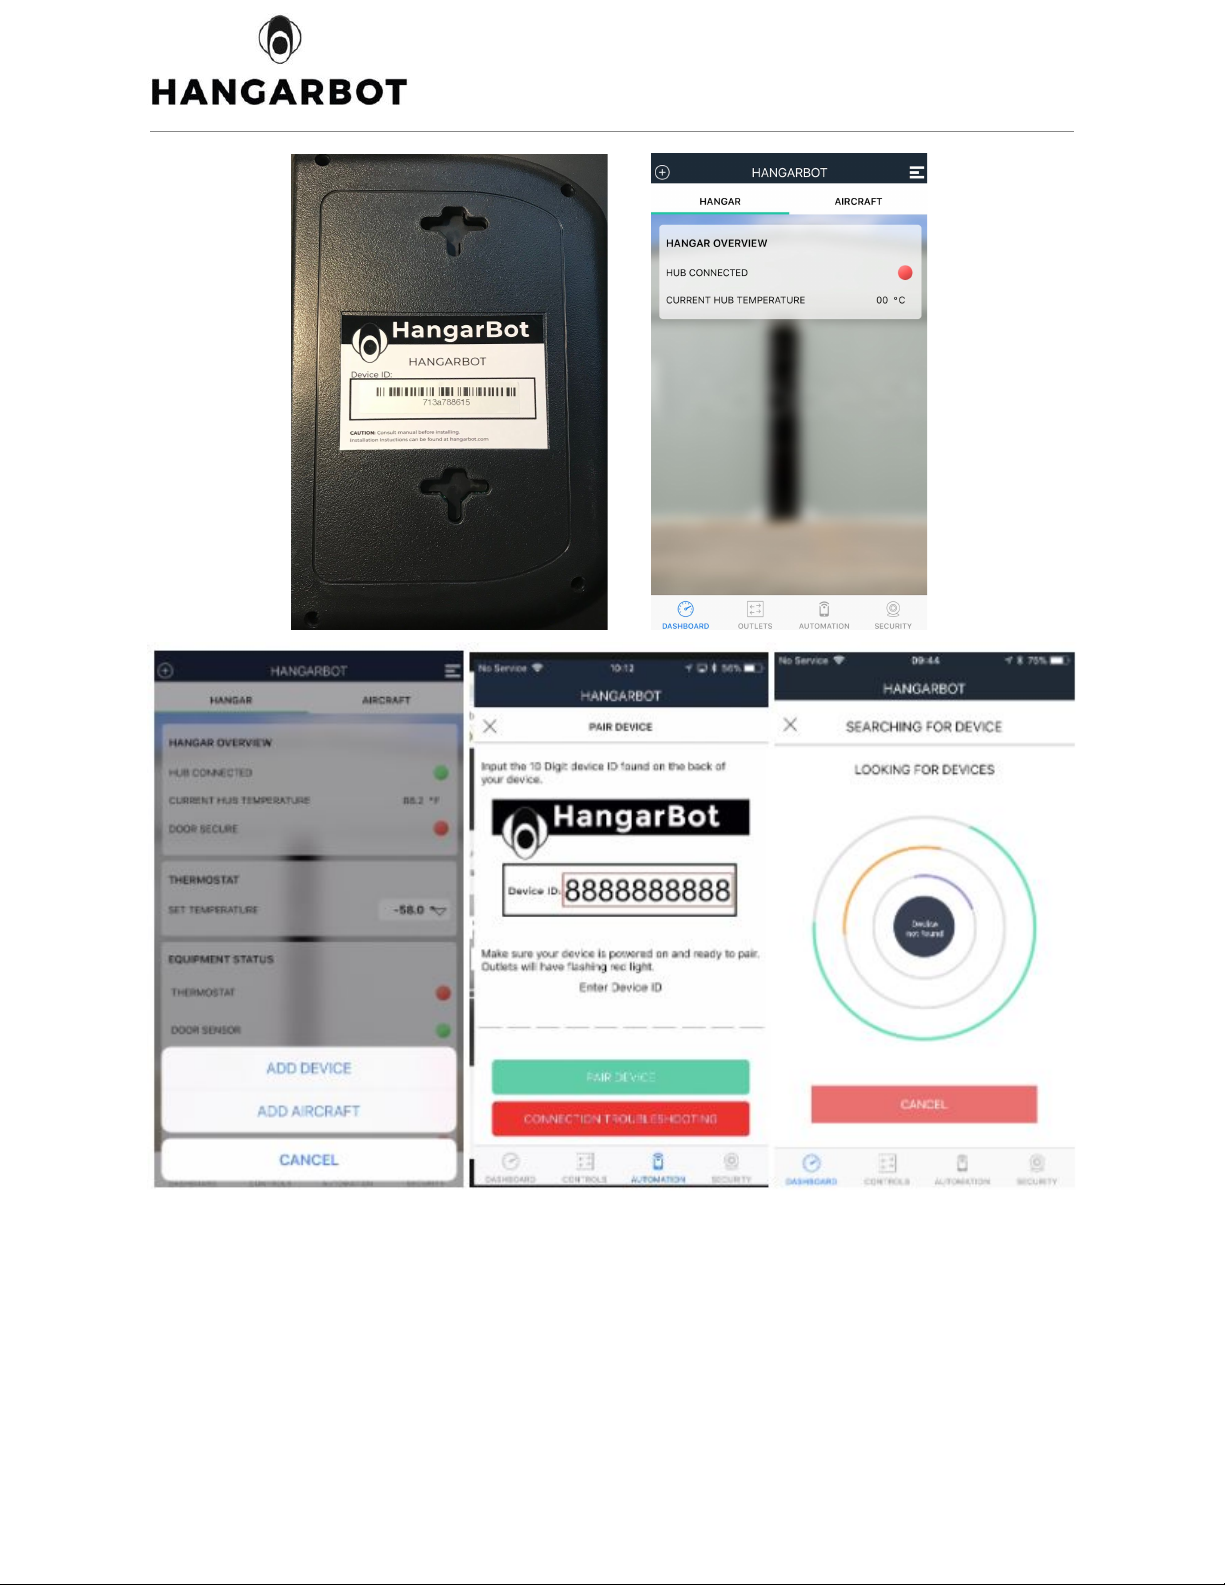
○ Go to SECURITY option in the app
○ You should have the following options:
www.hangarbot.com
DCN-8000-17-v1
February 2018
7
Page 9
○ Test OPEN or CLOSE options to ensure the door controller installation is done
correctly
○ Test STOP to ensure the door controller installation is done correctly
** to ensure open and close will work as expected, please select STOP before opening or
closing the door.
7. Recommended Tools/Supplies
○ Phillips Head/Flathead screwdriver
○ 22 AWG gauge wire
■ Prefer green, yellow, red, and black
○ Wire Stripper
○ Terminal wire connector
○ Crimp lugs
○ Crimp tool
○ Drill if necessary
8. Specifications:
Operating
Temperature
Dimensions
W x L x H
5 x 7.5 x 1.75 in.
Weight
300g
Input Voltage
12V @ 1.5A
www.hangarbot.com
DCN-8000-17-v1
February 2018
8
Page 10
Min.Current
Draw
0.15A
Relay Ratings
5A @ 250VAC
www.hangarbot.com
DCN-8000-17-v1
February 2018
9
 Loading...