

Page 1
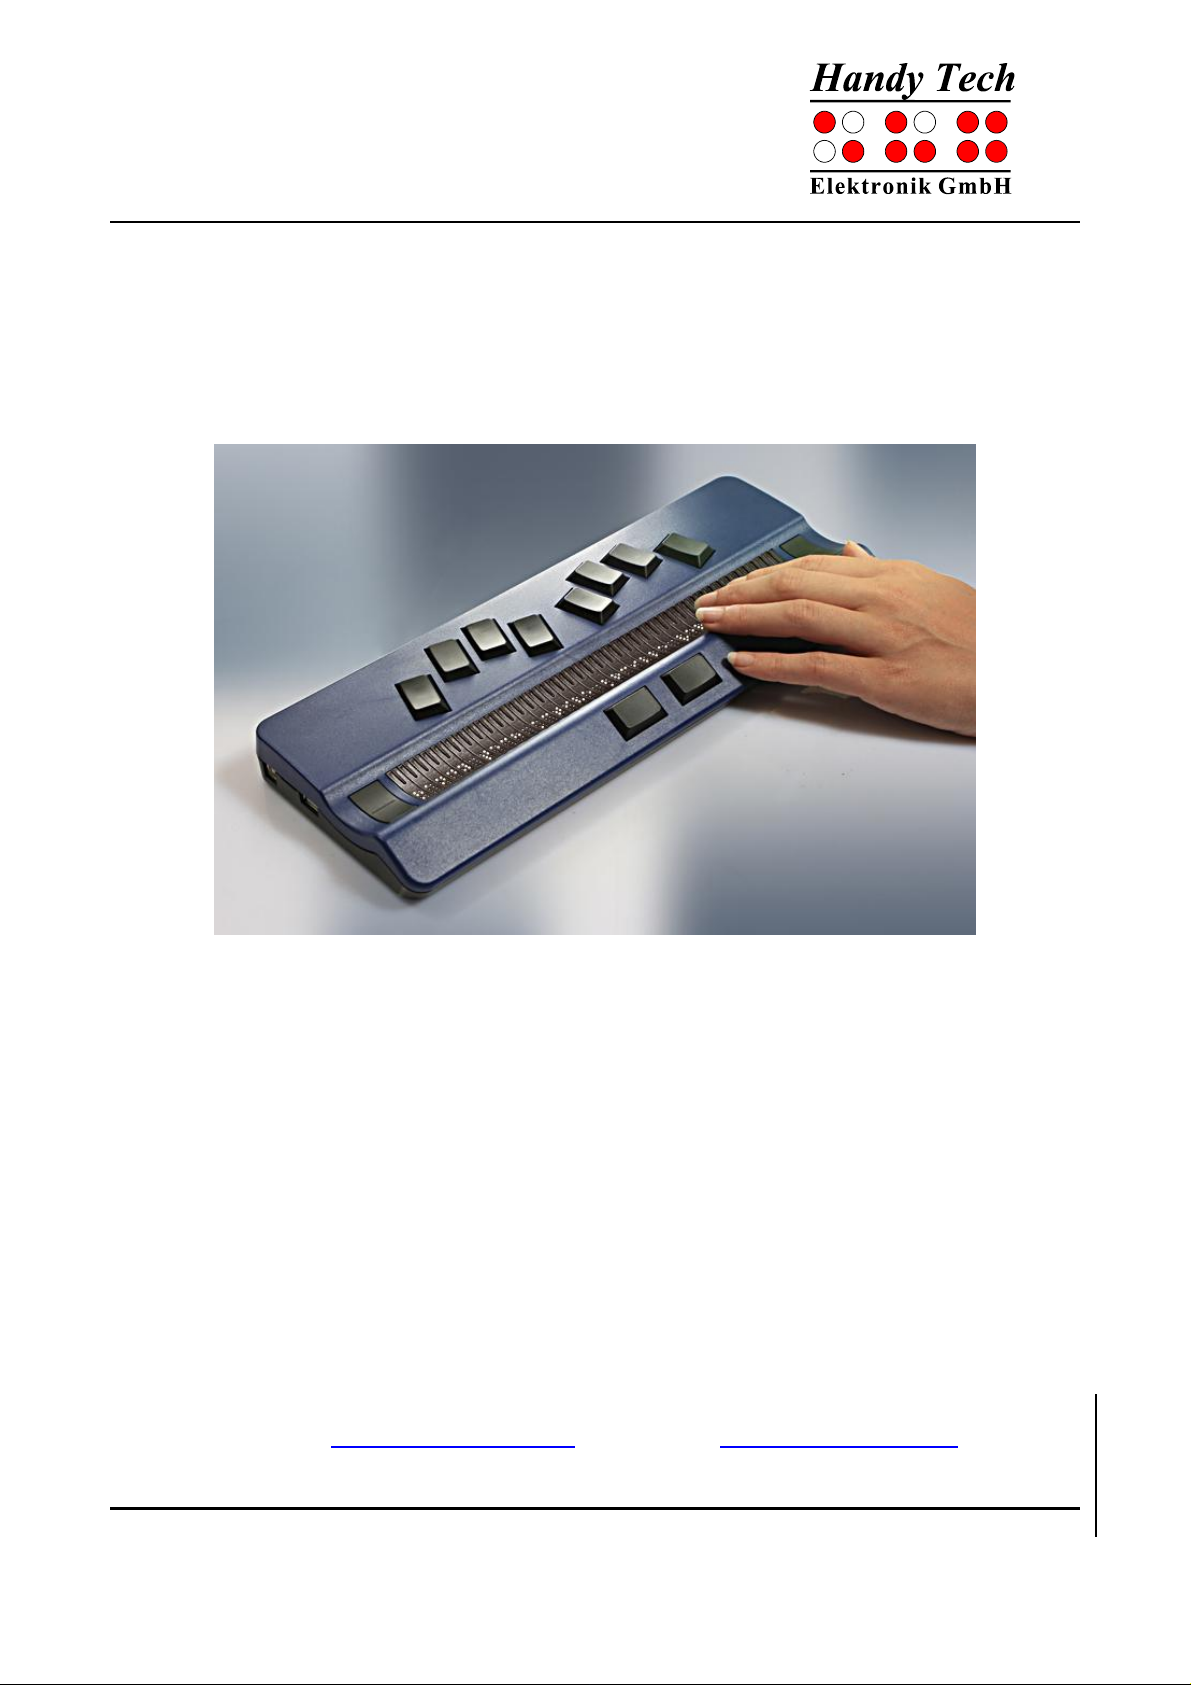
U s e r M a n u a l
Active Braille
Version 3.0
Horb, August 2013
© Handy Tech Elektronik GmbH
All Rights Reserved
Handy Tech Elektronik GmbH; Brunnenstraße 10; 72 160 Horb, Germany
Phone: +49 7451 55 46 0; Fax: +49 7451 55 46 67
E-Mail: [email protected] - Internet: www.handytech.de
Page 2

Handy Tech
Elektronik GmbH
Active Braille
Table of Contents
Table of Contents
1 GENERAL 7
1.1 Preface 7
1.2 Active Braille at a Glance 7
1.3 Conventions Used in This Manual 9
2 INSTALLATION 10
2.1 Package Contents 10
2.2 Software Installation 10
2.3 Connecting the Power Supply 11
2.4 Connecting the Interface Cable 12
2.5 Connecting a external USB keyboard 12
2.6 The Carrying Case 12
2.7 Installation of the Bluetooth Tie-In 13
2.7.1 Bluetooth-PC Tie-In 13
2.7.2 Bluetooth Apple iOS Device Tie-In 14
2.7.3 Bluetooth-Cell Phone Tie-In 14
2.8 Technical Specifications 15
3 START UP 16
3.1 Version Information 16
3.2 Turning the Power On 16
3.3 Basic Operation 17
3.3.1 Chords 17
3.3.2 Signal Tones 17
3.3.3 System Messages 17
3.3.4 Check Boxes 18
3.3.5 Radio Buttons (1 of x) 18
3.3.6 System Files 18
3.3.7 Energy Saving Features 18
3.3.8 The SAVE Mode 19
4 QUICK START 20
4.1 The Active Braille as Braille Display 20
4.2 The Active Braille as Notepad 20
4.2.1 Navigating the Menu 20
4.2.2 Writing a Note 21
4.2.3 Saving a Note 21
4.2.4 Opening a File 21
4.2.5 Transferring data between the Active Braille and a PC 22
4.2.5.1 Transferring a File from the Active Braille to the PC 22
4.2.5.2 Transferring a File from the PC to the Active Braille 22
5 OPERATION OF THE ACTIVE BRAILLE 23
5.1 The Menu System 23
5.1.1 File (F) 23
5.1.1.1 New file 23
5.1.1.2 Previous file 23
5.1.1.3 New Folder 24
5.1.1.4 File and Folder list 24
5.1.2 Calculator (A) 26
Page 2
Page 3

Active Braille
Table of Contents
Handy Tech
Elektronik GmbH
5.1.3 Scheduler (S) 28
5.1.3.1 Entering a New Appointment (New Entry) 29
5.1.3.2 Entering and Editing Appointments 29
5.1.3.3 Entering Appointments with Variables (Recurring Appointments) 30
5.1.3.4 A Few Notes on Entering Appointments 31
5.1.3.5 The Appointment Schedule 31
5.1.3.6 Full Text Search within Appointments 33
5.1.3.7 Appointment Editing Menu 33
5.1.3.8 Information Regarding Past Appointments 34
5.1.3.9 Resources Management 34
5.1.3.10 Backing up the scheduler data 34
5.1.4 Clock (C) 35
5.1.4.1 Display date/time (D) 35
5.1.4.2 set Alarm (A) 35
5.1.4.3 set Clock (C) 35
5.1.4.4 Stop watch (S) 36
5.1.4.5 count down (O) 36
5.1.5 MusikBraille (M) 36
5.1.6 Games (G) 37
5.1.6.1 BrailleHunt (B) 37
5.1.6.2 Hangman (H) 38
5.1.7 PC mode (P) 38
5.1.8 Braille character sets (B) 38
5.1.8.1 Creating a Braille Character Set 38
5.1.8.2 Loading Braille Character Sets 39
5.1.8.3 Selecting and Activating Braille Tables 39
5.1.8.4 Delete selected braille set (D) 40
5.1.9 Info (I) 41
5.1.9.1 Memory usage (M) 41
5.1.9.2 Battery statistics (B) 41
5.1.9.3 Keyboard layout (K) 42
5.1.9.4 Serial number (S) 42
5.1.9.5 Versions (V) 42
5.1.9.6 System information 43
5.1.10 Options (O) 43
5.1.10.1 6 dots braille (6) 43
5.1.10.2 hotkeys Activate objects (A) 43
5.1.10.3 Highlight hotkeys (H) 44
5.1.10.4 show system files (Y) 44
5.1.10.5 Folders first (O) 44
5.1.10.6 Quick entry (Q) 44
5.1.10.7 show file attributes (B) 44
5.1.10.8 auto switch external keyboard (X) 44
5.1.10.9 Bluetooth on (L) 45
5.1.10.10 Switch Bluetooth on/off automatically(W) 45
5.1.10.11 Startup mode (S) 45
5.1.10.12 Tone signals (T) 46
5.1.10.13 Date/time format (D) 46
5.1.10.14 Input indication (I) 46
5.1.10.15 dot firmness (F) 47
Page 3
Page 4

Handy Tech
Elektronik GmbH
Active Braille
Table of Contents
5.1.10.16 atc sensitivity (E) 47
5.1.10.17 standby (N) 47
5.1.10.18 Restore factory defaults (R) 48
5.2 The Editor 49
5.2.1 Overview of Editor Functions 49
5.2.2 Dialogs and Confirmation of Actions 49
5.2.3 Entering and Deleting Text 50
5.2.4 Reading Text 50
5.2.5 ATC within the Editor 51
5.2.6 Moving the Cursor 51
5.2.7 Editing Modes (SPC+2 4 = Chord i) 52
5.2.8 Calculator function 53
5.2.9 Status Display (SPC+2 3 4 7 = Chord S) 53
5.2.10 Set Mark (TU+TD) 53
5.2.11 Jump to Mark (SPC+1 3 4 = Chord m) 54
5.2.12 Delete Mark (TU+TD, Select Name, SPC) 54
5.2.13 Block Functions 54
5.2.13.1 Marking the Beginning of a Block [SPC+TRC] 55
5.2.13.2 Copy (SPC+1 4 = Chord c) 55
5.2.13.3 Cut (SPC+ 1 3 4 6 = Chord x) 55
5.2.13.4 Paste (SPC+1 2 3 6 = Chord v) 56
5.2.13.5 Exchange Mark and Cursor (SPC+7 8) 56
5.2.13.6 Deleting a Text Block (SPC+ 1 3 4 6 7 = Chord X, SPC+1 2 = Chord b)56
5.2.13.7 Saving a Block to a File (SPC+2 3 4 = Chord s) 57
5.2.14 Searches 57
5.2.14.1 Incremental Search (SPC+1 2 4 = Chord f) 57
5.2.14.2 Buffered Search 57
5.2.14.3 Backward Search (SPC+1 2 4 7 = Chord F) 58
5.2.15 Replace (SPC+1 2 3 5 = Chord r) 58
5.2.16 Opening Additional Files 58
5.2.17 Switching Between Open Files (SPC+5 6 8 or SPC+2 3 7) 59
5.2.18 Suspending the Editor (SPC+1 2 3 4 5 6) 59
5.2.19 Saving Files (SPC+2 3 4 = Chord s) 60
5.2.20 Closing a File and Quitting the Editor (SPC+1 5 = Chord e) 61
5.2.21 Activating PC Mode from the Editor (SPC+1 2 3 4 = Chord p) 61
5.2.22 Help (SPC+1 2 5 = Chord h) 61
5.2.23 The Editor's Setup Menu (SPC+1 3 6 = Chord u) 62
5.2.23.1 Window Scrolling (Global) 62
5.2.23.2 Scroll time (Global) 63
5.2.23.3 Indicate empty lines (Global) 63
5.2.23.4 Automatic scrolling (Global) 63
5.2.23.5 Dialog Timeout (Global) 63
5.2.23.6 Warn Timeout (Global) 63
5.2.23.7 Result position [c] or [e] 64
5.2.23.8 Keep expression [c] or [e] 64
5.2.23.9 Find Exact (Global) 64
5.2.23.10 Margin Action (Global) 64
5.2.23.11 Right Margin (Global) 65
5.2.23.12 Word Wrap (Global) 65
5.2.23.13 Tab Mode (Global) 65
Page 4
Page 5

Active Braille
Table of Contents
Handy Tech
Elektronik GmbH
5.2.23.14 Tab Stops (Global) 65
5.2.23.15 Tab Width (Global) 66
5.2.23.16 Line End (Individual File) 66
5.2.23.17 Insert Cursor (Global) 66
5.2.23.18 Edit Mode (Individual File) 66
5.2.23.19 Scroll Speed (Global) 67
5.2.23.20 Saved Position (Individual File) 67
5.2.23.21 Display Mode (Individual File) 67
5.2.23.22 Step Size (Global) 67
5.2.23.23 Match Column (Global) 67
5.2.24 Important Instructions Regarding the Editor 68
5.3 Controlling the PC from the Active Braille's Keyboard [SPC+1 2 7] (Chord B)69
5.3.1 Table of Key Commands for Controlling the PC 69
6 EXTERNAL KEYBOARD 72
6.1 General 72
6.2 Keyboard Keys 73
6.2.1 Alphanumerical Character Inputs 73
6.2.2 Numerical Pad 73
6.2.3 Function Keys 73
6.2.4 Navigation Keys 73
6.2.5 Special Keys 73
6.2.6 Status Indicators 74
7 THE ACTIVE BRAILLE AS BRAILLE DISPLAY 75
7.1 Screen reader using Windows, Example Window-Eyes 75
7.1.1 Overview 75
7.2 Screen readers using Windows, Example JAWS 76
7.2.1 Overview 77
7.3 Screen reader using Windows, Example Hal/SuperNova 79
7.3.1 Overview 79
7.4 VoiceOver: Screen reader for Apple iOS Devices 81
7.5 TALKS&ZOOMS: Screen reader for Mobile Telephones 82
7.5.1 Quick Start 82
7.5.2 List of Identification Letters 83
7.5.3 List of Braille Commands 83
7.5.4 Useful Tips for Using TALKS&ZOOMS 84
8 OPERATION SETTINGS FOR HANDY TECH BRAILLE DISPLAYS 86
8.1 Connection 86
8.2 ATC 87
8.3 Status Cells 87
8.4 Key Actions 88
8.4.1 Key Lock 88
8.4.2 Fast Keys 88
8.4.3 Repeat Keys 88
8.5 Miscellaneous 89
8.6 Info 89
9 ACTIVE TACTILE CONTROL (ATC) 90
9.1 ATC Assistant for Reading or Learning 91
9.2 Tips for Utilizing ATC to Learn Braille 92
9.3 Tips for Utilizing ATC for the Experienced Braille Reader 93
9.4 ATC-Monitor Settings 94
Page 5
Page 6

Handy Tech
Elektronik GmbH
Active Braille
Table of Contents
10 BATTERY MANAGEMENT 95
10.1 Types of Batteries 95
10.2 Battery Charging 95
10.3 Battery Capacity Display 96
10.4 Automatic Recognition of Low Voltage 96
10.5 Replacing the Batteries 96
11 IMPORTANT INFORMATION 98
11.1 Start-Up Procedures 98
11.1.1 Self check of the File System 98
11.1.2 Saving Files in Case of Fatal Errors 99
11.2 Symbols 99
11.3 Safety Information under the Standards for Medical Devices 99
11.4 General Safety Information 99
11.5 Handling the Active Braille 101
11.6 Warranty 101
11.7 Technical Support 101
12 LIST OF KEY COMBINATIONS 103
12.1 Navigating the Menu System 103
12.2 Editor Functions 103
12.3 Keys in PC Mode 104
12.4 Fixed Key Functions on External Keyboard 104
13 ERROR MESSAGES 106
13.1 English Language Error Messages 106
13.1.1 Fatal Errors 106
13.1.2 General Errors 107
13.1.3 Warnings and Messages 107
13.2 Error Messages from the Message File 108
13.2.1 General Messages 108
13.2.2 File System Messages 108
13.2.3 Editor Messages 109
14 COPYRIGHT NOTICE 113
Page 6
Page 7

Active Braille
General
Handy Tech
Elektronik GmbH
1 General
Thank you for choosing the Active Braille. Active Braille was designed with the focus on
easy and intuitive handling. Please take some time to read the Active Braille user manual.
It will help you to get the most out of every feature provided.
1.1 Preface
Before starting Active Braille for the first time it is important to carefully read the safety
instructions regarding the appropriate handling You will find the safety instructions at the
end of this manual.
Active Braille is a new-generation Braille display with note-taking function. Its note taking
function as well as the universal connection options and the latest ATC technology all are
patented by Handy Tech.
With the 4 GB data storage you can use your Active Braille to take notes at anytime,
anywhere. With the HTCom software package (included) the transfer of your notes to your
PC and back into Active Braille is easy and straightforward.
The Active Braille comes with wireless bluetooth technology allowing you to control a PC
or Mobile assistant like a cell phone.
To use Active Braille as a Braille display for a PC (Windows or Linux) an output program
called screen reader is needed. It is available from your supplier. The screen reader
program NVDA will be provided for free if needed.
If you have any ideas or suggestions to improve our product please do not hesitate to
contact your Handy Tech customer service representative or write to
[email protected]. Your opinion is very important to us.
Enjoy using Active Braille.
1.2 Active Braille at a Glance
This chapter will help you familiarize yourself with your Active Braille and its control
elements. We recommend keeping the Active Braille handy, so that you can actively follow
the instructions in this chapter.
The two space bars are located at the centre front. In the following description the left
space bar is called [SPCL] and the right space bar is called [SPCR]. If either the left or
right space bar can be used they will be called [SPC].
Above the Braille display you can find 8 ergonomic function keys. These function keys are
also used for Braille input. They correspond to the usual Braille keyboard layout and are,
from the left to the right as follows:
7 3 2 1 4 5 6 8
Page 7
Page 8

Handy Tech
Elektronik GmbH
Active Braille
General
Located in the middle of the device are 40 ergonomic Braille display elements with
integrated cursor routing keys. The cursor routing (CR) keys which are integrated as part
of each Braille cell enable you to place the cursor directly at the text position of this Braille
cell.
The Triple Action Keys are to the left and right of and flush with the Braille cells You can
activate the Triple Action keys at the top, in the centre, and at the bottom.
The Triple Action Key functions are:
The left or right Triple Action Key's (Up) position also serves as a reading key to move
backward within the text, and will be referred to as [TLU] or [TRU] in the list below. The left
or right Triple Action Key's (Down) position also serves as a reading key to move forward
through the text, and are referred to as [TLD] or [TRD] in the list below. In the event of the
right as well as the left Triple Action Key (Up) can be pressed, it is called [TU]. If
alternatively the Triple Action Key left or right (Down) can be used, this is called [TD]. In
the case that you need to press both [TU] and [TD] simultaneously, such as setting a mark
within the Editor, you may press the keys at the top left [TLU] and bottom right [TRD], or at
bottom left [TLD] and top right [TRU].
The centre position of either the left or right Triple Action Key [TLC] and [TRC] can be
used for additional functions.
In the list below you will find an overview of the symbols used in this manual to represent
the Triple Action Key settings:
Left Triple Action Key, up: [TLU]
Left Triple Action Key, center: [TLC]
Left Triple Action Key, down: [TLD]
Right Triple Action Key, up: [TRU]
Right Triple Action Key, center: [TRC]
Right Triple Action Key, down: [TRD]
If you move along the right side of the housing towards the back, you will first feel the main
power button. Located behind the power button is a USB type A port to connect a USB
keyboard. Behind the USB type A port is the outlet for the power supply.
On the left side of the device are from the front to the back – another USB type A port to
connect a USB keyboard, a Micro SD card for service reasons and a USB type B port to
connect a PC.
Please do not remove the Micro SD card at any time from the device while it is on. Data on
the card can be damaged. Please turn the Active Braille off, before you insert or remove
the Micro SD card.
Left on the back side you find a round headphone plug (2.5 mm) to connect a headphone
or an external loudspeaker. The Active Braille is shipped with an adapter cable to connect
also a 3.5 mm connector.
Page 8
Page 9

Active Braille
General
Handy Tech
Elektronik GmbH
1.3 Conventions Used in This Manual
In this manual, the following conventions are used for inputs and outputs on the Active
Braille and on the PC:
Single keystrokes on Active Braille: [Key1] e.g. [TLU]
Key/dot combination on Active Braille: [SPC + 1 2]
Display on the Active Braille modules: 'Display Text' such as 'File'
Single keystrokes on PC: {Key}, e.g., {ENTER}
Text input on PC: {input text}, e.g., {HTCOM}
Text output on PC: "output text" such as "Done"
Page 9
Page 10

Handy Tech
Elektronik GmbH
Active Braille
Installation
2 Installation
This section contains helpful information about how to install your Active Braille. Please
read it carefully to prevent difficulties while setting up.
2.1 Package Contents
Please verify that your package contains all of the parts listed below. If one of the
components is missing or damaged, please contact us in order to request the missing part
or a replacement.
You should find enclosed the following:
Active Braille
Carrying case
2 USB cables (one short, one long)
1 adapter cable for loudspeaker, 2.5 mm to 3.5 mm, about 10 cm long (4 inches)
Power supply with power cable to be connected to Active Braille (100 to 240 Volt
AC; 9 Volt DC / 1,5 A; FW 7555M/09)
Set of 4 NiMH batteries
Software Package with drivers for screen readers and HTCom (CD)
This user manual printed version
This user manual in daisy format on CD
User manual for file transfer with HTCom
Quick Reference in Braille
2.2 Software Installation
Before you can connect the Active Braille to your computer, you should first install the
enclosed software package. Please make sure that the screen reader program you intend
to use has been installed on the PC and close Word for Windows. Next, insert the CD
containing the installation software into your computer's CD-ROM drive. The installation
program of this CD will install the latest drivers for your screen reader as well as the file
transfer program HTCom and this user manual.
Start "setup.exe" on the CD. The installation program follows the Windows Standards. You
can choose the following components of the software, to be installed:
JAWS driver: latest Braille display driver for JAWS for Windows
Window-Eyes driver: latest Braille display driver for Window-Eyes
HAL/Supernova driver: latest Braille display driver for HAL/Supernova
Active Braille Firmware and Manuals: for updating the internal functions of your
Active Braille and this user manual.
HTCom (Handy Tech Communication Software): communication program for file
transfer between PC and Active Braille
We recommend that you use the default setting for the installation. All required software
components will be installed and a link for HTCom on the Desktop will be created. If there
is no screen reader running when starting the setup program, you have to choose the
Page 10
Page 11

Active Braille
Installation
Handy Tech
Elektronik GmbH
folder for the installation of your screen reader manually. After completion of the
installation program you will find a group named "Handy Tech" in programs in the start
menu. Here you find the following subfolders:
BrailleDriver: here you find the key settings of your Active Braille for your screen
reader.
Active Braille followed by the version number: for version 1.0 it is for example
"Active Braille 1.0". Here you find this user manual, the uninstall program, the
program for updating the firmware and important remarks.
HTCom: here you find the description of HTCom, the program HTCom itself and the
uninstall program.
After installing successfully you can hook on your Active Braille on to your computer. In the
installation folder of your Active Braille firmware you will find the following subfolders
(when installed completely):
Braille tables: contains the various Braille character sets for different Country
versions.
Firmware: contains four files for the internal programming of your Active Braille as
well as system files.
Manuals: includes this user manual and important information
KeyboardLayouts: contains different keyboard files for different countries.
Uninstall: contains the uninstall program for this software.
USB_driver: contains the USB driver for Windows98 and Windows-NT
Beside the start menu you can start HTCom wire the link on your desktop or wire the
preset key combination {Ctrl+Shift+H}. A detailed description of how to use HTCom you
will find this in the separate user manual "File transfer between PC and Active Braille"
which can be found in the sub folder "HTCom".
2.3 Connecting the Power Supply
The power supply included in your package is used to recharge the batteries and for
providing power to the Active Braille. The Active Braille can be used without restrictions
even while the batteries are recharging.
When connecting the power supply, please plug the round, thin plug into the power supply
port behind the USB Type A port on the right side of the housing first. You can feel the
plug snapping into place. Now you can connect the power supply to an easily accessible
wall outlet. When disconnecting the power supply cable, please reverse the order of steps
above. When connecting the power supply cable while the device is off, you get the
message ’Battery quick charging’ and the Active Braille turns off again.
If you plug in the power supply while the Active Braille is switched on, a signal tone
indicates that the device runs no longer on Batteries.
WARNING:
Should you decide to use non-rechargeable batteries in the Active Braille for any reason,
you must remove these from the device before connecting the Active Braille to a power
outlet via the power supply cable. The integrated charging circuitry cannot recognize
whether the batteries are rechargeable or not and will try to recharge the batteries. This
Page 11
Page 12

Handy Tech
Elektronik GmbH
Active Braille
Installation
can result in the batteries bursting, which may not only damage the device, but could also
be hazardous to your health.
If you are not sure whether the batteries you are using are rechargeable or not, you can
recognize rechargeable batteries by an indentation in the casing near the top button (plus
pole).
2.4 Connecting the Interface Cable
Your Active Braille can communicate with the PC either via USB interface, or through the
wireless bluetooth interface. If the Active Braille is used as a medical device, the
connected PC needs to comply with the medical device directive or needed to be
additional grounded or needs to be connected via a separating transformation.
Please make sure, that you have installed the enclosed software package, as described in
chapter 2.2 before you connect the USB cable.
To connect the Braille display to the PC via the USB interface, please identify the enclosed
USB interface cable first. The USB interface cable features a small, almost square plug on
one end. The other end features a small, flat plug. Now plug the square plug into the
leftmost port on the left side of your Active Braille. The flat plug is then plugged into the
PC's USB port.
When both the Braille display and the PC have been turned on, the Braille display will
automatically be recognized by USB enabled operating systems. When connecting the
USB cable while the device is off, you get the message ’Battery charging’ and the Active
Braille turns off again.
WARNING:
Should you decide to use non-rechargeable batteries in the Active Braille for any reason,
you must remove these from the device before connecting the Active Braille to a PC via
the USB cable. The integrated charging circuitry cannot recognize whether the batteries
are rechargeable or not and will try to recharge the batteries. This can result in the
batteries bursting, which may not only damage the device, but could also be hazardous to
your health.
If you are not sure whether the batteries you are using are rechargeable or not, you can
recognize rechargeable batteries by an indentation in the casing near the top button (plus
pole).
2.5 Connecting a external USB keyboard
You can also connect a standard USB keyboard to your Active Braille. Therefore plug in
the USB cable of the USB keyboard in the right or left USB Type A port of the Active
Braille. For more information please refer to chapter 6 External Keyboard.
2.6 The Carrying Case
An extra compartment is provided on the cover of the carrying case, which can be closed
with a velcro fastener. This compartment can store the cables and your mobile phone.
Page 12
Page 13

Active Braille
Installation
Handy Tech
Elektronik GmbH
On the right and left side of the case are openings for the power cable, the USB interfaces
and the main power button, so that the Active Braille can be operated inside its case.
These outlets are protected by a Velcro fastened cover, which can be flipped upwards. To
completely open the carrying case, also open the Velcro fastener on the bottom.
All of the control elements are now accessible. If you open the two Velcro fasteners at the
right and left back side, the Active Braille can be pulled out backwards of the case.
When you replace the Active Braille in the carrying case, please make sure that the sides
of the case fully enclose the Active Braille, and that the Velcro fasteners are proper closed,
because otherwise the Active Braille could fall out when the case is opened.
2.7 Installation of the Bluetooth Tie-In
Because your Active Braille features a Bluetooth transmission module, you can also
establish a wireless connection between the Active Braille and a computer or a cell phone,
if they are equipped with wireless Bluetooth technology. You need to make sure that the
wireless Bluetooth interface on your Active Braille is active, by enabling the option
“Bluetooth on” in the option menu like described in chapter 5.1.10.9. The wireless
transmission radius is approximately 10 meters (10 yards or 33 feet).
2.7.1 Bluetooth-PC Tie-In
1. Please make sure, that the Active Braille is switched on, the Bluetooth function in
the option menu is enabled and no USB cable is connected.
2. Select "Bluetooth Devices" from the control panel or from your system tray. A
window "Bluetooth Devices" will open.
3. Select on the tab sheet "Devices" the button "Add…"
4. "Add Bluetooth Device Wizard" will appear. Select "My device is set up and ready to
be found" and press "Next".
5. All detected Bluetooth devices will be listed. Select the Active Braille from the list
and press "Next".
6. Select "Let me choose my own passkey", insert into the text field the 5 digit pairing
code. Press "Next".
7. Now the pairing will be done and the COM Port will be assign. Please wait a
moment. All available COM Ports will be displayed. Please confirm by pressing
"Finish".
8. The Braille Star is shown in the window "Bluetooth Devices". Please confirm by
pressing "OK". Now the device is ready to use.
Your Active Braille now has a wireless connection to the PC, and you can utilize all of its
functions, as if it were connected via the USB cable.
Note:
If you move the Active Braille beyond the Bluetooth connection's communications radius
(10 meters/yards), the connection to the PC will be interrupted. The connection will
automatically be re-established by Handy Tech's Braille device driver once you move back
within range. For this you need to have installed the latest Braille display driver (see
chapter 2.2).
Page 13
Page 14

Handy Tech
Elektronik GmbH
Active Braille
Installation
2.7.2 Bluetooth Apple iOS Device Tie-In
Mobile Apple devices, such as the iPhone or iPad, include a screen reader by default,
which enables blind people to operate the devices by speech and Braille output. In order to
connect the Active Braille via Bluetooth with an Apple device, you have to activate
VoiceOver first. Please follow these steps:
1. Please make sure that the Active Braille is turned on, USB cable is not connected
and the Bluetooth option in Config mode is turned on.
2. Open “Settings” on the home screen of your iOS device..
3. Choose „Accessibility from the „General“ page.
4. Turn VoiceOver on.
5. Choose “Braille” on the Accessibility page.
6. If Bluetooth is off, the iOS device will remind you and you should turn it on now.
7. The iOS device is now searching for Bluetooth Braille displays. Please choose the
Active Braille from the list.
8. Now you have to enter the 5 digit pairing code.
9. The Bluetooth connection will be established and you can read the text from the iOS
device on the Braille display.
Note: if the Bluetooth connection was interrupted because the Active Braille or the Apple
device was turned off or in sleep mode, please activate the Active Braille first. The
connection will be reestablished automatically, when turning on the Apple device.
2.7.3 Bluetooth-Cell Phone Tie-In
If your cell phone uses the Symbian operating system (for example the Nokia E50) your
cell phone also includes a wireless Bluetooth interface. Please make sure, that you use
the Braille driver from Version 2.1 of TALKS&ZOOMS By executing the following steps,
you can tie in your Active Braille wirelessly with your cell phone to utilize Talks Premium:
1. In the cell phone's "Connections" menu, select the menu item "Bluetooth". Under
the tab "Paired Devices", select "Options".
2. Select "New Paired Device". All available Bluetooth devices will be displayed. If you
receive the message "Bluetooth is off. Turn on?" you should enter "Yes". Make
sure that your Active Braille's power is switched on and that the small sliding switch
between the two keyboard outlets is in the right position towards the edge of the
housing.
3. Now select the Active Braille from the list of devices. If the Active Braille is not
included on the list, activate the "More Devices" option. The Active Braille is
designated as Active Braille AB4/A0, followed by its serial number.
4. Once you have selected the Active Braille from the list, you will be prompted to
enter a password. This password is the five-digit pairing code.
5. Finally, select "Handy Tech" from the "Braille" tab in the TALKS&ZOOMS settings
menu.
Your Active Braille now has a wireless connection to your Symbian mobile phone, and you
can utilize all of the functions of your telephone with Braille input/output capability, as
described in the Section "TALKS&ZOOMS: Screen reader for Mobile Phones".
Page 14
Page 15

Active Braille
Installation
Handy Tech
Elektronik GmbH
2.8 Technical Specifications
40 concave piezoelectric Braille cells
40 cursor routing keys
2 Triple Action Keys
8 function keys
2 space keys
2 USB Type A port
1 USB Type B port
4 GB memory
1 plug for loudspeaker 2.5 mm
Battery duration ca. 20 hours; ca. 14 hours for Bluetooth operation
Quick charge circuitry (less then 3 hours)
Power: 9 V / 1.3 A
Measurements: 31.9 cm width, 12.4 cm depth, 2.9 cm high (12.56" width, 4.88"
depth, 1.14" high)
Weight 930 gr (2.05 lbs.)
Page 15
Page 16

Handy Tech
Elektronik GmbH
Active Braille
Start Up
3 Start Up
3.1 Version Information
As of this Section, all common characteristics of the Active Braille will be described. This
information applies to firmware Version 3.5 of your Active Braille.
3.2 Turning the Power On
Press the on/off button to turn the Active Braille on. You can now work independent of a
power source, because the batteries are fully charged. You will hear a short, high-pitched
beep, and the following start up message will be displayed on the Braille display:
'Handy Tech ACTIVE BRAILLE 3.5'.
At the end of this string is the version number of the firmware that you are currently
working with (e.g., 1.0).
The high-pitched beep, followed by a second lower beep at start up, indicates that you are
now in work mode. As soon as you hear the lower beep, also called startup sound, you
can begin working.
Please note that the Active Braille is equipped with protection against accidently turning
on. This means that the Active Braille is turning off automatically after 60 seconds if you
don’t read four characters in a row on the Braille display. It doesn’t turn off automatically if
it is connected via USB or power supply or if it is connected via Bluetooth to a screen
reader.
The Active Braille is not fully ready for operation until the startup sound appeared. The
device can only begin exchanging data or reacting to any other external events, such as
keystrokes, after the low beep.
You can change the startup sound by yourself using MusikBraille for composing your own
melody. Please refer to chapter 5.1.5 MusikBraille (M).
You are now in the Active Braille's main menu, which allows you to activate its various
functions.
Should you receive a message beginning with the words 'FER:', 'Warning', or 'WRN:'
instead of the work mode start up string shown above, then the Active Braille's software
has become corrupted. You will find detailed information and trouble-shooting tips in the
sections on firmware updates and error messages.
Now, before you can finally get started, we would like to familiarize you with some of the
basic concepts pertaining to your Active Braille.
Page 16
Page 17

Active Braille
Start Up
Handy Tech
Elektronik GmbH
3.3 Basic Operation
3.3.1 Chords
The Active Braille's keyboard is very easy to use. The keystroke functions are not
activated until the key is released. If a character is composed by several keys, it will be
created after releasing all keys.
In order to make functions available to you which require their own function keys on
standard keyboards, while also providing efficiency of operation, we have introduced the
so-called chord functions. Chords are letters or Braille dots that are used in combination
with the space bar. For example, in the Editor you can use Chord-i [SPC+2 4] to toggle
between insert and overwrite mode.
With Chord Commands it is enough to release one key in order to activate the function.
When entering characters all keys need to be released.
You will find a list of all available key combinations in chapter 12.
3.3.2 Signal Tones
The Active Braille utilizes various signal tones to indicate its status or to alert you to
prompts or possible errors.
1. Startup sound: This is a low tone which sounds during start up. If the startup sound
is preceded by a very short, high tone, followed by a pause, then the Active Braille
is in work mode.
2. Warning signal: This consists of two rapid, consecutive tones and may sound, for
example, when you have reached the beginning or the end of a text in the Editor, or
when you are canceling a search.
3. Error signal: This is a series of warning signals, which may be emitted, for example,
before you delete a file.
Note: You can specify which types of acoustic signals you want the Active Braille to emit
(see chapter 5.1.10 and 5.1.10.12). In this manual, the assumption is that this setting is set
to 'action Confirmations'. This is also the factory default.
3.3.3 System Messages
The Active Braille will display messages to indicate the successful completion of an
operation or to alert you to possible operating errors. If the message is an error message
or if it is an important message, a beep will also sound. We recommend carefully reviewing
these messages before continuing with your work. They frequently contain instructions on
how to proceed.
Most error messages will be in your local language however, there are some system
messages that are only provided in English. In regard to these messages, all messages
beginning with 'fatal', 'fer:', 'error' or 'wrn:' should be attended to.
After you have read the message, you can exit by pressing [TLC], which in most cases will
return you to the place from which the message was initiated. If the message text does not
fit on the Braille display, you can scroll through it by means of the [TD] and [TU] keys.
In chapter 13 you will find a list of the most important messages with explanations.
Page 17
Page 18

Handy Tech
Elektronik GmbH
Active Braille
Start Up
3.3.4 Check Boxes
Check boxes are switches that can be in either an "on" or "off" state. A check box consists
of a symbol indicating its state, and a designation. The symbol "[X]" indicates that the
check box is "on", or active, whereas "[ ]" is an inactive, or "off" check box.
Toggling the state of the check box between on and off is accomplished by pressing [SPC]
or [TRC]: the state is toggled upon each keystroke. Alternatively, you can also press the
cursor routing key above the check box to toggle it. As soon as you move on to a new
menu item, the last state indicated by the check box remains in force. However, the
settings are not permanently saved until the 'Options' menu is closed.
Check boxes are used for controlling your Active Braille's functions and are found in the
Options menu. For example, you can choose either 6 dot or 8 dot Braille this way.
Note:
If the Active Braille is turned off without having closed the Options menu, the last changes
to be entered will be lost. The new settings are saved only upon exiting the Options menu!
3.3.5 Radio Buttons (1 of x)
Radio buttons are similar to incremental dials, e.g., from 0 to 10. They are groups of
buttons that can be set to either an on or off state, of which only one can be selected at
any given time.
A radio button consists of a symbol indicating its state, and a designation. The symbol
"(X)" indicates that the button is active, whereas "( )" represents an inactive, or "off"
button. A radio button is selected by pressing [SPC] or [TRC]. Alternatively, you can also
press the cursor routing key above the radio button to toggle it. An example is the
frequency setting for acoustic alerts, which can be set to one of several levels.
Note:
As noted above, any new settings are saved only upon exiting the Options menu!
3.3.6 System Files
The Active Braille's firmware requires its own files for keeping track of settings and for
saving information. These system files always have the extension "HSF" (Handy Tech
System File). Some examples of system files are the message file (MSG.HSF), and the
layout file for the external keyboard (KBDLYOUT.HSF).
By default, system files are not displayed. However, the display of system files can be
activated via the Options menu (see chapter 5.1.10.4).
3.3.7 Energy Saving Features
Since the Active Braille is battery operated, it is designed specifically for efficiency in
energy consumption. Whenever possible, various components of the Active Braille are
deactivated in order to conserve energy.
If no key is pressed on the Active Braille for several minutes, it will enter sleep mode. In
sleep mode, the Braille display is turned off and some of the electronic modules are also
deactivated. As soon as any key is pressed, the Active Braille "wakes up" within a fraction
Page 18
Page 19

Active Braille
Start Up
Handy Tech
Elektronik GmbH
of a second, and will be fully operational. You will recognize this because the tactile pins
will be pushed backup.
Further explanations concerning the set-up of the energy saving features are contained in
chapter5.1.10.17 standby (N)
3.3.8 The SAVE Mode
In SAVE Mode, the Active Braille can only be operated as a Braille display. The SAVE
Mode is comparable to the save mode in Windows. To get into SAVE Mode, press the
on/off Button for more than 5 seconds or take out the micro SD card before turning the unit
on. Instead of the startup sound you will hear a different sound and on the Braille display
you can read:
’Handy Tech ACTIVE BRAILLE Save Mode 1.3’
The number at the end of the string is the version of the Save Mode. To get back into work
mode, just switch the Active Braille off/on again.
Page 19
Page 20

Handy Tech
Elektronik GmbH
Active Braille
Quick Start
4 Quick Start
4.1 The Active Braille as Braille Display
In order to operate the Active Braille as a Braille display under Windows, you need a
special program called a screen reader to control the display, which is not included with
the Active Braille itself. To use the Active Braille as a Braille display connect the USB
cable to the USB port on your PC or use the wireless Bluetooth connection.
Please make sure that your Active Braille is properly connected and switched on before
starting up the screen reader program, because otherwise the screen reader will not be
able to detect it. As a rule, the screen reader will display the selected position within the
active window on the Braille display. For example, if you are moving through a menu, the
selected menu item is displayed. The reading keys [TD] and [TU] allow you to move
through text. In word processing programs such as Microsoft Word, you can also position
the cursor with the cursor routing keys. In addition, the [CR] keys will also allow you to
activate menu items or functions directly (e.g. when you are prompted for a yes or no
answer with 'Y/N', pressing the [CR] key above the "y" has the same effect as entering
"y").
The screen reader program converts the text and graphic contents of the Windows screen
into speech and Braille. Generally, the computer's built-in sound card is employed for the
speech output function. The display of Braille is achieved with the help of your Active
Braille, after the screen display information has been forwarded from the screen reader to
the Braille display. All standard screen readers are compatible with Handy Tech's Active
Braille. During the installation of the screen reader software, all you need to do is to select
Handy Tech. The Braille display then automatically adjusts correctly to your Active Braille.
When starting your screen reader the first time, a small start up window appears which
displays the name of the Braille system detected by the program, the interface used for
communication, and the country currently selected. The various screen reader program
functions are assigned to specific keys on your Active Braille. How to operate your Active
Braille as a Braille display using Window-Eyes for Windows is described in Section7.1. A
summary of the essential functions of JAWS can be found in Section 7.2 and for
Hal/SuperNova in Section 7.3.
4.2 The Active Braille as Notepad
4.2.1 Navigating the Menu
Turn the Active Braille on and navigate through the menu using the [TU] and [TD] keys.
Pressing [TRC] or the [CR] keys activates functions or opens submenus; by pressing
[TLC] you can close the functions and submenus. [SPC+1 2 3] or [SPC+4 5 6] sends you
to the first or last item on the menu, respectively.
A detailed description of the menu items is contained in chapter 5.1.
Page 20
Page 21

Active Braille
Quick Start
Handy Tech
Elektronik GmbH
4.2.2 Writing a Note
To write a note, begin by pressing [TRC] as soon as the menu item 'File' is displayed.
'New file' will be displayed. If you press [TRC] now, a new file will be opened. The cursor,
represented by the blinking dots 7 and 8, appears on the first space of the Braille display.
You can now begin writing the note. If you make a mistake, activate the backspace key by
pressing [SPC+1 2]. The cursor routing keys are used for easy cursor placement.
[SPC+4 5] deletes the character at the current cursor position. [SPC+2 4] is used to toggle
between insert and overwrite mode. A low beep indicates that overwrite mode is active,
while a high beep indicates insert mode. Also, the cursor appears filled in (all 8 dots) and
blinking while in overwrite mode.
You can read previously entered text with the reading keys [TD] for forward and [TU] for
backward without moving the cursor. If you want to return to the position of the cursor,
simply press the [TLC] key. It is also possible to move the cursor to your current reading
position by means of the cursor routing keys.
Additional editing functions, such as Search and Replace, are described in chapter 5.2.
4.2.3 Saving a Note
You have several options for saving your note:
1. To save the current status without closing the file:
Enter [SPC+2 3 4] (chord s). The message 'Save file: ' appears, followed by the
default file name 'untitled'. The cursor is positioned on the first character of the file
name.
You may either accept the default file name, overwrite it by entering a name of your
choice, or edit the name easily by navigating the cursor and using the delete
function. If you enter any character without first moving the cursor, the default file
name will be overwritten.
To save the file, press the [TRC] key. If a file with that name exists already, you will
be notified and can then overwrite that file.
2. To save the current file and then close it:
Enter [SPC+1 5] (chord e). The procedure for saving the file is the same as the
steps described above in 1.
When the file has been saved, it is also closed. Unless you have other files open,
you will return to the main menu at menu item 'File'.
4.2.4 Opening a File
To open the last previously closed file, activate the menu item 'Previous file' in the 'File'
menu. This will open the most recently closed file, with the cursor at the position it was in
when the file was closed.
To open another existing file, continue navigating through the File menu beyond the items
'New file' and 'Previous file'. A list of files in alphabetical order will be compiled and
displayed.
Select the desired file using [TD] and [TU], and then press [TRC]. You can then choose
either 'Edit', 'View', 'Delete' or 'file attributes'. If you select 'Edit', the file will open within
the Editor.
Page 21
Page 22

Handy Tech
Elektronik GmbH
Active Braille
Quick Start
4.2.5 Transferring data between the Active Braille and a PC
Texts, message files and Braille character sets can be transferred to the Active Braille with
the aid of the loader program HTCom, which can be found on the CD-ROM included with
the system. This program can transfer files from a PC to the Active Braille via USB or
Bluetooth interface and can also transfer files from the Active Braille to a PC.
Various file formats can be transferred to the Active Braille with HTCom. When transferring
files in the following formats, HTCom extracts the text information:
Word format *.doc and *.docx
HTML format *.htm, *.html, *.php, *.php3, *.asp and *.jsp (Internet)
Text format *.txt, *.java, *.ini, *.hpp, *.h, *.cpp, *.c
RTF format *.rtf (Rich Text Format)
Optionally, the text information can be converted into Grade 2 during the transfer
operation. Files in formats other than those shown above (such as *.exe files) are
transferred unchanged to the Active Braille. The Active Braille can thus be used for the
transport of data. However, it should be noted that the transfer of large files to and from
the Active Braille takes much longer than the transfer to and from a memory stick.
HTCom runs under the operating systems WINDOWS 95 / 98 / Me / NT / 2000 / XP / Vista
and Windows 7. A special version of HTCom is available for the operating system LINUX,
and we will gladly send you a copy on request.
Please read the enclosed operating instructions for the transfer of data between a Braille
system and a PC. The data-transfer functions of HTCom are described briefly in the
following sections.
4.2.5.1 Transferring a File from the Active Braille to the PC
Start up the HTCom program on your PC then select the menu item "Receive file" by
means of the tab key or the arrow keys, followed by the Enter key.
The PC will show all of the files on your Active Braille. You can select one or more files for
the file transfer. Use the tab key to move to the input field that allows you to specify where
the transmitted files should be saved. Once you confirm this dialog by clicking OK the
transfer will start. During the file transfer, the Active Braille displays the following:
'Transmitted m kB of n kB', where m represents the number of Kilobytes already
transmitted, n the size of the entire file. Once all the files have been transferred to the PC,
you can close HTCom.
4.2.5.2 Transferring a File from the PC to the Active Braille
Start the HTCom program on your PC. Select the menu item "Send file" using the tab key
or the arrow keys, then press the Enter key. A dialog for choosing the files you want to
transmit opens. When you have selected the file you wish to transmit, press the Enter key.
Now another dialog opens, and you can specify any desired conversion into grade two
Braille. When you press the Enter key this time, the file will be transmitted.
When the file transfer is complete, you will again be in HTCom's main menu. The
transferred file will be found under the 'File' menu on the Active Braille. You can now open
it from here as described above and continue to edit.
Page 22
Page 23

Active Braille
Operation of the Active Braille
Handy Tech
Elektronik GmbH
5 Operation of the Active Braille
5.1 The Menu System
The menu system is structured hierarchically, containing submenus and functions. In
addition, the menu system has its own intelligence, so that only those menu items
currently available are displayed.
In addition to the keys described in chapter 12, there are also shortcut keys, known as
"hotkeys." These permit direct access to menu items within a menu level, without having to
navigate clumsily through the entire menu with [TD] and [TU]. A hotkey is one letter of the
menu item. It is spelled as a capital letter, but it may also have additional emphasis added.
Not only submenus, but functions and check boxes as well may be activated using
hotkeys. Furthermore, you can configure your Active Braille such that these objects are not
only selected, but also activated by pressing the hotkey.
In the following sections, the menu items as well as their sub-items are described in detail,
with the hotkeys enclosed in round brackets. If there is no letter indicated within brackets,
then there is currently no hotkey available for that menu item.
Please note:
The hotkeys permit instant access to items within the same menu level; they do not let you
move from one menu level to another. Therefore, you cannot access, e.g., the battery
voltage indicator from inside the File menu, instead, you have to return to the main menu
first then navigate via hotkeys through the menu levels until you have reached the menu
item Voltage.
5.1.1 File (F)
In the File menu you can choose to create or select a file or folder, and to open, edit, read,
rename, copy, move or delete it.
In order to copy, move or delete objects, you can also select more than one object. Press
[SPC + 2 4] (Chord i) {Insert}, the selected object will be marked with dot 7 and 8. To
unmark an object, press, [SPC + 2 4] (Chord i) {Insert} again. To mark all files and folders
within the current folder, press [SPC + 1 7] (Chord a) {Ctrl+a}.
5.1.1.1 New file
This menu item creates a new file. The file will be empty and can be edited. The cursor is
located at the first Braille position.
5.1.1.2 Previous file
This command opens the last file that was closed by the Editor. After opening the file, the
cursor will appear at the same position it was in when the file was closed. The file
automatically opens in the same editing mode in which it was saved.
Page 23
Page 24

Handy Tech
Elektronik GmbH
Active Braille
Operation of the Active Braille
Please Note:
This menu item is dynamic and will appear only if you have already edited a file in the
Editor and saved it. The name of the last edited file will remain stored in your Active Braille
even when it is turned off.
5.1.1.3 New Folder
With the function „New Folder“ you can create folders. You have the opportunity to store
your documents into different folders to make it easier to find them again. After calling the
“new folder” function, Active Braille proposes “untitled” which you can override by your
entries. A folder name cannot be longer than 255 characters and contain no special
characters (:*?"<>|+,;=[]/\). The entire path of the folder may not be longer than 259
characters. A folder is marked with a trailing slash.
5.1.1.4 File and Folder list
If you move beyond the menu item 'New Folder', a list of the existing files and folders will
be displayed in alphabetical order. First the folders, then the files are listed. You can
change this setting in the options (see chapter 5.1.10.5 Folders first (O)). You can
recognize a folder by the trailing slash. Files usually end in a three-character suffix which
is separated by a dot from the file name, E.g. “name.txt”.
By pressing [SPC + 4 5 6] or {End} on the external keyboard you jump directly to the end
of the file list. With [SPC + 1 2 3] or {Pos1} you can also jump directly to the first object (file
or folder) within the list. With [SPC + TU] {Ctrl+Arrow up} you reach the first folder, if the
option „folders first“ is set to on. Otherwise you get the first file. With [SPC + TD]
{Ctrl+Arrow down} you reach the first file, if the option „Folders first“ is set to on. Otherwise
you get the first folder.
If you are within a folder, all 8 dots of the first Braille character on the Braille display are
set. A full character is added for each additional sublevel. Thus, you can see by the
number of preceding full characters, in which sublevel you are. For going back one level,
select the two dots “..” item. You can also press the [CR] key on the full Braille character to
get back.
Normally, only the name of the file or folder will be displayed (short view). To see the
whole path with all folders (full view) press [SPC + 1 3 4 6 7] (Chord X) {Ctrl+Shift+x}. In
full view, you can jump by pressing the [CR] button over the slash in the appropriate level.
To quickly find a file or folder in the current folder, you can enter directly the name. While
entering the Active Braille is searching the matching file. A high signal tone indicates that
the file was found and the name will be displayed. The more characters you enter the
more precise is the search. In the moment the file or folder name is appearing the file is
selected. It is not necessary to enter more characters. With backspace [SPC+1 2] you can
delete entered characters.
If no file is found matching the letters you entered, a warning signal will sound. The
warning signal output, however, depends on the settings for signal tones (see chapter
5.1.10.12).
Page 24
Page 25

Active Braille
Operation of the Active Braille
Handy Tech
Elektronik GmbH
If no file is stored in the current folder, a message 'No files stored on disk!' appears. By
pressing [TLC] {Esc} you will return to 'New folder'.
If you select an existing file or folder by pressing [TRC]{Enter}, another menu level with the
following items appears.
5.1.1.4.1 Edit (E)
This menu item is only available for single files and opens the file in the Editor. The cursor
is at the beginning of the file, or, if the file was opened and saved before, at the position
the cursor was in when the file was saved. The file is automatically opened in insert mode.
If this menu item is not available, you have either selected a folder or one or more files
(recognizable at set dots 7 and 8). If you open a music file with the extension “.hmf” for
editing, the application “MusikBraille” will automatically be launched. (see chapter 5.1.5
MusikBraille).
5.1.1.4.2 View (V)
This menu item is only available for single files. This command opens the file in "Read
Only" mode. It cannot be modified. If you attempt to enter or delete characters, you will
simply generate warning signals, as long as the acoustic signals setting in the Active
Braille's Options menu is set to output warning tones. If the file is opened for the first time,
the cursor is located at the beginning, if not, it will be located at the previous cursor
position If this menu item is not available, you have either selected a folder or one or more
files (recognizable at set dots 7 and 8). If you open a music file with the extension “.hmf”
for reading, the application “MusikBraille” will automatically be launched. (see chapter
5.1.5 MusikBraille).
5.1.1.4.3 Open (O)
This menu item is only available for single folders. With this function you open the folder
and view its contents. These are marked with a leading full character. To leave the folder,
select the two points which follow the full character. In a folder, you can create new files or
folders, and reopen the last opened file. If this menu item is not available, you have either
selected a folder or one or more files (recognizable at set dots 7 and 8). However, in order
to get into the folder (for example to insert files), press [SPC + TRC] {Ctrl+Enter}.
5.1.1.4.4 cut (U)
In order to move a file or folder, you can cut it and insert it to a different place. Use the
menu item “cut” or press [SPC + 1 3 4 6] (Chord x) {Ctrl+x}. All marked objects will be
copied into the clipboard. Then move to the folder, you want to insert it and press [SPC + 1
2 3 6] (Chord v) {Ctrl+v}. The files and/or folders from the clipboard will be inserted at the
desired location and removed at their original location.
5.1.1.4.5 copy (C)
To copy a file or folder, choose the menu item „copy“ or press [SPC + 1 4] (Chord c)
{Ctrl+c}. All marked objects will be copied into the clipboard. Then move to the folder, you
want to insert it and press [SPC + 1 2 3 6] (Chord v) {Ctrl+v}. The files and/or folders from
the clipboard will be inserted at the desired location. .
Page 25
Page 26

Handy Tech
Elektronik GmbH
Active Braille
Operation of the Active Braille
5.1.1.4.6 Paste (P)
If you have marked one or more files and/or folders and executed “cut” or “copy”, you can
use the “paste” function to insert objects from the clipboard. Alternatively you can press
[SPC + 1 2 3 6] (Chord v) {Ctrl+v}. All objects from the clipboard will be copied into the
actual folder. These objects stay in the clipboard, until you execute “cut” or “copy” again.
This means, you can copy objects from the clipboard to as many places as you want.
5.1.1.4.7 Delete (D)
This command allows you to delete files and folders. First a message 'Sure deleting
(Yes/No/Abort)?' appears. By entering [y] for yes or activating the [CR] key above the "y",
you will delete the file or folder irrevocably; entering [n], [a], or [TLC] cancels the
command. An open file cannot be deleted. Alternatively, files can also be deleted by
entering the command [SPC+4 5] or pressing the {Delete} key on an external keyboard.
If you have marked several files and/or folders, Active Braille will inform you about the
amount of objects.
Note:
It is possible to display and delete system files (see chapter 5.1.10.4). However, you
should only undertake this if you know exactly what you are trying to do. For example, if
you were to delete the message file (msg.hsf), you could not work on the Active Braille
until you have loaded this file again. Because of this, you will receive the following warning
before you can delete any system file: ‘Warning: Deleting this file can cause system
instability!'
We recommend that you do not delete any system files which could cause the
malfunctioning of your Active Braille.
5.1.1.4.8 rename (R)
The rename function allows you to rename a file or folder. This menu item is only available
for single objects. If this menu item is not available, you have either selected a folder or
one or more files (recognizable at set dots 7 and 8). You can also press [SPC + 1 2 3 5]
(Chord r) {Ctrl+r} to rename a file or folder. Active Braille prompts the original name, which
can be edited or overwritten.
5.1.1.4.9 properties (E)
After selecting this menu item, the file's or folders name will be displayed, followed by its
size in kB and the date and time at which it was most recently accessed. If you have
marked one or more objects, you get the amount of marked files and folders, as well as
their size. Folders and several objects have two different sizes: their actual size and the
occupied space on the disk.
You can exit this display by pressing [TLC] {Esc}, which will return you to the file list.
5.1.2 Calculator (A)
The calculator function permits you to carry out calculations with your Active Braille and to
save the results or to insert them into a text. The calculator operates with an accuracy of
15 digits, and the decimal point can be positioned anywhere within these 15 digits. It offers
the following mathematical operations:
+ Addition
- Subtraction
Page 26
Page 27

Active Braille
Operation of the Active Braille
Handy Tech
Elektronik GmbH
* Multiplication
/ Division
() Bracketing with up to 10 pairs of brackets, whereby the brackets may be nested
% Calculation of percentages
When you select the menu item "Calculator", an empty Braille display with a cursor
appears, and you can enter the desired expression. Blanks are not permitted in the input.
A typical input could be, for example:
’3*5+6’
Pressing [SPC+2 3 5 6] (Chord =) or {Ctrl+Shift+Enter} causes the expression to be
calculated and the result is displayed before the expression. In the example above, this
looks like this:
’21 = 3*5+6’
In the calculator options (see Sections 5.2.23.7 and 5.2.23.8), you can define whether the
result is to be displayed before or after the expression or on its own. By default, the
resulted is displayed as in the example above before the expression.
You can navigate through the individual calculation steps with [TD] and [TU] if, for
example, you wish to modify an earlier expression. This means that you do not have to
enter the complete expression again. In our example, we want to insert a pair of brackets:
’3*(5+6)’
Pressing [SPC+2 3 5 6] (Chord =) or {Ctrl+Shift+Enter} now causes the following result to
be displayed:
’33 = 3*(5+6)’
You can delete all previously entered calculation steps by pressing [SPC+1 4 8] (Chord c +
Dot 8).
If you wish to carry out further calculations with the result, this can be done in two different
ways:
1. You can delete the equals sign and the original expression and enter a new
expression in the same line.
2. You can press [SPC+4 6] or {End} to move to the end of the current line and then
press [TRC] or {Enter} to position the cursor at the beginning of the next line. If you
now enter a mathematical operator at the beginning of this line, the result from the
previous line is automatically inserted in front of it. This method permits you to
follow all of your calculations more clearly.
You can also save the calculation steps you have entered by pressing [SPC+2 3 4] (Chord
s). The calculation is then saved in a file with the default name calc.txt. If desired, you can
change this name before saving the calculation.
The normal editing functions, such as marking a block of text, are also available in the
calculator. You can thus, for example, mark the result of a calculation, copy it to the
clipboard and insert it into a text file.
If you only want to insert the result of the last calculation into a text file, simply press
[SPC+1 4 7] or {Ctrl+Shift+c} while in calculator mode. This copies the result of the last
calculation into the clipboard, from where you can insert into any desired text file.
You can return to the menu without closing the calculator and thus losing all of the
calculations you have carried out. To do this, press [SPC+1 2 3 4 5 6]. The menu items
Page 27
Page 28

Handy Tech
Elektronik GmbH
Active Braille
Operation of the Active Braille
are then all preceded by ’–C–’ to remind you that the calculator is still active in the
background.
If you also open a file for editing and then suspend this with the key combination [SPC+1 2
3 4 5 6], the menu items are preceded by ’CE–’. For further details, please read Section
5.2.18.
Calculation examples:
To add 19% VAT to a net price of 500 €:
’500+19% = 595’
To calculate the net price from the price with VAT:
’595/1.19 = 500’
To calculate the VAT at 19% for a net price of 500 €:
’500*19% = 95’
To calculate the actual price if you receive a discount of 5%:
’595-5% = 565.25’
It is also possible to divide a value by a percentage:
’20/5% = 400’
The following example shows the calculation accuracy of 15 digits:
’123456789/3.3 = 37411148.1818182’
5.1.3 Scheduler (S)
The Scheduler allows you to access the Active Braille's added capability of tracking both
unique and recurring appointments. The Active Braille can remind you of your appointment
ahead of time, with the lead time specified by you, providing a brief description of the
appointment. This feature is very useful, for example, for storing the dates of your family
and friends' birthdays on your Active Braille, which will then remind you reliably and in
time.
The Scheduler provides the following functions:
Managing your schedule: enter, edit, delete, and copy appointments.
Manage regularly recurring appointments.
Display all appointments as a list sorted by date and time, with the additional option
of highlighting certain appointments (for example, in order to delete several
appointments at once). The calendar week that contains the appointments is also
displayed.
Full text search of the appointment schedule.
Check for appointments that have passed upon power up of the Active Braille.
Continuous monitoring of appointments and notification with the specified lead time.
When you open the Scheduler from the main menu, you have the option of either entering
a new appointment after pressing the [TRC] key (the Braille display shows "New Entry"), or
you can enter the command [SPC+4], moving the cursor downward. In this case, the
Active Braille will display the next scheduled appointment. If the warning signal sounds to
remind you of an upcoming appointment, you can turn it off by entering [SPC+7 8] during
the signal. The following paragraphs explain the Scheduler's various functions and
capabilities in detail.
Page 28
Page 29

Active Braille
Operation of the Active Braille
Handy Tech
Elektronik GmbH
5.1.3.1 Entering a New Appointment (New Entry)
After pressing [TRC], a form for entering the particulars of a new appointment will open.
Depending on the number of Braille elements available on your system, several input
fields will be displayed, which you can use to enter all the data related to that appointment.
Just reading the data shown provides information about the contents and the meaning of
most of the input fields. Also, whenever possible, the input fields will already contain
current data, which makes it much easier for you to enter appointments. Numeric fields,
like the weekday, can be filled by entering numbers.
5.1.3.2 Entering and Editing Appointments
All the information needed for entering an appointment is displayed on your Active Braille
in the following order, moving from left to right:
Day of the week in a standard abbreviation (up to 3 characters)
Day
Month
Year (2 digits)
Time, in the format "hours:minutes" (military time)
Calendar week (calculated automatically): as soon as you have entered the date
completely, the calendar week is displayed in the 2-digit format. If the calendar
week cannot be calculated for the reasons described below, this field will show two
question marks (??).
Reminder lead time, in the format "days, hours:minutes". The input fields for the
reminder lead time are displayed within parentheses. If you enter a lead time, you
will receive a reminder ahead of an appointment, but you will still see the actual
appointment time on the appointment schedule. For example, you can be reminded
of a birthday two days before, so that you will still have time to get a gift. The default
setting for the lead time is 15 minutes.
Appointment description (referred to as the text field here). This field can contain up
to 120 characters.
Only the information relevant to the current data entry is shown on the Active Braille. For
example, on a portable Active Braille with 40 modules, you will only see the text field while
it is active and can be edited. In the date and time input fields, blinking dots 7 and 8 under
the character show that this character can be edited. In the text field, the blinking character
indicates the cursor position.
Key assignments:
[TLC]: Cancel the entry and return to the appointment schedule.
[TRC]: Move on to the next input field. If the cursor is still within the previous input
field, you will complete your input when you press the [TRC] key.
[Backspace/Delete] (Chord b or Chord >): If the cursor is located within the text
field, the character preceding or at the cursor position will be deleted.
[Cursor to the Left/Right](SPC+7/8):
o Activate the previous/next input field.
o If the cursor is located within the text field, this will move the cursor to the left
or right.
o If the cursor is at the first character position of the text field and you move to
the left, you will exit the text field and activate the input field preceding the
text field.
Page 29
Page 30

Handy Tech
Elektronik GmbH
Active Braille
Operation of the Active Braille
[Cursor Up/Down] (TU or TD): Increase/decrease the current value in the input field
by 1. These commands have no function in the text field.
[SPC+2/SPC+5]: Increase/decrease the current value in the input field by 10.
[Pos1/End] (Chord k or Chord $): If the cursor is located within the text field, it will
jump to the beginning/end of the field.
[Cursor Routing Keys]:
o If the cursor is located within the text field, it will jump to the position of the
cursor routing key you pressed, if that position is within the text field.
o If a cursor routing key above a data field is pressed, that field will be
activated so that you can edit it.
Once you press [TRC] after editing the text field, the Active Braille will first check whether
the new appointment conflicts with any other appointment already stored in the data base.
If this is the case, you will be notified, and you can then either edit the new appointment
some more, or save it anyway. The appointment is entered into the Scheduler's database
by first determining the correct place for the appointment and then updating the database.
When the appointment is stored, two signal tones are emitted. If there are only a few
appointments stored in the database, the two tones will sound very close together, but the
more appointments that are contained in the database, the longer the pause between the
two tone signals. However, it is important that you wait and listen for both tone signals, or,
if you have disabled the tone signals (Options, Signal Tones), that you wait until the
appointment schedule reappears on the Braille display. Any premature action or shutting
down of the device can damage the appointments file or even the entire file system. To
utilize the Scheduler's functions most efficiently, we therefore recommend that you take
time now and then to delete appointments that are no longer needed from the
appointments data base. There is further information on this topic below.
5.1.3.3 Entering Appointments with Variables (Recurring Appointments)
The input fields for an appointment permit the entry not only of numeric values, but also
the star symbol (*) for a variable. To enter the star symbol, you can simply move past the
maximum or minimum value permitted for the input field. You can also enter the star
symbol directly.
The Scheduler interprets the star symbol to mean that the appointment is not restricted to
a fixed value. Instead, the appointment recurs when the corresponding date input field
changes with the actual date. For example, if you enter a star for the day input field for
your appointment, that appointment will recur every day. A few examples will illustrate the
management of appointments with variables. A description of the example is followed by
the settings entered into the Scheduler's input fields in the following examples.
Every Friday at 4:15 PM: "Fr *.*.* 16:15"
On every 5th of the month at 10 AM: "* 05.*.* 10:00"
On every 1st of the month during the year 2005 at 12 noon: "* 01.*.05 12:00".
On 02/01/04, with notification upon power up: "02.01.04 *:*". The day of the week
does not need to be set, because it is updated automatically after the date has been
entered.
Once you enter a variable appointment, or confirm it after it has occurred, the Scheduler
will inform you when that appointment will occur the next time.
Page 30
Page 31

Active Braille
Operation of the Active Braille
Handy Tech
Elektronik GmbH
Please note:
If you want to be reminded of an appointment when you turn the power on, the only
input field that contains variables should be the time field.
If you accidentally enter a star for every input field, that appointment cannot be
processed. You will receive an error message describing this problem.
5.1.3.4 A Few Notes on Entering Appointments
There are a few things to keep in mind when entering appointments:
Any dates that are in the past cannot be processed, which also includes the lead
time for notification. The Scheduler will inform you that the time of the appointment
or reminder has already passed.
The Scheduler checks for any overlap between appointments for the lead time, both
before and after the new appointment. Of course, any conflicts with variable
appointments are also taken into account in this conflict check. If there are
conflicting appointments, you will receive the message: "Appointment already
scheduled, continue (yes/no)?". If you answer yes, your new appointment will be
entered into the Scheduler's database. If you respond no, you will be able to edit
the appointment.
If two appointments fall at exactly the same time, a warning will appear
("Appointment already scheduled"). As before, you will now have the option of
either confirming the appointment and entering it into the database, or changing the
appointment by answering no.
Every editable input field except for the lead time can contain either the star symbol
(*) or else a valid numeric value. The star symbol indicates a variable. An incorrect
entry (e.g., appointments with too many variables) will result in an error message
("Too many variables for this appointment").
If you edit appointments that contain variables later, the variable input fields will
show the original variables instead of the current data values for those fields.
If the time input field is filled entirely with star symbols, then that appointment is
considered as occurring upon power up of the Active Braille on the specified date.
The time input field can contain either all numerical data or all star symbols. No
other kinds of input are valid.
The weekday can be specified only if one of the input fields for the day, month, or
year is variable. Otherwise, the weekday is calculated automatically based on the
date.
For all variable appointments, the calendar week is not calculated.
5.1.3.5 The Appointment Schedule
The appointment schedule shows all the appointments, sorted by date. As already
mentioned, when you open the Scheduler, you will first see "New Entry". If you press the
{Cursor Down} key now, the Scheduler will display the next appointment due, if the
database contains any scheduled appointments. If there are only past appointments in the
database, the appointment schedule will begin with the appointment that is the longest
past. If there are no appointments in the database, you will remain at "New Entry".
The sequence of the data fields shown on the schedule corresponds to the sequence of
data input fields, except that the calendar week and the lead time are not displayed. The
first column of the display contains a symbol indicating the type or status of the
appointment.
Page 31
Page 32

Handy Tech
Elektronik GmbH
Active Braille
Operation of the Active Braille
The following list explains the meaning of these symbols:
m: This appointment is marked. If you enter the delete command and respond yes
to the prompt, all marked appointments will be deleted from the database. Up to 20
appointments can be marked at the same time.
Exclamation mark (!): Indicates the next scheduled appointment in the future.
Star (*): Indicates that this appointment contains variables, meaning it is either a
recurring appointment, or it is due upon power up of the Active Braille.
Hyphen (-): This appointment has passed already.
i: Indicates that this appointment is not yet past, but you have already confirmed
your reminder alarm. This is only applicable to appointments that include a
notification lead time.
To optimize the display, only one character is ever used for these status symbols. This
means that only the status most relevant to you is actually indicated. For example, if the
appointment in question contains variables (star symbols), but is also the next scheduled
appointment, it will be marked with an exclamation mark. If you mark the next scheduled
appointment by pressing the space bar, only the symbol for a marked appointment is
shown.
The [TRC] key allows you to select a specific appointment, whereupon a submenu will
open. This gives you the option of either editing deleting, or copying the appointment.
Key assignments within the appointment schedule:
[TLC]: Exit the Scheduler and return to the main menu.
[Cursor Down/Right]: Display the next scheduled appointment in time.
[Cursor Up/Left]: Display the previous scheduled appointment in time. If you are
already on the oldest scheduled appointment in time in the database, this command
will return you to "New Entry".
[TRC]: Open the appointment editing menu.
[SPC+1 2 3]: Jump to "New Entry".
[SPC+4 5 6]: Jump to the appointment farthest in the future.
[SPC+1 2 3 4 5 6]: Display the next appointment due. This is the same effect as
opening the Scheduler and entering the [Cursor Down] command.
[SPC+1 2 4] Open the full text search (s. below).
[SPC]: marks or un-marks the appointment.
Reading Keys: Enable you to read the currently selected appointment entry. By
entering [TU], you will move on to the previous appointment. [TD] lets you read the
entire appointment entry, and then move on to the next appointment, if there is
another one. This capability means you can leave your fingers on the Braille display
and still move on from one appointment to another.
[SPC+1 4] (Chord c): Go directly to the copy function of the appointment editing
menu. You will find a more detailed description of the appointment editing menu
and its functions in a subsequent section.
[SPC+4 5]: Go directly to the delete function of the appointment editing menu.
[SPC+TRC]: Go directly to the edit function of the appointment editing menu.
Page 32
Page 33

Active Braille
Operation of the Active Braille
Handy Tech
Elektronik GmbH
5.1.3.6 Full Text Search within Appointments
A full text search is available for your appointments. It is activated by entering [SPC+1 2 4]
in the appointment schedule. This command will call up a search prompt, where you can
enter a search string of up to 40 characters. Your input position is indicated by a cursor
symbol.
Key assignments:
[TLC]: Cancel the search string input and return to the appointment schedule.
[TRC]: End the search string input and start the search.
[Cursor Left/Right]: Move the cursor left/right within the search input field.
[Backspace/Delete]: Delete the character to the left of or at the cursor position.
[SPC+1 3 or 4 6]: The cursor jumps to the beginning/end of the search string.
When you finish entering the search string by pressing [TRC], the search will start. The
following characteristics apply to these searches:
Searches are not case-sensitive.
The search starts at the most recently displayed appointment. Once the search
reaches the end of the appointment file, the search will continue from the beginning
of the file.
The search fails and is canceled when the currently selected appointment is
reached again without another appointment containing the search string having
been found.
If the search fails, you will receive a message indicating ("Not Found"). After exiting
this message by pressing [TLC], the appointment displayed before the search
function was initiated will be displayed again.
If the search string is found within the text field, the display will switch to the found
appointment, just as if that appointment had been selected manually.
Calling up the search function again will also display the previous search string.
However, the search string is only stored as long as the Scheduler is open.
5.1.3.7 Appointment Editing Menu
This menu opens after you press [TRC] while an appointment is selected. The editing
menu provides the following functions:
"Edit": The data of the appointment can now be changed. The input sequence is the
same as for a new appointment, but all input fields contain the data of the selected
appointment. If you edit an appointment that contains variables, the variable input
fields will show the star symbol, not the current data values. Any changes you enter
will overwrite the original values immediately after you confirm the input without any
further prompts. As in the case of new entries, a conflict check will be executed, and
you will receive information about any overlaps. Using the [TLC] key will return you
to the appointment editing menu without saving the edited information.
"Delete": Delete that appointment. This option is identical to deleting a file in terms
of the procedures and functions. Aborting the procedure or responding No to
prompts will return the display to the appointment editing menu. Confirmation of the
procedure will result in deleting that appointment or all marked appointments, if
applicable.
"Copy": The appointment is opened as a copy, which you can edit as described
above. When this appointment is saved, it will become a new entry in the
Scheduler's database instead of overwriting the original appointment.
Page 33
Page 34

Handy Tech
Elektronik GmbH
Active Braille
Operation of the Active Braille
Please note:
The Delete function is the only function that applies to marked appointments. The other
functions in this submenu apply only to the currently selected appointment.
Key assignments in the appointment editing menu:
[TLC]: Return to the appointment schedule.
[TRC]: Activate the selected menu item.
All commands that can be used within the menu system are also valid.
5.1.3.8 Information Regarding Past Appointments
Whenever the Active Braille is powered up and on an ongoing basis during the operation
of the system, it monitors the appointment schedule to determine whether an appointment
is due or has passed while the Active Braille was switched off. In either case, a repeating
warning signal is emitted to indicate the appointment, and the description of the
appointment is displayed blinking. The alarm signal can be turned off by entering [SPC+7
8], but the appointment must still be confirmed by pressing [TLC]. The Active Braille then
returns to whichever function was active before the appointment information was
displayed. If the appointment you just confirmed was a variable appointment, its next
occurrence is automatically calculated based on the current date and time, and entered
into the appointment schedule. The next occurrence of this appointment is also displayed
on the Active Braille and needs to be confirmed by pressing the [TLC] key. The text for the
appointment may stay till your next operation. If you want to skip the checking for
appointments when switching on the device, you have to hold down [6] for some time while
switching on. An additional high signal tone before the low signal tone will confirm this.
5.1.3.9 Resources Management
Depending on how you use the Scheduler, it may reduce the available memory on your
Active Braille. You can prevent this from becoming excessive by deleting appointments
that have passed as soon as possible. The Scheduler will then utilize the freed-up memory
space to store new appointments. The marking function (the [SPC] key within the
appointment schedule) can be used to efficiently delete several appointments
simultaneously. Up to 20 entries together can be deleted with one command with this
function. Since recurring appointments can result in the accumulation of a lot of data, the
Scheduler automatically deletes these while updating the variable values. This means that
an appointment containing variables is saved only once on the Active Braille, under the
next due date.
5.1.3.10 Backing up the scheduler data
If you use the scheduler intensively, we recommend that you back up the related data
regularly. The scheduler data are kept in the file "PLANER.HSF". This is a system file
(HSF = Handy Tech System file) and is therefore not normally shown in the file list.
Just like any other file, the scheduler data can be transferred to a PC with the program
HTCom. Further details of this can be found in the operating instructions "Transferring
data between the Active Braille and a PC". In the file selection dialog of HTCom, there is a
checkbox for displaying the system files. After activating this checkbox, you can select the
file "PLANER.HSF" and transfer it to your PC. We recommend that you deactivate the
checkbox again after transferring the file.
Page 34
Page 35

Active Braille
Operation of the Active Braille
Handy Tech
Elektronik GmbH
Please note that you can only back up the file "PLANER.HSF" on your PC; you cannot edit
it there.
5.1.4 Clock (C)
The Clock function allows you not only to display the current date and time, but also to
activate an alarm function. In addition, this function provides a stopwatch and countdown
feature. When you select this menu item by pressing [TRC], another menu level appears,
which contains the following options:
5.1.4.1 Display date/time (D)
Once you select this option, the time and then the date are displayed. The time is shown in
the format: hour:minute:second (military time), each separated by a colon. The next item in
the display is the day of the week, abbreviated as customary in your language, followed
directly by the date, in the format day.month.year; each indicated by two digits and
separated by a period.
5.1.4.2 set Alarm (A)
This option provides you the opportunity to display and set a time at which you want the
Active Braille to emit an alarm. When the time set by this option arrives and the Active
Braille's power is on, a rhythmic alarm tone sounds. You can press any key to turn the
alarm tone off (snooze) for five minutes until it sounds again or you turn it off by pressing
[SPC+7 8]. At the same time, the Active Braille displays the message 'Clock alarm'. This
message remains on the Braille display even after the sound has been shut off until you
press [TLC]. If you turn off the Active Braille, an active clock alarm will be deactivated.
If an alarm time was entered previously, this time will be displayed after selecting this
menu item. The '[X]' displayed before the time indicates that the alarm function is currently
active. The alarm is activated and deactivated by pressing the [SPC] key. It is also
possible to activate or deactivate an alarm by pressing the [CR] key above the shown
alarm time or above the checkbox to change the status of the alarm.
To change the alarm time, enter [SPC+7 8]. Then the message 'New alarm time:'
appears, followed by the currently set time in the format hour:minute:second, each
separated by a colon. Dots 7 and 8 will blink at the location of the hour.
The hour can be changed by using the [TD] and [TU] keys. The [TU] key decreases the
hour by one, the [TD] increases the hour by one. To switch to the minutes setting you may
press either [TRC] or [SPC+8]. Entering [SPC+7] will move you to the previous setting.
Minutes and seconds are changed in the same way as hours with the [TD] and [TU] keys.
When you have finished setting the seconds, you can return to the alarm time display by
pressing the [TRC] key, and the alarm is now set.
If you want to make sure, simply select the same menu item again. The alarm time you
just set will be displayed, preceded by '[X]'.
5.1.4.3 set Clock (C)
You can set both time and date in this submenu. First, 'Time:' is displayed, followed by the
time as currently set. Dots 7 and 8 will blink at the location of the hour, which can be
Page 35
Page 36

Handy Tech
Elektronik GmbH
Active Braille
Operation of the Active Braille
changed by pressing the [TU] and [TD] keys. [TU] decreases the hour by one, [TD]
increases the hour by one.
To switch to the minutes setting, you may press either [TRC] or [SPC+8]. Entering
[SPC+7] will move you to the previous setting. Minutes and seconds are changed in the
same way as hours with the [TD] and [TU] keys. When you have finished setting the
seconds, pressing the [TRC] key lets you move on to the date, 'Date:' is shown, followed
by day.month.year; each indicated by two digits and separated by a period. These values
can also be increased or decreased with the [TD] and [TU] keys. When you have set the
desired value, you may confirm it by pressing the [TRC] key. When the year has been set,
pressing the [TRC] key lets you return to the Time menu.
5.1.4.4 Stop watch (S)
The Stopwatch feature means you can time any period in hours, minutes, and seconds. An
'[X]' preceding the most recently stopped time indicates that the stopwatch is running. To
start and stop the stopwatch, press the [SPC] key. The stopwatch automatically starts
running from 0 when you release this key. The stopwatch can be reset by entering [SPC+7
8]. You can also start and stop the stop watch by pressing the CR key above the time
displayed or the checkbox.
You can cancel the Stopwatch display by pressing either [TRC] or [TLC]. This means the
stopwatch will continue to run in the background while you work on your notes or in PC
Mode.
5.1.4.5 count down (O)
The Countdown feature can be used to set any time period up to 24 hours in hours,
minutes, and seconds. After starting the Countdown function, the countdown period will
begin to count down. When 0 has been reached, a rhythmic alarm will be emitted until you
shut it off by entering [SPC+7 8]. At the same time, 'Countdown alarm' is displayed on
the Braille display. This message remains on the Braille display even after the sound has
been shut off until you press [TLC].
When you select this menu item, 'New count down time: 00:00:00' is displayed. As
before, dots 7 and 8 will blink at the location of the hour, which is changed by pressing the
[TU] and [TD] keys. To switch to the minutes setting, you may press either [TRC] or
[SPC+8]. Entering [SPC+7] will move you to the previous setting. Minutes and seconds are
changed in the same way as hours with the [TD] and [TU] keys. After setting the seconds
and then pressing the [TRC] key, the countdown is initiated. You can recognize this by the
'[X]' preceding the display showing the remaining amount of time.
To stop the countdown and reset the countdown time, press [SPC+7 8]. You can also start
and stop the countdown by pressing the [CR] key above the time displayed or the
checkbox. If the countdown time has reached 0 and you press [TRC], the countdown starts
again, beginning at 24 hours.
5.1.5 MusikBraille (M)
MusikBraille is the first Braille music editor that not only plays each note as you type it, but
also as you read, using ATC technology. Because MusikBraille is an editor, it is behaving
similar as described in chapter 5.1.1File (F). You can edit, read, copy, delete, rename etc.
Page 36
Page 37

Active Braille
Operation of the Active Braille
Handy Tech
Elektronik GmbH
music files, as well as create, open, copy, move and rename folders. In the application
MusikBraille only music files and folders are displayed, no text documents or other files.
You start MusikBraille by selecting its entry from the main menu of the Active Braille, then
selecting "New file" or an existing music file. You can then begin typing notes immediately,
and hear each note as you type it. In addition, each note will be played back to you when
you read it on the Braille display. In this way you can quickly and easily learn the notation
by listening to the notes as you read. Or you might type your favorite scale and then use
your reading finger for improvisation, turning your Braille display into a musical instrument.
Use the triple action keys to navigate through the music you entered, and press cursor
routing keys to place the cursor just like in any other editor. In addition, MusikBraille
currently recognizes the following commands:
[SPC + 1 5] (Chord e): Exits MusikBraille and takes you back to the main menu.
[SPC + 1 2] (Chord b): Backspace; deletes the note or symbol to the left of the cursor.
[SPC + 2 3 4] (Chord s): Saves the current contents of the editor to a file. Please note, that
music files have the extension “.HMF”, which cannot be changed.
[SPC + 1 2 3 4] (Chord p): Plays the music you entered, following the position of playback
with the cursor, and scrolling when appropriate.
[SPC + 1 2 3 6] (Chord v): Toggles entry of shorter note values, enabling you to type notes
of lengths shorter than 8th.
[SPC + 1 2 3 4 5 6]: MusikBraille exits and plays music in the background. Press [SPC + 1
3 4 6] (chord x) from the main menu to go back to MusikBraille and stop the music.
MusikBraille files are saved on Active Braille as files with the extension .HMF. They can be
placed into folders in the same way as text files (see chapter 5.1.1 File (F)).
You can also compose an individual startup sound, which sounds when the Active Braille
is switched on. Therefore please save your music file under the name “startup” in the root
directory of your Active Braille. The extension “.hmf” will be added automatically if you
save music files. Please note that the melody for the startup sound should not be too long.
5.1.6 Games (G)
For supporting the learning of Braille with Active Braille, we have implemented two
different games. At the game “Hangman” you have to guess letters composing a word.
The “Braille Hunt” helps to improve the tactile reading skills.
5.1.6.1 BrailleHunt (B)
The game “Braille Hunt” relies on the reading position detected by ATC as the only means
of control. Braille Hunt is the first game to be playable without ever pressing a single key.
When the game starts, there will be thirteen dot patterns on the Braille display, each of
them preceded by a full form to make them easier to identify. You should start by reading
the leftmost pattern. Remember it well; because this is the pattern you need to search
among the other twelve patterns to the right.
Once you have memorized the leftmost pattern, you can go on reading to the right,
searching for it. If you think you found it, simply let your finger rest on it. You will hear a
series of three beeps. As long as you hear beeps, you may still change your mind and
continue searching to the left or the right of your current position. If you do not change your
Page 37
Page 38

Handy Tech
Elektronik GmbH
Active Braille
Operation of the Active Braille
reading position during the three beeps, you will hear a little victory sound if you were right
or a little warning sound in case you were wrong. In any case, a new round of game
begins with a new dot combination to be hunted.
Attention: In this game, speed is required. If you have not found the right dot pattern within
a few seconds, the round is considered lost and a new dot pattern appears. The game
ends after 7 rounds. If you missed the right dot pattern three times in a row, the game also
terminates.
5.1.6.2 Hangman (H)
This is a variation of the classic game of Hangman, in which the Active Braille generates a
mystery word. Your goal is to guess the word by finding its individual letters.
When Hangman starts, there will be a number of dots on the Braille display. Each dot
represents a letter of the mystery word. Now, it is time to make your first guess by typing a
letter on the Braille keyboard on the Active Braille or, alternatively, on an external USB
keyboard. If the letter you typed in is a part of the mystery word, then all instances of it will
be revealed on the Braille display, and you will hear a little victory sound. On the other
hand, if the letter you typed in is not part of the mystery word, you will lose a point, and
hear a little warning sound. With every point you lose, the warning sound will increase in
pitch. To win the game, you will have to reveal the entire word. In this case the Active
Braille shows ’Congratulations. You have won!’ You lose the game when you make 7
wrong guesses. In both cases the game is over and you have to restart it by calling the
menu item. To exit the game at any time, simply press Chord e (or {Ctrl+e} on an external
keyboard).
The mysterious words are saved in the file “hangman.lst” in the root directory of the Active
Braille. You can add your own words into this file. Please note that a word consists of
maximum 20 letters and only lowercase letters are allowed. After each must be a newline
character (CR/LF). After editing the file „hangman.lst“, you must re-start the Active Braille
for the changes to take effect.
5.1.7 PC mode (P)
This menu command activates Braille display mode. During the start up of the screen
reader program, the PC mode is activated automatically. Activating PC Mode via the menu
is necessary only if you have previously switched from PC Mode into menu mode with
[SPC+1 3 4] (Chord m).
Please note that you must press the (SPC+1 3 4) keys for about one half second in order
to return to menu mode from PC mode. A quiet clicking sound will indicate that you have
returned to menu mode.
5.1.8 Braille character sets (B)
This section discusses the creation, loading and activation of Braille character sets. In
addition to the default German character set, nine other character sets may be loaded into
the Active Braille.
5.1.8.1 Creating a Braille Character Set
The easiest way to create a custom Braille character set is to modify an existing character
set. You will find several Braille character sets on the media delivered with the Active
Page 38
Page 39

Active Braille
Operation of the Active Braille
Handy Tech
Elektronik GmbH
Braille. For easier orientation, a subdirectory called "Brailletables" is created during
installation, which contains the character sets.
For example, if you wanted to edit the ibm437 character set and store it as a new,
customized character set, you would open the text editor supplied with Windows by
selecting "Execute" from the Start menu, and then entering "Notepad" followed by {Enter}.
Once the text editor is open, you can open an editable version of the ibm437.asc file by
activating the menu item "Open" from the File menu. More detailed information is
contained in your Operating System Manual.
The file ibm437.asc will open and can be edited. Please do not modify the file structure,
but you may change the Braille characters as desired. The Braille dot combinations are
given as their number equivalents on each line, along with the designation of the
character. However, the first line in the file contains a description of the character set in
that file. The characters are in ASCII character order. You can modify the dot combinations
for any character by changing the numbers. For example, if you want to represent the digit
4 with dots 2 3 5 instead of dots 1 4 5 6, you would change the numbers 1 4 5 6 to 2 3 5.
Please note that at least one space must be entered between the dot combinations and
any comments, because otherwise the conversion of the Braille table while transferring it
to the Active Braille may fail.
When you have finished changing characters, you can save the modifications under a new
name.
5.1.8.2 Loading Braille Character Sets
As mentioned above, nine additional Braille tables can be loaded into the Active Braille in
addition to the default character set. For example, if you have created a table under the
designation Mytable.asc, you can load it into the Active Braille with the HTCom program.
Start up HTCom and activate "Load Braille Table." A dialog enables you to specify the
character set to be transferred by selecting or entering the name. After pressing the
{Enter} key you can specify the Braille table slot where you want the table to be saved.
Pressing the {Enter} key again will initiate the file transfer.
Please note:
If you work with the 6-dot character sets delivered with your Active Braille, writing texts in
the Editor, these texts will be stored entirely in upper case letters. The reason for this is
that the capital letters' ASCII codes are found first while searching through the character
set table.
5.1.8.3 Selecting and Activating Braille Tables
Once you have activated the menu item 'Braille character sets' on the Active Braille, you
can select a character set and activate it by pressing [TRC]. The Active Braille contains
only the standard character set as shipped. Foreign language versions of the Active Braille
(e.g., English, French etc.) also provide character sets for those languages. An X enclosed
by square brackets indicates which character set is active. The menu consists of the
following items:
[X] Standard character set: The default character set, which is always available.
Character set (1): [empty]
to
Page 39
Page 40

Handy Tech
Elektronik GmbH
Active Braille
Operation of the Active Braille
Character set (9): [empty]: Positions for the nine additional loadable character sets.
The designation [empty] shows that there is currently no character set stored at this
position. If a character set has been downloaded, a name appears instead of [empty],
listing the file name under which the character set was loaded into the Active Braille.
If you attempt to activate an empty slot, the Active Braille will respond with the message:
'Braille set n is empty', where n is the number of the currently selected character set.
If the selected character set exists, it will be activated immediately, and you will be
returned to the main menu, menu item 'Braille character sets'. The character set has
already been switched.
Note:
When using a custom character set, it is possible that messages or menu items suddenly
become partially or entirely unreadable. This may be due to one of the following causes:
The Braille character assignments in the custom character set do not correspond to
the assignments in the character set used for generating messages.
A custom character set contains errors. For example, if you have deleted a line in a
character table, the table no longer consists of 256 definitions. This causes all
character definitions following the deleted line to be moved up by one character.
This could cause the word "info," for example, to turn into "jmen".
If you cannot read the Active Braille's messages at all, you have the following options:
1. Use the communications program HTCom's Monitor Mode. Under Monitor Mode,
the output is not affected by the Braille character set selected on the Active Braille.
With the assistance of a sighted person or your screen reader's speech output, you
can monitor the output from the Active Braille on the PC screen and restore the
standard character set. Switching into Monitor Mode is possible only if the screen
reader's access to the Braille display has been deactivated.
2. Create a situation where you are back in the main menu, so that you can navigate
from there to the menu item 'Braille character sets' by using the [TD] key. If you
are sure that you are somewhere in the menu system, you can simply press the
[TLC] key several times, and then [TD] exactly five times. Then press [TRC], which
opens the submenu. Pressing [TRC] again will activate the default character set.
5.1.8.4 Delete selected braille set (D)
If the loadable character set feature is used extensively, all slots will eventually be filled. In
order to delete a given Braille character set, please proceed as described below:
1. Activate the character set to be deleted in the menu item 'Braille character sets'.
2. Open 'Braille character sets' again and move through it to the end.
You will arrive at the menu item 'Delete selected braille set'. Once you have activated
this command, you will be asked whether you really want to delete the character set. If you
answer "Yes" the character set selected in the previous step will be deleted, and the
default character set will be activated.
Page 40
Page 41

Active Braille
Operation of the Active Braille
Handy Tech
Elektronik GmbH
5.1.9 Info (I)
You can check flash memory usage and the remaining charge and status of the batteries
in the 'Info' menu. You can also check the firmware version and serial number and
determine the configuration of the external keyboard.
5.1.9.1 Memory usage (M)
The Active Braille contains 4 GB of text memory, which equals text consisting of more than
4 billion characters.
The number of files that can be saved depends on their size. The file system's smallest
addressable unit (one sector) on the Active Braille is currently approximately 8000
characters, and there are 512 sectors available to the file system. However, if you save a
file requiring less space than one sector, an entire sector will still be used for this file. We
therefore recommend collecting small notes together in one file if possible and marking
them with search marks.
After you select 'Memory usage', the size of free disk space is displayed in KB (kilobytes)
as follows: '3863136 KB of 3864064 KB (99%) free space'. You can exit this menu item
by pressing [TLC].
5.1.9.2 Battery statistics (B)
This menu provides various data regarding the batteries contained in your Active Braille. It
consists of the three functions described below.
Please note that the values displayed by these functions are not updated dynamically. You
should close them by pressing [TLC] and reactivate them with [TRC] in order to display
updated information.
5.1.9.2.1 Capacity (C)
Here you can check the charging state of the batteries indicated by one of the fife following
values:
Fully charged: The batteries are 100% charged.
High: Much more than 50% battery charge remaining.
Medium: About 50% battery charge remaining.
Low: The battery charge is low but still sufficient. We recommend plugging in the
charger.
Empty: The battery charge is almost empty, a warning sound appears. Please plug in
the charger immediately.
5.1.9.2.2 Voltage (V)
This menu item provides information on the voltage remaining in the batteries. The voltage
of fully charged batteries is approximately 5.6 V. If battery voltage falls below ca. 4.0 V, the
Active Braille turns itself off. You can thus use Voltage to estimate your batteries' status.
We recommend replacing the rechargeable batteries if you notice the voltage decreasing
unusually rapidly after having used them for some time.
Page 41
Page 42

Handy Tech
Elektronik GmbH
Active Braille
Operation of the Active Braille
5.1.9.2.3 Status (S)
This function displays the battery status. This can be one of the following values:
’Running on battery’: The Active Braille receives its power from the batteries, which are
being discharged.
’Fast charging’: the batteries are receiving a high recharge voltage for fast charging from
the power supply.
’charging’: the batteries are only receiving a maintenance charge.
’On USB power’: Active Braille is connected via USB with the PC. There is no charging or
discharging of the batteries. The power is provided by the USB interface.
’On power supply’: The power supply is plugged in and connected. There is no charging
or discharging of the batteries. The power is provided by the power outlet.
In order to recharge the batteries, simply connect the included power supply to a power
outlet. The batteries will recharge in two to three hours. Recharging occurs entirely
automatically — it is not possible to overcharge the batteries. The Active Braille
automatically switches from initially high recharging voltage to a very low charge just to
maintain a full charge.
5.1.9.3 Keyboard layout (K)
This function displays the language currently implemented on the Active Braille via the
keyboard layout table. Keyboard tables are available for several languages, and the
included Keyboard Layout Compiler (BKC) can be used to create custom key
assignments.
5.1.9.4 Serial number (S)
With this function you can check the serial number of your Active Braille. This can be
useful for service purposes.
5.1.9.5 Versions (V)
Here you can check the versions of several software modules of the Active Braille.
5.1.9.5.1 Firmware
You can use this function to display the version number of the firmware. This is the same
version number that is displayed when you power up your Active Braille.
5.1.9.5.2 Braille io
This module handles the Braille input/output.
5.1.9.5.3 USB Host
This module controls the connection of USB devices. At the moment only USB keyboards
are supported.
5.1.9.5.4 Bluetooth
This module deals with the wireless communication via Bluetooth.
Page 42
Page 43

Active Braille
Operation of the Active Braille
Handy Tech
Elektronik GmbH
5.1.9.6 System information
This function displays important system information in almost any situation. It is NOT
provided as a menu item, but has to be called by pressing [SPC+2 3 4 7 8] or
{Shift+Enter}. The following information is displayed:
Date and time (updated continually)
Battery voltage
Free memory.
The above information is not displayed in a single message, but sequentially. To move
from one line to the next, you must press [TRC]. Pressing [TLC] after the free memory has
been displayed terminates the function. [TLC] can also be used to terminate the display at
any time. If, for example, you want to see only the data and time, you can press [TLC]
immediately after display of the first line and return to wherever you were working before
you called the function.
The system information function can be called from almost anywhere (editor, file list, etc)
in the Active Braille. The only exceptions to this are:
The menu "Clock" and its sub-menus
The menu "Info"
The system information function is also not available during communication with other
devices (e.g. file transfer) and when a file is being printed.
5.1.10 Options (O)
The options described below are used for customizing your Active Braille's features. The
various options are specified by using check boxes or radio buttons contained in the
submenus. You can review additional information regarding check boxes and radio buttons
in chapter 3.3.4 and 3.3.5.
The Options menu is closed as usual by pressing [TLC]. Closing the menu will
automatically save the new settings, so that they will still be in force even when the device
is turned off and then on again. After closing the menu, the Active Braille will display
'Saving configuration, please wait!'; however, since saving the configuration usually
takes less than one second, you will normally only notice that the Braille display changes.
5.1.10.1 6 dots braille (6)
This option allows you to toggle between 8 dot Braille (computer Braille) and 6 dot Braille.
The 6 dot representation suppresses dots 7 and 8. Even if you enter text in 8 dot Braille,
e.g., for capitalization, your entries will be saved correctly.
5.1.10.2 hotkeys Activate objects (A)
If this option is active, menu items in the same menu level are activated by their hotkeys.
This means:
In the case of submenus, that the menu items are both selected and immediately
opened by pressing their hotkey.
In the case of check boxes, that they are both selected and toggled.
In the case of radio buttons, that they are both selected and activated.
Page 43
Page 44

Handy Tech
Elektronik GmbH
Active Braille
Operation of the Active Braille
5.1.10.3 Highlight hotkeys (H)
When 'Highlight hotkeys' is active, the hotkeys are highlighted by being enclosed in
round brackets, as in the titles in this section. This is useful while you are working in 6 dot
Braille or while you are still learning the hotkeys.
5.1.10.4 show system files (Y)
If you activate this check box, the system files needed by the Active Braille will be
displayed in the file list, along with the files created by you.
!!!!WARNING!!!
We recommend not activating this option. There are several reasons:
1. You only need a display of system files under rare circumstances, and navigating
through the file list will be much faster without the system files displayed.
2. Displaying them also makes it possible to delete system files. You will receive a
warning if you attempt to delete system files, however, if you delete, for example the
message file, you can no longer work on the Active Braille until this file has been
downloaded again. You should therefore delete system files only if you are sure you
know what you are doing.
You take on a great deal of responsibility by being given the option of deleting system files.
Handy Tech Elektronik GmbH therefore accepts no warranty claims arising from any
damage caused by deleting system files.
5.1.10.5 Folders first (O)
This option determines whether the folders or files are listed first in the file list. By default,
this option is set which means the folders are listed first. If you want the files listed first,
you can deactivate this option by pressing [SPC].
5.1.10.6 Quick entry (Q)
If you activate this option, keys [7] and [8] will have a different function: pressed
individually, [7] is now the backspace key, and [8] by itself is the TRC key. When pressed
together with other keys, [7] and [8] retain their original function. For example, [SPC+7] still
moves the cursor to the left, and capital letters can also be typed as usual.
5.1.10.7 show file attributes (B)
This option controls whether file attributes are displayed on the file list or not. If this option
is activated, the file list will show the size as well as the date and time of the most recent
access to the file in addition to the file name. This function will slow navigation through the
file list a little, however.
5.1.10.8 auto switch external keyboard (X)
When active, the Active Braille automatically switches an external keyboard connected to it
into external keyboard mode when the operating mode is set to PC Mode, i.e., the
keyboard can now be used to operate the PC.
When the Active Braille is switched back into menu mode, the keyboard is automatically
reset to internal keyboard mode. You can therefore use the keyboard now to write notes
on the Active Braille.
Page 44
Page 45

Active Braille
Operation of the Active Braille
Handy Tech
Elektronik GmbH
Switching the external keyboard manually between internal and external operation is
effected by entering [SPC+2 5] (Chord :).
5.1.10.9 Bluetooth on (L)
This control enables the Bluetooth interface. It need to be enabled in order to connect the
Active Braille via Bluetooth to your PC or mobile phone.
5.1.10.10 Switch Bluetooth on/off automatically(W)
If this option is enabled and no Bluetooth connection was established for 15 minutes, the
Bluetooth interface will be switched off. This saves battery life if you have forgotten to
deactivate the Bluetooth interface after use.
5.1.10.11 Startup mode (S)
Startup mode determines what the Active Braille will do after it starts up in work mode. The
startup mode options are provided in the form of radio buttons. One of the four possible
settings described below is always active.
5.1.10.11.1 Main menu (M)
After start up, the Active Braille opens the main menu. From here, you can manually
navigate to the various submenus. This setting represents the classic Active Braille
operation.
5.1.10.11.2 autonew (N)
This option makes use of the Active Braille's capability to automatically open a new, empty
file within the Editor immediately upon startup in work mode. This option comes in handy if
you frequently use the Active Braille for entering notes in a new file after switching it on.
5.1.10.11.3 autoedit (E)
This option activates the Active Braille's capability to automatically open the most recently
closed file in the Editor upon startup in work mode. After opening the file, the cursor will be
at the same position it was at when the file was closed. Please note that this option will not
open the file that was last opened, but the file that was last edited and saved.
This option is the most useful one if you frequently use the Active Braille to make notes in
the same, already existing file after switching it on.
5.1.10.11.4 PC mode (P)
This feature enables the Active Braille to automatically activate its PC Mode after starting
up in work mode, so that the display is immediately available to a screen reader, this is
similar to manually activating the menu item PC mode.
You cannot utilize the System's internal functions, such as the Editor, until you have
switched back to internal mode. You can reactivate internal mode by pressing [SPC+1 3 4]
(Chord m) for about half a second.
Page 45
Page 46

Handy Tech
Elektronik GmbH
Active Braille
Operation of the Active Braille
5.1.10.11.5 Calculator (C)
This option activates the ability of the Active Braille to automatically start the calculator
function when it is switched on in work mode. We recommend using this option if you plan
to use the Active Braille primarily for calculations in the near future.
5.1.10.12 Tone signals (T)
The Active Braille generates a range of sounds in certain operational conditions in order to
alert the user unmistakably to successes, errors, or critical situations. Depending upon the
user's experience, or the location in which the Active Braille is being used (e.g., seminar
room, commuter train), these sounds may be inconvenient or even annoying. The Active
Braille therefore features various levels of sound outputs.
The tone signal options are provided in the form of radio buttons. One of the four possible
settings described below is always active. These signal tone settings apply only within
work mode. In SAVE mode all signal tones are turned on.
The various levels listed below apply only as of the Active Braille's startup sound. Any
errors or warnings during startup are generally of a more serious nature, and will therefore
always be indicated.
5.1.10.12.1 None (N)
The Active Braille generates no sound signals, not even during file transfers or
reformatting.
5.1.10.12.2 Errors (E)
The Active Braille generates a tone only if an error has occurred. In addition to internal
errors, errors could also result from operator mistakes, but these are usually not supported
by any message in Braille.
5.1.10.12.3 Warnings (W)
The Active Braille generates a tone only in case of errors or warnings.
5.1.10.12.4 action Confirmations (C)
All signal sounds are turned on. This is default setting.
5.1.10.13 Date/time format (D)
Any settings specified here will affect the entire System, including the Editor. If you specify
the 12-hour format, the time will be displayed in the 12-hour format everywhere; otherwise
the 24-hour military time format will be used. Also, if English dates are specified, the
international convention for date (day and month reversed from German) and time will be
used.
5.1.10.14 Input indication (I)
By changing the search direction within a Braille table, it is possible to input language
specific characters using the same Braille dot combination like normal alphanumeric
characters.
Page 46
Page 47

Active Braille
Operation of the Active Braille
Handy Tech
Elektronik GmbH
For example in Arabic, dot combination 1 2 4, are used for a certain Arabic character. The
same dot combination is also used for the letter “f”. Within the Arabic Braille table using
256 characters, you find the Arabic letters above position 128. To enable to enter Arabic
characters by using a specific dot combination, it is possible to change the direction.
Braille table will be searched for the matching character instead of using the standard
forward direction that means searching from position 0 to 256. Braille table can also be
searched backwards from 256 to 0. In case of Arabic, when using the backwards search
direction, the corresponding Arabic character can be found when entering a certain Braille
dot combination. In order to change the search direction, there are the following two chord
commands:
[chord 2 3 6] activates the backwards search direction which is indicated by a low-
pitched tone.
[chord 3 6 8] activates the forward search direction which will be indicated by a
high-pitched tone.
In order to have an indication which search direction is activated, this option allows you to
set an indicator signal. Using a radio button, one of the following three settings can be
activated:
“No indication”: No indicator tone will appear when entering Braille dot combinations
“Latin mode”: When entering Braille dot combination at active forwards search
direction, a deep indicator tone appears.
“nOn latin mode”: Entering Braille dot combination at active backwards search direction,
a high-pitched signal tone will appear.
We recommend you to preset the search direction for the characters you normally use. For
example for entering Arabic text it is better to activate backwards search direction. For the
Indicator tone we recommend to select Latin mode. When entering Latin characters in
Arabic text, a signal tone will appear. If you use a Braille table from Handy Tech, the
search direction is automatically in the right way.
5.1.10.15 dot firmness (F)
While reading text, it can be helpful to adjust the dot pressure of the Braille pins to your
individual needs. You can choose between the three settings soft, middle and hard. The
default setting is middle.
Experienced Braille readers often read the Braille cells with a light touch. Here we
recommend using the setting “soft”. This setting also improves the detection of the reading
position by ATC.
You can also adjust the dot firmness within the setting dialog of the Handy Tech Braille
driver (see chapter 8.5). Please be aware, that the settings are saved on the device, not
on the PC.
5.1.10.16 atc sensitivity (E)
When using ATC we recommend adjusting the ATC sensitivity to your individual needs.
You can choose a value between 1 and 7. The standard setting is “4”.
Note: If the automatic scrolling via ATC is not working properly, we ask you to increase the
ATC sensitivity.
5.1.10.17 standby (N)
With the option standby you can set the time for the activation of the sleep mode. This will
save Battery life and lowers power consumption. If you set it off, the Active Braille will not
Page 47
Page 48

Handy Tech
Elektronik GmbH
Active Braille
Operation of the Active Braille
shut down. For activation you can choose between 15, 30, 45 or 60 minutes. If you are not
working with the Active Braille or press any button, the Active Braille will automatically
switch off. When pressing any button the Active Braille wakes up and you can continue
working. No data will be lost when the sleep mode becomes active. The default setting is
15 minutes.
5.1.10.18 Restore factory defaults (R)
By pressing the [TRC] key for this item, factory defaults will be restored for all Options
items without prior confirmation.
The default settings are as follows:
6 Dots Braille: off
Hotkeys Activate Objects: off
Highlight Hotkeys: off
Show System Files: off
Folders first: on
Fast Input: on
File Attributes: off
Automatically Switch External Keyboard: on
Bluetooth off
Bluetooth off automatically: off
Radio button submenu Startup Mode:Main Menu
Radio button submenu Tone Signals:
Action Confirmations
Date/Time Format: 12-hour AM/PM and English Date: on
Input Display: No display
Dot firmness: middle
ATC sensitivity: 4
Standby: 15 minutes
Page 48
Page 49

Active Braille
Operation of the Active Braille
Handy Tech
Elektronik GmbH
5.2 The Editor
The Editor allows you to read and edit files. Up to five files can be open at the same time.
Any file can be opened from within the Editor if the exact name of the file is known.
5.2.1 Overview of Editor Functions
The Editor provides the following features:
Text input, moving the cursor, and setting bookmarks
Insert, overwrite, and read-only modes
Status display
Block functions (copy, cut, paste, exchange mark and cursor)
Text search functions, both forward and backward
Replacing of text (forward direction only)
Calculator within the editor
Open additional files and switch between files
Suspend the Editor temporarily while attending to other tasks
Close and save files
Help
Setup menu for the Editor
Automatic scrolling while reading with ATC.
The following paragraphs describe each of these features in detail.
5.2.2 Dialogs and Confirmation of Actions
For many functions, the Editor provides a dialog, to allow you to select or enter the desired
value. In addition, the Editor provides confirmation messages in order to inform you about
the results of your actions.
While you are in a dialog field, the Editor features several functions to help you enter
values quickly and efficiently:
The Paste command [SPC+1 2 3 6] (Chord v) allows you to copy the current
contents of the clipboard directly into the field.
A parameter's default setting, or the most recent setting of that parameter, can be
restored using the Copy command [SPC+1 4] (Chord c).
The text contained in a field will be deleted starting from the cursor position to the
end of the field if you enter the Cut command [SPC+1 3 4 6] (Chord x).
If you move the cursor towards the right within an input field, the existing input
characters will not be deleted. Therefore you only need to enter the characters that
you want to change.
You have several options for exiting any dialog or message:
1. You can confirm your input with the [TRC] key, which activates the desired function.
2. If you press the [TLC] key, you can close a dialog without implementing any
changes, or exit a message when you have finished reading it.
3. You can simply wait a short time, until the dialog or message closes automatically.
The duration of the timeout can be customized in the Editor's Setup menu.
Page 49
Page 50

Handy Tech
Elektronik GmbH
Active Braille
Operation of the Active Braille
The Editor uses the following tone signals to alert you to successful actions, or to errors.
(You can turn off the tone signals in the Active Braille's Options menu.)
Confirmation (single beep): A function has been executed successfully.
Warning (two short, high beeps): Sounds if no input has occurred for longer than
expected, or when the display's contents have changed, for example, because a
status message has been issued. The warning signal also sounds if you attempt to
move the cursor beyond the beginning or the end of the file.
Error (several consecutive warning beeps): Alerts you to the fact that an error
message is being displayed.
5.2.3 Entering and Deleting Text
The input keys are used to enter Braille. If you have entered a valid character, that
character is displayed at the cursor position. The cursor is represented as dots 7+8 on the
Braille display. When a character has been entered, the cursor moves to the next position.
After a character has been entered in the last position on the display, the cursor returns to
the first Braille position. The length of a line is not limited while entering text. You can
specify the end of a line at any time by pressing the [TRC] key.
To delete any character, you can either use Backspace, [SPC+1 2], to delete the character
to the left of the cursor, or Delete, [SPC+4 5], to delete the character at the cursor position.
If the delete function you entered is not possible because you are at the beginning or end
of a text file, you will hear the warning tone, which indicates that this action is not possible.
You can insert the current date into the text by entering {Ctrl+d} or [SPC+1 4 5], while
inserting the current time is effected by entering {Ctrl+t} or [SPC+2 3 4 5].
5.2.4 Reading Text
You can navigate to the left with the [TU] key and to the right with the [TD] key for reading
text. If an external keyboard is connected to the Active Braille, you can also use the
navigation keys on the keyboard. A tone indicates that you have reached the beginning or
end of the text the specific functioning of the reading keys can be customized in the
Editor's Setup menu.
If you have been reading the text and want to return to the cursor position, you can
accomplish this by simply pressing the [TLC] key. Alternatively, you can just begin to enter
text or execute other types of actions. The Active Braille will then automatically display the
area where the cursor is located. On the other hand, you can also quickly move the cursor
to your current position by using the cursor routing keys, and then continue to enter
changes there.
If a word does not fit at the end of the display, you can instruct the Editor in the Setup
menu to automatically suppress that word and display it fully on the next line after moving
the display towards the end of the file.
It is also possible to have the current character displayed in various ASCII formats
(hexadecimal, octal representation). This function is initiated with the [SPC+1 4 5 6]
(Chord D) command. To exit this display mode, simply press the [TLC] key.
Page 50
Page 51

Active Braille
Operation of the Active Braille
Handy Tech
Elektronik GmbH
The Editor also provides an automatic reading mode. In this mode, the text scrolls forward
automatically by one entire display line. The reading speed can be adjusted individually in
the Editor's Setup menu, but you can also adjust the speed while you are reading by using
the [TU] or [TD] key. To activate automatic reading mode, enter [SPC+TD]. The cursor is
not moved along with the text during automatic scrolling. Pressing any cursor routing key
will position the cursor at that location within the text and stop the automatic scrolling. You
can also move the display section manually by pressing the [SPC] key without affecting
the automatic scrolling speed.
5.2.5 ATC within the Editor
With [SPC + 1 7] (Chord A) you can activate and deactivate the automatic scrolling via
ATC. If activated, Active Braille detects when you have read the last Braille character
displayed and scrolls on automatically without pressing any button.
With this version we have further improved the reading experience by providing additional
convenience features. These are all turned off by default but can be toggled using their
respective chord commands.
1. End of line marking: This feature will display a full form at the end of the displayed
text if the line is not already completely filled. Using this function you always know
when you have reached the end of the currently displayed text. You can toggle this
function by pressing [SPC + 1 6].
2. Waiting longer for shorter lines: Some users reported that short lines of text tend to
scroll off the display too quickly. When this feature is turned on, Active Braille will wait
slightly longer before scrolling beyond a short line of text. Use [SPC + 1 2 6] to toggle
this function.
3. Tone signal: Plays a short beep every time the display scrolls automatically. This can
be toggled with [SPC + 1 4 6].
4. Flicker: This feature causes the Braille display to be cleared for a short time before
automatic scrolling takes place. The effect can be described as similar to what a
sighted user would experience with a flickering display. This is less obtrusive than a
tone signal but still makes it easier to determine when the display scrolls.
5.2.6 Moving the Cursor
To move the cursor without changing any text, you can use the so-called cursor routing
keys. These keys, also known as [CR] keys, are built into the Braille elements. A small fin
on the Braille elements is used to press the [CR] keys. The [CR] keys' shape is designed
to facilitate navigation.
If you attempt to use the [CR] keys to move beyond the end of a line, the Active Braille will
beep and the cursor will be positioned such that you can continue to enter characters.
The Editor provides the following functions for moving the cursor:
When you enter [SPC+1 2 3], the cursor jumps to the top of the file. Use [SPC+4 5
6] to move the cursor to the end of the file.
You can move the cursor to the beginning of a sentence by entering [SPC+2], or to
the beginning of the next sentence by entering [SPC+5]. The cursor will move to the
nearest period, colon, exclamation mark or question mark.
You can also jump to the front or back of the current line of text by entering [SPC+1
3] to move to the front of the line, and [SPC+4 6] to move to the end of the line.
Page 51
Page 52

Handy Tech
Elektronik GmbH
Active Braille
Operation of the Active Braille
After entering [SPC+3], the cursor jumps to the beginning of the previous word, and
after entering [SPC+6], it jumps to the beginning of the following word.
The cursor can also be moved one character at a time as follows:
with [SPC+7] one character to the left
with [SPC+8] one character to the right
with [SPC+1] one line up
with [SPC+4] one line down
If you move the cursor towards the left past the beginning of a line, the cursor is positioned
at the end of the previous line. If you move it past the end of a line, moving towards the
right, it will be positioned at the beginning of the next line. When you move the cursor up or
down, it is always positioned at the beginning of the corresponding line.
Please note that Tab characters are displayed as a certain specifiable number of spaces.
Tabs are saved in the file either as tab characters, or they can be replaced by a number of
spaces. You will find more detailed information regarding tabs in chapter 5.2.23.13 seqq. If
a tab is saved as a tab character in the text and you move the cursor to the first position of
the tab and on through the tab, the remaining spaces will be skipped, and the cursor
moves directly to the first position after the tab. If you position the cursor inside a tab using
the CR keys, it will be positioned at the tab's first character, and a warning tone will also be
issued.
It is also important to remember that jumping by words or sentences may be difficult or
impossible in grade two texts, because words can contain punctuation marks.
When a file is closed, the current cursor position is also saved. When you open the same
file again later, the cursor will be positioned at the same location it was in when the file
was closed. However, in certain cases the saved cursor position may be lost. Further
information may be found in chapter 5.2.19.
5.2.7 Editing Modes (SPC+2 4 = Chord i)
By entering [SPC+2 4] (Chord i) you can toggle between insert and overwrite mode. The
default is insert mode, i.e. input characters are entered at the cursor position and the
following text is pushed back. In overwrite mode, the present text is overwritten by input
characters after the cursor position. When you reach the end of a line in overwrite mode,
any additional input characters will be added to the line, without overwriting the next line. If
you want to delete a section of text that consists of more than one line, it would therefore
be easier to mark that section as a block and then delete it. You can subsequently enter
your new text in insert mode.
Insert and overwrite mode are indicated by different cursor shapes. In the default insert
mode, the cursor is an under-bar (dots 7+8), while appearing as a block cursor (all 8 dots)
in overwrite mode. Both cursor shapes blink. You have the option of assigning cursor
shapes differently in the Setup menu, but only these two shapes are possible.
There is one more editing mode, the read-only mode, in which the text can only be
displayed, not modified. If you are in read-only mode and attempt to enter text, the Active
Braille will only generate warning beeps. Read-only mode is specified while opening a file,
Page 52
Page 53

Active Braille
Operation of the Active Braille
Handy Tech
Elektronik GmbH
and once the file has been opened, the editing mode cannot be changed. You can set a
file to read-only mode in the Editor's Setup menu, or you may open any file in read-only
mode from within the Editor.
5.2.8 Calculator function
If you wish to carry out a calculation while you are writing a text, you can do this directly in
the editor. Simply enter the expression anywhere in the text and press [SPC+2 3 5 6]
(Chord =) or {Ctrl+Shift+Enter}. The expression is evaluated and the result is inserted in
the text, taking the current settings of the options "Result position" (see Section 5.2.23.7)
and "Keep expression" (see Section 5.2.23.8) into account.
Example:
My office has a floor area of 3.2*4.1 = 13.12 square metres
Remember that you may not enter spaces in a calculation expression. For further details,
see the Section 5.1.2 “Calculator”.
Note:
If you modify a previously calculated expression and have it evaluated again, the new
result will be inserted into the text without deleting the old result. For this, the cursor must
be located within the calculation expression.
5.2.9 Status Display (SPC+2 3 4 7 = Chord S)
The [SPC+2 3 4 7] command allows you to activate the Editor's status display for the
current file. The following information is displayed in list form:
The name of the current file
The current editing mode (insert, overwrite, read-only)
The file's modification status (modified or not)
The beginning and end of a marked block
The position of the character in the text which is the current cursor location
The number of the current column
5.2.10 Set Mark (TU+TD)
By pressing [TU+TD] at the same time, the current cursor position is remembered as a
"mark." You can use this mark like a bookmark to easily find that place in the text. Up to 10
marks can be set for any file.
A dialog will open asking you for the name of the mark. You can enter up to 24 letters, or
you can select a name from the list of marks you have already created for this file. By
pressing [TRC] the mark will be set and remembered under the designated name. If you
have entered a name which already exists as a mark, you will receive a message asking
whether you wish to overwrite that mark. By entering [y] you permit the overwriting of the
previous mark. If you have already set 10 bookmarks, your only options are to select and
rename or overwrite one of the existing marks. If you select the name of an existing mark
at the beginning of this dialog, you will not receive any additional questions about
overwriting that mark. When a mark has been set, a beep confirms your action.
Page 53
Page 54

Handy Tech
Elektronik GmbH
Active Braille
Operation of the Active Braille
If you edit the text after you have set a mark, the position of the mark will be adjusted to
reflect such changes. This means:
If you enter or delete any text, all marks located between the cursor position and the
end of the text will be adjusted accordingly. When you jump to any mark, you will
move to the desired location.
If you delete a character which had been set as a mark, the mark will still be
retained.
5.2.11 Jump to Mark (SPC+1 3 4 = Chord m)
Entering [SPC+1 3 4] (Chord m) lets you jump to a mark you have previously set by
pressing [TU+TD]. A list of all available marks will be displayed, and you will be positioned
at the end of the list. Now you can navigate through the list by moving the cursor up and
down, or you can enter the name of the desired mark. If you move down after opening the
list, you will reach the top of the list.
To jump to the selected mark, press [TRC]. The Editor keeps track of the position from
which you jumped to the mark as the beginning of a block. This enables you to return to
your original position immediately. How to use blocks is described in the sections below. If
you entered a name which does not exist as a mark, you will receive the message
'Bookmark x does not exist'. You can now enter or select a new name. If no marks have
been set in the current file, you will be notified with a message 'No bookmarks set'.
Please note:
In certain situations, your previously stored marks may no longer be available. You will find
details about this in chapter 5.2.19.
5.2.12 Delete Mark (TU+TD, Select Name, SPC)
If you want to delete a mark, activate the function for setting a mark by pressing [TU+TD]
at the same time, and then select the mark you wish to delete from the list using [SPC + 1]
or [SPC + 4]. Enter a space to delete the name of the mark, then press [TRC]. You will be
asked whether you really want to delete the mark. If so, answer with [y], and the mark will
be deleted.
5.2.13 Block Functions
This feature enables you to work with entire blocks of text at a time. The procedures for
working with blocks resemble those familiar from modern PC operating systems:
You mark a certain selection of the text.
The selection may be either copied or cut and is temporarily stored on a clipboard.
From here, the selection may be pasted at a different place in the same file or even
in another file.
You also have the option of saving a marked text block directly to a new file.
A block can also be deleted, or pasted in a new file or an input field. Block operations
sometimes cause the Editor to run slow. The following paragraphs describe the use of
blocks in detail.
Page 54
Page 55

Active Braille
Operation of the Active Braille
Handy Tech
Elektronik GmbH
5.2.13.1 Marking the Beginning of a Block [SPC+TRC]
To mark the beginning of a block, place the cursor at the desired position and enter the
key combination [SPC+TRC] or press the cursor routing key twice. You do not need to set
a special mark for the end of a block. Simply move the cursor one position to the right of
where you want the block to end and press the cursor routing key. While moving the
cursor, you will notice that all text between the beginning of the block and the current
cursor position appears underlined with dots 7 and 8.
Let us assume you had typed the text "This is a test" and wanted to mark the words "This
is" as a block. Before undertaking any block operations, the cursor should be moved to the
space between the words "is" and "a."
Marking text as a block is possible in either direction. You can therefore set the beginning
of a block and then move back towards the top of the file. In this case, the end of the block
is located just left of the cursor. In other words, the character at which the cursor is
currently located is part of the block.
Instead of marking a block by moving the cursor character by character, you can also jump
from a desired block location to a mark. Another way to quickly mark off a block is by using
one of the search functions described below, if the first word appearing after the desired
block is known. Simply mark the beginning of the block by pressing [SPC+TRC]
simultaneously, and then execute a search for that word.
If you press the [TLC] key while marking a block, the underlines indicated by dots 7 and 8
will be removed, but the beginning of the block is still saved. If you change your mind and
decide to copy or cut the marked text block after all, you must first restore the underlining.
To do this, you can use the function "Exchange Mark and Cursor," which is described in
chapter 5.2.13.5. After activating this function, the underlines reappear, and the cursor will
be located at the beginning of the block. Activating the function again will position you at
the end of the block.
5.2.13.2 Copy (SPC+1 4 = Chord c)
Once you have positioned the cursor at the end of the block, you can copy the block to the
clipboard by entering [SPC+1 4] (Chord c). A message from the Editor displays the
percentage of the block that has been written to the clipboard.
The Copy command has a different meaning while you are in an input field: it will restore
the default settings.
5.2.13.3 Cut (SPC+ 1 3 4 6 = Chord x)
You can cut a block with [SPC+1 3 4 6] (Chord x). This results in the block being deleted
from the file and stored on the clipboard. While cutting the block, the Editor informs you
about the percentage of the block that has been written to the clipboard.
If you enter [SPC+1 3 4 6] (Chord x) while you are in an input field, all characters from
your current cursor position to the end of the dialog field will be deleted.
Page 55
Page 56

Handy Tech
Elektronik GmbH
Active Braille
Operation of the Active Braille
5.2.13.4 Paste (SPC+1 2 3 6 = Chord v)
Any text contained on the clipboard can be pasted at the current cursor position by
entering [SPC+1 2 3 6] (Chord v), or you can open another file and paste the selection
there. Please remember that the block is always pasted exactly before the current cursor
position. Since pasting does not delete the block from the clipboard, you can paste a block
several times over. The Editor displays a percentage while pasting, indicating how much of
the block has already been written, and that it is being written from the clipboard.
The paste command can also be used for writing to input fields. For example, if you want
to use a chapter title as the name of a bookmark, you can mark that title in the file as a
block, copy it to the clipboard with [SPC+1 4] (Chord c), then move the cursor to the
desired position for the mark, press [TU+TD], and respond to the dialog prompting you for
the name of the mark with [SPC+1 2 3 6] (Chord v).
The contents of the clipboard remain intact as long as the Active Braille is in operation, so
that you may paste several times, including in other files. However, once the Active Braille
is turned off, the contents of the clipboard are deleted upon turning the device back on.
The memory available for the clipboard is limited by the remaining free memory in the file
system.
5.2.13.5 Exchange Mark and Cursor (SPC+7 8)
You can use this command to return to your original position after executing the following
functions:
When you have jumped to the beginning or end of the file.
When you have marked a text block in order to copy or cut it. In this case, you will
return to the beginning of the block, where you can use one of the block functions.
When you have pressed [TLC] while marking a block.
When you have pasted text from the clipboard into the file.
The Exchange Mark and Cursor function will set a mark at your current position in the text,
and the cursor will be returned to the position it was in before one of the functions listed
above was executed. The section of text between this mark and the cursor will now be
marked as a block. You can easily cancel the underlines if desired by pressing the [TLC]
key.
If you enter the command again, the previously set mark and the cursor position will be
exchanged again. You can therefore use this function to jump from the beginning to the
end of your text block and back, or to jump back and forth between your current and the
previous cursor position.
5.2.13.6 Deleting a Text Block (SPC+ 1 3 4 6 7 = Chord X, SPC+1 2 = Chord b)
If you want to delete a large section of text which you do not want to paste anywhere else,
you can enter the [SPC+1 3 4 6 7] (Chord X) command, which cuts the block without
writing it to the clipboard. Alternatively, you can also use the backspace command (SPC+1
2 = Chord b). Again, you will be notified in terms of a percentage value that the text is
being deleted.
Page 56
Page 57

Active Braille
Operation of the Active Braille
Handy Tech
Elektronik GmbH
5.2.13.7 Saving a Block to a File (SPC+2 3 4 = Chord s)
When you have marked a block, you can save it in its own file by using [SPC+2 3 4]
(Chord s). The text block will not be deleted from the current file. Additional details
regarding the saving of files are contained in chapter 5.2.19.
5.2.14 Searches
You can look for a search string in a text file in two different ways: with an incremental
search, or with a buffered search. Both searches can move either forward or backwards.
Any search begins at the cursor position.
5.2.14.1 Incremental Search (SPC+1 2 4 = Chord f)
The command [SPC+1 2 4] (Chord f) initiates an incremental search for a certain text in
forward direction, i.e., moving from the current cursor position towards the end of the file.
The message 'I-Search:' appears, followed by the cursor. As you enter the search string,
the search already begins. You are automatically positioned at the first occurrence of the
search string you have entered so far. If you erase a character from the search string
using the delete command, you are transported backwards to the place where the
remaining search string can be found. While the search is in progress, the entered string is
displayed as blinking. If the search string cannot be found, you will receive the following
message: 'Search failed, wrap around (Y/N)?'. If you answer by entering [y], the same
search begins again from the beginning or end of the text, respectively. If the search string
still cannot be found, you will receive the same message again. You can now enter [n] to
end the search.
When the desired string has been found, press [TRC] to continue editing your text at that
location.
If you want to search a text starting at the beginning, you can first move the cursor to the
beginning of the text with [SPC+1 2 3]. By entering [SPC+1 2 4] (Chord f), the search will
be repeated and the last search string will already be entered. If you are at the first
occurrence of the desired string, you can immediately reinitiate the same search by
pressing [SPC+1 2 4] (Chord f) again, as long as you do not press [TLC]. However, this
only applies to the current editing session. Once the Editor is closed or the Active Braille
switched off, the search string will be deleted.
Any search can be aborted while entering the search string or during the search by
pressing the [TLC] key. Every time the text is found, a signal tone sounds, and the cursor
will be placed one character to the right of the found search string. You can distinguish
between upper and lower case letters while searching if you change the corresponding
setting in the Editor's Setup menu.
5.2.14.2 Buffered Search
A buffered search means you first enter the entire search string, and the search does not
begin until you press [TRC]. To initiate a buffered search enter the command for an
incremental search, [SPC+1 2 4] (Chord f), followed by [TRC]. You will then receive the
message 'Search:'. Enter the search string. The search begins when you press [TRC]
again.
Page 57
Page 58

Handy Tech
Elektronik GmbH
Active Braille
Operation of the Active Braille
To indicate the difference between an incremental and a buffered search, the Active Braille
displays 'Search:' while you enter the search string. An incremental search is indicated by
the prefix "I", a search in reverse direction by the prefix "R". If you are executing an
incremental search in reverse direction, the prompt for entering the search string will look
like this: 'I-Search back:'.
When the search string has been found, the cursor will be at the first character of the
search string and you can immediately begin working, without having to first press [TRC]
as you need to in the case of an incremental search. If you want to repeat the search,
please position the cursor to the right of the found string and then activate another
buffered search as described above.
5.2.14.3 Backward Search (SPC+1 2 4 7 = Chord F)
With [SPC+1 2 4 7] (Chord F), you can initiate a backward search through the text towards
the beginning of the file. The procedures are the same as for a forward search. When the
search string has been found, the cursor will be located at the first character position of the
search string. In both types of searches described above, you can even change the
direction of the search during the ongoing search by entering the appropriate command
after being placed on the search string.
5.2.15 Replace (SPC+1 2 3 5 = Chord r)
If you want to search and replace a term, enter the command [SPC+1 2 3 5] (Chord r).
Just as in a buffered search, you will be asked to enter a search term. The message
'Replace:' appears on the Active Braille. Enter the search term. By pressing [TRC], you
indicate that you have finished entering the search string and the message 'Replace X
with:' appears instead, (X is the previously entered search string). Type in the text with
which you want to replace the search term. Again, as in a search, pressing [TRC] initiates
the replacing procedure. When the first occurrence of the search string has been found,
you will be positioned at that place in the text. You now have the following options:
Enter [y] to replace the search string with the replacement text.
If you enter [n], you will move on to the next occurrence of the search string and the
previously found text will not be replaced.
If you enter [g] for global replace, the found and all subsequent occurrences of the
search term will automatically be replaced without prompt. During this procedure,
the message 'Replacing, please wait...' is displayed. When the Editor has reached
the end of the file, it indicates how many occurrences of the search string were
replaced. The message 'Replaced n occurrences' appears, where n is the number
of occurrences of the search term that were replaced.
When replacing the setting of the option “Find Exact” (see Section 5.2.23.9) has no
influence. You have to enter the exact expression for the replace function.
Replacing is only possible in forward direction, from the cursor position towards the end of
the file.
5.2.16 Opening Additional Files
More than one file can be open within the Editor at the same time. There are two methods
available for opening a file from within the Editor:
1. Without write protection: The file can be edited after it is opened.
2. In read-only mode: The file is write protected and cannot be edited.
Page 58
Page 59

Active Braille
Operation of the Active Braille
Handy Tech
Elektronik GmbH
Files may be opened from within the Editor as follows:
1. The [SPC+1 3 5] (Chord o) function opens a file which can then be edited. The
Active Braille will show: 'Open file:'.
Alternatively, you can open a file in read-only mode with [SPC+1 3 5 7] (Chord O).
This file cannot be modified. This is indicated by the prompt 'View file:'.
2. Enter the name of the file to be opened in the input field. Please remember that the
file name must be entered exactly as it is stored on the Active Braille, otherwise the
file is not found and cannot be opened.
3. After pressing [TRC], the file will be opened.
There are several possibilities here:
If the file name does not exist, and you are opening the file in edit mode, the Editor
assumes that you wish to create a new file under the name you entered.
If you are attempting to open a file in read-only mode and the file name does not
exist, the message 'File x not found' will appear, where x is the file name entered.
If you are opening an already open file, the Editor will simply switch to that file
without reloading it again.
5.2.17 Switching Between Open Files (SPC+5 6 8 or SPC+2 3 7)
If you have several files open, you can switch between them with [SPC+5 6 8] or
{Alt+Tab}. Let's assume you have opened three files in the following sequence: "a.txt" first,
"b.txt" next, and "c.txt" last. You are reading "c.txt" at the moment. If you enter [SPC+ 5 6
8] now, you will switch over to the "b.txt" file. A message 'Current file:' followed by the file
name notifies you of the name of the file you have switched into. If you enter [SPC+5 6 8]
again, you will subsequently be in "a.txt," the next time in "c.txt" again, etc. If you want to
work in or read the current file, you must first press [TRC].
Using [SPC+2 3 7] or {Alt+Shift+Tab} allows you to switch between open files in the
reverse order. This is even possible after closing a file, when the message 'Current file:'
appears.
Note:
A file can only be transferred to the PC if it is not open in the Editor! Before it can be
transferred, it must be closed and saved.
5.2.18 Suspending the Editor (SPC+1 2 3 4 5 6)
You can temporarily suspend the Editor with [SPC+1 2 3 4 5 6], for example, if you want to
change menu settings, check battery status or other indicators, or delete a file. When you
suspend the Editor, you will automatically return to the main menu, where all menu options
are available to you. You can even enter into PC Mode. The first few positions of the
Braille display will show the symbol '-E-'. This is to remind you that the Editor is still open.
It may be a little irritating that the menu items are only displayed following this symbol, but
that is actually its purpose. It could be extremely annoying for you if you inadvertently lose
data because you did not remember that the Editor is still open and that your data have
not been saved, and switch the Active Braille off.
To return to the Editor, enter [SPC+1 2 3 4 5 6] again. It should be noted that you can only
return to the Editor from the main menu.
Page 59
Page 60

Handy Tech
Elektronik GmbH
Active Braille
Operation of the Active Braille
!!!IMPORTANT!!!
Never attempt any file transfers with the Editor open or suspended. The active or
suspended Editor utilizes certain regions of memory which are needed during file
transmissions for processing data. Also, the transfer of certain files causes the Active
Braille to restart. Any open files would not be saved, and all changes would be lost.
5.2.19 Saving Files (SPC+2 3 4 = Chord s)
To save a file without closing it use [SPC+2 3 4] (Chord s), you will then receive the
following notification 'Save file:' followed by the name of the file. If you have loaded this
file into the Editor, this would be the name of the downloaded file. If you generated the file
you are saving, the default file name will appear.
If you press [TRC] now, the file will be saved. However, you also have the option of
overwriting the given file name in part or entirely, if you want to save the file under a
different name. If you do this, please remember the following:
All changes to the file entered after it was saved apply only to the file you specified
while saving it. The reason for this is that a file must be reloaded into memory after
it has been saved. If you save a file called "Text1.txt" under the file name
"Text2.txt," you will be editing "Text2.txt" after the save. Therefore, if you want to
save a file temporarily in its current state, you should proceed as described below.
If you do not make any changes to the file name, or if you enter a name that does
not yet exist, the file will be saved without any further prompts when you press
[TRC].
If you enter the name of an already existing file, the following prompt will appear:
'File x exists, overwrite (Y/N) ?'. You can either to agree to overwrite the file by
entering [y] followed by [TRC], or decline, either by answering [n] followed by [TRC],
or by pressing. [TLC].
A file name may not be longer than 255 characters and contain no special
characters (:*?"<>|+,;=[]/\). The entire path including all the folders but exclusive the
file name may not be longer than 259 characters.
Please note:
If you have marked a text block, this save function will not apply to the entire file, but only
to the marked text block. This is indicated by the dialog 'Save block to file:', followed by
the file name.
As mentioned above, if you want to save a temporary copy of your text under a different
name in its current state, please proceed as follows:
1. Move to the top of the file with [SPC+1 2 3].
2. Set the beginning of a block with [SPC+TRC].
3. Move to the end of the file by entering [SPC+4 5 6].
4. Activate a save operation with [SPC+2 3 4] (Chord s).
5. Enter the name under which you wish to store the current status of your file.
6. Press [TRC]. The file will be saved, but the new file will not be loaded.
As soon as you cancel the block markings by pressing the [TLC] key and activate the Save
command again, the dialog described at the beginning of this chapter appears, and the
save operation now applies to the entire file again.
Page 60
Page 61

Active Braille
Operation of the Active Braille
Handy Tech
Elektronik GmbH
When a file is closed and saved, all marks set for that file as well as the current cursor
position will be remembered. If a file is then transferred to a PC, edited on the PC, and
then retransmitted to the Active Braille, the marks and current cursor position are no longer
valid. In addition to the marks and the cursor position, the Active Braille also notes the
file's current size while saving it. When the file is opened again, the Active Braille checks
the size, to see if it is the same as that recorded at the last save. If it is, the marks and the
cursor position will be restored. If the current size deviates from the size noted before, the
Editor assumes that the file has been modified on the PC in the meantime, or that it is
dealing with a file of the same name, but different contents. In this case, the cursor will be
positioned at the beginning of the file upon opening it, and the bookmarks associated with
this file will be discarded.
5.2.20 Closing a File and Quitting the Editor (SPC+1 5 = Chord e)
Use [SPC+1 5] (Chord e) to save and then close the current file.
If the file was modified, the Editor will ask: 'Save changes (Y/N)?'
"n": The file is closed, changes are not saved.
"y": If the file is already named, it is saved under that name and closed. If it is a new
file which does not yet have a name, the Editor will suggest the name “untitled”. You
can either change or accept this name.
Please note:
1. The Editor is open until all open files have been closed.
2. Before you switch off your Active Braille, all files that are open in the Editor must be
saved and closed. Shutting down the Active Braille while files with unsaved
changes are open is not possible. Only if all changes are saved or reject, you can
switch off the Active Braille.
5.2.21 Activating PC Mode from the Editor (SPC+1 2 3 4 = Chord p)
With [SPC+1 2 3 4] (Chord p), you can activate PC Mode directly from the Editor. Let's
assume your Active Braille is connected to your computer and you are looking for an
address in the Active Braille's internal Editor. At this moment, the PC notifies you via
acoustic signal that an e-mail has arrived. You are expecting an important e-mail, and
would like to quickly look at your mailbox. You can do this immediately by switching over to
PC Mode with [SPC+1 2 3 4] (Chord p) and then operating your PC. The Editor, in the
meantime, will be suspended, so that the Braille display is available to the screen reader.
You can open your mailbox, read the e-mail, and also take care of other tasks.
You can return to the Editor with [SPC+1 3 4] (Chord m). To do this, hold down [SPC+1 3
4] (Chord m) for a little while (approximately one half second).
!!!WARNING!!!
Before the Active Braille is turned off, the Editor must be closed, with all edited files saved.
You should therefore always return to the Active Braille's internal menu by using [SPC+1 3
4] (Chord m), in order to ascertain the status of the Editor.
5.2.22 Help (SPC+1 2 5 = Chord h)
Whenever you enter [SPC+1 2 5] (Chord h), the Editor starts looking for a file named
"HELP.HSF" and opens it in read-only mode. This file contains the user manual. Using
Page 61
Page 62

Handy Tech
Elektronik GmbH
Active Braille
Operation of the Active Braille
either an incremental or buffered search, you can look up solutions to any problems,
information, or key assignments. You cannot directly jump to any chapter; however, you
can find the chapter you need quickly by moving to the beginning of the file, reviewing the
Table of Contents, and then executing an incremental or buffered search with the section
number as the search string.
Please note:
The help file is write-protected to prevent the accidental overwriting of important
information. This means it is not possible to add your own notes to this file.
5.2.23 The Editor's Setup Menu (SPC+1 3 6 = Chord u)
The Editor provides a Setup menu, called up by entering [SPC+1 3 6], which allows you to
customize Editor functions to reflect your needs and habits. Some of the settings are
global, i.e., the chosen setting applies to all files. Other settings apply only to individual
files. The settings parameters for up to 20 files are stored individually when the files are
properly saved. If you modify a file whose parameter settings have not yet been stored, the
default setup parameters will be applied to this file. Before you save a new file, you should
therefore adjust the values in the Setup menu according to your requirements. Each of the
individual parameter descriptions below indicates whether that setting is global or valid
only for individual files.
The Setup menu contains a list of parameters. You can navigate through the list by moving
the cursor up and down with [SPC+1] and [SPC+4]. The desired parameter can be
selected by pressing [TRC]. Alternatively, you can also input the name of the parameter
you wish to change then confirm with [TRC].
Once you have selected a parameter with one of these two methods, a list of possible
settings will appear. By navigating up and down through this list, you can get to the value
you wish to set. Set that value by pressing [TRC], and you will then return to the list of
parameters. Instead of a list of settings, a field may also appear which is used to input
numerical values or text. Again, the input must be confirmed by pressing [TRC]. You can
also return to the list of parameters without making any changes by pressing [TLC].
If you want to restore the default value for any parameter, you can do this by typing
[SPC+1 4] (Chord c). In the case of parameters which were recently modified, [SPC+1 4]
(Chord c) will restore the previous settings.
The following subsections discuss each item on the Setup menu.
5.2.23.1 Window Scrolling (Global)
This value specifies by how many positions the display will be scrolled to the side when
the cursor moves beyond the currently displayed text. Valid settings for this parameter are
0 through the number of Braille positions available (40). The default value is 3/4 of the
available Braille elements. If you should enter a value outside of the valid range, this will
result in an error message.
This parameter can be used to obtain various effects. For example, you can enter 1; this
causes the display to scroll with every character you enter that falls beyond the current
display. In contrast, if you specify the highest possible value (40), the Active Braille will
react just like the older versions of Braille system software: the entire line will be rebuilt
Page 62
Page 63

Active Braille
Operation of the Active Braille
Handy Tech
Elektronik GmbH
every time you move beyond it. If you move the cursor beyond the display towards the
right, the cursor will next appear at the first Braille element. If you move the cursor beyond
the display towards the left, it will appear on the last Braille position.
5.2.23.2 Scroll time (Global)
This option is relevant only when using ATC and can be set to a value in the range from 1
to 10. It determines how long Active Braille will wait before automatically scrolling to the
next line of text. Lower values are better for skimming, while higher values prevent you
from missing characters at the end of the displayed text. The default value is 3.
5.2.23.3 Indicate empty lines (Global)
For the automatic scrolling with ATC it is necessary to mark empty lines. This allows
detecting the reading finger even for blank lines for the automatic scrolling. An empty line
is indicated by three Braille cells, where all dots are set. By default, empty lines are not
marked. If you want to use automatic scrolling, we recommend setting this option to “yes”.
5.2.23.4 Automatic scrolling (Global)
If this option is activated the Braille display will automatically scroll by ATC. ATC detects
the position of your reading finger and scrolls on automatically, when you have read the
last character displayed. When using automatic scrolling, we recommend also activating
the option “indicate empty lines” to be able to scroll on at empty lines.
By pressing [SPC + 1 7] (Chord A) you can toggle both options “indicate empty lines” and
“automatic scrolling” together without using the setting dialog.
5.2.23.5 Dialog Timeout (Global)
This value specifies the number of seconds you remain in any Editor dialog if you do not
enter anything. If the specified time limit has been exceeded and no input was made, the
dialog is closed without any changes being made or functions initiated. The valid settings
are between 0 and 999, and the default is 100 seconds.
Note: It is not advisable to set the timeout value to less than 10, because then the dialog
closes too quickly after being opened for you to have a chance to react to it or enter any
response.
The timeout function does not apply to the Setup menu itself. This would be undesirable,
since you might not have the opportunity to enter any changes. In the Setup menu, you
therefore must press [TLC] to exit the menu.
5.2.23.6 Warn Timeout (Global)
This menu item determines the number of seconds for displaying messages and warnings.
Remember, you can quit a message at any time by pressing [TLC]. If you press any other
key while a message is being displayed, the timeout period is reset, and you have more
time to read the message.
Possible values for this parameter are 0 through 999; the default here is 30.
Note:
It is not recommended to set this parameter to less than 10, because in most cases this
would not display the message long enough to read it.
Page 63
Page 64

Handy Tech
Elektronik GmbH
Active Braille
Operation of the Active Braille
5.2.23.7 Result position [c] or [e]
This option applies to the calculator function of your Active Braille and is used to specify
the position of the result, both in the actual calculator and in the calculator function within
the editor. The letter [c] stands for the setting in the calculator and the letter [e] stands for
the setting in the editor.
The possible settings are in each case:
Before expression: the result is displayed before the expression, for example:
5 = 2+3. This is the default setting for the calculator.
After expression: the result is displayed after the expression, for example:
2+3 = 5. This is the default setting for the editor.
5.2.23.8 Keep expression [c] or [e]
This option applies to the calculator function of your Active Braille and is used to specify
whether the expression you enter is to be displayed together with the result, both in the
actual calculator and in the calculator function within the editor. The letter [c] stands for the
setting in the calculator and the letter [e] stands for the setting in the editor.
The possible settings are in each case:
Yes: the complete expression is displayed, for example:
5 = 2+3, taking the setting for the option "Result position" into account. This is the
default setting for the calculator.
No: only the result is displayed, for example:
5. The setting for the option "Result position" has no effect in this case.
5.2.23.9 Find Exact (Global)
This parameter specifies how precisely a search string must match the search term during
searches (does not apply to replacing). There are two possible settings:
1. If you set 'Find Exact' to 'Yes', the search term must be entered with exactly the
same capitalization to be found in the text. For example, if you enter the search
string "Table" capitalized, the same word without the capitalization, "table," will not
be found.
2. If you set this parameter to 'No', words with upper and lower case letters will still be
found, even if you only enter lower case letters.
Please Note:
If the option 'Find Exact' is set to 'No', and your search term contains umlauts or special
characters, the Editor will only find the upper and lower case equivalent of the character if
the standard character set is active. The standard character set is "ANSI Latin1". If you are
not using the standard character set, an umlaut or special character will only be found in
the exact format in which you entered it (either upper or lower case). As a default, this
option is turned off.
5.2.23.10 Margin Action (Global)
You can choose one of three different types of actions when the right edge of the display is
reached within the Editor:
"None": No action.
"Bell": Emit a beep, depending on the settings for signal tones.
Page 64
Page 65

Active Braille
Operation of the Active Braille
Handy Tech
Elektronik GmbH
"Wrap": Look for the beginning of the word currently being typed and wrap it to the next
line. A beeping signal is also emitted. The default setting for Edge of Display Line is
"None".
5.2.23.11 Right Margin (Global)
To facilitate text input, you can specify a right margin. Possible values are from 0 to 32767,
with the default value set to 75. The previous option, "Margin Action", determines what the
Editor will do when the right edge is reached.
5.2.23.12 Word Wrap (Global)
For this parameter, you can choose either “Yes” or “No”. “Yes” means that a word that
does not fit completely on the end of the Braille display is suppressed, if the cursor is not
located in the currently displayed line. If the cursor is not in the current line of text, the
word will be displayed in part, and then again completely after the display has wrapped by
using the reading keys.
If word wrap is turned off (set to “No”), as many letters of the word as possible are
displayed on the Braille elements. The default setting is “Yes”.
Note:
This word wrap function applies only to the reading of text; it is not active while entering
text.
5.2.23.13 Tab Mode (Global)
This setting determines which characters will be inserted by the Editor when you input a
tab character. Two options are available:
"Tabs (\\t)": Preferably, tab characters will be inserted, but this depends on the
currently active setting for 'Tab Stops' (see next section). This option is
especially useful if you desire to keep your files as compact as possible.
"Blanks": For each tab character, the number of spaces specified under 'Tab
Width' will be inserted into the text. This option is appropriate if you want to
ensure that a file is formatted exactly like it was on the Active Braille once it has
been transmitted to your word processing program on the PC. The disadvantage
here is that you cannot delete the tab character with one keystroke. All of the
spaces inserted for the tab must be deleted individually.
Remember, the representation of tab characters on the Braille display is always by a
number of spaces, regardless of the option specified in Tab Mode.
5.2.23.14 Tab Stops (Global)
Valid arguments for this value are from 0 up to the maximum number of positions on your
Active Braille (40). If you specify 0, either a tab character or the number of spaces set
under 'Tab Width' (see next section) will be inserted into the text each time you input the
tab character, independent of your position within the text. Any value greater than 0 results
in the current line being filled up with either tab characters or spaces in such a way that a
tab stop is set at every nth position (e.g., every 5th position).
The following example will clarify this parameter:
Page 65
Page 66

Handy Tech
Elektronik GmbH
Active Braille
Operation of the Active Braille
If you have set 'Tab Stops' to 5, and the cursor is located at column 1, then the cursor will
move to column 6 as soon as you enter a tab character. If you enter a tab again, you will
be located in column 11 and so on. If you type in a word here consisting of 7 letters and
then enter tab from that position, which would be column 18, then the cursor will move to
column 22.
5.2.23.15 Tab Width (Global)
This parameter determines the number of spaces used for displaying a tab on the Braille
display. It also specifies the number of spaces used to represent a tab character that is
entered on the Active Braille if the option 'Tab Mode' is set to "Spaces". Valid entries for
this setting are 1 through the maximum number of positions available on the Active Braille
(40). The value in this menu item affects all tabs in a given file. In other words, you cannot
set a tab width of 4 characters in one place, and a tab width of 32 characters at another
place within the same file. Whenever you open a file for the first time or create a new file,
the default setting of 4 spaces applies.
Note:
When a file is transferred to the PC, tab characters will not be replaced by the number of
spaces specified for that file, but instead will be transmitted as tab characters. If you open
the file later on the PC in a word processing program, the tab characters may be handled
in several different ways. Many programs convert tab characters into a number of spaces
that is a multiple of 2 (e.g., 4 or 8). Others display tab characters without converting them
at all, or provide several options for conversion. Please consult the documentation for your
word processing program for details.
5.2.23.16 Line End (Individual File)
This menu item provides three options for representing the end of a line when you save a
file to the flash disk. The following displays are available:
Carriage return with line feed, CRLF (\\r\\n, ^M^J), used by DOS and Windows.
Carriage return only, CR (\\r, ^M), used by Macintosh OS.
Line feed only, LF (\\n, ^J, used by Unix-based operating systems.
In the case of files transmitted to the Active Braille, this setting is obtained from the file
itself and cannot be changed. However, you can specify this parameter for all files created
on the Active Braille.
5.2.23.17 Insert Cursor (Global)
Here you can specify the form the cursor should take in insert mode. This means you also
specify the cursor shape in overwrite mode at the same time, since the overwrite cursor
always takes the opposite shape from the insert cursor. The two cursor formats are: an
underline “Underline” or a block “Block”. Both shapes are blinking cursors, and that feature
cannot be changed.
5.2.23.18 Edit Mode (Individual File)
Dependent on which mode (edit or view) you opened this file, you find one of this three
settings:
"Insert": All text input is inserted at the cursor position the existing characters in the
file are not deleted.
Page 66
Page 67

Active Braille
Operation of the Active Braille
Handy Tech
Elektronik GmbH
"Overwrite": The characters existing at the cursor position are overwritten by the
input characters.
"Read Only": The file cannot be modified. Any commands that would modify the
file generate beeps, as long as acoustic output is activated in the Options menu.
If the file was opened in editing mode, you can choose between the settings “Insert” and
“Overwrite”. You can also change the edit mode by pressing [SPC+2 4] (Chord i) without
opening the menu.
Please note that you cannot switch back out of read-only mode once it has been specified
for a file while you are in that file. If you do wish to turn off read-only mode, you must quit
the file and then open it again — either from the Editor or from the file list. You can then
change the Edit Mode in the Setup menu.
5.2.23.19 Scroll Speed (Global)
This setting allows you to preset the speed for automatic reading mode. You may choose
any value from 1 to 10, where 10 is the slowest. The default value is 5.
5.2.23.20 Saved Position (Individual File)
Since the cursor does not move during automatic reading mode, two options are available
here for how to save the cursor when the file is closed. There are two possibilities:
"Cursor": This is the default. The current position of the cursor is remembered, and
when the file is opened again, the cursor will be at that position.
"Display": The cursor position is remembered at the text last shown on the display.
5.2.23.21 Display Mode (Individual File)
This item allows you to choose one of several modes of display:
"Text Only": Special characters are represented by a period, control characters by
^ with the appropriate letter (e.g., ^d for return).
"Special": Special characters are displayed in hexadecimal representation (e.g.,
0xfd for 253).
"Normal": All characters are displayed according to the currently active character
set.
The default setting for this parameter is “Normal”.
5.2.23.22 Step Size (Global)
This parameter specifies by how many characters the display moves when the reading
keys are used. Valid arguments are from 1 to the maximum number of positions available
on the Active Braille (40). The default setting is the highest value possible. It should be
remembered that the setting specified in the "Word Wrap" parameter (see chapter
5.2.23.12) also influences the movement of the display.
5.2.23.23 Match Column (Global)
This setting contains the value for the position on the Braille display where a found search
term will be displayed. Here the valid settings are between 0 and the maximum number of
positions available on the Active Braille (40), but both 0 and 1 refer to the first Braille
module. The default setting here is always the center of the display (20).
Page 67
Page 68

Handy Tech
Elektronik GmbH
Active Braille
Operation of the Active Braille
This function allows you to view the search term within its context. Depending on whether
the text just before or after the found term has priority, you can position the column for the
match further to the right or left on the display. Positioning the matching search term at the
match column occurs whenever the matching term in the text appears to the right of the
match column.
If we assume that you have set the match column to position 25, that you are searching for
the word "Help" and that the word "Help" has been found at column 36, then the Editor
adjusts the display on the Active Braille in such a way that the word "Help" is shown
beginning at the 25th module on the Braille display. Assume further that you search for the
word "Help" again, and that it is located at column 10 in the text. This time the Braille
display will not be adjusted, because the word appears to the left of the match column.
5.2.24 Important Instructions Regarding the Editor
The Editor's powerful features provide a comfortable, high-performance tool for you, but at
the same time, it is important to handle it properly. This chapter therefore contains many
useful tips for using the Editor.
1. Handling of files:
Always save your files to the PC at regular, brief intervals. This not only prevents
the loss of important data, but it will also enable you, if necessary, to delete one
of your unedited files, if you need to free up some memory.
While working with large files, such as manuscripts or lecture notes, the
available memory may not be sufficient for writing the edited file. If you are not
making changes within the entire document, but only adding text to the end of
the large file (e.g., a new chapter, or your notes for the most recent lecture), you
can circumvent this problem by creating a new file and writing your continuation
there, while keeping the larger file open in read-only mode. In this way, all of the
information is available to you, and it is more likely that you will be able to save
the additional texts. At a later time, you can open both files in edit mode and
attach the contents of the new file to the larger file by using the appropriate block
operations. If you find that you cannot save the file after having attached the
additional notes, you can transfer both files to the PC, concatenate them there,
and then retransmit that file to the Active Braille.
The Editor determines while you are working whether there is enough memory
left for saving the changes you are entering. Should this not be the case, the
Editor will notify you. If you have opened and edited several files, you can
increase available memory by first attempting to save and close smaller files. If
you succeed, you will then be able to also save and close larger files. Another
possibility is to suspend the Editor in order to delete any files not immediately
needed. However, the prerequisite for this procedure is that you regularly save
your data to the PC. Remember that a file cannot be deleted if it is open in the
Editor. Close the file before suspending the Editor if it is open.
One of the files needed by the Editor is the "$clipboard$" file. This file, if it exists,
is deleted when the Active Braille's power is turned on to provide as much
memory as possible for your data, but you can also delete it while working within
the Editor. You can do this by suspending the Editor and deleting this file from
the file menu. Please note, however, that you will not receive any special
warning other than the standard dialog while deleting this file. You should
Page 68
Page 69

Active Braille
Operation of the Active Braille
Handy Tech
Elektronik GmbH
therefore delete the clipboard only if you are sure that you will no longer require
its contents. Again, only files that are not currently open can be deleted.
When you are attempting to open an editable file with [SPC+1 3 5] (Chord o) or
via the menu item 'Edit' from the file list, the Editor will check whether enough
memory is available for editing the file. Should this not be the case, the file will
be opened in read only mode, and a message will be issued. As long as there is
enough memory left for managing the appropriate pages, a file can always be
opened in read only mode, because no swap file needs to be created to keep
track of changes.
2. Block operations may cause a slowdown of the Editor when working with large
amounts of data. This means that you may have to wait a little until a block has
been either, copied, cut, or pasted, if you are working with very large amounts of
text. Navigation within the Editor may slow down in the case of very long lines.
5.3 Controlling the PC from the Active Braille's Keyboard [SPC+1 2 7]
(Chord B)
It is possible to use the Active Braille's keyboard for inputs to the PC by utilizing the screen
reader. Therefore it is necessary to install the latest Handy Tech Braille display driver for
your screen reader, which you can find on the enclosed CD.
You can also activate and deactivate PC control specifically. This is necessary because
the Active Braille's function keys must be available both as input device for the PC and for
initiating screen reader functions. The following functionalities are available to you:
Turning PC control on and off
Input of characters
Use of the control key (Ctrl), including for keyboard shortcuts: One example is the
copy function, which is implemented on a standard keyboard as a keyboard
shortcut consisting of Ctrl+C
Use of the ALT key, including for keyboard shortcuts: One example is activating the
menu bar under Windows programs, or initiating hotkeys
Initiating the "Windows" and "Context" keys
Initiating the Enter key
Initiating the Escape key
Initiating the Backspace key
Initiating the Delete key
Moving the cursor
Initiating the Pos1 and End keys
Initiating the Page Up and Page Down keys
Initiating the Shift key: One example is entering CTRL+Shift+f
Caps lock, for example in order to select blocks
Initiating the function keys, including in combination with CTRL, Shift, and ALT. This
means it is possible, for example, to close certain windows or entire applications via
function keys.
5.3.1 Table of Key Commands for Controlling the PC
The key combinations for controlling the PC are listed below in the form of a table. We
have included as many combinations as possible; however, if a combination is not shown,
Page 69
Page 70
Handy Tech
Elektronik GmbH
Active Braille
Operation of the Active Braille
PC Key(s)
Chord
Commands
Emulated on the Active Braille by
Activate/deactivate PC
control
Chord B
SPC + 1 2 7
Backspace
Chord b
SPC + 1 2 or 7
Delete
SPC + 4 5
Paste
Chord i
SPC + 2 4
Alt
TRC + SPC
Alt + character
TRC + character
Alt for next character
SPC + 7 8
Activate/deactivate Alt
SPCL + SPCR + 7 8
Enter
8 or TRC
Ctrl + character
TLC + character
Ctrl for next character
SPC + 3 6
Activate/deactivate Ctrl
SPCL + SPCR + 3 6
Tab
Chord t
SPC + 2 3 4 5
Shift + Tab
Chord T
SPC + 2 3 4 5 7
Ctrl + Tab
TLC + SPC + 2 3 4 5
Ctrl + Shift + Tab
TLC + SPC + 2 3 4 5 7
Escape
Chord e
SPC + 1 5 or TLC
Shift + Escape
Chord E
SPC + 1 5 7
Ctrl + Shift + Escape
TLC + SPC + 1 5 7
Shift + character
Chord s
SPC + 2 3 4, character
CapsLock on/off
Chord S
SPC + 2 3 4 7
Cursor keys
Up: SPC + 1, Left: SPC + 7,
Down: SPC + 4, Right: SPC + 8
Mark
Chord S
SPC + 2 3 4 7 "holds down" the shift key
until SPC + 2 3 4 7 is input again. It is
therefore possible to work with all cursor
movements, such as Home, End, etc. If
you wanted to mark two characters to the
right of the cursor, you would enter SPC +
2 3 4 7, SPC+8 (cursor right) twice, and
SPC + 2 3 4 7 again
Previous word (Ctrl +
Cursor left)
SPC + 3
Next word (Ctrl + Cursor
right)
SPC + 6
Page Up
SPC + 2
Page Down
SPC + 5
Ctrl + Page Up
TLC + SPC + 2
Ctrl + Page Down
TLC + SPC + 5
Pos1
Chord k
SPC + 1 3
it does not mean that it is not possible. All key combinations with [SPC] can either be
pressed by [SPCL] or [SPCR].
Key combinations are represented by the plus sign (+), e.g., Ctrl+Alt+a. Consecutive key
strokes are separated by a comma, e.g., 1, 2 or SPC+2 3 7, z. The cursor routing keys are
abbreviated as CR (e.g., CR12 = cursor routing key above Braille module 12).
Page 70
Page 71
Active Braille
Operation of the Active Braille
Handy Tech
Elektronik GmbH
PC Key(s)
Chord
Commands
Emulated on the Active Braille by
End
SPC + 4 6
Ctrl + Pos1
Chord l
SPC + 1 2 3
Ctrl + End
SPC + 4 5 6
Function Keys F1 to F12
SPC + CR1 to CR12
Left Windows Key
Chord w
SPC + 2 4 5 6
Context Key
Chord W
SPC + 2 4 5 6 7
Windows Key + character
SPC + 2 4 5 6 8 followed by character
Windows Key
blocked/released
SPCL + SPCR + 2 4 5 6 8
PAUSE key
Chord p
SPC + 1 2 3 4
Windows key + PAUSE key
SPC + 2 4 5 6 8 followed by SPC + 1 2 3 4
Space
SPCL or SPCR
Screen Reader Key +
character
SPC + 2 3 4 8 followed by character
Screen Reader Key
blocked/released
SPCL + SPCR + 2 3 4 8
Page 71
Page 72

Handy Tech
Elektronik GmbH
Active Braille
External Keyboard
6 External Keyboard
An external keyboard may be connected directly to the Active Braille. Keyboards of any
make or model may be used, provided they comply with the following requirements:
USB connection
low current consumption (recommended 30 mA with LEDs turned off)
The external keyboard transmits your key strokes to the Active Braille in the same way as
the internal Braille keyboard. You can therefore operate both an external and the internal
keyboard in parallel. Please refer to Chapter "Installation" for the procedure for connecting
an external keyboard.
Please remember that all the information described in this section applies only to an
external keyboard, not to the built-in Braille keyboard.
6.1 General
Any keyboard transmits encoded data indicating which key has been pressed or released.
These data do not in themselves contain any information about what this key stroke
means, i.e., which character it should generate. That information is assigned by the socalled keyboard driver, and depends on the desired language. This means, for example,
that if a U.S. English keyboard layout has been selected, the character ":" is realized by
pressing "Shift ö" on a German keyboard.
Depending on the language (which means on the keyboard layout currently in force), the
Active Braille's keyboard driver needs further information indicating how it is to implement
the encoded key stroke information. Therefore a table for assigning key strokes to
characters must be present in the Active Braille, the keyboard layout table.
The Active Braille already contains a fixed, programmed keyboard layout table for a
German keyboard, as well as a downloadable keyboard layout table. This table is called
"kbdlyout.hsf" for all languages. The internal keyboard layout table is always activated
when no downloadable keyboard layout is found. This is the case, for example, when no
files at all are stored on the media after the Active Braille has been reformatted. When the
Active Braille is turned on, it checks whether an error-free, downloaded table is present: if
not, it generates the warning message
'Warning: No keyboard layout file found. Using standard layout.'
and switches automatically to the default internal table. The warning is even generated
when no external keyboard is connected to the Active Braille, because in this case it is still
possible to attach the keyboard later.
The keyboard layout table appropriate to your country is already loaded into the Active
Braille for shipping. However, you can also modify this file, or create a new one and then
load it into the Active Braille. This means that the existing keyboard layout will be
overwritten.
Page 72
Page 73

Active Braille
External Keyboard
Handy Tech
Elektronik GmbH
Shift
Activates the secondary function until the key is released.
ShiftLock / CapsLock
After pressing this key, the secondary functions remain active until
the Shift or ShiftLock key is pressed again. All keys are switched to
their secondary function, not only the letter keys.
ALT / ALT left
No function. If the key is held down continuously, ASCII codes may
be entered via the numerical pad.
ALT Gr / ALT right
Activates the tertiary function until the key is released.
Ctrl
Only remains active until the key is released.
WINDOWS and
context menu keys,
print, scroll, pause
These keys are not supported and cannot be assigned any
functions.
6.2 Keyboard Keys
In this section, you will find comments on some characteristics of using an external
keyboard. They are generally caused by the fact that there are keys on a keyboard that
make no sense when used in conjunction with the Active Braille.
6.2.1 Alphanumerical Character Inputs
There are no special characteristics regarding the input of alphanumerical characters on
the central keyboard area.
6.2.2 Numerical Pad
The keys on the numerical pad function just like the alphanumerical keys. The NUM key
has no function. All keys except Enter can be assigned your desired characters. In the
factory provided keyboard layout tables, these keys are assigned numerical meanings.
Alternatively, any desired characters can be implemented by means of the ALT+x function
(where x can be any number between 0 and 256). This ALT function is used for generating
characters that are not directly accessible on the keyboard layout.
6.2.3 Function Keys
The function keys have no function in conjunction with the Active Braille.
6.2.4 Navigation Keys
The term navigation keys refer to the 6-key block as well as the cursor keys located
between the main keyboard section and the numerical pad. These keys retain their
functions without any restrictions. You should note, however, that the key "POS1"
implements the chord command [SPC+1 3], and the key "End" the chord command
[SPC+4 6]. If pressed at the same time as the control key (Ctrl), "POS1" executes the
command [SPC+1 2 3], while the "End" key executes [SPC+4 5 6].
6.2.5 Special Keys
There are several special keys on many keyboards, which are described in detail below. It
should be noted that on some keyboards, the right shift key does not work in conjunction
with the right Alt key. The left Shift key can be used for these combinations instead.
Page 73
Page 74

Handy Tech
Elektronik GmbH
Active Braille
External Keyboard
6.2.6 Status Indicators
LED status indicators are not used. This circumstance should be pointed out to sighted
assistants. If the keyboard reacts in an unfamiliar manner, press the Shift and Control keys
to ensure that no undesirable state has been activated.
Page 74
Page 75
Active Braille
The Active Braille as Braille Display
Handy Tech
Elektronik GmbH
Control Key/Braille Dot
Function
[7]
Go to focus
[3]
Go to the active window's title bar
[2]
Toggle Braille tracking on/off
[1]
Move Braille display section one line up
[SPCL] or [TU]
Braille display section to the left
[SPCR] or [TD]
Braille display section to the right
[4]
Move Braille display section one line down
[5]
Toggle between Window-Eyes-cursor and mouse cursor
[6]
Go to the active window's status line
[8]
Drag mouse to focus
[7 8]
Specifies whether type of control element will be
indicated or not
[3 8]
Toggle Browser Mode on/off
7 The Active Braille as Braille Display
The Active Braille is supported by various screen output programs that include drivers for
the device, e. g.:
WINDOW EYES
JAWS
HAL (Dolphin Systems)
NVDA
VoiceOver
Blinux (SuSE LINUX)
If these programs are used, all of the Active Braille's functionality is assured.
7.1 Screen reader using Windows, Example Window-Eyes
Window-Eyes by GW Micro is one of the most commonly used screen readers worldwide.
It enables access to all kinds of different applications, without complicated scripts.
Window-Eyes is highly customizable, so you can control how to display the monitor
information.
When you use Window-Eyes with a Braille display, you can track both the focus as well as
the mouse cursor. In addition, there is also an invisible cursor, the so-called WE-cursor. If
you bind the Braille display to the WE-cursor, you can move the position of the Braille
display relative to the screen without changing the position of either the focus or the
mouse cursor.
7.1.1 Overview
Your Active Braille, just like all the other Handy Tech Braille displays, is supported by
Window-Eyes. The following table provides an overview of Window-Eyes commands that
can be entered with the control keys on the Braille display. We have not included an
exhaustive description of each of the functions, because they are already contained in the
Window-Eyes manual.
Page 75
Page 76
Handy Tech
Elektronik GmbH
Active Braille
The Active Braille as Braille Display
Control Key/Braille Dot
Function
[2 8]
Toggle between 6/8 dot Braille
[1 8]
Handy Tech configuration dialog
[4 8]
Toggle blank spaces
[5 8]
Drag cursor to mouse
[2 3]
Beginning of line
[5 6]
End of line
[6 8]
Toggle Show Attributes on/off
[1 2 3]
Top of file
[4 5 6]
End of file
[5 6 8]
Run through attributes
[TLC]
Tab
[TRC]
Shift +Tab
[SPC + 1 2 7]
Toggle Braille input on/off
[SPC + 1 7]
ATC on/off
[SPC + 1 2 3]
ATC reading protocol on/off
w
[2 4 5 6]
Activate the Window-Eyes settings menu
%
[1 2 3 4 5 6]
Activate the screen reader settings menu (WindowEyes)
d
[1 4 5]
Desktop minimizes all applications
h
[1 2 5]
Activate Window-Eyes Help
$
[4 6]
Tab
k
[1 3]
Shift Tab
g
[1 2 4 5]
Grade 2 on/off
m
[1 3 4]
Alternative for activating the menu bar
s
[2 3 4]
Windows Start menu
+
[2 3 5]
Toggle 6/8 dot Braille
=
[2 3 5 6]
System Tray
z
[1 3 5 6]
Announce date and time
c
[1 4]
Ctrl + Tab
C
[1 4 7]
Shift + Ctrl + Tab
e
[1 5]
ESC
?
[2 6]
Enter
v
[1 2 3 6]
Set level of Braille contractions
By entering letters in Braille, you can in addition input the so-called mnemonic commands
that are listed below:
The cursor routing keys (CR) are used to directly place the cursor at that text position.
7.2 Screen readers using Windows, Example JAWS
The functionality of JAWS for Windows is so extensive that only the basic functions for
operating the Braille display can be described in brief in this section.
The status modules of a Braille display contain important data regarding screen
positioning. Since your Active Braille does not include status modules, you can use
Page 76
Page 77
Active Braille
The Active Braille as Braille Display
Handy Tech
Elektronik GmbH
Control Key/Braille Dot
Function
[7]
Activate PC cursor tracking.
[3]
Display the first line in the window (title).
[2]
Move the Braille display to the left.
[1]
Move the Braille display section one line up without
changing the horizontal position.
[SPCL]
If there is any text to the left of the Braille display section,
it moves to the left, if not, it moves one line up and moves
the cursor.
[SPCR]
If there is any text to the right of the Braille display section,
it moves to the right, if not, it moves one line down and
moves the cursor.
[4]
Move the Braille display section one line down without
changing the horizontal position.
[5]
Move the Braille display to the right.
[6]
Display the last line in the window.
[8]
Drag the JAWS cursor to the PC cursor and activate the
JAWS cursor.
[TU]
If there is any text to the left of the Braille display section,
it moves to the left, if not, it moves one line up.
[TD]
If there is any text to the right of the Braille display section,
it moves to the right, if not, it moves one line down.
[SPCL + SPCR]
Toggle status modules on and off.
[7 8]
Switch between structured mode, section output and
speech output.
[3 8]
Change cursor representation (dots 7 and 8, all 8 dots,
blinking and non-blinking).
[2 8]
Toggle between 6/8 dot Braille.
[1 8]
Handy Tech configuration dialog (as of Handy Tech JAWS
Driver version 3.x)
[SPCL+SPCR] to toggle between displaying the contents of the screen and the status
module display. The first three status elements indicate the cursor's pixel position within
the line. The fourth status element indicates which mode is currently active, as follows:
p for PC cursor
j for JAWS cursor
s for structured mode
Dots 7 and 8 of the status elements show the Braille display's position in a window line.
Dots 7 and 8 in the status element have the following meanings:
1+2+3+4: The entire window line is shown on the Braille display
1+2: Left half of the window line
3+4: Right half of the window line
2+3: There is more text on the left and right in the window line
7.2.1 Overview
This table lists all functions associated with the Braille dots and control keys on the Active
Braille. We have not included an exhaustive description of each of the functions, because
these are contained in the JAWS for Windows manual.
Page 77
Page 78
Handy Tech
Elektronik GmbH
Active Braille
The Active Braille as Braille Display
Control Key/Braille Dot
Function
[4 8]
Toggle between focused text on Braille display/same text
as on screen.
[5 8]
Activate the JAWS cursor.
[2 3]
Beginning of line
[5 6]
End of line
[1 2 3]
Top of file
[4 5 6]
End of file
[3 6 7]
Speech interruption on/off
[3 6 7 8]
Output task bar
[TLC]
Tab
[TRC]
Shift + Tab
[TLC + TRC]
Enter
[SPC + 1 2 7]
Toggle Braille input on/off
[SPC + 1 7]
Toggle ATC on/off
[SPC + 1 2 3]
Toggle ATC reading protocol on/off
[SPCL + 1 2 3 7 ]
If there is any text to the left of the Braille display section,
it moves to the left, if not, it moves one line up.
[SPCR + 4 5 6 8]
If there is any text to the right of the Braille display section,
it moves to the right, if not, it moves one line down.
[SPCL + SPCR + 1 2 3 7]
Move the Braille display section one line up.
[SPCL + SPCR + 4 5 6 8]
Move the Braille display section one line down.
j
[2 4 5]
Activate the JAWS settings menu
%
[1 2 3 4 5 6]
Activate the screen reader settings menu (JAWS)
d
[1 4 5]
Desktop minimizes all applications
h
[1 2 5]
Activate JAWS Help (paste + F1)
$
[4 6]
Tab
k
[1 3]
Shift Tab
g
[1 2 4 5]
Grade 2 on/off
m
[1 3 4]
Alternative for activating the menu bar
s
[2 3 4]
Start menu
+
[2 3 5]
Toggle 6/8 dot Braille
=
[2 3 5 6]
System Tray
z
[1 3 5 6]
Announce time
|
[3 4]
Status cells on/off
c
[1 4]
Ctrl+Tab
C
[1 4 7]
Shift Ctrl+Tab
e
[1 5]
ESC
?
[2 6]
Enter
b
[1 2]
Braille cursor tracking on/off
f
[1 2 4]
Active cursor tracking on/off
v
[1 2 3 6]
Set level of Braille contractions
By entering letters in Braille, you can in addition input the so-called mnemonic commands
that are listed below:
Page 78
Page 79
Active Braille
The Active Braille as Braille Display
Handy Tech
Elektronik GmbH
[CR + 1] or [CR + 4]
Mark a text block (beginning and end of block)
[CR + 6]
Describe object at the CR position
[CR + 8]
Right mouse click at the CR position
[CR + TU] or [CR + TD]
Describe the font
[S1]
Toggle attribute / text mode
[S2]
Change attribute representation, underline with dots 7+8
[S3]
Toggle unconditional / conditional cursor tracking
[S4]
Toggle active cursor tracking on/off
Control Key/Braille Dot
Function
[7]
Use Live-Focus
[3]
Top
[2]
Left by one width
[1]
One line up
[SPCL] or [TU]
Back
[SPCR] or [TD]
Forward
[4]
One line down
[5]
Right by one width
The cursor routing keys (CR) are used to directly place the cursor at that text position. In
addition, the following functions can be initiated by activating cursor routing keys in
combination with certain control keys.
If the four status modules are in use on the Braille display, the CR keys above the status
elements (S1 through S4) have the following functions:
7.3 Screen reader using Windows, Example Hal/SuperNova
Hal converts the information on the PC screen into speech and into Braille output, while
SuperNova offers the additional option of displaying the screen information enlarged for
seeing-impaired users. The functionality of Hal and SuperNova for Windows is so
extensive that only the basic functions for operating the Braille display can be described in
brief in this section.
In addition to navigating, the most important keys for operating Hal/SuperNova with the
Active Braille are [7] and [3]. [7] switches into Live-Focus, and [3] activates the virtual
focus. The virtual focus can be used to explore the contents of the screen, while also
providing an opportunity to activate the Windows-elements displayed on the Active Braille.
In contrast, Live-Focus tracks whichever Windows-element is the most relevant at the
moment. For example, when entering text, if a cursor routing key is pressed at one of the
Braille modules, this result in a mouse click at that text position, which means the cursor is
now at this location.
7.3.1 Overview
This table lists all functions associated with the keys on the Active Braille. We have not
included an exhaustive description of each of the functions, because they are already
contained in the manuals for Hal and SuperNova.
Page 79
Page 80
Handy Tech
Elektronik GmbH
Active Braille
The Active Braille as Braille Display
Control Key/Braille Dot
Function
[6]
Braille down
[8]
Go to Live-Focus
[SPCL + SPCR]
Toggle status modules on/off
[7 8]
Physical / logical mode
[3 8]
Braille cursor style
[2 8]
Eight dot / six dot Braille
[1 8]
Handy Tech configuration dialog
[4 8]
Expand gap on/off
[5 8]
Use virtual focus
[2 3]
Beginning of line
[5 6]
End of line
[1 2 3]
Top of file
[4 5 6]
End of file
[5 6 8]
Run through attributes
[TLC]
Tab
[TRC]
Shift + Tab
[TLC + TRC]
Enter
[SPC + 1 2 7]
Toggle Braille input on/off
[SPCL + 1 2 3 7]
Back
[SPCR + 4 5 6 8]
Forward
[SPCL + SPCR + 1 2 3 7]
One line up
[SPCL + SPCR + 4 5 6 8]
One line down
[SPC + 1 7]
Toggle ATC on/off
[SPC + 1 2 3]
Toggle ATC reading protocol on/off
%
[1 2 3 4 5 6]
Activate system control
h
[1 2 5]
Help
$
[4 6]
Tab
k
[1 3]
Shift Tab
g
[1 2 4 5]
Literary Braille on/off
m
[1 3 4]
Alternative for activating the menu bar
s
[2 3 4]
Start menu
+
[2 3 5]
Eight dot / six dot Braille
=
[2 3 5 6]
System Tray
z
[1 3 5 6]
Announce date and time
c
[1 4]
Ctrl + Tab
C
[1 4 7]
Shift Ctrl + Tab
e
[1 5]
ESC
?
[2 6]
Enter
f
[1 2 4]
Tracking on/off
v
[1 2 3 6]
Set level of Braille contractions
By entering letters in Braille, you can in addition input the so-called mnemonic commands
that are listed below:
The cursor routing keys (CR) are used to directly place the cursor at that text position. In
addition, the following functions can be initiated by activating cursor routing keys in
Page 80
Page 81
Active Braille
The Active Braille as Braille Display
Handy Tech
Elektronik GmbH
[S1]
Run through attributes
[S2]
Set level of Braille contractions
[S3]
Tracking on/off
[S4]
Physical / logical mode
Control Key/Braille Dot
Function
[SPC + 1]
Move to previous item
[SPC + 4]
Move to next item
[SPC + 3]
Move to previous item using rotor setting
[SPC + 6]
Move to next item using rotor setting
[SPC + 2 3]
Select previous rotor setting
[SPC + 5 6]
Select next rotor setting
[SPC + 3 6]
Activates the selected object
[SPC + 1 2 5]
Activates the Home button
[SPC + 1 3 5]
Scroll right one page
[SPC + 2 4 6]
Scroll left one page
[SPC + 1 4 5 6]
Page down
[SPC + 1 2]
Activates the Back button if present
[SPC + 1 2 3]
Move to the first element
[SPC + 4 5 6]
Move to the last element
[SPC + 2 4 5 6]
Read page starting at the top
[SPC + 1 2 3 5]
Read page starting at selected item
[SPC + 2 3 4]
Goes to the status bar
[SPC + 3 4]
Speak page number or rows being displayed
[SPC + 4 7] iPad only
Move to next container
[SPC + 1 7] iPad only
Move to previous container
[SPC + 4 or 5]
Moves through the list
[SPC + 2]
Pan Braille to the left
[SPC + 5]
Pan Braille to the right
[SPC + 1 2 3 4]
Pause or continue speech
[SPC + 1 3 4]
Toggle speech on and off
[SPC + 1 2 3 4 5 6]
Toggle Screen Curtain on and off
[SPC + 2 3 6]
Toggle between 6-dot and 8-dot Braille
[SPC + 1 2 4 5]
Switch between contracted and uncontracted braille
[SPC + 3 4 5]
Activates the Volume Up button
[SPC + 1 2 6]
Activates the Volume Down button
[SPC + 1 2 3 4 6]
Set label
combination with certain control keys. If the four status modules are in use on the Braille
display, the CR keys above the status elements (S1 through S4) have the following
functions:
7.4 VoiceOver: Screen reader for Apple iOS Devices
You can also use your Active Braille as a Braille display for your iPhone, iPod, iPad or
Mac. Please establish a Bluetooth connection as described in chapter 2.7.2 Bluetooth
Apple iOS Device Tie-In. In the following table you find the key commands for controlling
your iOS device with the Active Braille using VoiceOver:
Page 81
Page 82
Handy Tech
Elektronik GmbH
Active Braille
The Active Braille as Braille Display
Control Key/Braille Dot
Function
[SPC + 1 3]
Keyboard help
[SPC + 2 3 4 5]
Activates the Tab key
[SPC + 1 2 5 6]
Activates Shifl Tab
[SPC + 1 5]
Activates the Return key
[SPC + 8]
Activates the Return key
[SPC + 1 4 5]
Activates the Delete key
[SPC + 7]
Activates the Delete key
[SPC + 2 5 6]
Select text
[SPC + 2 3 5]
Deselect text
[SPC + 1 4]
Copy
[SPC + 1 3 4 6]
Cut
[SPC + 1 2 3 6]
Paste
[SPC + 1 3 5 6]
Undo typing
[SPC + 1 4 6]
Activates the Eject key
[SPC + 3 4 5 6]
Scroll up one page
[SPC + 1 4 5 6]
Scroll down one page
7.5 TALKS&ZOOMS: Screen reader for Mobile Telephones
TALKS&ZOOMS is a screen reader for the mobile phone operating system Symbian. The
information contained on the screen is output as voice. With TALKS&ZOOMS, the
information is also converted into Braille, and Braille inputs for controlling the mobile phone
are made possible. There for you need to install the corresponding Braille driver on your
phone.
TALKS&ZOOMS is active as soon as it has been installed, neither does it need any
separate start up procedure later. In order to use the TALKS&ZOOMS features most
efficiently, we recommend listening to the Talks manual, which is included on audio CD.
This manual is also provided in printed form.
7.5.1 Quick Start
Dependent on which model of mobile phone you are using, the edit, menu or CHR key is
used as the Talks key. This means that if you press the Talks key first and then other keys,
you are entering Talks commands. For example, if you press Talks, followed by ”0”, you
will activate the training mode. This allows you to become familiar with all of your cell
phone's keys without actually initiating their functions. To exit training mode, press Talks,
then ”0” again. To stop the voice output, keep pressing the Talks key for a little while.
If you have connected your Active Braille to the mobile phone via a wireless Bluetooth link,
you can also operate all of the mobile phone's functions from the Braille keyboard. For
example, you can navigate forward or to the right with [TD] and back or to the left with
[TU]. You can toggle the Braille output by pressing the Talks key followed by a long press
on the End key.
If you press the right Triple Action Key in the center, this will mean Enter as usual. The
center position of the left Triple Action Key is the backspace key.
Page 82
Page 83
Active Braille
The Active Braille as Braille Display
Handy Tech
Elektronik GmbH
Identification
Description
F:
This letter precedes the selected item from any list, such as the phone
numbers directory, a list of folders (e.g., in "Messages"), or a list of
applications (e.g., under "Extras").
M:
The prefix "M" indicates the selected item from a menu.
T:
This identification letter precedes the line of text that contains the cursor.
S:
The meaning is the same as "T", with the block marking function active.
===
These characters appear before and after the title of the active window.
Mobile Phone Keys (Description)
Active Braille Keys
Space key
SPCL or SPCR (SPC)
Backspace
SPCL + 1 2 (Chord b) or 7
Enter
8 or TRC
Menu
SPCL+1 2 3 4 5 6
Left
SPCL+7
Right
SPCL+8
Up
SPCL+1
Down
SPCL+4
Ctrl+Left
SPCL+3
Ctrl+Right
SPCL+6
Ctrl+Up
SPCL+2
Ctrl+Down
SPCL+5
Alt+Left (Pos1)
SPCL+1 3 (Chord k) Series 80 only
Alt+Right (End)
SPCL+4 6 Series 80 only
Ctrl+Alt+Up (top of file)
SPCL+1 2 3 (Chord l)
Ctrl+Alt+Down (end of file)
SPCL+4 5 6
Backspace
SPCL+1 2 (Chord b)
Shift+Backspace (Delete)
SPCL+4 5
Tab
SPCL+5 6 or SPCL+2 3 4 5 (Chord t)
Series 80 only
Shift+Tab
SPCL+2 3 or SPCL+2 3 4 5 7 (Chord T) Series 80
only
If you are within an input field or the Editor, you can immediately begin to enter Braille. In
contrast to the internal note taking function of the Active Braille, TALKS&ZOOMS does
differentiate between the left and right space keys on the Active Braille. The left space key
activates Chord commands, e.g., [SPCL + 1 4] is equivalent to Chord c for copy, etc. The
right space key activates Talks commands.
7.5.2 List of Identification Letters
In most cases, the Braille display for TALKS&ZOOMS will begin with an identification
letter, indicating the type of text output displayed. This is a simple method for you to stay
oriented. The following types of text output are currently defined:
7.5.3 List of Braille Commands
The following table provides an overview of the operation of a cell phone by means of the
Active Braille's Braille keyboard. Note: some functions are only available on Series 80
Phones, which is also listed below:
Page 83
Page 84
Handy Tech
Elektronik GmbH
Active Braille
The Active Braille as Braille Display
Mobile Phone Keys (Description)
Active Braille Keys
Ctrl+c (Copy)
SPCL+1 4 (Chord c)
Ctrl+x (Cut)
SPCL+1 3 4 6 (Chord x)
Ctrl+v (Paste)
SPCL+1 2 3 6(Chord v)
Ctrl+f (Search)
SPCL+1 2 4 (Chord f)
Help
SPCL+1 2 5 (Chord h)
Esc
SPCL+1 5 (Chord e)
Display the command keys; can be
initiated with the cursor routing keys
SPCR+2
Display the active window's title
SPCR+1
Grade 2 on/off
SPCR+4
Display phone reception strength,
the selected network, and the
remaining battery charge.
SPCR+5
Switch between the cursor formats
"no cursor", "78", and "block
character".
SPCR+6
Display function keys. The function
can then be selected by pressing
one of the three cursor routing keys
above that function's abbreviation.
SPCR+8 Series 80 only
TALKS
SPCR+2 3 4 5
Open the window "TALKS&ZOOMS
Settings"
SPCR+2 3 4 5 7
Toggle "Speak With Closed Cover"
on/off (if using a headset)
SPCR+2 3 4 Series 80 only
Press a command key [Key1] to
[Key4]
SPCR+CR1 to 4
Move Braille display up/left: also
moves the cursor or highlighting.
TLU or TRU
Move Braille display down/right: also
moves the cursor or highlighting.
TLD or TRD
Place the cursor at the
corresponding text position.
Begin marking text (beginning of
block) by pressing the CR key above
the cursor position (end of block is
set by activating any CR key).
Activate a menu item.
CR
7.5.4 Useful Tips for Using TALKS&ZOOMS
If you want to mark a block of text for copying, cutting, or deleting, press the cursor
routing key at the beginning of the desired block to position the cursor at that
location. By pressing the same cursor routing key again, you activate the marking
function, and the identification letter on the Braille display changes from "T" to "S" to
indicate this. Next, press the cursor routing key at the end of the desired text block.
The marked block will now be underlined with dots 7 and 8. You should execute
whichever block function you were planning now, before moving the Braille display
Page 84
Page 85

Active Braille
The Active Braille as Braille Display
Handy Tech
Elektronik GmbH
anywhere else, because otherwise the cursor will be moved along with the Braille
output, and thus the marked block will be lost.
If you change the active application, or if you change the marked position,
TALKS&ZOOMS will automatically show the marked position on the Braille display.
If no marked block is available, the title of the active window will be displayed.
Utilizing only the Braille display, without voice output, significantly speeds up the
operation of the mobile phone. As long as you are using Braille output, we therefore
recommend turning voice output off.
Page 85
Page 86

Handy Tech
Elektronik GmbH
Active Braille
Operation Settings for Handy Tech Braille
Displays
8 Operation Settings for Handy Tech Braille Displays
The universal Handy Tech Braille display driver features several optional settings for
operating your Active Braille with your PC and screen reader. In order to open the Settings
window activate the [1 8] keys simultaneously. The Settings window can also be started up
from the Start menu, under "Programs – Handy Tech – Configure Braille display driver."
The Braille display driver does not need to be running.
There are the following six tabs in the Settings window:
Connection
ATC
Status Cells
Key Actions
Miscellaneous
Info
Your changes in the settings of the different tab sheets will be saved by pressing the OK or
Apply Button. If you choose the OK Button, the dialog will be closed.
The following sections provide more details about the settings that are available under
these six tabs.
8.1 Connection
The check box "Activate Driver" is checked to enable your Active Braille to be driven by
the screen reader. If you uncheck this box, the driver will be deactivated, and you will not
be able to drive any Handy Tech Braille display.
The field "Device Detection" provides two options: "Automatic" means that your screen
reader will detect the Braille display regardless of the interface through which it is
connected to your PC. The second option is to specify a fixed interface at which the screen
reader should look for the Braille display. In the corresponding combo box you can choose
one of the existing COM interfaces. The type of the interface (e.g. USB or Bluetooth) will
also be shown.
The field "Show Pop-Up Braille Display Information" allows you to specify whether you
want to be informed which Braille display system is connected to which of your PC's
interfaces at the start-up of the screen reader. If this setting is activated, there will be a
small pop-up box during start-up containing the Braille display driver's version number, any
detected Braille displays, and the interface designation.
You have the following three options:
When changing device or interface: The pop-up box appears only if you have
connected a different Handy Tech Braille display to the PC, or if you have
connected the same Braille display to a different interface on your PC.
Never: The pop-up box will not be displayed during start-up.
Always at start: Every time your screen reader starts up, the pop-up box will be
displayed.
Page 86
Page 87

Active Braille
Operation Settings for Handy Tech Braille Displays
Handy Tech
Elektronik GmbH
If the check box "Connect Braille display even when switched on after start up" is checked,
the Braille display may be connected to the computer while the screen reader is already
running, and the Braille display will be recognized. The default setting is for this check box
to be unchecked.
Checking the check box "Reconnect Braille display automatically when disconnect"
instructs the screen reader to search for the Braille display in brief intervals if there has
been a disconnection. For example, if you turned off the Braille display in order to remove
the keyboard or to install the power cable, the screen reader will continuously search for a
Braille display until you turn the power back on. By checking the check box "Notify when
searching for connection" you can cause the screen reader to inform you of this process. If
you do, you will receive the message e.g. "Searching Active Braille" in short intervals.
8.2 ATC
The Active Braille's integrated ATC technology detects your reading position on the Braille
display, which opens up innovative features in the operation and control of the PC. This
tab is shown only if your screen reader supports the ATC functions through the Handy
Tech Braille display driver.
ATC functionality is so extensive that we have dedicated a separate section to the ATC
features. Please review the settings available under this tab in the next Chapter 9, Active
Tactile Control (ATC).
8.3 Status Cells
The so-called status modules on your Braille display are used to indicate where your
current position is on the screen, for example, within a menu or within a text field. Exactly
what information is shown on the status modules depends on the screen reader. Under the
"Status Cells" tab, you can specify some of the options for these status modules yourself.
The field "Device" allows you to specify which Handy Tech Active Braille or Braille display
you are using. By default, the actual connected device is recognized and becomes the
default setting here. However, this setting provides you with the option of configuring other
Handy Tech Braille displays, even though they are not currently connected to the
computer.
In the next field, you may specify the size of the status display section. As a default, four
Braille elements are used as status modules. There is automatically one blank position
inserted between the status modules and the remaining positions on the Braille line. The
blank element has no function.
The field "Position of status cells" allows you to determine whether the status modules
should be displayed on the left or right side of the Braille line. As a default, they are
displayed on the left.
The check box called "Display status cells" lets you enable and disable the status display.
The status information is not displayed by default. There is a quicker method for enabling
and disabling the status display: pressing [SPCL + SPCR] simultaneously. When you use
this method you don't need to open the Settings menu.
Page 87
Page 88

Handy Tech
Elektronik GmbH
Active Braille
Operation Settings for Handy Tech Braille
Displays
8.4 Key Actions
This tab sheet allows you to adjust the behavior of the single keys strokes of your Active
Braille in the following three different ways:
Key Lock: Keys, defined as locked, will be ignored when pressed.
Fast Keys: Keys, defined as fast keys, performs their action already when pressed
and not – as usual – when released.
Repeat Keys: Keys, defined as repeat keys, will repeat their action continually while
be pressed.
8.4.1 Key Lock
Single keys of the Active Braille can be locked to prevent unintentional functions by
pressing a key by mistake. This is helpful when starting to learn how to use the Active
Braille.
With the checkbox “Use Key Lock“, you can activate this function. The button “Locked
Keys…” will open the dialog “Define locked keys for device”. In the list box “Device” the
connected Braille display is already preselected. In the list box “Available keys” you
choose the keys to be locked. With the “Add” button you move the selected key into the list
box “Locked keys”. The “Remove” button removes the key back to the available keys. By
default, no keys are locked.
8.4.2 Fast Keys
Fast keys, also known as hot keys, refer to keys that implement the function associated
with that key as soon as the key is pressed, instead of when the key is released. If one of
the keys to be used in a key combination is a fast key, the fast key must therefore be
pressed last.
The check box "Use Fast Keys" is used for enabling this function. The button “Fast
Keys…” will open the dialog “Define Fast Keys for device”. In the list box “Device” the
connected Braille display is already preselected. In this dialog you can then select the keys
you want to define as fast keys from the list box "Available keys" and move them by
pressing the “Add” button into the list box “Fast Keys”. By default, no keys are defined as
fast keys. There are no fast keys available for Braille input.
8.4.3 Repeat Keys
With the settings under "Repeat Keys" you can specify the repeat interval at which a
function initiated by a key is repeated when that key is continually pressed. This feature
makes it easier, for example, while you are trying to navigate through a list, because you
do not need to keep pressing the forward or backward key for each item in the list, but
keep holding down that key until the cursor is at the desired item.
The check box "Use Repeat Keys" is used for enabling this function. The default setting is
that key repeats are disabled. The button “Repeat Keys…” will open the dialog “Settings
for repeat keys”. In the list box “Device” the connected Braille display is already
preselected. In this dialog you can then select the keys you want to define as repeat keys
from the list box "Available keys" and move them by pressing the “Add” button into the list
box “Repeat Keys”. For the Active Braille, the keys [1], [4], [TLU], [TLD], [TRU] and [TRD]
Page 88
Page 89

Active Braille
Operation Settings for Handy Tech Braille Displays
Handy Tech
Elektronik GmbH
are implemented with a default repeat interval of 500 milliseconds if you activate key
repeats. There is no key repeat available for Braille input.
8.5 Miscellaneous
Under the tab "Miscellaneous", you can adjust the dot firmness and specify whether your
actions should be tracked in a protocol file. Protocol function is available in case you enlist
Technical Support. Please check this box only when asked to do so by your customer
service representative. You will then also be able to specify where this protocol file should
be saved, in the field called "Protocol file".
The check box "Quick Entry in PC mode by Dot 7 as Back Space and Dot 8 as Enter"
results in the [7] key functioning like a Backspace key during Braille input, and the [8] key
as Enter. If you want to disable this option, you can do so by unchecking this box, which is
checked by default.
8.6 Info
In the ”Info“ tab sheet you find important information about your Active Braille and the
driver software, you are using.
In the field ”Active Braille display“ you find the type of Braille display, you are using, as well
as the interface it is connected to and the serial number of your Braille display. In addition
you find a reference when the next recommended maintenance of your Braille display is
due.
In the field “Driver properties” the type of screen reader, you are using is listed, as well as
the version of your driver.
At “Your dealer” you get the contact details of your Handy Tech dealer with postal address,
telephone number and E-mail.
Page 89
Page 90

Handy Tech
Elektronik GmbH
Active Braille
Active Tactile Control (ATC)
9 Active Tactile Control (ATC)
The Active Braille's integrated ATC technology now makes it possible for the first time to
detect the Braille dots that you touch. By evaluating the nature of individual tactile
contacts, your reading position on the Braille line can be determined. Using various
assistant functions that can be customized, your reading position can be employed to
control the screen reader. Depending on your current reading status, certain actions can
be initiated. ATC can recognize four different reading behaviors:
Normal reading: The reading position is moving from left to right.
Fast reading: Reading speed is faster than at a pre-determined rate of characters
per second.
Resting: Detected when one character is touched for longer than a specified time
period.
Reading backwards: The reading position is moving from right to left.
A certain action can be assigned to each of these four behaviors. There are two
customizable modes for the so-called assistant functions. The two modes are "Reading"
and "Learning". The tab "ATC" in the Settings menu of the Handy Tech Braille system is
used to specify what your Active Braille and your screen reader should do when each
reading behavior is detected, depending on whether you selected either Reading or
Learning mode.
Under the ATC tab, the check box "Use ATC" allows you to enable or disable the ATC
functionality. There is also a quicker way to do this, by pressing [SPCL + 1 7] (Chord A).
By default, this function is unchecked.
The sliding "Sensitivity" control is used to set the sensitivity of the ATC sensors to match
your personal reading style. You can increase or decrease, respectively, the sensitivity by
activating the "right" or "left" cursor key. Advanced Braille readers with a light touch while
reading Braille could experience that the reading position is not detected reliably even with
high sensitivity. In this case we recommend to lower the dot firmness to “weak” (see
chapter 8.5 Miscellaneous) to improve the detection.
The field "Assistant Mode" is used to specify whether you want to take advantage of the
assistant functions for reading or learning Braille. If you have selected one of the two
functions in the combo box, you can use the "Settings" button to determine how the screen
reader should react to your reading behavior. More details on these settings are provided
below in Section 9.1, ATC Assistant for Reading or Learning.
The ATC-monitor enables the text currently being displayed on the Braille line to be shown
in a window corresponding to the size of the Braille line on the monitor, as well, so that a
seeing person is able to follow what is going on on the Braille display. The Settings button
in this field allows you to specify the color used for displaying the reading position. A
different color can be specified for each reading behavior. More details on these settings
are provided below in Section 9.4, ATC-Monitor Settings.
Page 90
Page 91

Active Braille
Active Tactile Control (ATC)
Handy Tech
Elektronik GmbH
If the check box "Show monitor after start-up" is checked, the ATC-monitor will
automatically start upon the screen reader's start-up. If you want to turn on the ATCmonitor at a later time, you can go into this menu and activate the button "Start monitor
now".
If you check the "Generate protocol" check box at "Reading protocol", everything you enter
or read on the Braille display will be logged in a protocol file as of the moment when you
click "OK" or "Apply". It’s faster to use the short key combination [SPCL + 1 2 3] (chord l)
to activate the logging function. If ATC was off, it will be activated. You are free to choose
any name for this protocol file. The default file name is HtAtc.log. Generating the reading
protocol stops only when you deactivate this "Generate protocol" option again, or when
you quit the screen reader. The protocol file can be scanned and analyzed by an
evaluation program later.
9.1 ATC Assistant for Reading or Learning
You can specify an action as your screen reader's reaction to your reading status. The
following actions are available:
no action
speak letter: the letter at the reading position will be spoken.
speak word: when touching the first letter of a word, the word will be spoken.
Optionally it is also possible to change the setting so that the word is spoken when
read completely. Here you can also set a delay time.
speak Braille display: the text shown on the Braille display will be spoken by the
speech output.
low signal
high signal
speak Braille display and move to the next line: When using this setting with
"reading fast", you can skip through text by the length of the Braille display till you
reach the section, where you want to read without speech. After refreshing the
Braille display, the reading of the previous line will be interrupted and the reading
starts with the new position.
say all and route Braille line: starting to read the whole text and the Braille display
will be synchronized with the reading position of the speech output. When detecting
any reading position, the speech will stop and the Braille display shows the current
position.
say current character´s attributes: the attribute at the current reading position will be
announced e.g. "bold Arial 12".
say character attribute changes: if the attribute at the reading position changes, like
from normal to bold, than "bold" will be announced. Also changes of font type and
font size will be announced e.g. "bold Arial 12".
route mouse cursor to reading position: the mouse pointer will – depending on the
reading behavior – be moved with the reading position. This helps to synchronize
the magnification area on the screen with the reading position on the Braille display.
The following four behaviors can be detected as your reading status:
reading fast
reading normal
Page 91
Page 92

Handy Tech
Elektronik GmbH
Active Braille
Active Tactile Control (ATC)
resting
reading backwards
It is also possible to delay the speech output for a certain amount of time if you do not
want the text to be spoken right away. This delay is entered in milliseconds. The possible
range for this value is from 0 (no delay) to 5000 milliseconds.
You can also determine the reading speed after which the ATC-function should define your
reading speed as "fast". For this specification, you can enter any value from 0 to 200
characters per second.
The time period after which the ATC-function should identify your reading status as
"resting" can also be customized. This value is specified in milliseconds.
You can further control the speech output by checking or unchecking the check boxes
"Speak word only at end of word" and "Also spell word". If "Also spell word" is checked,
you can then also insert a delay before speech output starts by activating the check box
"Use delay while spelling word". These settings are implemented only if you have assigned
the action "Speak word" to any one of the four possible reading behaviors.
You can control what happens when you reach the end of the Braille line in the field
"Action when line has been read". Three check boxes are available. If you check "Signal
tone", a signal tone will be emitted when you have read the last character on the line. If the
check box "Automatic scrolling after x milliseconds" is checked, you don't need to press
[TRD] to advance when you reach the end of the line, instead, the next line will
automatically be displayed after the specified time has elapsed. If you activate the check
box "Indicate empty lines", blank lines will be shown on the Braille display by setting all the
dots of the first three elements on the display. This is useful if you have automatic scrolling
enabled, because now you do not have to manually advance through blank lines by
pressing [TRD].
9.2 Tips for Utilizing ATC to Learn Braille
In this section, we provide some useful tips for how you can improve your Braille reading
skills with the help of ATC. First, enable ATC by entering the key combination [SPCL + 1
7] (Chord A) This will activate the Braille system's reading position detection via ATC. You
can turn ATC off again by entering this same key combination.
In the default setting, the Assistant Mode is "Reading". Under the tab ATC in the Settings
window for Handy Tech Braille displays, change the Assistant Mode to "Learning". Now,
after you have read an entire word, the word will be spoken as speech output. In this way,
ATC can help you to become more secure in reading text. If you come across any Braille
character that you do not recognize, you only need to remain at that character and the
speech output will spell the character. Individual letters and characters are also spoken if
you are reading backwards.
ATC can also be extremely useful when you are learning a foreign language. For example,
if you want to learn how to pronounce, let's say, German words, correctly, you can first
switch your speech output to German. Then, set the Assistant Mode under the tab ATC in
the Settings window for Handy Tech Braille displays to "Learning". We recommend setting
Page 92
Page 93

Active Braille
Active Tactile Control (ATC)
Handy Tech
Elektronik GmbH
a speech output delay of approximately 2000 milliseconds, i.e., 2 seconds. Now when you
activate ATC, you will have two seconds after having read an entire word to pronounce it
yourself, before the speech output speaks the word as well.
9.3 Tips for Utilizing ATC for the Experienced Braille Reader
In this section, you will find tips on how the ATC technology can help you, as an
experienced Braille display user, to operate your PC and your screen reader program even
more efficiently.
Probably the most important Assistant function made possible by ATC is automatic text
scrolling when you reach the end of the Braille line. Enable ATC by entering the key
combination [SPCL + 1 7] (Chord A). This will activate reading position detection via ATC.
In the default setting, the Assistant Mode is "Reading". You can turn ATC off again by
entering the same key combination.
Automatic scrolling is the default setting. The active cursor should be tracking the Braille
display in order to make automatic scrolling of the text possible. If ATC is active, you will
find that the Braille display automatically resets itself to the next segment of text once you
have read to the last character represented on the Braille line, just as if you had entered
[SPCR] or [TRD].
If you leave the default setting in Reading mode, you can also cause the entire text on the
line to be spoken when ATC recognizes fast reading. Simply move quickly across at least
three Braille characters from left to right, which will be detected as fast reading, and the
speech output will speak the entire text on the display. By default, fast reading is
recognized upwards of a reading speed of 15 characters per second. You can customize
this value in the Reading Speed profile.
At this point, we would like to draw your attention to a special feature: If there is a blank
line, the first three elements on the display will be set with all eight dots. This enables the
Braille system to provide automatic scrolling even when there are blank lines.
If you remain at one character for longer than one second or whichever delay you specify
in the Reading Speed profile, that character will be spoken.
We recommend the following ATC-settings for you as an experienced Braille reader:
With "reading normal" we recommend to use "say character attribute changes". Now you
can easily follow attribute changes at the reading position without a hassle switching to
attribute information. This is especially useful when checking the layout for example within
a word document.
With "reading fast" it makes sense to use the action "say all and route Braille line". This
allows you to browse fast through a text till you reached the position you were looking for.
You can assign the reading behavior "resting" with "say current character´s attributes".
This allows you to check the current character´s attributes anytime.
Page 93
Page 94

Handy Tech
Elektronik GmbH
Active Braille
Active Tactile Control (ATC)
For "reading backward" we recommend to assign the action "route mouse cursor to
reading position". This allows you with a small gesture to place the mouse pointer to your
reading position. This can be helpful to route the attention of a sighted person to a specific
text position.
9.4 ATC-Monitor Settings
For the graphic display of the reading modes on the monitor screen, you may assign a
different color to each reading status. The following colors are the default assignments for
each mode:
Finger on line: yellow
Reading status fast: light blue
Reading status normal speed: green
Reading status resting: orange
Reading status reading backwards: red
You can customize the colors by opening the standard Windows color dialog.
Page 94
Page 95

Active Braille
Battery Management
Handy Tech
Elektronik GmbH
10 Battery Management
Your Active Braille features four rechargeable NiMH round cell batteries. The Active Braille
will operate for about 20 hours with new, fully charged batteries. This maximum run time
decreases as the batteries get older. The average useful life of a battery is approximately
2 years with constant recharging and discharging.
Batteries are subject to aging, which can be aggravated under adverse conditions. This
situation prevails if seemingly fully charged batteries operate for only a short time period
before they need to be recharged. You can do a few things to reduce this effect:
Try to always let your batteries discharge completely before recharging them again.
Always use the recharging device integrated into the Active Braille.
10.1 Types of Batteries
The Active Braille utilizes four batteries with the following technical specifications:
Type NiMH (nickel-metal-hydride)
Size round cell (AA)
Rated Voltage 1.2 V
Rated Capacity 2700 mAh
These batteries are regular, commercial rechargeable batteries, which can be purchased
at any appliance store or from Handy Tech. However, please make sure that you are
purchasing batteries with this exact designation. The only permissible deviation from the
above specifications is in the rated capacity. It is best to always replace all four batteries at
once. The rated capacity of the four batteries must be the same.
It is possible to install non-rechargeable batteries of the same ratings in the Active Braille
instead of the rechargeable batteries. However, it is very important that there be no
attempt to charge these batteries, i.e. the power supply or USB cable must not be
connected. This could cause the batteries to burst and destroy the recharging circuitry.
10.2 Battery Charging
The Active Braille contains integrated, intelligent recharging circuitry for charging the
batteries. Recharging starts automatically when the power supply delivered with your
Active Braille is connected to a wall outlet.
Recharging lasts approximately three hours if the batteries were empty. The Active Braille
features electronic recognition and interpretation of the end of recharging, as well as of the
permissible discharge. This way, the batteries can neither be overcharged nor excessively
discharged. The power supply may therefore remain connected for longer periods of time.
Page 95
Page 96

Handy Tech
Elektronik GmbH
Active Braille
Battery Management
10.3 Battery Capacity Display
The device monitors battery status in every operating mode. It is therefore possible to
display current battery status at any time. There are two options for displaying battery
status: display of battery voltage and display of available remaining battery capacity.
Battery voltage is an indirect measure of battery status. The end of discharge has been
defined as 4.3 V. The device turns itself off at a battery voltage of 4.3 V and can only be
turned on again when it has been connected to the power supply or USB for recharging.
With fully charged batteries, the voltage may increase to 5.6 V, or even exceed 6 V during
charging.
If you require information about the batteries, you can display all the important data in the
Info menu, submenu Battery Statistics (see chapter 5.1.9.2).
10.4 Automatic Recognition of Low Voltage
The Active Braille includes battery voltage recognition in two steps. When the voltage falls
to approximately less than 4.6 V, a warning signal sounds every minute. This indicates that
battery capacity is nearing its end, and that the batteries should be recharged. You can
turn the warning signal off or on in the option menu (see chapter 5.1.10.12 Tone signals
(T)).
When the lowest limit of battery voltage has been reached, at about 4.3 V, your Active
Braille turns itself off. However, even in this state it uses up a small amount of electricity.
You should therefore never leave the Active Braille in this state for longer than one day. It
would be best if you begin to recharge the batteries immediately, but you should at least
turn off the Active Braille.
If you expect not to use your Active Braille for several weeks, either recharge the batteries
first, or remove the batteries completely from the device.
10.5 Replacing the Batteries
The Active Braille contains four rechargeable batteries, which enable you to work for about
20 hours independent of a power source. The batteries are fully charged prior to shipment,
so that you can begin working independent of any power source. The power supply
included in the package allows you to recharge the empty batteries.
Due to aging of the batteries, or if you have been using non-rechargeable batteries, the
batteries must be replaced periodically. Please proceed as follows to replace the batteries:
1. Turn off the Active Braille and disconnect the power supply and USB cable.
2. If the Active Braille is inside of its carrying case, disconnect all cables connected to
the device and take it out of the case.
3. Turn the device over horizontally, so that the control keys are underneath.
4. The battery compartments on the bottom of the housing are secured by snap
catches, which should be pushed towards the batteries in order to open the cover.
Please note that the Active Braille features two compartments for 2 batteries each.
Page 96
Page 97

Active Braille
Battery Management
Handy Tech
Elektronik GmbH
5. Now you can remove the batteries by lifting them out by the plus side, which has
the indent.
6. When inserting the new batteries, make sure that the buttons on the top, which
includes an indent (plus pole), point away from the springs contained in the battery
compartments.
7. You lock the covers again by inserting their pins into the appropriate recesses on
the housing and then pushing down lightly on the catches. The catches snap
audibly into place.
8. You may now return the Active Braille to its carrying case and close the Velcro
fasteners.
Important Notes:
1. Please use only NiMH batteries, as the Active Braille's recharging circuitry has been
designed for that type of battery only.
2. If you replace the rechargeable batteries with standard non-rechargeable batteries,
you must make sure that you remove these before connecting the Active Braille to a
power outlet or via USB to your PC, because the recharging circuitry cannot discern
the difference. The batteries would therefore be overcharged (danger of explosion),
which may cause damage to your Active Braille, and in certain cases may be
hazardous to your health.
3. We do not recommend replacing only some of the batteries. If batteries are only
replaced partially, the new cells will be used up more rapidly and cells with a lower
capacity may be damaged. The same applies if you are using non-rechargeable
batteries.
4. Please refer to the applying environmental law for disposal of batteries.
Page 97
Page 98

Handy Tech
Elektronik GmbH
Active Braille
Important Information
11 Important Information
This section contains important safety and warranty information. Please make sure you
have read this information before starting up your Active Braille.
The Braille device's selection circuitry uses a high voltage of 200 V for the operation of the
Braille modules. Danger of electric shock exists when the housing is opened or the device
is handled improperly.
11.1 Start-Up Procedures
After you turn on your Active Braille, the device executes tests of certain of its
components. This section contains a description of each of these tests. If you receive any
error messages upon turning on the unit, you will find help in understanding these
messages in this section.
If you encounter problems, please make sure you review chapter 11.1.2.
11.1.1 Self check of the File System
The self check of the file system searches the entire serial flash memory. During this test,
every file is tested for completeness, whether the data are stored correctly, and whether
any two files point to the same sector (concatenation). Also, the two system sectors are
checked for contents.
This test can conclude with three different possible results, which have varying
consequences, as follows:
1. No error was found during the test: no measures need be taken.
2. An error not affecting the entire file system was detected: the file system issues a
warning message.
3. A fatal error was detected: it is necessary to reformat the entire flash disk.
In the case of a warning, the Active Braille will output the following message on the
display: 'Warning when initializing file system, Backup recommended!'.
As soon as this message has been confirmed by pressing [TLC], a message appears
showing the version number of the file system, the identification number of the error that
was detected, and a description of the error. The display will read as follows: 'FsVersion
x.y, Error: n: t' where x.y is the version of the file system, n the number of the detected
error, and t the description of the error.
If a fatal error has occurred, your Active Braille will display the following: 'Fatal: Error in
file system. Flash disk must be formatted.' Again, this message is followed by the
display of the version number of the file system, the identification number of the error, and
the error description.
Once this information has been confirmed, the Active Braille will begin reformatting the
flash disk. After reformatting, the unit will restart automatically, and you must reload the
message file.
Page 98
Page 99
Active Braille
Important Information
Handy Tech
Elektronik GmbH
Note:
If you receive a fatal error of the file system message after loading new firmware, the
reason may be that the file system's version number has changed.
11.1.2 Saving Files in Case of Fatal Errors
If you receive a fatal error message, but you have not made any changes to the firmware,
it will unfortunately not be possible to salvage your files. Although this is a very unlikely
scenario, we recommend regularly saving your files on a separate system, e.g. a PC.
In addition, it is not impossible that a fatal error of the file system message is received after
you have updated the firmware, but relevant data are still stored on the Active Braille.
!!! IMPORTANT !!!
If this is the case, do NOT confirm the error message by pressing [TLC]! Once the
automatic reformatting has begun, you cannot salvage any of your data!
Instead, turn off the Active Braille and restart it in SAVE mode by pressing the on/off
button for more than 5 seconds. Load the previous firmware version into the Active Braille.
Following this, save all of your files on a PC.
11.2 Symbols
The symbols located on the underside of the unit have the following meanings:
Please read the information in the manual!
Applied Part, Type B
11.3 Safety Information under the Standards for Medical Devices
Medical electric devices are subject to special precautions in regard to electromagnetic
compatibility and must be installed and taken into operation according to the directions
contained in this manual. Please review also the general safety information in Section 11.4
below.
Portable mobile HF communications facilities may affect electrical devices.
11.4 General Safety Information
Avoid contact between your Active Braille and any fluids (rain, coffee...). If fluids enter into
the housing, you may be exposed to the danger of hazardous electric shock. In addition,
the Braille elements may sustain damage, which can only be remedied by costly repairs.
Page 99
Page 100

Handy Tech
Elektronik GmbH
Active Braille
Important Information
Only representatives of Handy Tech Elektronik GmbH or its authorized dealers have
permission to open the Active Braille. The device contains no user-serviceable parts. In
the event of a defect, please contact your dealer, or Handy Tech directly. Only an
authorized Handy Tech dealer has permission to service the device.
Avoid switching your Active Braille on immediately after moving it from a cold room into a
warm environment. Under unfavorable conditions, condensation might ruin the device.
Wait until the device has warmed to room temperature before turning it on.
Do not expose your Active Braille to extreme temperature fluctuations or high humidity
during operation. The operating temperature should be between +10°C (= 50°F) and
+40°C (= 100°F) and relative humidity may not exceed 80%.
The Active Braille must not be operated in moist rooms, for example, bathrooms, because
the device generates voltages up to 200 V.
All cables (interface cable, power cable) must be installed such that they do not pose any
hazards (tripping hazard).
Whenever you want to connect or disconnect the interface cable to or from the Active
Braille, always avoid any direct touching of the wire contacts in the plug. Touching the
contacts could damage your computer interface through static electricity overload.
Before disconnecting the interface cable from the Active Braille, we recommend first
disconnecting the cable from the PC.
Please use only the power supply unit (type FW7555M/09) and cable supplied with your
Active Braille for connecting it to utility power and for recharging the batteries. Never use
the included power supply if the Active Braille contains commercial non-rechargeable or
nickel cadmium-batteries.
When cleaning the device, always disconnect both the power cable and the interface
cable.
If the Active Braille was dropped, the housing has become damaged, or the Active Braille
is malfunctioning, turn the unit off immediately. It needs to be serviced by authorized
service personnel.
The power supply should be disconnected if the unit will not be used for an extended
period of time.
Always finish what you are working on before disconnecting the power supply cable from
the Active Braille. Switching over from the power supply to battery power takes some time,
during which fluctuations in voltage can occur.
This device must be disposed of at the end of its useful life in compliance with applicable
guidelines for electronic devices.
Page 100
 Loading...