

Page 1

4035-MAN5060
SSm
maarrtt AAuuddiioo PPllaayyeerr
User’s Manual
Ver.4.0
HANBiT Electronics Co., Ltd.
http://www.hbe.co.kr
Model : XD403
Page 2

Page 3

1. Preparations ------------------------------------------------------------
2
Features ----------------------------------------------------
4
Safety instruction ---------------------------------------- 5
Inserting battery ----------------------------------------------------
6
Rotating USB connector --------------------------------------------
6
Appearance --------------------------------------------------------------- 7
2. Drive installation for Windows 98 ---------------------------------------- 9
3. Basic function
----------------------------------------------------------- 12
4. Setup menu description
------------------------------------------------ 26
5. Firmware upgrade ------------------------------------------------------- 39
6. Application software ----------------------------------------------------
49
7. Customer Support ----------------------------------------------------------- 50
Troubleshooting --------------------------------------------------------------- 50
Safety ------------------------------------------------------------------------ 51
Product specification ------------------------------------------------------- 52
Customer support and A/S ------------------------------------------------ 53
Company and website ----------------------------------------------------
53
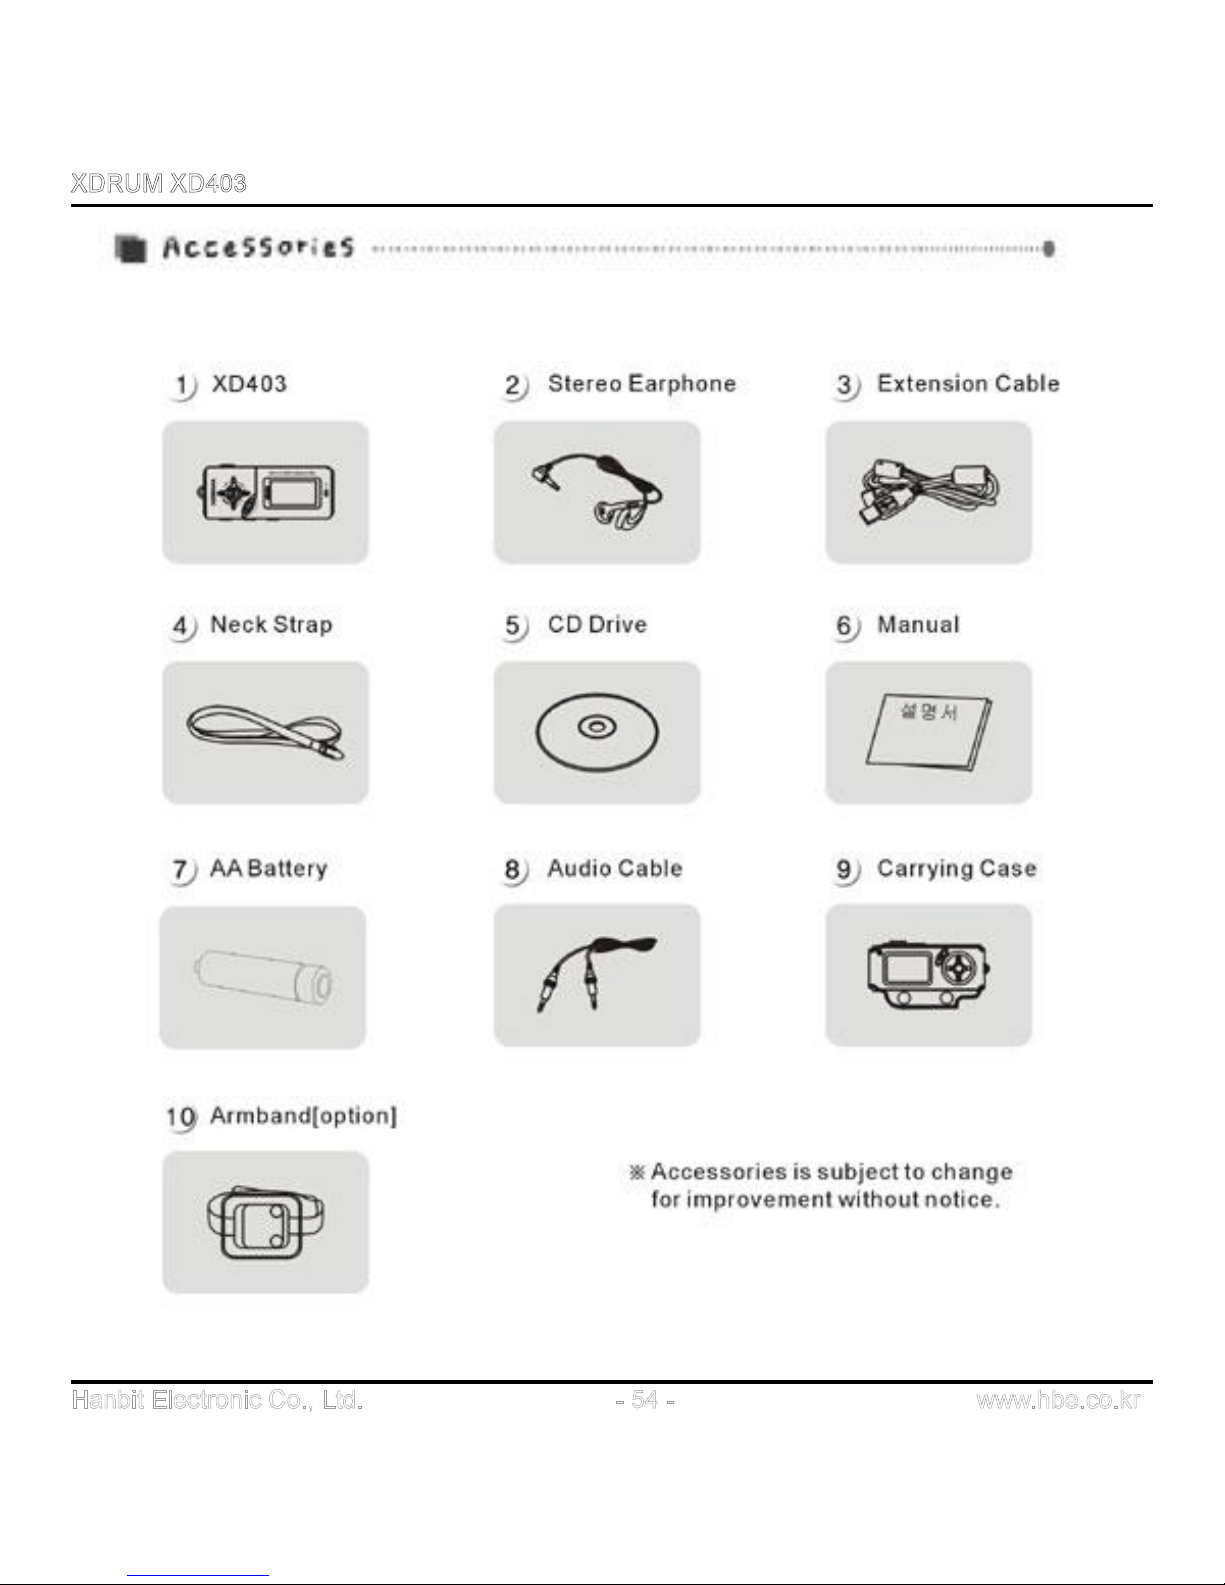
Accessories ------------------------------------------------------------- ------ 54
Warranty card --------------------------------------------------------------- 55
Page 4

l USB portable memory storage device
l Worldwide FM Tuner / Recorder
l LCD back light and 4 line display (4 Line LCD)
l Firmware upgradeable
l User friendly navigation design
l Direct MP3 encoding function: convert external audio files into MP3 files
l 5 Band 7 EQ / User EQ mode support
l Adjustable playback speed and repeat function
l Line-in auto sync. function
l MP3, WMA, ASF format support
l Digital voice recorder
l Sleep power off / Stop power off function
l Sound balance function
l Playlist function
l 10 FM Preset / Auto-scan function
l Built-In speaker
l VAD (Voice Activity Detect) function
l Long-lasting playback time only with a AA battery (more than 20 hours)
l High-brightness LED flashlight
l 5 application software : E-mail, PC Lock, Time Lock, File Lock, My-AD
l Built in rotating USB connector
l Multi-language support
Page 5

l Don’t try to disassemble and repair the
device yourself.
l Don’t push two buttons at the same
time or disjoint the machine.
l Don’t spray or put water directly on the
surface of the device for cleaning. Just
smoothly wipe its surface with dry towel. Don’t
use chemicals or cleaner as they may
damage its surface and color.
l Don’t expose to extreme temperatures
(above 104° F or below 23° F) Don’t expose to
moisture.
l Please contact customer service center
when the player is wet or dropped in water. If
you operate the player when it’s wet, it will
cause malfunctioning.
l Don’t drop or put pressure on the device.
Keep it away from a magnet or a place with
strong vibration
Page 6

2. Insert battery properly in accordance with
the plus (+) and minus (-) directions.
3. Slide the battery cover in the direction of
arrow and close it like the picture.
1. Slide the battery cover in the direction of
arrow and open it like the picture.
Do not place heavy objects on the cover
l Use finger to rotate and pull the USB
connector out as shown in the picture..
Page 7

Page 8

Page 9

Please install the drive before connecting XD403 to PC.
1. Insert the installation CD into CD-ROM Drive.
2. Select Windows 98 Driver folder in the XDRUM XD403 folder in the CD.
3. Execute Win98Driver_XD403P_En.exe in the folder.
4. Click “Next” button to continue and complete the installation.
Page 10

5. Restart your Computer (PC) after completing installation.
6. Connect the USB extension cable to PC’s USB port.
7. If you see “USB CONNECTED!” message on LCD screen,
it’s successfully connected.
Copy and paste files like a USB disk drive as shown below
Page 11

Page 12

● Press and hold PLAY/STOP button to turn on / off the power.
● Lightly press PLAY/STOP button to play or stop music file.
● Push OK button in the direction of + / - to adjust VOLUME.
● Push OK button to 8 or 7 direction to play next or previous music.
● Push and hold PLAY/STOP button to play fast forward or rewind.
● Press OK button on its center to select Music/Menu/Folder.
● Press and hold OK button to display Setup Menu when stop playing.
Page 13

You can easily search songs or folders in MP3 mode by using the NAVIGATION function.
To use the NAVIGATION function, lightly press OK button in MP3 mode and search files by
pushing the OK button toward plus (+) or minus (-) directions. Then, if you press OK button
again, the song you found is selected.
After selection, you can enjoy the song by pressing PLAY/STOP button.
Press and hold REC/MODE button to display FUNCTION MENU.
- Move between menus: pushing OK button to 8 or 7 direction.
- Select Menu/Function: pressing OK button.
Page 14

To use Repeating track function for folders or songs selected, lightly press REC/MODE button
and select Repeating track options one-by-one when MP3 file is in Play or Stop mode.
Repeats the whole track in the folder
Repeats only one song
Stops when all songs in the folder are played
Random Play music regardless of order
Deleting FILE/FOLDER function is only available when Play is stopped (in Stop mode).
In NAVIGATION function, go to the file or folder you want to delete and press A-B/EQ button
to display the message of ‘FILE DELETE, ARE YOU SURE?’, Upon seeing the message,
push OK button to 8 or 7 direction to select YES or NO, and press the OK button to delete
the file or folder selected.
Before deleting a folder, data within the folder must be deleted in advance.
Page 15

Use LOOP REPEATING function when you want to repeat a certain range of file in play.
1. Define Start point of repeat range: define start point (A point) of the repeat range for the
music/voice file in play by pressing A-B/EQ button (A is displayed on the LCD screen).
2. Define End point of repeat range: press A-B/EQ button again at the point where you
want to stop REPEAT. (AàB will be displayed on LCD screen. The defined range is
repeatedly played)
3. To release REPEAT RANGE function, lightly press A-B/EQ button again.
Page 16

EQ function is only operational when MP3 Mode is in Play or Stop.
1. If you press and hold A-B/EQ button when MP3 Mode is in Play or Stop, EQ will be
displayed. If you push the button again and again, the following Timbre will be displayed
consecutively.
(NORMAL - CLASSIC – BASS - LIVE - POP - ROCK - USER EQ)
EQ function is only activated when Study Mode of Setup Menu is off.
2. If you want to define Timbre to your liking, press and hold OK button and select User EQ
in Setup Menu (Please refer to User EQ in Setup Menu section, later)
Page 17

Playlist function allows you to select and play only the songs (up to 10 songs) you want to
listen out of songs stored in MP3 Mode.
1. Using the NAVIGATION function of OK button, select files by pushing the button toward +/-
direction and store files by pressing REC/MODE button
2. Using the NAVIGATION function of OK button, select files by pushing the OK button toward
+/- direction and store files by pressing REC/MODE button.
3. After selecting songs (files), you can play the selected files by pressing PLAY/STOP button.
When PLAY LIST is in play, songs (files) in PLAYLIST will be continuously repeated
regardless of pre-defined REPEAT MODE.
Page 18
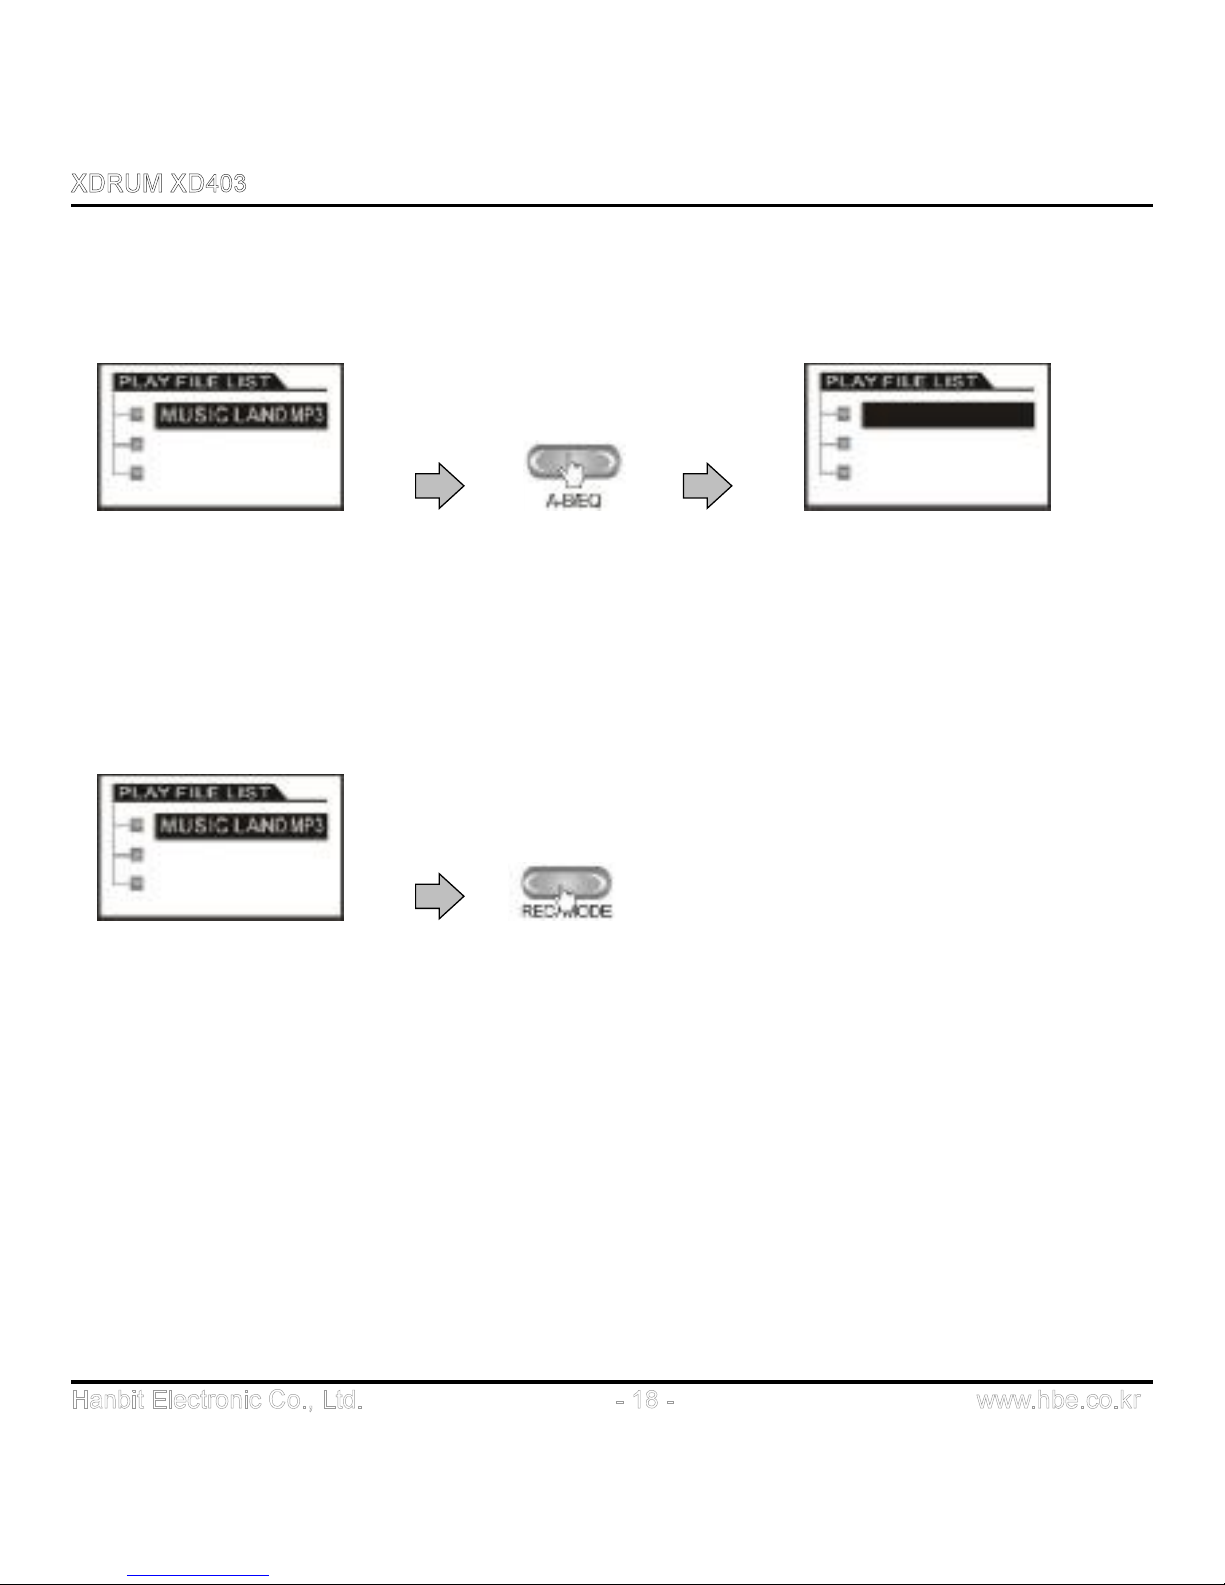
4. To delete a file from PLAYLIST, select the file and press A-B/EQ button and then the file
will be deleted from PLAYLIST.
5. How to get out of PLAYLIST: In Play List mode, lightly press REC/MODE button to return
to MP3 Stop Mode.
Page 19
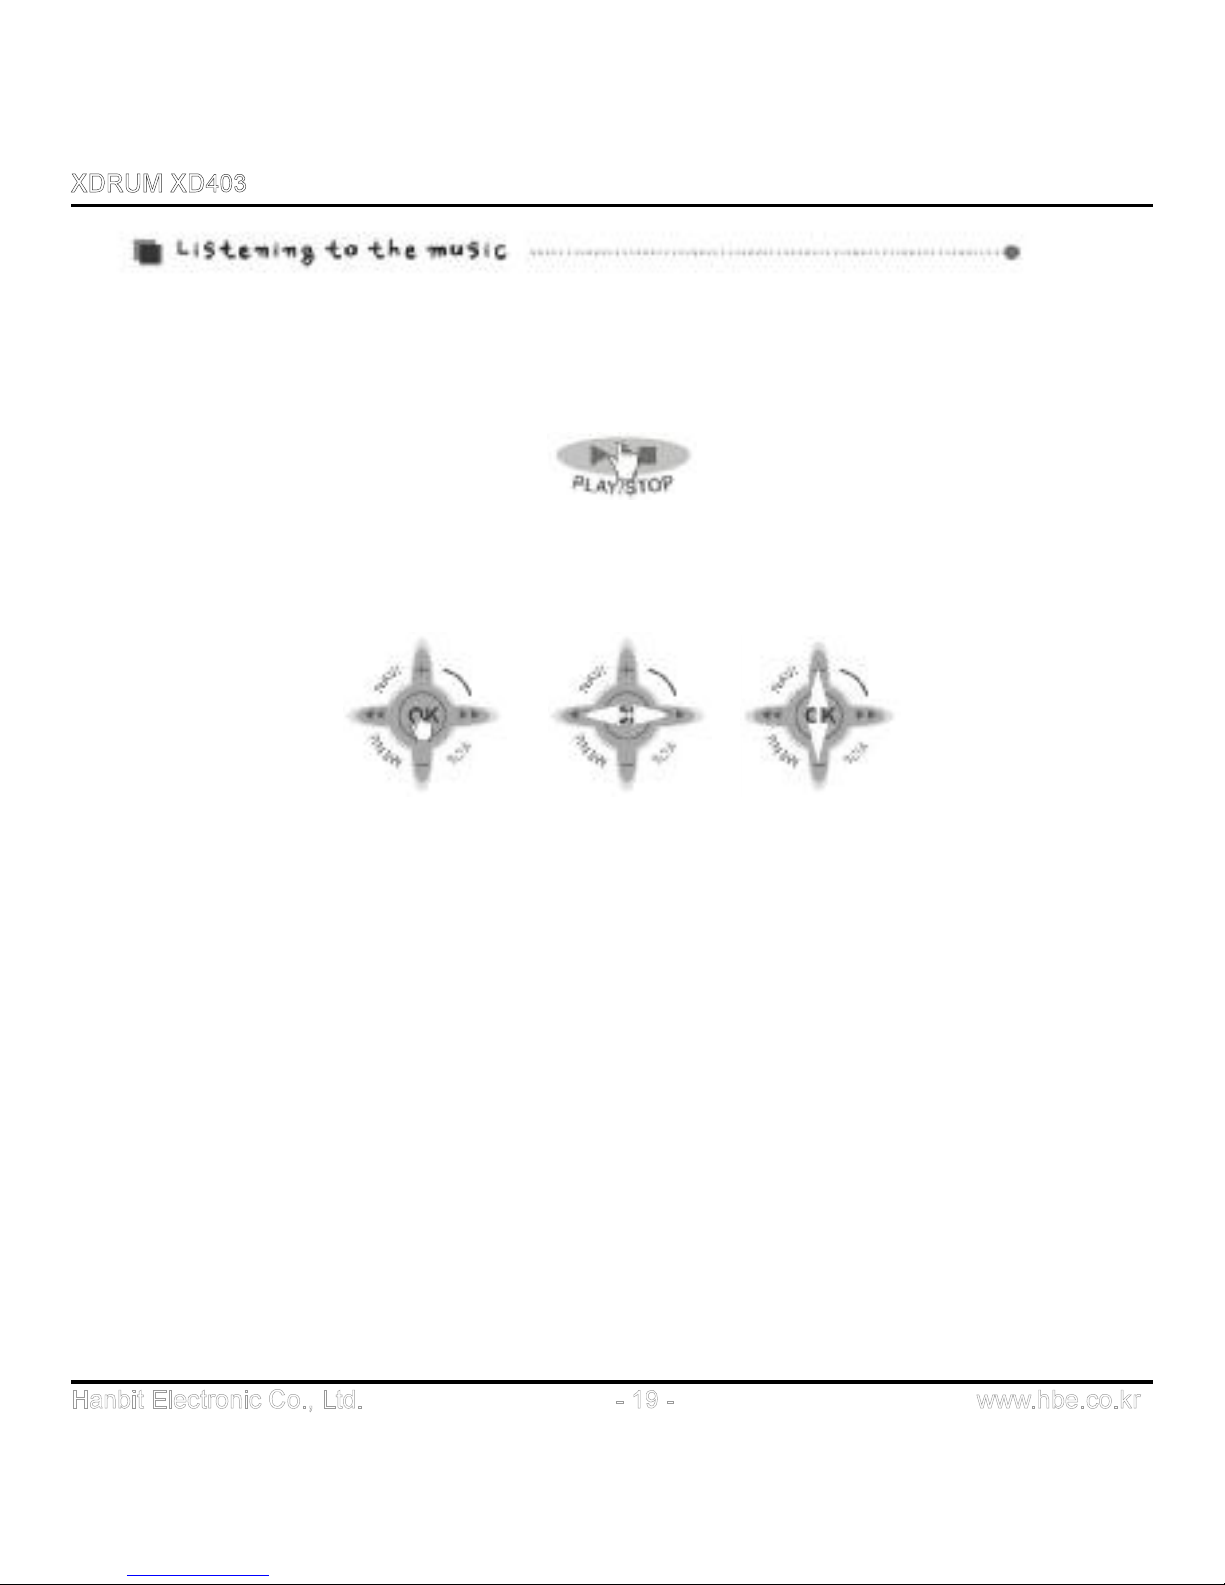
1. Press and hold PLAY/STOP button to turn on the power of the Player.
If power is not on, check the battery and HOLD switch location.
2. Select music you want to play by using NAVIGATION function.
(Please refer to NAVIGATION function in Basic Operation)
3. You can play the music by pressing PLAY/STOP button after selecting the music.
4. While a music file is in PLAY, if you want to go back to previous music, lightly push OK
button to 7 direction, or to 8 direction if you want to move to Next music.
5. To adjust volume, push OK button toward plus (+) or minus (-) direction.
6. While a music file is in PLAY, push OK button to 8 direction to fast forward (FF), or to 7
direction to rewind (REW) the file.
7. Lightly press PLAY/STOP button to stop the music.
8. Press and hold PLAY/STOP button to turn off the power.
Page 20
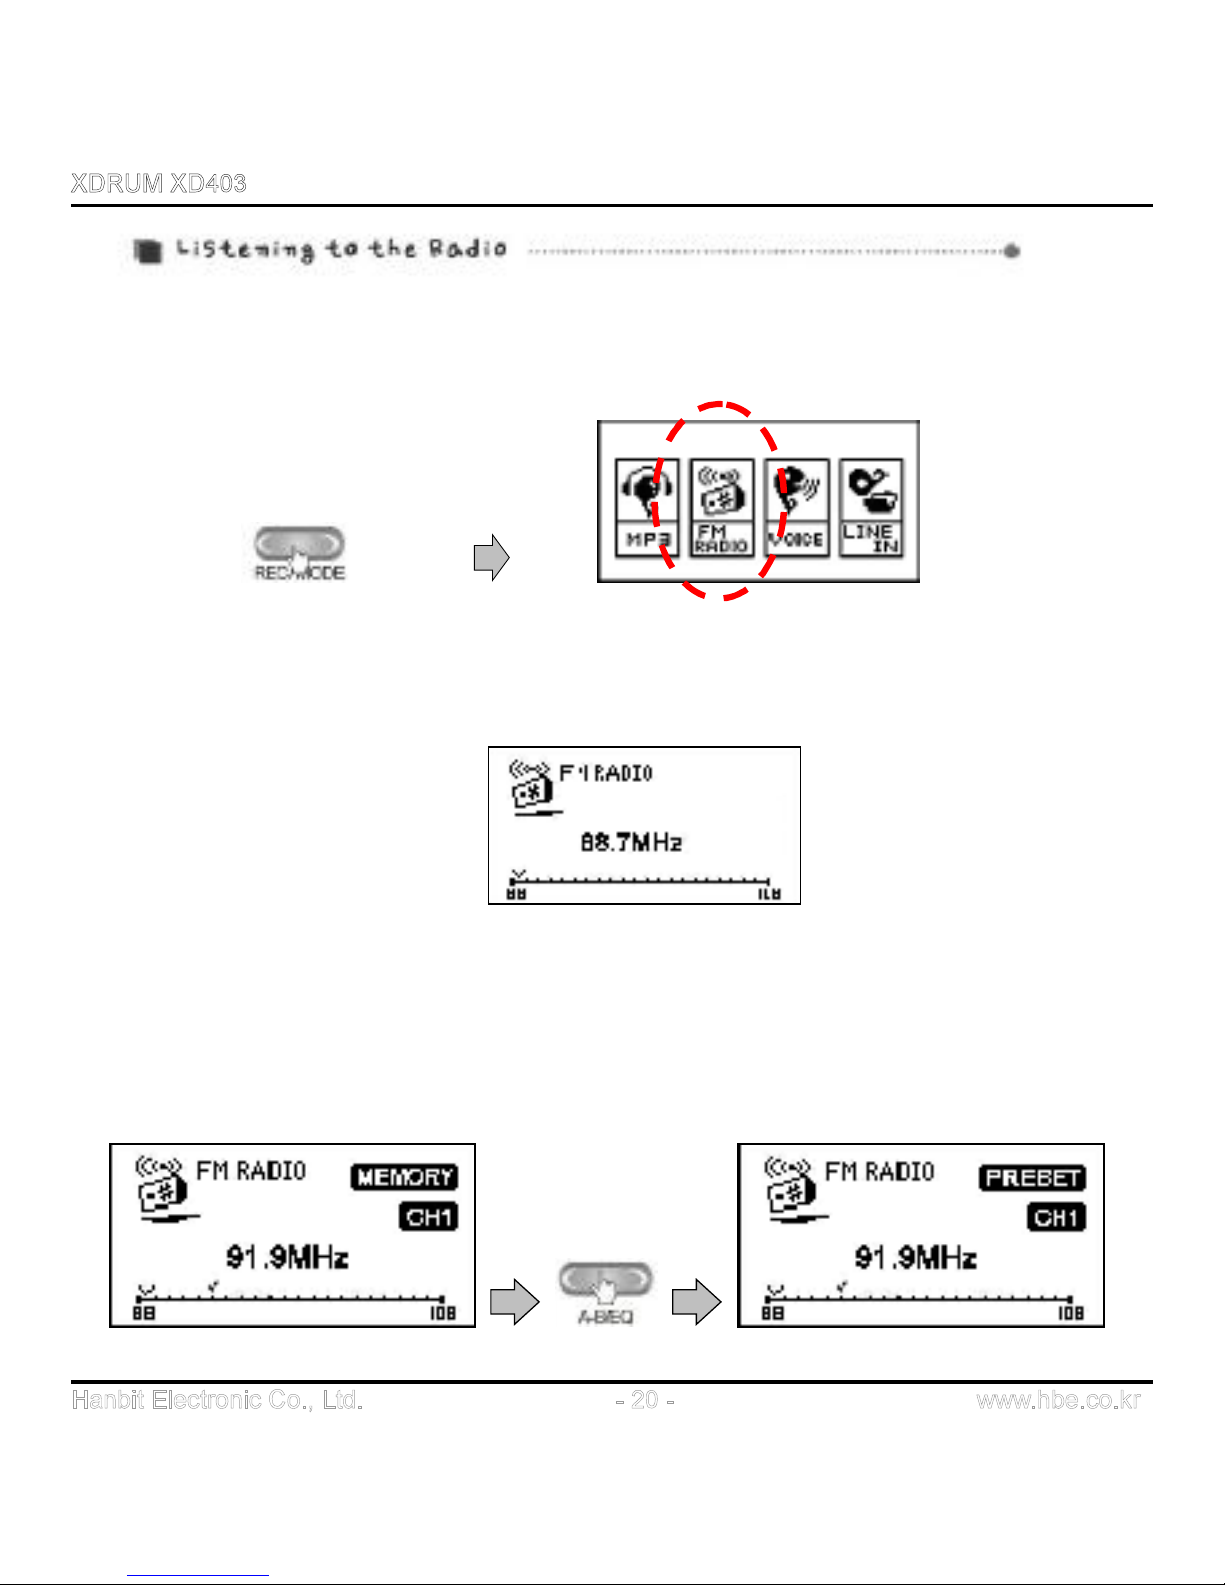
1. Press and hold REC/MODE button to display Function Selection screen. Lightly push
the OK button to the left or right to select FM RADIO.
2. Select channels (frequency) by lightly pushing OK button to 7or 8 direction. If you want
to use AUTOSCAN, press and hold OK button to 8 or 7 direction when PRESET is
released.
3. After finding the channel you want, if you want to save the Radio channel, lightly press
A-B/EQ button. When ‘MEMORY’ is displayed on LCD screen, lightly push OK button to 7
or 8 direction to select ‘CH’ and press A-B/EQ button again to save the channel. You can
save up to 10 channels.
Page 21
4. If you want to search for the channels stored, lightly press the OK button to enter
PRESET mode. After that, select a channel stored by lightly pressing OK button to 7 or 8
direction.
5. If you want to find and save channels using AUTOSCAN:
Upon pressing and holding OK button in PRESET mode, “AUTOSCAN START” will be
displayed on LCD screen and channels will be automatically scanned and stored. When
channel saving is completed, the message of “COMPLETE” will be displayed on LCD
screen.
When listening to the Radio, plug-in an earphone set. As an earphone takes the rol e of
antenna, you cannot clearly listen to the Radio without an earphone. In areas where
reception of frequency is not good, quality of broadcasting may be affected.
Page 22
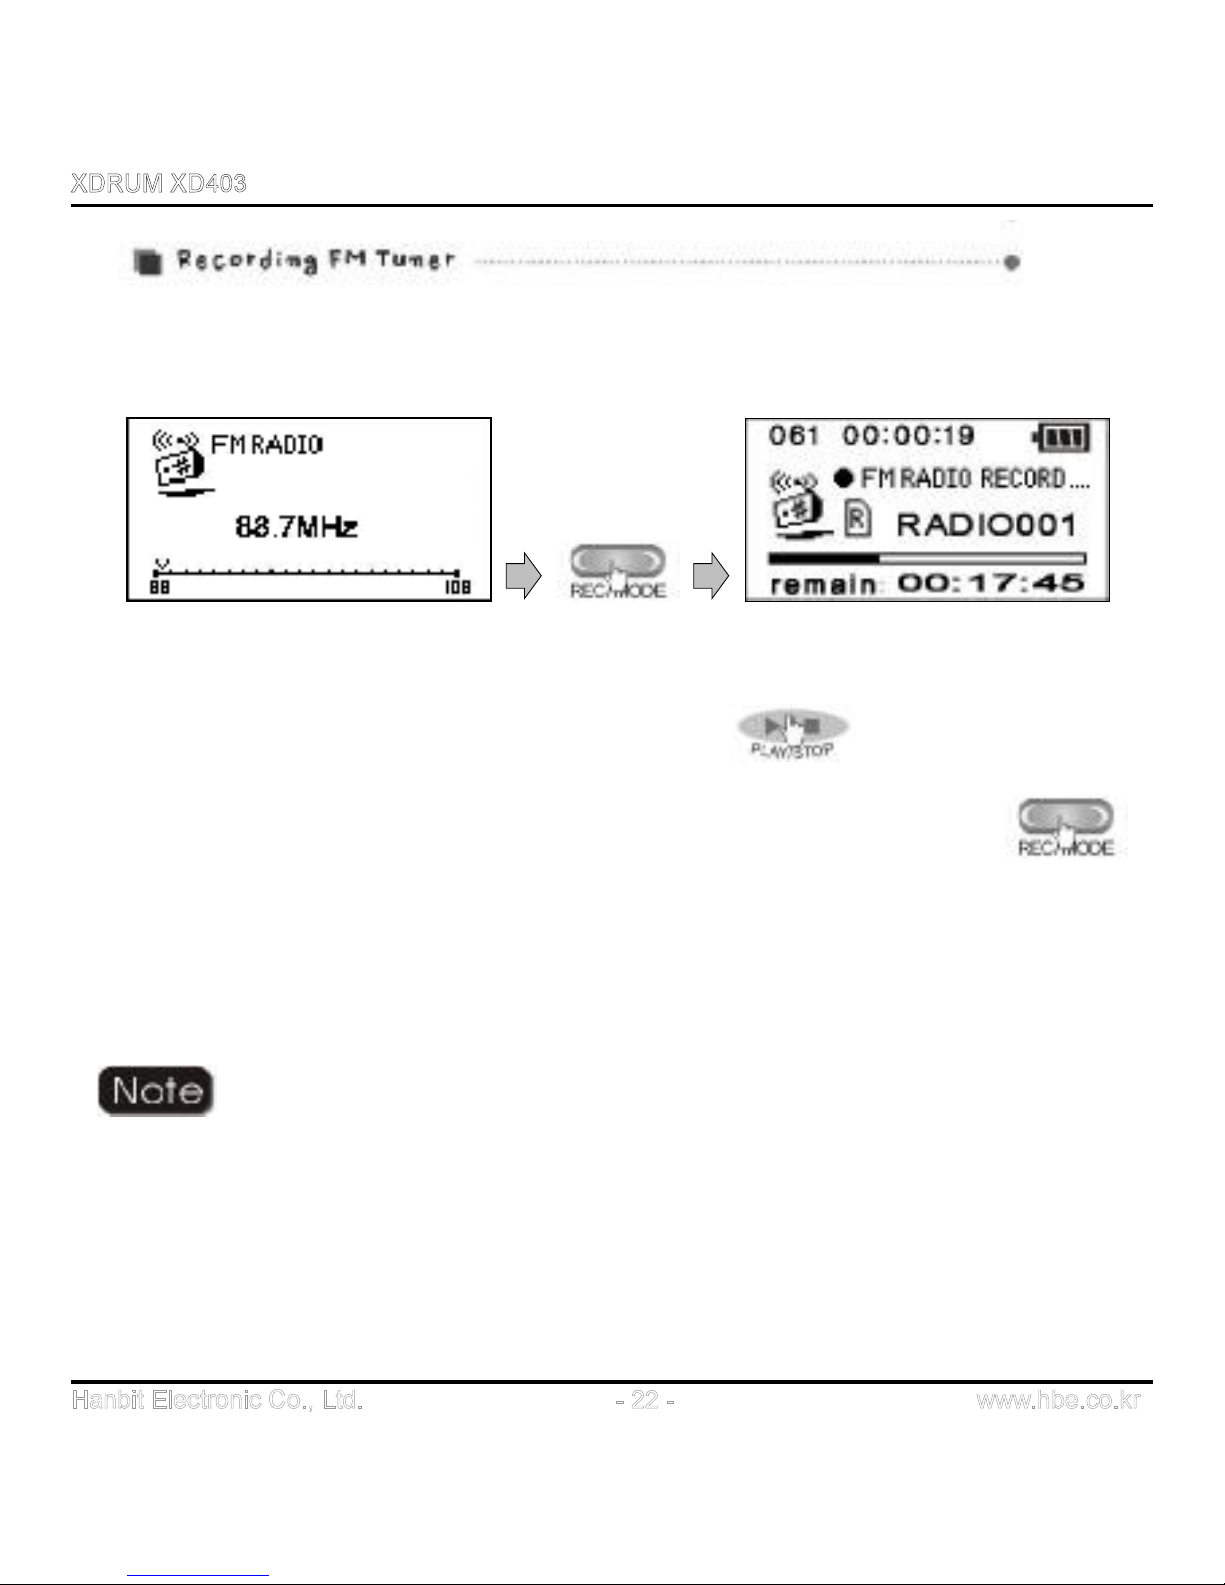
1. While listening to the FM Radio, lightly press REC/MODE button to start recording.
Please note that recording is not allowed in PRESET mode.
2. Lightly press PLAY/STOP button to finish recording.
.
3. To suspend recording for some moment, lightly press the REC/MODE button.
4. To play the recorded file, go back to MP3 mode and press the OK button to enter into
RECORD folder and play it.
In that case, the recorded files will be in RADIO***.MP3 file format in the
RECORD folder of the PLAYER. According to their recording order, they
will be saved as RADIO001, RADIO002, *** form.
In the Setup Menu, you can change the environment for FM recording
(Refer to Setup Menu)
Page 23
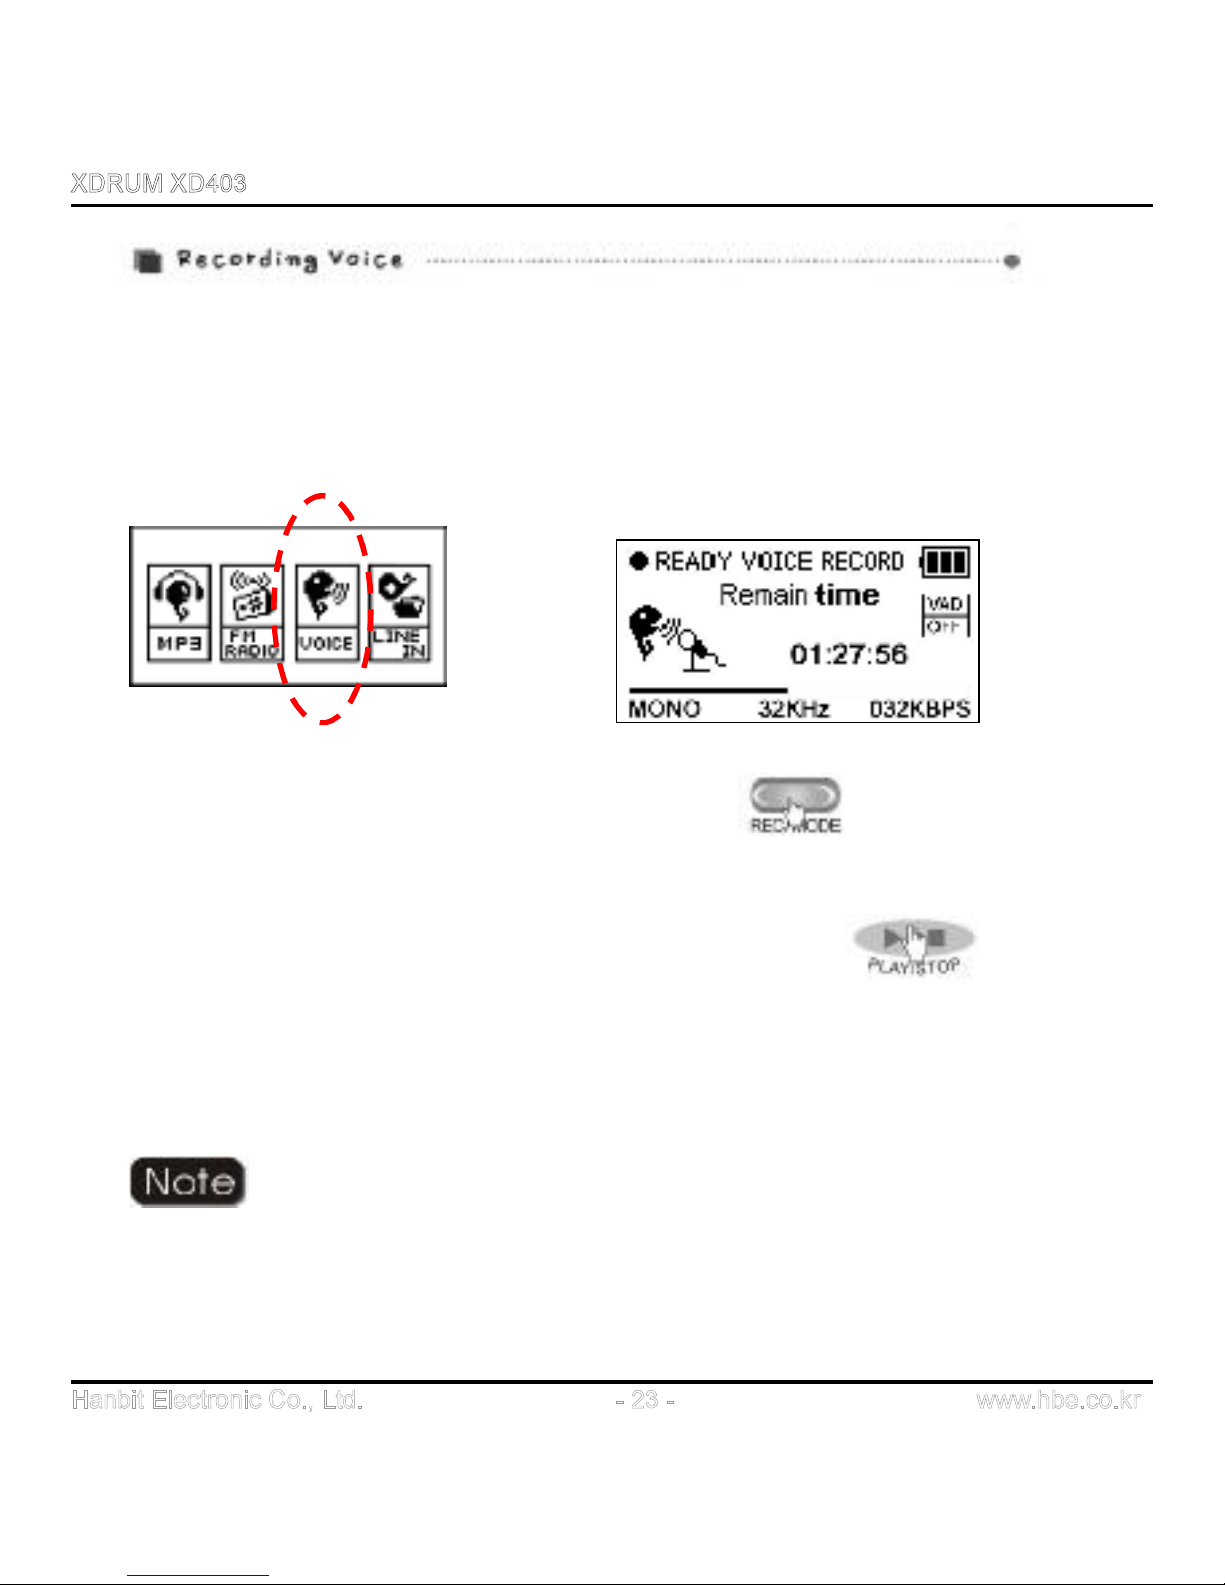
3. Upon selection, the Player becomes Voice
Recording Ready mode.
1. Press and hold REC/MODE button to move to Function Menu
2. After selecting VOICE by lightly pushing the OK button to 8 or 7 direction, press the OK
button.
4. Lightly press REC/MODE button to start recording.
5. To suspend recording, lightly press REC/MODE button again.
6. To stop and save recording, lightly press PLAY/STOP button.
7. To play recorded files, go back to MP3 mode and press OK button to go into the VOICE
folder.
Recorded files are saved as REC***.MP3 format under VOICE folder.
You can play the files in MP3 mode. You can change the environment
for Voice Recording in Setup Menu. (Refer to Setup Menu)
Page 24
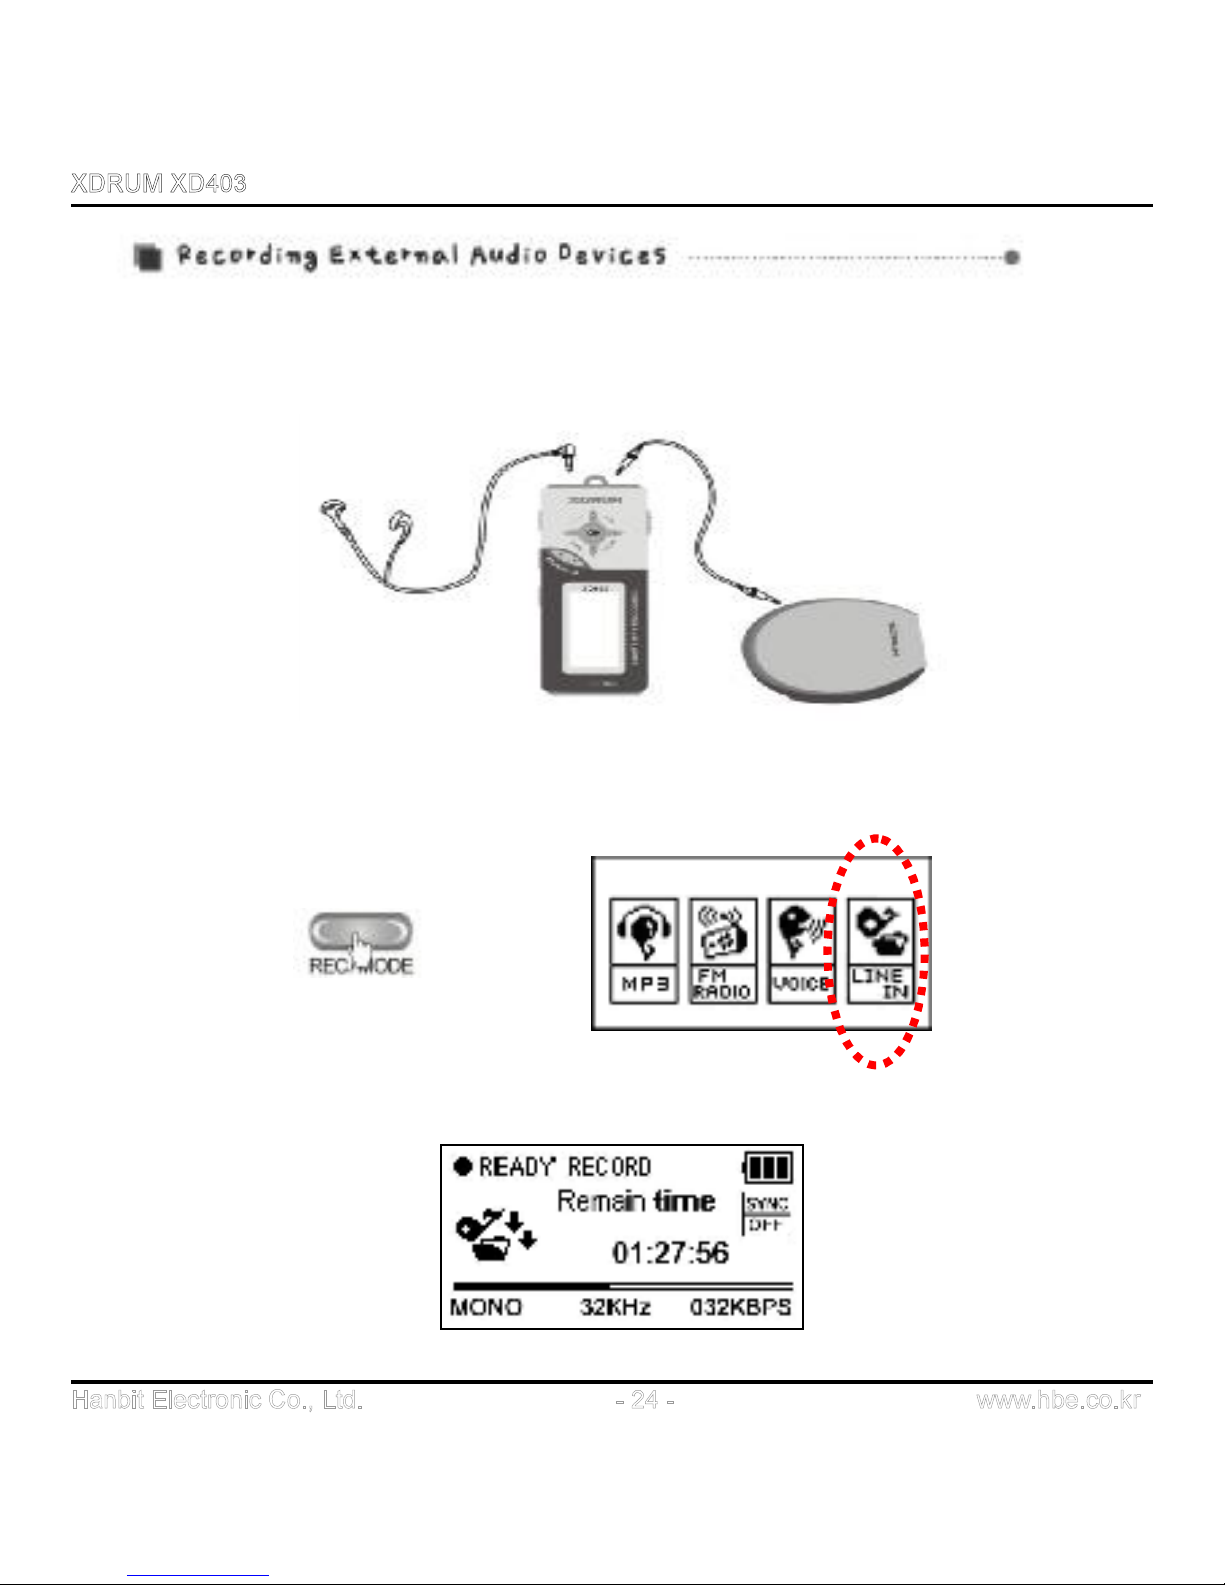
1. This function allows you to record an audio signal from external audio device or PC.
Connect external device to the Player using the enclosed audio cable as shown below.
2. Press and hold REC/MODE button to display Function Selection screen. Push OK button to
7 or 8 direction to select LINE-IN, and press the OK button.
3. Upon selection, the Player becomes Recording ready mode.
Page 25
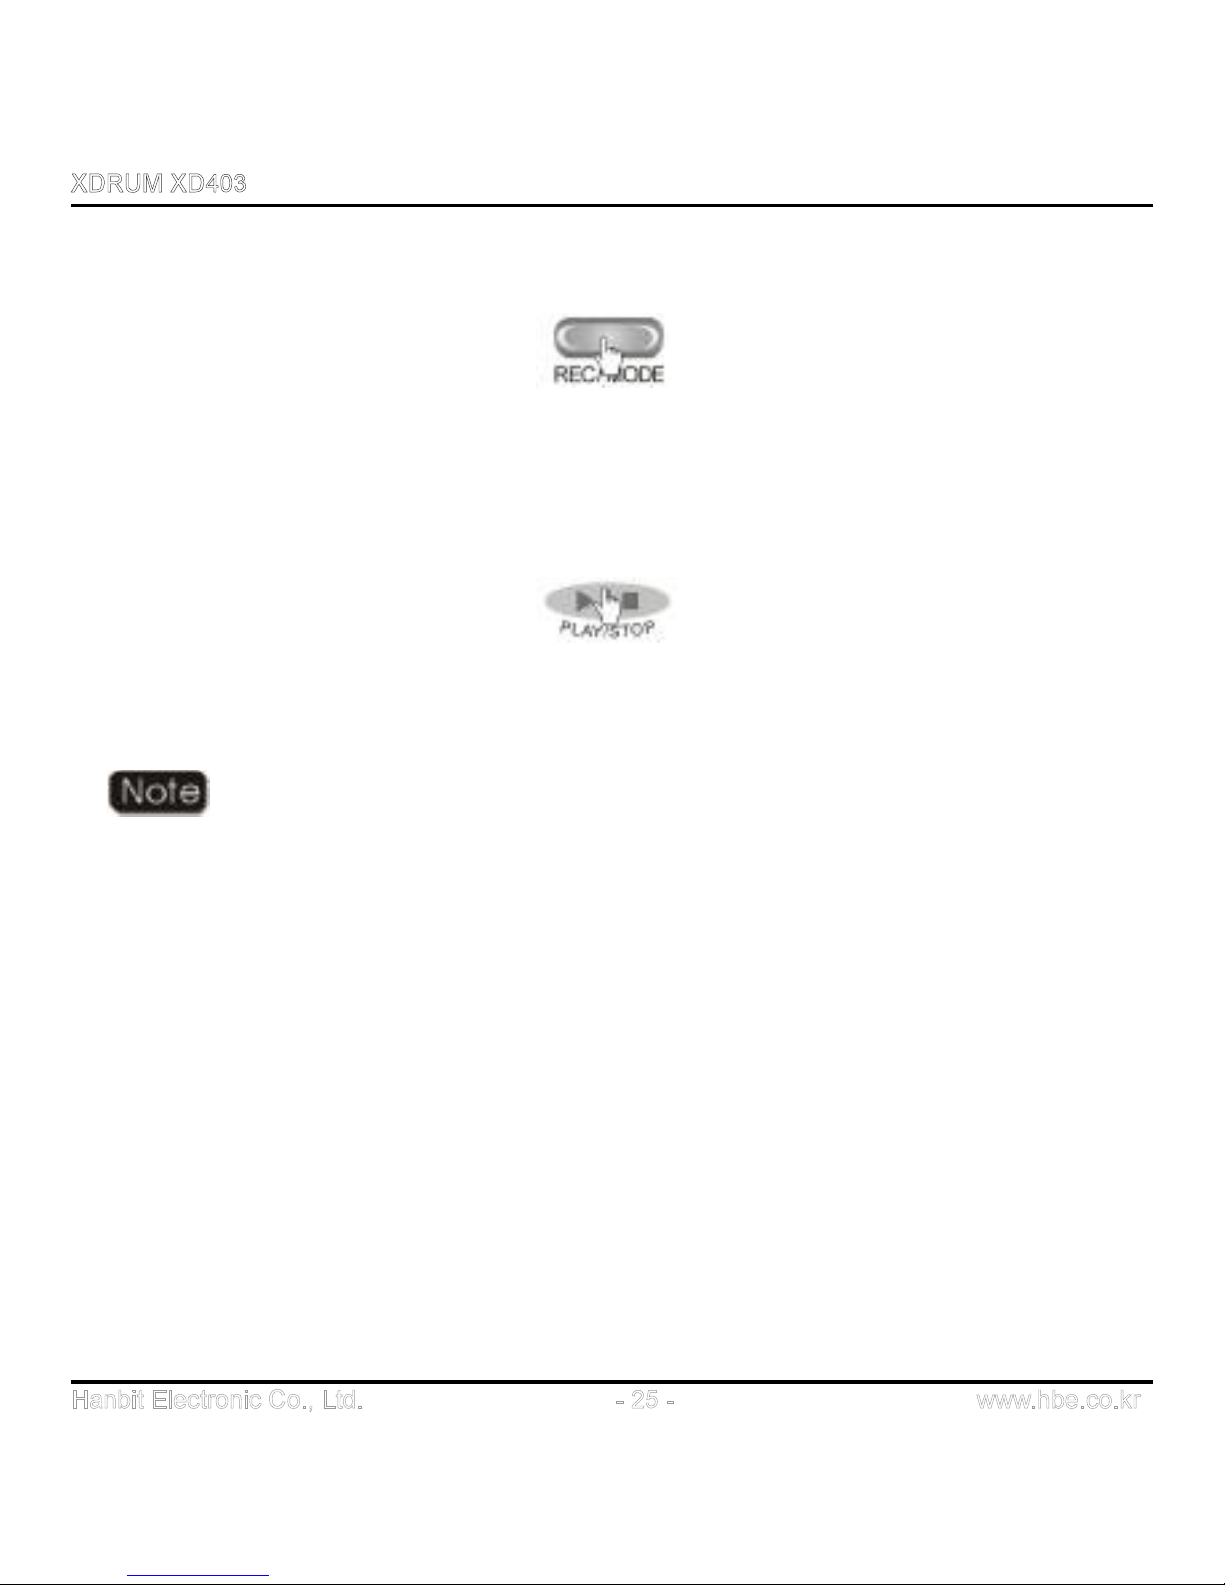
4. To start recording, lightly press REC/MODE button.
5. To suspend recording, lightly press REC/MODE button again.
6. To stop and save recording, lightly press the PLAY/STOP button.
Recorded files are saved as REC***.MP3 format under RECORD folder.
You can play the files in MP3 mode. You can change the environment for
LINE-IN recording in Setup Menu (Refer to Setup Menu).
Page 26
Page 27
Page 28
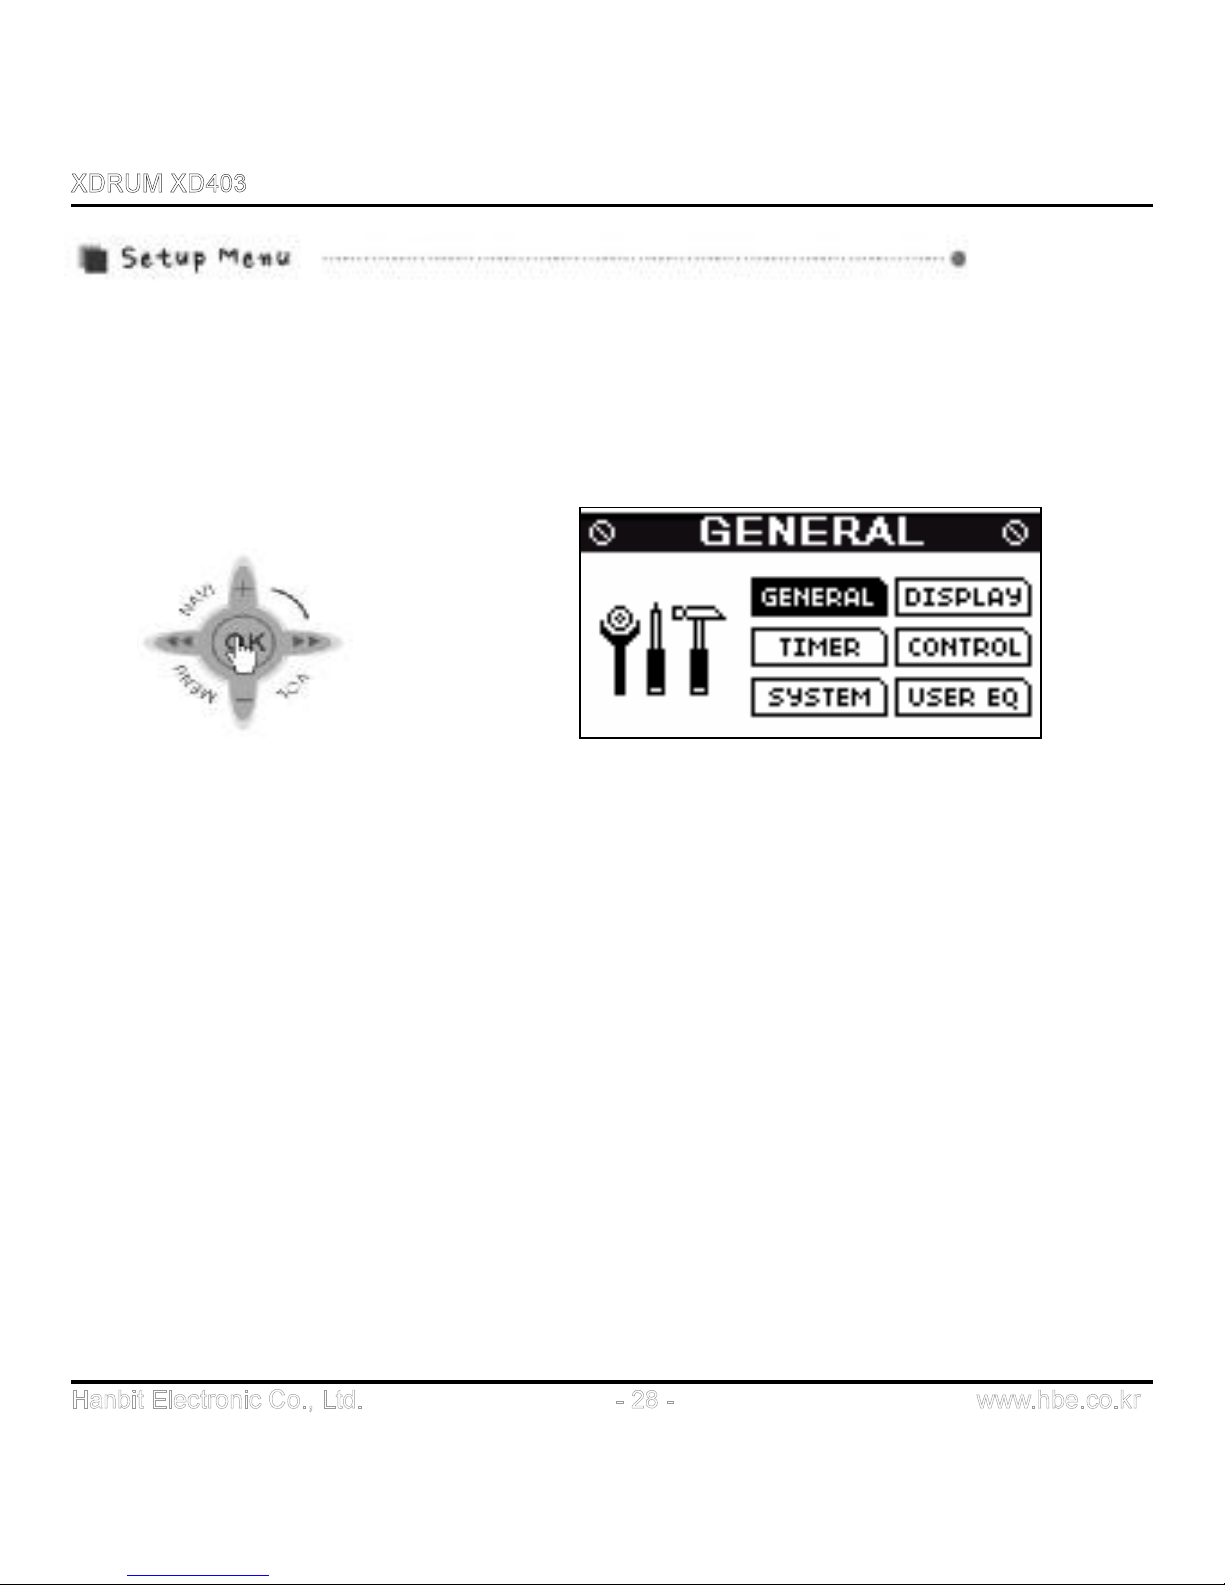
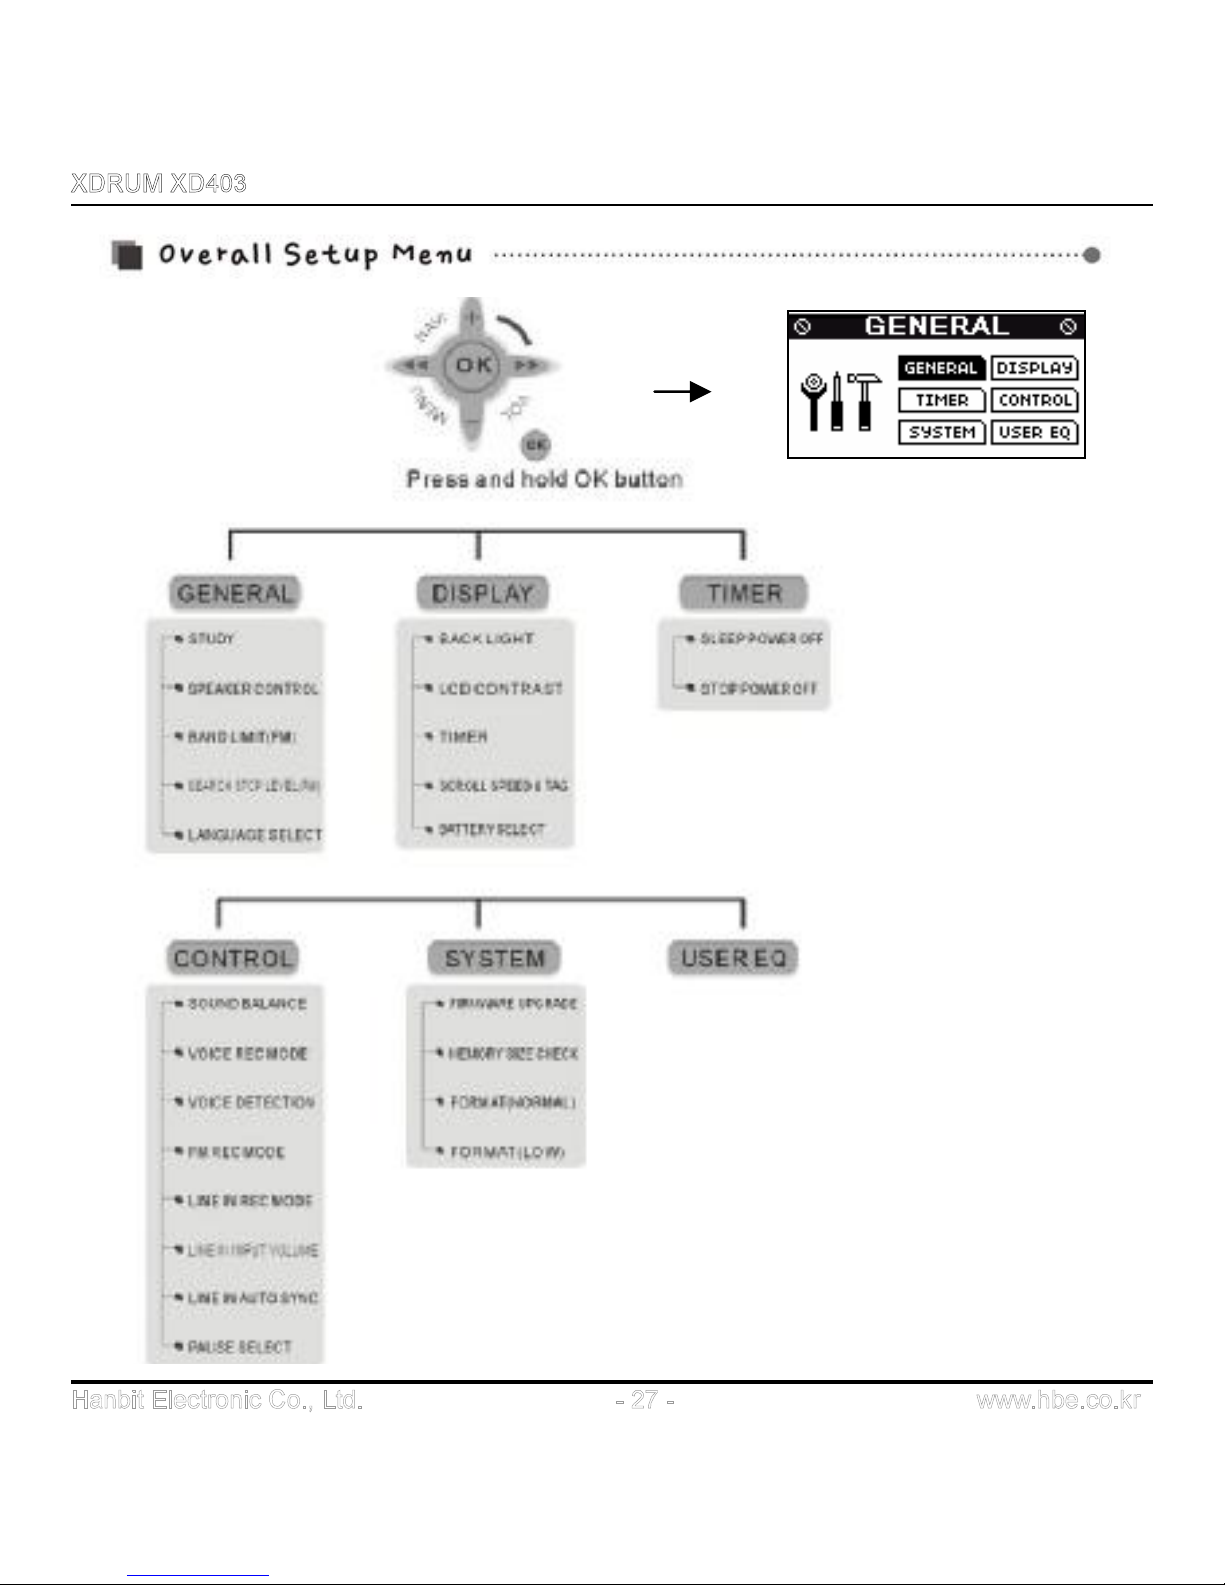
To adjust various setups of XDRUM AUDIO PLAYER, press and hold the OK button to enter
Setup Menu. (When recording is underway or the Player is in Mode Change Menu status, you
cannot go into Setup Menu regardless how strongly you press OK button).
- Movement between menus: lightly push the OK button to up · down · left · right directions
- Menu/Function selection: press and hold OK button.
- Function adjustment: lightly push the OK button to 7 or 8 direction.
- Getting out: return to upper menu after saving the setup by pressing PLAY/STOP button.
Page 29
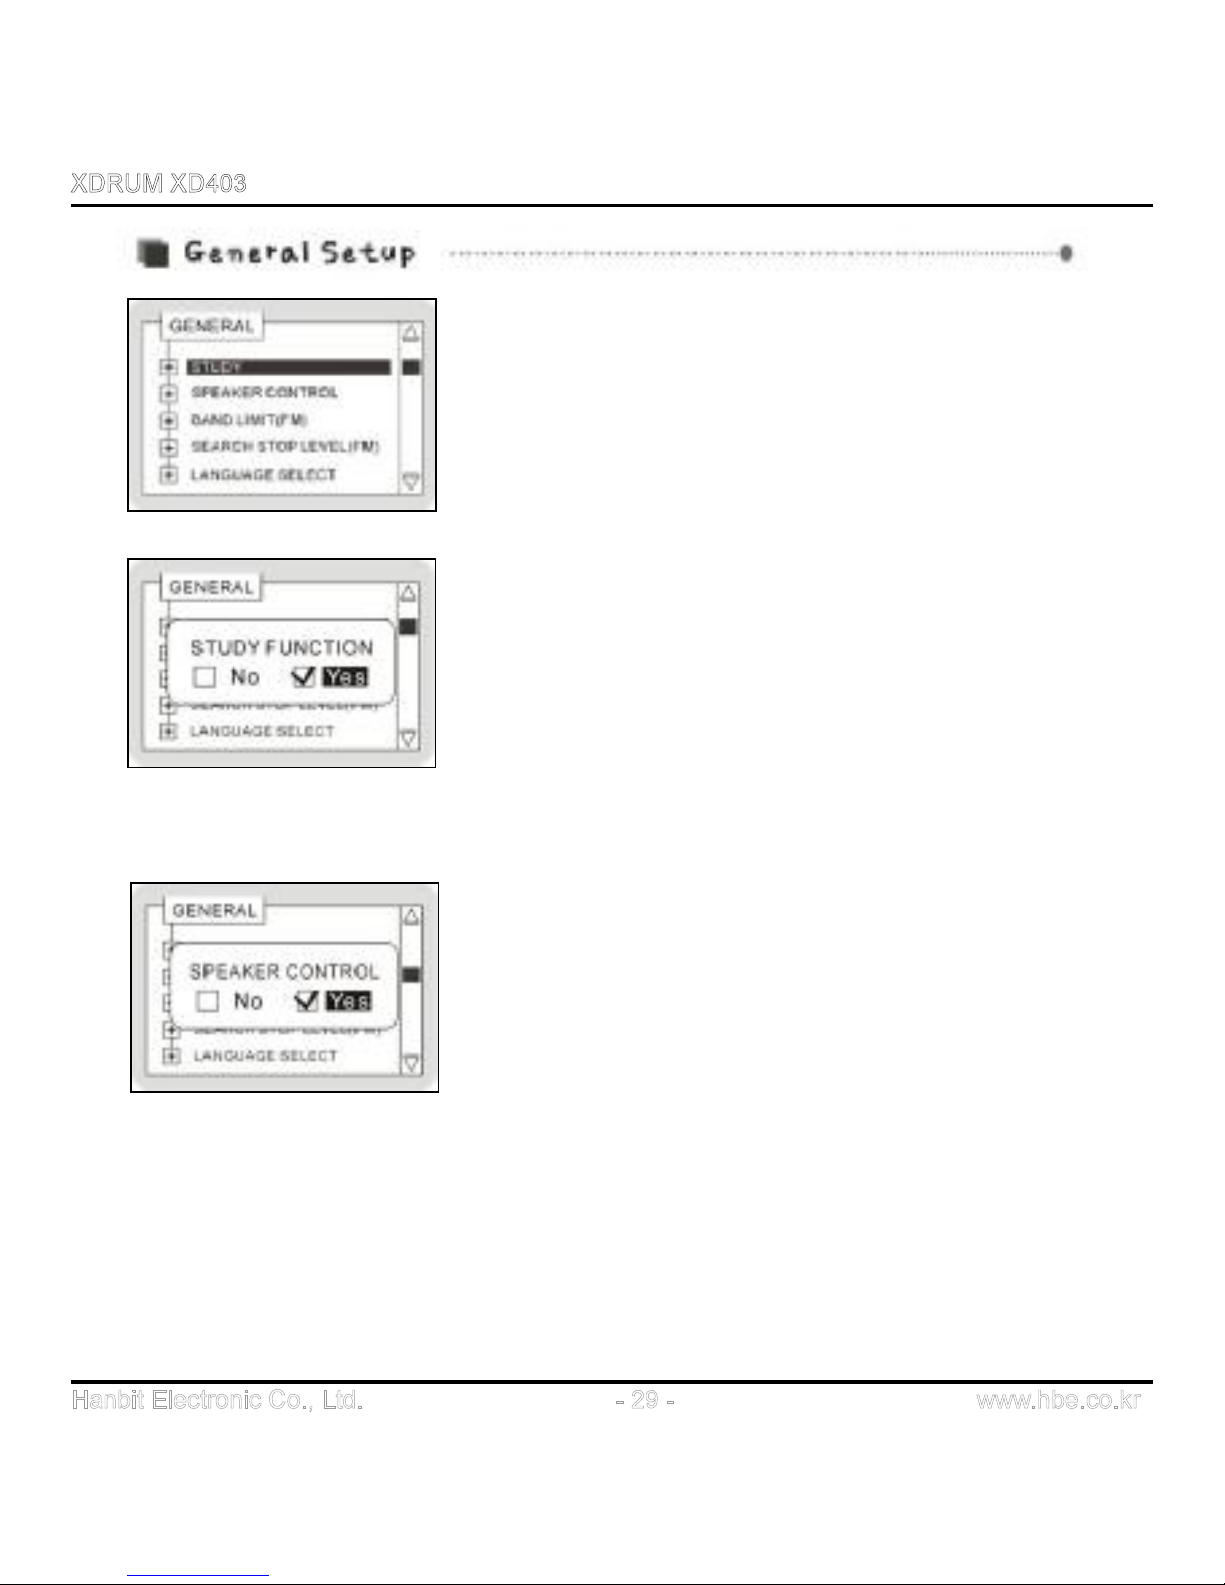
l STUDY : In STUDY MENU, press OK button to
select it. Then, STUDY FUNCTION menu will be
displayed. If you select YES, STUDY function is
activated allowing you to adjust speed of music in MP3
mode but if you select NO, EQ function is provided
(Default is NO)
In playing MP3 mode, press and hold A-B/EQ button to
select the function and press A-B/EQ button to adjust
the speed by 6 phases
(Normal / Slow1 / Slow2···Slow5)
Setup Menu à GENERAL à STUDY à Function Selection à PLAY/STOP button
l SPEAKER CONTROL: Select YES, if you want to
use internal speaker. or NO if you don’t use it.
If you select YES, Electricity will be supported to
speaker. and battery life can be little shorten. So If you
don’t use internal speaker, please select No.
(Default is Yes)
Setup Menu à GENERAL à SPEAKER CONTROL à FUNCTION SELECTION à PLAY/STOP button
When battery bars are under two, speaker will be off with a sentence "Low battery, Speaker
off" on the display. This is for saving battery and malfunction of the device. To use speaker
again, please change new battery and set up Speaker Control into "Yes"
Page 30
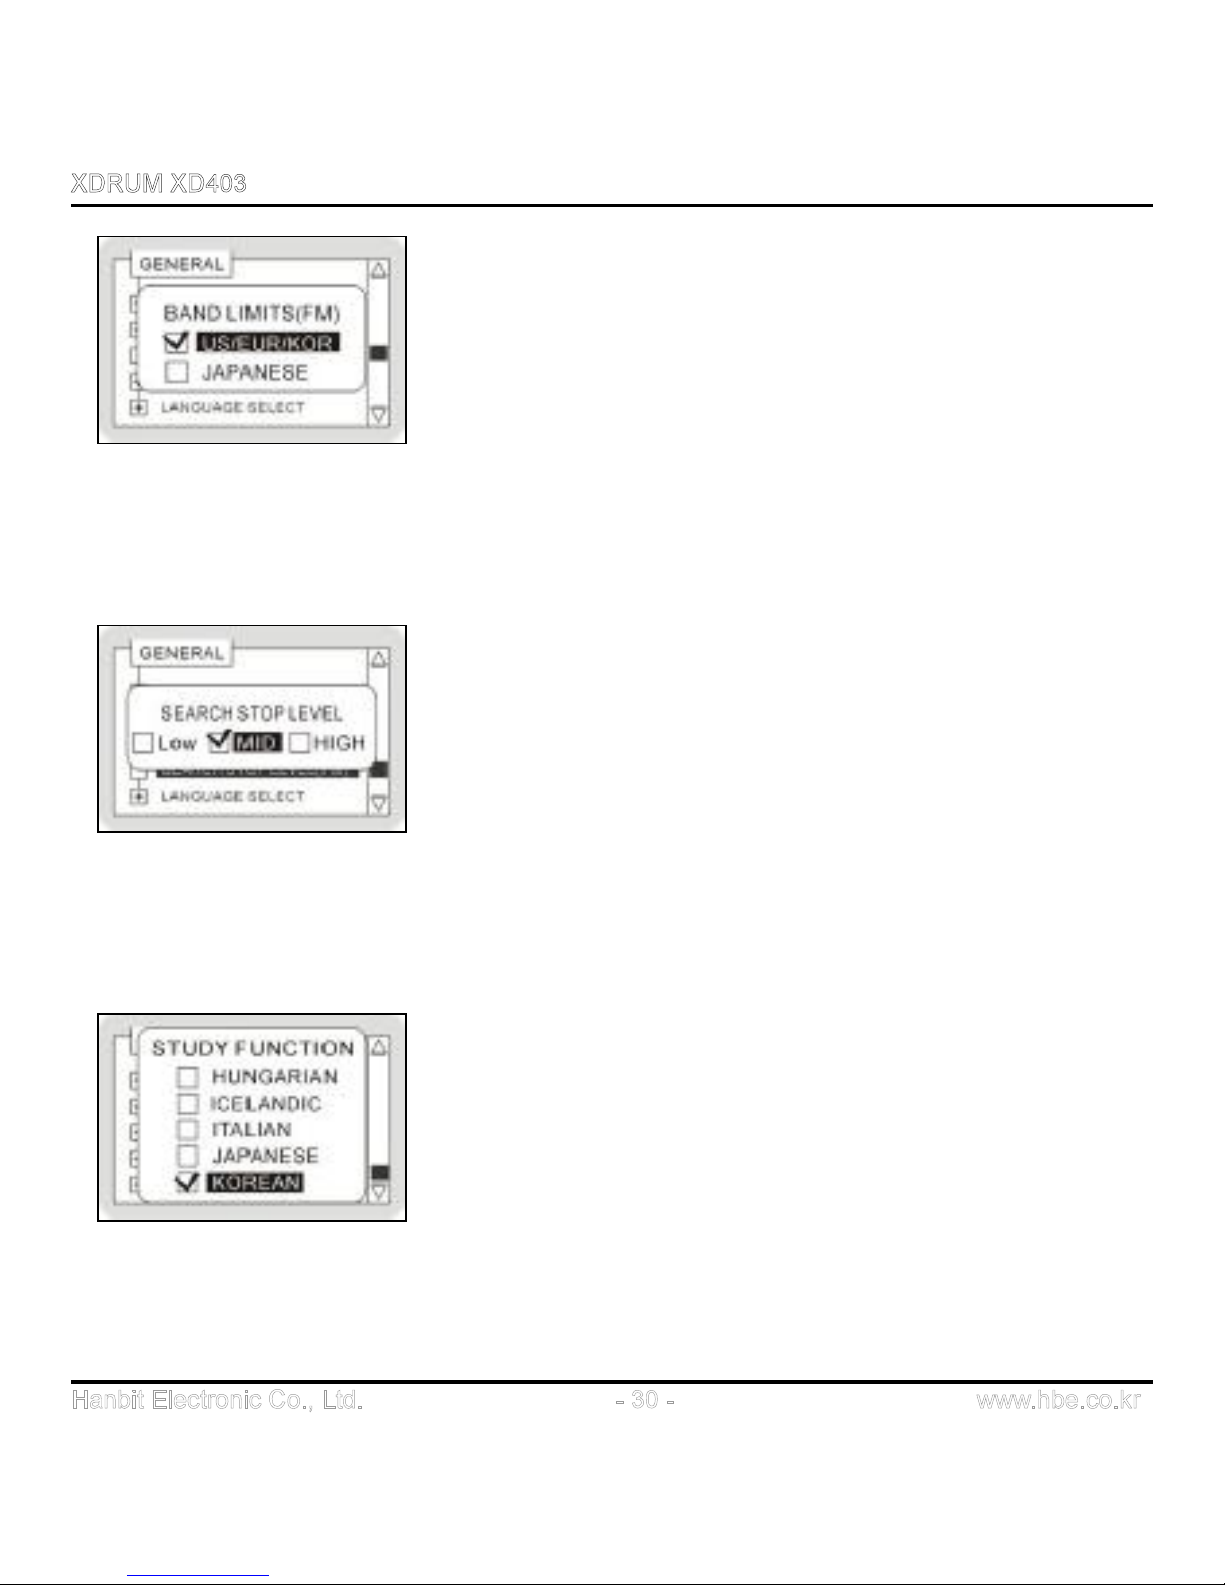
l BAND LIMITS (FM) : it is to setup FM BAND range by
country. There are two regions (US/KOR/EUR and
JAPANESE). Select JAPANESE in Japan or select
US/KOR/EUR in other regions
(Default is US/KOR/EUR)
Setup Menu à GENERAL à BAND LIMITS (FM) à REGION SELECTION à PLAY/STOP button
l SEARCH STOP LEVEL (FM): it is to define FM
reception level. Setting is available in three levels such as
LOW, MID and HIGH. The lower the level is, the more
sensitive it is in receiving lower frequency.
(Default is MID)
Setup Menu à GENERAL à SEARCH STOP LEVEL à LEVEL SELECT à PLAY/STOP button
l LANGUAGE SELECT: characters may be broken
depending on PC operating system where song titles or
ID3TAG information is entered. Therefore, you need to
select LANGUAGE befitting the PC operating system
where songs are created. It supports languages of over 44
countries including Korean, English and Japanese.
(Default is ENGLISH)
SETUP MENU à GENERAL à STUDY FUNCTION à LANGUAGE SELECT à PLAY/STOP button
Page 31
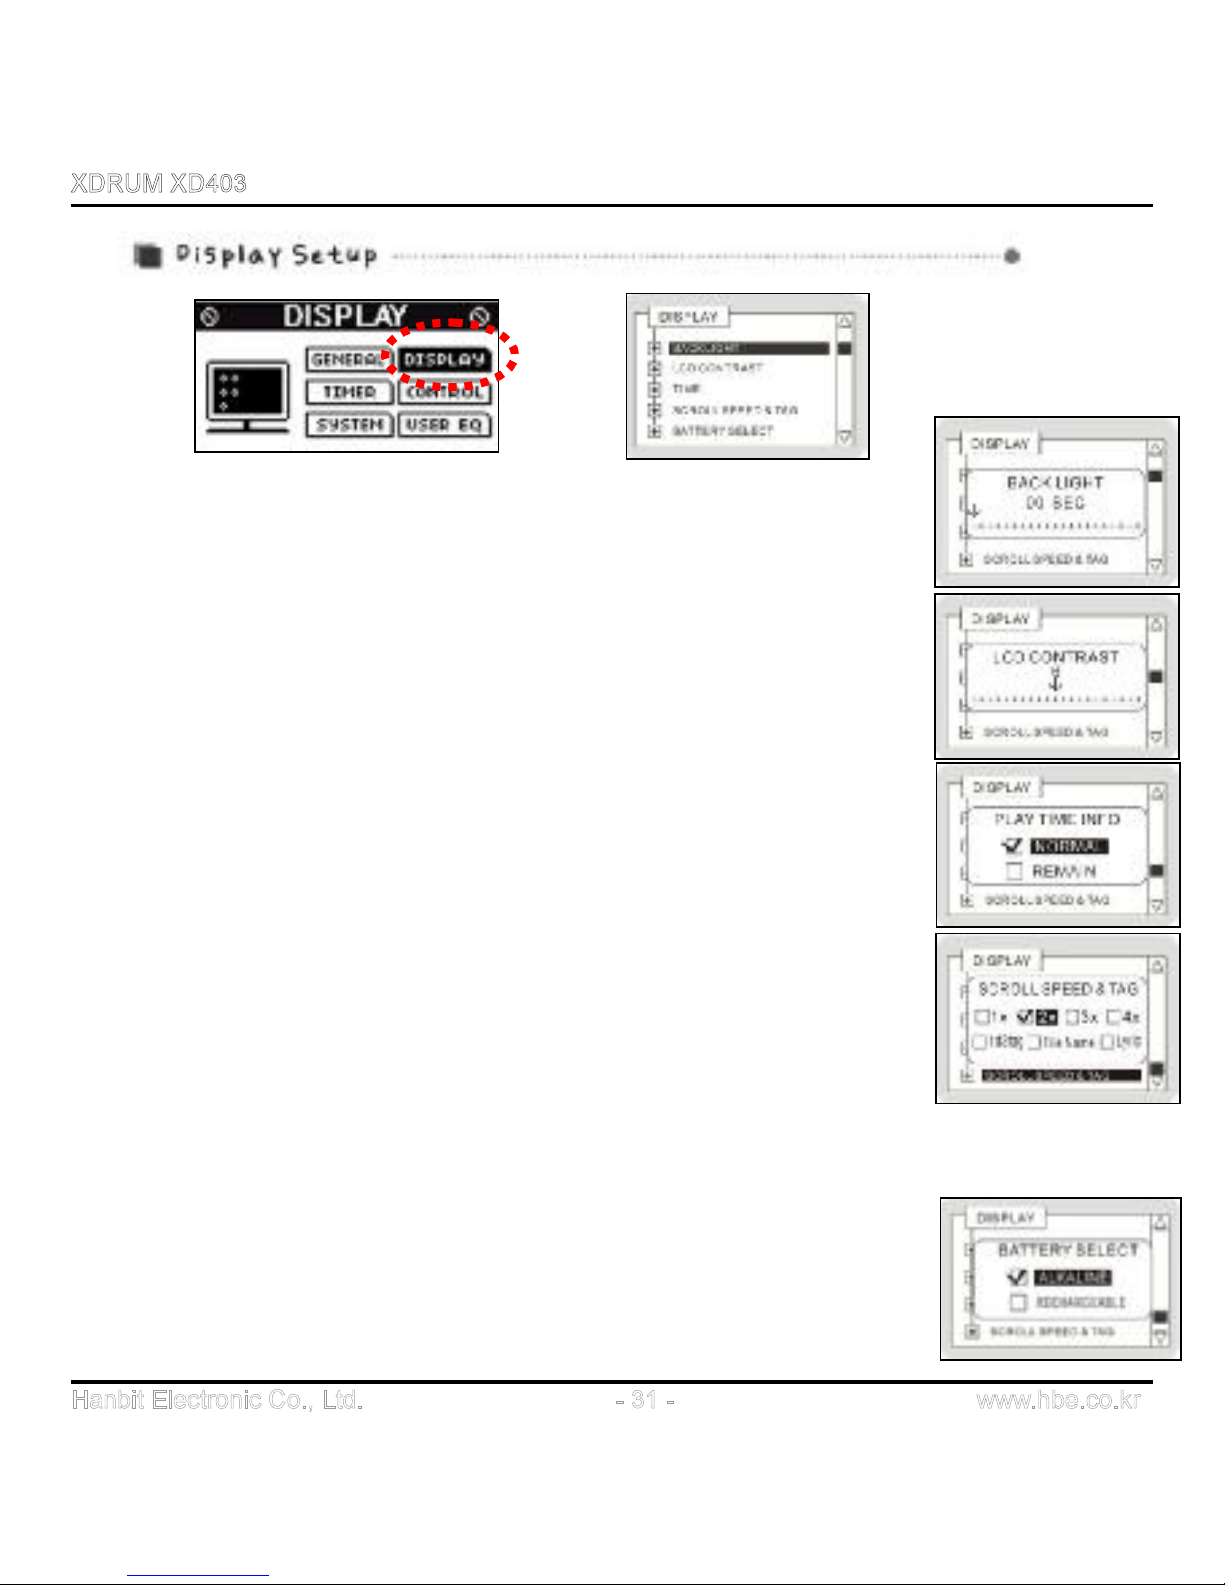
l BACK LIGHT : you can setup the time during which LCD screen light is
on by pushing OK button to the left or right. (Default is 5 SEC)
DISPLAY
SETUP
à
BACK LIGHT
à
TIME SETUP
à
PLAY/STOP button
l LCD CONTRAST : you can adjust contrast of LCD screen by pushing
OK button to the left or right. (Default is 6)
DISPLAY SETUP à LCD CONTRAST à SETUP à PLAY/STOP button
l TIME: NORMAL - play time of a song is displayed.
REMAIN - remaining play time of a song is displayed. (Default is NORMAL)
DISPLAY SETUP à TIME à SETUP à PLAY/STOP button
l SCROLL SPEED & TAG: the display speed of music name/file name on
the screen can be defined as 1x/2x/3x/4x (Default is 3x & File Name)
DISPLAY à SCROLL SPEED & TAG à TIME SETUP à PLAY/STOP button
1. Id3tag : Display ID3 TAG (or file name)
2. File Name : Display file name / 3. Lyric : Display the words of song(or file name)
l BATTERY SELECT : to display more accurate battery capacity, select
battery type which you are using now. (Default is ALKALINE)
DISPLAY SETUP à BATTERY SELECT à SELECT à PLAY/STOP button
Page 32
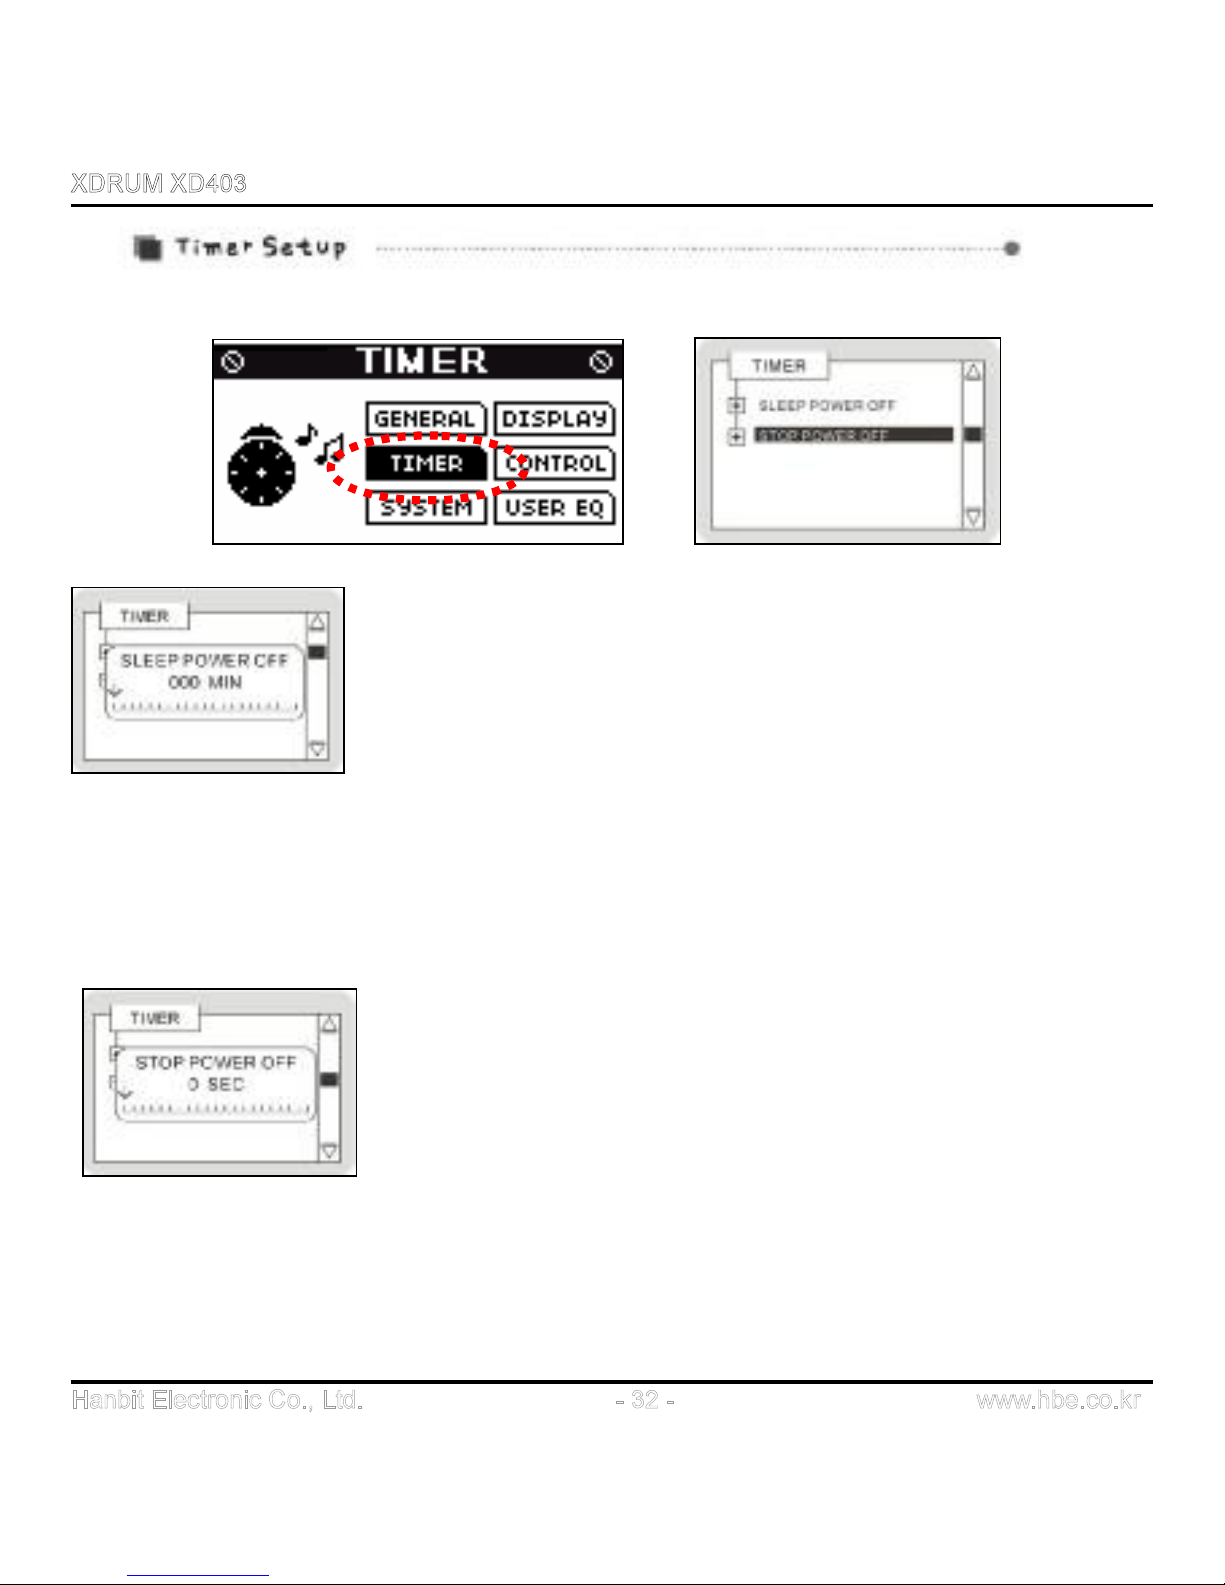
l SLEEP POWER OFF: you can setup timer by pushing OK
button to the left or right. When it reaches the time defined, the
Player will be automatically turned off. This function is very
useful when you want to fall asleep while listening to the music.
When the power of the player is off, the initial timer setup will not
be effective and it returns to default timer setup (setup is
possible up to 300 minutes). (Default is 0 SEC)
l STOP POWER OFF: you can define Power Off time by
pushing OK button to the left or right. You can define from 30
sec. to 30 minutes. It stops play and turn off power upon
reaching the defined time without requiring further button inputs.
(Note : if you define 0 sec., the power will not be turned off and
the Player stays only in STOP mode.)
(Default is 30 SEC)
Setup Menu à TIMER à SLEEP POWER OFF à TIME SETUP à PLAY/STOP button
Setup Menu à TIMER à STOP POWER OFF à TIME SETUP à PLAY/STOP button
Page 33
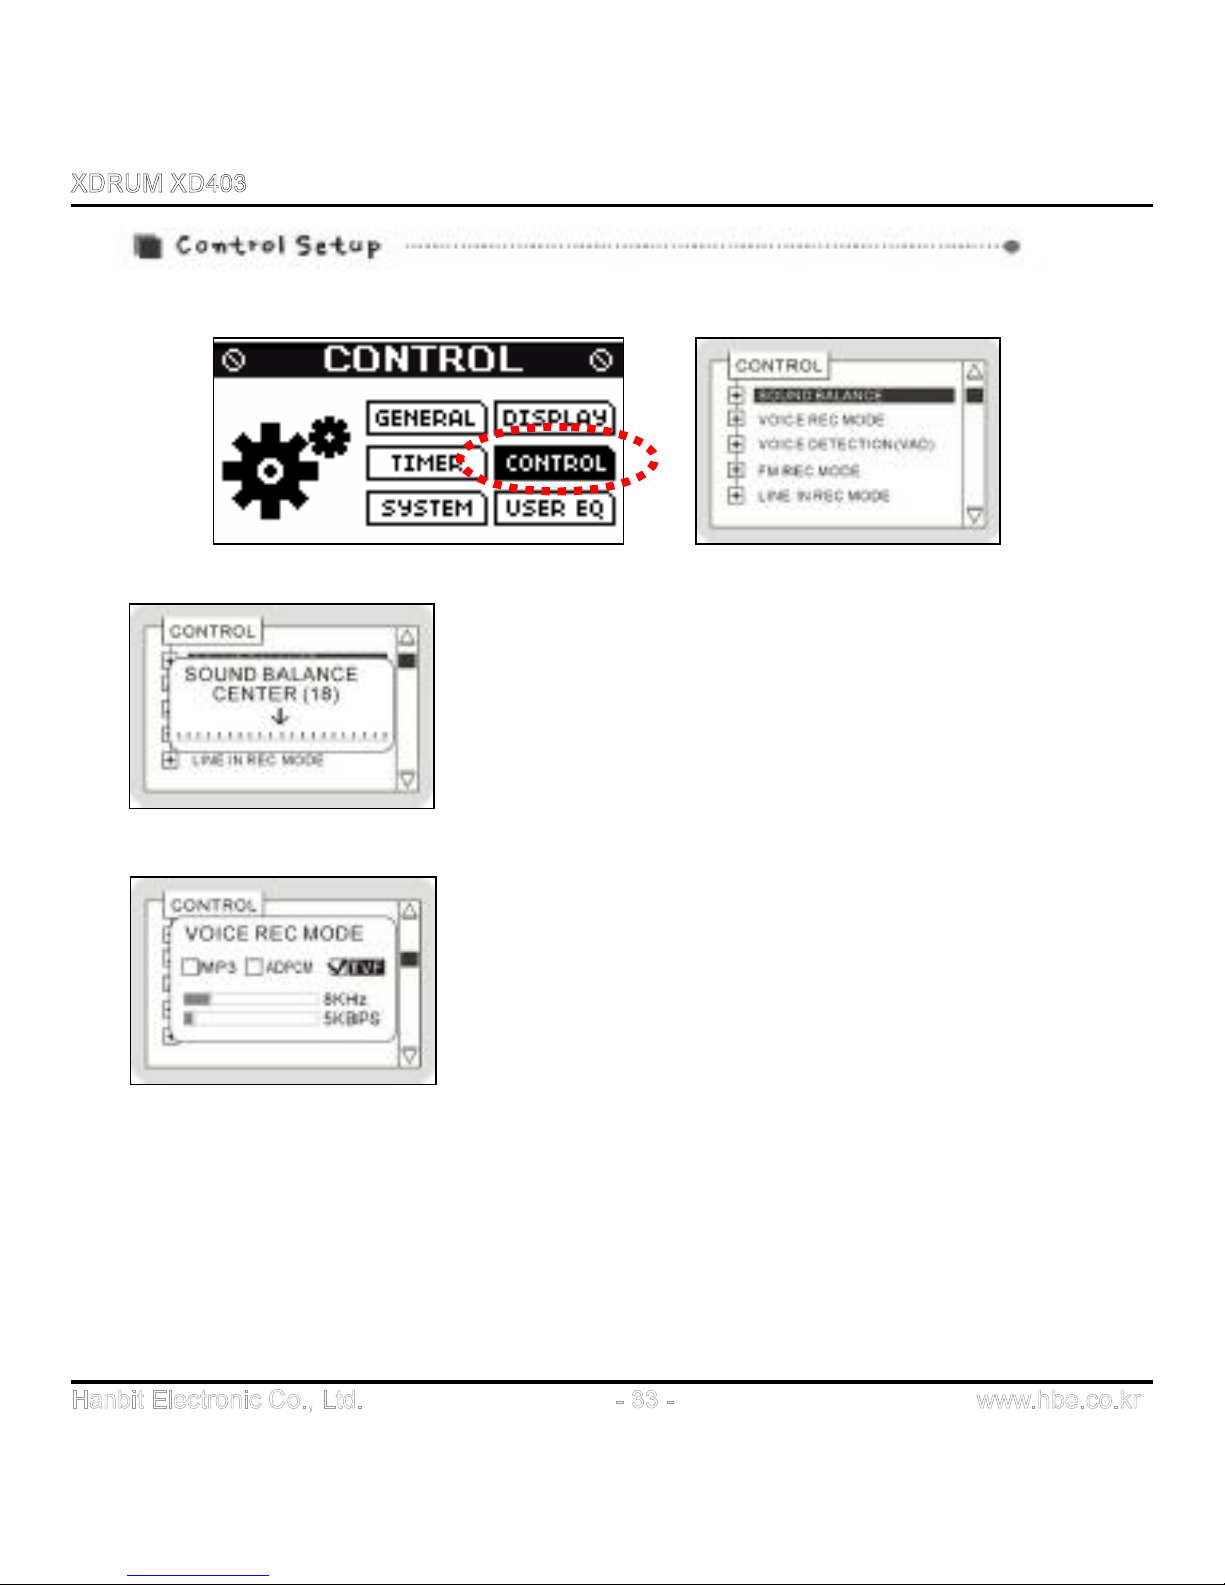
l VOICE REC MODE
you can select sound quality in voice recording
1. File type setup: voice file selection is available in
three types (MP3 / ADPCM / TVF) (Default is MP3)
2. SAMPLING frequency: you can select minimum 8
KHz to maximum 22.5 KHz depending on the file type
you selected. (Default is 22.05KHZ)
l SOUND BALANCE : you can adjust output level of
left or right side of earphone or headset by pushing OK
button to the left or right direction. (Default is 18)
Setup Menu à CONTROL à SOUND BALANCE à
SETUP à PLAY/STOP button
Setup Menu à CONTROL à VOICE REC MODE à SETUP à PLAY/STOP button
3. BITRATE: you can select minimum 8Kbps to maximum 112 Kbps depending on the
file type you selected. (Default is 96KBPS)
Page 34
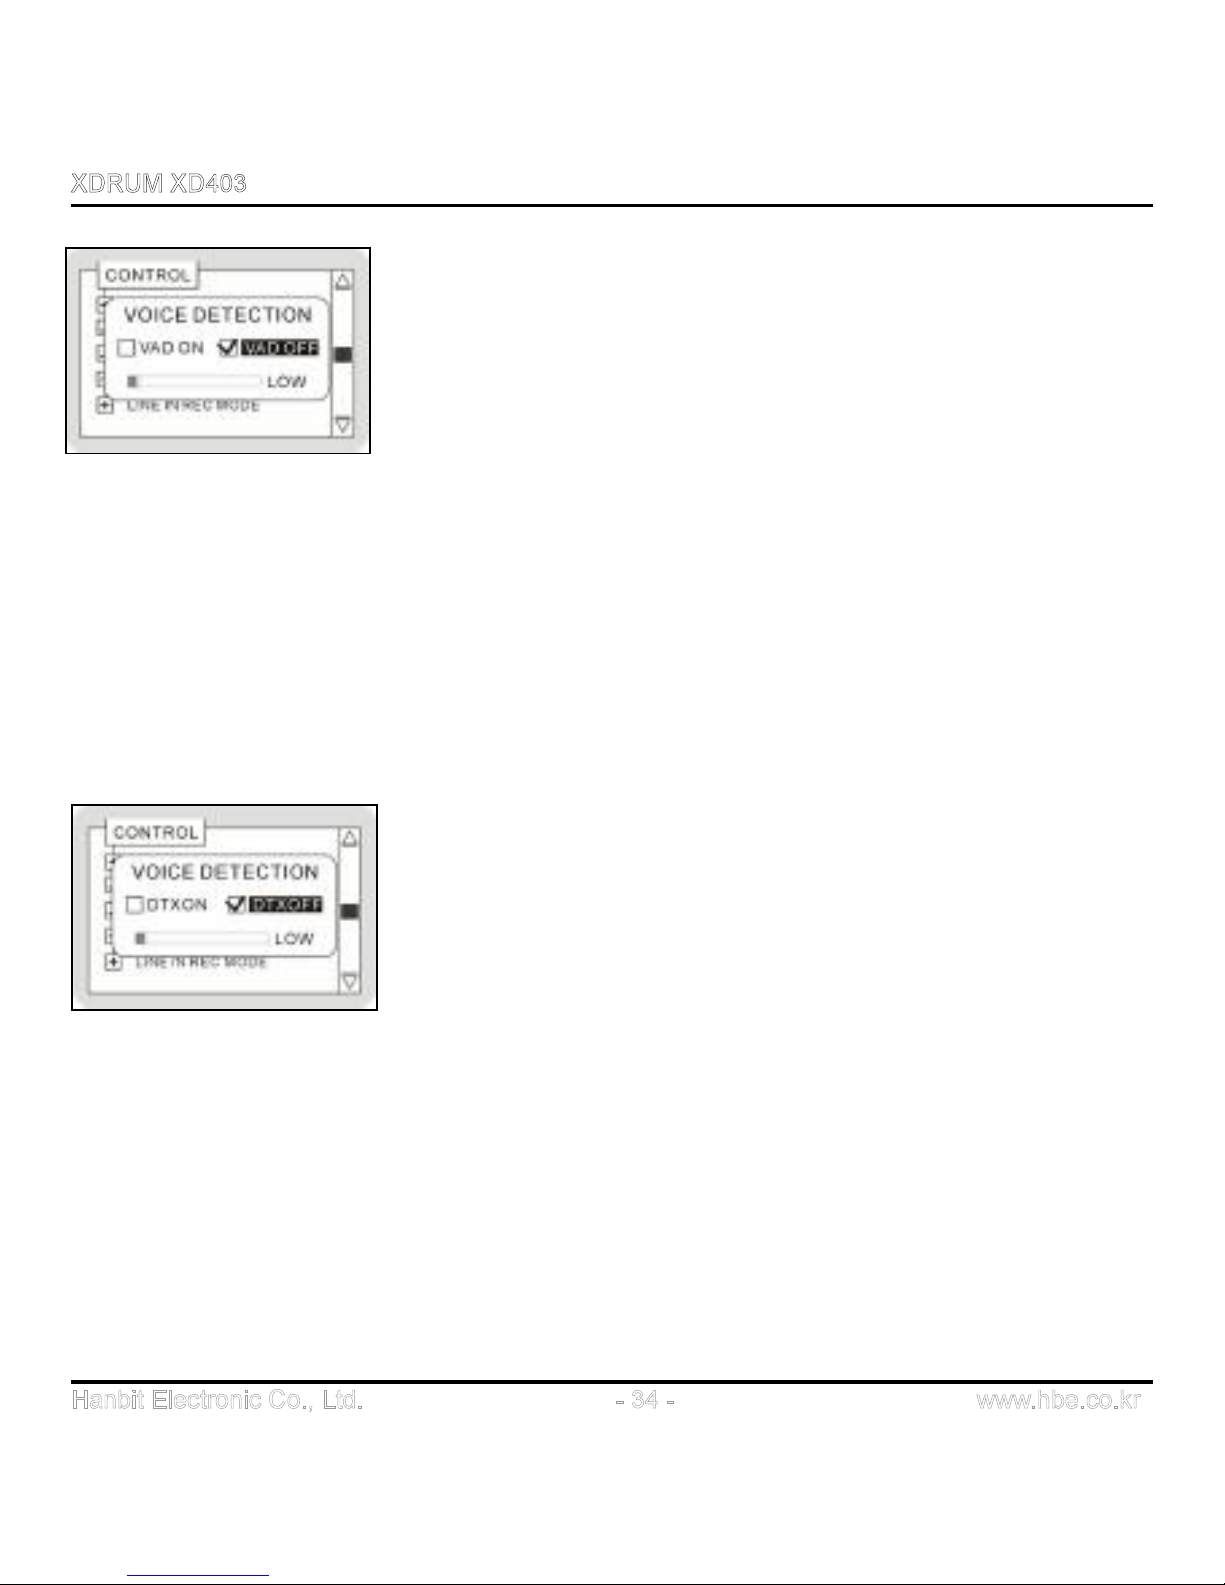
l VOICE DETECTION:
1. When you select MP 3 in VOICE REC MODE as explained
above – in voice recording, the Player automatically detects
external sound and if voice sound is not detected for a certain
time period, the Player automatically suspends recording to
save its memory capability thereby allowing longer period voice
recording. (Default is VAD OFF)
VAD ON: Voice activity detection function is on
VAD OFF: Voice activity detection function is off
Voice detection level setup: it can be defined as LOW, MIDDLE
and HIGH. (Default is MIDDLE)
2. When you select TVF in VOICE REC MODE – in voice
recording, the Player automatically detects external sound and
if voice sound is not detected, it automatically saves its memory
capability to allow longer period voice recording.
DTX ON: Voice activity detection function is on
DTX OFF: Voice activity detection function is off
Setup Menu à CONTROL à VOICE REC MODE à SETUP à PLAY/STOP button
Page 35
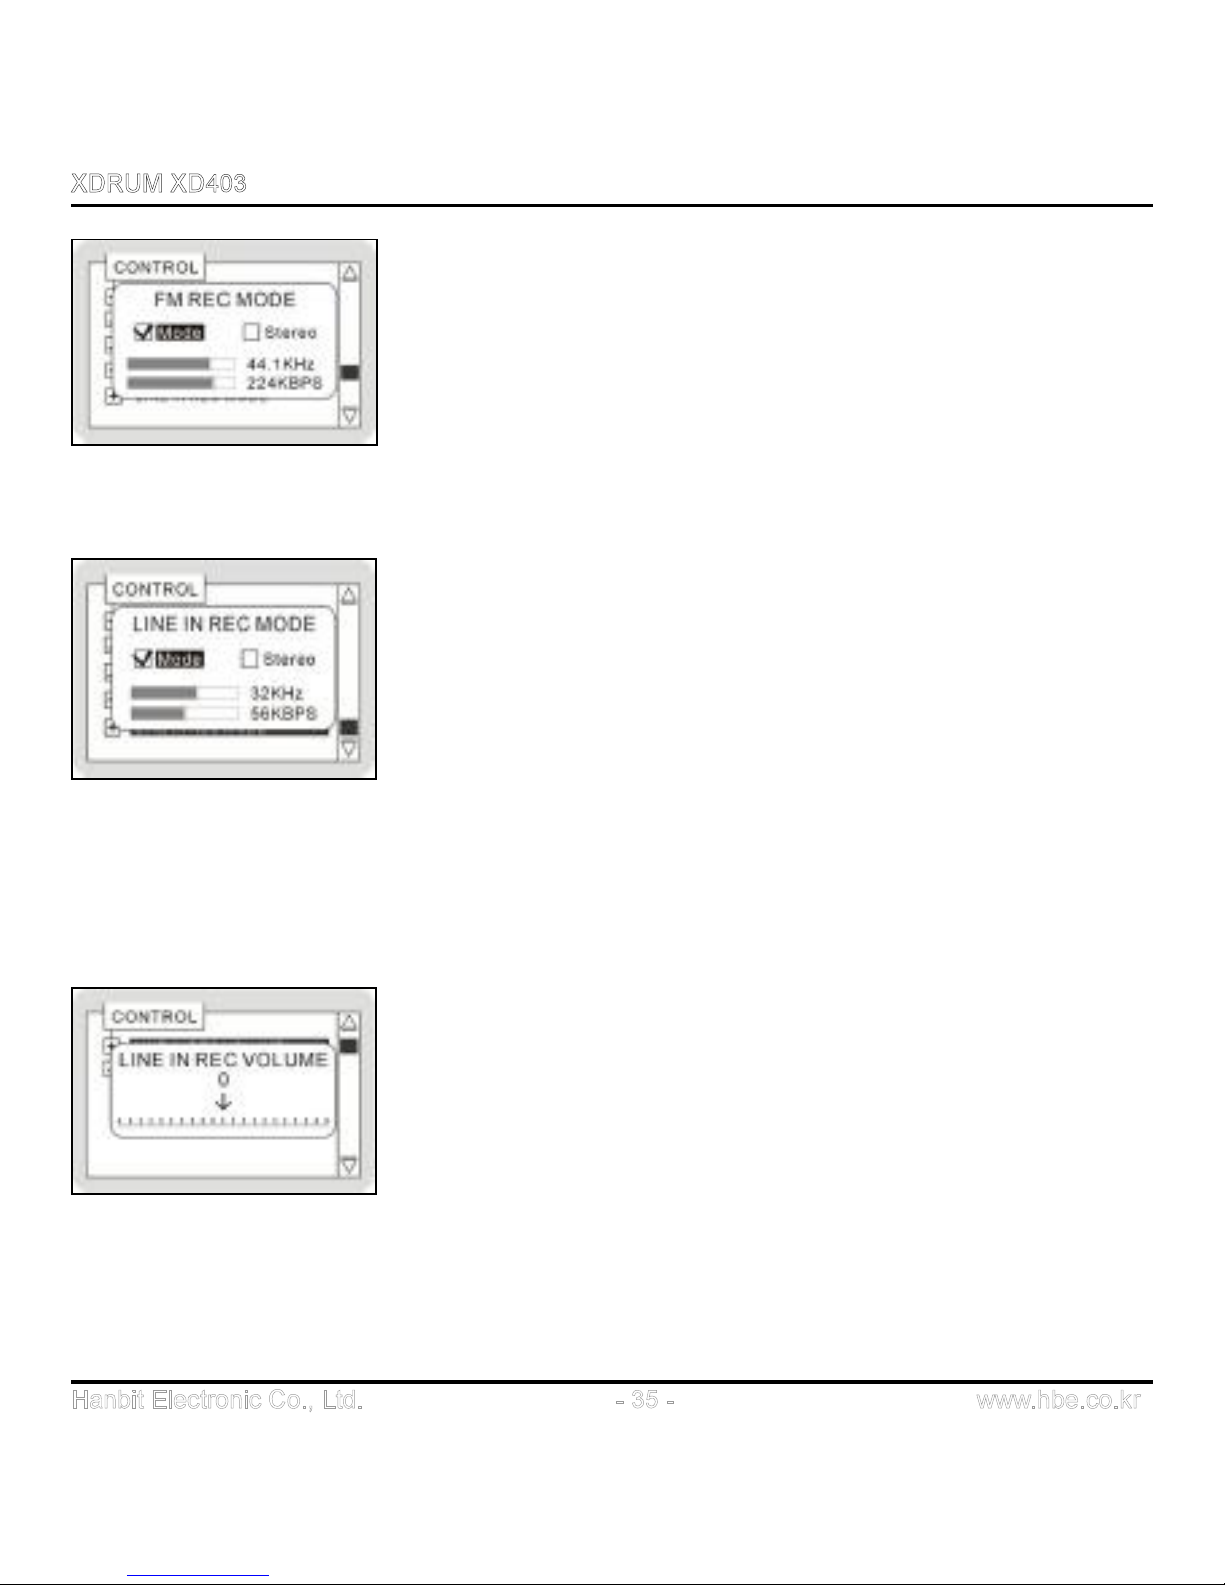
l LINE-IN REC VOLUME : in line-in recording, you can adjust
recording level by pushing OK button to the left or right. The higher
the level is, the bigger the recording volume is.
(Default is 0)
Setup Menu à CONTROL à LINE IN INPUT VOLUE à SETUP à PLAY/STOP button
l FM REC MODE : you can select sound quality in radio recording
1. RECORD mode: you can define it as MONO or STEREO.
2. SAMPLING frequency: setup is possible from 16 KHz to 44.1 KHz.
3. BIT RATE: you can define it from 32Kbps to 224Kbps.
(Default is Stereo / 44.1KHZ / 128KBPS)
l LINE-IN REC MODE: you can select sound quality in line-in
recording.
1. Recording Mode: you can define it as MONO or STEREO
2. SAMPLING frequency: you can define it from 16KHZ
to 44.1KHz.
3. BIT RATE: you can define it from 32Kbps to 224Kbps
(Default is Stereo / 44.1KHZ / 128KBPS)
Setup Menu à CONTROL à LINE IN REC MODE à SELECT à PLAY/STOP button
Setup Menu à CONTROL à FM REC MODE à SETUP à PLAY/STOP button
Page 36
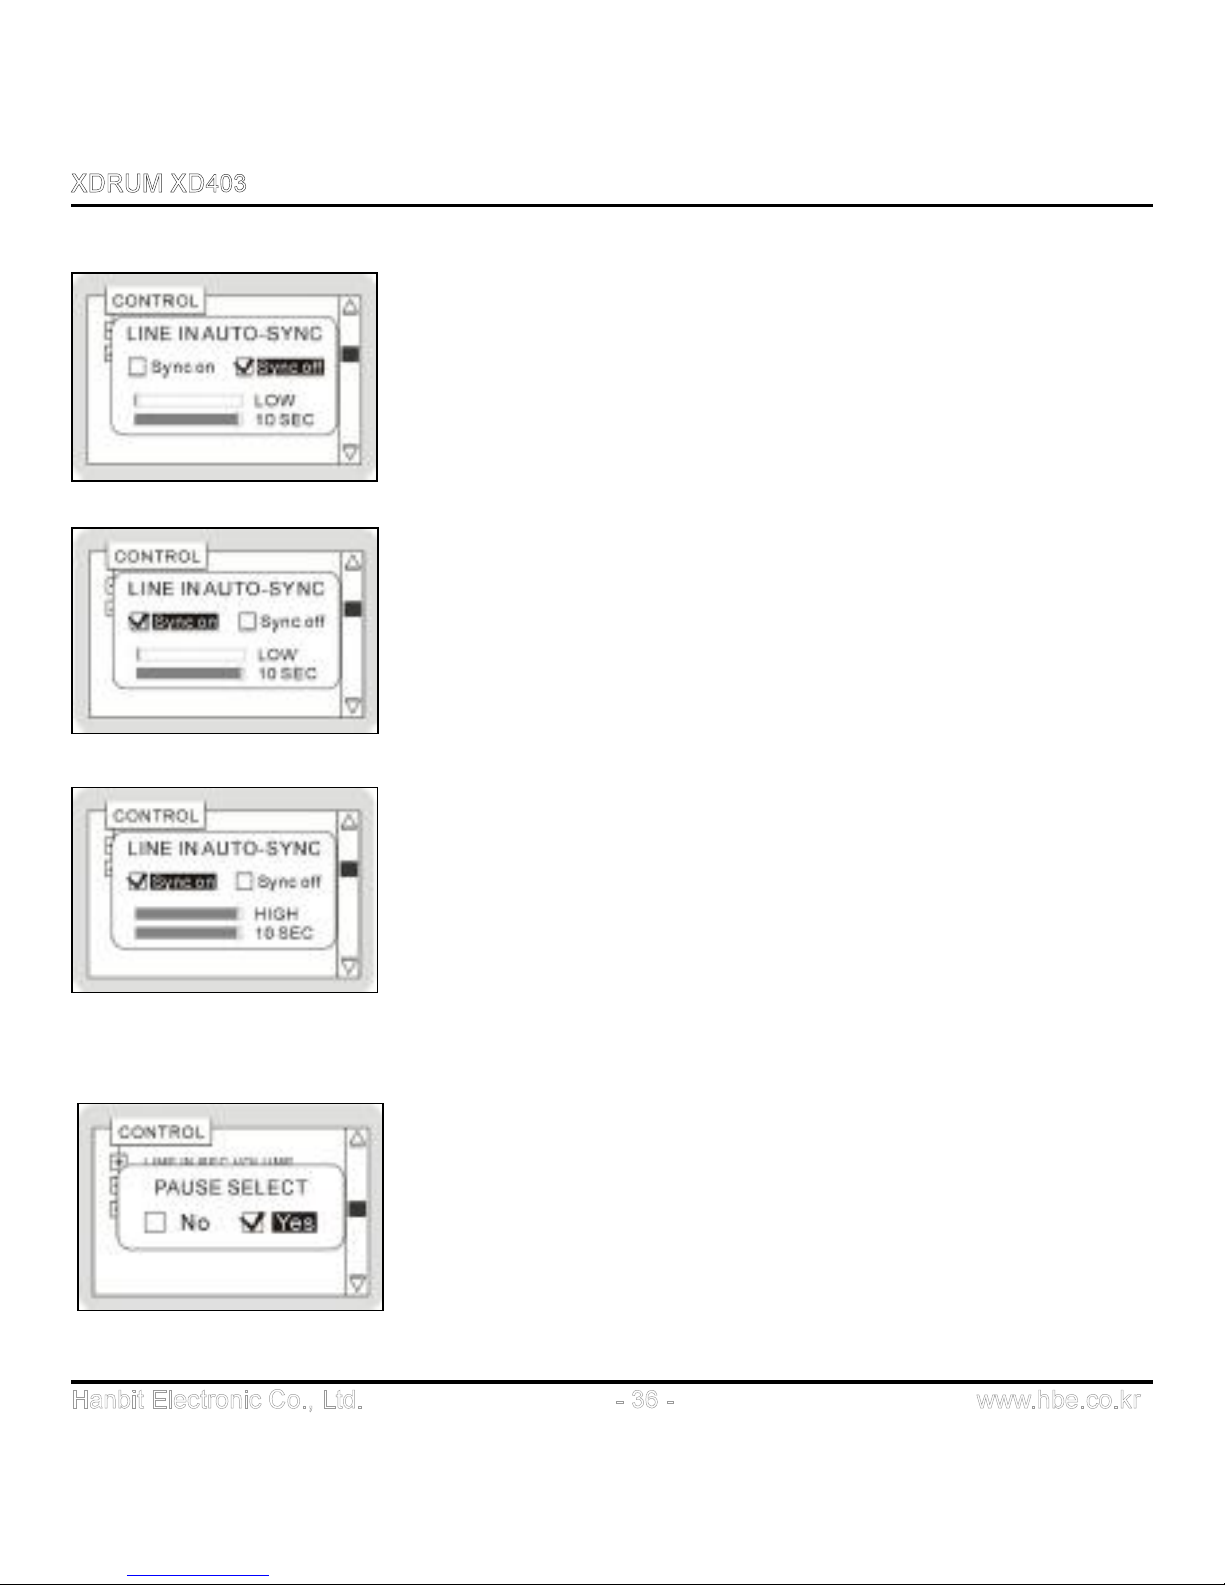
l LINE-IN AUTO SYNC:
In case of playing and recording multiple files consecutively
from an external audio device through Line-in input, it
automatically detects si
lent interval between files. Then it
recognizes and records each file separately. Silent interval can
be defined from 1 sec. to 10 sec.
SYNC OFF : it turns off the audio signal detection function and
useful in recording all audio track defined in one file.
SYNC ON : it activates the audio signal detection function and
creates new file when there is no audio signal within detection
time. It is useful in recording one song in one file.
Detection Level: you can define detection level which is
available in LOW, MIDDLE and HIGH. The lower the level is,
the more sensitive it is in detecting small signal.
Detection time: it creates new files when there is no signal
during defined time period.
(Default is Sync off / MIDDLE / 3 SEC)
Setup Menu à CONTROL à LINE IN AUT-SYNC à SETUP à PLAY/STOP button
l PAUSE SELECT:
Yes : PLAY/STOP button for PLAY/PAUSE function (XD403
resumes playing music after turning off and on)
No : PLAY/STOP button for PLAY/STOP function
Setup Menu à CONTROL à PAUSE SELECT à SETUP à PLAY/STOP button
Page 37
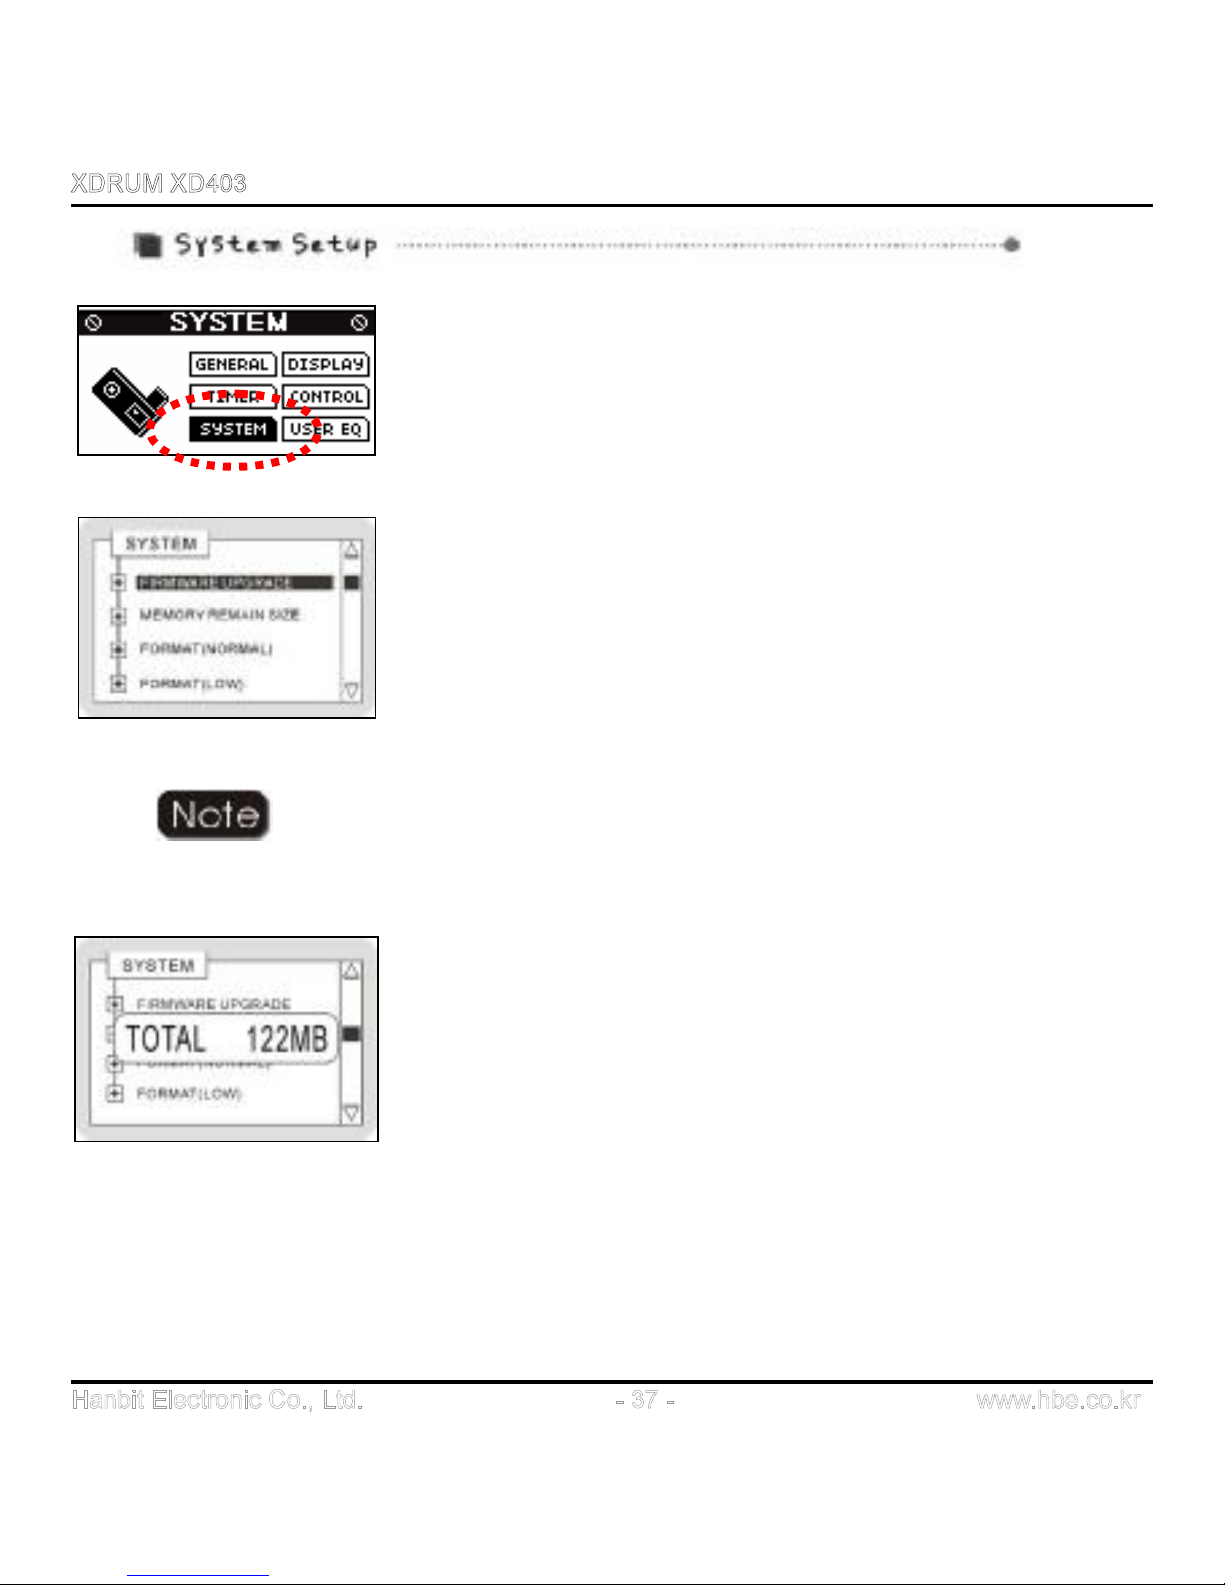
l Firmware Upgrade
For firmware upgrade, press the OK button in FIRMWARE
UPGRADE. Select YES and press the OK button again. Then,
“FIRMWARE UPGRADE. Not connect!!” message will be
displayed on LCD screen. Upon seeing the message, connect
the Player to USB CONNECTOR of PC. Then, you can see
“Connected” on the LCD screen. Now you can start Firmware
Upgrade.
(Default is NO)
You must install Firmware Upgrade Drive to use Firmware Upgrade.
(Please refer to Firmware Upgrade Section)
l MEMORY SIZE CHECK:
It displays total memory capacity. You can check and see total
and remaining memory capacity by pushing the OK button 8 or
7 direction.
Setup Menu à SYSTEM à MEMORY SIZE CHECK à SETUP à PLAY/STOP button
Page 38
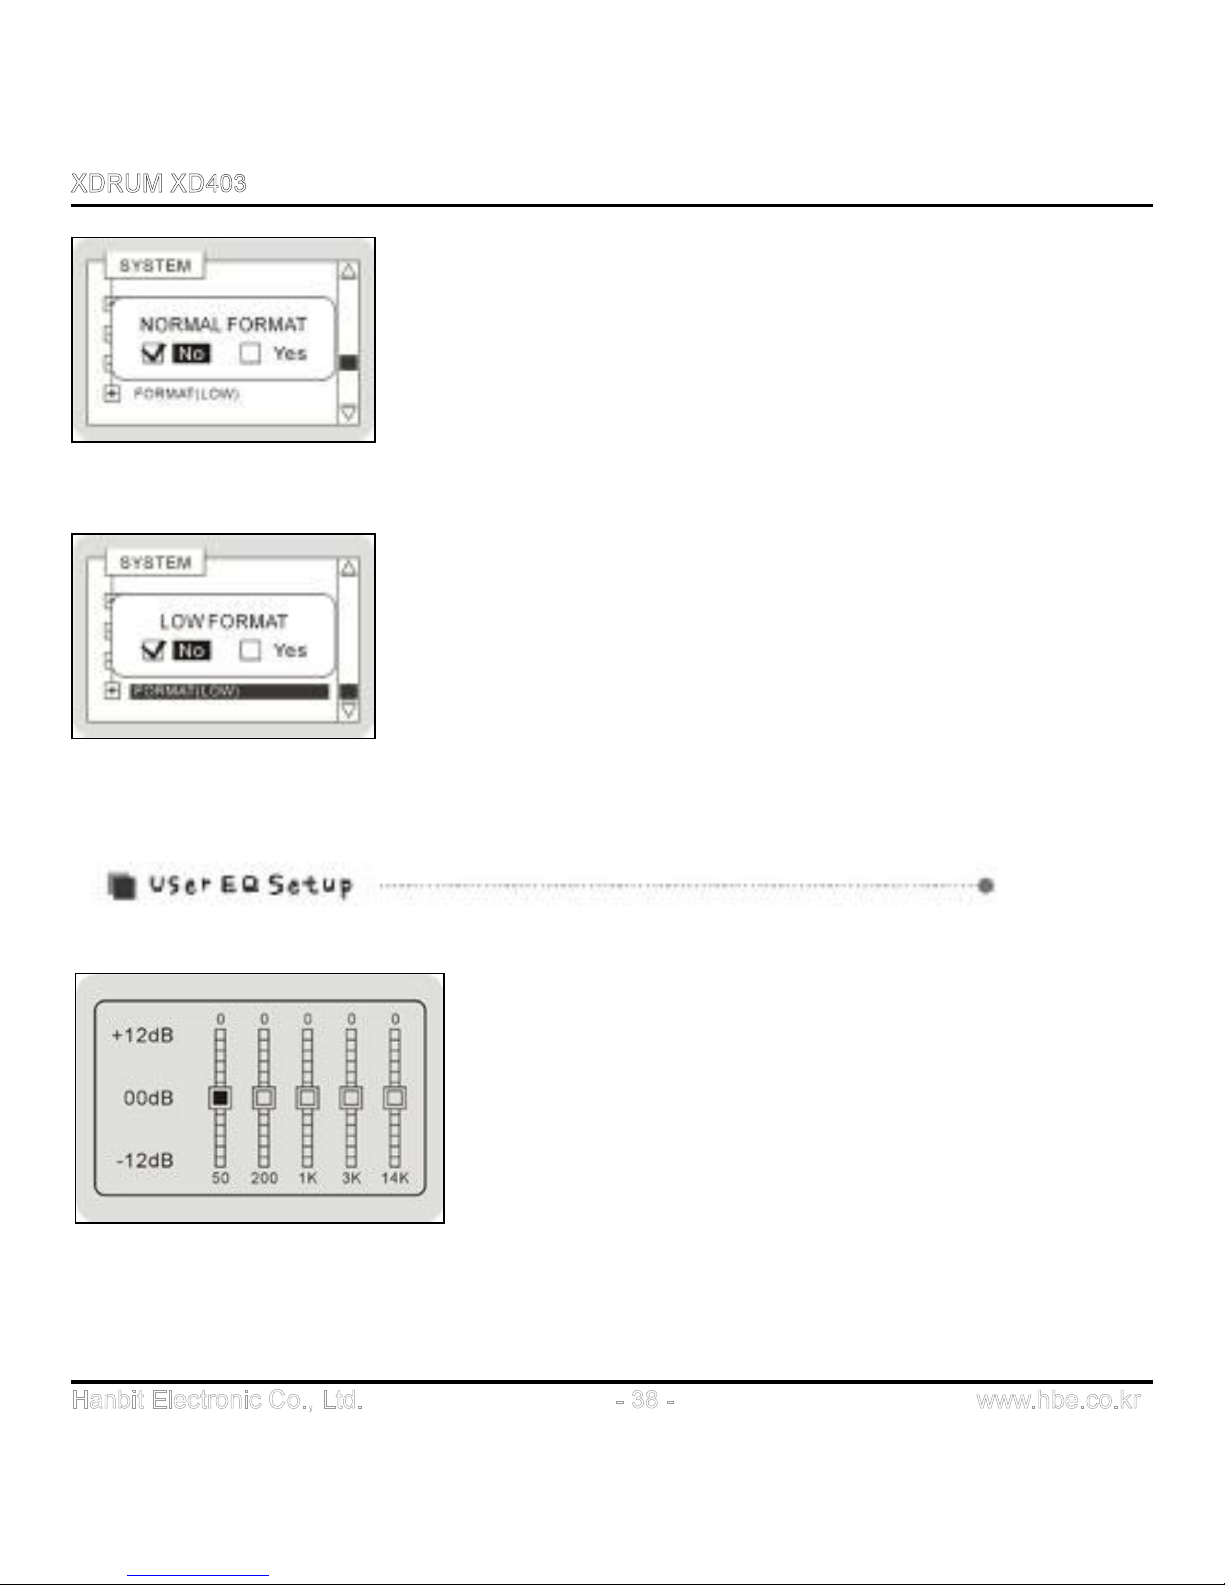
l FORMAT (NORMAL) : It executes NORMAL FORMAT. Be
careful in executing format as all stored data will be deleted
when format is executed.
(Default is NO)
Setup Menu à SYSTEM àFORMAT (NORMAL) à SETUP à PLAY/STOP button
l FORMAT (LOW) :
It executes LOW FORMAT. In case of LOW FORMAT, it may
take some time.
(Default is NO)
Setup Menu à SYSTEM à FORMAT (LOW) à SETUP à PLAY/STOP button
l Select frequency band you want to adjust by pushing
OK button to 8 or 7 direction.
l Setup your desired level by pushing OK button to plus
(+) or minus (-) direction.
l To complete and finish the adjustment, press
PLAY/STOP button.
(Default is 0 dB)
Setup Menu à USER EQ à SETUP à PLAY/STOP button
Page 39
n Acquire a PC (general PC) having USB port
n MP3 Player (XD403)
n FIRMWARE UPGRADE execution files (ex: EZ_Upgrade.exe)
n Latest version of FIRMWARE (downloadable via www.hbe.co.kr)
l FIRMWARE UPGRADE execution files and driver installation files are available in the
CD provided in the Product package or in the download bulletin board on our website
(http://www.hbe.co.kr)
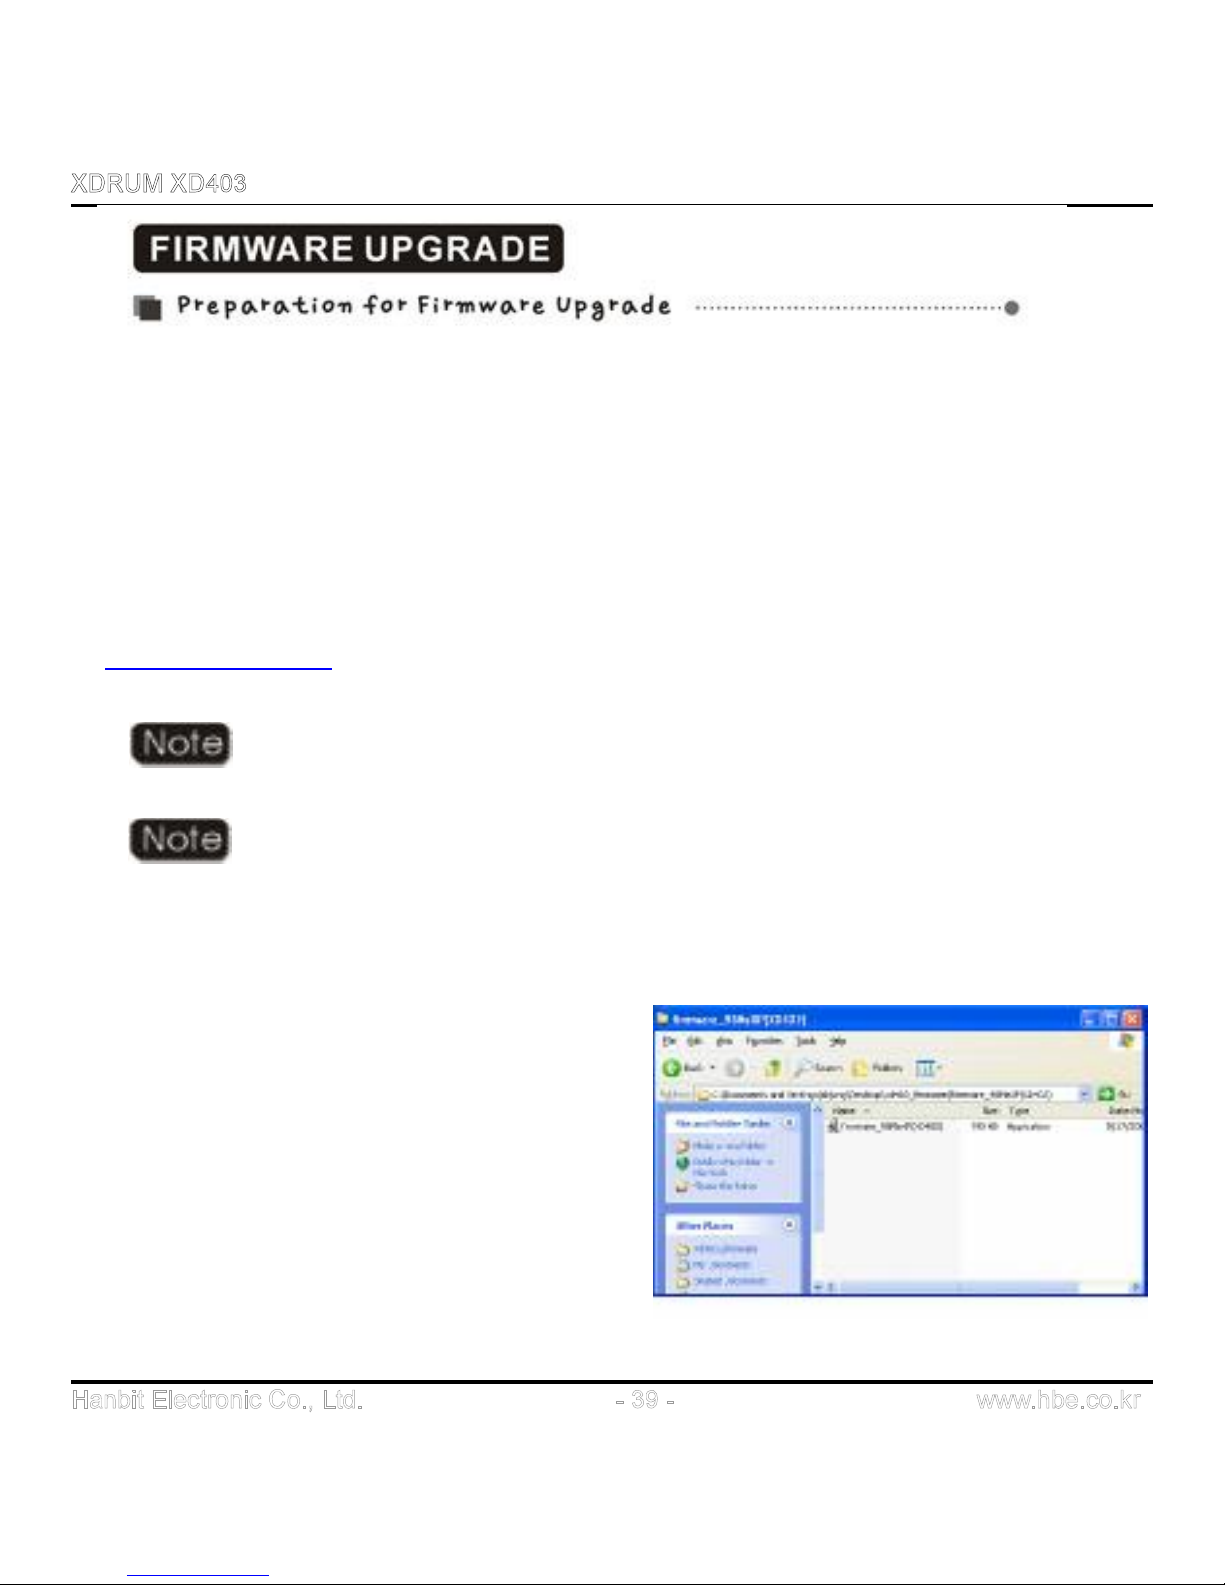
1. Install Firmware Upgrade Driver
You must install FIRMWARE UPGRADE Drive to
use FIRMWARE UPGRADE. If you use Windows
2000, execute Firmware_Win2K.exe located in
the Firmware Upgrade Driver folder in the CD (If
you use Windows 98, Me or Windows XP,
execute Firmware_Win98MeXP.exe) and restart
your PC after completing installation.
Before Firmware upgrade, back up important data in XD403 for safety.
Please check your firmware version with latest version in our website
(www.hbe.co.kr > English > Download) before upgrading the firmware.
Page 40
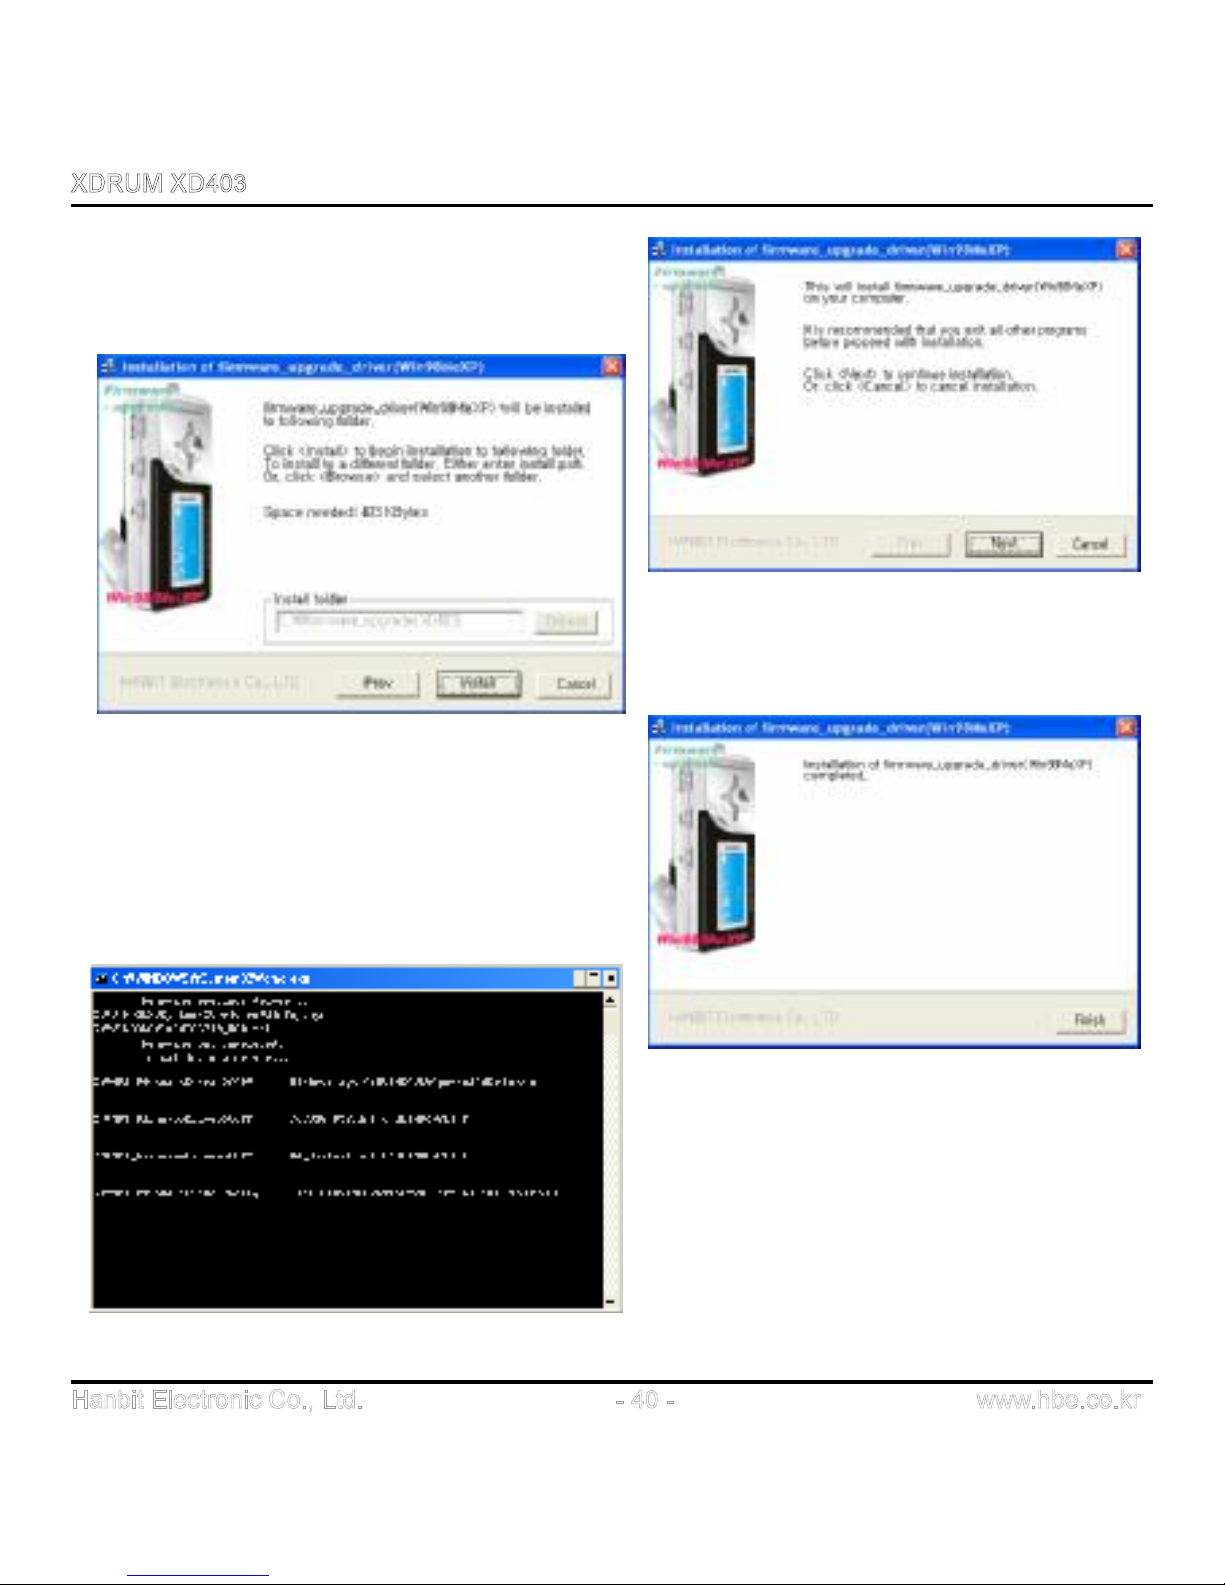
Click ‘Next’
Click ‘Install’
Click ‘OK’ and Firmware drive will
complete after showing DOS windows.
Page 41
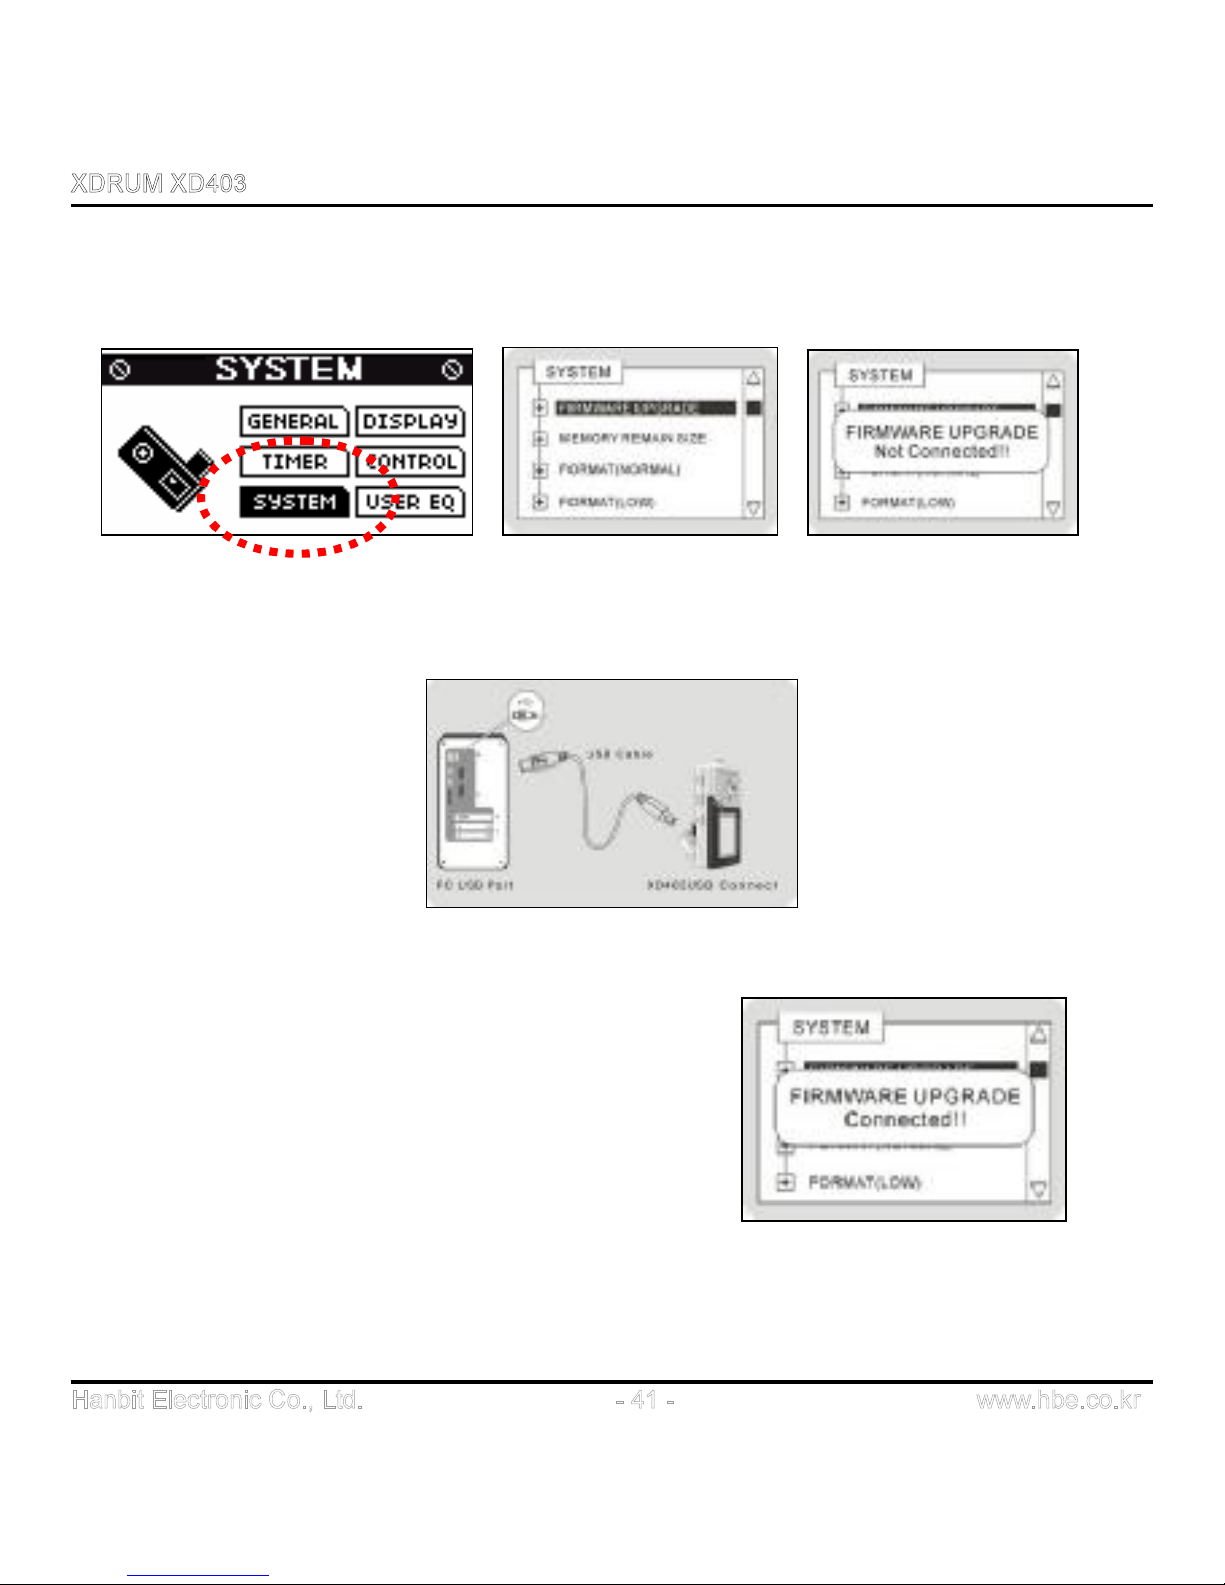
2. Connect MP3 to PC
Now, go into Setup Menu in the MP3 player (XD 403) and define the Player as System à
Firmware Upgrade mode.
Connect MP 3 player (XD403) to PC’s USB port as shown in the picture.
If you connect MP3 Player (XD403) to PC’s USB
port, the message of “FIRMWARE UPGRADE
Connected!!” will be displayed on LCD screen.
Page 42
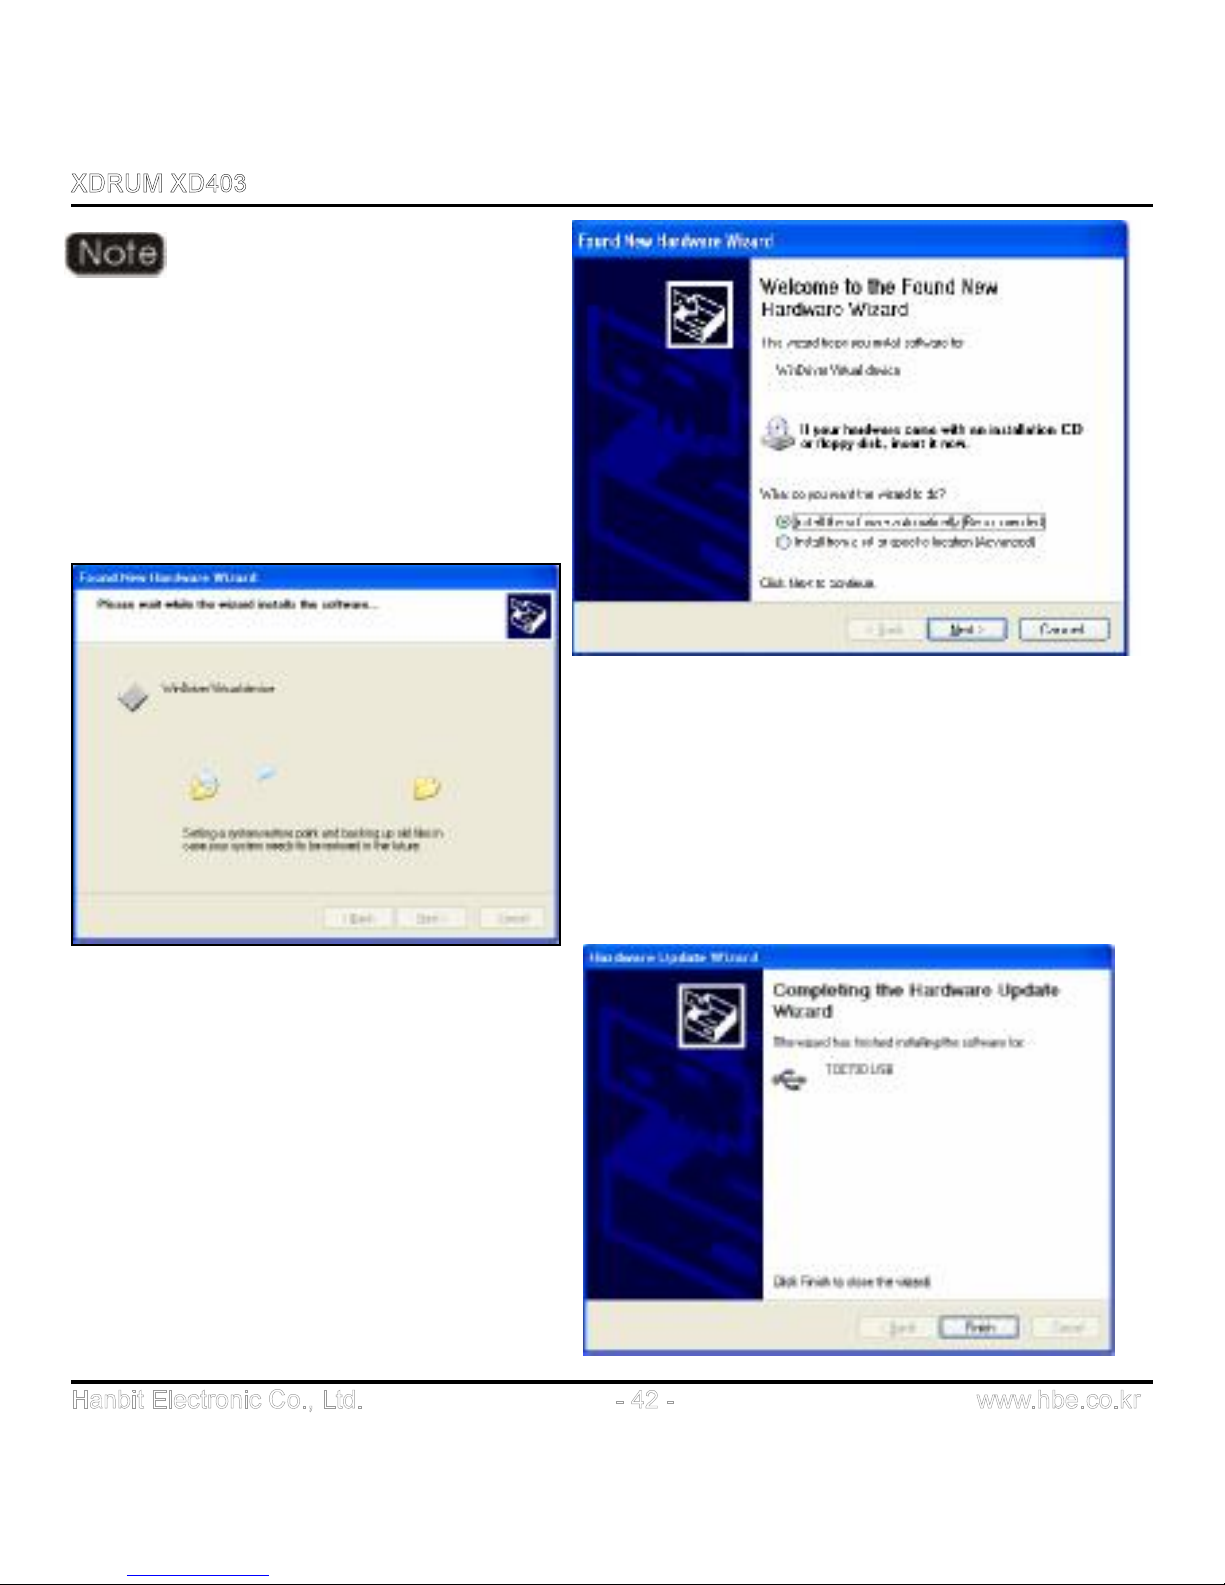
Some case of O/S, Hardware
Install Wizard can execute
automatically. And then please
follow as below.
Click ‘Next’
Click ‘Finish’ and Re-boot PC to
complete Firmware Drive.
Page 43
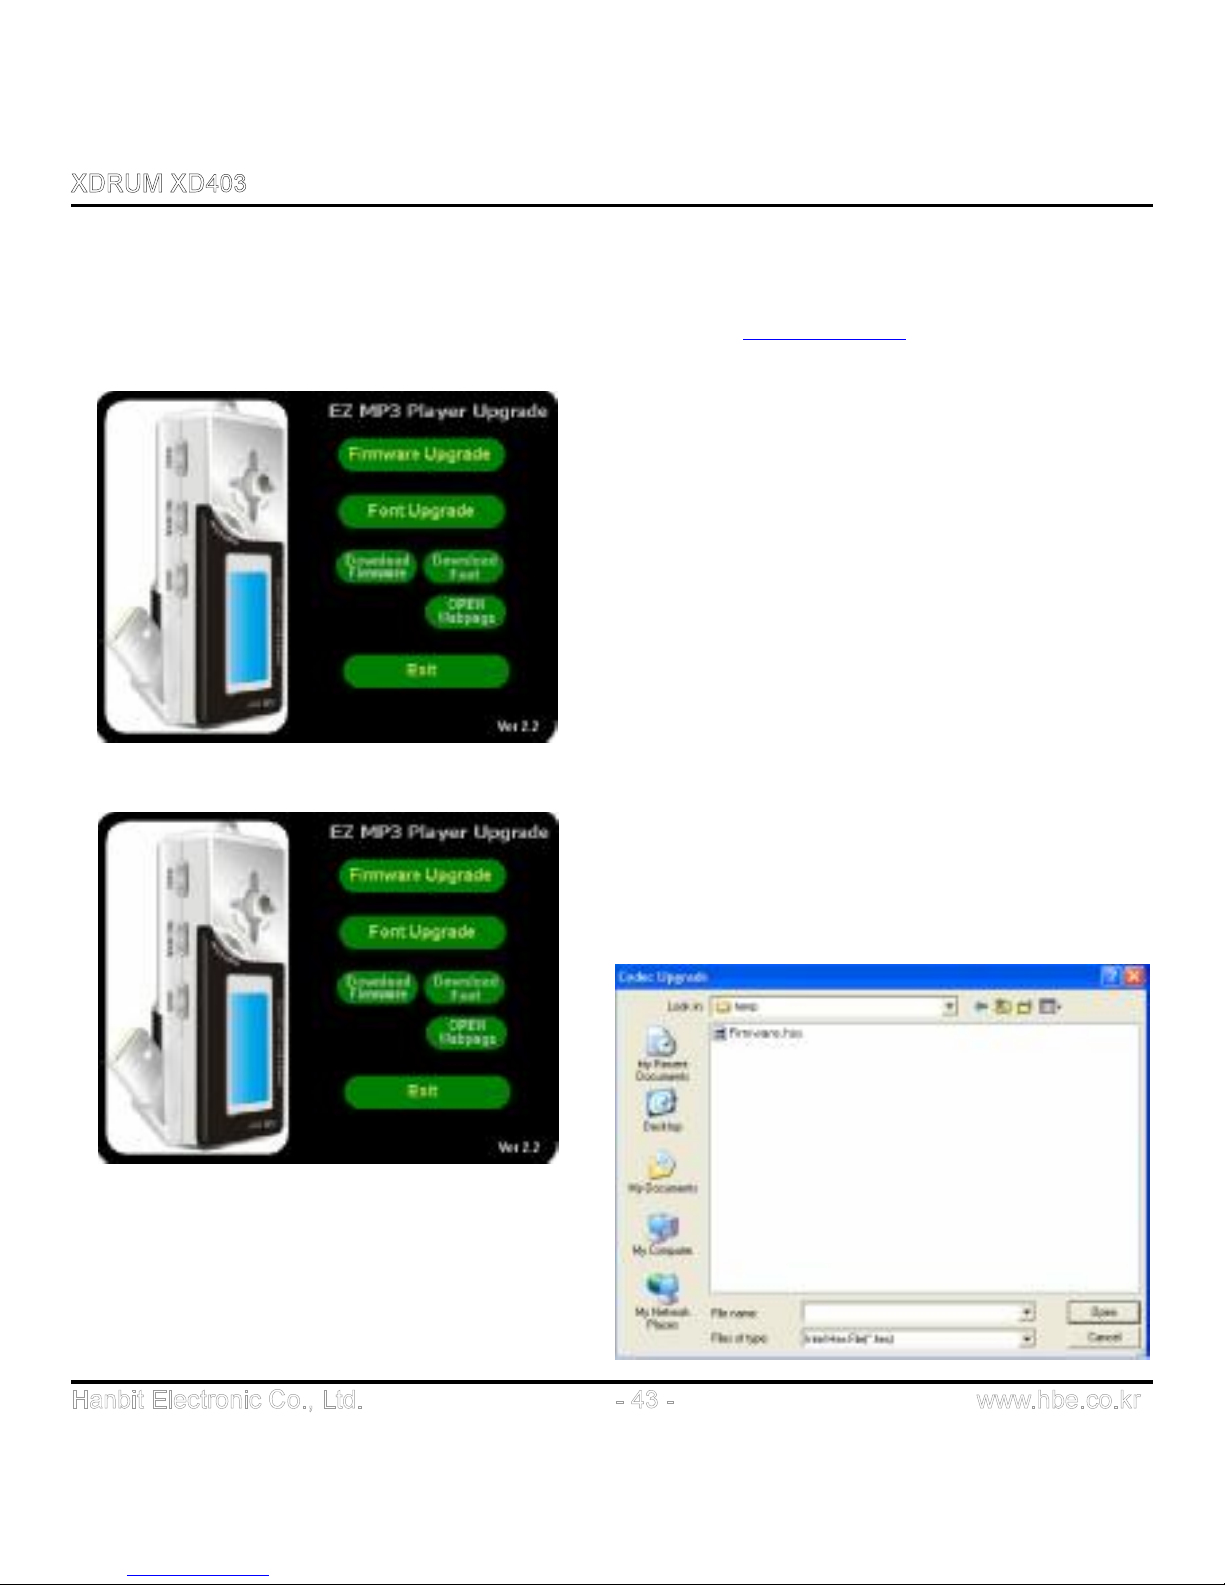
3. Font Upgrade
Execute ‘EZ_Upgrade.exe’ in CD Drive (or download it from www.hbe.co.kr)
Click Download FONT
Click Font Upgrade
Choose font file which was
downloaded and Click ‘Open’
Page 44
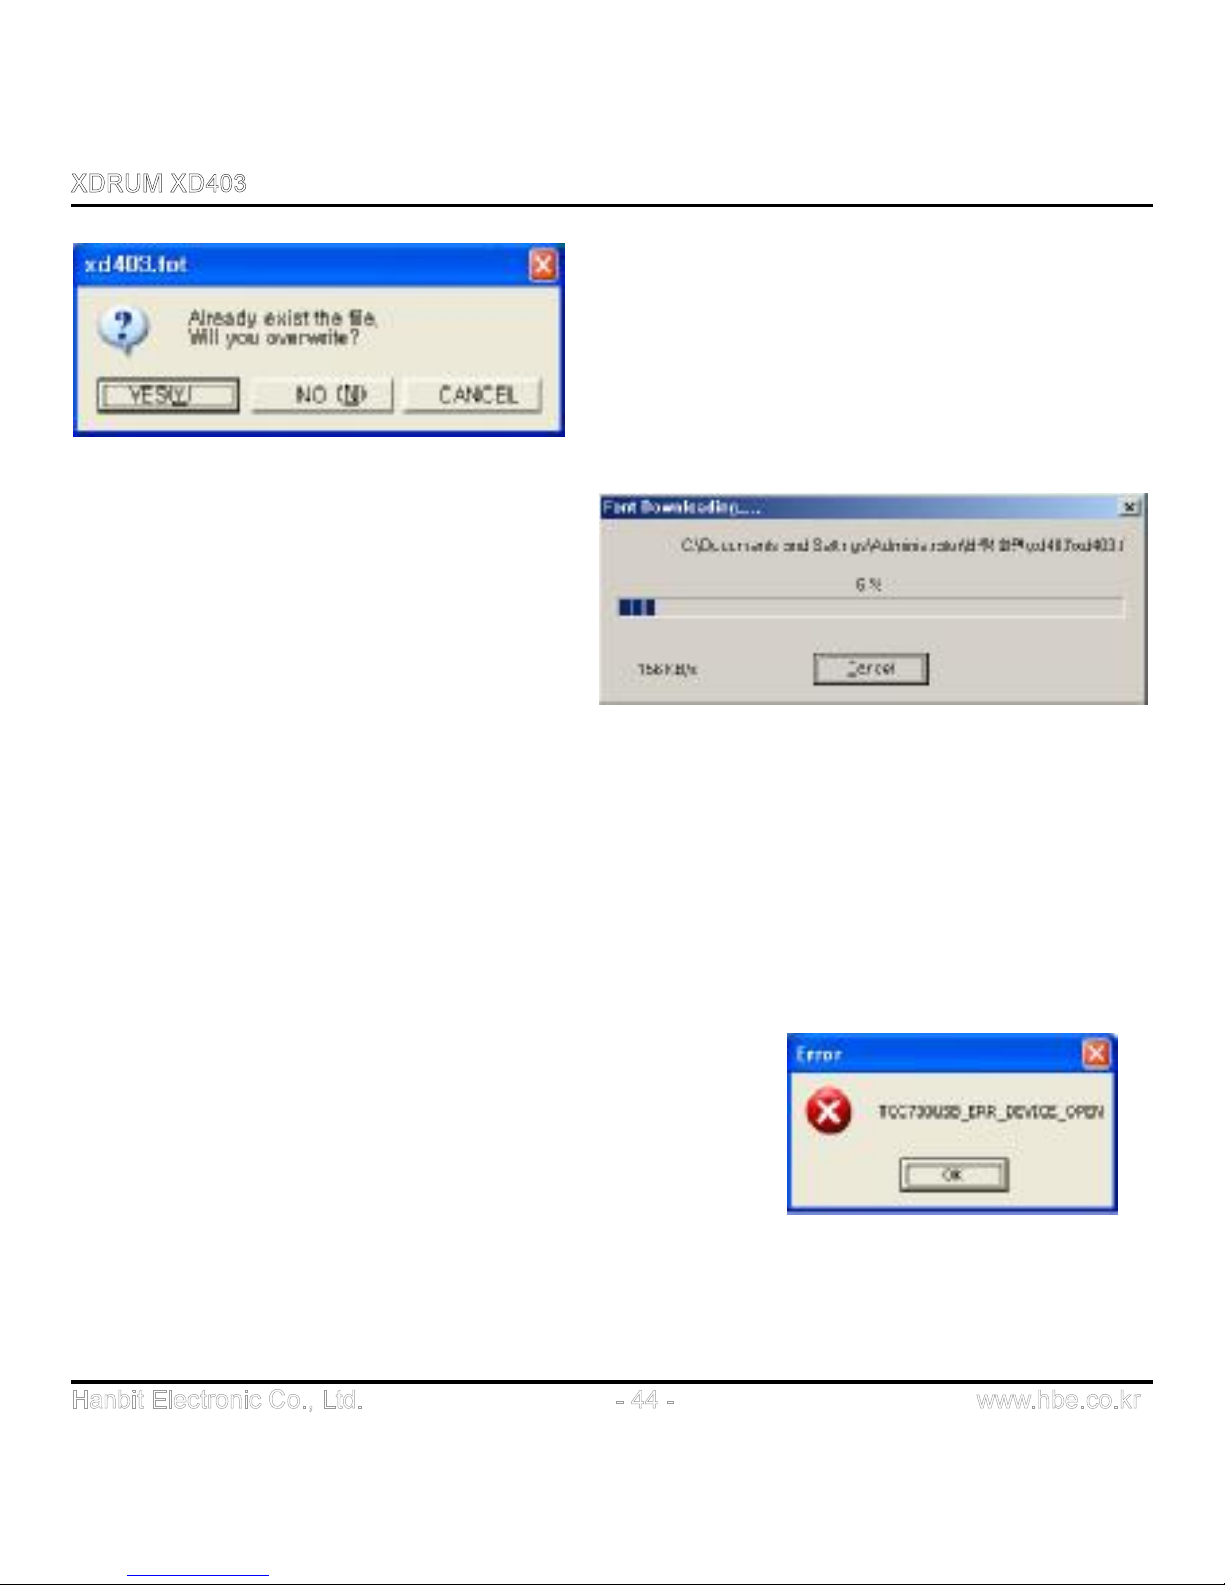
Click Yes
After progress 100%, you can enjoy
MP3 Player after disconnect MP3
Player from PC.
● If the same massage repeats, disconnect MP3 from
PC, and install Firmware Upgrade Driver again.
Page 45
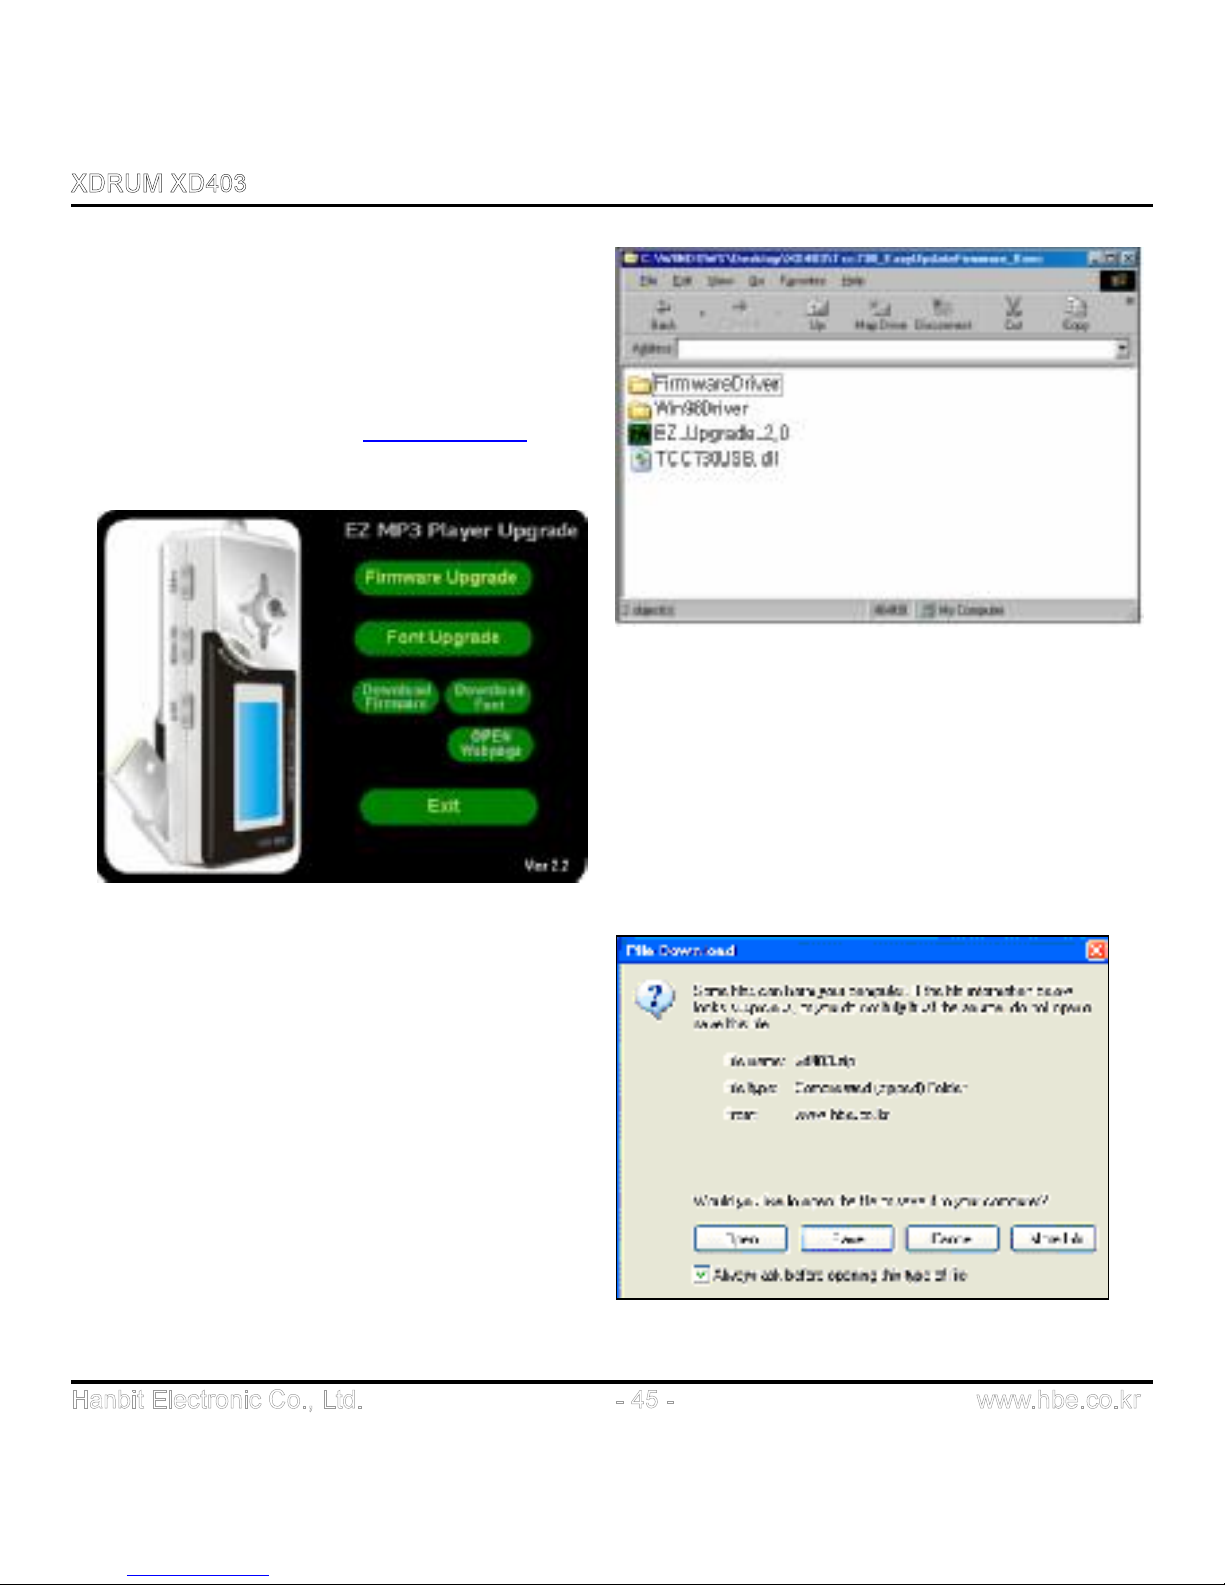
4. Firmware Upgrade
Execute ‘EZ Upgrade.exe’
located in XDRUM XD403 folder in the CD
drive (or download it from www.hbe.co.kr).
Click Download Firmware
Click Save when the following
window is displayed.
Page 46
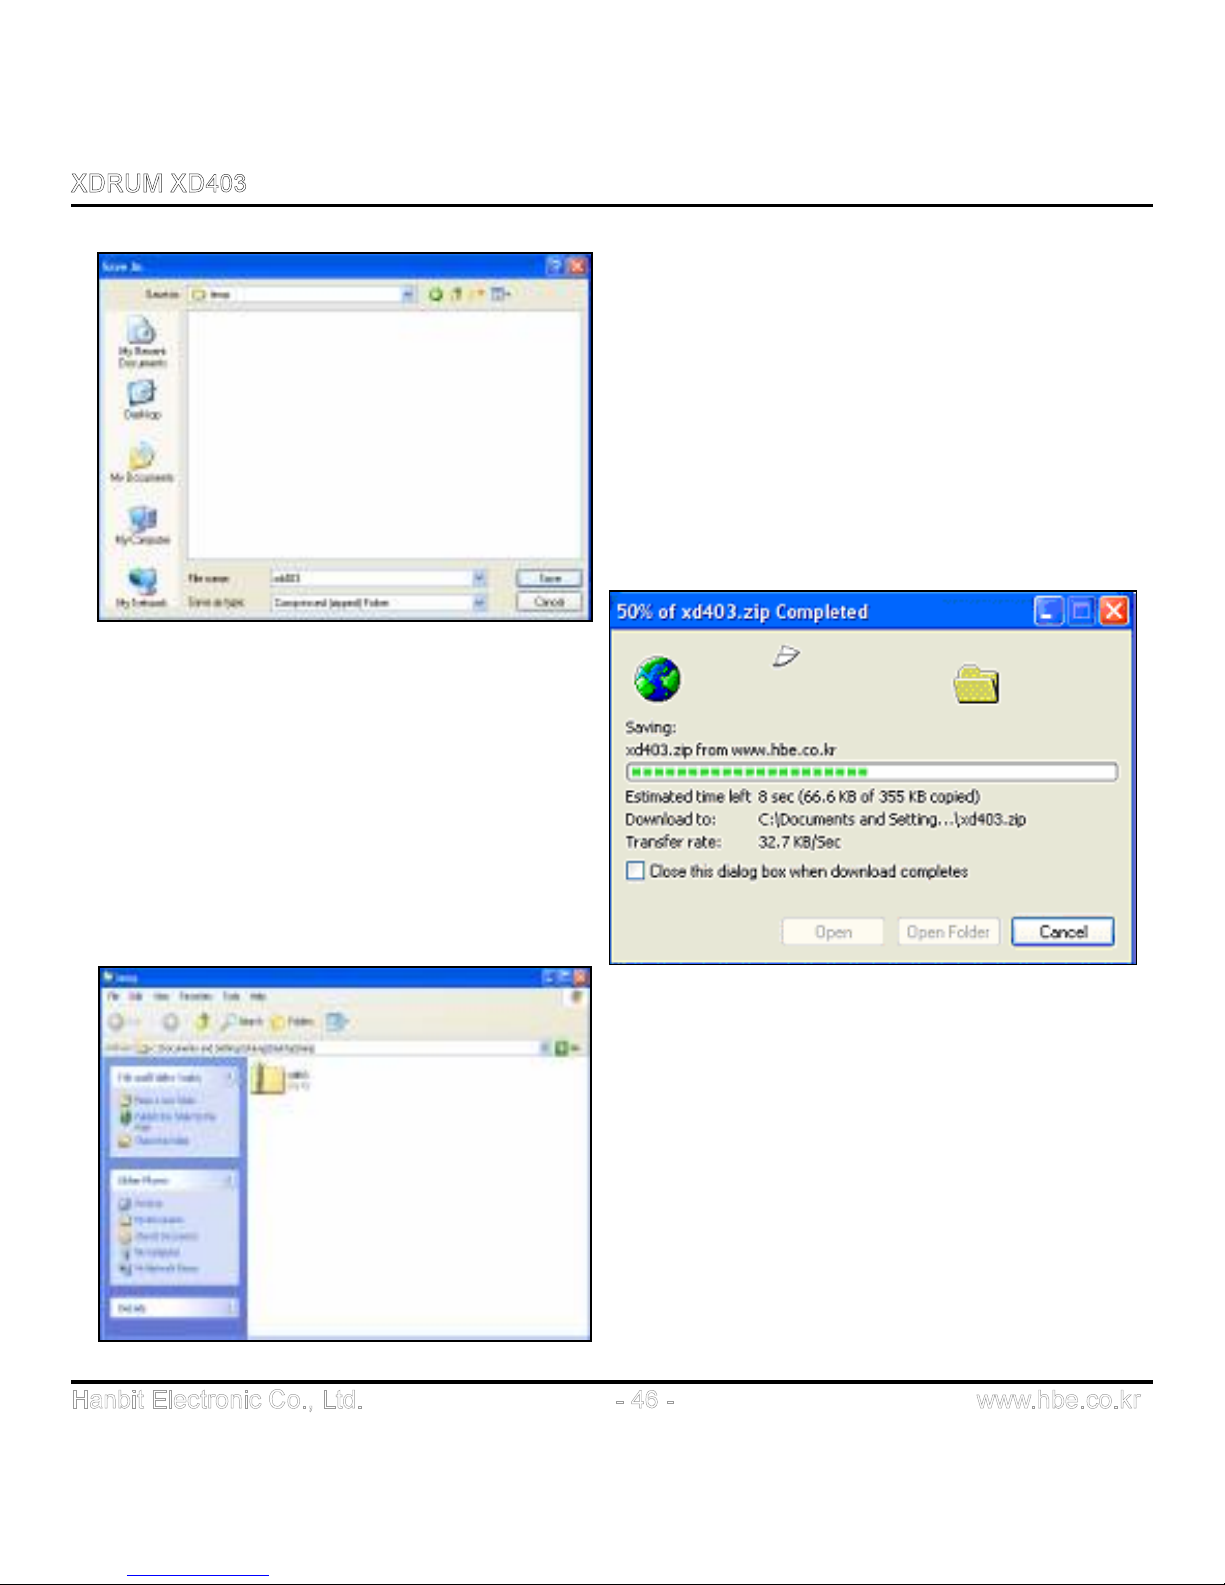
Click Save after selecting the location to
save the file.
Download is executed as shown in the
picture and the zip file is saved in the folder
Page 47
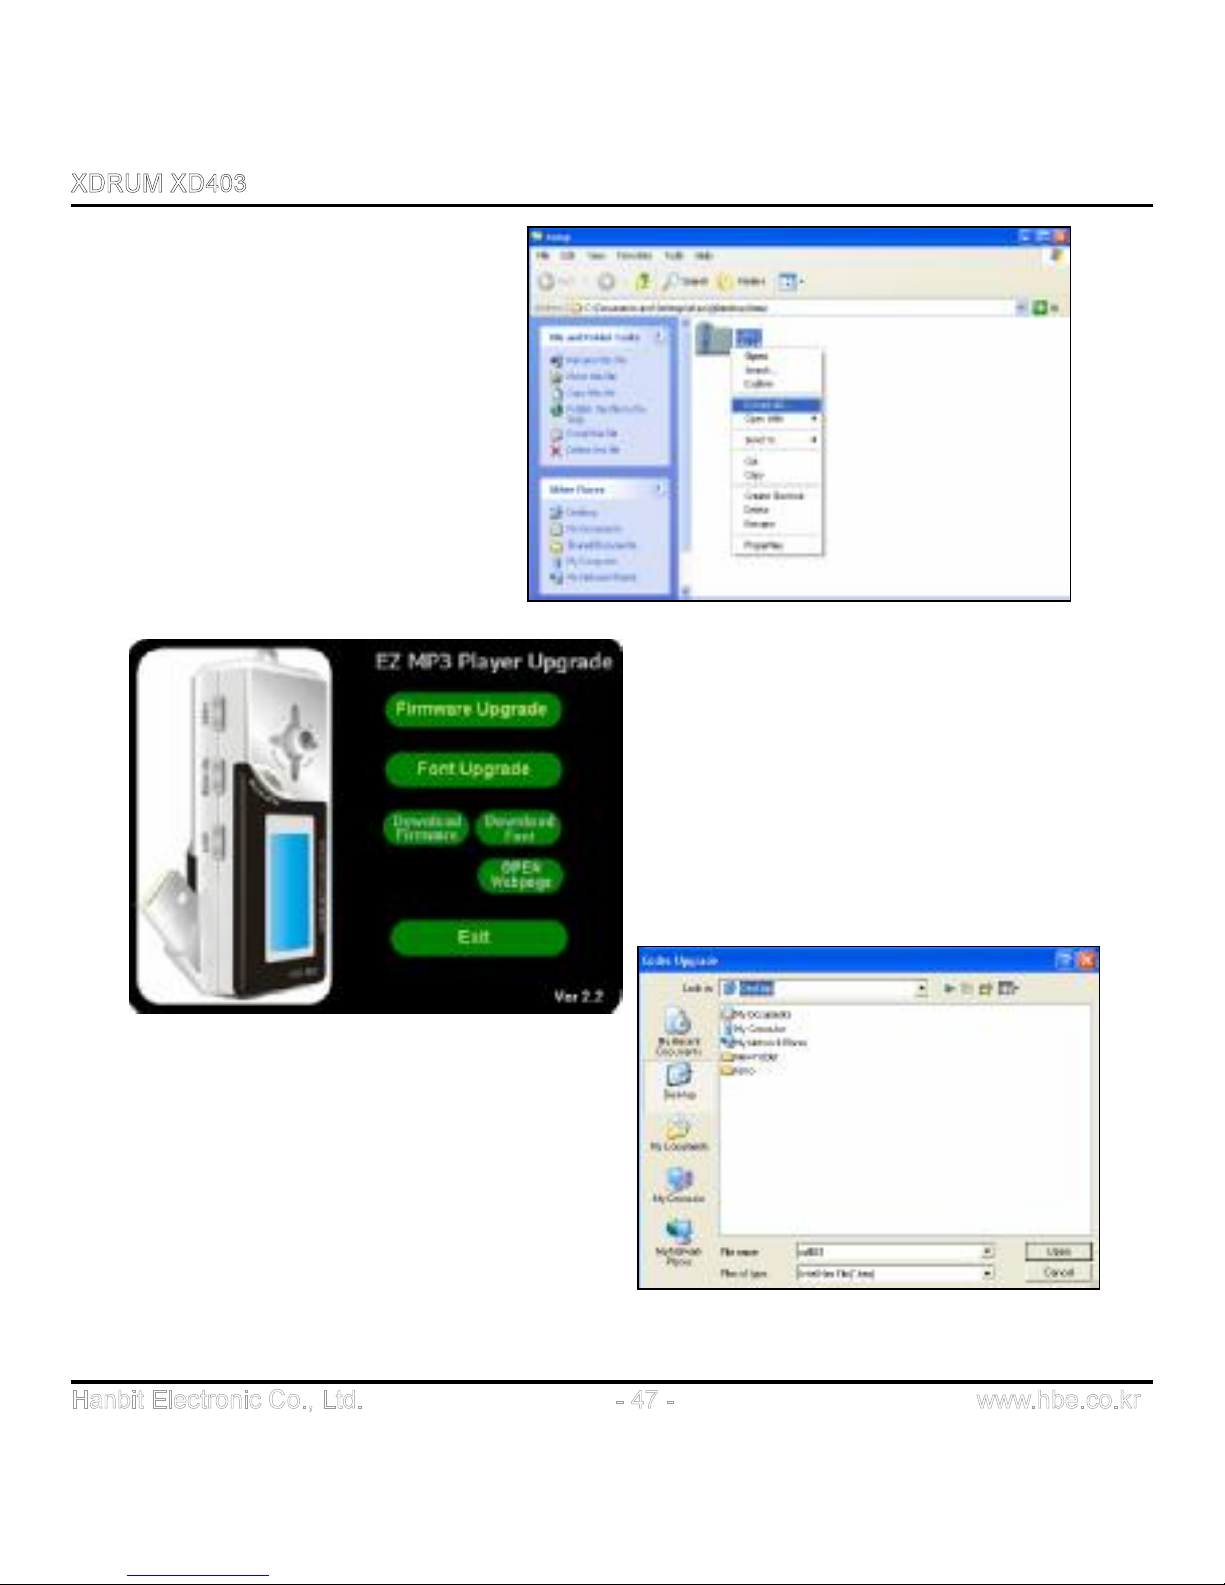
Unzip the downloaded zip file
as shown in the picture. (Use
Winzip program)
Click Firmware Upgrade
Select the location of Firmware to be
updated.
Page 48
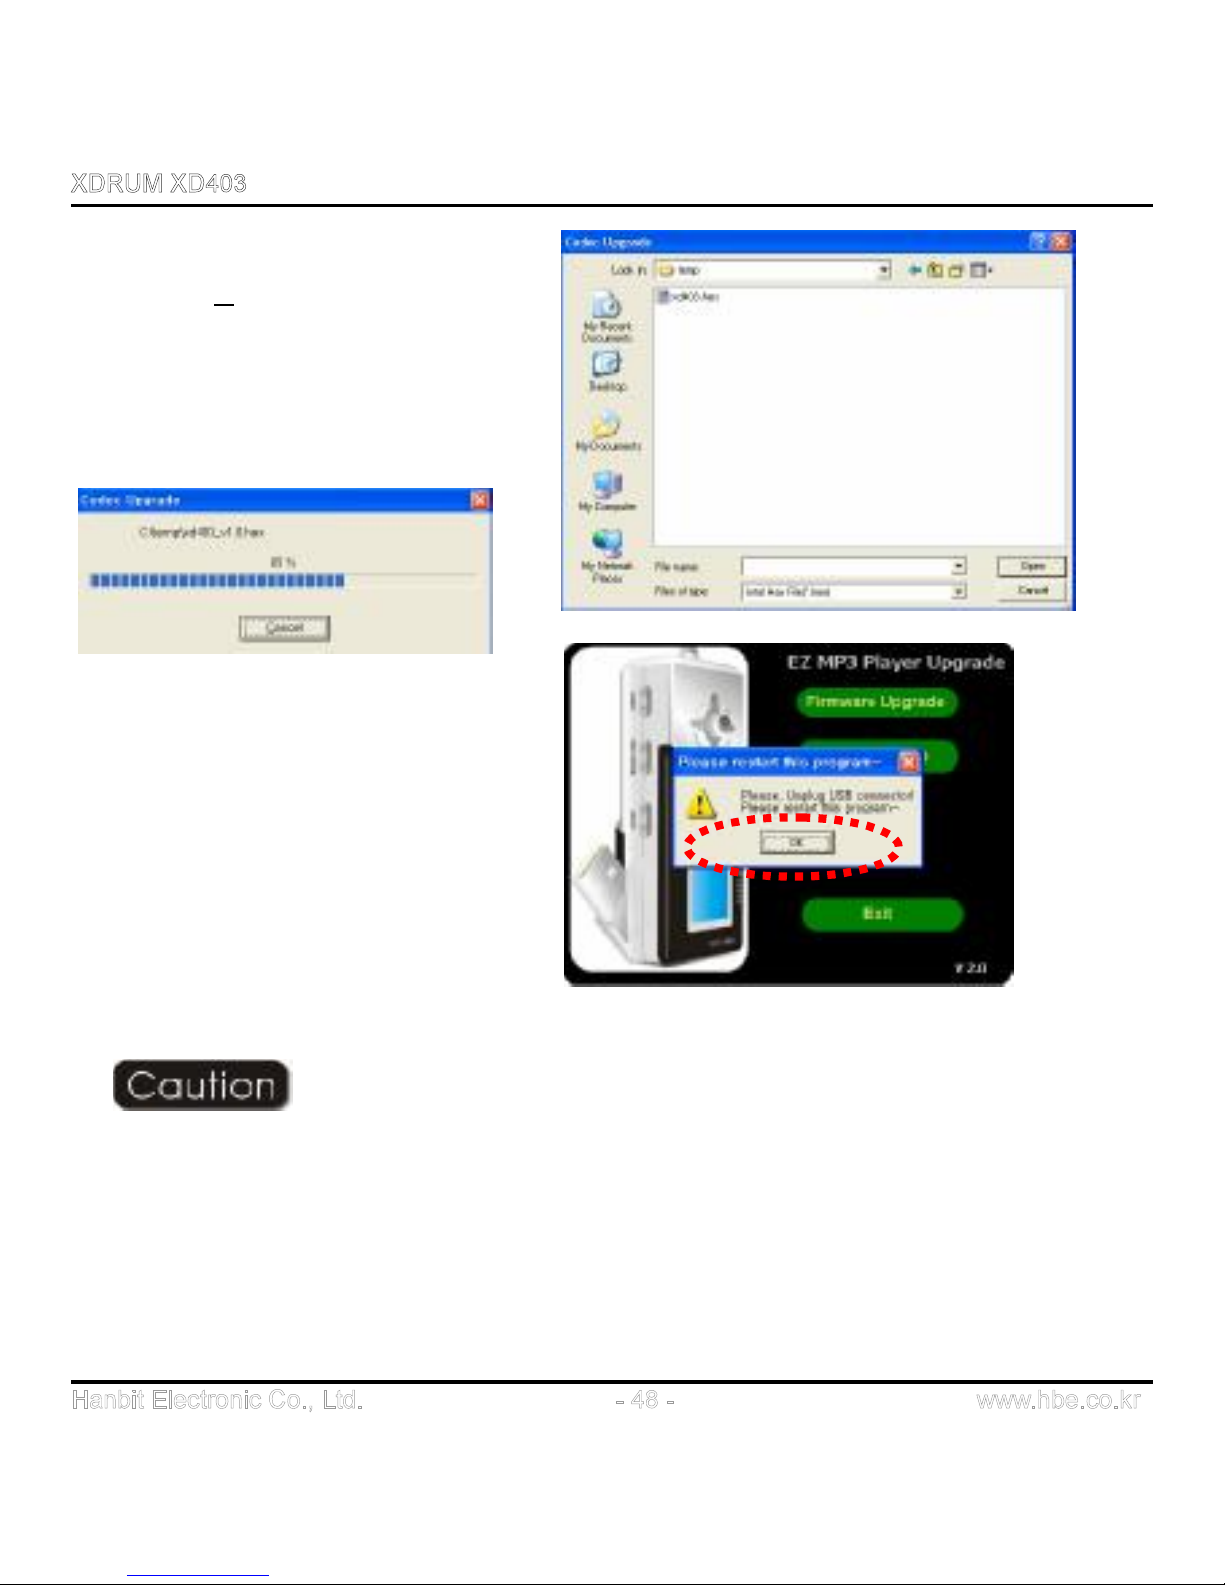
Select hex file that is unzipped, and
click Open (O)
Firmware Upgrade is processed as
shown in the following pictures.
Click OK to finish Firmware Upgrade
and Disconnect MP3 Player from PC.
And you can enjoy MP3 Player.
If the program suddenly stops in the middle of Firmware Upgrade
procedure, firstly release the XD403 from PC and re-operate
EasyUpdateFirmware.exe
If you release XD403 from PC after completing Firmware Upgrade, XD403 will be turned off
automatically. Then turn on XD403, and execute Format(Normal) operation in the System
Setup Menu to use XD403 safely.
Setup Menu à SYSTEM à FORMAT(NORMAL) à SETUP à PLAY/STOP button
Page 49
HANBiT Electronics supply you with five useful application softwares as shown below.
1. E-MAIL : Enable you to receive and send email on other PC.
2. PC LOCK : Protect from illegal approach by using system lock key
3. TIME LOCK : Limit PC using time to prevent internet addiction
4. FILE LOCK : Hold function for protection document, as well as auto compression and
uncompression
5. MY AD : As a POP UP function, showing desired graphic file on the monitor.
Please refer to Application Software folder in supported CD for usage
Page 50
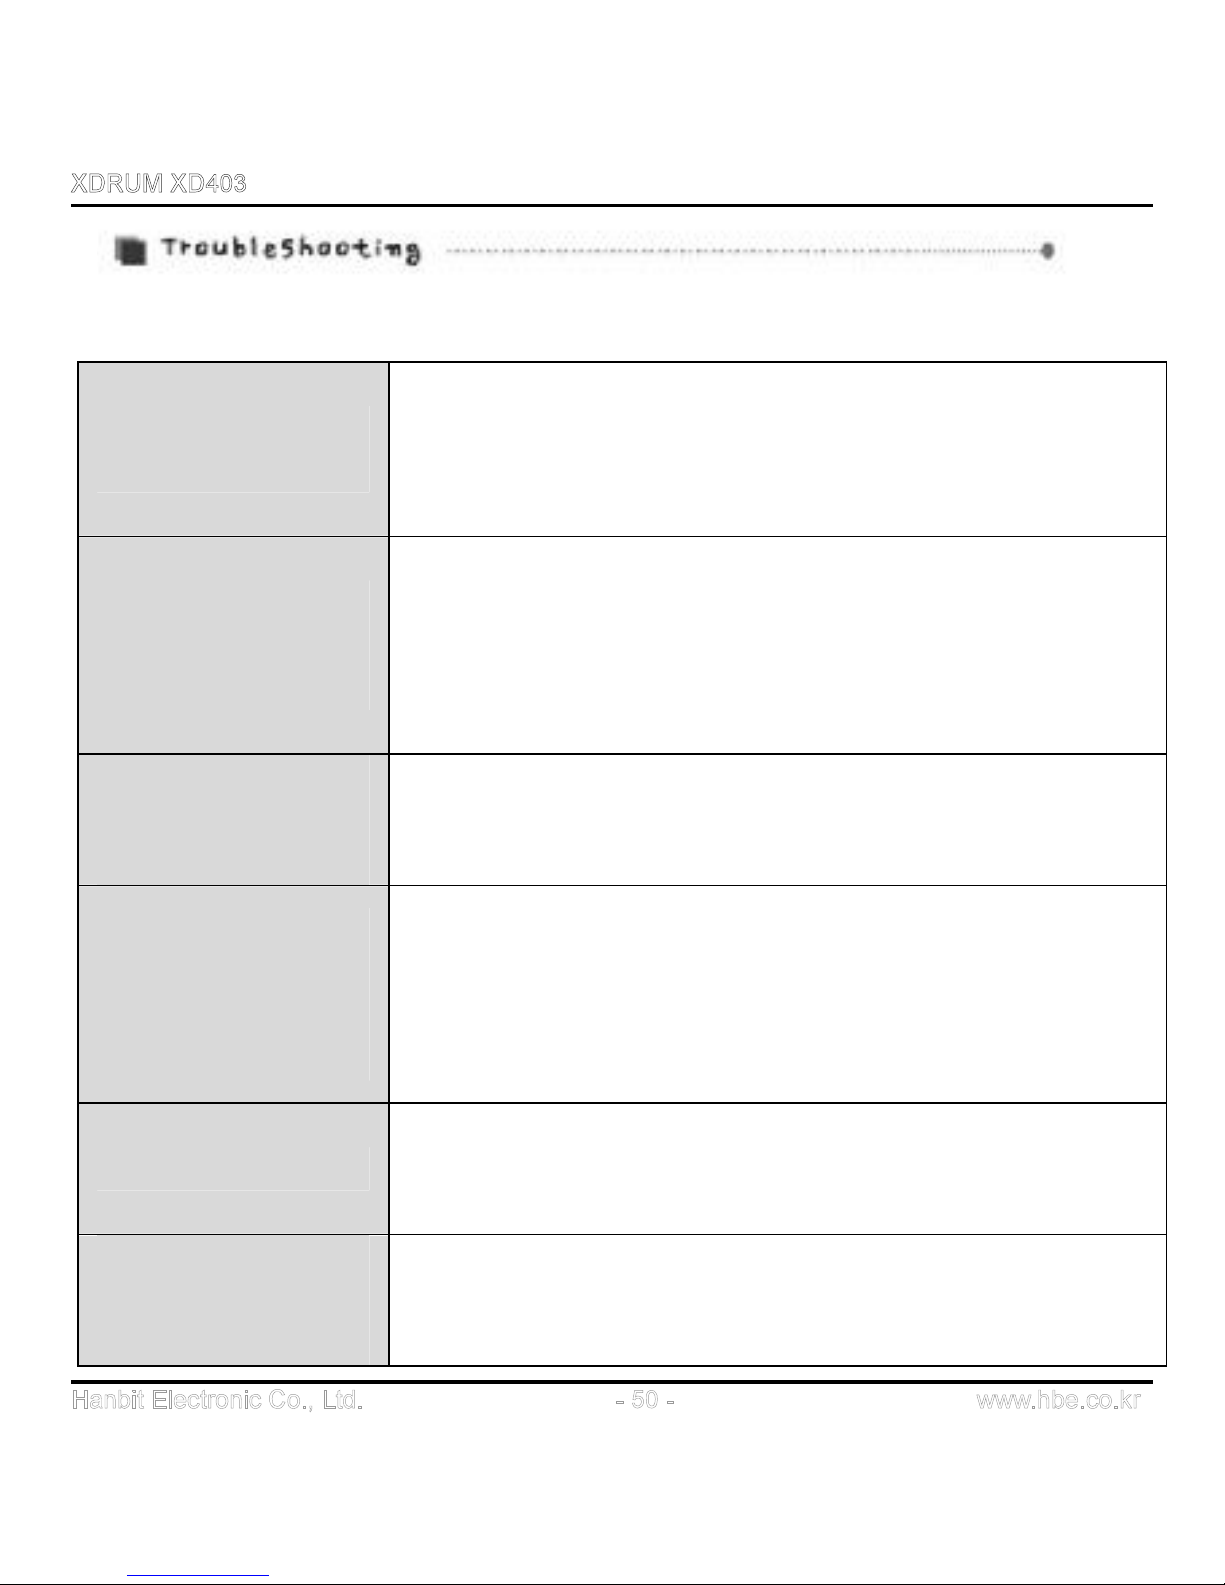
Please check the following first when you think there is something wrong with the Player.
I cannot turn on the
Power.
l Did you properly insert the battery?
l Check whether the HOLD switch of the Player is in the lock
mode. (If it’s in lock mode, please switch it to the unlock mode)
l Please check remaining battery fuel gauge.
I cannot hear any
sound or there is
noise in sound.
l Is the Volume defined as ‘0’?
l Please check whether your earphone is properly inserted or
there is any alien material in the terminal.
l In case of MP3 and WMA, noise might be caused when data is
damaged. Please check other files to see whether it’s the case.
Some strange
characters appear on
LCD screen
l Please check whether language is properly defined by entering
‘Setup MenuàDisplayàLanguage menu’.
In listening to the
Radio, there is noise
and frequency is not
clearly captured
l Move around the Player or earphone to various directions.
Please turn off other electronic devices nearby.
l Earphones take the role of antenna when you listen to the
Radio. Therefore, if you don’t properly insert your earphone, the
frequency may not be clearly received.
I cannot save data
l Please check whether battery is out or USB cable is properly
connected between your PC and the Player
l Please check whether HOLD switch is in OPEN mode.
I cannot operate any
control and there is no
sign in LCD
l Please check the battery to be inserted in the right direction
l Please check the battery capacity
Page 51
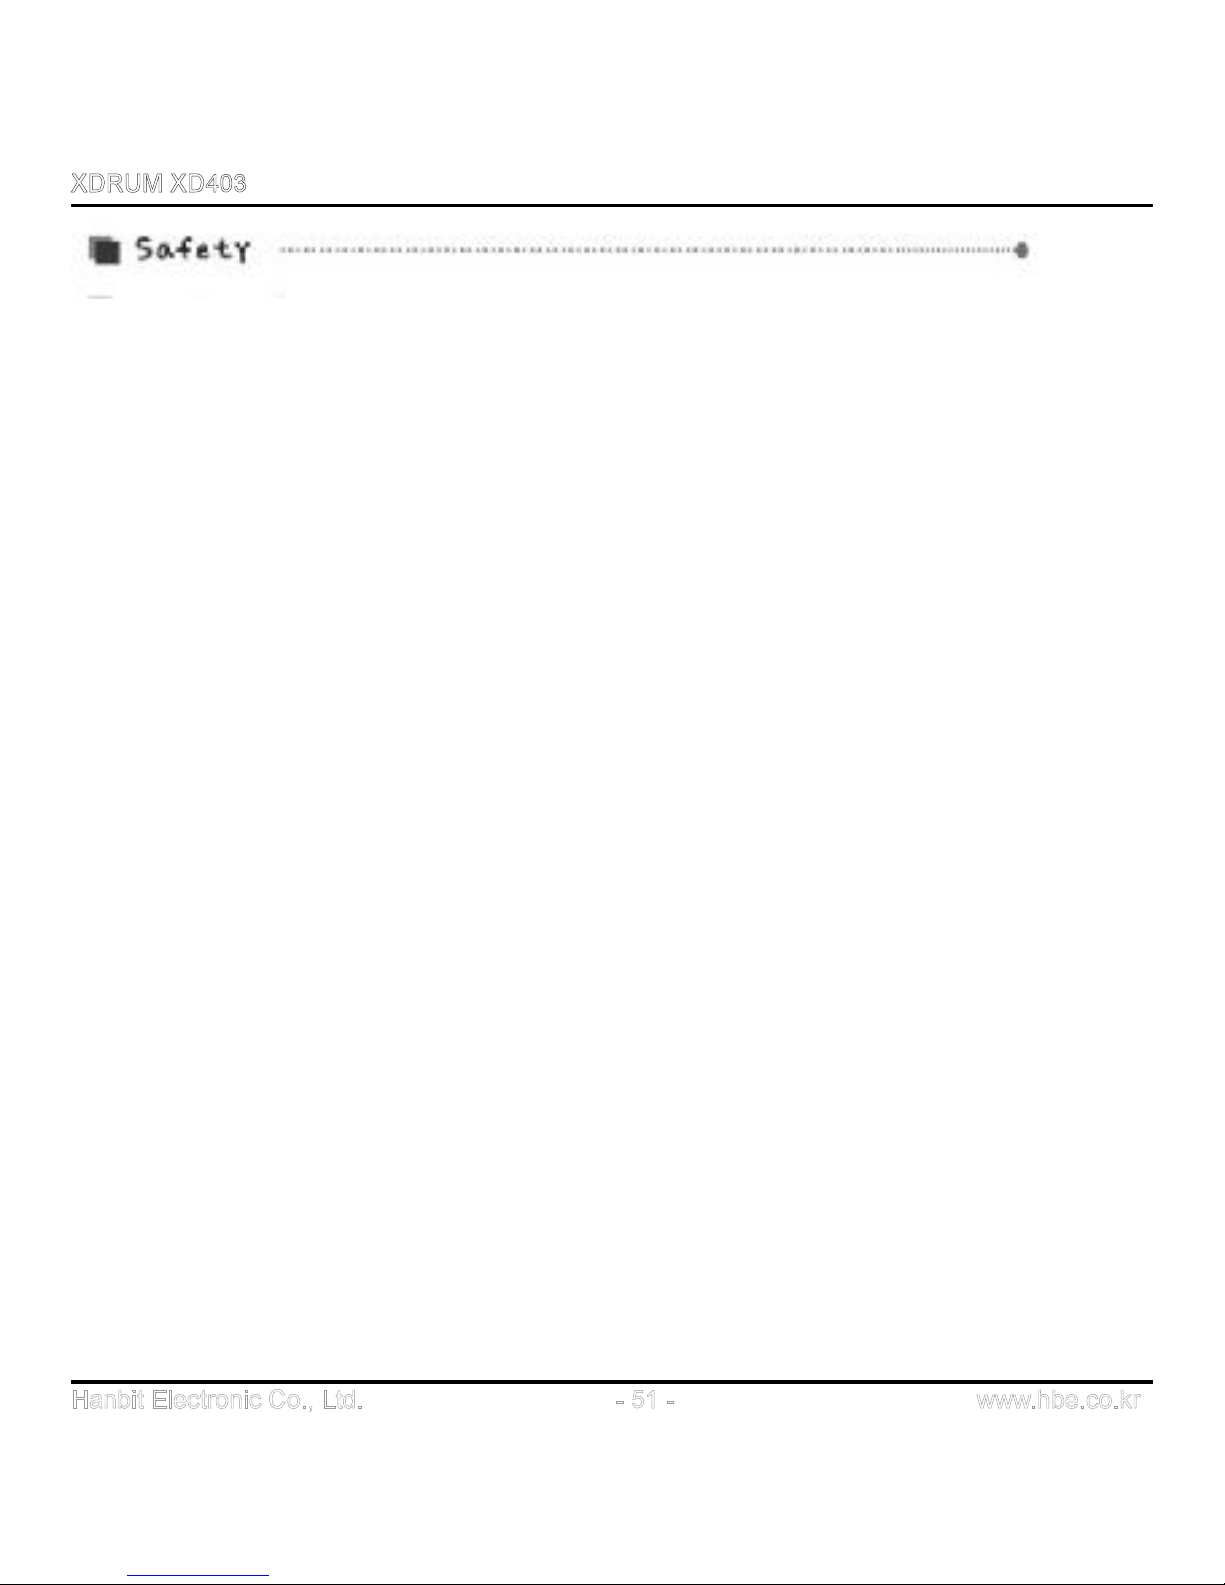
l Don’t put strong pressure on the Player such as dropping it.
The Player may be significantly damaged if you drop it from a higher place or put strong pressure
on it with a hard object, but the Player is designed to be resistant to movement or vibration
caused by fast walking or exercising.
l Please keep it away from water.
If the Player is wet, significant damages or problems may be caused. When the Player is wet,
wipe the Player with dry towel as soon as possible and take the battery out before showing it to
an expert for checkup.
l Please remove battery when you don’t use the Player for a long time.
If you put the battery in the Player while not using it for a long time, the Player may be damaged
due to leakage of battery.
l Do not leave the player in a location near heat sources, or in a place subject to direct sunlight,
excessive dust or sand, moisture.
l Disclaimer
Hanbit shall not be held legally liable for any data loss or damage caused while using the Player
by our consumers. Due to the nature of Flash Memory chip, the frequency of data storage has its
own lifespan. Please secure back-up files in a safer place for important data.
Part or the entire manual shall not be copied or used for any activities illegally without the prior
consent of Hanbit.
Hanbit shall not be held legally liable for any technical/editing related mistakes or errors
mentioned in the User Manual.
Page 52
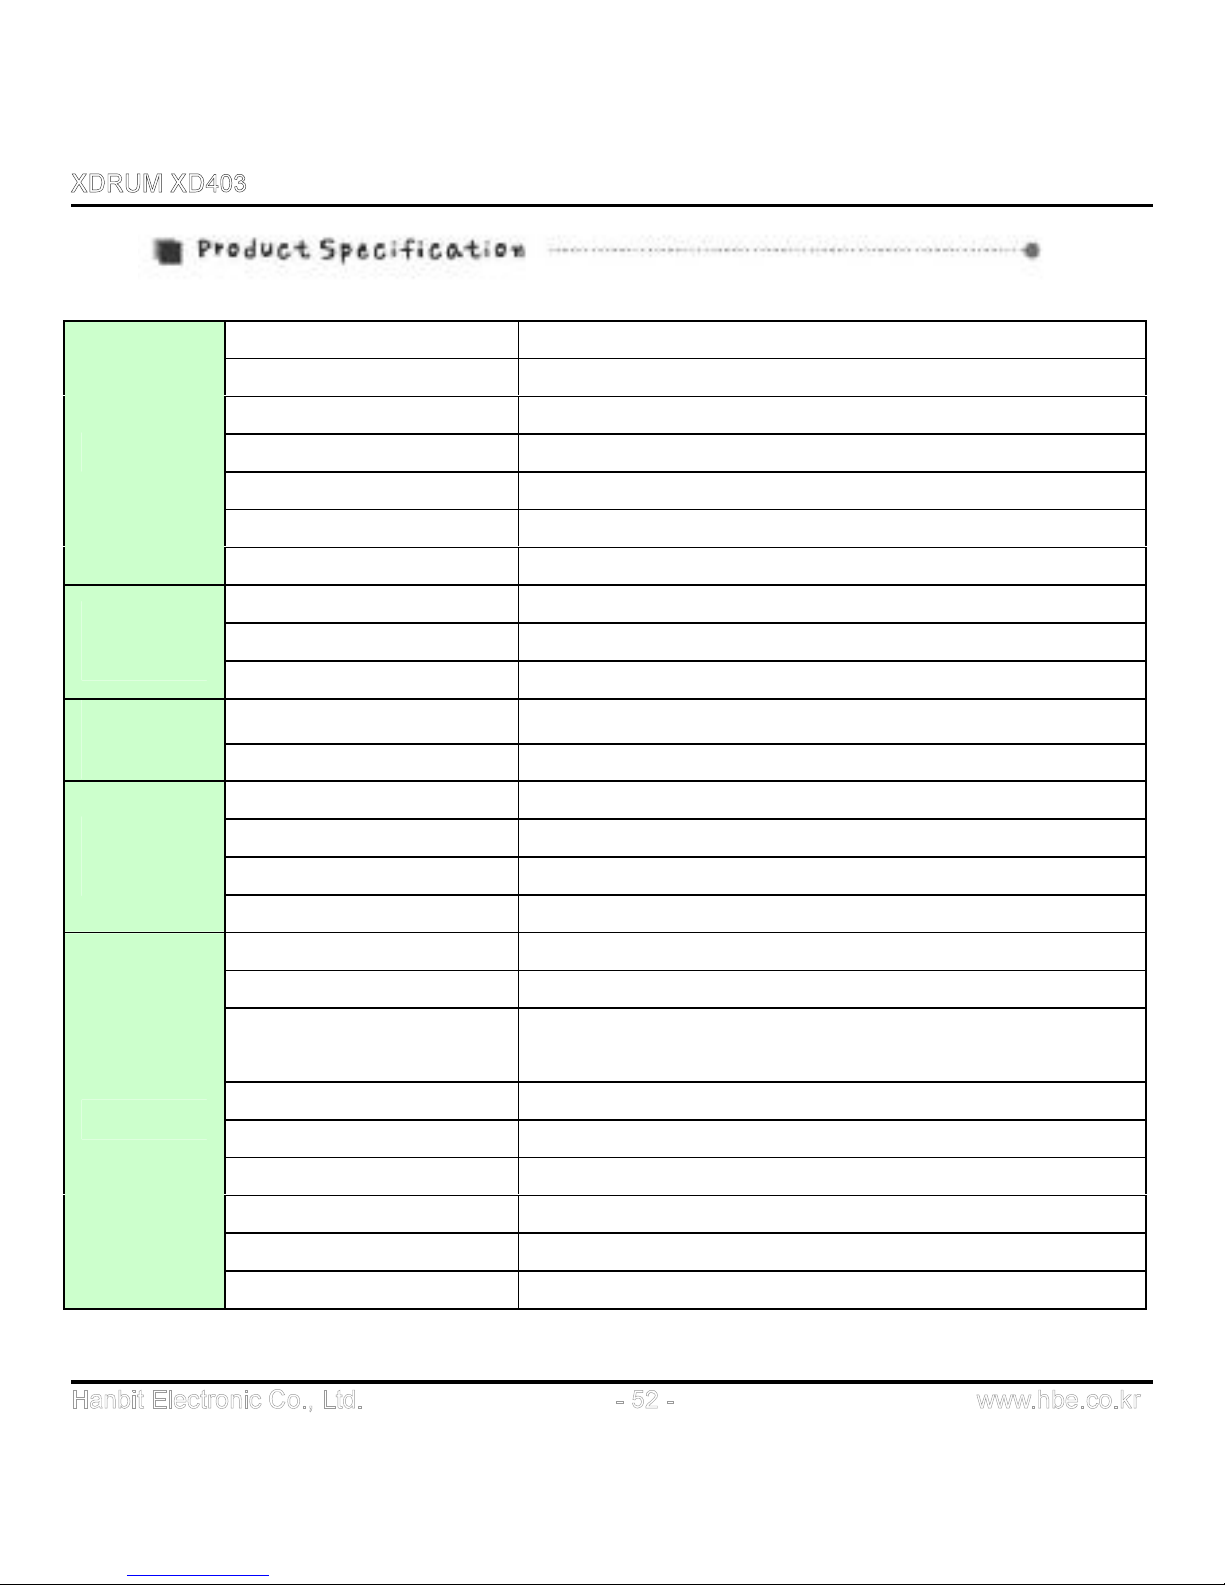
Channel Stereo 2 channel
Frequency range 20Hz ~ 20kHz
Headphone Output 20mW(10mW + 10mW)
Max. Speaker Output 70mW
Resistance 16 ohm
S/N ratio 90 dB
AUDIO
Distortion rate 0.10%
FM Frequency range 76.0MHz ~ 108.0 MHz
Headphone Output 12mW (6mW + 6mW)
FM
TUNER
S/N ratio 90 dB
USB Connection
Built-in rotating A type USB connector
USB
STORAGE
Applicable Software E-mail, PC-lock, Time-lock, File-lock, My-AD
Play File type MPEG 1/2/2.5/ Layer3, WMA, ASF
Encoding File type MPEG 1/2/2.5/ Layer3, TVF, TCW(ADPCM)
Bit Rate 8 Kbps ~ 320 Kbps
FILE
SUPPORT
Tag info ID TAG3 (Ver1.0 / 2.0) support
Dimension 74mm(W) X 30mm(D) X 21mm(H)
Weight 32.5g (without battery), 56.5g(include battery)
Operational
Temperature
-5 ‘C ~ 40’C
Memory 128MB/256MB/512MB/1GB
USB USB 1.1 support, USB2.0 compatible
Max. Playtime Approx. 20 hours (without using internal speaker)
Voice Recording Approx. 140 hours with MP3 (512MB/8kbps)
O/S support Windows 98/SE/ME/2000/XP
GENERAL
Battery 1.5V 1 AA type Alkaline battery
Page 53
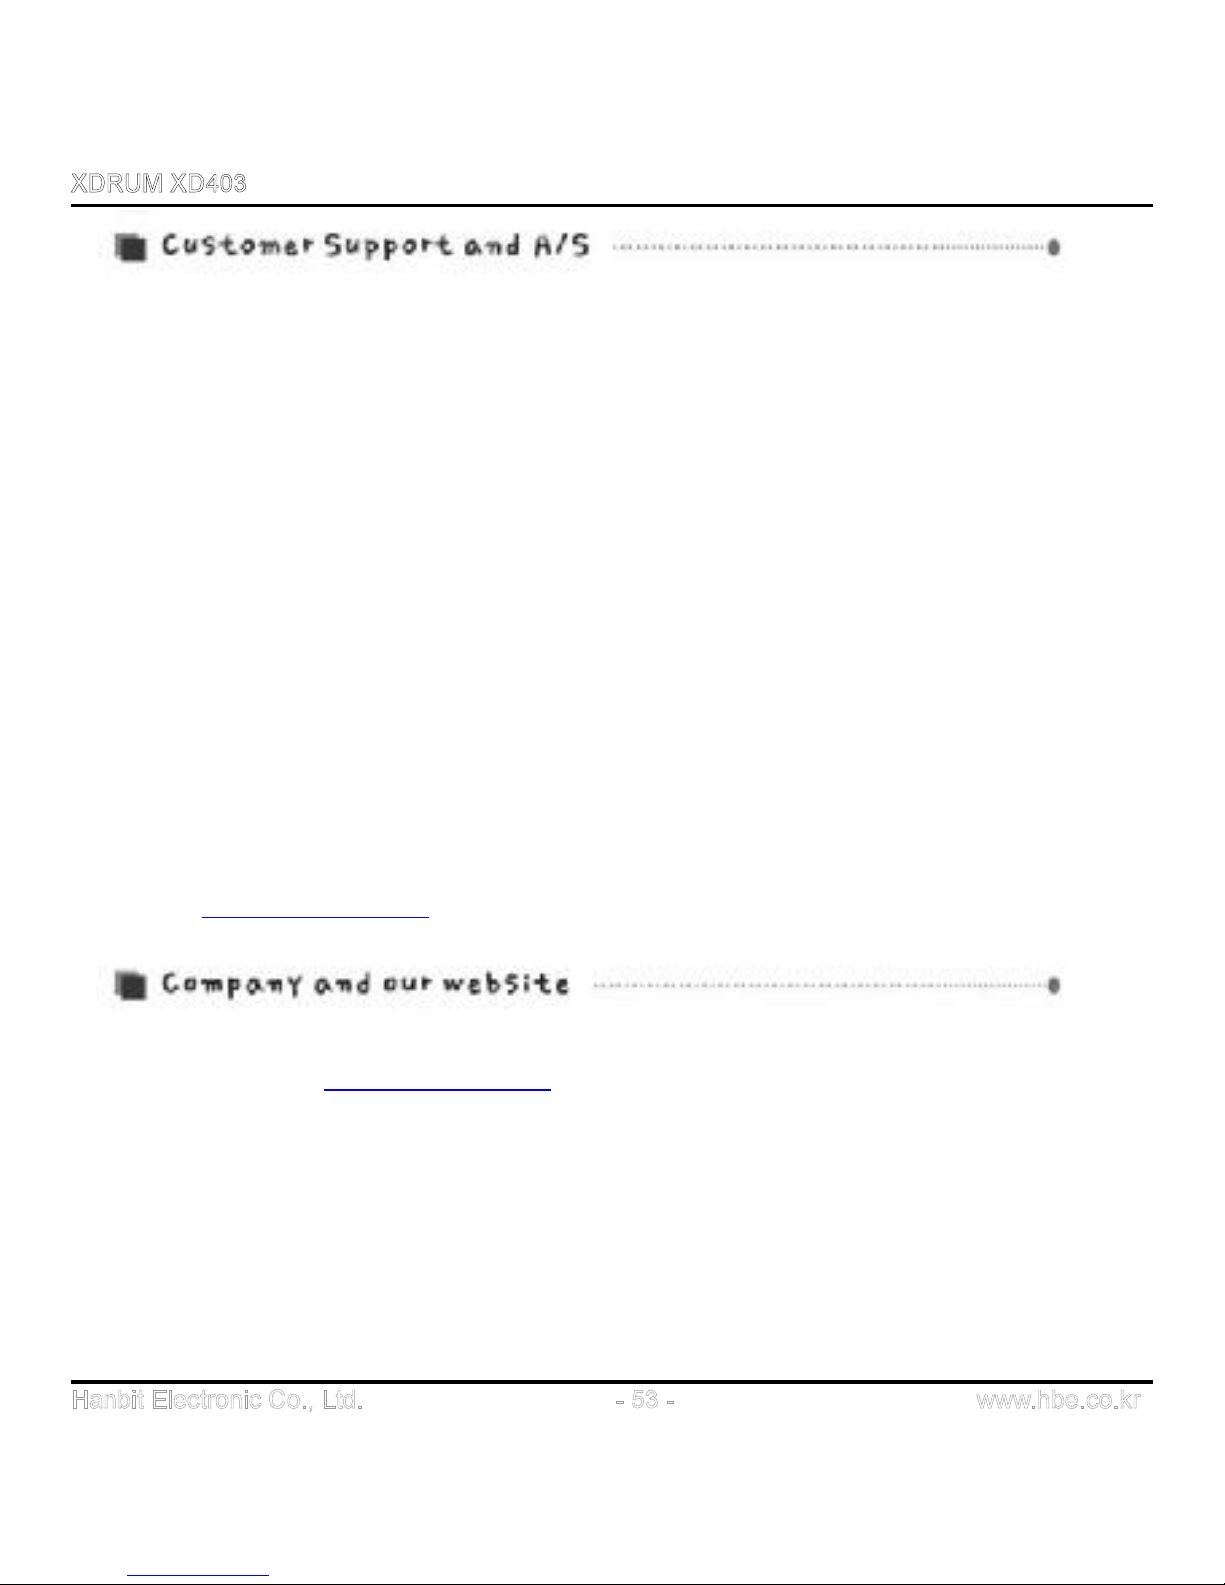
l Thank you for purchasing Hanbit’s product.
Even though Hanbit has been doing its best to produce quality products, there can be some
problems involving our products. If you have any problems in using our product and you
need A/S (after sales service), please contact us at the following address.
Sorry for the inconveniencies you experience.
Customer Service Team address:
To Customer service responsible person / Customer Service Team of Sales Division, Hanbit
Ltd.
414-5 Wonchon-dong, Youngtong-gu, Suwon City, Kyunggi Province
Republic of Korea, 443-823
TEL: 82-31-218-1915 or 1941 / FAX: 82-31-217-1926
Website: http://www.hbe.co.kr (Customer Support)
l Website address: http://www.hbe.co.kr
l Our website provides useful information on our products and responses for customers’
inquires or questions.
l You can continuously upgrade your Player by using FIRMWARE UPGRADE available on
our company website.
Page 54
Page 55
Customer Card
Warranty Card
Product Name: Model:
Purchasing Data: Customer:
E-mail: Telephone:
Address:
HANBiT Electronics Co.,Ltd. Tel )+82
-31-
218-1915 Fax)+82
-31-
217-1926 URL:
www.hbe.co.kr
The product purchased is warranted and tested to be free from defects in material and Workmanship
and conform to the published specifications. Hanbit Electronics Co.,Ltd will offer a service for product
Malfunction in the conditions as below.
1. Limited Quality Warranty
1) For a period of one year from the date of purchase.
2) HANBIT Elec. Co., Ltd will repair or replace your product with a comparable product for a defect
occurred by improper workmanship or materials within the warranty period.
3) The target of no compensation service:
The product proved not to pass a period of one year from the date of purchase.
Hanbit Electronics Co., Ltd will charge the cost for malfunction occurred by a negligence,
a mistake, repair and rebuilding in other place no Hanbit’s agency.
4) Duration of no compensation service is one year.
Compensation service will be offered in a principle as below after one year.
2. Compensation / No compensation Service
1) No compensation Service
A. Content of compensation for damage (within 1 year from purchasing date) :
Need to repair due to a functional defect in the normal state within 10 days after purchasing.
B. Exchange or Repayment : Need to repair for the efficiency or functional defect in the normal
state within 1 month after purchasing.
C. Product Exchange : Occurrence defects until 3 times as the same reason within 1 month.
2) Compensation Service Charge Service
Hanbit Electronics Co., Ltd can charge a customer the cost to ask for repairs and can refuse the
repairs in the reason as below.
A. Defects of function occurred in product which is exceeded the validity period of quality warranty.
B. The case crushed or cracked by shock.
C. The case destroyed by using a non standardized parts.
D. The case modified by disassembly or remodeled construction or function.
E. The malfunction occurred by the natural disaster.
F. The Obvious fault occurred by mishandling of purchaser
Note : Exhibit the customer card in order to get the service, This card is not reissued again.※
1Year
Limited
Warrenty
Page 56
HANBIT Electronics Co.
, Ltd.
Address : 414-5 Woncheon-Dong, Youngtong-Gu, Suwon-City, Kyoungki-Do, Korea (Zip 443-823)
Telephone : +82 31 218 1915 / Fax : +82 31 217 1926
Home Page : www.hbe.co.kr / E-mail : [email protected]
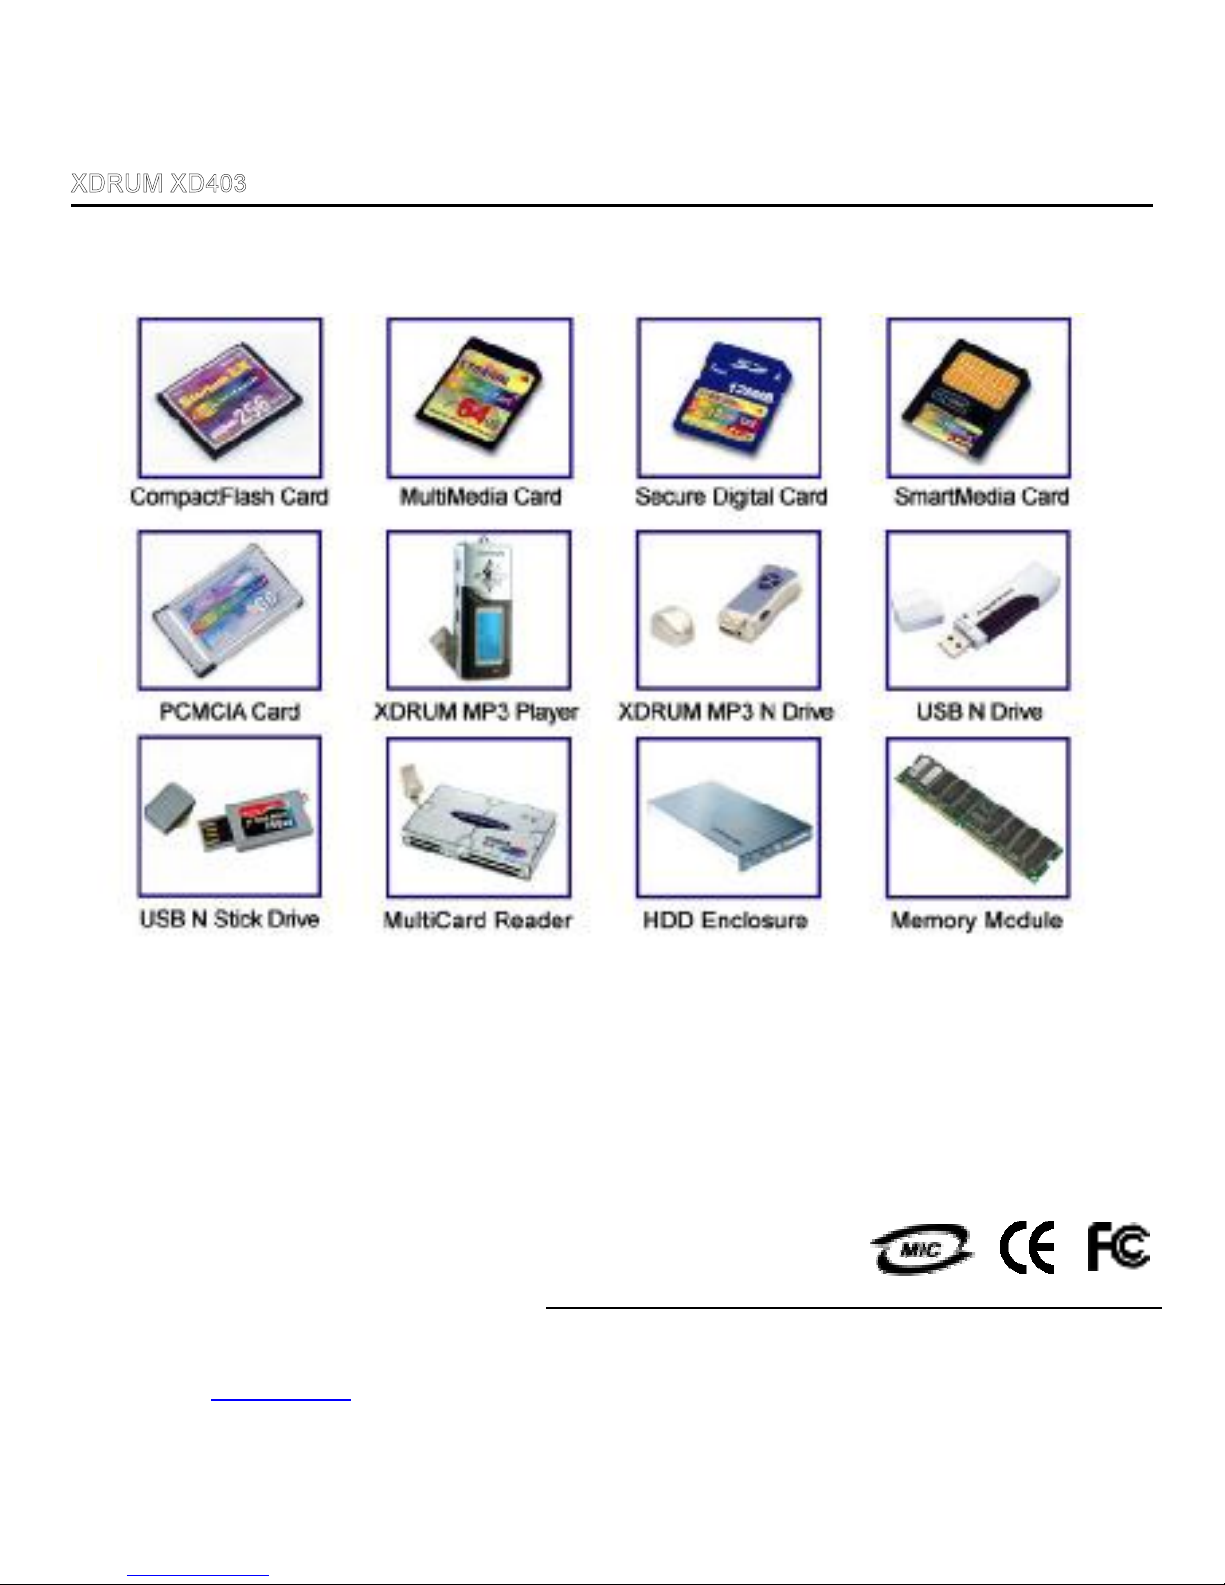
Product Series
 Loading...