

Page 1
®
appendix C
Router Table Handles
®
Page 2
Appendix C - Router Table Handles
Follow the safety and general instructions for using the KATIE JIG™ System except as
indicated below.
Attaching Router Table Handles to the KATIE JIG™ System
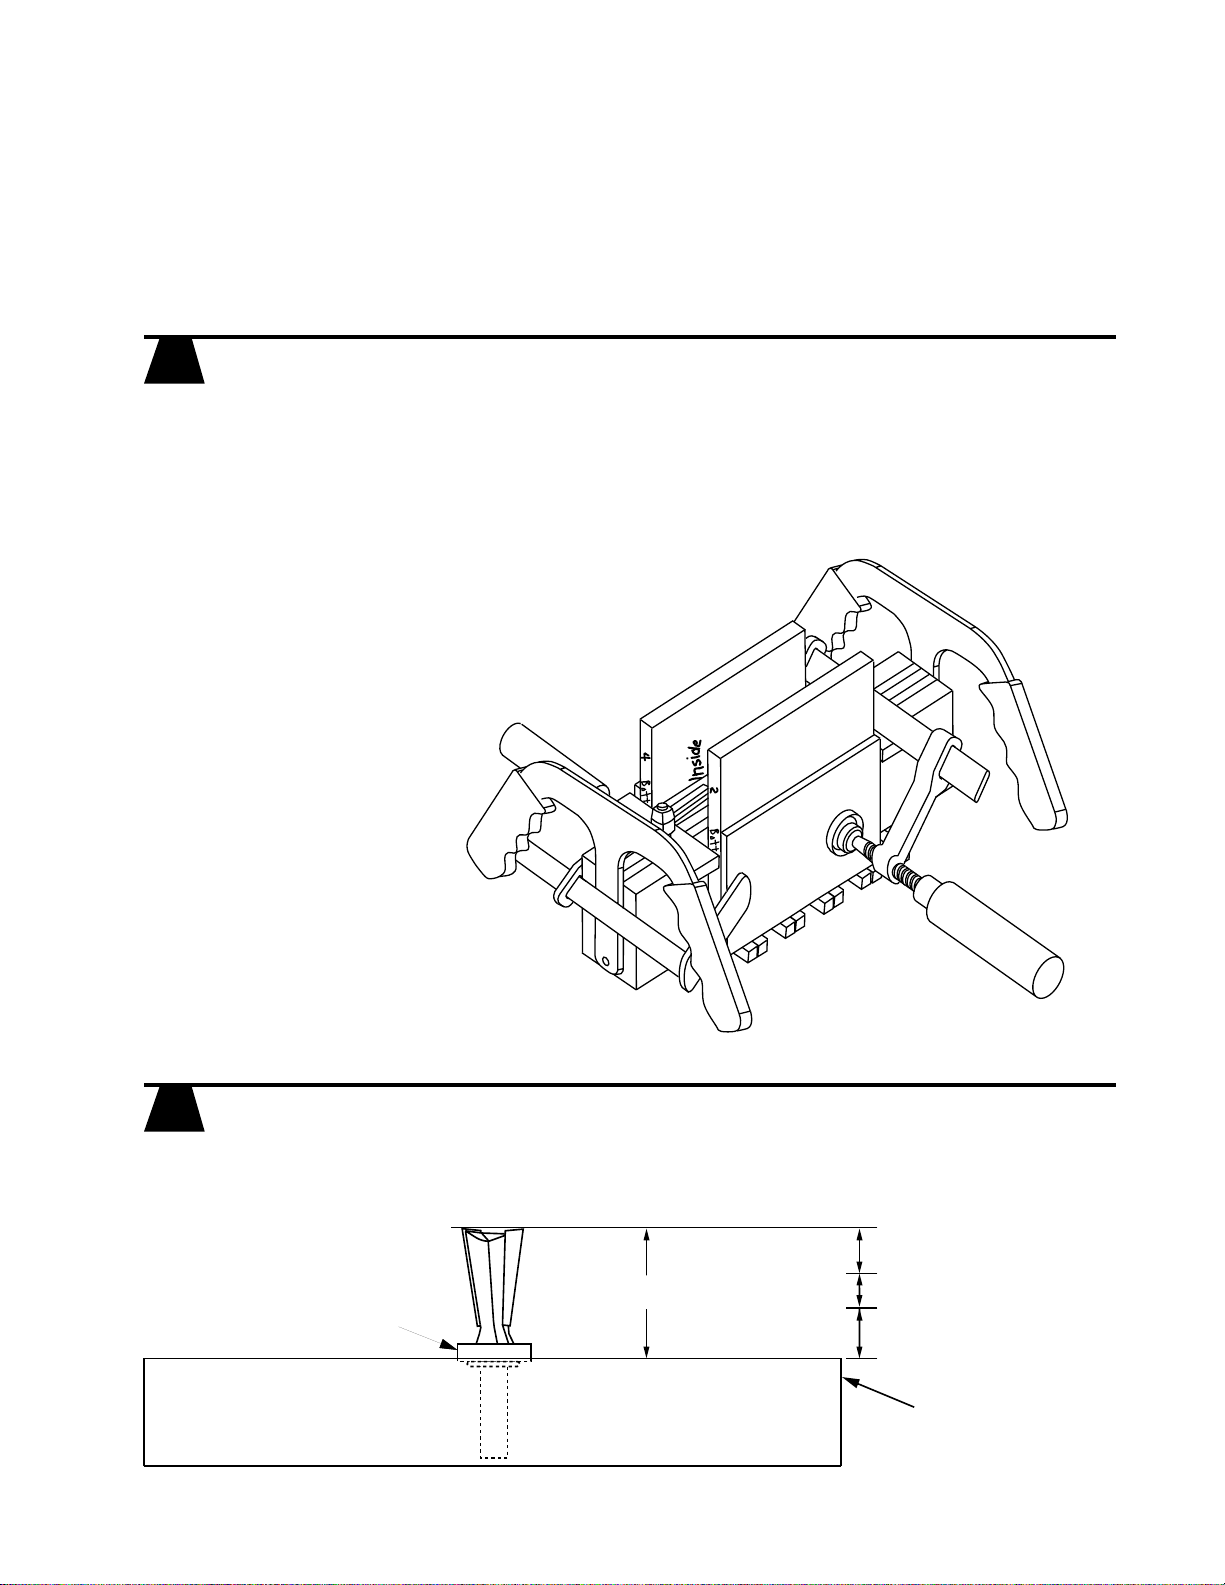
Attach handles to ends of KATIE JIG™ System fixture using screws provided
so that the guide/tuning forks will be down. Securely clamp the boards to
the KATIE JIG® System using 2 clamps. Placement of these clamps should be
done to best accommodate the boards.
CAUTION: Make sure the clamps do not interfere with the router bits.
Prepare Router Table and Set Height of Bits
For best results, use two routers mounted in router table.
Determine height for dovetail bit.
At least 1/16" of bearing
must extend above base
of router table.
Copyright © 1997-2000 Hampton House, Inc. Page C-1
Dovetail bit depth
Thickness of pin board
Trim stock or spacer
1/2" for guide/tuning forks
Base of router
table
Page 3
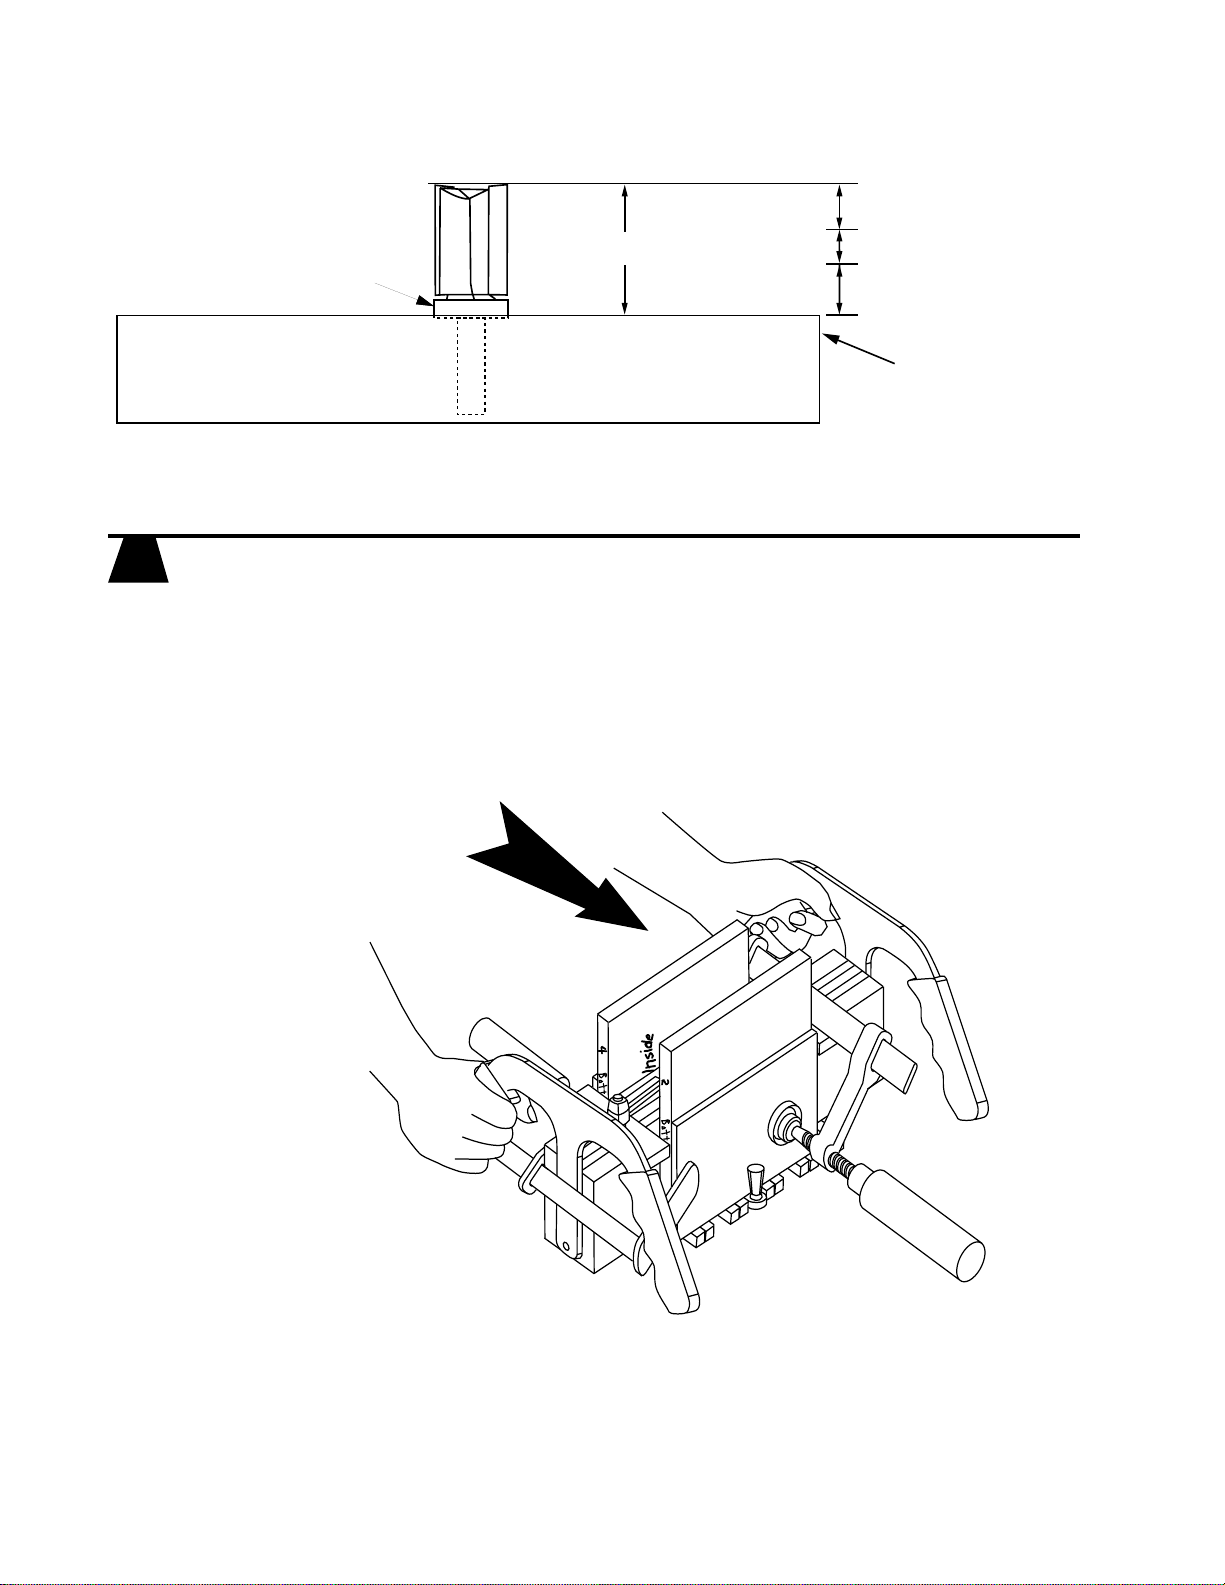
Determine height for pattern bit.
Thickness of tail board
At least 1/16" of bearing
must extend above base
of router table.
Routing Pins and Tails
Grasp the router table handles on the side opposite the board that you wish to
route, and slide the KATIE JIG™ System toward the bit. Carefully route the
areas between each of the guide/tuning forks.
CAUTION: DO NOT lift the KATIE JIG™ System while the router is running!
Pattern bit depth
Trim stock or spacer
1/2" for guide forks
Base of router
table
Slide fixture toward bit
Page C-2 Copyright © 1997-2000 Hampton House, Inc.
 Loading...