

Page 1
INSTRUCTION MANUAL
Razor Ceiling Fan Light Kit
Home Depot SKU 110480 (UPC 813291014164) (Brushed Nickel)
Page 2

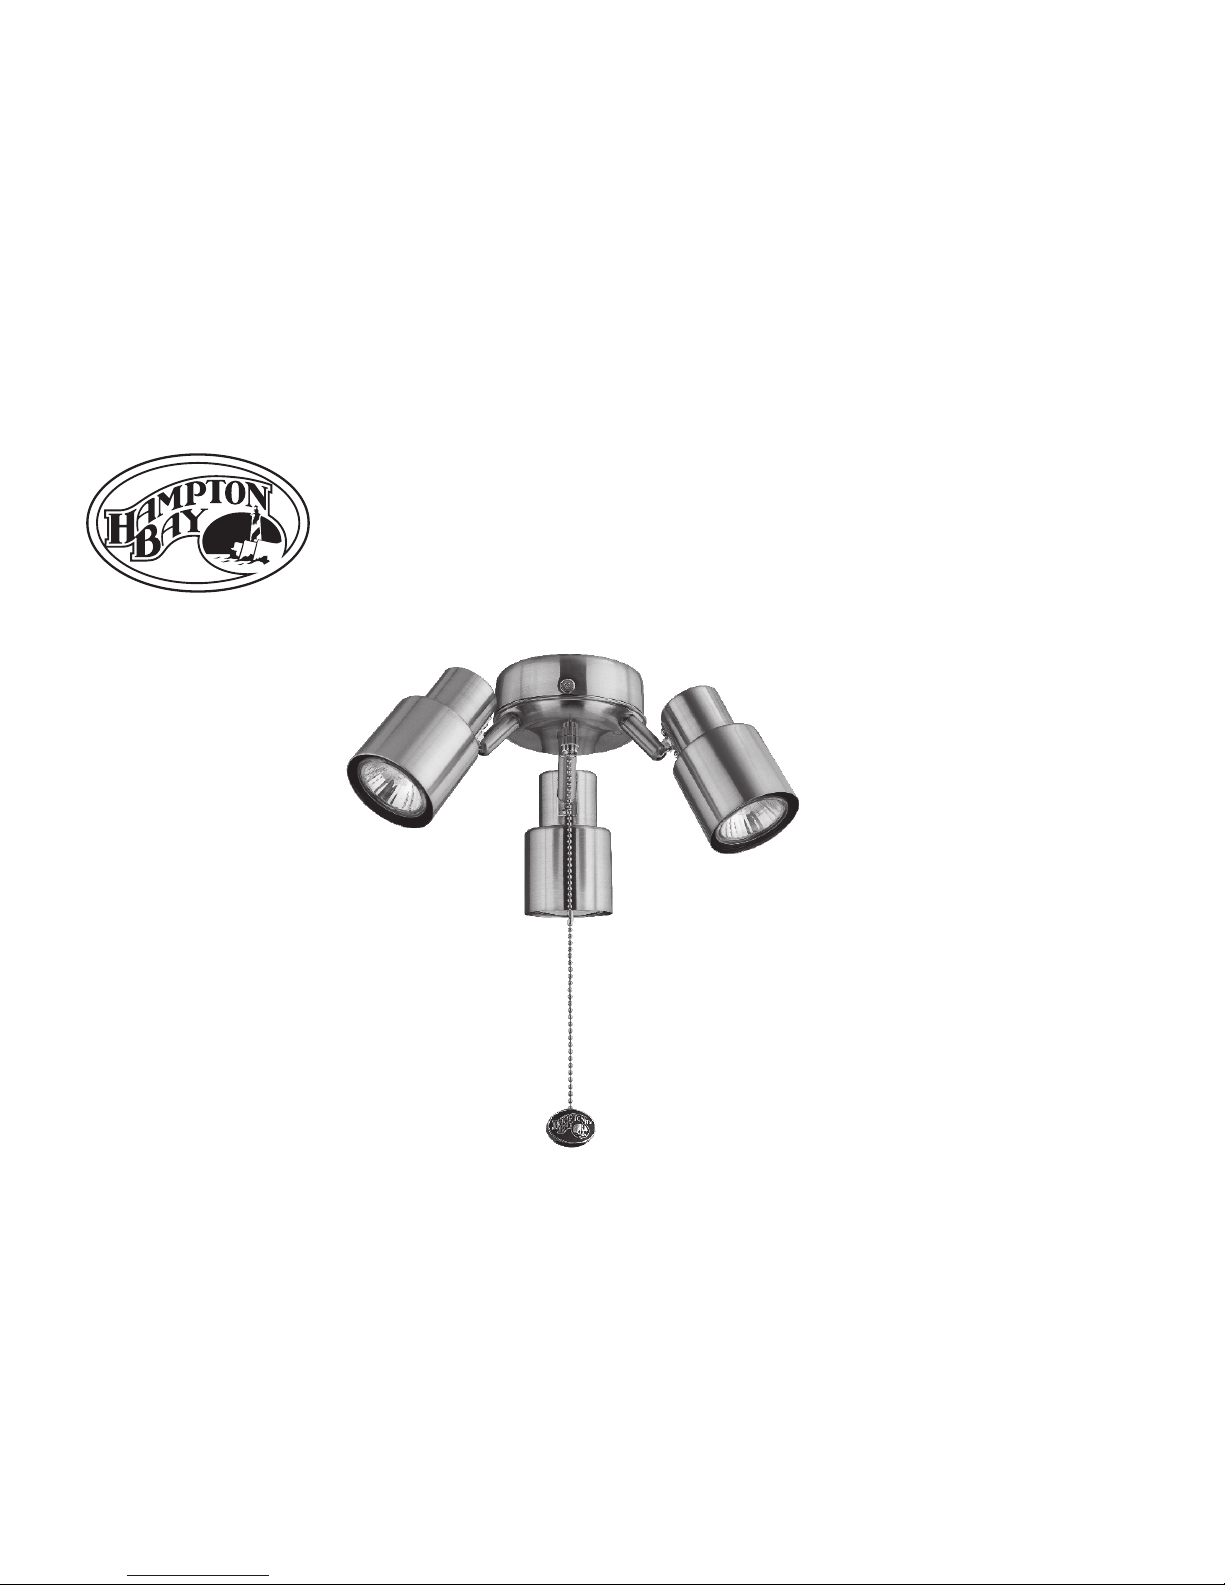
Razor
Light Kit by Hampton Bay
Brushed Nickel Finish
(3)50-Watt GU10 Bulbs Included
Adjustable Shades
Universal Mounting System
QUESTIONS, PROB LEMS,
MISSING PART S:
Before returning to your local Home
Depot, please call our Customer
Service Team at 1-866-885-4649.
Monday-Friday, 8 am-6pm EST.
Please reference your SKU(110480)
or UPC(813291014164).
Thank you for purchasing this Hampton
Bay light kit. This product has been
manufactured with the highest standards
of safety and quality.
Table of Contents:
Safety Rules 1
Unpacking Your Light Kit 2
Installing Light Kit 3
Care of Your Light Kit 5
Warranty Information 6
Page 3

1
Safety Rules - Read and Save These Instructions
1. WARNING: To reduce the risk of electric shock, ensure electricity has been turned
off at the circuit breaker or fuse box before beginning. Note: Turning power off
using fan switch is not sufficient to prevent electric shock.
2. All wiring must be in accordance with the National Electrical Code and local
electrical codes. Electrical installation should be performed by a qualified licensed
electrician.
3. This light kit is supplied with a universal mounting system and will attach to
Hampton Bay fans with a center plug in the switch-cap. For assistance, please
call 1-866-885-4649.
4. Do not use water or detergents when cleaning the light kit. A dry dust cloth or
lightly dampened cloth will be suitable for most cleaning.
Page 4

2
C
D
A
B
Unpacking Your Light Kit
Unpack your light kit and check the contents. You should have the following items:
A. Wire nuts (2)
B. Light kit (1)
C. 50Watt GU10 bulbs (3)
D. Pull chain (1)
Page 5

3
F ig u re 1
Switch housing
co
ver
Center Plug
Screw
Switch housing
Screw
Lig ht Kit
Pul l Chain
Installing Your Light Kit
STEP 1 Remove the cover from the switch
housing below the fan motor by removing
the mounting screws. Refer to Figure 1.
STEP 2 Remove the center plug from the
switch housing cover. Refer to Figure 1.
STEP 3 Remove the lock washer and
hex nut from the top of the light kit.
Insert the black and white wire from
the light kit through the center hole of
the switch housing cover, thread the
switch housing cover onto the light kit.
Re-install lock washer and hex nut and
tighten securely. Refer to Figure 2.
Black Wire
Page 6

Lig ht Kit
Pu
ll Cha in
4
STEP 4 Locate the blue and white wires
inside the switch housing for the light kit
connection. Connect the blue wire from
the fan switch housing to the black wire
from the light kit and the white wire from
the fan switch housing to the white wire
from the light kit. Attach the wires
together using the wire connectors supplied
on the fan light wires. Refer to Figure 3.
STEP 5 Re-attach the switch housing cover
to the switch housing of the fan assembly
by aligning the screw holes on the switch
housing cover with the screw holes on the
switch housing and secure with the screws
removed in STEP1.
Your ceiling fan light kit installation is
finished!
Black Wire
Black Wire
Page 7

5
1. Clean your light kit periodically to help maintain its new appearance
over the years. Do not use water when cleaning. Use only a soft brush or
lint-free cloth to avoid scratching the finish.
2. Cover small scratches with a light application of shoe polish.
Weight of the light kit: 0.754kg
Care Of Your Light Kit
Here are some suggestions to help you maintain your light kit.
Page 8

The retailer warrants the light kit to be free from defects in workmanship and material present at time
of shipment from the factory for a lifetime after the date of purchase by the original purchaser. The
retailer also warrants that all other light kit parts, excluding any glass , to be free from defects in
workmanship and material at the time of shipment from the factory for a period of one year after the
date of purchase by the original purchaser. We agree to correct such defects without charge or at our
option replace with a comparable or superior model if the product is returned to the retailer. To obtain
warranty service, you must present a copy of the receipt as proof of purchase. All costs of removing
and reinstalling the product are your responsibility. Damage to any part such as by accident or misuse
or improper installation or by affixing any accessories, is not covered by this warranty. Because of
varying climatic conditions in the United States this warranty does not cover any changes in brass
finish, including rusting, pitting, corroding, tarnishing or peeling. Brass finishes of this type give
their longest useful life when protected from varying weather conditions. Servicing performed by
unauthorized persons shall render the warranty invalid. There is no other express warranty. The
retailer hereby disclaims any and all warranties, including but not limited to. Those of merchantability
and fitness for a particular purpose to the extent permitted by law. The duration of any implied
warranty which cannot be disclaimed is limited to the time period as specified in the express warranty.
Some states do not allow limitation on how long an implied warranty lasts, so the above limitation may
not apply to you. The retailer shall not be liable for incidental, consequential, or special damages
arising out of or in connection with product use or performance except as may otherwise be accorded
by law. Some states do not allow the exclusion of incidental or consequential damages, so the above
exclusion or limitation may not apply to you. This warranty gives specific legal rights, and you may
also have other rights which vary from state to state. This warranty supersedes all prior warranties.
Shipping costs for any return of product as part of a clain on the warranty must be paid by the customer.
Hampton Bay Lifetime Limited Warranty
6
 Loading...