

Page 1
HA<O>
DRAWBAR KEYBOARD
Quick Features Guide
HAMMOND SUZUKI, LTD.
Hamamatsu, Japan
Page 2
IMPORTANT SAFETY INSTRUCTIONS
WARNING - As with any electrical or electronic equipment, care
should be exercised to prevent fire and shock hazard. The
following information is provided to give guidance in the safe
use of your Hammond Keyboard.
Read all of the instructions before using this product.
To reduce the risk of injury, close supervision is necessary when
the product is used near children.
Do not use this product near water.
This product, either alone or in combination with an amplifier
and speakers or headphones, may be capable of producing
sound levels that would cause permanent hearing loss. Do not
operate for a long period of time at a high volume level or at
a level that is uncomfortable. If you experience any loss or
ringing in the ears, you should consult an audiologist.
This product should be located so that its location or position
does not interfere with its proper ventilating
The product should not be located away from heat sources
such as radiators, heat registers or other products that produce
heat.
IF YOUR INSTRUMENT FAILS TO OPERATE:
1. Be sure your POWER ON/OFF switch is ON, and the MASTER
VOLUME is set to at least the half way point.
2. Be sure that at least one voice is selected ON.
3. Make certain that the power cord is plugged in and the
"AC" wall receptacle is not faulty.
In the event that the instrument is still inoperable, your
Hammond Dealer is best qualified to provide competent
service.
THIS PRODUCT SHOULD BE SERVICED BY QUALIFIED SERVICE
PERSONNEL WHEN:
A. The power-supply cord or plug has been damaged.
B. Objects have fallen, or liquid has been spilled, into the
product.
C. The product has been exposed to rain.
D. The product does not appear to operate normally or
exhibits a marked change in performance.
E. The product has been dropped or damaged.
This product should be connected to a power source only of the
type described in the operating instructions or as marked on
the product.
The power-supply cord should be unplugged from the outlet
when left unused for a long period of time. When unplugging
the power supply cord, do not pull on the cord, but grasp it by
the plug.
Care should be taken so that objects do not fall and liquids are
not spilled into the enclosure through openings.
SAVE THESE INSTRUCTIONS
Do not attempt to service this product beyond that described
in the user maintenance instructions. All servicing should be
referred to qualified service personnel.
This product must be grounded. If it should malfunction or
break down, grounding provides a path of least resistance for
electric current to reduce the risk of electric shock. This product
is equipped with a cord having an equipment-grounded
conductor and a grounding plug. The plug must be plugged
into an appropriate outlet that is properly installed and
grounded in accordance with all local codes and ordinances.
WARNING: TO AVOID THE HAZARDS OF FIRE OR ELECTRICAL SHOCK, DO NOT EXPOSE THIS APPLIANCE
TO RAIN OR OTHER MOISTURE.
DANGER: Improper grounding of the equipment-grounding conductor can result in a risk of electric shock.
Check with a qualified electrician or serviceman if you are in doubt as to whether the product is properly
grounded. Do not modify the plug provided with the product - if it will not fit the outlet, have a proper
outlet installed by a qualified electrician.
Page 3

IMPORTANT - READ THIS FIRST
Your Hammond XK-2 Drawbar Keyboard is designed to give you the true and
authentic sound of Hammond Harmonic Drawbars, as well as provide you a large
variety of features to allow great flexibility in how you want to use the keyboard.
This Quick Reference Guide is designed to explain the operating features of your
Hammond XK-2 as simply and graphically as possible.
Because we want to make this manual, as well as the keyboard itself, as easy to
understand as possible, the explanations in this manual are grouped by subject
matter, and not in the order in which they necessarily appear in the Information
Center Display (the screen in the center of the front panel). For example, all
functions pertaining to Drawbars are grouped together, all Percussion features are
treated as a group, and so on.
Also, each feature is treated as an explanation unto itself, and does not require you
to already have prior working knowledge of some other feature. The explanations
are presented such that, if you follow the steps outlined, the message you see in the
Information Center Display screen will be identical to that shown in the manual at
that stage of the explanation.
Do not be daunted by the number of steps required to perform each operation.
Each step is simple. Simply bear these things in mind:
1. Read each step carefully.
2. Don't skip any of the steps.
3. Don't perform the steps out of sequence.
With these guidelines, you are well on your way to mastering all of the many sounds
and features of your Hammond XK-2.
Page 4

- Table of Contents -
INTRODUCTION 1
INFORMATION CENTER DISPLAY 6
DRAWBARS 10
MANUAL SPLIT 30
EFFECTS 34
Basic Hook-Up ............................................1
Basic Controls .............................................4
Play Mode ...............................................6
Menu Mode ..............................................7
DRAWBAR SELECT Touch Buttons .............................. 8
Sound Groups ........................................... 10
Color Groups ............................................11
Tone Families By Shape .................................... 12
Percussion .............................................. 20
Upper and Lower Manuals on the XK-2 .......................... 30
SPLIT Touch Button .......................................30
Advanced Features - Manual Split .............................. 31
Vibrato ................................................. 34
Chorus ................................................. 34
A.C. Power ......................................1
Audio Connections ................................ 1
MIDI Connections ................................2
Connecting a Foot Switch ...........................2
Connecting an Expression Pedal ......................2
Connecting the Hammond EXP-100 Expression Pedal .......3
Connecting a Set of Headphones ......................3
ON / OFF Power Switch ............................. 4
Information Center Display .......................... 4
Touch Buttons ................................... 4
Rotary Controls .................................. 4
Pitch Bend and Modulation Wheels .................... 5
Graphic Display ..................................6
Numeric Display ................................. 6
EDIT Touch Button ............................... 7
Drawbar Registration ..............................9
White Drawbars .................................11
Black Drawbars ................................. 11
Brown Drawbars ................................ 12
Flute family .................................... 13
Reed family .................................... 13
Diapason family ................................. 14
String family ................................... 14
Drawbar Volume ................................ 15
Drawbar Attack ................................. 16
Drawbar Sustain ................................ 17
Drawbar Voice Mode ............................. 18
Drawbar Fold Back ............................... 19
SECOND ...................................... 20
THIRD ....................................... 20
FAST ......................................... 20
SOFT ......................................... 20
Percussion Slow Decay ............................21
Percussion Fast Decay ............................ 22
Percussion Normal Level .......................... 23
Percussion Soft Level .............................24
Percussion Touch ............................... 25
Percussion Velocity Sensitivity .......................26
Percussion Drawbar Cancel ......................... 27
Percussion Drawbar Level .......................... 28
Percussion Key Tracking ...........................29
Split Point ..................................... 31
Split Mode ..................................... 32
Lower Manual Octave ............................. 33
V1 - (Small Vibrato) ..............................34
V2 - (Wide Vibrato) .............................. 34
V3 - (Full Vibrato) ............................... 34
C1 - (Small Chorus) .............................. 34
C2 - (Wide Chorus) .............................. 34
C3 - (Full Chorus) ............................... 35
Speed ........................................35
Connecting to an Amplifier .................1
Connecting a Leslie Speaker ................2
Select Touch Buttons ..................... 4
Touch and Hold Touch Buttons .............4
MASTER VOLUME Control .................5
REVERB Control ........................5
OVERDRIVE Control .....................5
BASS and TREBLE Tone Controls ............ 5
Preset Parameters .......................7
Global Parameters .......................7
Changing the Split Point using the Value Touch
Changing the Split Point by Key Input ........31
Buttons .................... 31
Leslie .................................................. 36
Reverb ................................................. 47
Overdrive ...............................................48
Treble Level ............................................. 50
Oscillator Phase Control ..................................... 51
PRESETS 52
MIDI 54
SPECIAL ADVANCED FEATURES 90
SPECIAL UTILITY FEATURES 99
CANCEL Mode ........................................... 52
Preset Banks ............................................ 52
Recording Your Own Presets ................................. 53
MIDI Connections ......................................... 54
Typical Applications ........................................ 55
MIDI Channels ........................................... 56
Omni Mode ............................................. 58
Local Control ............................................59
NRPN .................................................. 60
Foot Switch Controller Number ............................... 61
Modulation Wheel Controller Number .......................... 62
Program Change .......................................... 65
Drawbar Change .......................................... 66
Control Change ........................................... 67
Transmit Bender Data ON / OFF ............................... 68
Transmit Modulation Wheel Data ON / OFF ....................... 69
Receive Breath Controller Data ON / OFF ......................... 70
Receive After Touch Data ON / OFF ............................. 71
Maximum Volume ........................................ 72
Minimum Volume ........................................73
Receive Transpose ON / OFF ................................. 74
SOFT THRU ON/OFF ....................................... 75
External Zones ...........................................76
MIDI Implementation Chart ................................. 87
MIDI Implementation - Each Channel ..........................88
Drawbar MIDI Data ........................................ 89
System Exclusive Messages .................................. 89
Bend Length ............................................ 90
Modulation Mode ......................................... 91
Organ Zone Key Map ....................................... 92
Master Tune ............................................. 93
Tune Mode ............................................. 94
Transpose .............................................. 95
Foot Switch Function ....................................... 96
Foot Switch Press "ON"/Press "OFF" ............................ 97
Foot Switch Alternate/Momentary .............................. 98
Memory Dump - All Data ................................... 99
Memory Dump - Current Settings ............................. 100
Preset Copy ............................................ 101
Preset Back to Default ..................................... 102
Reset Procedure ......................................... 103
Expression Monitor ....................................... 104
Demo Songs ............................................ 105
Important Note - Battery ................................... 106
Appendix A - System Parameter List ........................... 108
Appendix B - Leslie Parameter (NRPN) List ...................... 108
Appendix C - Preset Parameter (NRPN) List ...................... 109
Leslie Touch Buttons .............................36
Leslie Parameters ................................ 37
Using a Leslie Speaker Cabinet ......................46
Reverb Mode ................................... 47
Reverb Level ...................................48
Overdrive Level ................................. 49
MIDI IN and MIDI OUT ........................... 54
MIDI THRU .................................... 54
MIDI Channels ................................. 76
Program Number ................................ 77
Program Bank .................................. 78
Key Map ......................................79
Key Octave ..................................... 80
Maximum Volume ............................... 81
Minimum Volume ............................... 82
Velocity Curve .................................. 83
Bender ....................................... 84
Modulation .................................... 85
Damper ...................................... 86
Quick All Reset Procedure ......................... 103
ON Touch Button ...................... 36
FAST Touch Button ..................... 36
BRAKE Touch Button .................... 36
Leslie Brake Time ......................42
Leslie Volume Balance ................... 43
Leslie Microphone Setting ................ 44
Leslie Percussion Setting .................45
Hammond XK-2 Quick Features Guide
Page 5
INTRODUCTION
Basic Hook-Up
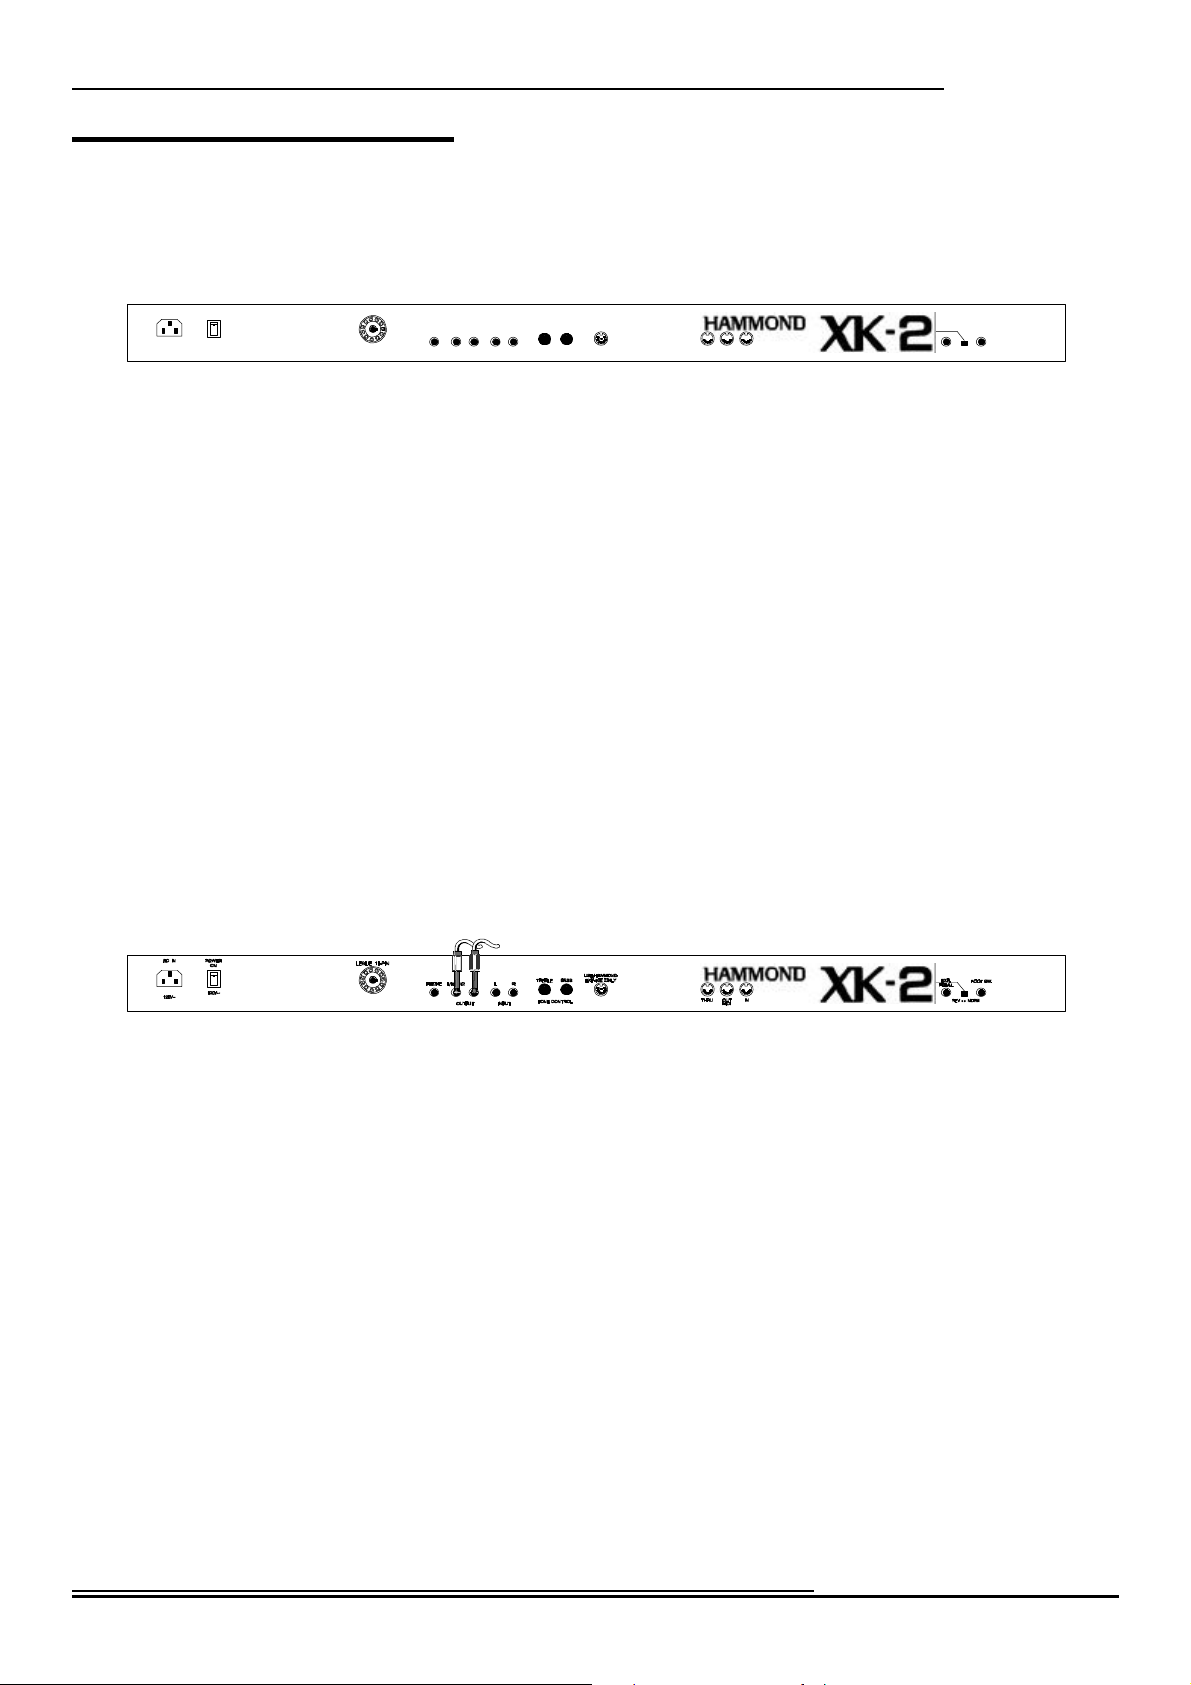
All connections are found on the Accessory Panel on the back of the XK-2.
AC IN
POWER
ON
120V~
120V~
Ë A.C. Power
Your Hammond XK-2 is shipped from the factory set for 120 V.A.C. power. To connect the XK-2 to A.C. power:
1. Locate the A.C. Power Cord that came with your XK-2.
2. Plug the female end of the Power Cord into the receptacle on the XK-2 marked, “AC IN.”
3. Plug the other end of the Power Cord into an A.C. power outlet.
Ë Audio Connections
LESLIE 11-PIN
Introduction
USE HAMMOND
BASS
TREBLE
PHONE
L/MONO LR
OUTPUT
R
INPUT
EXP-100 ONLY EXP.
IN
TONE CONTROL
THRU OUT
MIDI
FOOT SW.
PEDAL
REV = < NORM
1
In order to hear the sounds produced by the XK-2, you will need to connect it to an amplifier or other external sound source.
You can either:
1. Connect the XK-2 to an amplifier, or;
2. Connect the XK-2 to a Leslie Speaker cabinet.
Connecting to an Amplifier
1. Use two audio cables with 1/4" plugs on both ends of each cable.
2. Connect one end of each of the audio cables to the audio output connectors on the back of the XK-2.
NOTE: At this point it is assumed that you are using a keyboard or guitar amplifier that has 1/4" phono plug inputs. We
assume this since this is the most common type of connector used on these types of amplifiers.
3. Connect the other ends of each cable to the female 1/4" audio input connectors of your amplifier.
If your amplifier has only a single (1) female 1/4" phono plug audio input, you can connect one end of one cable to
the L/MONO audio output connector on the XK-2, and the other end to the female 1/4" audio input connector of
your amplifier.
Hammond XK-2 Quick Features Guide
Page 6

Introduction
2
Connecting a Leslie Speaker (11-pin)
If you wish to use a Leslie Speaker with your XK-2, the Leslie Speaker should be connected before turning the power "ON".
To do this:
1. Locate the Leslie Connector Cable.
2. Plug the female end of the Connector Cable into the receptacle on the back lower left corner of the Leslie
Speaker.
3. Plug the male end of the Connector Cable into the 11-pin Leslie socket found on the Accessory Panel of
the XK-2.
To Leslie Speaker
NOT E:
Both the Leslie connections are "keyed", that is, each connection contains a notch which insures that the pins properly match up.
IMPORTANT NOTE: The 11-pin Leslie socket on your XK-2 allows you to plug directly into many standard 1- and 2channel Leslie Speaker cabinets. Some current models: 122XB, 303, 723, 771. However, it should be noted that when
plugging the XK-2 into a multi-channel Leslie cabinet such as a 303 or 723, only the Rotary channel will sound.. The
Stationary channel(s) will be silent.
IMPORTANT NOTE: To connect the XK-2 to a Leslie Speaker having a different pin configuration such as an older 6-pin
122 or 147, or a 9-pin cabinet such as the 900 series, 760 or 770 cabinets, you will require an adapter kit and/or Connector
Cable. Contact your Hammond Dealer for more information regarding which adapter kit and/or cable you may need.
Ë MIDI Connections
In order to play the sounds produced by your XK-2, the unit must be connected via MIDI to a keyboard or other MIDIcompatible device. See the MIDI section starting on page 54 for more information about MIDI connections and your
Hammond XK-2.
Ë Connecting a Foot Switch
You can connect an optional foot switch such as the Hammond model FS-9H foot switch to your XK-2. Simply plug the
foot switch plug into the jack marked "FOOT SW" on the back of the XK-2.
Ë Connecting an Expression Pedal
If you wish to use an expression pedal which has a 1/4" plug, simply insert the plug into the jack marked “EXP.PEDAL”.
REV/NORM Selector
This selector, located to the right of the “EXP. PEDAL” jack, allows you to choose the setting which matches the
Expression Pedal you are using. Some expression pedals, because of their configuration, may play only at maximum volume
with this switch set in the “NORM” position. If you experience this, simply slide the REV/NORM Selector to the “REV”
position.
Hammond XK-2 Quick Features Guide
Page 7
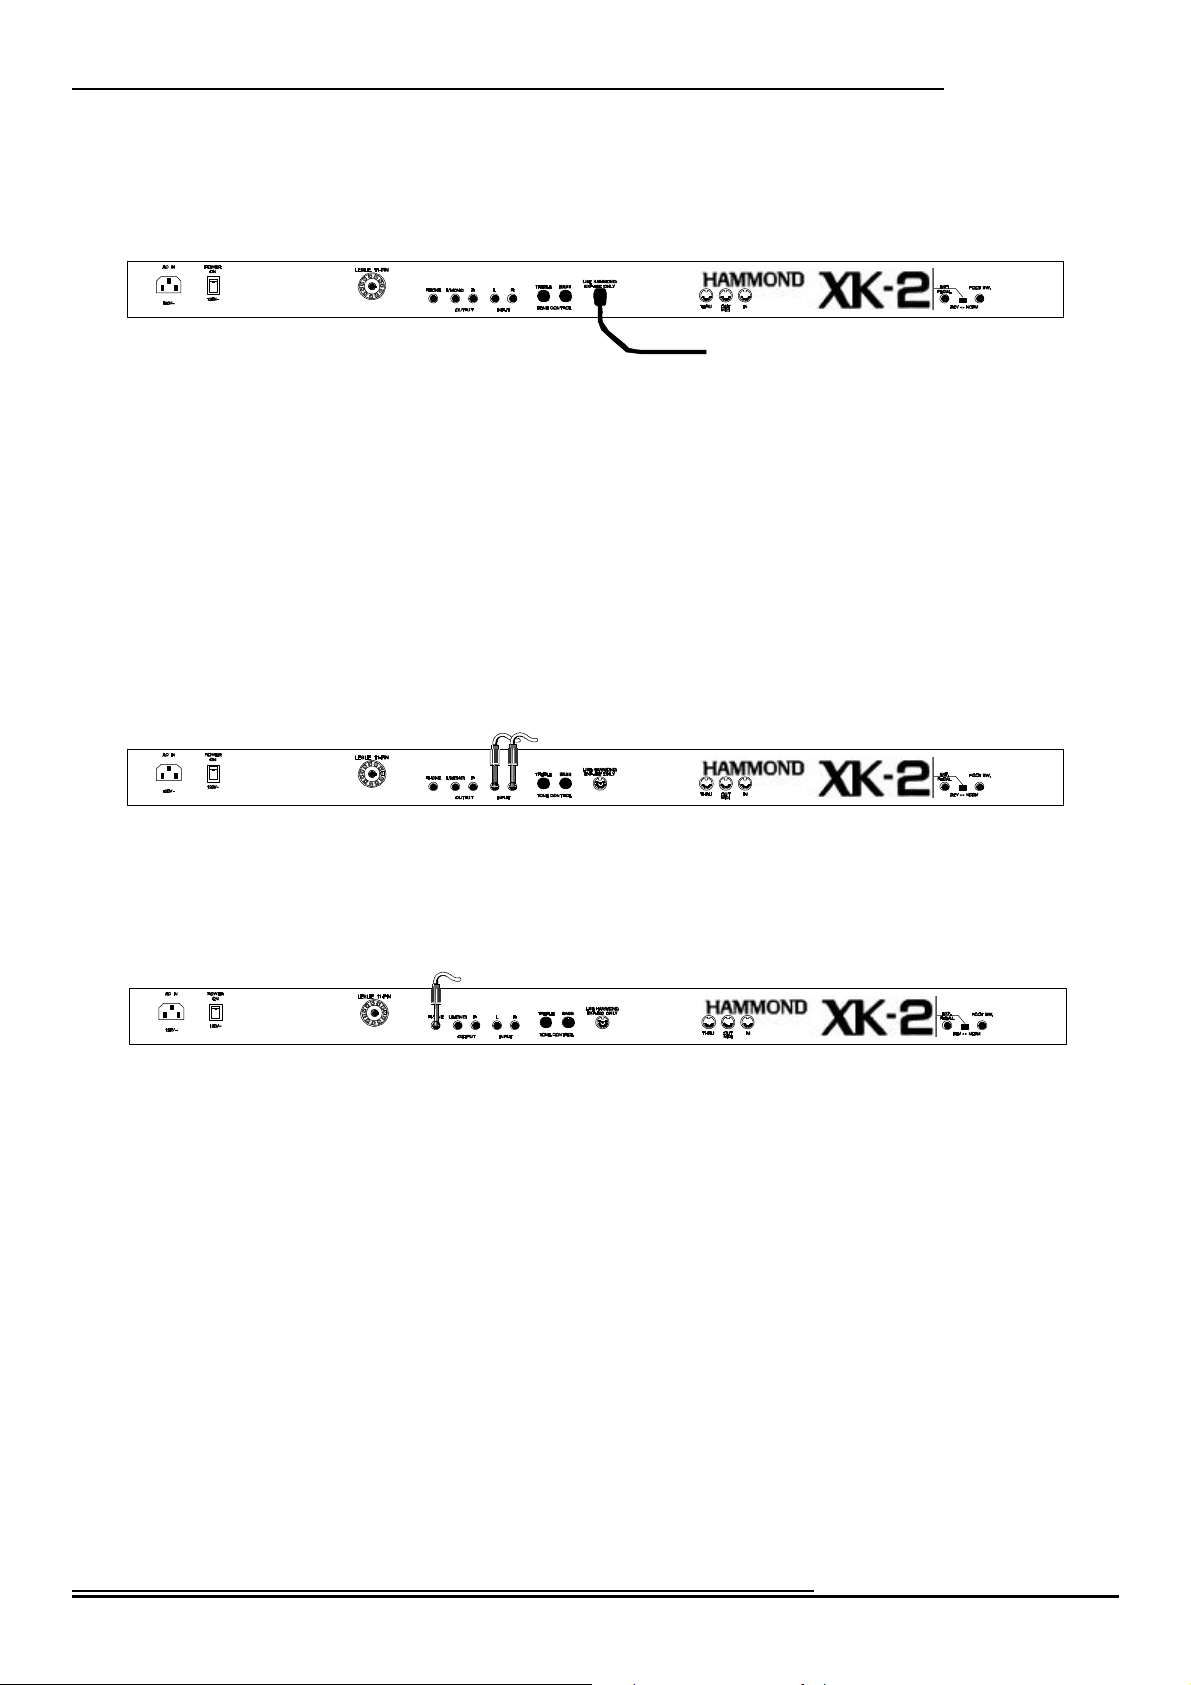
Ë Connecting the Hammond EXP-100 Expression Pedal
If you wish to use the Hammond EXP-100 Expression Pedal, a special DIN-type jack is provided on the Accessory Panel on
the back of the XK-2. Simply insert the plug from the EXP-100 into this jack as shown below.
To EXP-100 Expression Pedal
NOTE: ONLY the EXP-100 plug should be inserted into this jack.
Ë Connecting an External Sound Source
You may connect an external sound source such as a Sound Module to the XK-2. In this way, both the XK-2 and the
external sound source can be heard through the same speaker system. If you wish to do this:
1. Locate two audio cables with 1/4" plugs on both ends of each cable.
2. Connect one end of each of the audio cables to the audio output connectors on the external sound source.
Introduction
3
3. Connect the other ends of the same audio cables to the jacks marked “INPUT” on the back of the XK-2.
Ë Connecting a Set of Headphones
A stereo headphone jack is provided so that you may play or practice in privacy.
Hammond XK-2 Quick Features Guide
Page 8
4 Introduction
Basic Controls
The basic controls on your Hammond XK-2 include Drawbars, Touch Buttons, Rotary Controls and Wheel Controls. These
controls allow you to make adjustments and voice changes on the instrument.
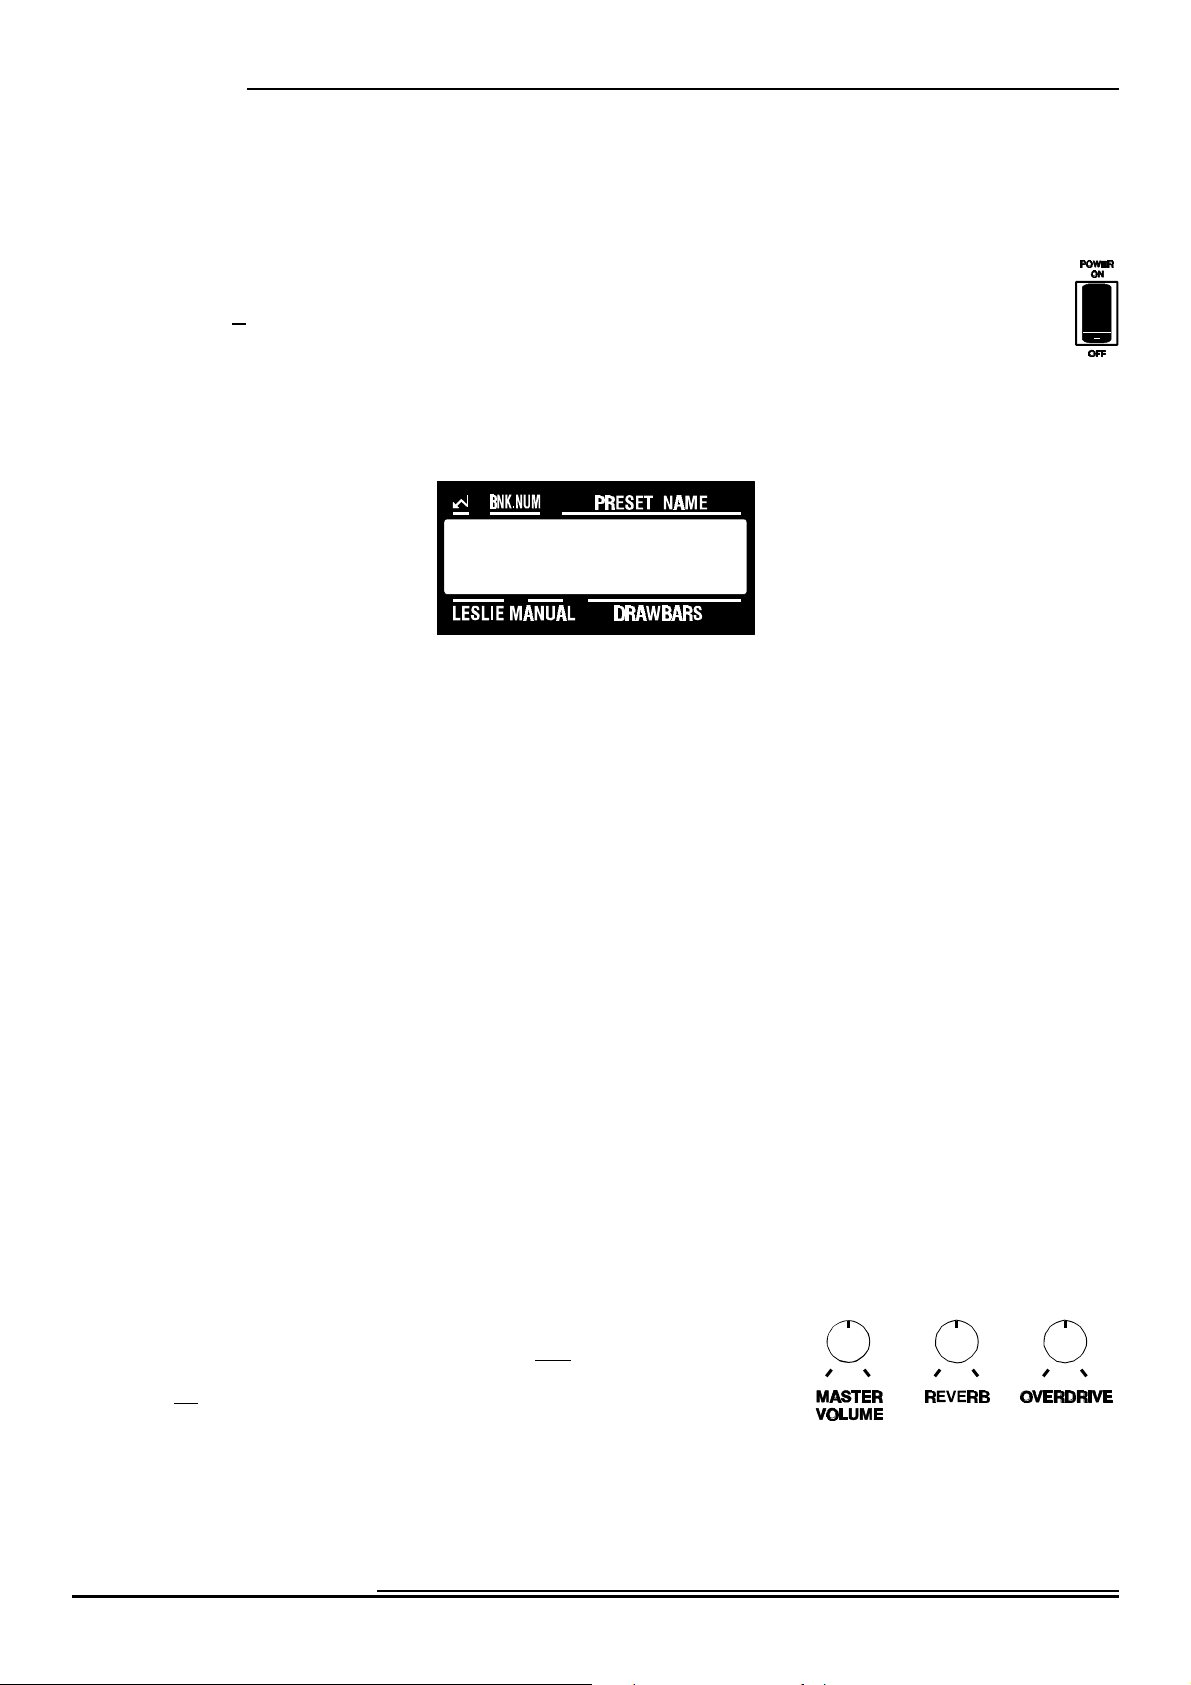
Ë ON / OFF Power Switch
Facing the keyboard, the ON / OFF Power Switch is located on the back right side of the rear panel. Push
this switch in at the top to turn the XK-2 "ON.” To turn the unit "OFF,” push the switch in at the bottom.
When the XK-2 is "ON,” the Information Center Display as well as certain LED's (Light Emitting Diodes)
will light up showing that the unit is "ON.”
Ë Information Center Display
The Information Center Display is an LCD (Liquid Crystal Display) located in the center of the front panel.
The Information Center Display has two modes: (1) the PLAY mode, and (2) the MENU mode. The Play mode allows you
to graphically or numerically see the Drawbar settings for whichever manual is selected. The Menu mode allows you to
change and edit the XK-2's software parameters such as Sustain Mode, Drawbar Voicing, MIDI parameters and other
advanced functions.
NOTE: The Play and Menu modes are covered starting on page 6 of this Guide.
Ë Touch Buttons
Touch Buttons are the two groups of controls on either side of the Information Center Display and to the left of the
keyboard in front of the Drawbars. The basic functions of these Buttons are:
1. Turning something "ON" or "OFF.”
2. Modification of parameters - increasing or decreasing.
3. Selecting among multiple functions.
4. Confirmation - YES, NO or OK.
The Touch Buttons on the XK-2 operate in two different ways:
1. Select Touch Buttons will allow you to select among multiple functions such as selecting a Menu Page.
2. Touch and Hold Touch Buttons will increase or decrease their function in incremental steps when they
are touched once, or "scroll" through the steps if touched and held. The new value will be shown in the
Information Center Display.
NOTE: More information about Parameters is covered under “Information Center Display.”
Ë Rotary Controls
There are three Rotary Controls located on the top panel to the left of the
Touch Buttons. Turning a Rotary Control to the right (clockwise) will
increase the intensity of the corresponding control. Turning the control to
the left (counter-clockwise) will decrease the corresponding control's level.
Hammond XK-2 Quick Features Guide
Page 9
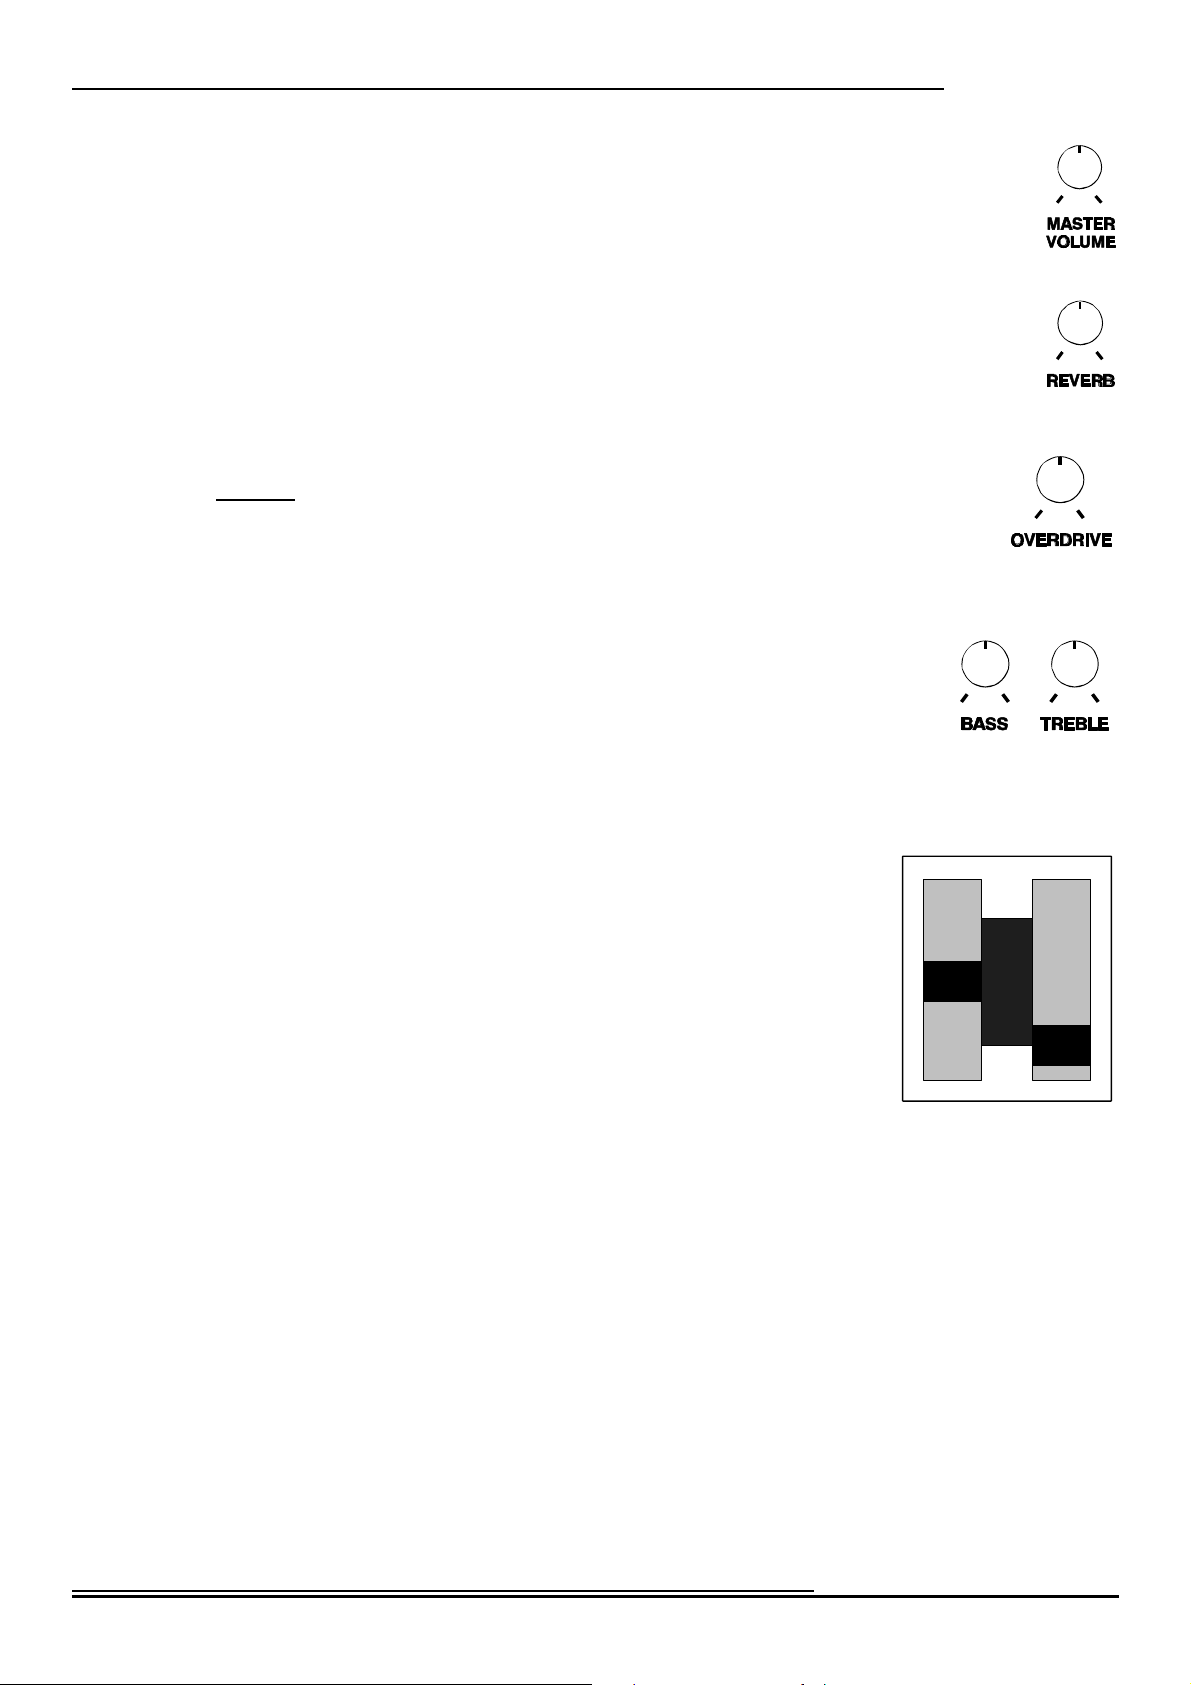
MASTER VOLUME Control
This Rotary Control allows you to control the total or maximum volume of the entire instrument.
Turn this control to the right to increase the total volume, and to the left to decrease the total
volume.
REVERB Control
This Rotary Control allows you to control the total or maximum volume of digital Reverb. Turn
this control to the right to increase the amount of Reverb, and to the left to decrease the amount
of Reverb. Reverb is explained in detail starting on page 47.
OVERDRIVE Control
Overdrive adds the fuzzy, raspy, "dirty" sound created by the vacuum tubes of a tube-style
Leslie Speaker when its volume is pushed past its sound limit. This Rotary Control allows
you to control the total or maximum amount of Overdrive. Turn this control to the right to
increase the amount, and to the left to decrease the amount.
BASS and TREBLE Tone Controls
5Introduction
These two Rotary Controls, located on the Accessory Panel on the back of the XK-2,
allow you to control the Bass and Treble response of the XK-2 tones. Turn each
control to the right for the maximum amount of Treble or Bass. Turn each control
to the left for the minimum amount of Treble or Bass. For a “flat” frequency
response, turn each control to its center position.
Ë Pitch Bend and Modulation Wheels
Pitch Bend
You can adjust the pitch range, plus or minus, 12 half steps. For more information
about how to change the Pitch Bend range, see page 90.
Modulation Wheel
The Modulation Wheel has several functions that can be selected. The two main uses
are:
1. To send MIDI data to a connected MIDI device. Normally the
Modulation Wheel will send Animation (Controller #1) but can be
used to send any data for any numbered MIDI Controller. For more
information about this function, see page 62.
2. To control certain internal functions of the XK-2 such as Leslie Slow/Fast. For more information about
this function, see page 91.
PITCH MODULATION
Moving either control forward (away from you) will increase the intensity of the corresponding control. Moving
either control downward (toward you) will decrease the corresponding control's level.
Hammond XK-2 Quick Features Guide
Page 10
6 Information Center Display
INFORMATION CENTER DISPLAY
The Drawbars, Touch Buttons and Rotary Controls control the operations necessary for performance on the XK-2.
Advanced Features such as Drawbar Voice Mode, Attack Mode, etc., are accessed using the Information Center Display.
IMPORTANT: It is assumed at this point that you have just turned the XK-2 "ON" and have not touched
the EDIT Touch Button. If you have, please turn the XK-2 "OFF,” wait 5 seconds and turn it back "ON.”
Play Mode
There are two (2) screen displays to the Play Mode - Graphic with parameters, and Numeric with parameters.
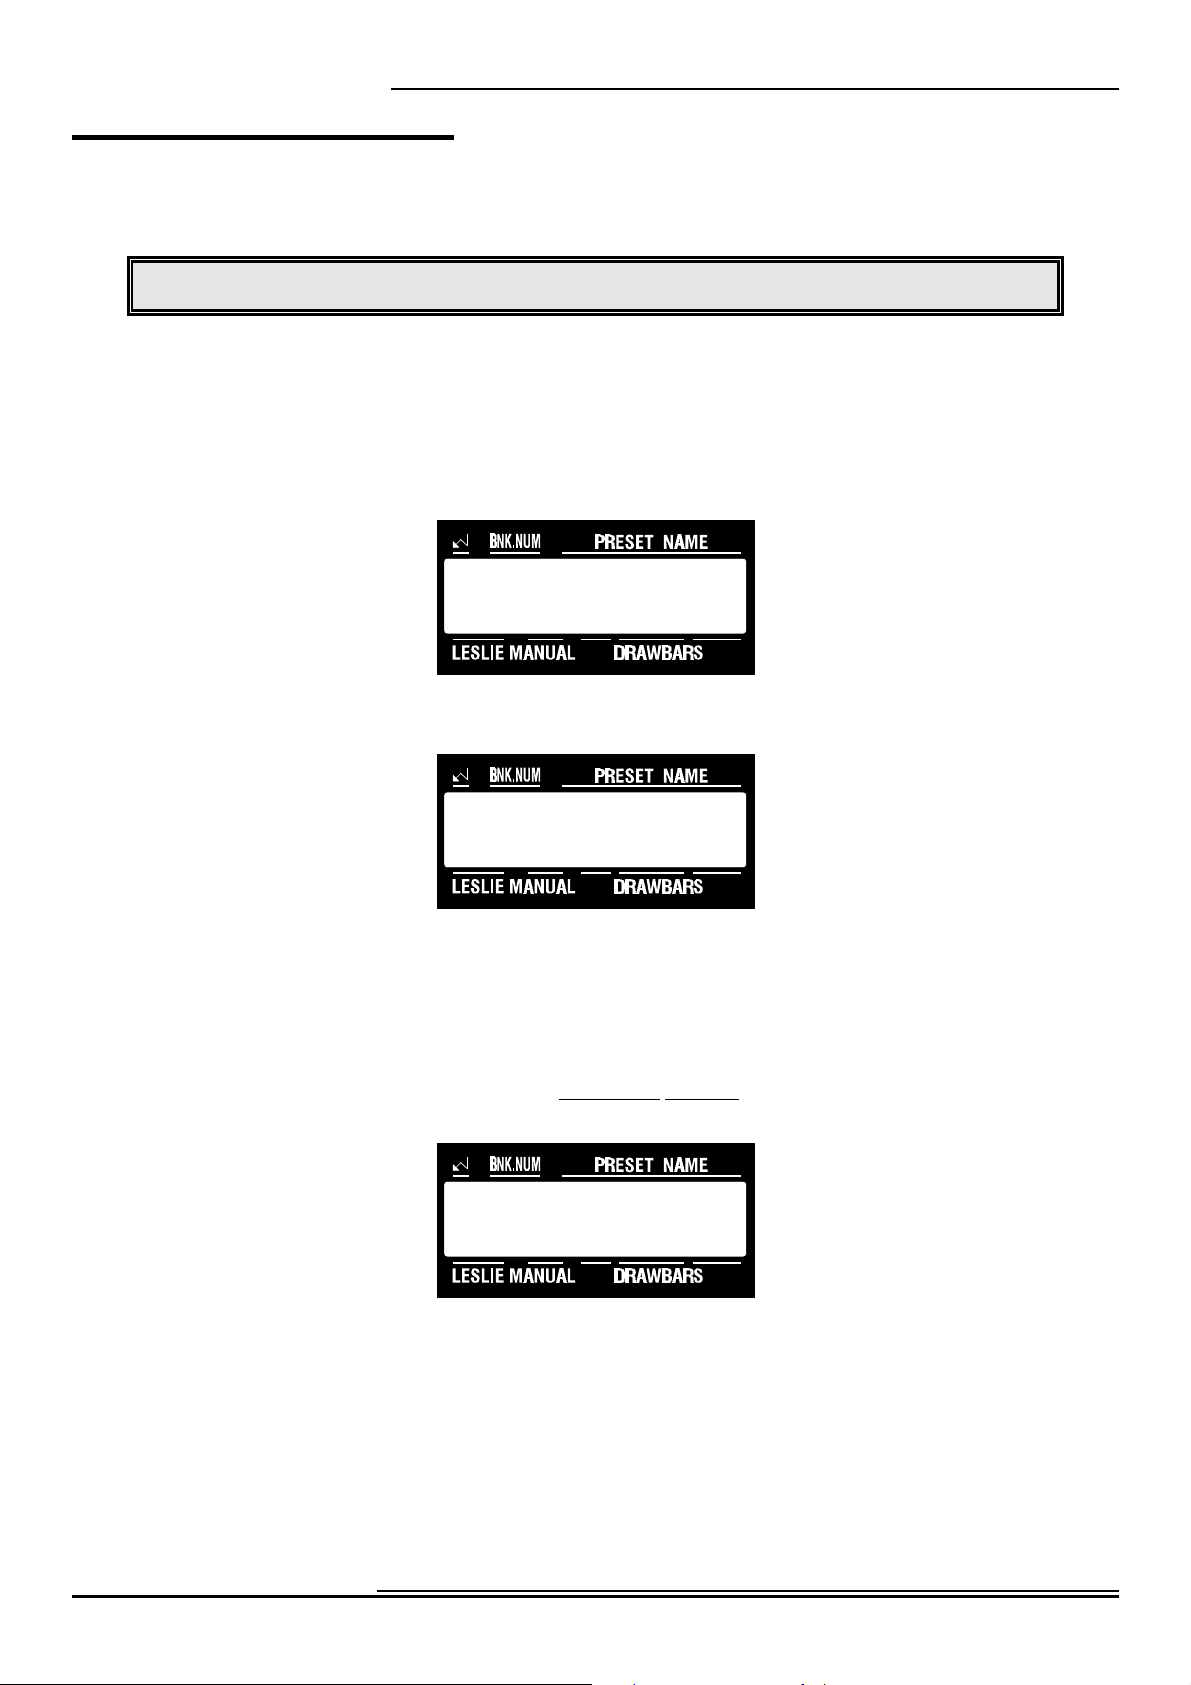
Ë Play Mode - Graphic Display
When the XK-2 is turned "ON,” the LCD screen should look like this. This information is only displayed for a short time.
The B-3 World of
the HAMMOND XK-2
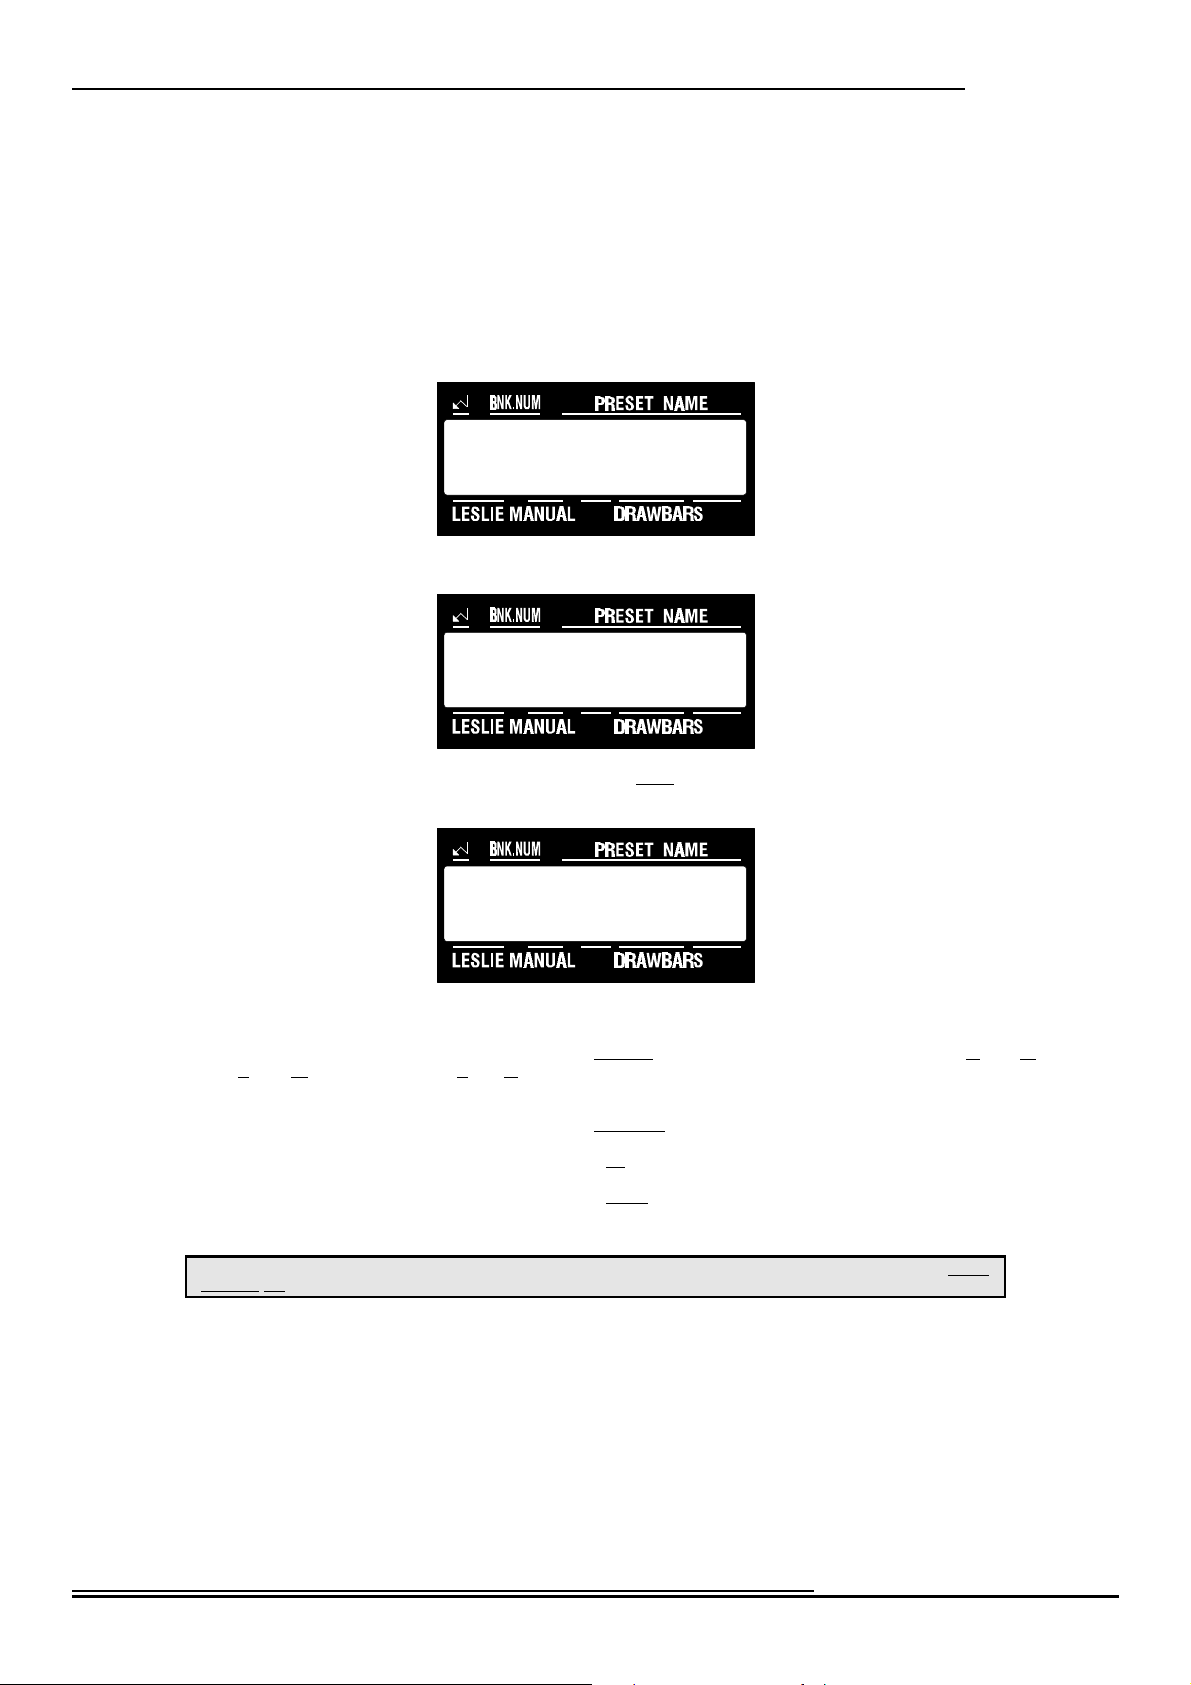
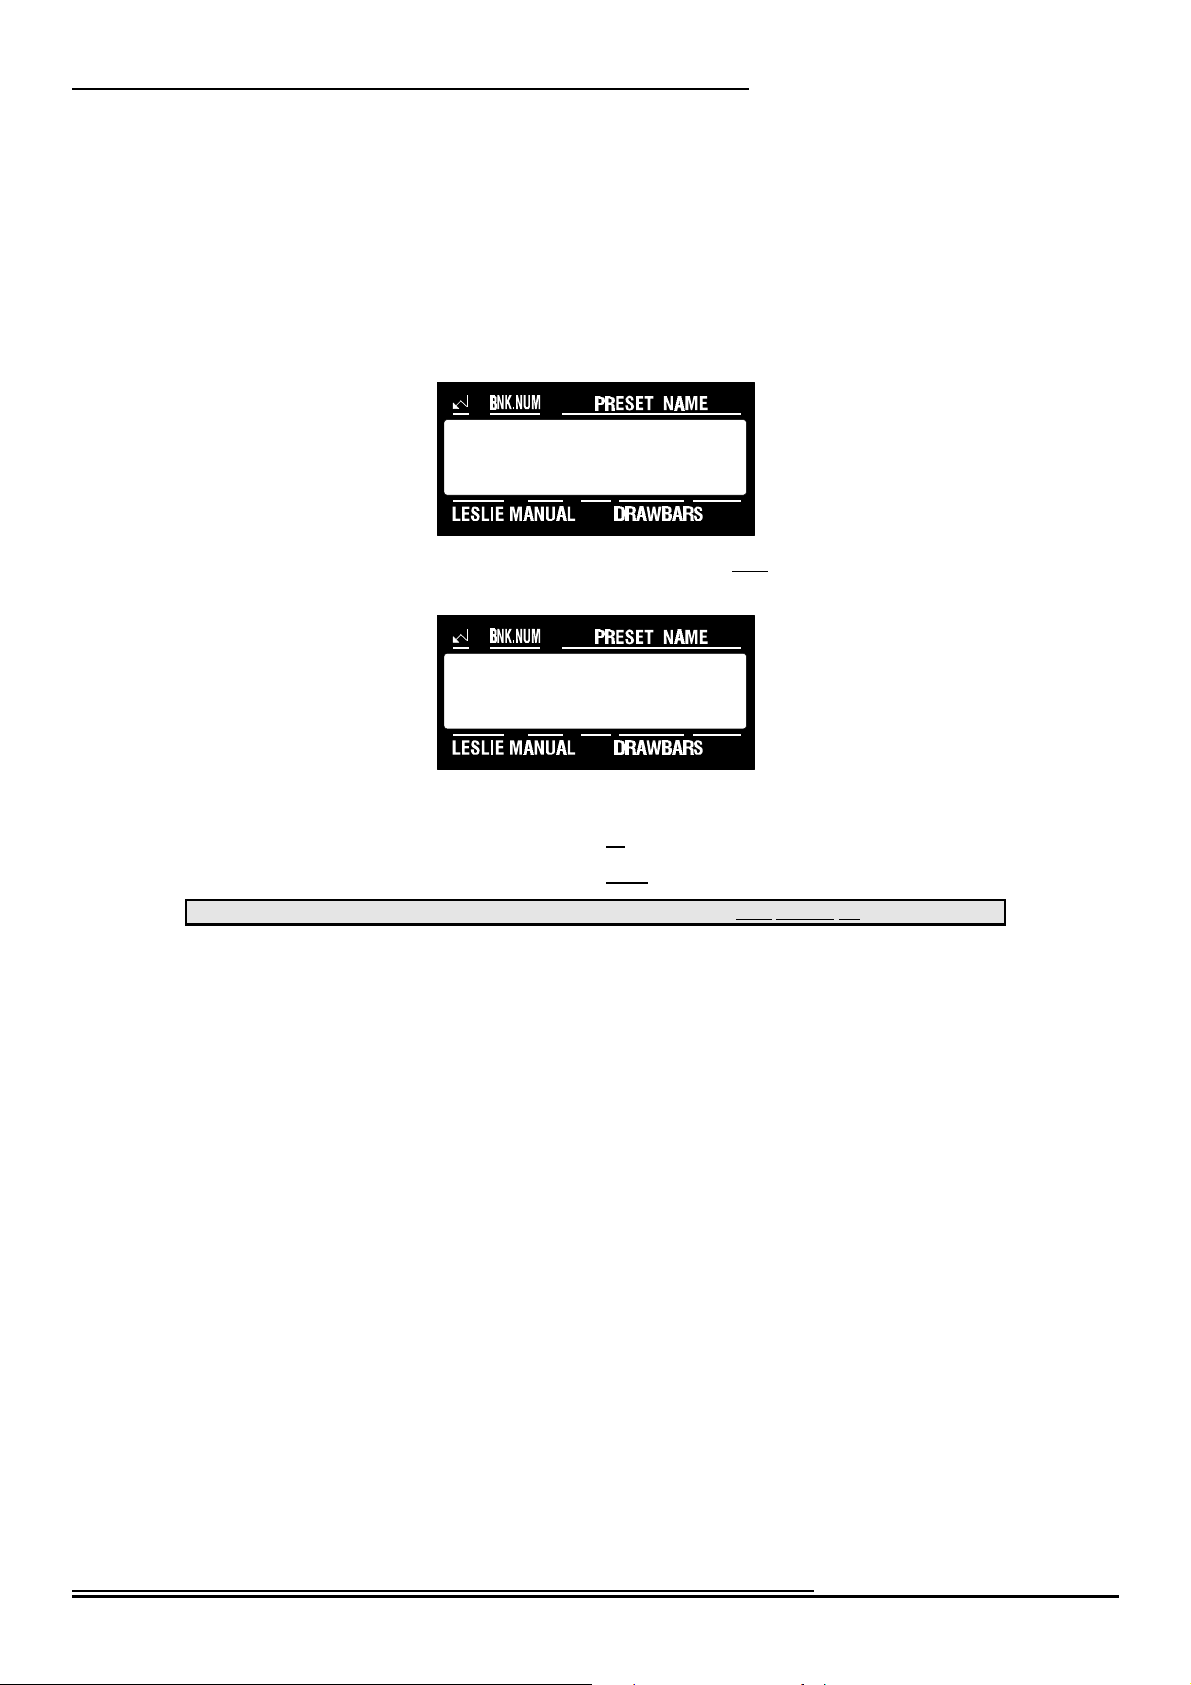
Once the opening message has disappeared, the display screen of your instrument should look similar to this:
The upper half of the display shows the Bank Number, Preset Number and Preset Name. The bottom half of the display
shows, from left to right, the Leslie Preset, the Manual currently being displayed and the Graphic Drawbar setting for the
manual.
Ë Play Mode - Numeric Display
Now, touch the UPPER Select Touch Button in the DRAWBAR SELECT Touch Button Section. The Information Center
Display should now look like this:
A-/ CANCEL
L#1 UM
A-/ CANCEL
L#1 UM 000000000
Now you are in the Numeric Display of the Play Mode. The upper half of the display shows the Bank Number, Preset
Number and the Preset Name. The bottom half of the display shows, from left to right, the name of the Manual currently
being displayed and the Numeric Drawbar setting for the manual.
Hammond XK-2 Quick Features Guide
Page 11
Menu Mode
There are eight (8) Menus on the XK-2. Each of these Menus allows you to access Advanced Features. These Advanced
Features allow you to change parameters, turn something “ON” or “OFF,” modify values, etc. These functions are
explained in detail throughout this Guide.
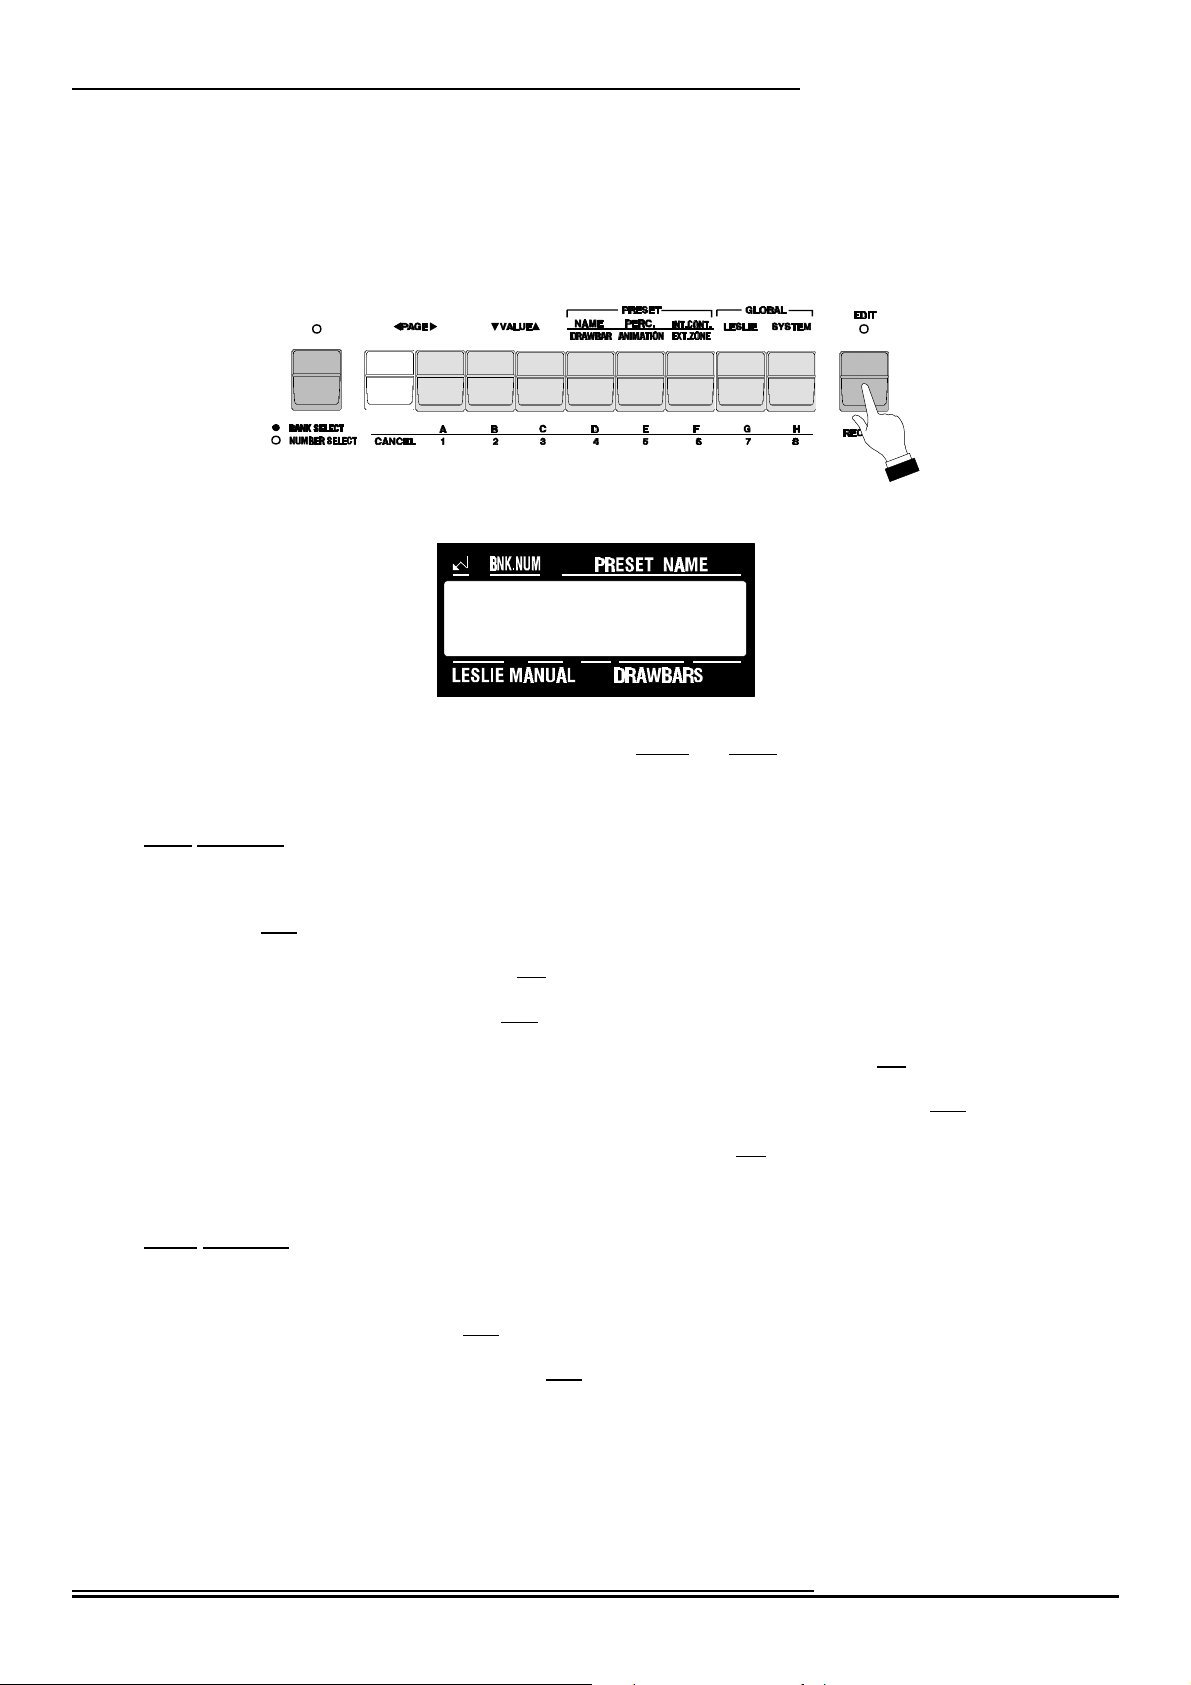
Ë EDIT Touch Button
If you touch the gray EDIT Touch Button once, the Information Center Display will look like this:
7Information Center Display
Select
EDIT PARAMETER
There are two types of parameters you can edit on the XK-2 - Global and Preset parameters.
Preset Parameters
Preset Parameters are changes you can make to the instrument for the purpose of defining your own Preset settings. These
are explained below.
NAME - This Menu allows you to name your Presets. From the above message, touch the NAME/DRAWBAR Select
Touch Button once to see this Menu.
DRAWBAR - This Menu allows you to change various characteristics of the Drawbars. From the above message, touch
the NAME/DRAWBAR Select Touch Button two times to see this Menu.
PERC. - This Menu allows you to change various characteristics of the Percussion. From the above message, touch the
PERC./ANIMATION Select Touch Button once to see this Menu.
ANIMATION - This Menu allows you to change various characteristics of features such as Vibrato, Reverb and
Overdrive. From the above message, touch the PERC/ANIMATION Select Touch Button two times to see this Menu.
INT.CONT. - This Menu allows you to change various characteristics of the internal features of the XK-2, such as
Manual Split. From the above message, touch the INT.CONT./EXT.ZONE Select Touch Button once to see this Menu.
EXT.ZONE - This Menu allows you to change various characteristics of the External Zones of the XK-2. From the
above message, touch the INT.CONT./EXT.ZONE Select Touch Button two times to see this Menu.
Global Parameters
Global Parameters are parameters which affect the entire instrument, such as Master Tune, Transpose, etc. These cannot be
saved to Presets.
LESLIE - This Menu allows you to change various characteristics of the internal digital Leslie. From the above message,
touch the LESLIE Select Touch Button once to see this Menu.
SYSTEM - This Menu allows you to Transpose the XK-2, perform a MIDI Memory Dump, etc. From the above
message, touch the SYSTEM Select Touch Button once to see this Menu.
Hammond XK-2 Quick Features Guide
Page 12
8 Information Center Display
DRAWBAR SELECT Touch Buttons
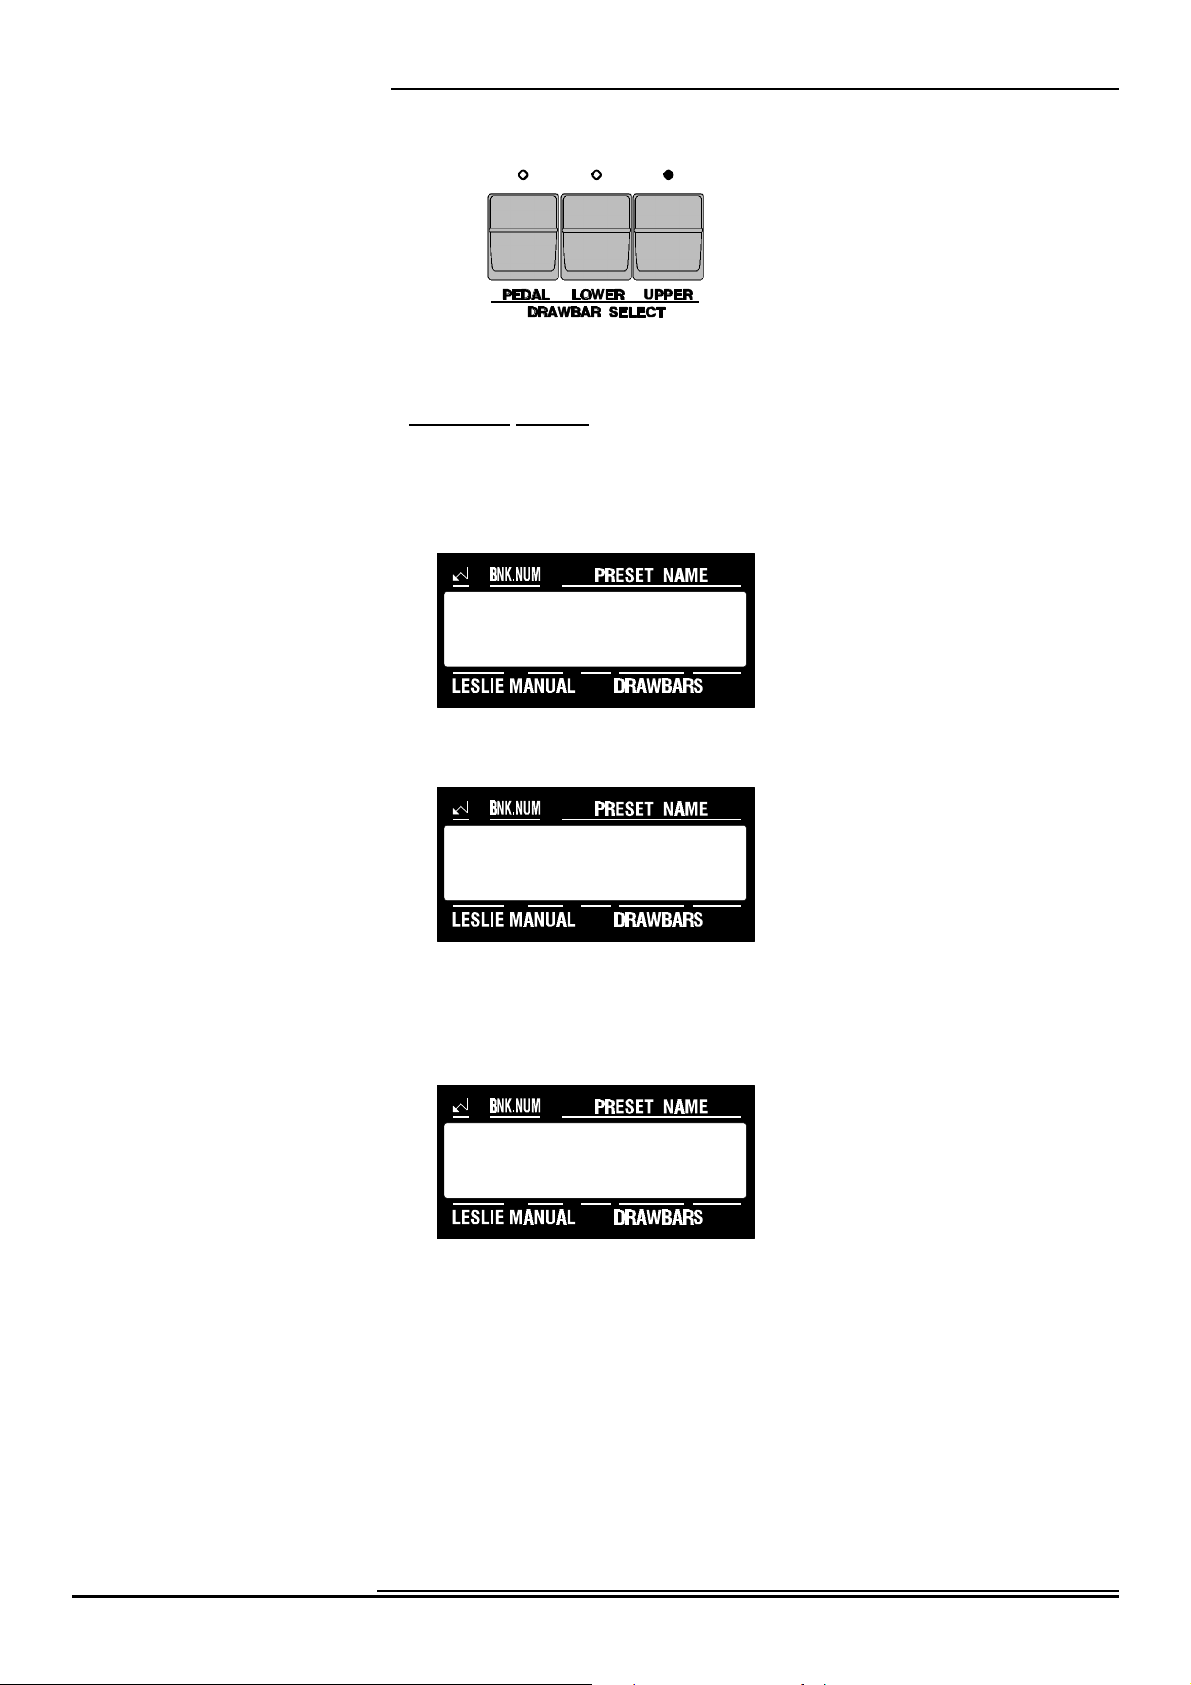
These Touch Buttons allow you to use the XK-2's Drawbar set to control sounds for Upper Manual, Lower Manual and
Pedal. If an LED above a Touch Button is lit, the Drawbars will control the tones represented by that Touch Button.
One of the Touch Buttons in the DRAWBAR SELECT section is always “ON” (red LED lit). Use the Touch Button that
is currently “ON” to select Graphic or Numeric Drawbar Display.
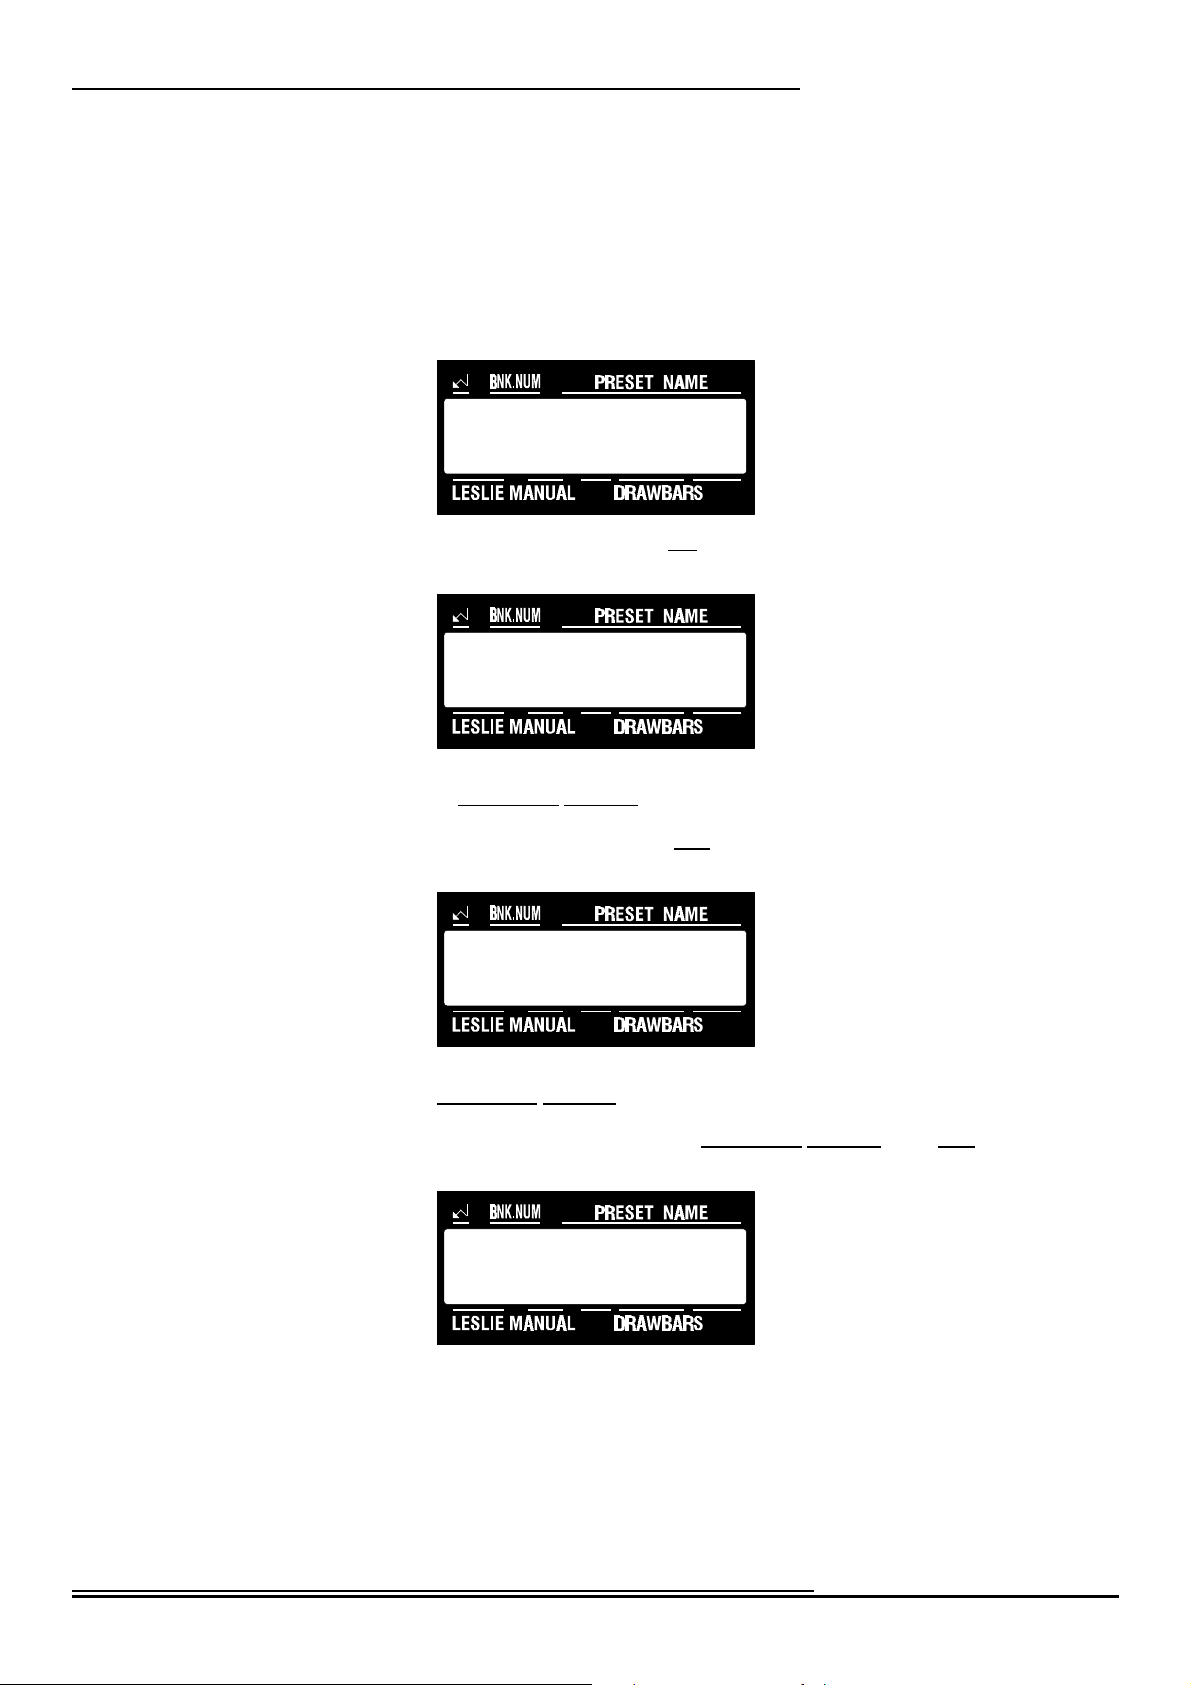
TRY THIS:
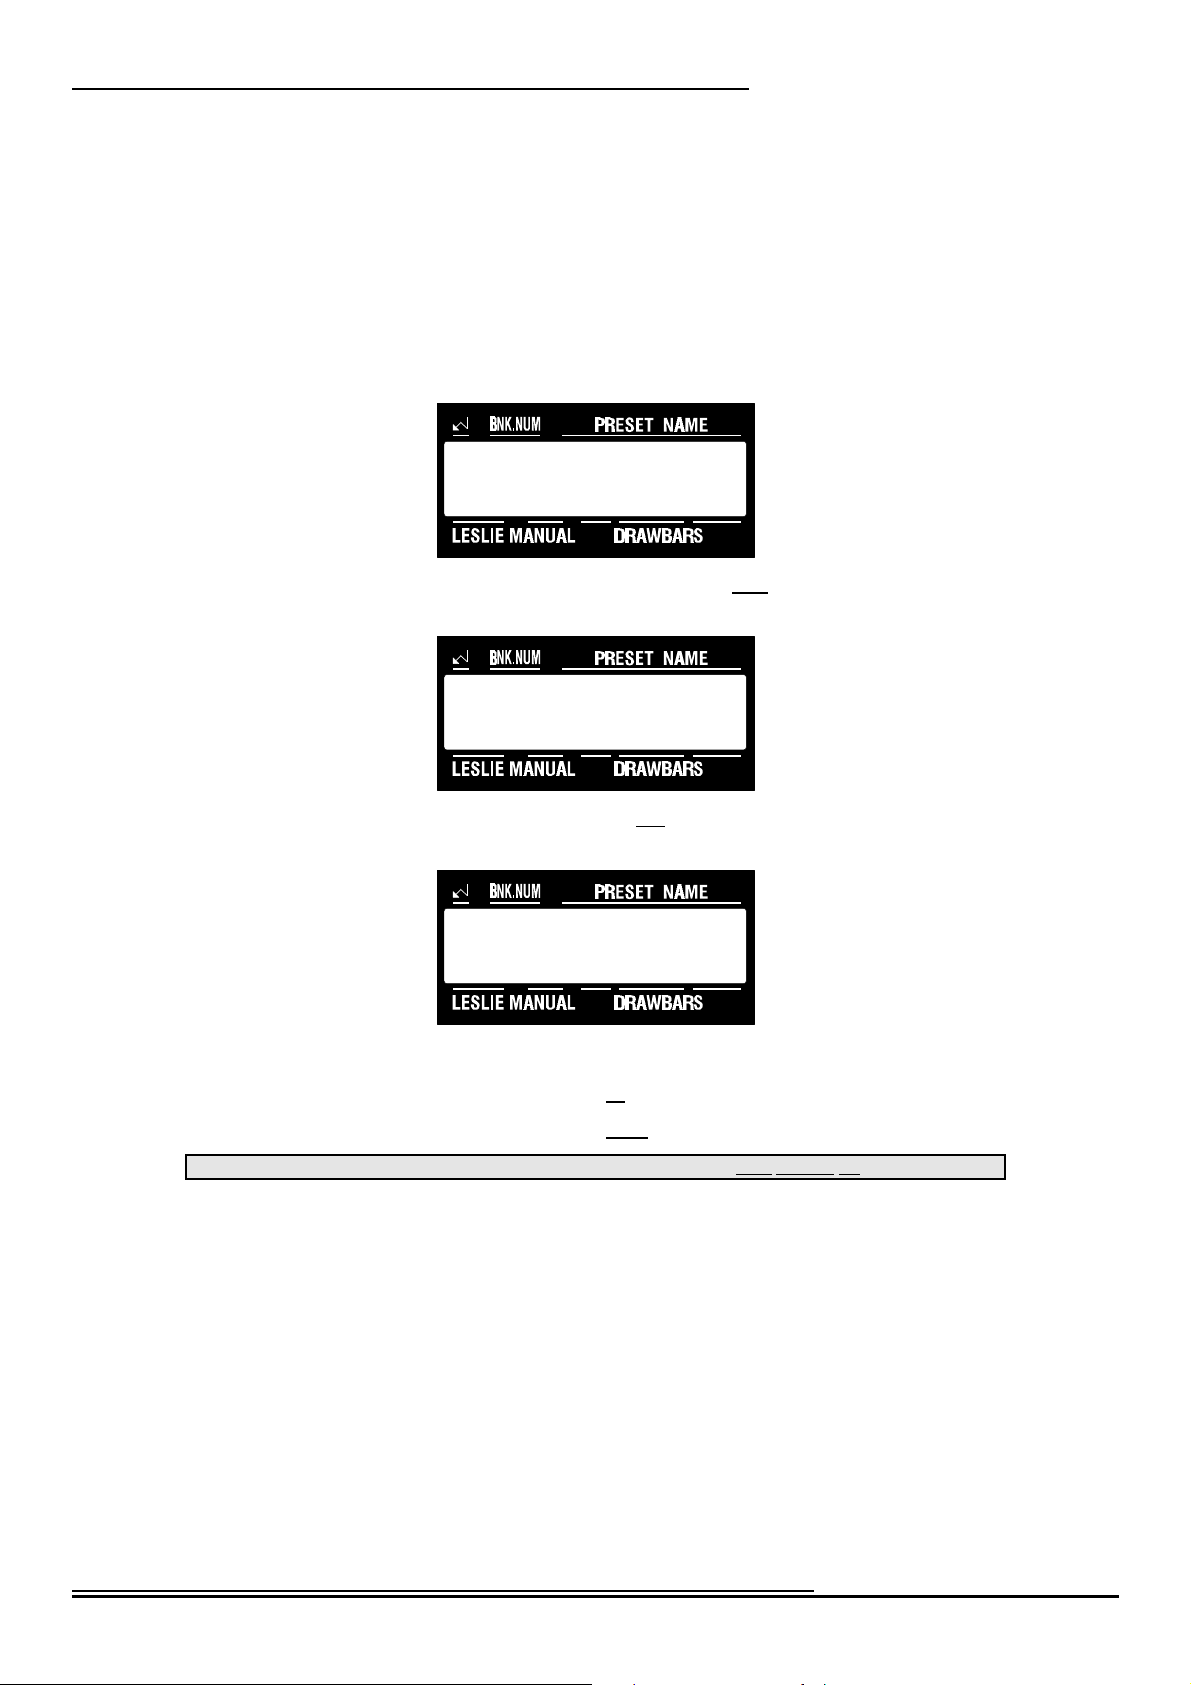
1. After first turning the XK-2 “ON”, the Information Center Display should look similar to this:
A-/ CANCEL
L#1 UM
2. From the above display, touch the LOWER Select Touch Button. The Information Center Display
should now look similar to this:
A-/ CANCEL
L#1 LM
Now you see the Drawbar Display for the Lower Manual. (LM). To see the Graphic Display, touch the LOWER
Select Touch Button again.
1. Now, touch the PEDAL Select Touch Button. The Information Center Display should now look similar
to this:
A-/ CANCEL
L#1 PK
Now you see the Drawbar Display for the Pedal Keyboard. (PK). To see the Graphic Display, touch the PEDAL Select
Touch Button again.
Notice that only two (2) Drawbar settings are shown in the Information Center Display. On most Hammond Organs with
two manuals and pedals, there are two Drawbars for controlling the Pedal tones - one at “16'" pitch and the other at “8'”
pitch. The XK-2 recreates this by using the Sub-Fundamental Drawbar (marked “16'”) and the Fundamental Drawbar
(marked “8'”) to control the Pedal sounds.
Hammond XK-2 Quick Features Guide
Page 13
Ë Drawbar Registration
If, while you are editing, you want to verify the Drawbar Registrations for each section of the XK-2 (Upper Manual, Lower
Manual and Pedal Keyboard), you can use the Drawbar Registration feature of the Information Center Display. This makes
it easier to make all your changes during one editing session.
TRY THIS:
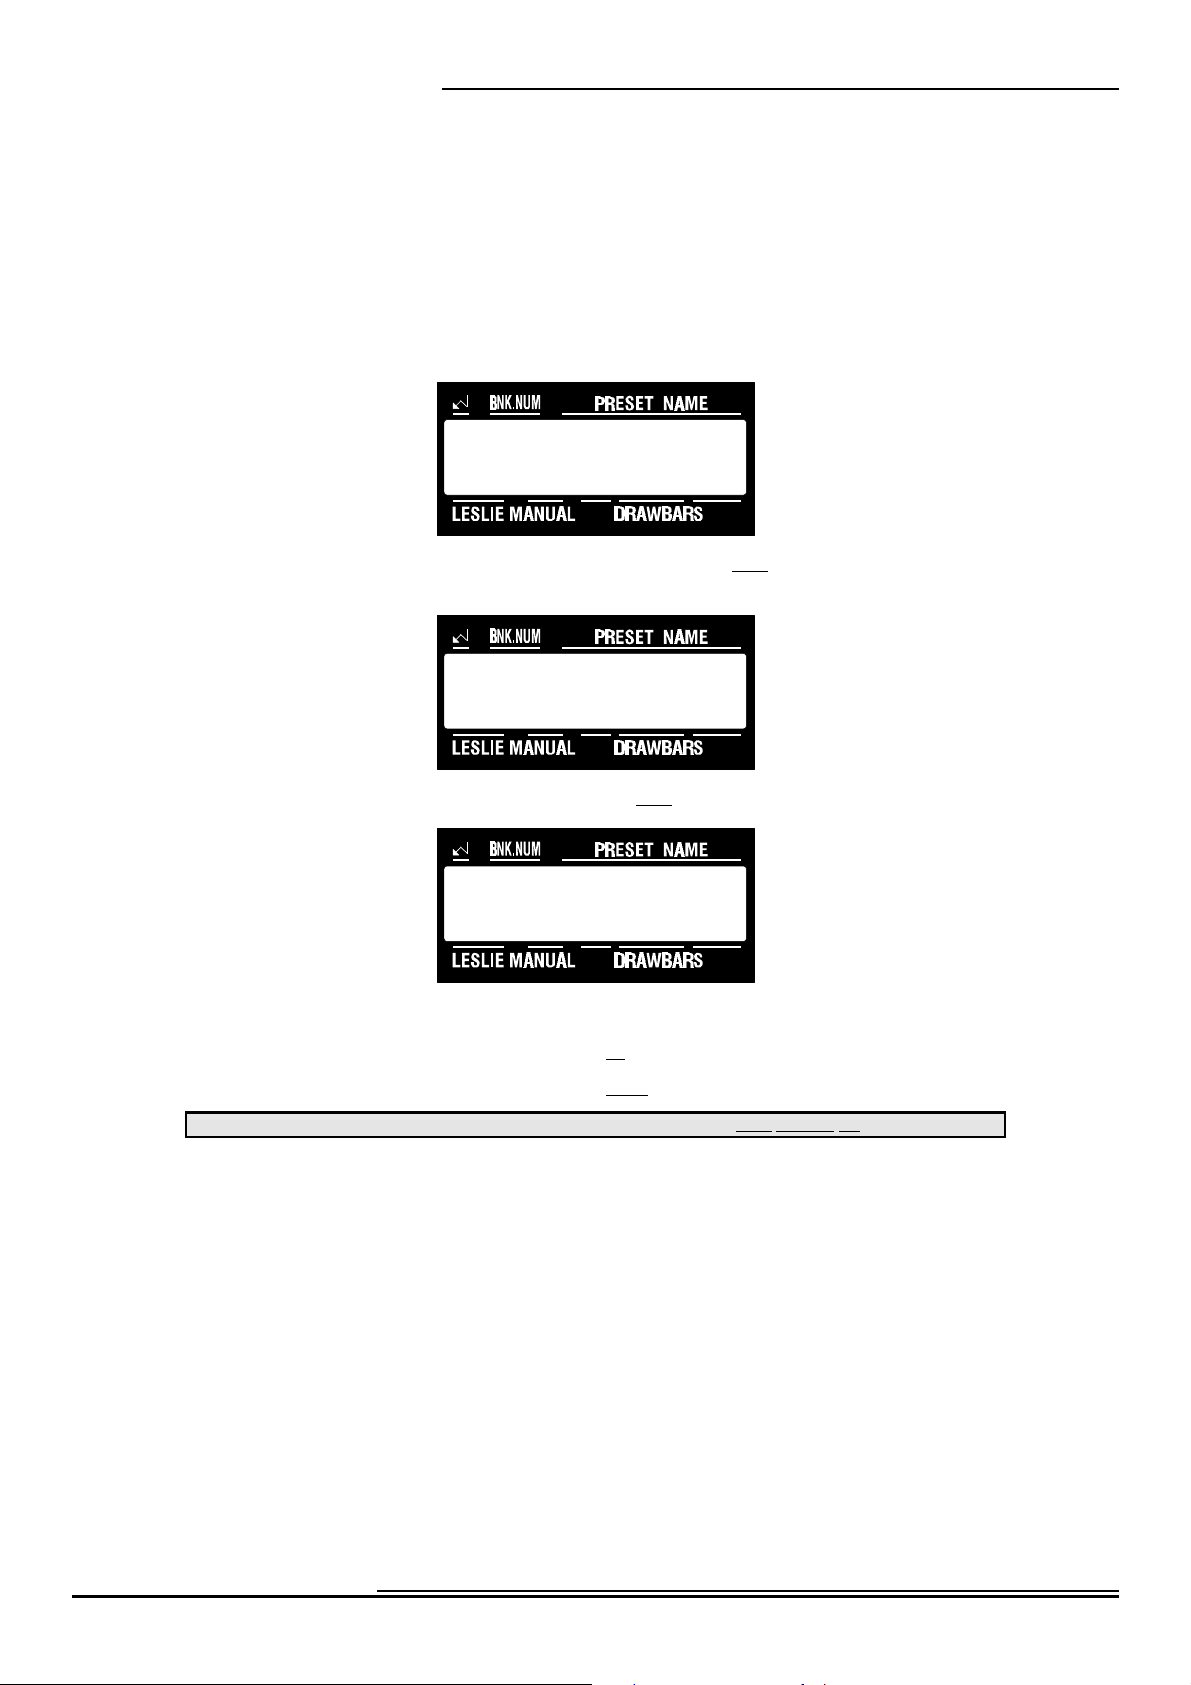
1. Touch the EDIT Select Touch Button. The red LED will light, and the Information Center Display
should look like this:
3. Touch the NAME/DRAWBAR Touch Button two times. The Information Center Display should look
similar to this:
9Information Center Display
Select
EDIT PARAMETER
}2 DB REGIST1
UM 000000000
You will now see the Upper Manual Drawbar Registration shown numerically. You will also see that the LED for
the UPPER Touch Tab in the DRAWBAR SELECT group is lit.
4. Now touch the PAGE “<” Select Touch Button once. The Information Center Display should look
similar to this:
}3 DB REGIST2
LM 000000000
You will now see the Lower Manual Drawbar Registration shown numerically. Notice that the LED for the
LOWER Touch Tab in the DRAWBAR SELECT group is lit.
5. Now touch the PEDAL Select Touch Button in the DRAWBAR SELECT group once. The
Information Center Display should look similar to this:
}4 DB REGIST3
PK 0 0
You will now see the Pedal Drawbar Registration shown numerically.
In this mode, you can use either the PAGE Touch Buttons or the DRAWBAR SELECT Touch Buttons to see the current
Drawbar settings for both manuals and pedals.
NOTE: You can exit by touching the EDIT Select Touch Button.
Hammond XK-2 Quick Features Guide
Page 14
10 Drawbars
DRAWBARS
Your Hammond XK-2 Drawbar Keyboard recreates the sounds of Hammond Harmonic Drawbars. Therefore, before
explaining the features pertaining to Drawbars a few words of explanation about the Drawbars themselves are in order.
Drawbars, often called Tonebars, are the heart and the basis of the renowned Hammond Sound and have been used since the
first Hammond Organ Model A introduced in 1935. There are approximately 253,000,000 possible sound combinations that
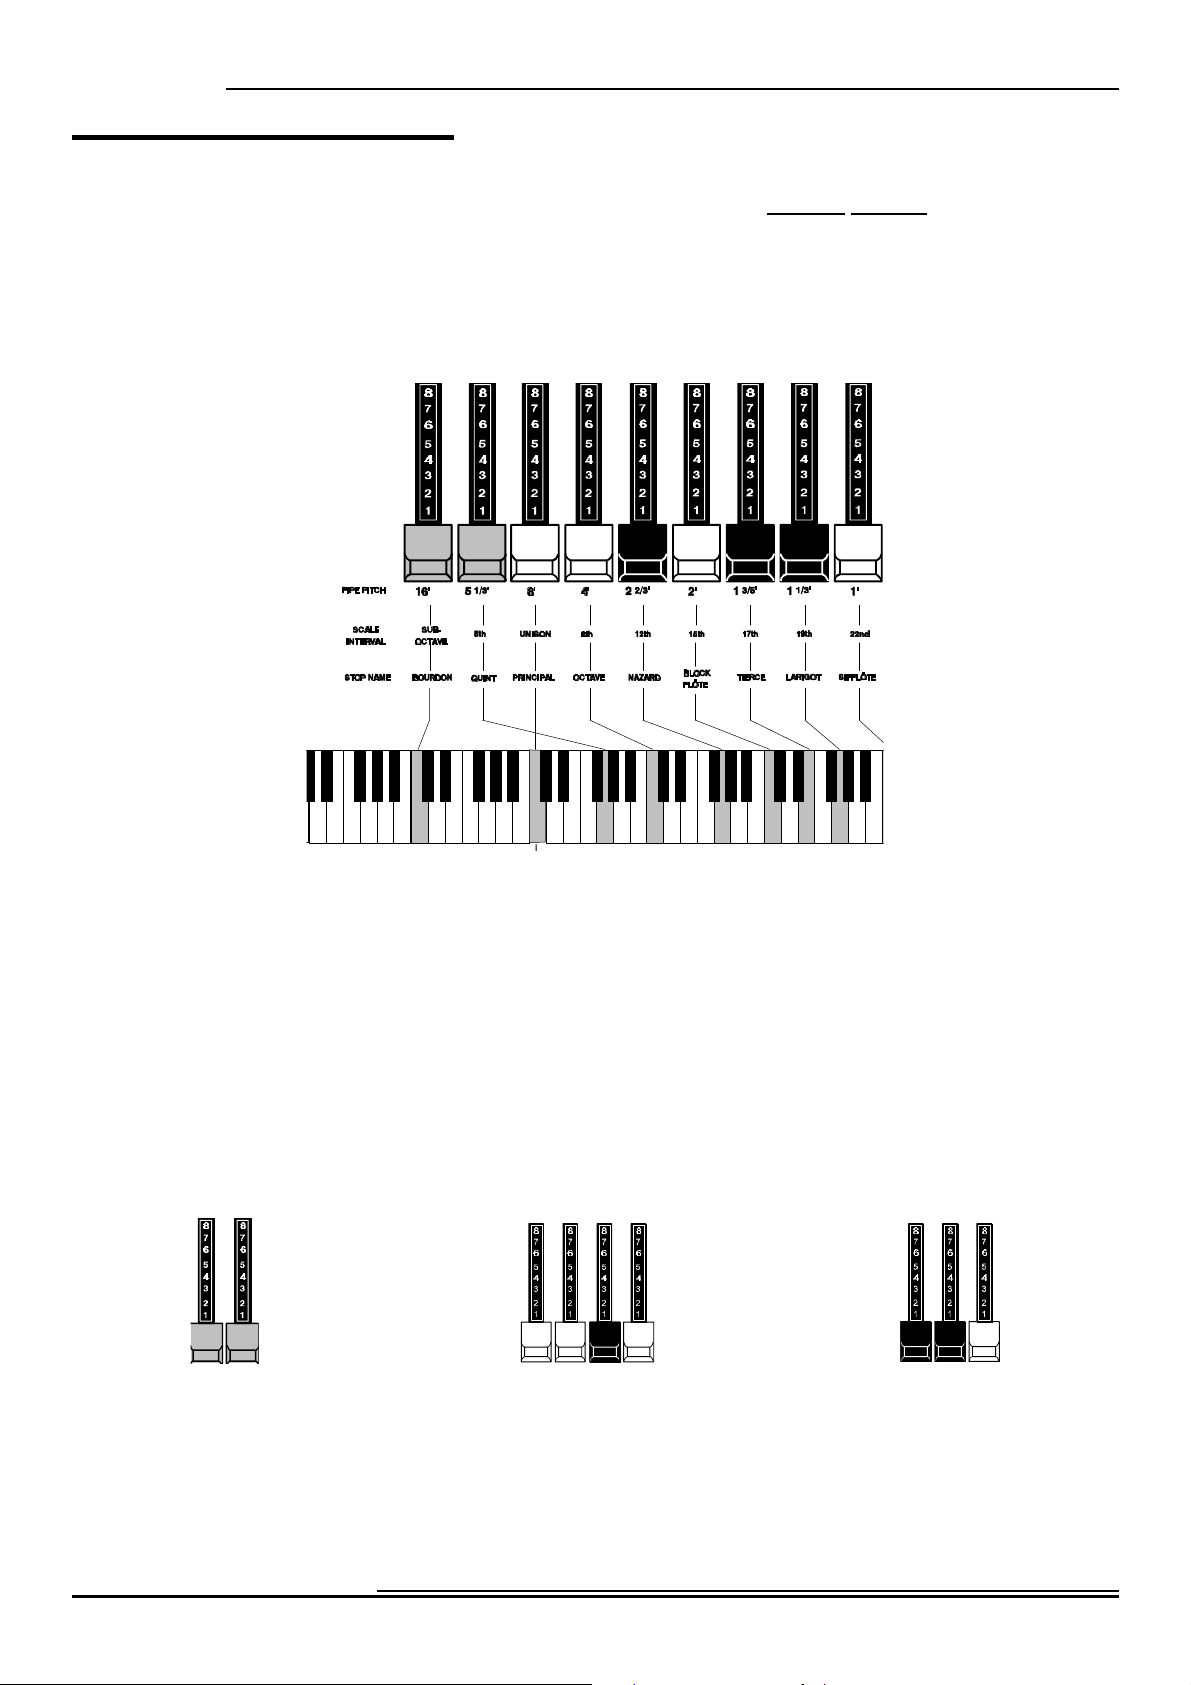
can be produced by these Drawbars. Each Drawbar consists of sine waves of different pitches (which means tone depth).
The illustration below shows how each Drawbar relates to the manual when middle "C" is pressed.
Each Drawbar is marked with a number followed by a footage mark. For example, the first white Drawbar is marked "8'.”
This is pipe organ terminology indicating that the pipe used to produce the lowest note on the keyboard on a pipe organ is
actually eight feet long. The numbers from "1" to "8" on each Drawbar represent degrees of loudness - number 1 being the
softest, and number 8 being the loudest.
Drawbars are divided into 3 groups of sound as well as 3 groups of color. We will first look at the 3 sound groups.
Sound Groups
You may think of these sound groups in terms of the three levels - The Sub being the deep pitches, the Foundation being the
mid range of pitches and the Brilliance being the high pitches.
- SUB - - FOUNDATION - - BRILLIANCE -
Hammond XK-2 Quick Features Guide
Page 15

TRY THIS:
1. Make sure all Drawbars, are "IN" (off) and that the LED above the UPPER Touch Button in the
2. Hold down a C chord, starting with E above middle "C,” ("E,” "G" & "C" notes) with your right hand on
3. Starting with the 8' Drawbar, pull out and push in each of the FOUNDATION Drawbars one group at a
4. While still holding the "C" chord down, pull each of the brown SUB Drawbars out until you like the
5. Now do the same with the BRILLIANCE Drawbars.
It's that easy to create your own custom Drawbar settings.
Color Groups
Ë White Drawbars
The first white Drawbar represents the "fundamental" or "8' base" tone. All of the
other white Drawbars are octave intervals or harmonics of the fundamental tone.
The tonal brilliance is greatly increased by adding white Drawbars, but the harmonics
added are always in "consonance" or harmony.
11Drawbars
DRAWBAR SELECT Group is “ON.”
the manual.
time until you have a sound that you like.
sound.
TRY THIS:
1. Make sure all Drawbars are pushed "IN" (off) and that the LED
2. Hold down middle "C" on the Upper Manual.
3. Pull the first white Drawbar in the UPPER DRAWBARS group, marked “8'”, all the way out.
4. Now, one by one, pull the other Upper white Drawbars out in sequence.
As you add each Drawbar, you will hear the addition of the same note an octave higher in each case.
Ë Black Drawbars
The Black Drawbars represent the dissonant (discordant) harmonics which are also
necessary in building rich tone colors.
The mellowness of a horn, the pungency of strings, and the brilliance of reed voices
owe much of their character to the presence of these harmonics in different degrees.
TRY THIS:
1. Make sure all Drawbars are pushed "IN" (off) and that the LED
2. Hold down middle "C" on the manual.
3. Pull the first white Drawbar, marked “8'”, all the way out.
above the UPPER Touch Button in the DRAWBAR SELECT Group is “ON.”
above the UPPER Touch Button in the DRAWBAR SELECT Group is “ON.”
4. Now pull the 3 Black Drawbars all the way out.
The sound produced by the Drawbars is that of a clarinet.
Hammond XK-2 Quick Features Guide
Page 16

12 Drawbars
Ë Brown Drawbars
In addition to the white and black Drawbars, there are two brown Drawbars in the group. These two Drawbars produce
"sub-octave" effects. The first brown Drawbar is the sub-octave of the fundamental 8' Drawbar and is "one octave" lower in
sound. The second brown Drawbar is the "sub-octave" of the third harmonic and sound a "fifth" or five tones above the
fundamental. Both of these Drawbars are used to add depth and richness to many combinations. They also increase the
range of the manual by one octave since a solo registration of the "8 foot," or normal pitch, can be set up using the first
brown Drawbar as the fundamental and played one octave higher.
TRY THIS:
1. Make sure all Drawbars are "IN" (off) and that the LED above the UPPER Touch Button in the
2. Hold down middle "C" on the manual.
3. Pull the first white Drawbar, marked “8',” all the way out.
4. While continuing to hold middle "C" down, pull the first brown Drawbar, marked “16',” all the way out.
You will now hear the sound of "C" one octave lower being added.
The second brown Drawbar is the "sub-octave" of the third harmonic. Both of these Drawbars are used to add depth and
richness to many combinations. They also increase the range of the manual by one octave since a solo registration of the "8
foot," or normal pitch, can be set up using the first brown Drawbar as the fundamental and played one octave higher.
DRAWBAR SELECT Group is “ON.”
TRY THIS:
1. Make sure all Drawbars are "IN" (off) and that the LED above the UPPER Touch Button in the
DRAWBAR SELECT Group is “ON.”
2. Hold down middle "C" on the manual.
3. Pull the first white Drawbar, marked “8',” all the way out.
4. While continuing to hold middle "C" down, pull the first brown Drawbar, marked “16',” all the way out.
You will now hear the sound of "C" one octave lower being added.
5. Now pull the second brown Drawbar out, and you will hear it add a richness to the sound of the "C" note
that you are holding down.
Tone Families By Shape
Regardless of the size of a pipe organ or its number of stops, all of its voices are related to four basic families of tone. The
four basic families - FLUTE, REED, STRING and DIAPASON - can be quickly set up on the Drawbars by relating a
pattern or shape to each family.
These are the generalities which apply to the tonal resources of the organ, and in themselves produce pleasant and usable
effects. However, real beauty of tone is secured in two ways. The first way is to use registrations which have been devised by
organists. The second way, and eventually the one that best expresses your own feeling for the music, is to create your own
tonal effects, experimenting with and perfecting tones which you use to play your favorite selections.
The Hammond Organ Drawbars allow you not only to set up any tonal effect you want, but also to make many fine
variations of the tone. Only with the Hammond Drawbars can you play exactly the shade of tone you want for every selection
and, perhaps even more important, for every size and type of room in which you play.
With the Hammond Organ Drawbars, a touch of a finger is all that is needed to make the tone quality softer or more
brilliant, richer in one harmonic or another.
Hammond XK-2 Quick Features Guide
Page 17
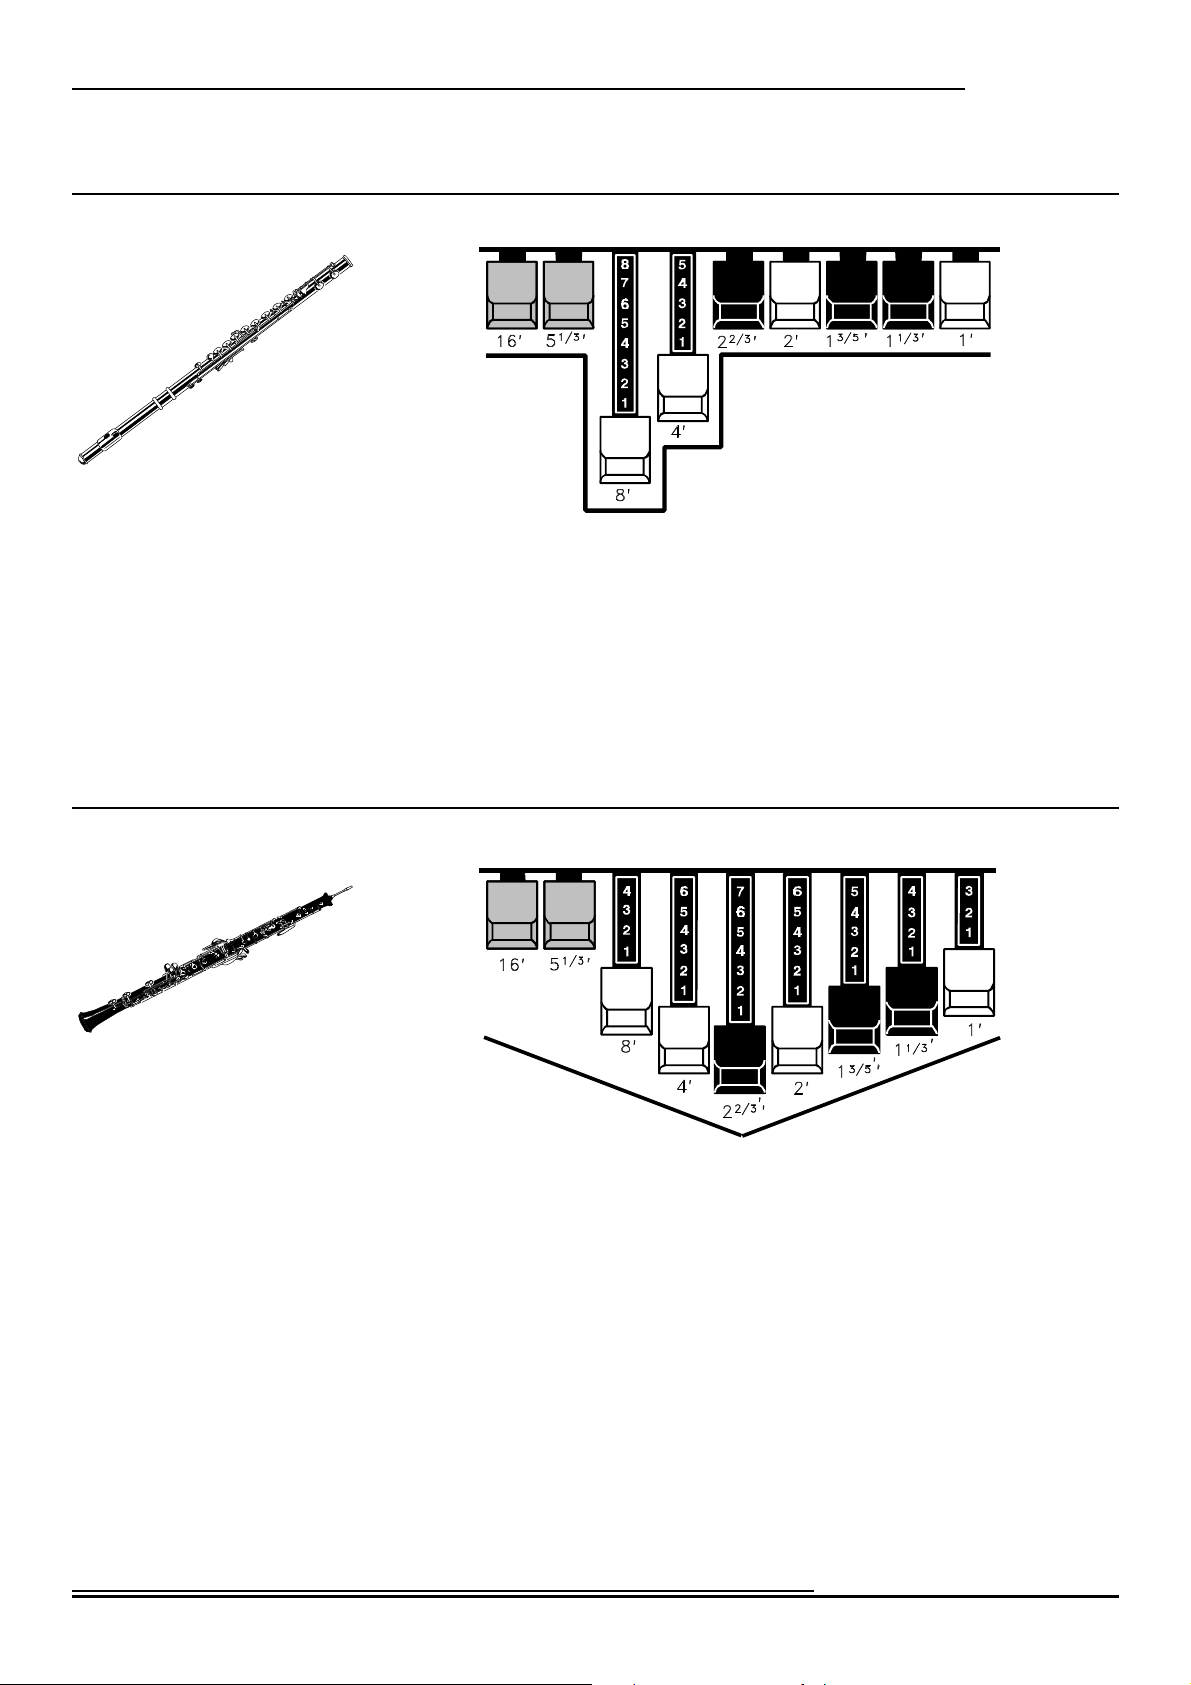
Typical Drawbar Registration Patterns For The
Ë Flute family (2 step pattern)
13Drawbars
Four Families Of Organ Sound
Ë Reed family (triangle pattern)
Flute Tones
Accompaniment Flute 8' I
Accompaniment Flute 8' II
Accompaniment Flute 8' III
Chorus of Flutes 16'
Orchestral Flute 8'
Piccolo 2'
Stopped Flute 8'
Tibia 8'
Tibia 4'
Tibia (Theater) 16'
Wooden Open Flute 8'
00 8460 000
00 3220 000
00 8600 000
80 8605 002
00 3831 000
00 0006 003
00 5020 000
00 7030 000
00 0700 030
80 8605 004
00 8840 000
Reed Tones
Bassoon 16'
Clarinet 8'
English Horn 8'
Flugel Horn 8'
French Horn
Kinura 8'
Oboe 8"
Trombone 8'
Trumpet 8'
Tuba Sonora 8'
Vox Humana 8'
44 7000 000
00 6070 540
00 3682 210
00 5777 530
00 7654 321
00 0172 786
00 4764 210
01 8777 530
00 6788 650
02 7788 640
00 4720 123
Hammond XK-2 Quick Features Guide
Page 18

14 Drawbars
Ë Diapason family (check mark pattern)
Ë String family (bow pattern)
Diapason Tones
Accomp. Diapason 8'
Chorus Diapason 8'
Diapason 8'
Echo Diapason 8'
Harmonic Diapason 16'
Harmonic Diapason 8'
Harmonic Diapason 4'
Horn Diapason 8'
Open Diapason 8'
Solo Diapason
Wood Diapason 8'
00 8874 210
00 8686 310
00 7785 321
00 4434 210
85 8524 100
00 8877 760
00 0606 045
00 8887 480
01 8866 430
01 8855 331
00 7754 321
Hammond XK-2 Quick Features Guide
String Tones
Cello 8'
Dulciana 8'
Gamba 8' I
Gemshorn 8'
Orchestral String 8'
Salicional 8'
Solo Viola 8'
Solo Violin 8'
Viola da Gamba 8'
Violina 4'
Violone 16
00 3564 534
00 7770 000
00 3484 443
00 4741 321
00 1464 321
00 2453 321
00 2474 341
00 3654 324
00 2465 432
00 0103 064
26 3431 000
Page 19
Ë Drawbar Volume
Although the Drawbars give you individual control over each harmonic, you may still want to balance registrations for the
manuals and pedals. This Advanced Feature allows you to set the volume of the Drawbar registrations for the following: (1)
Upper Manual ("UM"), (2) Lower Manual ("LM") and (3) Pedal Keyboard ("PK"). You may select from “0" to “127" for
each manual and pedals.
TRY THIS:
1. Touch the EDIT Select Touch Button. The red LED will light, and the Information Center Display
2. Touch the SYSTEM Select Touch Button. The Information Center Display should look like this:
15Drawbars
should look like this:
Select
EDIT PARAMETER
{1 MASTER TUNE
440Hz
3. Touch the PAGE “<” Select Touch Button three times. The Information Center Display should look like
this:
{4 DB VOLUME1
UM 127
4. Now select the option you wish by doing the following:
Use the PAGE "<" Select Touch Button to scroll forward through the manual selections ("UM" or Upper Manual, "LM"
or Lower Manual, and "PK" or Pedal Keyboard). As you scroll forward through the Manual selections, you will see the
upper left-hand corner of the display change from “S4" to “S5" to “S6.”
Use the PAGE "=" Select Touch Button to scroll backward through the manual selections.
Use the VALUE ">" Select Touch Button to scroll up through the volume increments.
Use the VALUE "?" Select Touch Button to scroll down through the volume increments.
*default setting
This is a System Parameter, and this data CAN NOT be stored to a Preset. To see a total listing of all System Parameters, see the System
Parameter List.
NOTE: You can exit by touching the EDIT Select Touch Button.
Hammond XK-2 Quick Features Guide
Page 20
16 Drawbars
Ë Drawbar Attack - Key Click Volume
Each time a key was depressed on a tone-wheel Hammond Organ, a key-pop or click was produced. With the Attack
Advanced Feature, you can change the type of attack or the personality of the key click. You can select “SLOW ATTACK,”
“NO CLICK,:” “SOFT CLICK,” “NORMAL CLICK,” or “MAX CLICK” for Upper Manual, Lower Manual and Pedal
Keyboard.
TRY THIS:
1. Touch the EDIT Select Touch Button. The red LED will light, and the Information Center Display
should look like this:
Select
EDIT PARAMETER
2. Touch the NAME/DRAWBAR Select Touch Button two times. The Information Center Display should
look like this:
}2 DB REGIST1
UM 000000000
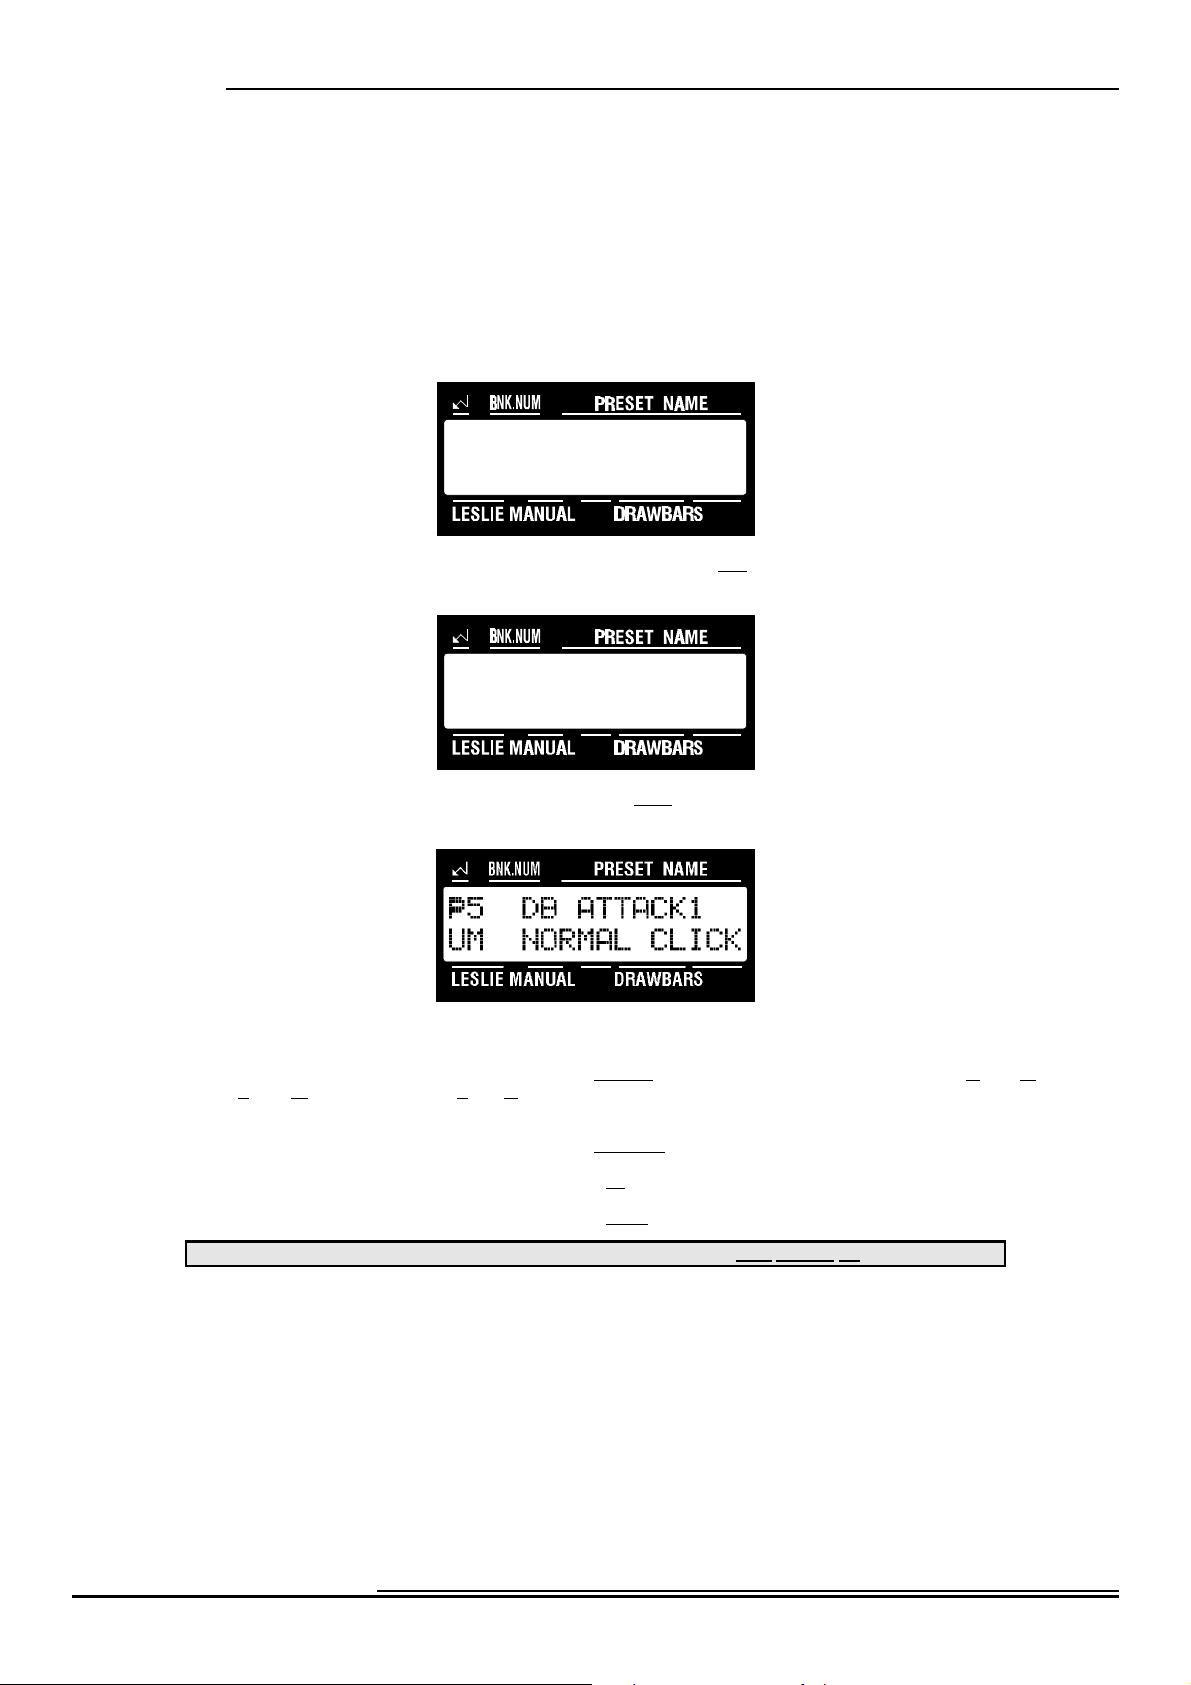
3. Touch the PAGE "<" Select Touch Button three times. The Information Center Display should look like
this:
4. Now select the option you wish by doing the following:
Use the PAGE "<" Select Touch Button to scroll forward through the manual selections ("UM" or Upper Manual, "LM"
or Lower Manual, and "PK" or Pedal Keyboard). As you scroll forward through the Manual selections, you will see the
upper left-hand corner of the display change from “P5" to “P6" to “P7.”
Use the PAGE "=" Select Touch Button to scroll backward through the manual selections.
Use the VALUE ">" Select Touch Button to scroll up through the Drawbar Attack options.
Use the VALUE "?" Select Touch Button to scroll down through the Drawbar Attack options.
This data CAN be stored to a Preset. To see a total listing of all Preset Parameters, see the Preset Parameter List.
NOTE: You can exit by touching the EDIT Select Touch Button.
Hammond XK-2 Quick Features Guide
Page 21

Ë Drawbar Sustain
Sustain is used with the Drawbars to produce a lingering tone when keys are released. It is suited for producing sounds like
harps, chimes or bells. This Advanced Feature allows you to select the Sustain Length for the following: (1) Upper Manual
("UM"), (2) Lower Manual ("LM") and (3) Pedal Keyboard ("PK"). You can select either “OFF,” “SHORT,” “MEDIUM,”
or “LONG.”
TRY THIS:
1. Touch the EDIT Select Touch Button. The red LED will light, and the Information Center Display
2. Touch the NAME/DRAWBAR Select Touch Button two times. The Information Center Display should
17Drawbars
should look like this:
Select
EDIT PARAMETER
look like this:
}2 DB REGIST1
UM 000000000
3. Touch the PAGE "<" Select Touch Button six times. The Information Center Display should look like
this:
}8 DB SUSTAIN1
UM OFF
3. Now select the option you wish by doing the following:
Use the PAGE "<" Select Touch Button to scroll forward through the manual selections ("UM" or Upper Manual, "LM"
or Lower Manual, and "PK" or Pedal Keyboard). As you scroll forward through the Manual selections, you will see the
upper left-hand corner of the display change from “P8" to “P9" to “P10.”
Use the PAGE "=" Select Touch Button to scroll backward through the manual selections.
Use the VALUE ">" Select Touch Button to scroll up through the options.
Use the VALUE "?" Select Touch Button to scroll down through the options.
This data CAN be stored to a Preset. To see a total listing of all Preset Parameters, see the Preset Parameter List.
NOTE: You can exit by touching the EDIT Select Touch Button.
Hammond XK-2 Quick Features Guide
Page 22
18 Drawbars
Ë Drawbar Voice Mode
This Advanced Feature allows you to change the overall sound of the Drawbars. For the Upper and Lower Manuals, you
can select: (1) "B3-TYPE,” which reproduces the sound of the B-3 tone-wheel generator, (2) "MELLOW,” which produces a
pure sine-wave tone quality, or (3) "BRITE,” which adds extra frequencies to the higher-pitched Drawbar tones. For the
Pedal Keyboard, you can select either “NORMAL” or “MUTED.”
TRY THIS:
1. Touch the EDIT Select Touch Button. The red LED will light, and the Information Center Display
should look like this:
2. Touch the NAME/DRAWBAR Select Touch Button two times. The Information Center Display should
look like this:
Select
EDIT PARAMETER
}2 DB REGIST1
UM 000000000
3. Touch the PAGE “<” Select Touch Button nine times. The Information Center Display should look like
this:
}11 DB VOICING1
UM B3-TYPE
4. Now select the option you wish by doing the following:
Use the PAGE "<" Select Touch Button to scroll forward through the manual selections. As you scroll forward through
the Manual selections, you will see the upper left-hand corner of the display change from “P11" to “P12" to “P13.”
Use the PAGE "=" Select Touch Button to scroll backward through the manual selections.
Use the VALUE ">" Select Touch Button to scroll up through the Drawbar Voicing options.
Use the VALUE "?" Select Touch Button to scroll down through the Drawbar Voicing options.
This data CAN be stored to a Preset. To see a total listing of all Preset Parameters, see the Preset Parameter List.
NOTE: You can exit by touching the EDIT Select Touch Button.
Hammond XK-2 Quick Features Guide
Page 23
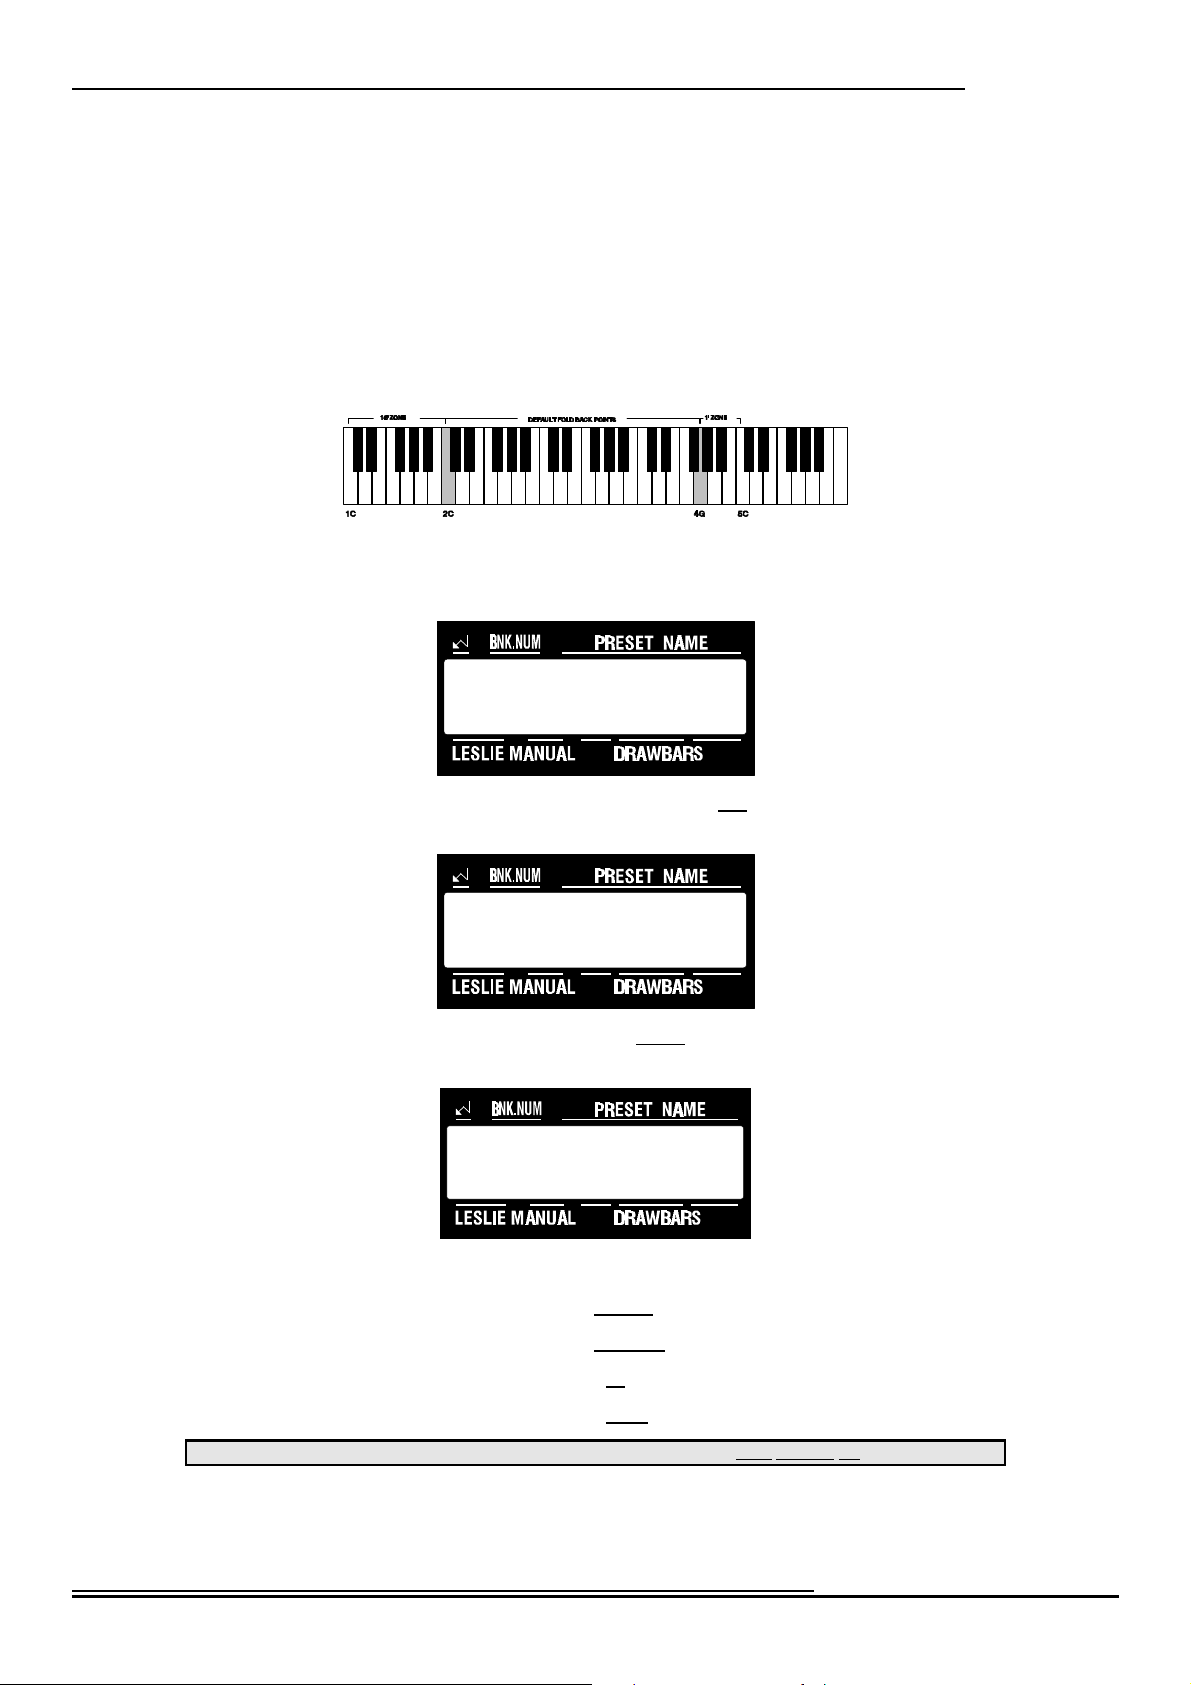
Ë Drawbar Fold Back
There are two function selections to the Drawbar Fold Back Advanced Feature Menu of the XK-2: (1) Select how low the
Sub-Fundamental Drawbar will play on each manual (from “2C” down to “1C”). (2) Set the upper frequency limit for each
manual (from “4G” to “5C”).
On the earliest model Hammond Organs, the Sub-Fundamental Drawbar (the one marked, “16'”) would continue to play all
the way down to the lowest "C" ("1C"). Newer models such as the Hammond Models X-66, X-77 and Concorde do the
same, however, the 8th harmonic Drawbar (the one marked “1'”) continues to play up the manual to the next to highest "C"
("5C") on the manual. On a B-3, the lowest note produced by the Sub-Fundamental Drawbar is the 2nd "C" ("2C") from
the left end of the manual, while the highest note that can be played by the 8th harmonic Drawbar is the 4th "F<" from the
left end of the manual. The lower and higher keys on the manual "Fold Back,” in that they repeat the pitches played by other
notes.
TRY THIS:
1. Touch the EDIT Select Touch Button. The red LED will light, and the Information Center Display
19Drawbars
should look like this:
Select
EDIT PARAMETER
2. Touch the NAME/DRAWBAR Select Touch Button two times. The Information Center Display should
look like this:
}2 DB REGIST1
UM 000000000
3. Touch the PAGE “<” Select Touch Button twelve times. The Information Center Display should look
like this:
}14 DB FOLDBACK1
UM LOW NOTE 2C
4. Now select the option you wish by doing the following:
Use the PAGE "<" Select Touch Button to scroll forward through the manual and note selections.
Use the PAGE "=" Select Touch Button to scroll backward through the manual and note selections.
Use the VALUE ">" Select Touch Button to scroll up through the Foldback numbers.
Use the VALUE "?" Select Touch Button to scroll down through the Foldback numbers.
This data CAN be stored to a Preset. To see a total listing of all Preset Parameters, see the Preset Parameter List.
NOTE: You can exit by touching the EDIT Select Touch Button.
Hammond XK-2 Quick Features Guide
Page 24
20 Percussion
Percussion
Your Hammond XK-2, in addition to recreating the sounds of Hammond Harmonic Drawbars, also faithfully replicates the
Hammond Touch-Response Percussion Control. This feature is found on Hammond Organs containing a "3" as part of
their model number (B-3, C-3, M-3, RT-3) as well the A-100 and D-100 series. On later tone-wheel Hammond models, the
Percussion feature consisted of preset voices rather than harmonics. The Percussion feature on the XK-2 recreates the
original implementation of Percussion. The following pages explain each part of this feature in detail.
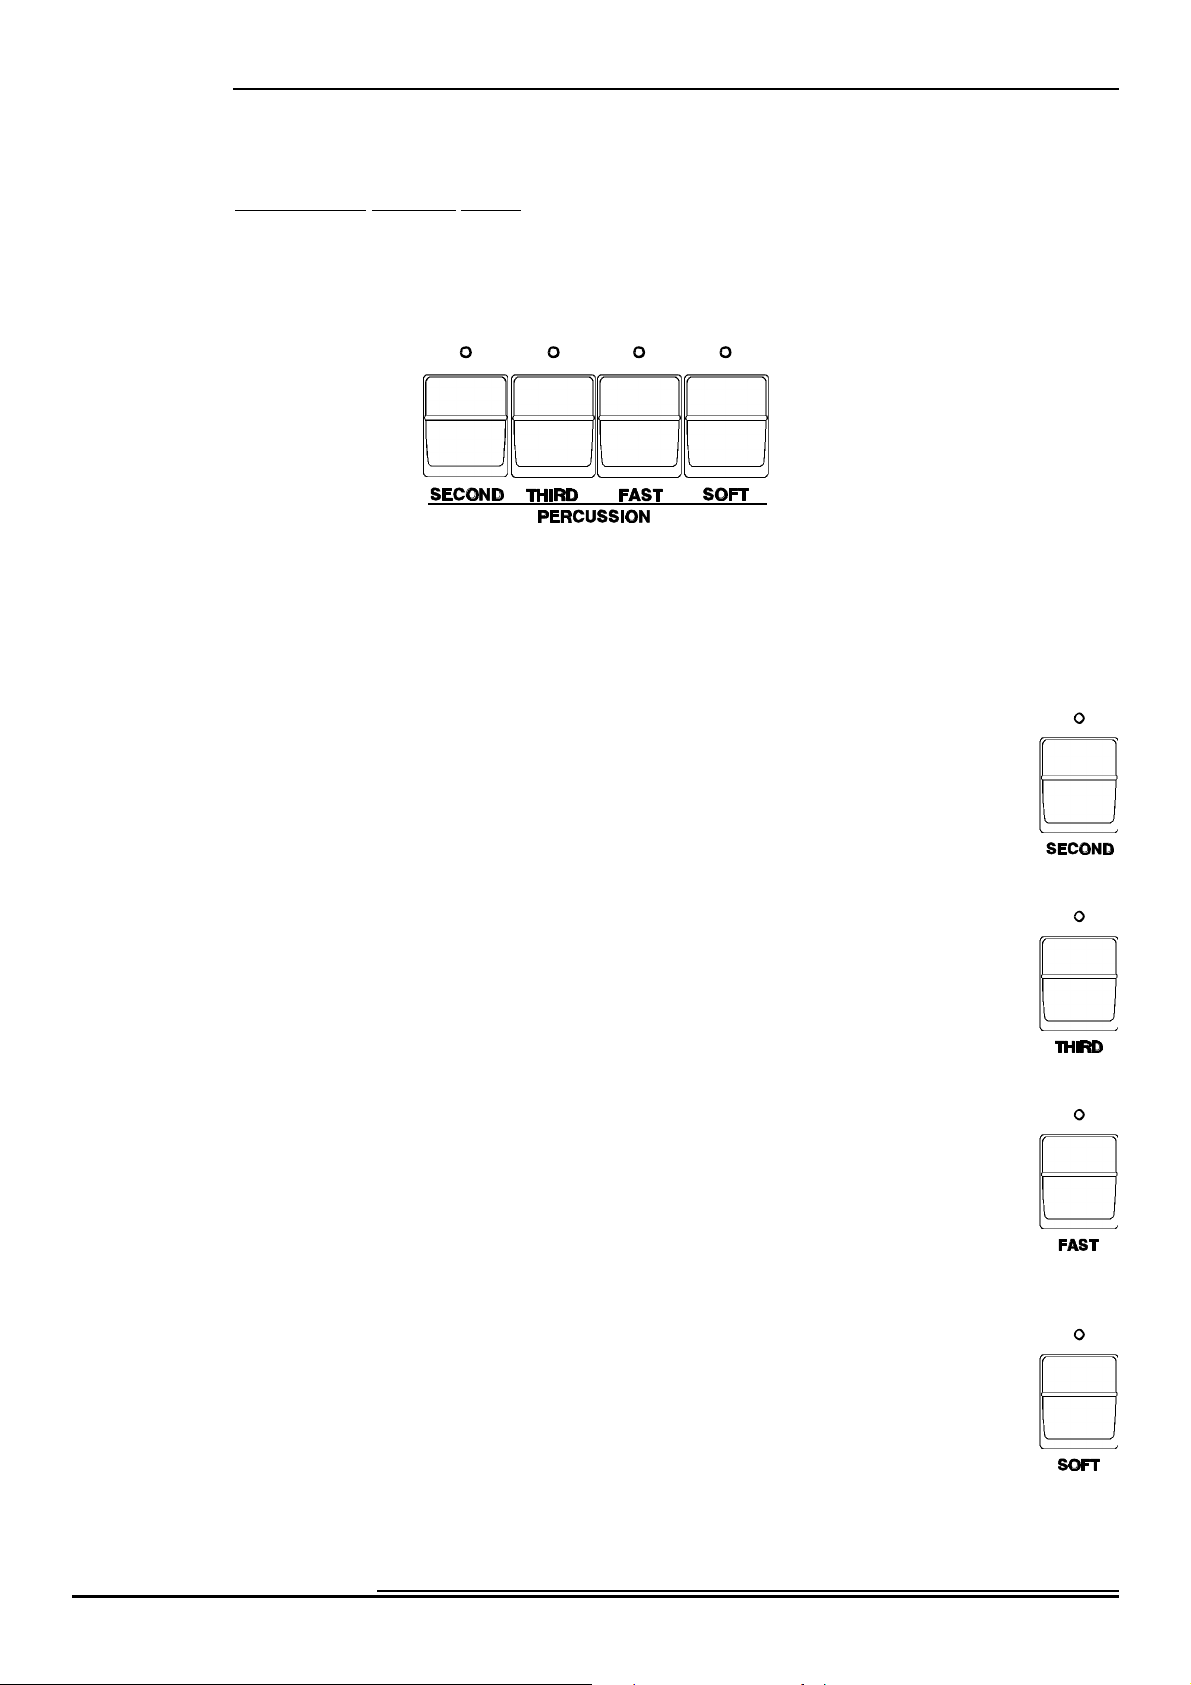
Ë Percussion Touch Buttons
The Percussion Touch Button Section is located to the left of the Information Center Display. The first two Touch Buttons
determine the pitch at which the Percussion tones sound.
NOTE: When either of these Touch Buttons are "ON" (LED lit), all of the Drawbars will be effective except the 8th
harmonic Drawbar (last white Drawbar). When Percussion is "OFF,” the 8th Harmonic Drawbar is effective as usual.
Ë SECOND
This Touch Button causes the Percussion tone to sound up one octave with respect to the Fundamental
Drawbar (first white Drawbar).
Ë THIRD
This Touch Button causes the Percussion tone to sound up an octave and a fifth with respect to the
Fundamental Drawbar.
Ë FAST
When this Touch Button is "OFF" (LED not lit), the Percussion tone will decay (die away) slowly like a
chime. When FAST DECAY is "ON" (LED lit) the Percussion effect will decay rapidly like a xylophone
or glockenspiel.
Ë SOFT
When this Touch Button is "OFF" (LED not lit), the Percussion effect will be very prominent. You will
also notice that the Upper Manual Drawbar tones are reduced in volume to compensate for the addition
of the Percussion tones. When this Touch Button is "ON" (LED lit), the Percussion effect is much less
prominent. The Upper Manual Drawbar volume remains unaffected by the addition of the PERCUSS.
SOFT Touch Button.
Hammond XK-2 Quick Features Guide
Page 25
Ë Percussion Slow Decay
Although the Percussion has two rates of decay accessible from the Touch Buttons (NORMAL and FAST), you can adjust
the decay rate that you prefer for each of the Touch Button settings. This Advanced Feature allows you to select the rate of
“NORMAL” decay (FAST Touch Button “OFF”). You can select from “1" (fastest) through “8" (longest). The default
setting is “8.”
TRY THIS:
1. Touch the EDIT Select Touch Button. The red LED will light, and the Information Center Display
should look like this:
2. Touch the PERC./ANIMATION Select Touch Button once. The Information Center Display should
look like this:
21Advanced Features - Percussion
Select
EDIT PARAMETER
}18 PERC. PARAM1
DECAY S_SPD. 8
3. Now select the option you wish by doing the following:
Use the VALUE ">" Select Touch Button to scroll up through the numbers.
Use the VALUE "?" Select Touch Button to scroll down through the numbers.
This data CAN be stored to a Preset. To see a total listing of all Preset Parameters, see the Preset Parameter List.
NOTE: You can exit by touching the EDIT Select Touch Button.
Hammond XK-2 Quick Features Guide
Page 26
22 Advanced Features - Percussion
Ë Percussion Fast Decay
Although the Percussion has two rates of decay accessible from the Touch Buttons (NORMAL and FAST), you can adjust
the decay rate that you prefer for each of the Touch Button settings. This Advanced Feature allows you to select the rate of
“FAST” decay (FAST Touch Button “ON”). You can select from “1" (fastest) through “8" (longest). The default setting is
“3.”
TRY THIS:
1. Touch the EDIT Select Touch Button. The red LED will light, and the Information Center Display
should look like this:
2. Touch the PERC./ANIMATION Select Touch Button once. The Information Center Display should
look like this:
Select
EDIT PARAMETER
}18 PERC. PARAM1
DECAY S_SPD. 8
3. Touch the PAGE “<” Select Touch Button once. The Information Center Display should look like this:
}19 PERC. PARAM2
DECAY F_SPD. 3
4. Now select the option you wish by doing the following:
Use the VALUE ">" Select Touch Button to scroll up through the numbers.
Use the VALUE "?" Select Touch Button to scroll down through the numbers.
This data CAN be stored to a Preset. To see a total listing of all Preset Parameters, see the Preset Parameter List.
NOTE: You can exit by touching the EDIT Select Touch Button.
Hammond XK-2 Quick Features Guide
Page 27
Ë Percussion Normal Level
Although the Percussion has two volume settings accessible from the Touch Buttons (NORMAL and SOFT), you can adjust
the absolute level that you prefer for each of the Touch Button settings. This Advanced Feature allows you to select the
“NORMAL” (SOFT Touch Button “OFF”) level. You can select from “1" (softest) through “16" (loudest). This will allow
you to balance the amount of "normal" and "soft" Percussion sound (the choices provided by the Touch Buttons) with the
sound produced by the Drawbars. The default setting is “13.”
TRY THIS:
1. Touch the EDIT Select Touch Button. The red LED will light, and the Information Center Display
should look like this:
2. Touch the PERC./ANIMATION Select Touch Button once. The Information Center Display should
look like this:
23Advanced Features - Percussion
Select
EDIT PARAMETER
}18 PERC. PARAM1
DECAY S_SPD. 8
3. Touch the PAGE “<” Select Touch Button two times. The Information Center Display should look like
this:
}20 PERC. PARAM3
LEVEL NORM. 13
4. Now select the option you wish by doing the following:
Use the VALUE ">" Select Touch Button to scroll up through the numbers.
Use the VALUE "?" Select Touch Button to scroll down through the numbers.
This data CAN be stored to a Preset. To see a total listing of all Preset Parameters, see the Preset Parameter List.
NOTE: You can exit by touching the EDIT Select Touch Button.
Hammond XK-2 Quick Features Guide
Page 28
24 Advanced Features - Percussion
Ë Percussion Soft Level
Although the Percussion has two volume settings accessible from the Touch Buttons (NORMAL and SOFT), you can adjust
the absolute level that you prefer for each of the Touch Button settings. This Advanced Feature allows you to select the
“SOFT” (SOFT Touch Button “ON”) level. You can select from “1" (softest) through “16" (loudest). This will allow you
to balance the amount of "normal" and "soft" Percussion sound (the choices provided by the Touch Buttons) with the sound
produced by the Drawbars. The default setting is “9"
TRY THIS:
1. Touch the EDIT Select Touch Button. The red LED will light, and the Information Center Display
should look like this:
2. Touch the PERC./ANIMATION Select Touch Button once. The Information Center Display should
look like this:
Select
EDIT PARAMETER
}18 PERC. PARAM1
DECAY S_SPD. 8
3. Touch the PAGE “<” Select Touch Button three times. The Information Center Display should look like
this:
}21 PERC. PARAM4
LEVEL SOFT 9
4. Now select the option you wish by doing the following:
Use the VALUE ">" Select Touch Button to scroll up through the numbers.
Use the VALUE "?" Select Touch Button to scroll down through the numbers.
This data CAN be stored to a Preset. To see a total listing of all Preset Parameters, see the Preset Parameter List.
NOTE: You can exit by touching the EDIT Select Touch Button.
Hammond XK-2 Quick Features Guide
Page 29
Ë Percussion Touch
This Advanced Feature allows you to turn "ON" or "OFF" the Percussion Touch-Response. When “ON,” this feature
replicates the Touch-Response Percussion function on the original models B-3, C-3, RT-3 or A-100. When "ON,”
remember that Touch-Response Percussion tones will sound only if you play the keys in a detached manner (non-legato).
Any degree of detachment is sufficient. The “OFF” mode replicates the “legato” Percussion function on the H-100, X-66,
Concorde and later model Hammond Organs. Each key will sound when played regardless of whether other keys are being
held. The default setting is “ON.”
TRY THIS:
1. Touch the EDIT Select Touch Button. The red LED will light, and the Information Center Display
2. Touch the PERC./ANIMATION Select Touch Button once. The Information Center Display should
25Advanced Features - Percussion
should look like this:
Select
EDIT PARAMETER
look like this:
}18 PERC. PARAM1
DECAY S_SPD. 8
3. Touch the PAGE “<” Select Touch Button four times. The Information Center Display should look like
this:
}22 PERC. PARAM5
TOUCH ON
4. Now select the option you wish by doing the following:
Use either the VALUE ">" or the VALUE "?" Select Touch Button to turn Percussion Touch "ON" or "OFF.”
This data CAN be stored to a Preset. To see a total listing of all Preset Parameters, see the Preset Parameter List.
NOTE: You can exit by touching the EDIT Select Touch Button.
Hammond XK-2 Quick Features Guide
Page 30
26 Advanced Features - Percussion
Ë Percussion Velocity Sensitivity
This Advanced Feature allows you to turn "ON" or "OFF" Percussion Velocity Sensitivity. When this feature is “ON,” the
volume of Percussion is controlled by how fast keys are played. The faster keys are played, the louder the Percussion sounds.
The more slowly keys are played, the softer the Percussion sounds. When this feature is “OFF,” each key will sound at the
same volume level when played regardless of the speed or force with which the keys are struck. The default setting is “OFF.”
TRY THIS:
1. Touch the EDIT Select Touch Button. The red LED will light, and the Information Center Display
should look like this:
2. Touch the PERC./ANIMATION Select Touch Button once. The Information Center Display should
look like this:
Select
EDIT PARAMETER
}18 PERC. PARAM1
DECAY S_SPD. 8
3. Touch the PAGE “<” Select Touch Button five times. The Information Center Display should look like
this:
}23 PERC. PARAM6
VELOCITY OFF
4. Now select the option you wish by doing the following:
Use either the VALUE ">" or the VALUE "?" Select Touch Button to turn Percussion Velocity "ON" or "OFF.”
This data CAN be stored to a Preset. To see a total listing of all Preset Parameters, see the Preset Parameter List.
NOTE: You can exit by touching the EDIT Select Touch Button.
Hammond XK-2 Quick Features Guide
Page 31

Ë Percussion Drawbar Cancel
On the original Hammond Organs with Touch-Response Percussion Control, such as the B-3, C-3 and RT-3, when the Swell
Manual "B" Preset Key is engaged, and Percussion is "ON,” the sound produced by the 8th harmonic Drawbar (1') is
canceled. However, some pros would re-wire the organ so that the 8th harmonic Drawbar would continue to play while
Percussion is "ON.” The Percussion Drawbar Cancel Advanced Feature allows you to select whether the 8th harmonic
Drawbar will continue to sound when Percussion is turned "ON.”
When this feature is “ON,” the 8th harmonic Drawbar will be canceled when Percussion is "ON.” When this feature is
“OFF,” the 8th harmonic Drawbar will sound while Percussion is "ON.”
TRY THIS:
1. Touch the EDIT Select Touch Button. The red LED will light, and the Information Center Display
should look like this:
2. Touch the PERC./ANIMATION Select Touch Button once. The Information Center Display should
look like this:
27Advanced Features - Percussion
Select
EDIT PARAMETER
}18 PERC. PARAM1
DECAY S_SPD. 8
3. Touch the PAGE “<” Select Touch Button six times. The Information Center Display should look like
this:
}24 PERC. PARAM7
DB CANCEL ON
4. Now select the option you wish by doing the following:
Use either the VALUE ">" or the VALUE "?" Select Touch Button to turn Percussion Touch "ON" or "OFF.”
This data CAN be stored to a Preset. To see a total listing of all Preset Parameters, see the Preset Parameter List.
NOTE: You can exit by touching the EDIT Select Touch Button.
Hammond XK-2 Quick Features Guide
Page 32

28 Advanced Features - Percussion
Ë Percussion Drawbar Level
On the original Hammond Organs with Touch-Response Percussion Control, such as the B-3, C-3, RT-3 and A-100, when
the Swell Manual "B" Preset Key is engaged, Percussion is "ON" at normal volume and a Drawbar setting is used, the
volume of the Swell Manual Drawbars is reduced slightly in order to preserve the musical balance between Swell and Great
Manuals. However, some pros would perform a modification so that the "B" Preset Drawbar settings would remain at full
volume even if Percussion were "ON" at normal volume. This Advanced Feature allows you to select either option.
When the “-3db” setting is chosen, the Drawbars will be reduced by "-3db" in volume when Percussion is "ON" at normal
volume. When “0db,” the volume of the Drawbars will stay at the same level, or "0db,” when Percussion is "ON" at normal
volume.
NOTE: A “decibel” is a unit of measurement for the loudness of sound waves, and is usually abbreviated “db.”
TRY THIS:
1. Touch the EDIT Select Touch Button. The red LED will light, and the Information Center Display
should look like this:
Select
EDIT PARAMETER
2. Touch the PERC./ANIMATION Select Touch Button once. The Information Center Display should
look like this:
}18 PERC. PARAM1
DECAY S_SPD. 8
3. Touch the PAGE “<” Select Touch Button seven times. The Information Center Display should look like
this:
}25 PERC. PARAM8
DB LEVEL -3db
4. Now select the option you wish by doing the following:
Use either the VALUE ">" or the VALUE "?" Select Touch Button to select either "-3db" or "0db.”
This data CAN be stored to a Preset. To see a total listing of all Preset Parameters, see the Preset Parameter List.
NOTE: You can exit by touching the EDIT Select Touch Button.
Hammond XK-2 Quick Features Guide
Page 33

Ë Percussion Key Tracking
On the original Hammond Organs with Touch-Response Percussion Control, such as the B-3, C-3, RT-3 and A-100, the
Percussion sounds would taper off slightly at higher frequencies. This Advanced Feature is designed to replicate this
characteristic of the Percussion. When this feature is “ON,” the Percussion tones will be gradually reduced in volume on the
higher notes. When this feature is “OFF,” the volume of the Percussion will stay at the same level throughout the entire
compass of the manual.
TRY THIS:
1. Touch the EDIT Select Touch Button. The red LED will light, and the Information Center Display
should look like this:
2. Touch the PERC./ANIMATION Select Touch Button once. The Information Center Display should
look like this:
29Advanced Features - Percussion
Select
EDIT PARAMETER
}18 PERC. PARAM1
DECAY S_SPD. 8
3. Touch the PAGE “<” Select Touch Button eight times. The Information Center Display should look like
this:
}26 PERC. PARAM9
KEY TRACKING ON
4. Now select the option you wish by doing the following:
Use either the VALUE ">" or the VALUE "?" Select Touch Button to turn Key Tracking "ON" or "OFF.”
This data CAN be stored to a Preset. To see a total listing of all Preset Parameters, see the Preset Parameter List.
NOTE: You can exit by touching the EDIT Select Touch Button.
Hammond XK-2 Quick Features Guide
Page 34

30 Manual Split
MANUAL SPLIT
Although the XK-2 has a single manual, the manual can be Split so that one sound can be played on one part of the manual
and a different sound can be played on another part of the manual.
Upper and Lower Manuals on the XK-2
When the manual is split, the effect is that of a conventional two-manual organ on which the Upper Manual would be played
by the right hand and the Lower Manual would be played by the left hand. Therefore, when Split is “ON,” the area to the
right of the Split Point is referred to on the XK-2 as the Upper Manual and is abbreviated, “UM.” The area to the left of the
Split Point is designated as the Lower Manual and bears the abbreviation, “LM.” You will notice both of these abbreviations
in the Information Center Display. This is important to keep in mind because if you are making any changes to parameters
affecting the Lower Manual, such as Drawbar Registration, you will not hear any change unless Split is “ON.”
SPLIT Touch Button
Touch this Touch Button “ON” (LED lit) to activate the Split Point. Touch it “OFF” (LED not lit) to
deactivate the Split Point and play the XK-2 as a single-manual instrument.
The following pages will explain the Advanced Features pertaining to the Split feature.
Hammond XK-2 Quick Features Guide
Page 35

Advanced Features - Manual Split
Ë Split Point
This Advanced Feature allows you to select the Split Point.
NOTE: The Split Touch Button must be “ON” (red LED lit) in order to hear the effect of this feature.
Changing the Split Point using the Value Touch Buttons
TRY THIS:
1. Touch the EDIT Select Touch Button. The red LED will light, and the Information Center Display
should look like this:
2. Touch the INT.CONT./EXT.ZONE Select Touch Button once. The Information Center Display should
look like this:
31Manual Split
Select
EDIT PARAMETER
}34 SPLIT1
SPLIT POINT 2B
3. Now select the option you wish by doing the following:
Use the VALUE ">" Select Touch Button to move the Split Point up. The upper limit is “6C” (the highest note on the
manual).
Use the VALUE "?" Select Touch Button to move the Split Point scroll down. The lower limit is “1C” (the lowest note
on the manual).
Changing the Split Point by Key Input
TRY THIS:
1. Touch and hold the SPLIT Touch Button. The red LED will flash repeatedly, and the Information Center
Display should look like this:
Select
SPLIT POINT 2B
2. Touch the note on the manual that represents the Split Point you wish. The note you touch will become
the top note of the Lower Manual. All notes to the right of the note you touch will be assigned to the
Upper Manual. When you touch the note that represents your chosen Split Point, the SPLIT Touch
Button LED will stop flashing and your Split Point setting will be stored.
This data CAN be stored to a Preset. To see a total listing of all Preset Parameters, see the Preset Parameter List.
NOTE: You can exit by touching the EDIT Select Touch Button.
Hammond XK-2 Quick Features Guide
Page 36

32 Manual Split
Ë Split Mode
This Advanced Feature allows you to select how the XK-2 will function when Split is active. You can select from : “UM +
LM” (Upper Manual to the right of the Split Point and Lower Manual to the left of the Split Point), “UM + PK (Upper
Manual right of Split and Pedal Keyboard left of Split) or “LM + PK” (Lower Manual right of Split and Pedal Keyboard left
of Split). You will find this feature particularly useful if you are using another keyboard along with your XK-2 or two XK-2's
connected together via MIDI to simulate “B-3" (two-manuals-and-pedals) operation.
NOTE: The Split Touch Button must be “ON” (red LED lit) in order to hear the effect of this feature.
TRY THIS:
1. Touch the EDIT Select Touch Button. The red LED will light, and the Information Center Display
2. Touch the INT.CONT/EXT.ZONE Select Touch Button once. The Information Center Display should
should look like this:
Select
EDIT PARAMETER
look like this:
}34 SPLIT1
SPLIT POINT 2B
3. Touch the PAGE "<" Select Touch Button once. The Information Center Display should look like this:
}35 SPLIT2
MODE UM+LM
4. Now select the option you wish by doing the following:
Use the VALUE "<" Select Touch Button to scroll up through the selections.
Use the VALUE “=” Select Touch Button to scroll down through the selections.
This data CAN be stored to a Preset. To see a total listing of all Preset Parameters, see the Preset Parameter List.
NOTE: You can exit by touching the EDIT Select Touch Button.
Hammond XK-2 Quick Features Guide
Page 37

Ë Lower Manual Octave
This Advanced Feature allows you to select the Octave range in which the Lower Manual will play. This is so that you can
play chords or chordal accompaniment to your right hand melody in the correct octave range.
NOTE: The Split Touch Button must be “ON” (red LED lit) in order to hear the effect of this feature.
TRY THIS:
1. Touch the EDIT Select Touch Button. The red LED will light, and the Information Center Display
should look like this:
2. Touch the INT.CONT/EXT.ZONE Select Touch Button once. The Information Center Display should
look like this:
33Manual Split
Select
EDIT PARAMETER
}34 SPLIT1
SPLIT POINT 2B
3. Touch the PAGE "<" Select Touch Button two times. The Information Center Display should look like
this:
}36 LM OCTAVE
OCTAVE UP 0
4. Now select the option you wish by doing the following:
Use the VALUE ">" Select Touch Button to move the Lower Manual Octave up. The upper limit is “2” (the notes
sound one, or two, two octaves higher than written).
Use the VALUE "?" Select Touch Button to move the Lower Manual Octave down. The lower limit is “0” (the notes
sound as written, or at “concert” pitch).
This data CAN be stored to a Preset. To see a total listing of all Preset Parameters, see the Preset Parameter List.
NOTE: You can exit by touching the EDIT Select Touch Button.
Hammond XK-2 Quick Features Guide
Page 38

34 Effects
EFFECTS
The XK-2 has the effects of Vibrato, Chorus, Leslie, Reverb, Overdrive, Treble adjustment and Oscillator Phase Control. By
adding such effects, you can enhance the sound of your music.
Vibrato
Your Hammond XK-2 has three Touch Buttons which control the degrees of Vibrato and Chorus.
Ë V1 - (Small Vibrato)
This produces the vibrato equivalent of most orchestral solo instruments. Touch the V1/C1
Touch Button to turn Vibrato 1 "ON.”
Ë V2 - (Wide Vibrato)
This is the standard depth vibrato used with the Drawbars to produce the effect of a theater
organ. Touch the V2/C2 Touch Button to turn Vibrato 2 "ON.”
Ë V3 - (Full Vibrato)
By pressing both the V1/C1 and the V2/C2 Touch Buttons at the same time, you turn
"ON" Vibrato 3. Vibrato 3 gives the fullest amount of vibrato, adding much warmth and
enhancing your music.
Chorus
The third Touch Button selects the Chorus effect. When the CHORUS Touch Button is
used, half of the tone is heard without Vibrato, and half contains the vibrato amount selected
by the first two Touch Buttons.
Ë C1 - (Small Chorus)
This produces the light chorus effect.
Ë C2 - (Wide Chorus)
This is the standard depth of the chorus effect.
Hammond XK-2 Quick Features Guide
Page 39

Ë C3 - (Full Chorus)
By pressing both the V1/C1 and the V2/C2 Touch Buttons at the same time along with the
CHORUS Touch Button, you get the fullest amount of Chorus, adding warmth that
enhances your Drawbar settings.
Ë Vibrato/Chorus Speed
This Advanced Feature allows you to select the speed for the Vibrato and Chorus that you
prefer. You can select “SLOW,” “MID,” “NORMAL,” “MIDFAST” or “FAST.”
TRY THIS:
1. Touch the EDIT Select Touch Button. The red LED will light, and the Information Center Display
should look like this:
2. Touch the PERC./ANIMATION Select Touch Button two times. The Information Center Display
should look like this:
35Effects
Select
EDIT PARAMETER
}27 VIBRATO
SPEED NORMAL
3. Now select the option you wish by doing the following:
Use the VALUE ">" Select Touch Button to scroll up through the options.
Use the VALUE "?" Select Touch Button to scroll down through the options.
This data CAN be stored to a Preset. To see a total listing of all Preset Parameters, see the Preset Parameter List.
NOTE: You can exit by touching the EDIT Select Touch Button.
Hammond XK-2 Quick Features Guide
Page 40

36 Effects
Leslie
Your Hammond XK-2 has a built-in digital Leslie effect that replicates the sound of a Leslie Speaker cabinet. In addition, the
XK-2 can also be used with a variety of different Leslie Speaker cabinets. There is a full explanation of how to use the XK-2
with a Leslie Speaker cabinet starting on page 46. The following paragraphs explain how the internal digital Leslie of your
Hammond XK-2 works.
Ë Leslie Touch Buttons
These three Touch Buttons allow you to control either the internal digital Leslie or the rotors of a connected Leslie Speaker
cabinet.
ON Touch Button
Normally when this Touch Button is "OFF" (LED not lit), the Drawbars will sound as if through a “straight” speaker
cabinet (one with no rotors). Touching the ON Touch Button "ON" (LED lit) will change the sounds produced by the
Drawbars from a “straight” sound to the sound produced by a Leslie Speaker. The speed of the Leslie effect depends upon
the position of the FAST Touch Tab, which is explained below.
NOTE: This Button also works in conjunction with the BRAKE Touch Button, which is explained below.
FAST Touch Button
When this Touch Button is "OFF" (LED not lit), the Leslie effect is that of an acoustic Leslie Speaker Cabinet with the
rotors turning slowly (Chorale). Touching the FAST Touch Button "ON" (LED lit) will cause the Leslie effect to speed up
and rotate fast (Tremolo) to produce a rich, full sound.
NOTE: The FAST Touch Button will function only if the ON Touch Button is "ON" (LED lit).
BRAKE Touch Button
When this Touch Button is "OFF" (LED not lit) and the ON Touch Button is “OFF”, the sound quality changes to simulate
the effect of the Drawbar tones speaking through the Stationary channel of a multi-channel Leslie Speaker such as models
723, 750 or 914. When this Touch Button is “ON” and the ON Touch Button is “OFF”, the digital Leslie effect is
"stopped" and the sound quality remains unchanged. This simulates the effect produced by a single-channel Leslie Speaker
such as a 122 or 147.
Hammond XK-2 Quick Features Guide
Page 41

Ë Leslie Parameters
Your Hammond XK-2 has a special group of Leslie Parameters. Using these special Leslie features, you can define different
characteristics of how the built-in digital Leslie effect will perform. The Leslie Parameters are:
1. Slow Speed for both Horn and Bass Rotor.
2. Fast Speed for both Horn and Bass Rotor.
3. Rise Time for both Horn and Bass Rotor.
4. Fall Time for both Horn and Bass Rotor.
5. Brake Time for both Horn and Bass Rotor.
6. Volume for both Horn and Bass Rotor.
7. Microphone Settings (Angle and Distance)
8. Percussion Setting.
Although each Leslie Speaker is carefully calibrated at the factory, several factors such as motor age and placement of the
belts on the pulleys can affect the speeds of the rotors, as well as time required for the rotors to speed up (Rise Time) and
slow down (Fall Time). Your Hammond XK-2 includes in its Advanced Feature Menu advanced features which allow you
to select the settings that you prefer for all of the above Leslie Parameters.
Ë Leslie Presets
Your Hammond XK-2 contains five different Leslie Presets which you can use to store different settings for all of the above
Leslie Parameters. These Leslie Presets can then be assigned to Presets. This makes it very convenient to call up the Leslie
performance characteristics you want all at once.
NOTE: This Advanced Feature DOES NOT affect a connected external Leslie Speaker cabinet.
TRY THIS:
37Effects
1. Touch the EDIT Select Touch Button. The red LED will light, and the Information Center Display
should look like this:
Select
EDIT PARAMETER
3. Touch the PERC./ANIMATION Select Touch Button two times. The Information Center Display
should look like this:
}27 VIBRATO
SPEED NORMAL
4. Touch the PAGE “<” Select Touch Button once. The Information Center Display should look like this:
}28 LESLIE1
PRESET L#1
5. Now select the option you wish by doing the following:
Use the VALUE ">" Select Touch Button to scroll up through the options.
Use the VALUE "?" Select Touch Button to scroll down through the options.
Hammond XK-2 Quick Features Guide
Page 42

38 Effects
Ë Leslie Slow Speed
This Advanced Feature allows you to set the rate for the Slow Speed of the digital Leslie. The default setting is “38." You
can select from “0rpm” through “48rpm.”
TRY THIS:
1. Touch the EDIT Select Touch Button. The red LED will light, and the Information Center Display
2. Touch the LESLIE Select Touch Button once. The Information Center Display should look like this:
should look like this:
Select
EDIT PARAMETER
~#1-1 SLOW SPED1
HORN ROTR 36rpm
6. Now select the option you wish by doing the following:
Use either the PAGE "<" or the PAGE "=" Select Touch Button to select between Horn and Bass Rotors.
Use the VALUE ">" Select Touch Button to increase the number setting.
Use the VALUE "?" Select Touch Button to decrease the number setting.
NOTE: The setting of "0" for the Slow and Fast Speeds enables you to prevent a rotor from turning when the Leslie is
switched back and forth from "SLOW" to "FAST.” For example, if you want only the Horn Rotor to respond to SLOW/FAST
speed selection, set both the Slow and Fast Speeds for the Bass Rotor to "0.” With this setting, only the Horn Rotor will run
either SLOW or FAST and the Bass Rotor will remain stationary.
This data can be included as part of a Leslie Preset, then the Leslie Preset can be stored to a Preset. To see a total listing of all Leslie
Parameters, see the Leslie Parameter List.
NOTE: You can exit by touching the EDIT Select Touch Button.
Hammond XK-2 Quick Features Guide
Page 43

Ë Leslie Fast Speed
This Advanced Feature allows you to set the rate for the Fast Speed of the digital Leslie. You can select from “375rpm”
through “435rpm” as well as “0.”
NOTE: This Advanced Features DOES NOT affect a connected external Leslie Speaker cabinet.
TRY THIS:
1. Touch the EDIT Select Touch Button. The red LED will light, and the Information Center Display
2. Touch the LESLIE Select Touch Button once. The Information Center Display should look like this:
39Effects
should look like this:
Select
EDIT PARAMETER
~#1-1 SLOW SPED1
HORN ROTR 36rpm
3. Touch the PAGE “<” Select Touch Button two times. The Information Center Display should look like
this:
~#1-3 FAST SPED1
HORN ROTR 387rpm
4. Now select the option you wish by doing the following:
Use either the PAGE "<" or the PAGE "=" Select Touch Button to select between Horn and Bass Rotors.
Use the VALUE ">" Select Touch Button to increase the number setting.
Use the VALUE "?" Select Touch Button to decrease the number setting.
NOTE: The setting of "0" for the Slow and Fast Speeds enables you to prevent a rotor from turning when the Leslie is
switched back and forth from "SLOW" to "FAST.” For example, if you want only the Horn Rotor to respond to SLOW/FAST
speed selection, set both the Slow and Fast Speeds for the Bass Rotor to "0.” With this setting, only the Horn Rotor will run
either SLOW or FAST and the Bass Rotor will remain stationary.
This data can be included as part of a Leslie Preset, then the Leslie Preset can be stored to a Preset. To see a total listing of all Leslie
Parameters, see the Leslie Parameter List.
NOTE: You can exit by touching the EDIT Select Touch Button.
Hammond XK-2 Quick Features Guide
Page 44

40 Effects
Ë Leslie Rise Time
This Advanced Feature allows you to set the rate for the Rise Time (the amount of time for the rotors to speed up from Off
or Slow to Fast) of the digital Leslie. You can select from 0.2 through 5.0 sec. for the Horn Rotor and from 0.5 through 12.5
sec. for the Bass Rotor.
NOTE: This Advanced Feature DOES NOT affect a connected external Leslie Speaker cabinet.
TRY THIS:
1. Touch the EDIT Select Touch Button. The red LED will light, and the Information Center Display
2. Touch the LESLIE Select Touch Button once. The Information Center Display should look like this:
should look like this:
Select
EDIT PARAMETER
~#1-1 SLOW SPED1
HORN ROTR 36rpm
3. Touch the PAGE “<” Select Touch Button four times. The Information Center Display should look like
this:
~#1-5 RISE TIME1
HORN ROTR 1.2s
4. Now select the option you wish by doing the following:
Use either the PAGE "<" or the PAGE "=" Select Touch Button to select between Horn and Bass Rotors.
Use the VALUE ">" Select Touch Button to increase the number setting.
Use the VALUE "?" Select Touch Button to decrease the number setting.
This data can be included as part of a Leslie Preset, then the Leslie Preset can be stored to a Preset. To see a total listing of all Leslie
Parameters, see the Leslie Parameter List.
NOTE: You can exit by touching the EDIT Select Touch Button.
Hammond XK-2 Quick Features Guide
Page 45

Ë Leslie Fall Time
This Advanced Feature allows you to set the rate for the Fall Time (the amount of time for the rotors to slow down from
Fast to Slow) of the digital Leslie. You can select from 0.2 through 5.0 sec. for the Horn Rotor and from 0.5 through 12.5
sec. for the Bass Rotor.
NOTE: This Advanced Feature DOES NOT affect a connected external Leslie Speaker cabinet.
TRY THIS:
1. Touch the EDIT Select Touch Button. The red LED will light, and the Information Center Display
2. Touch the LESLIE Select Touch Button once. The Information Center Display should look like this:
41Effects
should look like this:
Select
EDIT PARAMETER
~#1-1 SLOW SPED1
HORN ROTR 36rpm
3. Touch the PAGE “<” Select Touch Button six times. The Information Center Display should look like
this:
~#1-7 FALL TIME1
HORN ROTR 1.0s
4. Now select the option you wish by doing the following:
Use either the PAGE "<" or the PAGE "=" Select Touch Button to select between Horn and Bass Rotors.
Use the VALUE ">" Select Touch Button to increase the number setting.
Use the VALUE "?" Select Touch Button to decrease the number setting.
This data can be included as part of a Leslie Preset, then the Leslie Preset can be stored to a Preset. To see a total listing of all Leslie
Parameters, see the Leslie Parameter List.
NOTE: You can exit by touching the EDIT Select Touch Button.
Hammond XK-2 Quick Features Guide
Page 46

42 Effects
Ë Leslie Brake Time
This Advanced Feature allows you to select the settings for the digital Leslie Brake Time (the time required for the rotors to
slow down to a dead stop) that you prefer. You can select from 0.2 through 5.0 sec. for the Horn Rotor and from 0.5
through 12.5 sec. for the Bass Rotor.
NOTE: This Advanced Feature DOES NOT affect a connected external Leslie Speaker cabinet.
TRY THIS:
1. Touch the EDIT Select Touch Button. The red LED will light, and the Information Center Display
2. Touch the LESLIE Select Touch Button once. The Information Center Display should look like this:
should look like this:
Select
EDIT PARAMETER
~#1-1 SLOW SPED1
HORN ROTR 36rpm
3. Touch the PAGE “<” Select Touch Button eight times. The Information Center Display should look like
this:
~#1-9 BRK TIME1
HORN ROTR 1.2s
4. Now select the option you wish by doing the following:
Use either the PAGE "<" or the PAGE "=" Select Touch Button to select between Horn and Bass Rotors.
Use the VALUE ">" Select Touch Button to increase the number setting.
Use the VALUE "?" Select Touch Button to decrease the number setting.
This data can be included as part of a Leslie Preset, then the Leslie Preset can be stored to a Preset. To see a total listing of all Leslie
Parameters, see the Leslie Parameter List.
NOTE: You can exit by touching the EDIT Select Touch Button.
Hammond XK-2 Quick Features Guide
Page 47

Ë Leslie Volume Balance
This Advanced Feature allows you to adjust the balance between the Horn and Bass Rotors of the digital Leslie. You can
select from 0db through -12db for both Horn and Bass Rotors.
NOTE: A “decibel” is a unit of measurement for the loudness of sound waves, and is usually abbreviated, “db.”
NOTE: This Advanced Feature DOES NOT affect a connected external Leslie Speaker cabinet.
TRY THIS:
1. Touch the EDIT Select Touch Button. The red LED will light, and the Information Center Display
should look like this:
2. Touch the LESLIE Select Touch Button once. The Information Center Display should look like this:
43Effects
Select
EDIT PARAMETER
~#1-1 SLOW SPED1
HORN ROTR 36rpm
3. Touch the PAGE “<” Select Touch Button ten times. The Information Center Display should look like
this:
~#1-11 ROTR VOL1
HORN ROTR 0dB
4. Now select the option you wish by doing the following:
Use either the PAGE "<" or the PAGE "=" Select Touch Button to select between Horn and Bass Rotors.
Use the VALUE ">" Select Touch Button to increase the number setting.
Use the VALUE "?" Select Touch Button to decrease the number setting.
This data can be included as part of a Leslie Preset, then the Leslie Preset can be stored to a Preset. To see a total listing of all Leslie
Parameters, see the Leslie Parameter List.
NOTE: You can exit by touching the EDIT Select Touch Button.
Hammond XK-2 Quick Features Guide
Page 48

44 Effects
Ë Leslie Microphone Setting
When a Leslie Speaker cabinet or cabinets are used in a large facility such as an auditorium or outdoor arena, the Leslie(s) are
frequently "miked" to insure that the sound carries adequately. Sound technicians have discovered that the placement of the
microphones greatly affects the character of the sound heard by the audience from the Leslie Speaker(s) (see the diagram
below).
This Advanced Feature allows you to simulate various microphone distances and angles using the built-in digital Leslie effect.
NOTE: This Advanced Feature DOES NOT affect a connected external Leslie Speaker cabinet.
TRY THIS:
1. Touch the EDIT Select Touch Button. The red LED will light, and the Information Center Display
should look like this:
Select
EDIT PARAMETER
2. Touch the LESLIE Select Touch Button once. The
Information Center Display should look like this:
~#1-1 SLOW SPED1
HORN ROTR 36rpm
3. Touch the PAGE “<” Select Touch Button twelve
times. The Information Center Display should look like this:
~#1-13 MIC. SET1
ANGLE 120|
4. Now select the option you wish by doing the following:
Use either the PAGE "<" or the PAGE "=" Select Touch Button to select "ANGLE" or "DISTANCE.”
Use the VALUE ">" Select Touch Button to increase the number setting.
Use the VALUE "?" Select Touch Button to decrease the number setting.
NOTE: Both these are subtle effects and may require careful listening to detect the differences among the various settings.
NOTE: You can exit by touching the EDIT Select Touch Button.
Hammond XK-2 Quick Features Guide
Page 49

Ë Leslie Percussion Setting
This Advanced Feature allows you to select whether you want the Percussion tones to receive the Leslie effect. In the “ON”
position, the Percussion tones receive Leslie animation. In the “OFF” position, the Percussion tones are “dry”; that is, they
do not receive animation from the Leslie.
NOTE: This Advanced Feature DOES NOT affect a connected external Leslie Speaker cabinet.
TRY THIS:
1. Touch the EDIT Select Touch Button. The red LED will light, and the Information Center Display
should look like this:
2. Touch the LESLIE Select Touch Button once. The Information Center Display should look like this:
45Effects
Select
EDIT PARAMETER
~#1-1 SLOW SPED1
HORN ROTR 36rpm
3. Touch the PAGE “<” Select Touch Button fourteen times. The Information Center Display should look
like this:
~#1-15 LES.PERC.
ON
4. Now select the option you wish by doing the following:
Use either the VALUE ">" or the VALUE "?" Select Touch Button to turn this feature “ON” or “OFF.”
NOTE: You can exit by touching the EDIT Select Touch Button.
Hammond XK-2 Quick Features Guide
Page 50

46 Effects
Using a Leslie Speaker Cabinet
Your Hammond XK-2 is designed to directly interface with a Leslie Speaker Cabinet. A Leslie Speaker cabinet, in addition to
amplifying the basic sound, also uses mechanical rotors which turn at different speeds to add different animation effects. The
data chart below shows the options available.
DescriptionDescription FunctionFunction
SLOW (Chorale) Rotors will turn slowly (Chorale), producing an effect suitable for use with hymns, classical style music and
OFF Rotors do not turn. Animation can be provided by using Vibrato and Chorus.
FAST (Tremolo) Rotors will speed up and rotate fast (Tremolo) to produce a rich full sound.
some slower songs.
NOTE: The above table shows the options which can be selected for either a single- or multi-channel Leslie Speaker cabinet
using an 11-pin interface.
There are two ways to control the speed of the rotors of a connected Leslie Speaker cabinet:
1. Using the Leslie Touch Buttons. This is explained on page 35.
2. Using a Foot Switch. This is explained starting on page 96.
NOTE: If more than one of the above options is selected, the rotors of the connected Leslie Speaker cabinet will respond to
whichever control is in use.
LESLIE ROTOR SPEED OPTIONSLESLIE ROTOR SPEED OPTIONS
Hammond XK-2 Quick Features Guide
Page 51

Reverb
Using Reverb adds the beautiful concert hall effect to all voices when you are playing. It counteracts the "deadening" effect
of carpets, drapes or furniture in whatever acoustical environment you may be in.
Located to the right of the VOLUME Rotary Control is the REVERB Rotary Control. This Rotary
Control allows you to control the total or maximum volume of digital Reverb. Turn this control to the
right to increase the amount of Reverb, and to the left to decrease the amount of Reverb. Setting the
REVERB Rotary Control to the center position (half way) or more will produce a moderate amount of
reverberation.
Ë Reverb Mode
This Advanced Feature allows you to select from four different types of Reverb. You can select
“ROOM,” “LIVE,” “HALL” or “CHURCH.”
TRY THIS:
47Effects
1. Touch the EDIT Select Touch Button. The red LED will light, and the Information Center Display
should look like this:
Select
EDIT PARAMETER
2. Touch the PERC./ANIMATION Select Touch Button two times. The Information Center Display
should look like this:
}27 VIBRATO
SPEED NORMAL
3. Touch the PAGE “<” Select Touch Button two times. The Information Center Display should look like
this:
}29 REVERB1
MODE LIVE
4. Now select the option you wish by doing the following:
Use the VALUE ">" Select Touch Button to scroll up through the options.
Use the VALUE "?" Select Touch Button to scroll down through the options.
This data CAN be stored to a Preset. To see a total listing of all Preset Parameters, see the Preset Parameter List.
NOTE: You can exit by touching the EDIT Select Touch Button.
Hammond XK-2 Quick Features Guide
Page 52

48 Effects
Ë Reverb Level
This Advanced Feature allows you to set the numeric level of the Reverb. You can select from “0" to “15.”
TRY THIS:
1. Touch the EDIT Select Touch Button. The red LED will light, and the Information Center Display
should look like this:
Select
EDIT PARAMETER
2. Touch the PERC./ANIMATION Select Touch Button two times. The Information Center Display
should look like this:
}27 VIBRATO
SPEED NORMAL
NOTE: You can exit by touching the EDIT Select Touch Button.
Overdrive
Overdrive adds the fuzzy, raspy, "dirty" sound created by the vacuum tubes of a tube-style Leslie Speaker when its volume is
pushed past its sound limit. This Advanced Feature allows you to adjust the amount of Overdrive that you prefer.
3. Touch the PAGE “<” Select Touch Button three times. The Information Center Display should look like
this:
}30 REVERB2
LEVEL 0
4. Now select the option you wish by doing the following:
Use the REVERB Rotary Control to make your numeric setting, or:
Use the VALUE ">" Select Touch Button to scroll up through the numbers.
Use the VALUE "?" Select Touch Button to scroll down through the numbers.
This data CAN be stored to a Preset. To see a total listing of all Preset Parameters, see the Preset Parameter List.
Located to the right of the REVERB Rotary Control is the OVERDRIVE Rotary Control. This
Rotary Control allows you to control the total or maximum volume of Overdrive. Turn this control
to the right to increase the amount of Overdrive, and to the left to decrease the amount of Overdrive.
Hammond XK-2 Quick Features Guide
Page 53

Ë Overdrive Level
This Advanced Feature allows you to set the numeric level of the Overdrive. You can select from “0" to “15.”
TRY THIS:
1. Touch the EDIT Select Touch Button. The red LED will light, and the Information Center Display
2. Touch the PERC./ANIMATION Select Touch Button two times. The Information Center Display
49Effects
should look like this:
Select
EDIT PARAMETER
should look like this:
}27 VIBRATO
SPEED NORMAL
3. Touch the PAGE “<” Select Touch Button four times. The Information Center Display should look like
this:
}31 OVERDRIVE
LEVEL 0
4. Now select the option you wish by doing the following:
Use the OVERDRIVE Rotary Control to make your numeric setting, or:
Use the VALUE ">" Select Touch Button to scroll up through the numbers.
Use the VALUE "?" Select Touch Button to scroll down through the numbers.
This data CAN be stored to a Preset. To see a total listing of all Preset Parameters, see the Preset Parameter List.
NOTE: You can exit by touching the EDIT Select Touch Button.
Hammond XK-2 Quick Features Guide
Page 54

50 Effects
Treble Level
This Advanced Feature allows you to adjust the overall brightness of the sound from the XK-2. You can select from “1"
through “6.” The default Setting is “5".
TRY THIS:
1. Touch the EDIT Select Touch Button. The red LED will light, and the Information Center Display
should look like this:
Select
EDIT PARAMETER
2. Touch the PERC./ANIMATION Select Touch Button two times. The Information Center Display
should look like this:
}27 VIBRATO
SPEED NORMAL
3. Touch the PAGE “<” Select Touch Button five times. The Information Center Display should look like
this:
}32 TREBLE
5
4. Now select the option you wish by doing the following:
Use the VALUE ">" Select Touch Button to scroll up through the options.
Use the VALUE "?" Select Touch Button to scroll down through the options.
This data CAN be stored to a Preset. To see a total listing of all Preset Parameters, see the Preset Parameter List.
NOTE: You can exit by touching the EDIT Select Touch Button.
Hammond XK-2 Quick Features Guide
Page 55

Oscillator Phase Control
This Advanced Feature allows you to subtly adjust the sound of the XK-2 Drawbar sounds by altering the “phase”
relationship between notes played on the different manual settings. When this setting is “ON,” all notes played will
automatically be “in phase” with each other regardless of when the keys are played. When this setting is “OFF,” the
interaction of the phases of each note will depend on when notes are pressed.
TRY THIS:
1. Touch the EDIT Select Touch Button. The red LED will light, and the Information Center Display
should look like this:
2. Touch the PERC./ANIMATION Select Touch Button two times. The Information Center Display
should look like this:
51Effects
Select
EDIT PARAMETER
}27 VIBRATO
SPEED NORMAL
3. Touch the PAGE “<” Select Touch Button six times. The Information Center Display should look like
this:
}33 OSCILLATOR
PHASE CNT. ON
4. Now select the option you wish by doing the following:
Use either the VALUE ">" or the VALUE "?" Select Touch Button to turn this function “ON” or “OFF.”
NOTE: This is a subtle effect and may require careful listening to detect the difference between the settings.
This data CAN be stored to a Preset. To see a total listing of all Preset Parameters, see the Preset Parameter List.
NOTE: You can exit by touching the EDIT Select Touch Button.
Hammond XK-2 Quick Features Guide
Page 56

52 Presets
PRESETS
The registrations contained in the Presets are pre-programmed at the factory but can be programmed with your own
registrations. These factory Presets can be restored by doing the RESET ALL procedure.
CANCEL Mode
Touch the white CANCEL Touch Button. The Information Center Display should look similar to this:
A-/ CANCEL
L#1 UM
The XK-2 is now in CANCEL Mode. You now have control over Drawbar settings, Touch Button settings such as Vibrato
and Percussion, and Advanced Feature settings.
Preset Banks
You can select from among 8 different Preset Banks. This allows you to control 64 (8 × 8) Presets using the same eight
Preset Touch Buttons.
TRY THIS:
1. Touch the white CANCEL Touch Button to make sure you are in CANCEL Mode.
2. Touch the first gray Touch Button in the PRESET Section.
Hammond XK-2 Quick Features Guide
Page 57

The Information Center Display should look like this:
A-1 JIMMY 1
L#1 UM \\\
Notice the legend, “A-1" in the top left of the Information Center Display. This tells you that the selected bank is “A” and
that the Preset number is “1".
Now, notice the Touch Button marked “BANK SELECT/NUMBER SELECT.” When the LED for this Select Touch
Button is “OFF,” touching different Preset Touch Buttons will call up different Preset numbers within a Bank. When the
LED for this Select touch Button is “ON,” touching different Preset Touch Buttons will select different Banks. The Preset
Number will remain constant, but the Bank number will change (“A-1,” “B-1,” “C-1,” etc.)
TRY THIS:
1. Touch the BANK SELECT/NUMBER SELECT Touch Button “ON.” The red LED will light.
2. Touch different Preset Touch Buttons and note how the bank number changes.
Refer to the legend printed below the Preset Touch Buttons for the Preset and Bank numbers. When the LED
above the BANK SELECT/NUMBER SELECT Touch Button is “ON,” the top row of numbers has priority.
When the LED above the BANK SELECT/NUMBER SELECT Touch Button is “OFF,” the bottom row of
letters has priority.
53Presets
Recording Your Own Presets
TRY THIS:
1. Select a Preset using the Preset Touch Buttons.
2. Make whatever changes you wish using the Drawbars, Percussion or Preset Parameters.
3. Touch and Hold the EDIT/RECORD Touch Button. The red LED will start flashing and the
Information Center Display will look similar to this:
4. Touch one of the Preset Touch Buttons to select the Bank . The Information Center Display should now
look like this:
A-1 PRESET REC.
select BANK
A-1 PRESET REC.
select NUMBER
5. Touch the Preset Select Touch Button that represents the number you want to save to. The Information
Center Display will flash, “Data Recording,” then return to Play Mode. Your new preset is now saved.
Hammond XK-2 Quick Features Guide
Page 58

54 MIDI
MIDI
The letters MIDI stand for Musical Instrument Digital Interface. MIDI is an international standard for allowing electronic
musical instruments equipped with MIDI capability to exchange performance information. For example, a synthesizer can be
used to communicate with a drum machine, an electronic piano can interface with a computer, and so forth. Additionally,
since MIDI is an international standard recognized and implemented by all musical instrument manufacturers worldwide,
instruments made by different manufacturers can communicate with each other via MIDI.
MIDI Connections
Ë MIDI IN and MIDI OUT
In order to allow communication to take place, all MIDI-equipped instruments have at least two MIDI jacks - MIDI IN and
MIDI OUT. MIDI IN is for receiving MIDI data from another instrument, while MIDI OUT is for sending MIDI data
out to another instrument.
In the example above, the keyboard of the sending or transmitting instrument (MIDI OUT) is being used to control the
sound generators of the receiving instrument (MIDI IN). When a key is played on the sending instrument, the
corresponding note will play on the receiving instrument. When the key is released on the sending instrument, the tone being
played by the receiving instrument will stop. (This is called "Note On / Note Off" data and is the most basic MIDI hookup.)
Ë MIDI THRU
The MIDI THRU function allows more than one instrument to be controlled by the same transmitting instrument - in other
words, the data being sent from MIDI OUT goes to MIDI IN, where it can be passed on to another instrument via MIDI
THRU. The picture shown below shows how this is done.
In the above example, the MIDI data goes from the sending instrument (MIDI OUT) to another instrument (MIDI IN),
which receives the data and passes it along to a third instrument via the MIDI THRU connection.
Hammond XK-2 Quick Features Guide
Page 59

Typical Applications
Ë Example 1: The XK-2 connected to an amplifier.
Ë Example 2: The XK-2 sounding through a self-contained keyboard instrument.
55MIDI
If you connect the audio output from the XK-2 to the INPUT jack(s) of an instrument with self-contained speakers, such as
an organ or electronic piano,, you will be able to hear the XK-2 through the speaker system of the other instrument.
Ë Example 3: A personal computer
If you wish to use a personal computer, run a standard MIDI cable from the MIDI OUT of the computer to the MIDI IN
connector of the instrument. You will also need a MIDI interface and MIDI software for your computer.
Your Hammond XK-2 has MIDI IN, MIDI OUT and MIDI THRU jacks. These are
located on the back right hand side of the instrument.
The following pages will describe the MIDI Advanced Features of your Hammond
XK-2.
Hammond XK-2 Quick Features Guide
Page 60

56 MIDI
MIDI Channels
This Advanced Feature allows you to assign MIDI channels for the following: (1) Upper Manual ("UM"), (2) Lower Manual
("LM") and (3) Pedal Keyboard ("PK"). You can select MIDI Channels from 1 through 16 as well as “OFF” (no MIDI
transmission or reception) for all three Manuals.
TRY THIS:
1. Touch the EDIT Select Touch Button. The red LED will light, and the Information Center Display
should look like this:
Select
EDIT PARAMETER
2. Touch the SYSTEM Select Touch Button two times. The Information Center Display should look like
this:
{10 MIDI1
UM CHANNEL 1
3. Now select the option you wish by doing the following:
Use the PAGE "<" Select Touch Button to scroll forward through the manual selections ("UM" or Upper Manual, "LM"
or Lower Manual, and "PK" or Pedal Keyboard).
Use the PAGE "=" Select Touch Button to scroll backward through the manual selections.
Use the VALUE ">" Select Touch Button to scroll up through the MIDI Channel numbers.
Use the VALUE "?" Select Touch Button to scroll down through the MIDI Channel numbers.
This is a System Parameter, and this data CAN NOT be stored to a Preset. To see a total listing of all System Parameters, see the System
Parameter List.
NOTE: You can exit by touching the EDIT Select Touch Button.
Hammond XK-2 Quick Features Guide
Page 61

MIDI Expression Control
This Advanced Feature allows you to control how Expression data (Controller #11) is sent from the XK-2. The default
setting is “INDIV,” meaning that Expression data is received individually for Upper, Lower and Pedal on whatever MIDI
Channel each is set for. However, on personal keyboards and home organs by certain manufacturers, Expression data is
transmitted on one MIDI Channel only. By using this parameter, you can select on which MIDI channel the XK-2 will
receive. In this way, all sounds from the XK-2 can be under expression while receiving Expression data on only one MIDI
Channel. (NOTE: If you are also using the Keyboard Split function of the XK-2, the MIDI channel setting for the
Expression Control parameter must be the same as the MIDI channel setting for the Upper Manual in order for the
entire instrument to receive expression.)
TRY THIS:
1. Touch the EDIT Select Touch Button. The red LED will light, and the Information Center Display
should look like this:
2. Touch the SYSTEM Select Touch Button two times. The Information Center Display should look like
this:
57MIDI
Select
EDIT PARAMETER
{10 MIDI1
UM CHANNEL 1
3. Touch the PAGE “<” Select Touch Button three times. The Information Center Display should look like
this:
{13 MIDI4
EXP. CTR INDIV.
4. Now select the option you wish by doing the following:
Use the VALUE ">" Select Touch Button to scroll up through the choices.
Use the VALUE "?" Select Touch Button to scroll down through the choices.
This is a System Parameter, and this data CAN NOT be stored to a Preset. To see a total listing of all System Parameters, see the System
Parameter List.
NOTE: You can exit by touching the EDIT Select Touch Button.
Hammond XK-2 Quick Features Guide
Page 62

58 MIDI
MIDI Omni Mode
This Advanced Feature allows you to turn “ON” or “OFF” Omni Mode. When Omni Mode is “OFF,” the XK-2 will
recognize MIDI data being sent to it on MIDI Channel 1. When Omni Mode is “ON,” the XK-2 recognizes MIDI data
being sent to it from any MIDI Channel.
TRY THIS:
1. Touch the EDIT Select Touch Button. The red LED will light, and the Information Center Display
2. Touch the SYSTEM Select Touch Button two times. The Information Center Display should look like
should look like this:
Select
EDIT PARAMETER
this:
{10 MIDI1
UM CHANNEL 1
3. Touch the PAGE “<” Select Touch Button four times. The Information Center Display should look like
this:
{14 MIDI5
OMNI OFF
4. Now select the option you wish by doing the following:
Use either the VALUE ">" or the VALUE "?" Select Touch Button to turn OMNI Mode "ON" or "OFF.”
This is a System Parameter, and this data CAN NOT be stored to a Preset. To see a total listing of all System Parameters, see the System
Parameter List.
NOTE: You can exit by touching the EDIT Select Touch Button.
Hammond XK-2 Quick Features Guide
Page 63

MIDI Local Control
This Advanced Feature allows you to turn Local Control "ON" or "OFF.” When Local Control is "ON,” the XK-2 will
play both its internal sounds and the sounds from a connected MIDI device. When Local Control is "OFF,” the XK-2 will
play only the sounds from a connected MIDI device and the XK-2's internal sounds are silenced.
TRY THIS:
1. Touch the EDIT Select Touch Button. The red LED will light, and the Information Center Display
2. Touch the SYSTEM Select Touch Button two times. The Information Center Display should look like
59MIDI
should look like this:
Select
EDIT PARAMETER
this:
{10 MIDI1
UM CHANNEL 1
3. Touch the PAGE “<” Select Touch Button five times. The Information Center Display should look like
this:
{15 MIDI6
LOCAL ON
4. Now select the option you wish by doing the following:
Use either the VALUE ">" or the VALUE "?" Select Touch Button to turn Local Control "ON" or "OFF.”
This is a System Parameter, and this data CAN NOT be stored to a Preset. To see a total listing of all System Parameters, see the System
Parameter List.
NOTE: You can exit by touching the EDIT Select Touch Button.
Hammond XK-2 Quick Features Guide
Page 64

60 MIDI
MIDI NRPN
This Advanced Feature allows you to turn "ON" or "OFF" NRPN. "NRPN,” or Non-Registered Parameter Number, is an
expanded control change message, each function of which is implemented differently by different manufacturers. The
Hammond XK-2 uses NRPN to allow you to control such parameters as Percussion 2nd and 3rd Harmonic ON/OFF,
Vibrato or Chorus ON/OFF, Leslie ON/OFF and Leslie Slow/Fast.
TRY THIS:
1. Touch the EDIT Select Touch Button. The red LED will light, and the Information Center Display
should look like this:
Select
EDIT PARAMETER
2. Touch the SYSTEM Select Touch Button two times. The Information Center Display should look like
this:
{10 MIDI1
UM CHANNEL 1
3. Touch the PAGE “<” Select Touch Button six times. The Information Center Display should look like
this:
{16 MIDI7
NRPN ON
4. Now select the option you wish by doing the following:
Use either the VALUE ">" or the VALUE "?" Select Touch Button to turn NRPN "ON" or "OFF.”
This is a System Parameter, and this data CAN NOT be stored to a Preset. To see a total listing of all System Parameters, see the System
Parameter List.
NOTE: You can exit by touching the EDIT Select Touch Button.
Hammond XK-2 Quick Features Guide
Page 65

MIDI Foot Switch Controller Number
This Advanced Feature allows you to select the Controller number for the Foot Switch. The default setting is “64"
(Damper).
TRY THIS:
1. Touch the EDIT Select Touch Button. The red LED will light, and the Information Center Display
should look like this:
2. Touch the SYSTEM Select Touch Button two times. The Information Center Display should look like
this:
61MIDI
Select
EDIT PARAMETER
{10 MIDI1
UM CHANNEL 1
3. Touch the PAGE “<” Select Touch Button seven times. The Information Center Display should look like
this:
{17 MIDI8
FOOT SW CTR# 64
4. Now select the option you wish by doing the following:
Use the VALUE ">" Select Touch Button to scroll up through the numbers.
Use the VALUE "?" Select Touch Button to scroll down through the numbers.
This is a System Parameter, and this data CAN NOT be stored to a Preset. To see a total listing of all System Parameters, see the System
Parameter List.
NOTE: You can exit by touching the EDIT Select Touch Button.
Hammond XK-2 Quick Features Guide
Page 66

62 MIDI
MIDI Modulation Wheel Controller Number
This Advanced Feature allows you to select the Controller number for the Modulation Wheel. The default setting is “1"
(Vibrato).
TRY THIS:
1. Touch the EDIT Select Touch Button. The red LED will light, and the Information Center Display
should look like this:
Select
EDIT PARAMETER
2. Touch the SYSTEM Select Touch Button two times. The Information Center Display should look like
this:
{10 MIDI1
UM CHANNEL 1
3. Touch the PAGE “<” Select Touch Button eight times. The Information Center Display should look like
this:
{18 MIDI9
MOD. CTR# 1
4. Now select the option you wish by doing the following:
Use the VALUE ">" Select Touch Button to scroll up through the numbers.
Use the VALUE "?" Select Touch Button to scroll down through the numbers.
This is a System Parameter, and this data CAN NOT be stored to a Preset. To see a total listing of all System Parameters, see the System
Parameter List.
NOTE: You can exit by touching the EDIT Select Touch Button.
Hammond XK-2 Quick Features Guide
Page 67

MIDI Expression Pedal Controller Number
This Advanced Feature allows you to select the Controller number for a connected Expression Pedal. The default setting is
“7" (Volume).
TRY THIS:
1. Touch the EDIT Select Touch Button. The red LED will light, and the Information Center Display
should look like this:
Select
EDIT PARAMETER
2. Touch the SYSTEM Select Touch Button two times. The Information Center Display should look like
this:
{10 MIDI1
UM CHANNEL 1
63MIDI
3. Touch the PAGE “<” Select Touch Button nine times. The Information Center Display should look like
this:
{19 MIDI10
EXP. CTR# 7
4. Now select the option you wish by doing the following:
Use the VALUE ">" Select Touch Button to scroll up through the numbers.
Use the VALUE "?" Select Touch Button to scroll down through the numbers.
This is a System Parameter, and this data CAN NOT be stored to a Preset. To see a total listing of all System Parameters, see the System
Parameter List.
NOTE: You can exit by touching the EDIT Select Touch Button.
Hammond XK-2 Quick Features Guide
Page 68

64 MIDI
MIDI Leslie SLOW/FAST Controller Number
This Advanced Feature allows you to select the Controller number for the Leslie SLOW/FAST function. The default setting
is “92.”
TRY THIS:
1. Touch the EDIT Select Touch Button. The red LED will light, and the Information Center Display
should look like this:
Select
EDIT PARAMETER
2. Touch the SYSTEM Select Touch Button two times. The Information Center Display should look like
this:
{10 MIDI1
UM CHANNEL 1
3. Touch the PAGE “<” Select Touch Button ten times. The Information Center Display should look like
this:
{20 MIDI11
LES.S/F CTR# 92
4. Now select the option you wish by doing the following:
Use the VALUE ">" Select Touch Button to scroll up through the numbers.
Use the VALUE "?" Select Touch Button to scroll down through the numbers.
This is a System Parameter, and this data CAN NOT be stored to a Preset. To see a total listing of all System Parameters, see the System
Parameter List.
NOTE: You can exit by touching the EDIT Select Touch Button.
Hammond XK-2 Quick Features Guide
Page 69

MIDI Program Change
This Advanced Feature allows you to turn the MIDI Program Number Gate "ON" or "OFF.” When this switch is "ON,”
incoming Program changes made during performance are recognized by the XK-2. When this switch is "OFF,” the XK-2
ignores all incoming Program change messages. The default setting is “ON.”
TRY THIS:
1. Touch the EDIT Select Touch Button. The red LED will light, and the Information Center Display
should look like this:
2. Touch the SYSTEM Select Touch Button two times. The Information Center Display should look like
this:
65MIDI
Select
EDIT PARAMETER
{10 MIDI1
UM CHANNEL 1
3. Touch the PAGE “<” Select Touch Button eleven times. The Information Center Display should look
like this:
{21 MIDI12
PRG. CHANGE ON
4. Now select the option you wish by doing the following:
Use either the VALUE ">" or the VALUE "?" Select Touch Button to turn Program Change "ON" or "OFF.”
This is a System Parameter, and this data CAN NOT be stored to a Preset. To see a total listing of all System Parameters, see the System
Parameter List.
NOTE: You can exit by touching the EDIT Select Touch Button.
Hammond XK-2 Quick Features Guide
Page 70

66 MIDI
MIDI Drawbar Change
This Advanced Feature allows you to turn the MIDI Drawbar Change Gate "ON" or "OFF.” When this switch is "ON,”
incoming Drawbar changes made during performance (Controllers #50, 51 & 52) are recognized by the XK-2. (These are
treated separately from the other Controllers such as Volume, Modulation, Expression, etc. See the next page for
information about MIDI Control Change. See the MIDI Controller list for a complete listing of Controllers.) When this
switch is "OFF,” the XK-2 ignores incoming Drawbar Changes. The default setting is “ON.”
TRY THIS:
1. Touch the EDIT Select Touch Button. The red LED will light, and the Information Center Display
should look like this:
2. Touch the SYSTEM Select Touch Button two times. The Information Center Display should look like
this:
Select
EDIT PARAMETER
{10 MIDI1
UM CHANNEL 1
3. Touch the PAGE “<” Select Touch Button twelve times. The Information Center Display should look
like this:
{22 MIDI13
DB CHANGE ON
4. Now select the option you wish by doing the following:
Use either the VALUE ">" or the VALUE "?" Select Touch Button to turn Drawbar Change "ON" or "OFF.”
This is a System Parameter, and this data CAN NOT be stored to a Preset. To see a total listing of all System Parameters, see the System
Parameter List.
NOTE: You can exit by touching the EDIT Select Touch Button.
Hammond XK-2 Quick Features Guide
Page 71

MIDI Control Change
This Advanced Feature allows you to turn the MIDI Control Change Gate "ON" or "OFF.” When this switch is "ON,”
incoming Control changes made during performance, such as Volume, Modulation, Expression, etc., are recognized by the
XK-2. When this switch is "OFF,” the XK-2 ignores all incoming Control change messages other than Drawbar changes.
(See the previous page for information about MIDI Drawbar Change. See the MIDI Controller List for a complete listing of
Controllers.) The default setting is “ON.”
TRY THIS:
1. Touch the EDIT Select Touch Button. The red LED will light, and the Information Center Display
2. Touch the SYSTEM Select Touch Button two times. The Information Center Display should look like
67MIDI
should look like this:
Select
EDIT PARAMETER
this:
{10 MIDI1
UM CHANNEL 1
3. Touch the PAGE “<” Select Touch Button thirteen times. The Information Center Display should look
like this:
{23 MIDI14
CTR. CHANGE ON
4. Now select the option you wish by doing the following:
Use either the VALUE ">" or the VALUE "?" Select Touch Button to turn Control Change "ON" or "OFF.”
This is a System Parameter, and this data CAN NOT be stored to a Preset. To see a total listing of all System Parameters, see the System
Parameter List.
NOTE: You can exit by touching the EDIT Select Touch Button.
Hammond XK-2 Quick Features Guide
Page 72

68 MIDI
MIDI Transmit Bender Data ON / OFF
This Advanced Feature allows you to select whether you want a connected MIDI instrument to receive Pitch Bend data sent
from the XK-2. When this switch is "ON,” Pitch Bend data will be sent from the XK-2 when the Pitch Bend Wheel is
moved. When this switch is "OFF,” the XK-2's Pitch Bend Wheel can still be used to bend the internal sounds of the XK-2;
however, Pitch Bend data will be transmitted through the MIDI OUT connector to a connected MIDI instrument. The
default setting is “ON.”
TRY THIS:
1. Touch the EDIT Select Touch Button. The red LED will light, and the Information Center Display
should look like this:
Select
EDIT PARAMETER
2. Touch the SYSTEM Select Touch Button two times. The Information Center Display should look like
this:
{10 MIDI1
UM CHANNEL 1
3. Touch the PAGE “<” Select Touch Button fourteen times. The Information Center Display should look
like this:
{24 MIDI15
Tx BENDER ON
4. Now select the option you wish by doing the following:
Use either the VALUE ">" or the VALUE "?" Select Touch Button to turn this feature "ON" or "OFF.”
This is a System Parameter, and this data CAN NOT be stored to a Preset. To see a total listing of all System Parameters, see the System
Parameter List.
NOTE: You can exit by touching the EDIT Select Touch Button.
Hammond XK-2 Quick Features Guide
Page 73

MIDI Transmit Modulation Wheel Data ON / OFF
This Advanced Feature allows you to select whether you want a connected MIDI instrument to receive Modulation data sent
from the XK-2. When this switch is "ON,” Modulation or other MIDI data will be sent from the XK-2 when the
Modulation Wheel is moved. When this switch is "OFF,” the XK-2's Modulation Wheel can still be used to control internal
functions of the XK-2; however, no MIDI data will be transmitted through the MIDI OUT connector to a connected MIDI
instrument. The default setting is “ON.”
TRY THIS:
1. Touch the EDIT Select Touch Button. The red LED will light, and the Information Center Display
should look like this:
Select
EDIT PARAMETER
2. Touch the SYSTEM Select Touch Button two times. The Information Center Display should look like
this:
69MIDI
{10 MIDI1
UM CHANNEL 1
3. Touch the PAGE “<” Select Touch Button fifteen times. The Information Center Display should look
like this:
{25 MIDI16
Tx MOD. ON
4. Now select the option you wish by doing the following:
Use either the VALUE ">" or the VALUE "?" Select Touch Button to turn this feature "ON" or "OFF.”
This is a System Parameter, and this data CAN NOT be stored to a Preset. To see a total listing of all System Parameters, see the System
Parameter List.
NOTE: You can exit by touching the EDIT Select Touch Button.
Hammond XK-2 Quick Features Guide
Page 74

70 MIDI
MIDI Receive Breath Controller Data ON / OFF
Your Hammond XK-2 can receive Breath Control (Controller #2). This is so that the XK-2 can be played using a MIDI
wind controller. This Advanced Feature allows you to select whether you want the XK-2 to receive Breath Control. The
default setting is “OFF.”
NOTE: The XK-2 treats incoming Breath Control data as Volume data.
TRY THIS:
1. Touch the EDIT Select Touch Button. The red LED will light, and the Information Center Display
should look like this:
Select
EDIT PARAMETER
2. Touch the SYSTEM Select Touch Button two times. The Information Center Display should look like
this:
{10 MIDI1
UM CHANNEL 1
3. Touch the PAGE “<” Select Touch Button sixteen times. The Information Center Display should look
like this:
{26 MIDI17
Rx BREATH OFF
4. Now select the option you wish by doing the following:
Use either the VALUE ">" or the VALUE "?" Select Touch Button to turn this feature "ON" or "OFF.”
This is a System Parameter, and this data CAN NOT be stored to a Preset. To see a total listing of all System Parameters, see the System
Parameter List.
NOTE: You can exit by touching the EDIT Select Touch Button.
Hammond XK-2 Quick Features Guide
Page 75

MIDI Receive After Touch Data ON / OFF
This Advanced Feature allows you to select whether you want the XK-2 to receive After Touch data, and how you want the
XK-2 to respond to After Touch data. You may select “OFF,” Leslie Slow/Fast control, Overdrive or Pitch Bend. The
default setting is “OFF.”
TRY THIS:
1. Touch the EDIT Select Touch Button. The red LED will light, and the Information Center Display
should look like this:
Select
EDIT PARAMETER
2. Touch the SYSTEM Select Touch Button two times. The Information Center Display should look like
this:
{10 MIDI1
UM CHANNEL 1
71MIDI
3. Touch the PAGE “<” Select Touch Button seventeen times. The Information Center Display should look
like this:
{27 MIDI18
Rx AFT OFF
4. Now select the option you wish by doing the following:
Use the VALUE ">" Select Touch Button to scroll up through the options.
Use the VALUE "?" Select Touch Button to scroll down through the options.
This is a System Parameter, and this data CAN NOT be stored to a Preset. To see a total listing of all System Parameters, see the System
Parameter List.
NOTE: You can exit by touching the EDIT Select Touch Button.
Hammond XK-2 Quick Features Guide
Page 76

72 MIDI
MIDI Maximum Volume
This Advanced Feature allows you to assign the maximum amount of MIDI Volume. The default setting is "127.”
TRY THIS:
1. Touch the EDIT Select Touch Button. The red LED will light, and the Information Center Display
should look like this:
2. Touch the SYSTEM Select Touch Button two times. The Information Center Display should look like
this:
Select
EDIT PARAMETER
{10 MIDI1
UM CHANNEL 1
3. Touch the PAGE “<” Select Touch Button eighteen times. The Information Center Display should look
like this:
{28 MIDI19
VOLUME max. 127
4. Now select the option you wish by doing the following:
Use the VALUE ">" Select Touch Button to scroll up through the numbers.
Use the VALUE "?" Select Touch Button to scroll down through the numbers.
This is a System Parameter, and this data CAN NOT be stored to a Preset. To see a total listing of all System Parameters, see the System
Parameter List.
NOTE: You can exit by touching the EDIT Select Touch Button.
Hammond XK-2 Quick Features Guide
Page 77

MIDI Minimum Volume
This Advanced Feature allows you to assign the minimum amount of MIDI Volume. The default setting is "40.”
TRY THIS:
1. Touch the EDIT Select Touch Button. The red LED will light, and the Information Center Display
should look like this:
2. Touch the SYSTEM Select Touch Button two times. The Information Center Display should look like
this:
73MIDI
Select
EDIT PARAMETER
{10 MIDI1
UM CHANNEL 1
3. Touch the PAGE “<” Select Touch Button nineteen times. The Information Center Display should look
like this:
{29 MIDI20
VOLUME min. 40
4. Now select the option you wish by doing the following:
Use the VALUE ">" Select Touch Button to scroll up through the MIDI Channel numbers.
Use the VALUE "?" Select Touch Button to scroll down through the MIDI Channel numbers.
This is a System Parameter, and this data CAN NOT be stored to a Preset. To see a total listing of all System Parameters, see the System
Parameter List.
NOTE: You can exit by touching the EDIT Select Touch Button.
Hammond XK-2 Quick Features Guide
Page 78

74 MIDI
MIDI Receive Transpose ON / OFF
This Advanced Feature allows you to transpose incoming MIDI Note data. You can transpose the data up or down 6 halfsteps (-6 ~ +6). The default setting is “0".
TRY THIS:
1. Touch the EDIT Select Touch Button. The red LED will light, and the Information Center Display
should look like this:
2. Touch the SYSTEM Select Touch Button once. The Information Center Display should look like this:
Select
EDIT PARAMETER
{10 MIDI1
UM CHANNEL 1
3. Touch the PAGE “<” Select Touch Button twenty times. The Information Center Display should look
like this:
{30 MIDI21
Rx TRANSPOSE 0
4. Now select the option you wish by doing the following:
Use the VALUE ">" Select Touch Button to raise the pitch by semitones.
Use the VALUE "?" Select Touch Button to lower the pitch by semitones.
NOTE: This setting DOES NOT affect the pitch of the XK-2 Drawbar or Percussion tones. For information on
how to transpose the XK-2 itself, see page 95.
This is a System Parameter, and this data CAN NOT be stored to a Preset. To see a total listing of all System Parameters, see the System
Parameter List.
NOTE: You can exit by touching the EDIT Select Touch Button.
Hammond XK-2 Quick Features Guide
Page 79

MIDI SOFT THRU ON/OFF
Some MIDI sequencers are capable of mixing MIDI IN information with MIDI OUT information. This is called SOFT
THRU and can be useful if you are recording sequences and want to listen to previously recorded tracks as well as a track you
are currently recording. Your Hammond XK-2 has MIDI SOFT THRU which can be turned “ON” or “OFF” using this
Advanced Feature.
TRY THIS:
1. Touch the EDIT Select Touch Button. The red LED will light, and the Information Center Display
should look like this:
2. Touch the SYSTEM Select Touch Button two times. The Information Center Display should look like
this:
75MIDI
Select
EDIT PARAMETER
{10 MIDI1
UM CHANNEL 1
3. Touch the PAGE “<” Select Touch Button twenty-one times. The Information Center Display should
look like this:
{31 MIDI22
SOFT THRU OFF
4. Now select the option you wish by doing the following:
Use either the VALUE “?” or the VALUE “>” Select Touch Button to turn this function “ON” or “OFF.”
This is a System Parameter, and this data CAN NOT be stored to a Preset. To see a total listing of all System Parameters, see the System
Parameter List.
NOTE: You can exit by touching the EDIT Select Touch Button.
Hammond XK-2 Quick Features Guide
Page 80

76 MIDI
External Zones
In addition to Upper and Lower Manuals, the XK-2 has two additional “manuals” called External Zones. These can be
assigned MIDI Channel numbers, Program Numbers, “low” and “high” limits and other MIDI data. These Zones allow you
to control additional sounds from the XK-2 keyboard, thereby giving your XK-2 the ability to function as a MIDI Master
Controller for a sequencer, sound modules, or whatever you wish. For example, you could have Piano on one part of the
keyboard, Strings playing from another part of the keyboard, Wood Bass from another area of the keyboard and Trumpet
from still another portion of the keyboard.
Ë External Zone MIDI Channels
This Advanced Feature allows you to assign MIDI channels for the External Zones. You can select MIDI Channels from 1
through 16 as well as “OFF” (no MIDI transmission or reception) for both External Zones.
TRY THIS:
1. Touch the EDIT Select Touch Button. The red LED will light, and the Information Center Display
should look like this:
Select
EDIT PARAMETER
2. Touch the INT.CONT./EXT.ZONE Select Touch Button two times. The Information Center Display
should look like this:
}43 ZONE1-1
CHANNEL OFF
3. Now select the option you wish by doing the following:
Use the INT.CONT./EXT ZONE Select Touch Button to select EXT. ZONE 1 or EXT. ZONE 2.
NOTE: When you touch the INT.CONT./EXT.ZONE Select Touch Button repeatedly, you are actually toggling
between the INT.CON T. and EXT.ZONE Menus. As a result, you will also see the SPLIT Menu display along with
EXT.ZONE 1 and EXT.ZONE 2.
Use the VALUE ">" Select Touch Button to scroll up through the MIDI Channel numbers.
Use the VALUE "?" Select Touch Button to scroll down through the MIDI Channel numbers.
This is a System Parameter, and this data CAN NOT be stored to a Preset. To see a total listing of all System Parameters, see the System
Parameter List.
NOTE: You can exit by touching the EDIT Select Touch Button.
Hammond XK-2 Quick Features Guide
Page 81

Ë External Zone Program Number
This Advanced Feature allows you to set the Program Numbers for both of the External Zones.
TRY THIS:
1. Touch the EDIT Select Touch Button. The red LED will light, and the Information Center Display
should look like this:
2. Touch the INT.CONT./EXT.ZONE Select Touch Button two times. The Information Center Display
should look like this:
77MIDI
Select
EDIT PARAMETER
}43 ZONE1-1
CHANNEL OFF
3. Touch the PAGE “<” Select Touch Button once. The
Information Center Display should look like this:
}44 ZONE1-2
PROGRAM# 0
3. Now select the option you wish by doing the following:
Use the INT.CONT./EXT ZONE Select Touch Button to select EXT. ZONE 1 or EXT. ZONE 2.
NOTE: When you touch the INT.CONT./EXT.ZONE Select Touch Button repeatedly, you are actually toggling
between the INT.CON T. and EXT.ZONE Menus. As a result, you will also see the SPLIT Menu display along with
EXT.ZONE 1 and EXT.ZONE 2.
Use the VALUE ">" Select Touch Button to scroll up through the choices.
Use the VALUE "?" Select Touch Button to scroll down through the choices.
This is a System Parameter, and this data CAN NOT be stored to a Preset. To see a total listing of all System Parameters, see the System
Parameter List.
NOTE: You can exit by touching the EDIT Select Touch Button.
Hammond XK-2 Quick Features Guide
Page 82

78 MIDI
Ë External Zone Program Bank
This Advanced Feature allows you to select different Bank numbers for voices. You can select the “MSB” (Most Significant
Bit) and the “LSB” (Least Significant Bit) for each Bank selection. This is so that you have access to the great number of
voices available on modern GS-compatible sound modules. Please refer to the documentation for your module to determine
the Bank numbers for specific voices.
TRY THIS:
1. Touch the EDIT Select Touch Button. The red LED will light, and the Information Center Display
should look like this:
2. Touch the INT.CONT./EXT.ZONE Select Touch Button two times. The Information Center Display
should look like this:
Select
EDIT PARAMETER
}43 ZONE1-1
CHANNEL OFF
3. Touch the PAGE ”<” Select Touch Button two times.
The Information Center Display should look like this:
}45 ZONE1-3
BANK# MSB 0
4. Now select the option you wish by doing the following:
Use the INT.CONT./EXT ZONE Select Touch Button to select EXT. ZONE 1 or EXT. ZONE 2.
NOTE: When you touch the INT.CONT./EXT.ZONE Select Touch Button repeatedly, you are actually toggling
between the INT.CON T. and EXT.ZONE Menus. As a result, you will also see the SPLIT Menu display along with
EXT.ZONE 1 and EXT.ZONE 2.
Use the PAGE “>” and the PAGE “?” Select Touch Buttons to select “MSB” or “LSB.”
Use the VALUE ">" Select Touch Button to scroll up through the choices.
Use the VALUE "?" Select Touch Button to scroll down through the choices.
This is a System Parameter, and this data CAN NOT be stored to a Preset. To see a total listing of all System Parameters, see the System
Parameter List.
NOTE: You can exit by touching the EDIT Select Touch Button.
Hammond XK-2 Quick Features Guide
Page 83

Ë External Zone Key Map
This Advanced Feature allows you to set the Low and High note ranges for the External Zones.
TRY THIS:
1. Touch the EDIT Select Touch Button. The red LED will light, and the Information Center Display
should look like this:
2. Touch the INT.CONT./EXT.ZONE Select Touch Button two times. The Information Center Display
should look like this:
79MIDI
Select
EDIT PARAMETER
}43 ZONE1-1
CHANNEL OFF
3. Touch the PAGE ”<” Select Touch Button four times.
The Information Center Display should look like this:
}47 ZONE1-5
KEY MAP LO 1C
4. Now select the option you wish by doing the following:
Use the INT.CONT./EXT ZONE Select Touch Button to select EXT. ZONE 1 or EXT. ZONE 2.
NOTE: When you touch the INT.CONT./EXT.ZONE Select Touch Button repeatedly, you are actually toggling
between the INT.CON T. and EXT.ZONE Menus. As a result, you will also see the SPLIT Menu display along with
EXT.ZONE 1 and EXT.ZONE 2.
Use the PAGE “<” and “=” Select Touch Buttons to select either “LO” (the lower limit of the zone) or “HI” (the upper
limit of the zone).
Use the VALUE ">" Select Touch Button to scroll up through the choices.
Use the VALUE "?" Select Touch Button to scroll down through the choices.
This is a System Parameter, and this data CAN NOT be stored to a Preset. To see a total listing of all System Parameters, see the System
Parameter List.
NOTE: You can exit by touching the EDIT Select Touch Button.
Hammond XK-2 Quick Features Guide
Page 84

80 MIDI
Ë External Zone Key Octave
This Advanced Feature allows you to select the Octave range in which each External Zone will play. You may select from “4" (down four octaves) to “+4" (up four octaves). The default setting is “0.”
TRY THIS:
1. Touch the EDIT Select Touch Button. The red LED will light, and the Information Center Display
should look like this:
2. Touch the INT.CONT./EXT.ZONE Select Touch Button two times. The Information Center Display
should look like this:
Select
EDIT PARAMETER
}43 ZONE1-1
CHANNEL OFF
3. Touch the PAGE ”<” Select Touch Button six times.
The Information Center Display should look like this:
}49 ZONE1-7
KEY OCTAVE 0
4. Now select the option you wish by doing the following:
Use the INT.CONT./EXT ZONE Select Touch Button to select EXT. ZONE 1 or EXT. ZONE 2.
NOTE: When you touch the INT.CONT./EXT.ZONE Select Touch Button repeatedly, you are actually toggling
between the INT.CON T. and EXT.ZONE Menus. As a result, you will also see the SPLIT Menu display along with
EXT.ZONE 1 and EXT.ZONE 2.
Use the VALUE ">" Select Touch Button to scroll up through the numbers.
Use the VALUE "?" Select Touch Button to scroll down through the numbers.
This is a System Parameter, and this data CAN NOT be stored to a Preset. To see a total listing of all System Parameters, see the System
Parameter List.
NOTE: You can exit by touching the EDIT Select Touch Button.
Hammond XK-2 Quick Features Guide
Page 85

Ë External Zone Maximum Volume
This Advanced Feature allows you to set the maximum Volume for the External Zones. You may select from “64" to
“127.” The default setting is “127.”
TRY THIS:
1. Touch the EDIT Select Touch Button. The red LED will light, and the Information Center Display
should look like this:
2. Touch the INT.CONT./EXT.ZONE Select Touch Button two times. The Information Center Display
should look like this:
81MIDI
Select
EDIT PARAMETER
}43 ZONE1-1
CHANNEL OFF
3. Touch the PAGE ”<” Select Touch Button seven times.
The Information Center Display should look like this:
}50 ZONE1-8
VOLUME MAX 127
4. Now select the option you wish by doing the following:
Use the INT.CONT./EXT ZONE Select Touch Button to select EXT. ZONE 1 or EXT. ZONE 2.
NOTE: When you touch the INT.CONT./EXT.ZONE Select Touch Button repeatedly, you are actually toggling
between the INT.CON T. and EXT.ZONE Menus. As a result, you will also see the SPLIT Menu display along with
EXT.ZONE 1 and EXT.ZONE 2.
Use the VALUE ">" Select Touch Button to scroll up through the numbers.
Use the VALUE "?" Select Touch Button to scroll down through the numbers.
This is a System Parameter, and this data CAN NOT be stored to a Preset. To see a total listing of all System Parameters, see the System
Parameter List.
NOTE: You can exit by touching the EDIT Select Touch Button.
Hammond XK-2 Quick Features Guide
Page 86

82 MIDI
Ë External Zone Minimum Volume
This Advanced Feature allows you to set the minimum Volume for the External Zones. You may select from “0" to “64.”
The default setting is “0.”
TRY THIS:
1. Touch the EDIT Select Touch Button. The red LED will light, and the Information Center Display
should look like this:
2. Touch the INT.CONT./EXT.ZONE Select Touch Button two times. The Information Center Display
should look like this:
Select
EDIT PARAMETER
}43 ZONE1-1
CHANNEL OFF
3. Touch the PAGE ”<” Select Touch Button eight times.
The Information Center Display should look like this:
}51 ZONE1-9
VOLUME MIN 0
4. Now select the option you wish by doing the following:
Use the INT.CONT./EXT ZONE Select Touch Button to select EXT. ZONE 1 or EXT. ZONE 2.
NOTE: When you touch the INT.CONT./EXT.ZONE Select Touch Button repeatedly, you are actually toggling
between the INT.CON T. and EXT.ZONE Menus. As a result, you will also see the SPLIT Menu display along with
EXT.ZONE 1 and EXT.ZONE 2.
Use the VALUE ">" Select Touch Button to scroll up through the numbers.
Use the VALUE "?" Select Touch Button to scroll down through the numbers.
This is a System Parameter, and this data CAN NOT be stored to a Preset. To see a total listing of all System Parameters, see the System
Parameter List.
NOTE: You can exit by touching the EDIT Select Touch Button.
Hammond XK-2 Quick Features Guide
Page 87

Ë External Zone Velocity Curve
The XK-2 can transmit MIDI Key Velocity information. This Advanced Feature allows you to select the Velocity Curve you
wish for each External Zone. You may select from 6 different curves plus “OFF” (all Note data sent at a velocity of 100).
The default setting is “1.”
TRY THIS:
1. Touch the EDIT Select Touch Button. The red LED will light, and the Information Center Display
should look like this:
2. Touch the INT.CONT./EXT.ZONE Select Touch Button two times. The Information Center Display
should look like this:
83MIDI
Select
EDIT PARAMETER
}43 ZONE1-1
CHANNEL OFF
3. Touch the PAGE ”<” Select Touch Button nine times.
The Information Center Display should look like this:
}52 ZONE1-10
VELOCITY CURVE 1
4. Now select the option you wish by doing the following:
Use the INT.CONT./EXT ZONE Select Touch Button to select EXT. ZONE 1 or EXT. ZONE 2.
NOTE: When you touch the INT.CONT./EXT.ZONE Select Touch Button repeatedly, you are actually toggling
between the INT.CON T. and EXT.ZONE Menus. As a result, you will also see the SPLIT Menu display along with
EXT.ZONE 1 and EXT.ZONE 2.
Use the VALUE ">" Select Touch Button to scroll up through the choices.
Use the VALUE "?" Select Touch Button to scroll down through the choices.
This is a System Parameter, and this data CAN NOT be stored to a Preset. To see a total listing of all System Parameters, see the System
Parameter List.
NOTE: You can exit by touching the EDIT Select Touch Button.
Hammond XK-2 Quick Features Guide
Page 88

84 MIDI
Ë External Zone Bender (Pitch Bend)
This Advanced Feature allows you to select whether you want to transmit Pitch bend data to a connected MIDI instrument.
The default setting is "ON.”
TRY THIS:
1. Touch the EDIT Select Touch Button. The red LED will light, and the Information Center Display
should look like this:
2. Touch the INT.CONT./EXT.ZONE Select Touch Button two times. The Information Center Display
should look like this:
Select
EDIT PARAMETER
}43 ZONE1-1
CHANNEL OFF
3. Touch the PAGE ”<” Select Touch Button ten times.
The Information Center Display should look like this:
}53 ZONE1-11
BENDER ON
4. Now select the option you wish by doing the following:
Use the INT.CONT./EXT ZONE Select Touch Button to select EXT. ZONE 1 or EXT. ZONE 2.
NOTE: When you touch the INT.CONT./EXT.ZONE Select Touch Button repeatedly, you are actually toggling
between the INT.CON T. and EXT.ZONE Menus. As a result, you will also see the SPLIT Menu display along with
EXT.ZONE 1 and EXT.ZONE 2.
Use either the VALUE ">" or the VALUE "?" Select Touch Button to turn this function “ON” or “OFF,”.
This is a System Parameter, and this data CAN NOT be stored to a Preset. To see a total listing of all System Parameters, see the System
Parameter List.
NOTE: You can exit by touching the EDIT Select Touch Button.
Hammond XK-2 Quick Features Guide
Page 89

Ë External Zone Modulation
This Advanced Feature allows you to select whether you want to send Modulation Data from the External Zones.
TRY THIS:
1. Touch the EDIT Select Touch Button. The red LED will light, and the Information Center Display
should look like this:
2. Touch the INT.CONT./EXT.ZONE Select Touch Button two times. The Information Center Display
should look like this:
85MIDI
Select
EDIT PARAMETER
}43 ZONE1-1
CHANNEL OFF
3. Touch the PAGE ”<” Select Touch Button eleven
times. The Information Center Display should look like this:
}54 ZONE1-12
MODULATION ON
4. Now select the option you wish by doing the following:
Use either the VALUE ">" or the VALUE "?" Select Touch Button to turn this function "ON" or "OFF.”
This is a System Parameter, and this data CAN NOT be stored to a Preset. To see a total listing of all System Parameters, see the System
Parameter List.
NOTE: You can exit by touching the EDIT Select Touch Button.
Hammond XK-2 Quick Features Guide
Page 90

86 MIDI
Ë External Zone Damper
This Advanced Feature allows you to select whether you want to send Damper Data from the External Zones.
TRY THIS:
1. Touch the EDIT Select Touch Button. The red LED will light, and the Information Center Display
should look like this:
2. Touch the INT.CONT./EXT.ZONE Select Touch Button two times. The Information Center Display
should look like this:
Select
EDIT PARAMETER
}43 ZONE1-1
CHANNEL OFF
3. Touch the PAGE ”<” Select Touch Button twelve
times. The Information Center Display should look like this:
}55 ZONE1-13
DAMPER ON
4. Now select the option you wish by doing the following:
Use either the VALUE ">" or the VALUE "?" Select Touch Button to turn this function "ON" or "OFF.”
This is a System Parameter, and this data CAN NOT be stored to a Preset. To see a total listing of all System Parameters, see the System
Parameter List.
NOTE: You can exit by touching the EDIT Select Touch Button.
Hammond XK-2 Quick Features Guide
Page 91

MIDI Implementation Chart
FUNCTION TRANSMITTED RECOGNIZED REMARKS
87MIDI
Basic
Channel
Mode
Note
Number: True voice
Velocity Note ON
After
Touch
Default
Changed
Default
Messages
Altered
Note OFF
Key's
Ch's
1
1 ~ 16
Mode 3
×
******************
36 - 96
******************
•
×
×
×
1 ~ 16
Mode 3
36 - 96
****************
Pitch Bend • •
Control
Change
Bank Select 0
32
Modulation 1
Breath Control 2
Main Volume 7
Expression 11
Tremolo 92
Hold 64
NRPN lsb 98
NRPN msb 99
RPN lsb 100
RPN msb 101
Data Entry 6
SW Drawbar 80
GT Drawbar 81
PK Drawbar 82
•
•
•
×
•
•
•
•
•
•
•
•
•
•
•
•
1
Upper Channel *1
×
Transpose ±6
•
×
×
×
×
×
External Zones Only
External Zones Only
•
•
•
•
•
•
•
Main Volume
Main Volume
Expression
Leslie Slow/Fast
Damper
If NRPN SW. is ON
•
•
Bend Sensitivity
•
•
•
•
•
Program
Change :True #
• 1 - 65
******************
• 1 - 65 Cancel + 8 Banks
System Exclusive • •
Common
System
Real Time
Aux
Messages
:Song Pos
:Song Sel
:Tune
:Clock
:Commands
:Local On/Off
:All Notes Off
:Active Sense
:Reset
×
×
×
×
×
×
•
•
×
×
×
×
×
×
×
•
•
×
Notes *1: LOWER ch : 2 ZONE1 ch : OFF
PEDAL ch : 3 ZONE2 ch : OFF
Mode 1 : OMNI ON, POLY
Mode 3 : OMNI OFF, POLY
Mode 2 : OMNI ON, MONO
Mode 4 : OMNI OFF, MONO
× 8 Presets
(123)
• : Yes
× : No
Hammond XK-2 Quick Features Guide
Page 92

88 MIDI
MIDI Implementation - Each Channel
ORGAN ZONES EXT. ZONES EXP CONT
UM LM PK ZONE1 ZONE2
OUT IN OUT IN OUT IN OUT IN OUT IN
MIDI CHANNELS 1~16, OFF 1~16, OFF 1~16, OFF 1~16
OFF
× 1~16
OFF
OUT IN
× INDI. 1~16,
INDI.
PROGRAM CHANGE • • × × × × • × • × × ×
PITCH BEND • • • • • • • × • × × ×
CONTROL Bank Select MSB 0
LSB 32
Modulation 1
Volume 7 (2)See note 1
Expression 11 See note 2
Tremolo 92
Hold 1 (Damper) 64
NRPN LSB 98
NRPN MSB 99
RPN LSB 100
×
×
×
×
×
×
•
×
•
×
×
×
×
×
×
×
×
•
×
•
×
×
•
•
×
×
×
×
•
×
•
×
×
•
•
•
•
•
•
•
•
•
•
•
•
×
×
×
•
•
•
•
•
•
•
×
×
×
•
•
×
×
×
•
•
×
×
×
See note
•
3
•
•
×
×
•
•
×
×
×
×
×
×
See note
×
3
×
•
×
×
×
•
×
×
×
×
×
×
See note
×
3
×
•
×
×
×
×
×
×
×
×
×
×
×
×
×
×
•
×
×
×
×
×
RPN MSB 101
DATA ENTRY MSB 6
UM DRAWBAR 80
LM DRAWBAR 81
PK DRAWBAR 82
AFTER CH’s
TOUCH KEY’s
Note 1: Volume data is normally received as Controllers #2 and #7.
The last data received takes priority regardless of the Controller number.
Volume data is received as Controller #2 only when “Rx. BREATH CONTROL” is “ON.”
Note 2: Expression data is normally transmitted as Controller #11, but can be changed to any other
controller number from 0 through 127.
When “MIDI EXP. CTR.” is set for “INDIV”, Expression data can be received on MIDI Channels 1
through 16.
If different MIDI channels contain different Expression data, each Manual will respond with
whatever Expression data is contained in each MIDI channel.
Note 3: If the Expression data controller number is changed to 7, Volume data will be transmitted along
with Expression data.
•
•
×
×
×
×
•
•
×
×
×
×
•
•
×
×
×
×
×
×
•
•
×
×
×
×
×
×
•
•
×
•
×
×
×
×
×
×
×
×
×
×
×
×
×
×
×
×
×
×
×
×
×
×
×
×
×
×
×
×
×
×
×
×
×
×
×
×
×
×
×
×
×
×
×
×
×
×
×
×
×
×
×
×
Hammond XK-2 Quick Features Guide
Page 93

Drawbar MIDI Data
Control Change Bx 50h yy :Upper
Bx 51h yy :Lower x: MIDI channel for each manual
Bx 52h yy :Pedal yy: data
Upper / Lower Data:yy Pedal Data:yy
DRAWBAR 16' 5 1/3' 8' 4' 2 2/3' 2' 1 3/5' 1 1/3' 1' 16' 8'
Level 0 00h( 0) 09h( 9) 12h(18) 1Bh(27) 24h(36) 2Dh(45) 36h(54) 3Fh(63) 48h(72) 00h( 0) 09h( 9)
Level 1 01h( 1) 0Ah(10) 13h(19) 1Ch(28) 25h(37) 2Eh(46) 37h(55) 40h(64) 49h(73) 01h( 1) 0Ah(10)
Level 2 02h( 2) 0Bh(11) 14h(20) 1Dh(29) 26h(38) 2Fh(47) 38h(56) 41h(65) 4Ah(74) 02h( 3) 0Bh(11)
Level 3 03h( 3) 0Ch(12) 15h(21) 1Eh(30) 27h(39) 30h(48) 39h(57) 42h(66) 4Bh(75) 03h( 4) 0Ch(12)
Level 4 04h( 4) 0Dh(13) 16h(22) 1Fh(31) 28h(40) 31h(49) 3Ah(58) 43h(67) 4Ch(76) 04h( 5) 0Dh(13)
Level 5 05h( 5) 0Eh(14) 17h(23) 20h(32) 29h(41) 32h(50) 3Bh(59) 44h(68) 4Dh(77) 05h( 6) 0Eh(14)
89MIDI
Level 6 06h( 6) 0Fh(15) 18h(24) 21h(33) 2Ah(42) 33h(51) 3Ch(60) 45h(69) 4Eh(78) 06h( 7) 0Fh(15)
Level 7 07h( 7) 10h(16) 19h(25) 22h(34) 2Bh(43) 34h(52) 3Dh(61) 46h(70) 4Fh(79) 07h( 8) 10h(16)
Level 8 08h( 8) 11h(17) 1Ah(26) 23h(35) 2Ch(44) 35h(53) 3Eh(62) 47h(71) 50h(80) 08h( 9) 11h(17)
System Exclusive Messages
1. FORMAT
F0h
55h
[DID]
10h
0Bh
11h
[BODY]
F7h
3. ACKNOWLEDGE
F0h
55h
[DID]
10h
0Bh
14h
[AK]
[PNH]
[PNL]
F7h
System Exclusive
SUZUKI I.D. Number
Device No.
Model ID Number (High)
Model ID Number (Low)
Command (Data packet)
DATA
End of Exclusive
System Exclusive
SUZUKI I.D. Number
Device No.
Model ID Number
Model ID Number
Command Acknowledge
AK Type 00h:Normal
Packet Number (High)
Packet Number (Low)
End of Exclusive
05h:Check Sum Error
06h:Protect SW On
2. BODY
02h
[PNH]
[PNL]
[DATA]
[SUM]
4. HAND SHAKE COMMUNICATION
Master Slave
Data out Packet1 º
Data out Packet2 º
Data out Packet58 º
Data Type (02:User program)
Packet Number(High) 0001~7F7F
Packet Number (Low)
256byte ASCII (128byte data)
Check Sum (7bit)
256byte ASCII XOR
(One way transfer)
» Acknowledge
» Acknowledge
:
» Acknowledge
The organ will wait for the data for 20ms is no acknowledge is received and transmit the next data of the
packet number. (ONE WAY TRANSFER)
Hammond XK-2 Quick Features Guide
Page 94

90 Special Advanced Features
SPECIAL ADVANCED FEATURES
Bend Length
This Advanced Feature allows you to assign the range of the Pitch Bend Wheel for the internal organ sounds. You can select
from ± 1 through 12. The default setting is "1.”
TRY THIS:
1. Touch the EDIT Select Touch Button. The red LED will light, and the Information Center Display
should look like this:
2. Touch the INT.CONT./EXT.ZONE Select Touch Button once. The Information Center Display should
look like this:
Select
EDIT PARAMETER
}34 SPLIT1
SPLIT POINT 2B
3. Touch the PAGE ”<” Select Touch Button three times. The Information Center Display should look like
this:
}37 BENDLENGTH1
UM 1
4. Now select the option you wish by doing the following:
Use the PAGE "<" Select Touch Button to scroll forward through the manual selections. As you scroll forward through
the Manual selections, you will see the upper left-hand corner of the display change from “P37" to “P38" to “P39.”
Use the PAGE "=" Select Touch Button to scroll backward through the manual selections.
Use the VALUE ">" Select Touch Button to scroll up through the numbers.
Use the VALUE "?" Select Touch Button to scroll down through the numbers.
NOTE: You can exit by touching the EDIT Select Touch Button.
Hammond XK-2 Quick Features Guide
Page 95

Modulation Mode
This Advanced Feature allows you to assign the internal function of the XK-2 that the Modulation Wheel will control. You
can select “OFF,” “LES S/F” (the LESLIE FAST Touch Button will turn “ON” or “OFF”) or “OVERDRIVE”. The
default setting is "OFF.”
TRY THIS:
1. Touch the EDIT Select Touch Button. The red LED will light, and the Information Center Display
2. Touch the INT.CONT./EXT.ZONE Select Touch Button once. The Information Center Display should
91Special Advanced Features
should look like this:
Select
EDIT PARAMETER
look like this:
}34 SPLIT1
SPLIT POINT 2B
3. Touch the PAGE ”<” Select Touch Button six times. The Information Center Display should look like
this:
}40 MOD. MODE
OFF
4. Now select the option you wish by doing the following:
Use the VALUE ">" Select Touch Button to scroll up through the choices.
Use the VALUE "?" Select Touch Button to scroll down through the choices.
NOTE: You can exit by touching the EDIT Select Touch Button.
Hammond XK-2 Quick Features Guide
Page 96

92 Special Advanced Features
Organ Zone Key Map
This Advanced Feature allows you to set the Low and High note ranges for the internal Organ Zones.
TRY THIS:
1. Touch the EDIT Select Touch Button. The red LED will light, and the Information Center Display
should look like this:
2. Touch the INT.CONT./EXT.ZONE Select Touch Button once. The Information Center Display should
look like this:
Select
EDIT PARAMETER
}34 SPLIT1
SPLIT POINT 2B
3. Touch the PAGE ”<” Select Touch Button three times. The Information Center Display should look like
this:
}41 ORG.ZONE-1
KEYMAP LOW 1C
4. Now select the option you wish by doing the following:
Use the PAGE "<" and "=" Select Touch Buttons to select either ORG. ZONE-1 or ORG. ZONE-2. As you scroll
forward through the Manual selections, you will see the upper left-hand corner of the display change from “P41" to
“P42.”
Use the PAGE “<” and “=” Select Touch Buttons to select either “LOW” (the lower limit of the zone) or “HI” (the
upper limit of the zone).
Use the VALUE ">" Select Touch Button to scroll up through the choices.
Use the VALUE "?" Select Touch Button to scroll down through the choices.
This data CAN be stored to a Preset. To see a total listing of all Preset Parameters, see the Preset Parameter List.
NOTE: You can exit by touching the EDIT Select Touch Button.
Hammond XK-2 Quick Features Guide
Page 97

Master Tune
This Advanced Feature allows you to change the overall tuning pitch of the entire instrument. You can select from “430Hz”
to “450Hz.” The default setting is “440Hz.”
NOTE: The term “Hz” is an abbreviation for HertzHertz, and refers to the frequency of a pitch measured in cycles per second.
The note reference commonly used is “A440,” meaning that a note consisting of 440 Hertz will be the pitch “A.” This is the
international standard used to tune most musical instruments.
TRY THIS:
93Special Advanced Features
1. Touch the EDIT Select Touch Button. The red LED will light, and the Information Center Display
should look like this:
Select
EDIT PARAMETER
2. Touch the SYSTEM Select Touch Button once. The Information Center Display should look like this:
{1 MASTER TUNE
440Hz
3. To change the pitch of the XK-2, do the following:
Use the VALUE ">" Select Touch Button to raise the pitch.
Use the VALUE "?" Select Touch Button to lower the pitch.
default setting is "440Hz.”
This is a System Parameter, and this data CAN NOT be stored to a Preset. To see a total listing of all System Parameters, see the System
Parameter List.
NOTE: You can exit by touching the EDIT Select Touch Button.
Hammond XK-2 Quick Features Guide
Page 98

94 Special Advanced Features
Tune Mode
This Advanced Feature allows you to change the overall temperament of the entire instrument. You can select either “ETEMPERA” (equal-tempered scale similar to standard piano tuning.) Or “”B3-PITCH” (alters the frequency of certain notes
in a manner similar to the characteristics of the tone-wheel generator used in the B-3, C-3 and similar instruments). The
default setting is “B-3-PITCH.”
TRY THIS:
1. Touch the EDIT Select Touch Button. The red LED will light, and the Information Center Display
should look like this:
2. Touch the SYSTEM Select Touch Button once. The Information Center Display should look like this:
Select
EDIT PARAMETER
{1 MASTER TUNE
440Hz
3. Touch the PAGE “<” Select Touch Button once. The Information Center Display should look like this:
{2 TUNE MODE
B-3 PITCH
4. Now select the option you wish by doing the following:
Use either the VALUE ">" or the VALUE "?" Select Touch Button to select either "E-TEMPERA" or "B3-Pitch.”
This is a System Parameter, and this data CAN NOT be stored to a Preset. To see a total listing of all System Parameters, see the System
Parameter List.
NOTE: You can exit by touching the EDIT Select Touch Button.
Hammond XK-2 Quick Features Guide
Page 99

Transpose
This Advanced Feature allows you to shift the musical key of the entire instrument. This is useful if you have a piece of
music written in one key but which needs to sound in another key. You can transpose the XK-2 up or down 6 half-steps (-6
~ +6). The default setting is “0".
TRY THIS:
95Special Advanced Features
1. Touch the EDIT Select Touch Button. The red LED will light, and the Information Center Display
should look like this:
Select
EDIT PARAMETER
2. Touch the SYSTEM Select Touch Button once. The Information Center Display should look like this:
{1 MASTER TUNE
440Hz
3. Touch the PAGE “<” Select Touch Button two times. The Information Center Display should look like
this:
{3 TRANSPOSE
0
4. To transpose the XK-2, do the following:
Use the VALUE ">" Select Touch Button to raise the pitch by semitones.
Use the VALUE "?" Select Touch Button to lower the pitch by semitones.
NOTE: If the XK-2 is transposed and you wish to return to concert pitch (no transposition), touching the VALUE ">" and
the VALUE "?" Select Touch Buttons together will restore regular pitch.
This is a System Parameter, and this data CAN NOT be stored to a Preset. To see a total listing of all System Parameters, see the System
Parameter List.
NOTE: You can exit by touching the EDIT Select Touch Button.
Hammond XK-2 Quick Features Guide
Page 100

96 Special Advanced Features
Foot Switch Function
This Advanced Feature allows you to select different functions for the Foot Switch. You can select from:
“OFF” - Disables the foot switch, allowing it to be used strictly for sending MIDI Controller #64 (Sustain).
“LES S/F” - Use for turning the Leslie rotor(s) “SLOW” or “FAST.”
“UM DAMPER” - Allows Upper Manual Drawbar tones to be "damped" or sustained.
“LM DAMPER” - Allows Lower Manual Drawbar tones to be "damped" or sustained.
“PRESET FW” - Allows you to change Presets. Each time the Foot Switch is pressed the next Preset number in sequence
will be selected.
TRY THIS:
1. Touch the EDIT Select Touch Button. The red LED will light, and the Information Center Display
should look like this:
2. Touch the SYSTEM Select Touch Button once. The Information Center Display should look like this:
Select
EDIT PARAMETER
{1 MASTER TUNE
440Hz
3. Touch the PAGE “<” Select Touch Button six times. The Information Center Display should look like
this:
{7 FOOT SW.1
SELECT LES S/F
4. Now select the option you wish by doing the following:
Use the VALUE ">" Select Touch Button to scroll up through the options.
Use the VALUE "?" Select Touch Button to scroll down through the options.
This is a System Parameter, and this data CAN NOT be stored to a Preset. To see a total listing of all System Parameters, see the System
Parameter List.
NOTE: You can exit by touching the EDIT Select Touch Button.
Hammond XK-2 Quick Features Guide
 Loading...