

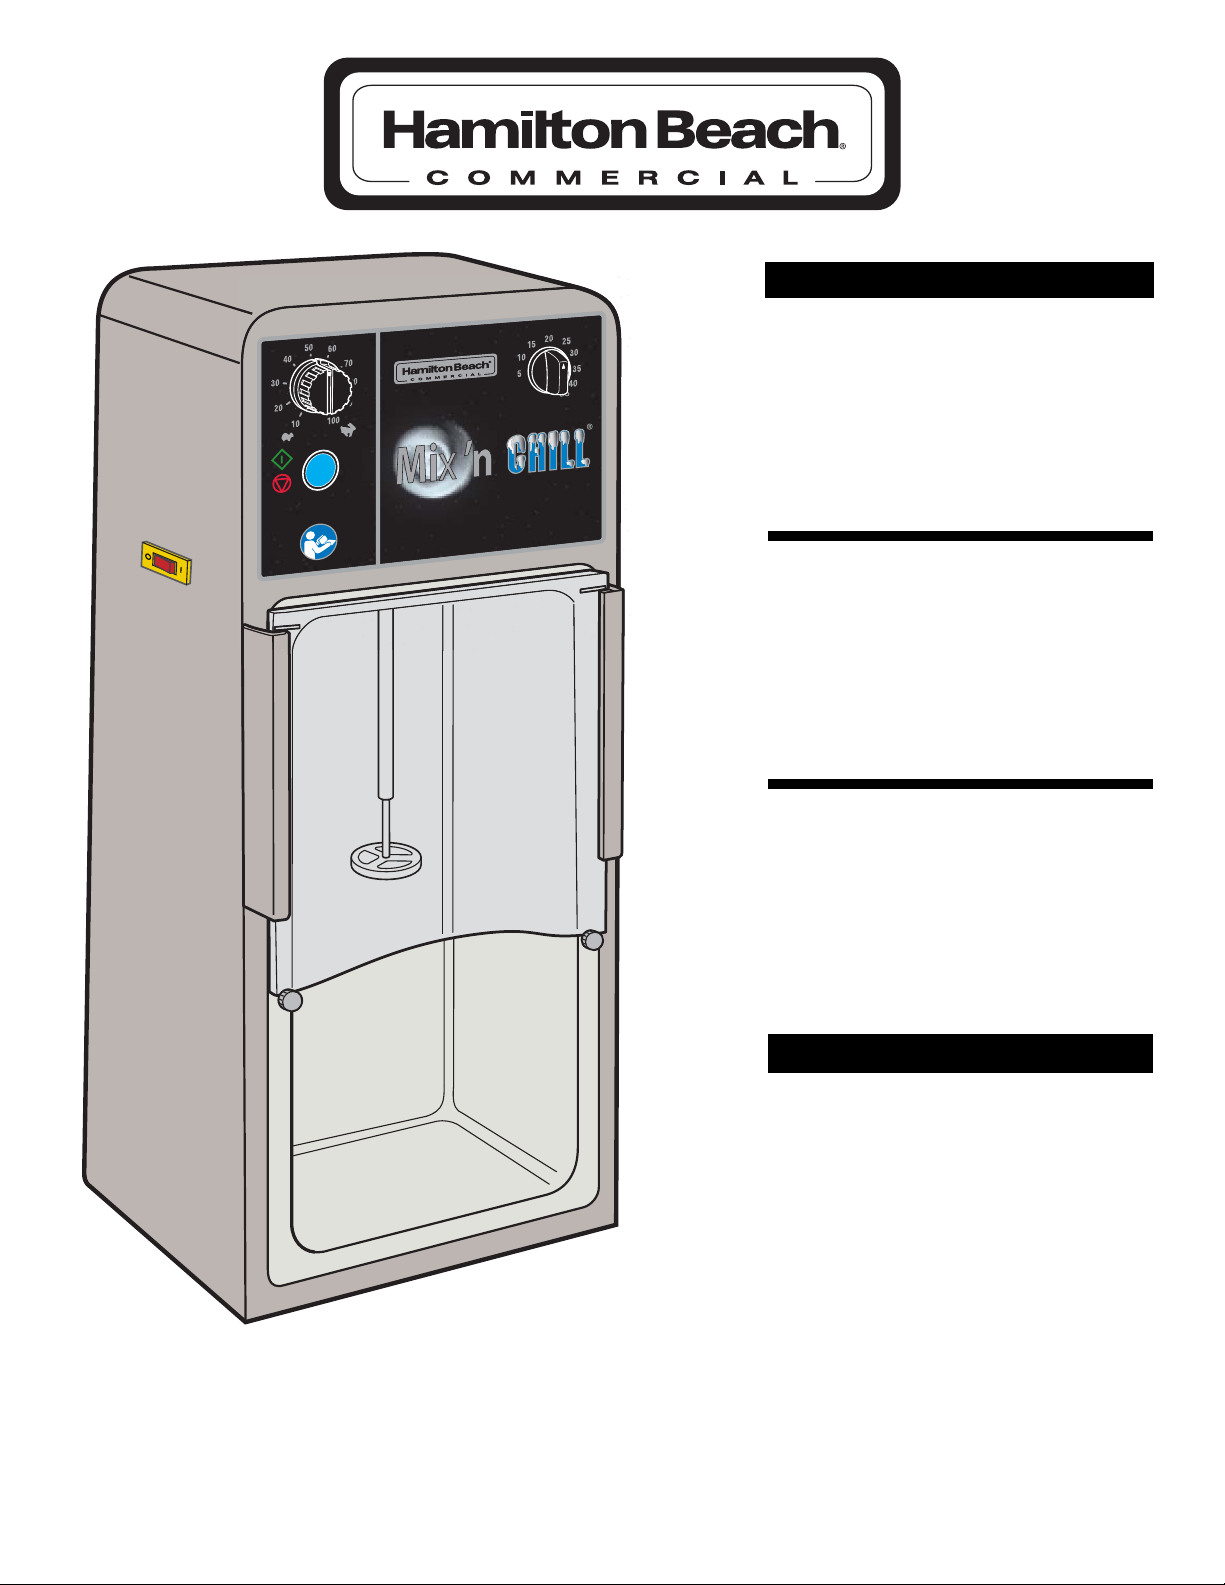
Hamilton Beach Commercial HMD900T-CE, HMD900T-UK Service Manual
840187100
Mix ’n Chill
®
Operation Manual
Page 2
Mix ’n Chill
®
Manual de uso
Página 22
Mix ’n Chill
®
Manuel d’utilisation
Page 12
READ BEFORE USE.
LIRE AVANT DʼUTILISER.
LEA ANTES DE USAR.
2
Mixer Safety
SAFETY PRECAUTIONS
WARNING – TO PREVENT ACCIDENTS RESULTING IN ELECTRIC SHOCK, PERSONAL INJURY OR
FIRE, AND IN ORDER TO LIMIT EQUIPMENT DAMAGE DUE TO MISUSE OF THE APPLIANCE, PLEASE
READ THIS MANUAL CAREFULLY AND FOLLOW IT STRICTLY. READING THIS MANUAL WILL HELP YOU
UNDERSTAND AND USE YOUR APPLIANCE CORRECTLY. READ THIS MANUAL IN ITS ENTIRETY AND
MAKE SURE THAT ANYONE WHO MAY USE THE MIXER ALSO READS THIS MANUAL BEFORE OPERATING
THE APPLIANCE.
– SAVE THESE IN STRUC TIONS –
Safety Alert Symbols
The following safety alert symbols are used throughout this manual to alert you to the safety hazards described below:
A caution or warning you must observe. Read the instructions carefully to ensure correct and safe
product use.
A prohibited action. Read the instructions carefully and never attempt the prohibited action.
A mandatory action. Read the instructions carefully and always follow the instructions.
The following safety alert symbols are referenced on the product and (or) within this Operation Manual:
Read the instructions carefully and always follow the instructions.
Electrical Shock Hazard. Read the instructions carefully and always follow the instructions.

3
wWARNING
• Connect unit to a grounded outlet only.
• Switch off the appliance and disconnect power supply plug from socket before cleaning.
• Only authorized specialists may repair the mixer or open the mixer housing.
• Make sure the mixer is resting on a sturdy level surface during operation. Failure to comply may
result in personal injury or equipment damage.
• If the supply cord is damaged, it must be replaced by the manufacturer, its service agent,
or a similarly qualified person in order to avoid a hazard.
• Do not use attachments not recommended or sold by the appliance manufacturer. Doing so may
result in fire, electric shock, personal injury, or equipment damage.
• Do not remove the ground connection.
• Do not use a plug adaptor.
• Do not use an extension cord.
• Do not use glass mixing containers.
• Do not put spoons or other utensils in the container when mixing.
• Do not use a water jet to clean or rinse any part of the mixer.
wCAUTION
• Inspect the agitator daily for wear.
• Replace the agitator every 90 days.
• Always use a mixing collar with paper cups or foam containers.
Your safety and the safety of others is very important.
We have provided many important safety messages
in this manual and on your appliance. Always read
and obey all safety messages. Read thoroughly and
understand the instructions within this manual before
operating or performing any maintenance on the
appliance. Before allowing operation of this appliance,
the operator must be trained and approved by
management staff.
The spindle mixer you have purchased is intended
for use in commercial and professional environments
requiring trained operators. Such environments may
include, but not be limited to, restaurants, bars,
fast-food outlets, hospitals, catering businesses, etc.
The spindle mixer is designed to mix drinks made from
yogurt, frozen custard, granita, hard or soft ice cream.
The mixer is also ideal for mixing candy, fruit, and nuts
into the shake. Use of this appliance outside of this
scope may result in fire, electric shock, severe personal
injury, or equipment damage.
This Operation Manual must be read and fully
understood before operating or performing any
maintenance on your appliance.
To the Operator
– SAVE THESE IN STRUC TIONS –
Mixer Safety

4
Mixer Safety
Carefully remove the mixer from the packaging and
take out all boxes or packets containing attachments
or specific items. Check that all of the parts have been
delivered, that the mixer operates as intended, and that
nothing has been damaged in transit. Contact the mixer
supplier to remedy any findings.
Unpacking
Position the mixer on a sturdy level surface and in
an open, well-lighted environment that provides easy
access to all controls, front and side. We recommend
that you position the mixer so that the working height
of the agitator and controls are appropriate for the
intended operator(s).
Installation
The equivalent continuous sound level when the mixer
is operating on no-load is less than 70dB(A).
Noise Level
Observe all electrical governing codes and ordinances.
A 220–240V ac only, 50–60 Hz, 15-amp, fused
electrical supply is required. (A time-delay fuse
is recommended.) It is recommended that a separate
circuit serving only this appliance be provided.
Connection
Check the agitator daily for wear or damage.
Replace the agitator every 90 days.
Maintenance
– SAVE THESE IN STRUC TIONS –
5
The wheeled bin symbol marked on this mixer signifies compliance with the EU Directive
as well as other similar legislation in effect after August 13, 2005. Therefore, it must be collected
separately after its use is completed and cannot be disposed of as unsorted municipal waste. The user
is responsible for returning the product to the appropriate collection facility, as specified by your local
code. For additional information regarding applicable local laws, please contact the municipal facility
and/or local distributor.
The ON (I)/OFF(O) power switch is provided with an
integral circuit breaker to automatically turn off (O) the
unit in overcurrent conditions that may occur due to
excessive loads to the motor. When this occurs, allow
the mixer to cool down for 30 minutes and then turn
the unit ON (I). If the unit does not operate, contact
Technical Service for further direction.
Safety
For assistance or replacement parts, call our
Technical Service number:
1-866-285-1087 (USA, Canada) or
910-693-4277 (all others)
8:00 a.m. – 5:00 p.m. EST Monday – Friday
www.commercial.hamiltonbeach.com
Technical Service
The mixer is in compliance with the following European
Directives and related national legislation:
• Machinery Directive 2006/42/EC
• Low Voltage Directive 73/23/EEC
• EMC Directive 89/336/EEC
Standard Conformity
– SAVE THESE IN STRUC TIONS –
Mixer Safety
Parts and Features
The parts and features of the Mix ʼn Chill®are shown on this page.
Become familiar with all parts and features before using the mixer.
Speed
control
knob
START/STOP
button
Agitator
assembly
(Replace every
90 days)
Spindle
shaft
(2) Splash pan
thumbscrews
Power cord
Timer knob
6
Splash
pan
Front of Mixer
Back of Mixer
Power
switch
and circuit
breaker
Splash
shield
Removing Splash Pan
7
Operating the Mixer
Observe all governing codes and ordinances. A fused electrical supply is required. (A time-delay fuse is
recommended.) It is recommended that a separate circuit serving only this appliance be provided.
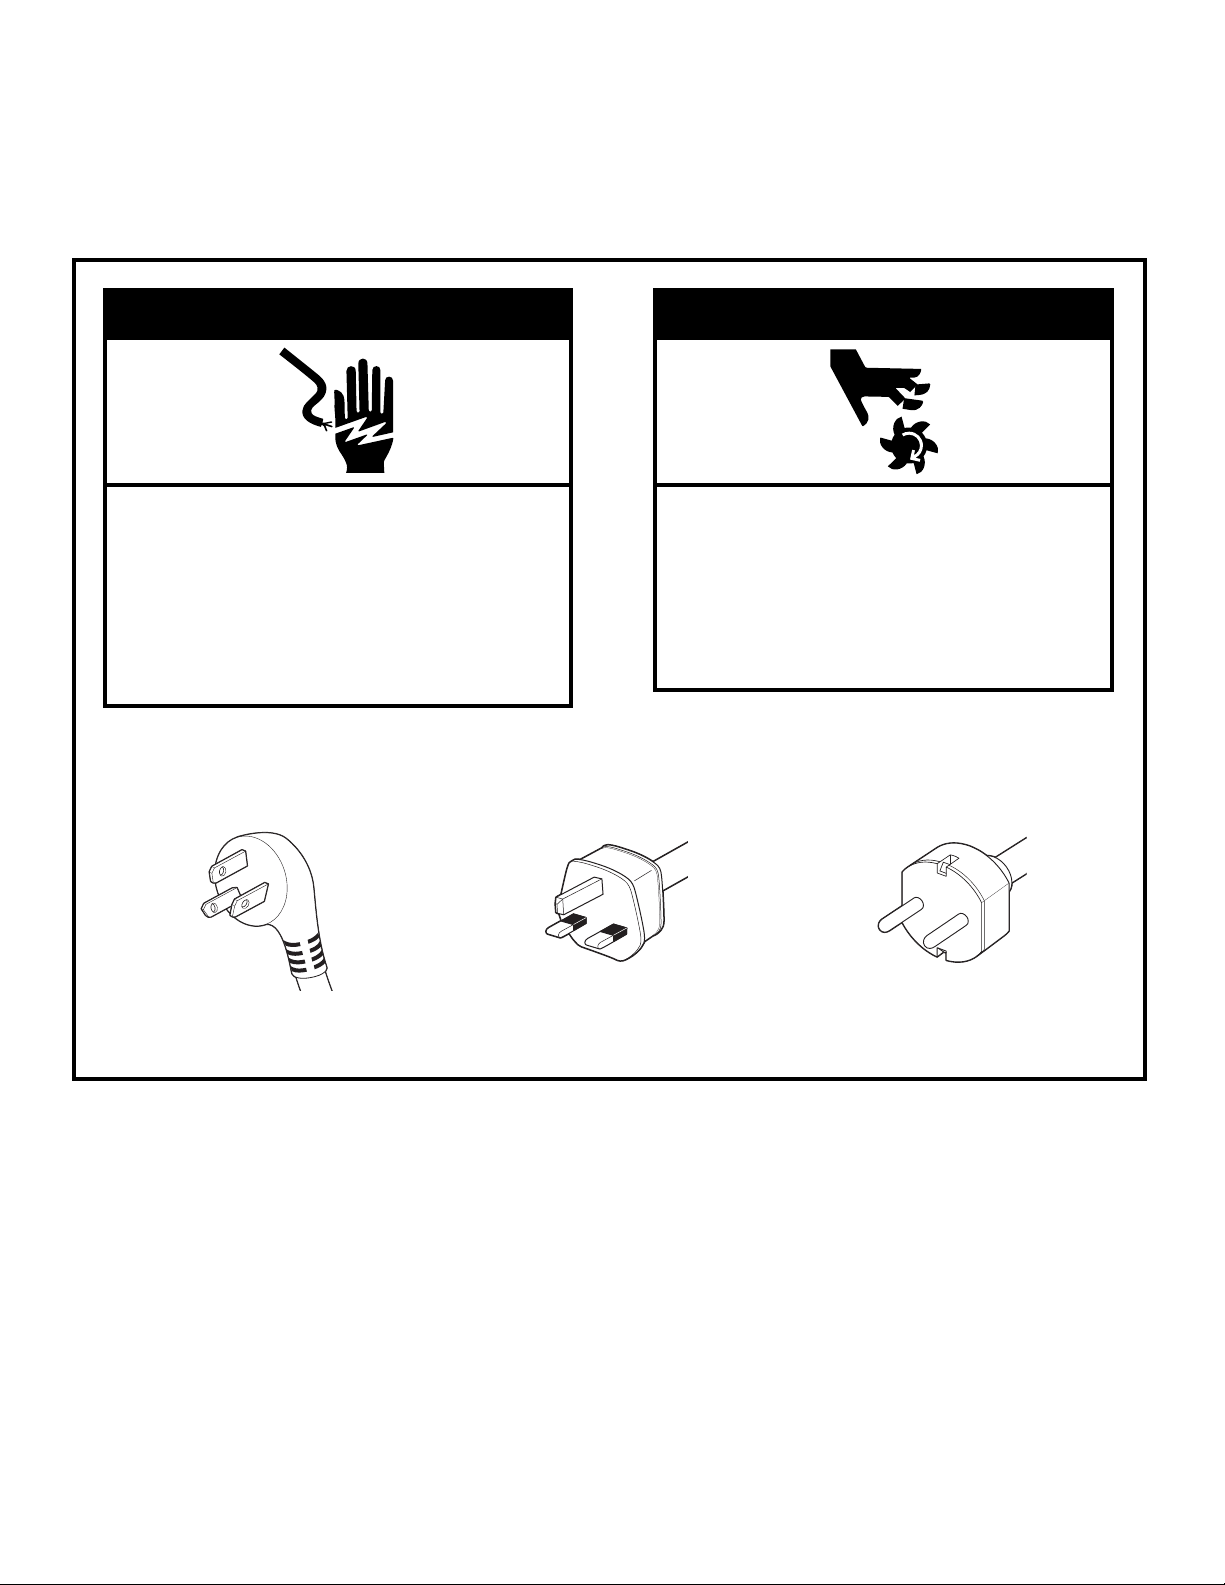
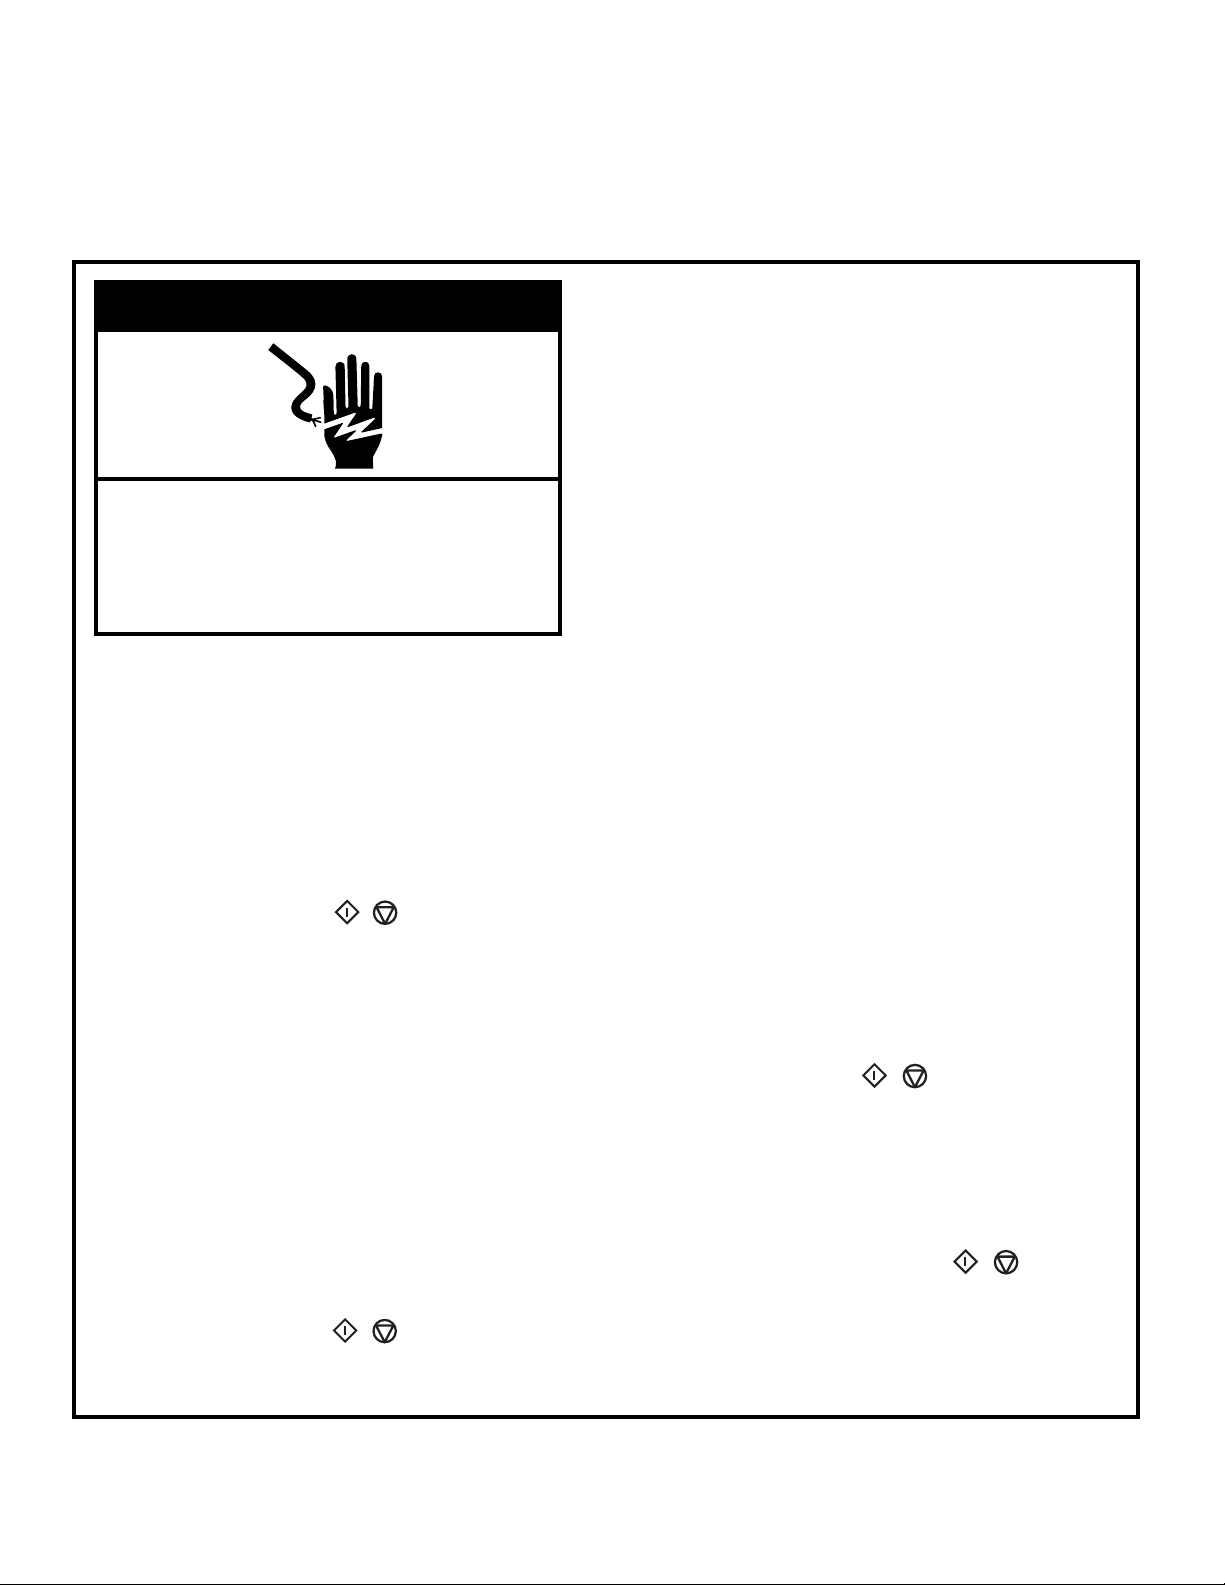
wWARNING
Electrical Shock Hazard
Plug into a grounded outlet.
Do not remove ground prong.
Do not use an adapter.
Do not use an extension cord.
Failure to follow these instructions can result
in death, fire, or electrical shock.
wWARNING
Cut Hazard
Agitator can cause glass mixing containers
to break.
Do not put spoon or other utensils in cup
when mixing.
Failure to follow these instructions can
result in broken bones or cuts.
China GB 2099-1
and GB 1002-1
United Kingdom/Ireland
BS 1363
Continental Europe
(Schuko) CEE 7/7
Depending on the model of your mixer, the plug will look like one of the following to meet power requirements:
Electrical Requirements

Mixing Containers
For mixing and sanitizing, it is recommended to
use the Hamilton Beach Stainless Steel Universal
Container, #110E.
Mixing Soft-Serve Drink/Dessert
The amount of time required for mixing will
depend on the temperature of the soft-serve,
overrun %, and the type of flavoring ingredients.
A basic soft-serve mix recipe follows:
• 240–300 ml of soft-serve
• 40 ml flavoring ingredients
8
Operating the Mixer
Mixing a Drink
Mixing Hard Ice Cream
Mix ʼn Chill®can also handle mixing hard ice cream
and mix-ins. A basic recipe follows:
• 60 ml cookies or candies, or other mix-ins
• Four rounded scoops, or approximately 1355 ml,
of hard ice cream
• 80 ml milk
Place mix-ins in container first. Add ice cream and milk.
Mixing time will depend on the consistency of the ice
cream.
1. Place the ingredients to be mixed into
an appropriate container. See the “Mixing
Containers” section above.
2. Set the speed control for the desired mixing
speed. NOTE: You will have to develop the
speed and time required to obtain the desired
results with various mixes.
3. Press the START/STOP button ( / ) to
turn the unit on. NOTE: The agitator MUST
always be on before it comes in contact with the
ingredients.
4. Slowly insert the container up into the mixer
until the agitator comes in contact with the
ingredients. Move the container up and down
for thorough mixing. The splash shield will move
up and down when it comes in contact with your
hand or wrist.
5. When the mixing is complete, slowly lower and
remove the container from the mixer and press
the START/STOP button ( / ) to turn the
unit off.
9
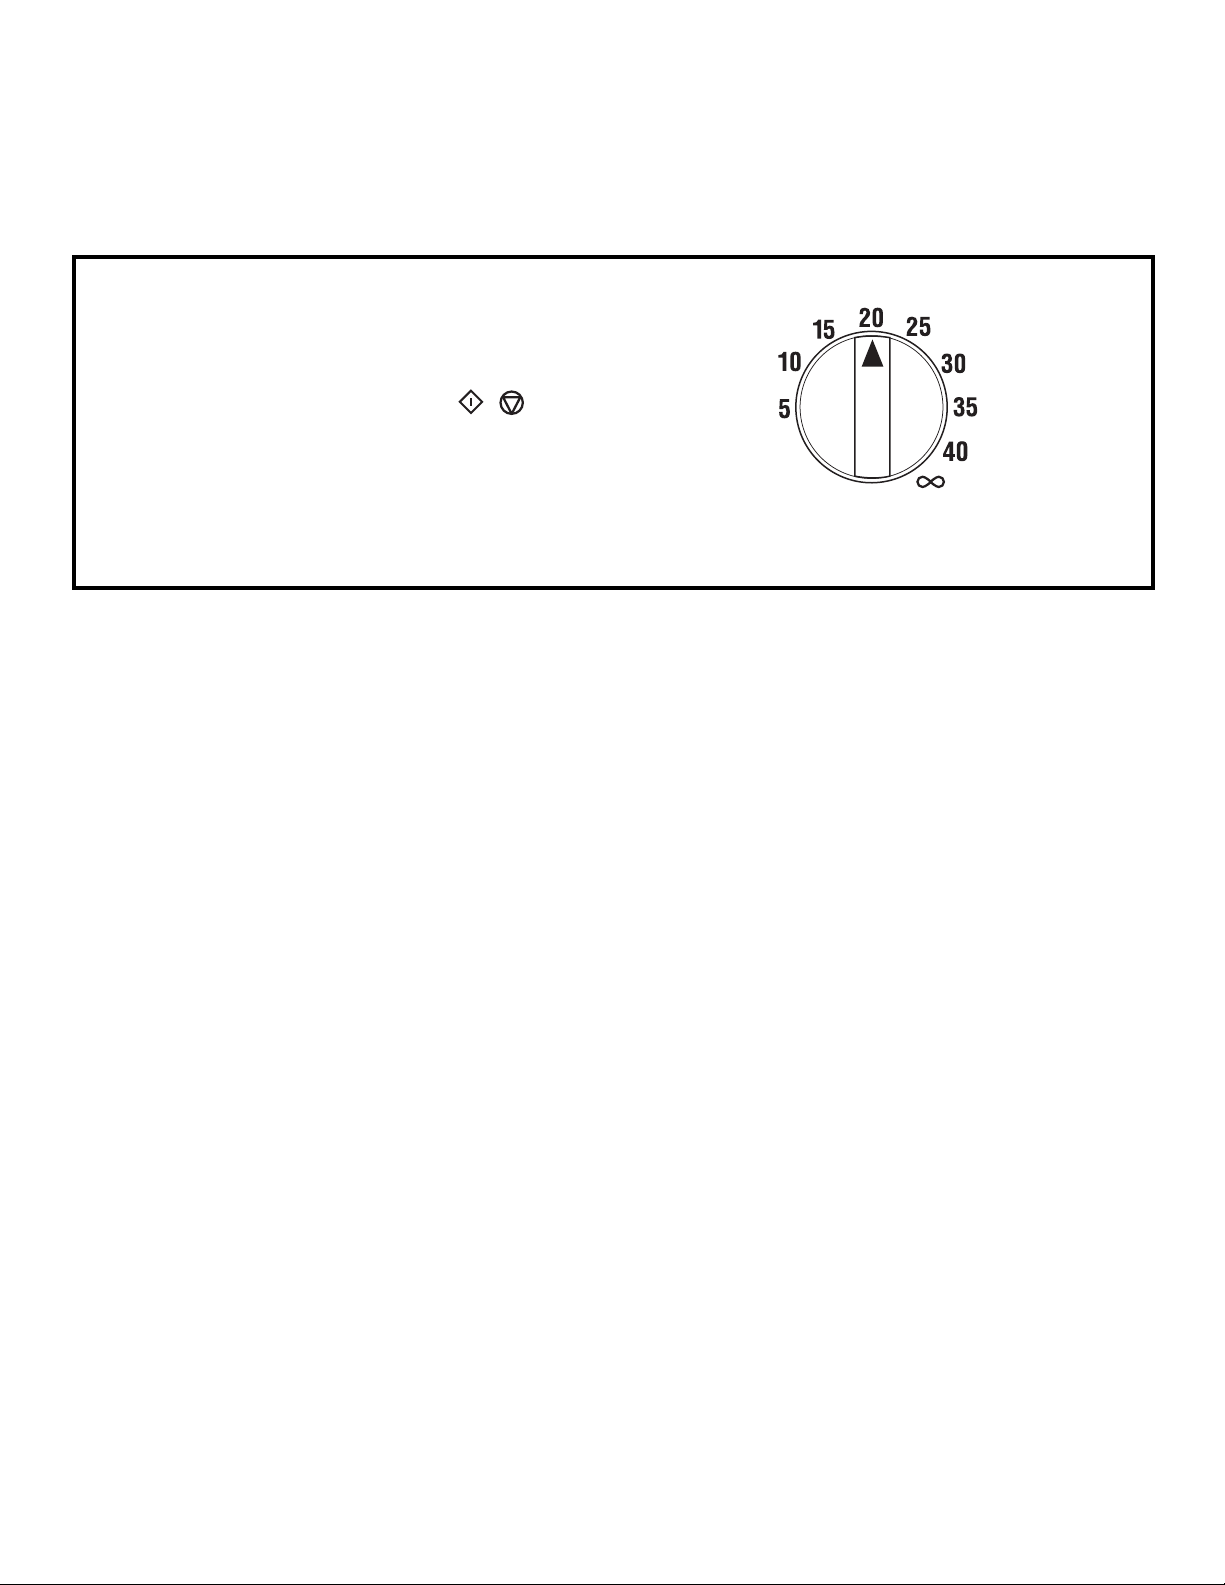
Using the Timer
1. The Timer Knob allows the operator to set a mix
time in 5-second increments between 5 and 40
seconds.
2. When the START/STOP button ( / ) is
pressed, the unit will mix for the preset amount
of time, then beep 3 seconds before the end of
the cycle.
3. The infinity
∞
setting allows the mixer to run
up to 3 minutes before turning off automatically.
Mixing a Drink
Operating the Mixer
10
Cleaning the Mixer
Partial Cleaning
The mixer agitator should be cleaned frequently
between operations. This will eliminate any clogged
ice cream or candy pieces. NOTE: We recommend
using the Hamilton Beach #110E Container with this
mixer.
1. Fill a metal container to
1
⁄3 capacity with warm
water (minimum 120°F) and add a drop of liquid
detergent.
2. Set the speed control to setting 35 and press the
START/STOP button (/).
3. Move the container up and down with the agitator
immersed for 30 seconds.
4. At the end of the 30-second cycle, remove the
container.
5. Fill container with clear, warm water (minimum
120°F) and repeat steps 2, 3, and 4.
6. Unplug the mixer.
7. Wipe off the agitator and the inside of the splash
pan with a damp cloth.
8. Plug in the mixer.
Full Cleaning
1. Fill a metal container to 1⁄3 capacity with warm
water (minimum 120°F) and add a drop of liquid
detergent.
2. Set the speed control to setting 35 and press the
START/STOP button (/).
3. Move the container up and down with the agitator
immersed for 30 seconds.
4. At the end of the 30-second cycle, remove the
container.
5. Fill the container with clear, warm water (minimum
120°F) and repeat steps 2, 3, and 4.
6. Unplug the mixer.
7. The clear splash shield is removed by pulling it
out of the top of the splash shield guides.
8. The agitator assembly is removed from the spin-
dle by holding the agitator shaft and unscrewing
the agitator.
9. The stainless steel pan is removed by unscrewing
the 2 thumbscrews on both sides of the pan and
pulling the pan forward and down. The thumbscrews
will stay attached to the splash pan.
10. The stainless steel mixing cups and other parts
removed in steps 7 through 9 may be washed in
a commercial dishwasher or hand-washed using
warm water (120°F) and liquid detergent.
11. The mixer body and motor splash pan are to be
washed by using a clean, soapy cloth.
12. After washing, parts should be rinsed in clean,
fresh, warm water (minimum 95°F).
13. Reassemble mixer prior to sanitizing.
14. Plug in the mixer.
Sanitizing Instructions
1. Fill the container to 1⁄3 capacity with recommended
sanitizing solution: 1 tbsp. household bleach per
1 gallon of 50°–70°F water.
2. Set the speed control to setting 35 and press the
START/STOP button (/).
3. With the splash shield in position, place
the container of sanitizing solution into the mixer
and move the container up and down to clean the
agitator for 1 minute. Remove the container.
4. To dry, run on setting 35 for 30 seconds.
NOTE: Do not rinse after sanitizing is complete.
5. Press the START/STOP button ( / ) to
turn off.
wWARNING
Electrical Shock Hazard
Disconnect power before cleaning.
Replace all parts before operating.
Failure to do so can result in death
or electrical shock.
Cleaning and Sanitizing the Container, Spindle, and Agitator
 Loading...