

Hamilton Beach HBF1100, HBF1100S Operation Manual

HIGHPERFORMANCE
FOOD BLENDER
Operation Manual
Page 2
MÉLANGEUR
HAUTE
PERFORMANCE
Manuel d’utilisation
Page 9
LICUADORA DE
ALIMENTOS DE
ALTO DESEMPEÑO
Manual de Uso
Página 16
READ BEFORE USE.
LIRE AVANT UTILISATION.
LEA ANTES DE USAR.
Le invitamos a leer cuidadosamente este
instructivo antes de usar su aparato.
For more visit www.hamiltonbeachcommercial.com
Good Thinking
HBF1100/HBF1100S Series
1 Gallon/4 L
840249500
9/15
®

IMPORTANT SAFETY INSTRUCTIONS
WARNING – When using electrical appliances, basic safety precautions should
always be followed to reduce the risk of fire, electric shock, and/or injury to persons,
including the following:
1. Read the Operation Manual before using
blender. Keep Operation Manual handy.
2. Before first use, wash container
assembly in hot, soapy water. Do NOT
place in dishwasher.
3. Plug into a grounded outlet.
4. Do not remove ground.
5. Do not use an adapter.
6. Do not use an extension cord.
7. Disconnect power before cleaning or
servicing.
8. To reduce risk of personal injury, unplug
cord from outlet when not in use and
before putting on or taking off parts.
9. Unplug the blender and inspect the
power cord insulation for cracks on
a weekly basis. Refer to “Technical
Services” for repair or replacement.
10. To protect against electrical shock, do
not immerse cord, plug, or blender base
in water or any other liquid.
11. Do not spray the base with a highpressure spray gun.
12. Extreme caution must be used when
moving an appliance containing hot oil or
other hot liquids.
13. Do not use appliance for other than
intended use.
14. This appliance is not intended for use
by persons with reduced physical,
sensory, or mental capabilities, or lack
of experience and knowledge, unless
they have been given supervision
or instruction concerning use of the
appliance by a person responsible for
their safety.
15. Not intended for use by or near children.
Children should be supervised to ensure
that they do not play with the appliance.
16. The use of accessory attachments
not recommended by the appliance
manufacturer may cause injuries.
17. To reduce risk of personal injury and to
prevent damage to blender or container
and cutter assembly, DO NOT insert
utensils into blender container while
operating blender.
18. Do not store any kitchen utensils in the
container because the blender would be
damaged if inadvertently turned on.
19. To prevent possibility of serious personal
injury, keep hands out of blender
container while operating blender.
20. Avoid contacting moving parts. Switch
OFF (O) the appliance and disconnect
from power supply before changing
accessories or approaching parts that
move in use.
21. Blades are sharp. Handle carefully.
22. If cutter assembly blades are loose,
discontinue use immediately and replace
cutter assembly. Do not attempt to repair
or tighten cutter assembly.
23. Inspect container and cutter assembly
daily. Do not use broken, chipped, or
cracked container. Check cutter for wear,
nicks, or broken blades. Do not use
broken, loose, or cracked cutting blades.
24. Do not use outdoors.
25. This appliance is intended for short
periods of operation, with a rated
operating time of 3 minutes.
26. Do not leave blender unattended while it
is operating.
27. To prevent damage to blender, container,
or cutter assembly, DO NOT move or
shake blender while in operation. If
blending action stops during operation,
turn blender OFF (O), remove container
from base, remove container cover, and
use a thin rubber spatula to push mixture
towards cutters.
28. When blending hot liquids, remove
center piece of two-piece lid. Hot liquids
may push lid off jar during blending.
To prevent possible burns: Do not fill
blender jar beyond the 1 quart (946 ml)
level. With the protection of an oven mitt
or thick towel, place one hand on top of
lid. Keep exposed skin away from lid.
Start blending at lowest speed.
29. Always operate blender with container
cover in place.
2

30. This blender is designed with motor
overload protection. If the motor stops
during operation due to overheating,
unplug the unit and allow it to cool down
for 15 minutes. Plug unit back in after 15
minutes to resume normal operation.
31. The normal function of this product may
be disturbed by strong electromagnetic
interference. If this occurs, simply reset
the product and resume normal operation
by following the operation manual. If
normal operation cannot be resumed,
place the product in a different location.
– SAVE THESE IN STRUC TIONS –
32. Do not operate any appliance with a
damaged supply cord or plug, or after
the appliance malfunctions or has been
dropped or damaged in any manner.
Supply cord replacement and repairs
must be conducted by the manufacturer,
its service agent, or similarly qualified
persons in order to avoid a hazard. Call
the provided customer service number
for information on examination, repair, or
adjustment.
3
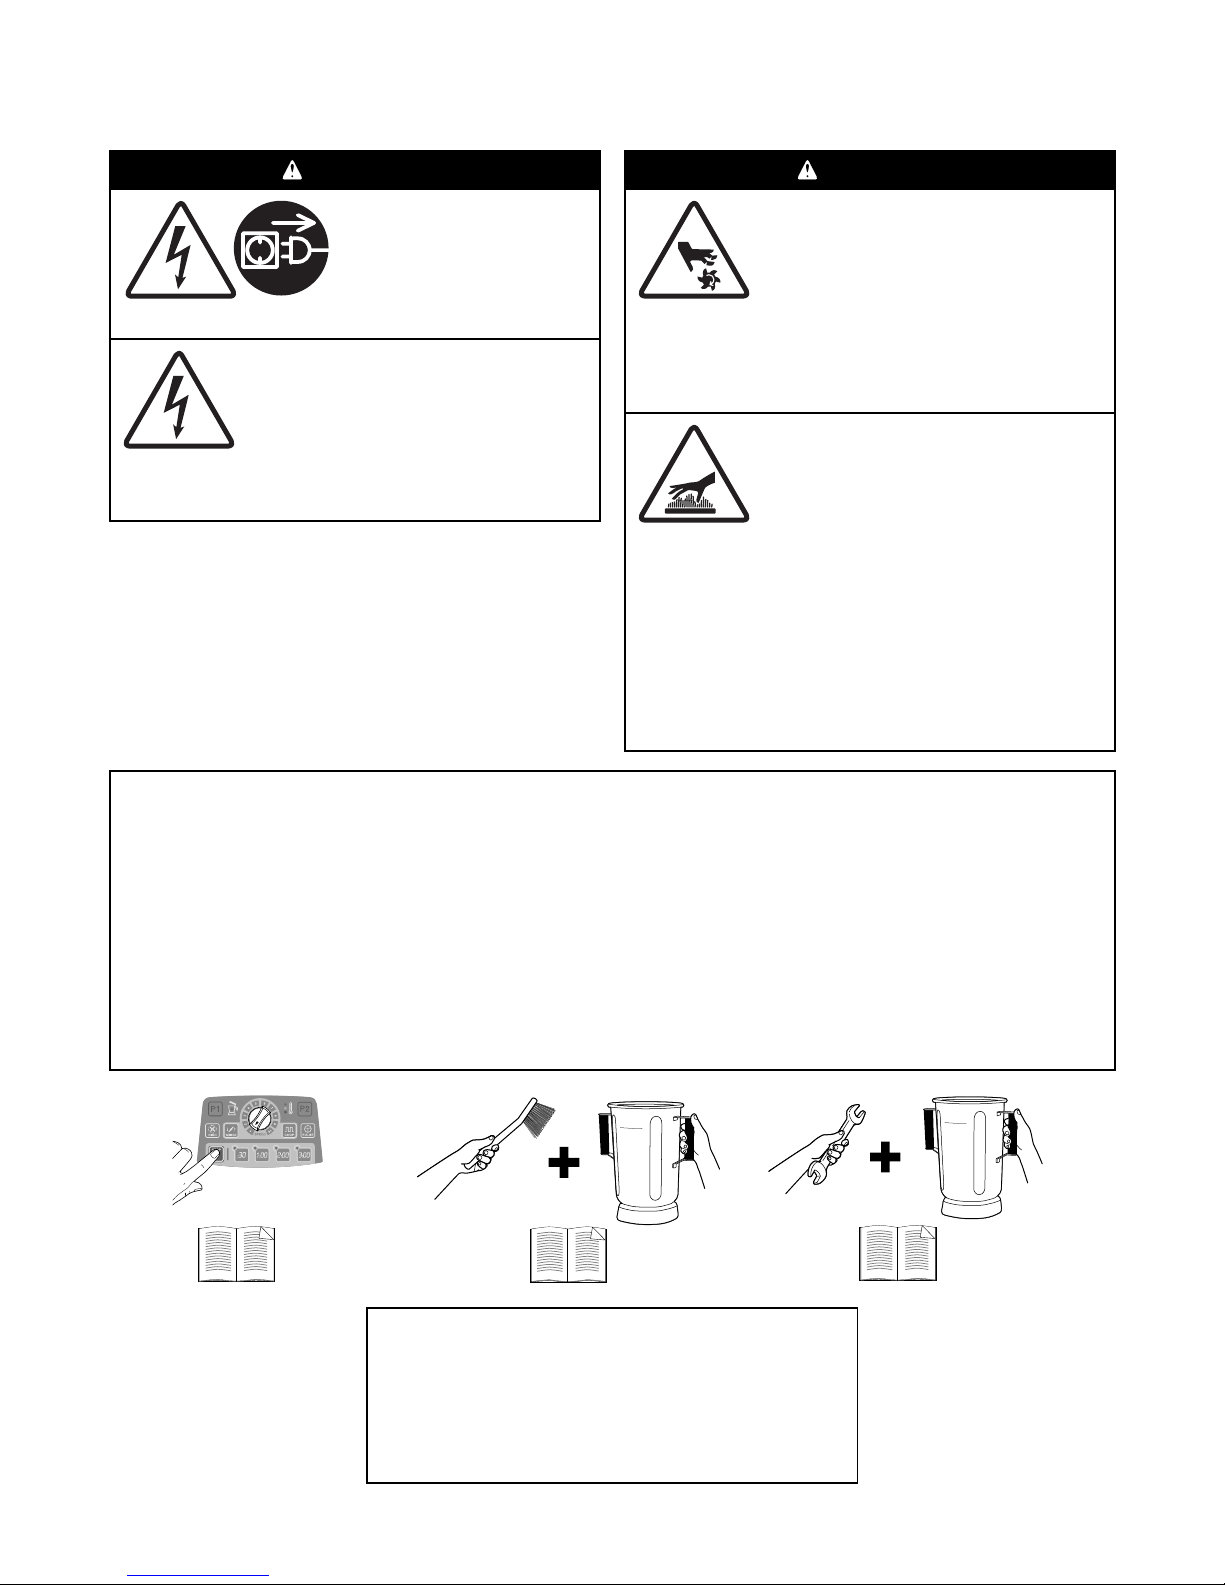
Blender Safety
WARNING
Electrical Shock Hazard
Disconnect power before
cleaning blender base.
Failure to follow these
instructions can result in
death or electrical shock.
Electrical Shock Hazard
Plug into a grounded outlet.
Do not remove ground.
Do not use an adapter.
Do not use an extension cord.
Failure to follow these instructions can
result in death, fire, or electrical shock.
WARNING
Cut Hazard
The blending blade is sharp.
Always place lid on container when
blending.
Do not put hands, spoons, or other
utensils in container when blending.
Failure to follow these instructions can
result in broken bones, cuts, or other
injuries.
Burn Hazard
Always use caution when blending
hot contents.
When blending hot liquids, remove
center piece of two-piece lid. Hot
liquids may push lid off jar during
blending. To prevent possible burns:
Do not fill blender jar beyond the
1 quart (946 ml) level. With the
protection of an oven mitt or thick
towel, place one hand on top of lid.
Keep exposed skin away from lid. Start
blending at lowest speed.
Failure to follow these instructions can
result in burns.
Sanitizing
Sanitize using 1 tablespoon (15 ml) of household bleach per 1 gallon (3.8 liter) of clean, cool water (60°F/16°C),
mixed according to the instructions on the bleach.
1. Fill container with sanitizing solution, replace cover and filler cap, and run on LOW (1) speed for 2 minutes.
Empty container.
2. Wipe exterior with soft cloth dampened with sanitizing solution.
3. Immerse lid, blending jar with cutter assembly, and dosing cup in sanitizing solution for 2 minutes.
4. Place empty container on base and run on HIGH (10) speed for 2 seconds to remove any moisture from the
cutter assembly.
5. When ready to use, rinse with clean water.
22
23
25
Technical Services
For assistance or replacement parts, call our
Technical Services number:
+910-693-4277 or 1-866-285-1087
8 a.m. – 5 p.m. EST Monday – Friday
www.hamiltonbeachcommercial.com
4

Parts and Features
Dosing Cup
Lid Magnet
Dosing Cup
Lid Magnet
(not visible)
Plastic
Blender
Jar
Stainless
Steel
Blender
Jar
Lid
Lid Magnet (not visible)
Lid
Lid Latch
Max Fill Line
Overmolded
Handle
Jar
Collar
Jar Pad
Base
Memory Card Cover
Control Panel
To load custom programs with the memory card:
1. Turn OFF (O) and unplug unit.
2. Remove the memory card cover.
3. Insert memory card.
4. Plug in unit and turn ON (Reset) (I).
5. Wait 3–5 seconds.
6. Turn OFF (O) and unplug unit.
7. Remove memory card and reinstall memory
card cover.
Clutch
ON/OFF
(I/O) Power
Switch
5

Using the Controls
Variable Speed Control
Speeds 1–10. Works with VARIABLE or CHOP functions.
HIGH
Speed starts LOW and ramps to HIGH.
VARIABLE
Works with Variable Speed Control.
CHOP
Works with Variable Speed Control.
PULSE
Press and hold for desired time.
P1 and P2
Preset program buttons. P1 and P2 can be changed to a different
preprogrammed cycle.
Interlock Lid Indicator Light
The red light will flash when lid is not in place.
The red flashing light will stop when lid is in place and blending can
start.
Thermal Overload Protection
Temperature gauge alerts operator if motor overheats while blending
back-to-back batches.
LED Lighted Preset Timer Panel
Programmed for 30 seconds, 1 minute, 2 minutes, and 3 minutes.
NOTE: 3 minutes is the default setting.
6
STOP
Press STOP or any button to stop operating.

Operation
• Plug in blender.
• Turn switch ON (I).
• The 3-minute (3:00) LED light is the default time on the control panel when plugged in.
• Interlock lid red indicator light will be flashing.
• When jar and lid are in place, light will stop flashing.
• START by using the controls below.
• Select an option:
• Press any timer button (:30, 1:00, 2:00, 3:00) and press HIGH, OR
• Press any timer button (:30, 1:00, 2:00, 3:00), press VARIABLE, and turn variable speed dial, OR
• Press any timer button (:30, 1:00, 2:00, 3:00), press CHOP, and turn variable speed dial, OR
• Press PULSE. Pulse is not associated with the timer buttons.
• Press STOP or any button to stop operation.
Troubleshooting Guide
Problem . . . Solution . . .
Blender fails to start
or stops while it is
running and cannot be
restarted.
Ingredients will not
mix properly.
• Check to see if unit is securely plugged into an electric outlet.
• Check to see if the fuse for the electric outlet has blown or if a circuit breaker has
tripped.
• Check control panel for red flashing interlock lid light. Realign lid. Start blending.
• The motor is overheated. Try mixing smaller batches or running for shorter cycle
times. Allow motor to cool between batches. See “Motor Cooling Steps” on page
26 for additional details.
• Check to see if enough liquid has been added to the ingredients. Mixture should
be fluid and free-running at all times.
• Solid pieces are too large. Cut pieces smaller.
• Cutters are not sharp or are damaged. Inspect container and cutter assembly
daily. Replace container and cutter assembly if damaged.
• Check to see if cutter assembly is installed properly.
• Select speed to create a fluid blend.
Maintenance
Inspect the blender and its various parts and replace as follows:
Daily Unplug the blender, remove the container from the base, and then inspect the container
and cutter assembly for wear, nicks, and broken or loose blades. If the blades are nicked,
broken, or loose, discontinue use immediately and replace the container or cutter
assembly. See “Replacement Parts” on website www.hamiltonbeachcommercial.com.
Weekly Unplug the blender, and then inspect the power cord insulation and power plug for cracks.
Refer to “Technical Services” for repair or replacement. Remove jar from blender base.
Inspect the cutter assembly by rotating the drive end of the cutter assembly by hand. It
should turn smoothly. If it does not, replace the container or cutter assembly.
7

Notes
8

CONSIGNES DE SÉCURITÉ IMPORTANTES
AVERTISSEMENT – Pour utiliser un appareil électroménager, vous devez toujours
prendre des mesures élémentaires de sécurité pour réduire le risque d’incendie,
d’électrocution et/ou de blessure corporelle, en particulier les mesures suivantes :
1. Liser le Manuel d’utilisation avant
d’utiliser votre mélangeur. Conserver le
Manuel d’utilisation à portée de votre
main.
2. Avant la première utilisation, laver
l’ensemble conteneur avec de l’eau
chaude savonneuse. N’UTILISER PAS de
lave-vaisselle.
3. Brancher l’appareil à une prise avec mise
à la terre.
4. N’enlever jamais la mise à la terre.
5. N’utiliser jamais un adaptateur.
6. N’utiliser jamais une rallonge.
7. Débrancher l’électricité avant de nettoyer
ou de réparer votre appareil.
8. Pour réduire le danger de blessure
personnelle, débrancher le cordon de
la prise électrique quand votre appareil
n’est pas en fonctionnement, et avant d’y
mettre ou d’en retirer des pièces.
9. Débrancher le mélangeur et inspectez
toutes les semaines l’isolation du cordon
d’alimentation pour rechercher des
fissures. Adressez-vous au « Services
techniques » pour leur réparation ou leur
remplacement.
10. Pour vous protéger contre une
électrocution, n’immerger jamais le
cordon, la fiche ou la base du mélangeur
dans de l’eau ou dans tout autre liquide.
11. Ne pulvériser jamais la base à l’aide d’un
pistolet à pulvérisation à haute pression.
12. Vous devez faire extrêmement attention
quand vous déplacez un appareil
électroménager qui contient de l’huile
chaude ou tout autre liquide chaud.
13. N’utiliser jamais cet appareil à des
fins autres que celles auxquelles il est
destiné.
14. L’utilisation de cet appareil n’est pas
prévu pour les porteurs d’handicaps
(y compris les enfants) de type
physique, sensoriel ou mental, ou
pour les personnes sans expérience ni
connaissance, à moins qu’elles aient été
convenablement formées ou contrôlées
par une personne responsable de leur
sécurité.
15. Une surveillance étroite est requise pour
tout appareil utilisé par ou près des
enfants. Surveiller que les enfants ne
jouent pas avec l’appareil.
16. L’utilisation d’accessoires non
recommandés par le fabricant pourrait
provoquer des blessures.
17. Pour réduire le danger de blessure
personnelle et pour empêcher tout
dommage au mélangeur ou au récipient
et à l’ensemble de couteaux, N’INSERER
JAMAIS d’ustensile de cuisine dans le
récipient du mélangeur quand vous faites
fonctionner le mélangeur.
18. Ne ranger aucun ustensile de cuisine
dans le récipient, parce que le mélangeur
pourrait être endommagé s’il est mis en
marche par accident.
19. Pour empêcher la possibilité de blessures
personnelles sérieuses, ne mettre
jamais vos mains dans le récipient du
mélangeur quand vous faites fonctionner
le mélangeur.
20. Éviter de toucher des pièces en
mouvement. Mettre l’appareil hors
tension (O) et débrancher l’alimentation
électrique avant de changer les
accessoires ou d’approcher des pièces en
mouvement pendant le fonctionnement.
21. Les lames sont aiguisées. Manipuler-les
avec soins.
22. Si les lames du mécanisme de coupe
sont lâches, arrêtez-vous immédiatement
d’utiliser votre appareil et remplacer le
récipient. N’essayer jamais de réparer ou
de resserrer le mécanisme de coupe.
23. Inspecter le récipient et le mécanisme de
coupe chaque jour. N’utiliser jamais un
récipient cassé, ébréché ou fendu. Vérifier
l’ensemble de coupe à la recherche de
lame cassée, ébréchée, ou usée. N’utiliser
jamais de lames cassées ou ébréchées.
24. N’utiliser jamais votre appareil à
l’extérieur.
25. Cet appareil doit être utilisé pendant
des périodes courtes, avec une durée
d’opération normale de 3 minutes.
9
 Loading...