

Hamilton Beach 80374, 80384 User Manual
Coffee Grinder
Moulin à café
English .................................................. 2
USA: 1-800-851-8900
Français ................................................ 8
Canada : 1-800-267-2826
Español .............................................. 16
En México: 01-800-71-16-100
Le invitamos a leer cuidadosamente este
instructivo antes de usar su aparato.
Molino de café
840140400
READ BEFORE USE
LIRE AVANT D’UTILISER
LEA ANTES DE USAR
840140400 ENv00.qxd 7/26/05 2:27 PM Page 1

3
2
IMPORTANT SAFEGUARDS
SAVE THESE INSTRUCTIONS
When using electrical appliances, basic safety precautions should
always be followed including the following:
1. Read all instructions.
2. To protect against risk of electrical shock, do not put unit, cord
or plug in water or other liquid.
3. Close supervision is necessary when any appliance is used by
or near children.
4. Unplug from outlet when not in use, before putting on or taking
off parts, and before cleaning.
5. Avoid contacting moving parts.
6. Do not operate any appliance with a damaged cord or plug or
after the appliance malfunctions, or is dropped or damaged in any
manner. Call our toll free customer service number for information
on examination, repair or electrical or mechanical adjustment.
7. The use of attachments not recommended or sold by the
manufacturer may cause fire, electric shock or injury.
8. Do not use outdoors.
9. Do not let cord hang over edge of table or counter or touch hot
surfaces including stove.
10. Check grinding chamber for presence of foreign objects before
using.
11. Do not use appliance for other than intended purpose.
12. Do not remove cover until blade has completely stopped rotating.
This appliance intended for household use only.
This appliance is equipped with a polarized plug. This type of plug has
one blade wider than the other. The plug will fit into an electrical outlet
only one way. This is a safety feature intended to help reduce the risk of
electrical shock. If you are unable to insert the plug into the outlet, try
reversing the plug. If the plug should still fail to fit, contact a qualified
electrician to replace the obsolete outlet. Do not attempt to defeat the
safety purpose of the polarized plug by modifying the plug in any way.
CONSUMER SAFETY INFORMATION
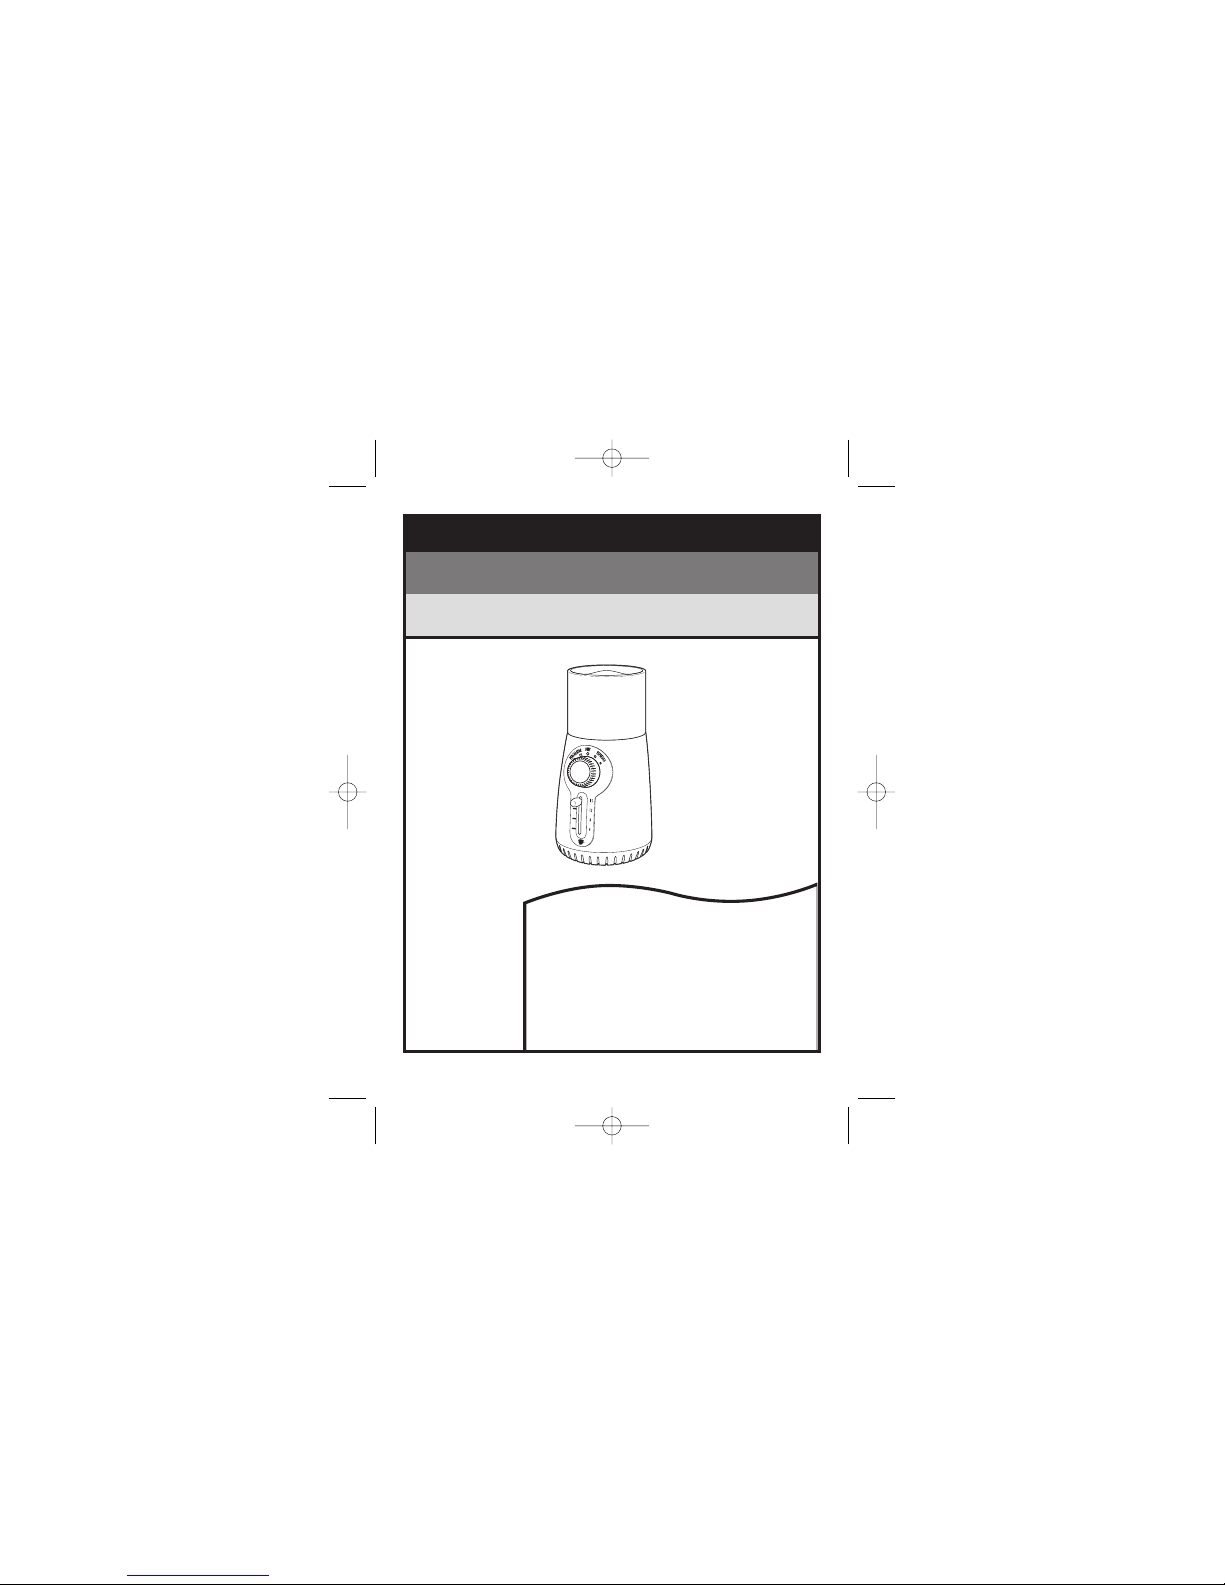
Parts and Features
1. Cover
2. Removable Grinding Chamber
3. ON/OFF Button
4. Base
5. Base with Cord Wind
6. Cup Selector Switch
7. Grind Setting Dial
8. Coffee Brush*
9. Whole Bean Scoop*
*on selected models only
840140400 ENv00.qxd 7/26/05 2:27 PM Page 2
5
4
How to Use
1. Before First Use: Clean coffee grinder.
2. Remove cover, if locked in place, by turning counter-
clockwise to unlock position, then lift straight up.
3. Twist grinding chamber clockwise to locked position.
(Refer to LOCKED symbol on back of unit.
Make sure that the grinding chamber is FIRMLY locked
into position. The grinding chamber will “click” when
locked into position.
4. Pour whole coffee beans directly into grinding chamber
and fill to desired level. Use the convenient cup markings,
which correspond to cups of brewed coffee.
5. Place cover onto grinder. Make sure the arrow on cover is
aligned with the unlock symbol on side of grinder. Turn lid
clockwise to locked position.
6. Hold plug and pull slowly to release stored cord. Plug into
outlet.
7. Rotate Grind Setting Dial to select desired fineness of
grind:
PERCOLATOR coarse grind for French Press or percolators
DRIP medium grind for automatic drip coffeemakers
ESPRESSO fine grind for steam or pump espresso machines
NOTE: There are two additional settings that will yield
results in between the three shown.
8. Move Cup Selector Switch to total number of cups to be
ground.
9. Press ON/OFF button and release once grinding has
begun. The coffee grinder will stop automatically when
grinding is complete. To stop grinding cycle at any time,
push ON/OFF button. If ON/OFF button is pressed again,
grinder will start from beginning of timed cycle.
10. Remove cover and grinding chamber from base. Pour
ground coffee into paper or permanent filter. A brush can
be used to remove remaining grounds.
11. When finished, unplug grinder. Clean grinding chamber
and rewind the cord. To rewind cord: turn base clockwise,
using either the interior finger grips or the outside of base.
NOTE: Grinder will only operate with cover in locked
position.
CUPS
1-4
5-8
9-12
13-15
SELECT
4
8
12
15
LOCKED
UNLOCKED
840140400 ENv00.qxd 7/26/05 2:27 PM Page 4
7
6
This warranty applies to product purchased in the U.S.
or Canada.
LIMITED WARRANTY
This product is warranted to be free from defects in material and workmanship for a
period of one (1) year for Hamilton Beach products or one hundred eighty (180) days
for Proctor-Silex and Traditions products from the date of original purchase, except as
noted below. During this period, we will repair or replace this product, at our option, at
no cost. THE FOREGOING WARRANTY IS IN LIEU OF ANY OTHER WARRANTY,
WHETHER EXPRESS OR IMPLIED, WRITTEN OR ORAL INCLUDING ANY
WARRANTY OF MERCHANTABILITY OR FITNESS FOR A PARTICULAR PURPOSE.
ANY LIABILITY IS EXPRESSLY LIMITED TO AN AMOUNT EQUAL TO THE
PURCHASE PRICE PAID, AND ALL CLAIMS FOR SPECIAL, INCIDENTAL AND
CONSEQUENTIAL DAMAGES ARE HEREBY EXCLUDED. There is no warranty with
respect to the following items that are subject to wear, which may be supplied with
this product: glass parts, glass containers, cutter/strainers, blades, drip valve seals,
gaskets, clutches, and/or agitators. This warranty extends only to the original
consumer purchaser and does not cover a defect resulting from abuse, misuse,
neglect, use for commercial purposes, or any use not in conformity with the printed
directions. This warranty gives you specific legal rights, and you may also have other
legal rights which vary from state to state, or province to province. Some states or
provinces do not allow limitations on implied warranties or special, incidental or
consequential damages, so the foregoing limitations may not apply to you.
If you have a claim under this warranty, DO NOT RETURN THE APPLIANCE TO THE
STORE! Please call our CUSTOMER SERVICE NUMBER. (For faster service please
have model, series, and type numbers ready for operator to assist you.)
CUSTOMER SERVICE NUMBERS
In the U.S. 1-800-851-8900
In Canada 1-800-267-2826
hamiltonbeach.com or proctorsilex.com
KEEP THESE NUMBERS FOR FUTURE REFERENCE!
Customer Service
If you have a question about your appliance, call our toll-free customer service number. Before calling, please note the model, type,
and series numbers and fill in that information below. These numbers
can be found on the bottom of your appliance. This information will
help us answer your question much more quickly.
MODEL:_____________ TYPE:_____________ SERIES: ______________
Tips for Best Results
• For best flavor, store coffee beans in an airtight container.
• Grind beans immediately before brewing.
• Grinding times will vary by amount and fineness setting:
• To ensure optimal grinding performance, allow coffee
grinder to cool for at least one minute between uses.
• Coffee flavor and strength is a personal preference. Vary the
type of coffee beans, amount of coffee and fineness of
grind to find the flavor you prefer.
• To grind flax seed, spices, herbs, garlic, and nuts: place one
to four tablespoons of food in the grinding chamber. Select
espresso grind and 15 cups for maximum grinding time.
Press ON/OFF button to start grinder. When desired ground
size is reached, press ON/OFF to stop grinder
How To Clean
1. Unplug from outlet before cleaning.
2. Remove cover by turning counter-clockwise to unlock
position, then lift straight up.
3. Remove grinding chamber by turning chamber counterclockwise until it comes loose from base. Lift grinding
chamber straight up out of base.
4. Grinding chamber and lid can be washed in sink. Grinding
chamber may also be washed on top shelf of dishwasher.
5. Wipe base with a damp cloth.
6. Hold grinder and turn the base clockwise to rewind cord.
Electrical Shock Hazard
• Unplug unit before cleaning.
• Do not immerse base, plug or cord in water or other liquid.
WARNING
840140400 ENv00.qxd 7/26/05 2:27 PM Page 6
 Loading...