

Page 1
READ BEFORE USE
LIRE AVANT UTILISATION
LEA ANTES DE USAR
Visit www.hamiltonbeach.com for our
complete line of products and Use and
Care Guides – as well as
delicious recipes, tips, and
to register your product online!
Rendez-vous sur www.hamiltonbeach.ca
pour notre liste complète de produits et de
nos manuels utilisateur – ainsi que nos
délicieuses recettes, nos conseils et pour
enregistrer votre produit en ligne !
¡Visite www.hamiltonbeach.com.mx para
obtener nuestra línea completa de productos
y las Guías de Uso y Cuidado, además de
deliciosas recetas, consejos y para registrar
su producto en línea!
Questions?
Please call us – our friendly
associates are ready to help.
USA: 1.800.851.8900
Questions ?
N’hésitez pas à nous appeler –
nos associés s’empresseront
de vous aider.
CAN : 1.800.267.2826
¿Preguntas?
Por favor llámenos – nuestros
amables representantes están
listos para ayudar.
MEX: 01 800 71 16 100
Le invitamos a leer cuidadosamente
este instructivo antes de usar su
aparato.
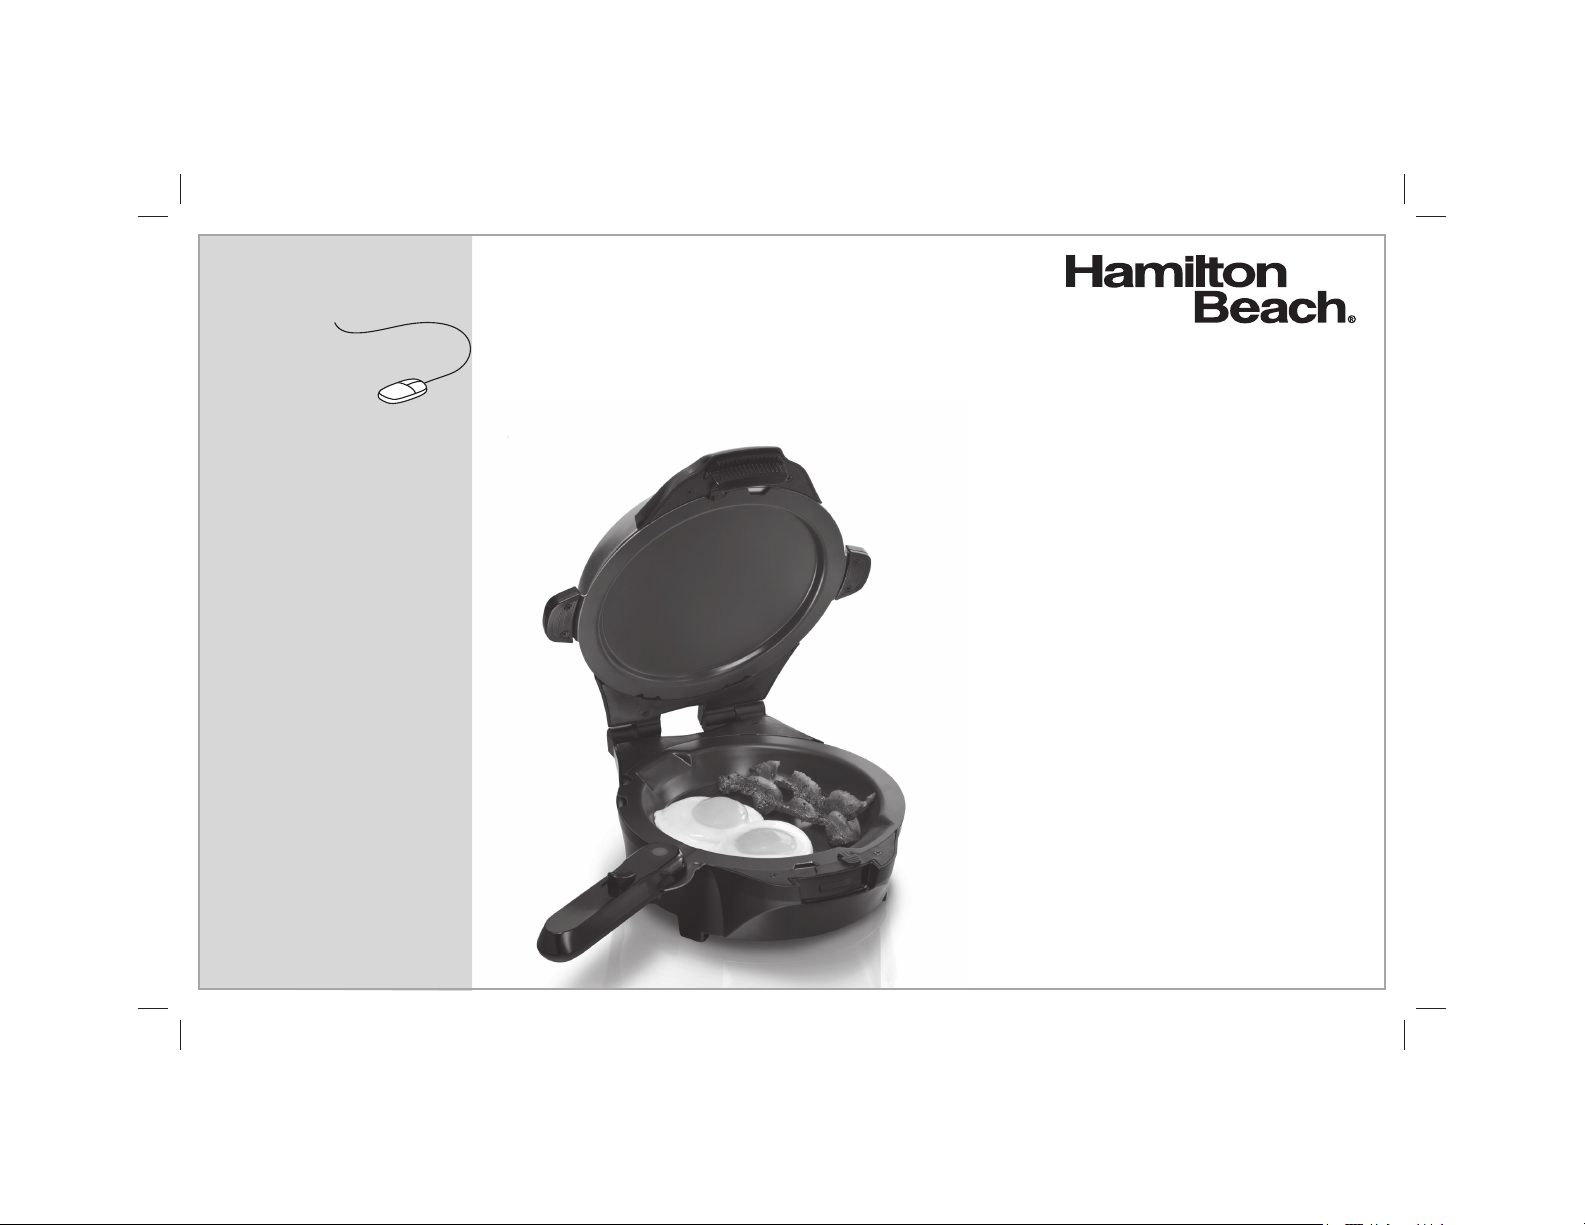
Breakfast Master
With Removable Waffle
Grids and Skillet
Maître-déjeuner avec grilles
pour gaufre et plaques
de cuisson amovibles
Breakfast Master con Parrillas
para Waffles y Sartén
Desmontables
English ...................... 2
Français .................. 15
Español ................... 29
840216601 ENv01.indd 1840216601 ENv01.indd 1 7/9/12 9:49 AM7/9/12 9:49 AM
Page 2

IMPORTANT SAFEGUARDS
When using electrical appliances, basic safety precautions should always be followed, including the following:
1. Read all instructions.
2. Do not touch hot surfaces. Use handles or knobs.
3. To protect against risk of electrical shock, do not immerse cord,
plug, or any part of the appliance in water or other liquid.
4. Close supervision is necessary when any appliance is used by
or near children.
5. Unplug from outlet when not in use and before cleaning. Allow
to cool before putting on or taking off parts and before cleaning.
6. Do not operate any appliance with a damaged cord or plug,
or after the appliance malfunctions or has been dropped or
damaged in any manner. Call our toll-free customer service
number for information on examination, repair, or adjustment.
7. The use of accessory attachments not recommended by the
appliance manufacturer may cause injuries.
8. Do not use outdoors.
9. Do not let cord hang over edge of table or counter or touch
hot surfaces, including the stove.
10. Do not place on or near a hot gas or electric burner, or in a
heated oven.
11. Extreme caution must be used when moving an appliance
containing hot oil or other hot liquids.
12. Do not use appliance for other than intended use.
13. Do not use appliance unattended.
14. During use, provide 4 to 6 inches air space above, behind, and
on both sides for air circulation.
15. Never remove the food with any kind of cutting device or other
metallic kitchen utensil.
16. Always allow the appliance to cool before putting it away, and
never wrap the cord around the appliance while it is still hot.
17. This appliance is not intended for deep-frying foods.
SAVE THESE INSTRUCTIONS!
Other Consumer Safety Information
This product is intended for household use only.
WARNING! Shock Hazard: This appliance has a polarized plug (one
wide blade) that reduces the risk of electric shock. The plug fits only
one way into a polarized outlet. Do not defeat the safety purpose of
the plug by modifying the plug in any way or by using an adapter.
If the plug does not fit fully into the outlet, reverse the plug. If it still
does not fit, have an electrician replace the outlet.
The length of the cord used on this appliance was selected to reduce
the hazards of becoming tangled in or tripping over a longer cord.
If a longer cord is necessary, an approved extension cord may be
used. The electrical rating of the extension cord must be equal to
or greater than the rating of the appliance. Care must be taken to
arrange the extension cord so that it will not drape over the countertop or tabletop where it can be pulled on by children or accidentally
tripped over.
To avoid an electrical circuit overload, do not use another highwattage appliance on the same circuit with this appliance.
2
840216601 ENv01.indd 2840216601 ENv01.indd 2 7/9/12 9:49 AM7/9/12 9:49 AM
Page 3

Parts and Features
Cover Lock
Cover
Grid Release
Button
Removable Upper
Skillet Grid
Temperature Control
Red Power
ON Light
The red Power ON light comes on
when the appliance is first plugged
Grips
Removable
Upper Waffle
Grid
Removable Lower
Waffle Grid
840216601 ENv01.indd 3840216601 ENv01.indd 3 7/9/12 9:49 AM7/9/12 9:49 AM
Removable Lower
Skillet Grid
Grid Release
Button
Release for Folding
Handle
Folding Handle
Premeasured Scoop
(1/2 cup/125 ml)
in. This light will stay on until the
unit is unplugged.
The green READY light comes on
when the appliance has reached
the desired temperature. For best
results, wait until green READY
light comes on before adding
waffle batter. This light will cycle
on and off during cooking.
= waffles
= skillet cooking
= keep warm
Green READY
Light
3
Page 4

3-Way Mess-Free Waffle Features
1 2 3
Use two premeasured scoops for
the perfect amount of batter.
Deep grids leave room for
waffles to rise while baking.
Extra-deep overflow channel gives
excess batter a place to go.
4
840216601 ENv01.indd 4840216601 ENv01.indd 4 7/9/12 9:49 AM7/9/12 9:49 AM
Page 5

How to Change Grids
TO CHANGE UPPER GRID:
w WARNING
Burn Hazard. Do not change hot grids.
1
Open lid. Remove installed grid
by pressing the release button in
the direction of the small arrow,
pulling out grid.
TO CHANGE LOWER GRID:
1
Remove installed grid by
pressing the release button in
the direction of the small arrow,
holding grip, and pulling grid up
and out.
840216601 ENv01.indd 5840216601 ENv01.indd 5 7/9/12 9:49 AM7/9/12 9:49 AM
2
Hold both sides of other grid
using grips. Insert two tabs into
the openings in the bottom cover.
2
To reinstall grid, grip lower waffle
grips and insert two tabs into the
openings on the base.
3
Push grid release button in the
direction of the small arrow,
press grid into place, and release
button to secure grid in place.
3 4
Push grid release button in the
direction of the small arrow,
press grid into place, and release
button to secure grid in place.
Lower skillet grid does not lock
into place. Simply place skillet
on base, turn handle to align
notched area with release button,
and skillet will be in place.
5
Page 6

How to Use Waffle Grids
BEFORE FIRST USE: Wash grids in dishwasher or in hot, soapy
water. Rinse and dry. Wipe or brush waffle grids with vegetable
oil. This is only recommended before first use, but may be
necessary afterwards.
1 2 3
Plug cord into wall outlet.
The red Power ON light will glow.
TIP: A small amount of nonstick
cooking spray can be used on the
grids before preheating.
5
6
840216601 ENv01.indd 6840216601 ENv01.indd 6 7/9/12 11:18 AM7/9/12 11:18 AM
Choose desired waffle temperature
setting and preheat with cover
closed until the green READY
light comes on.
TIP: Waffle color and crispness
are determined by the
temperature of the grids. The
higher the temperature, the
browner and crisper the waffle.
Using an oven mitt, open cover. Remove waffle with plastic or
wooden utensil. Never use metal. This will damage the nonstick
coating of the appliance. Turn control to “MIN.” Unplug unit when
through cooking. Let cool.
WARNING! Burn Hazard.
when opening a hot waffle maker. Escaping steam can burn.
Always use an oven mitt to protect hand
Raise cover and pour two FULL
premeasured scoops of batter
onto center of bottom cooking
grid. Lower cover.
TIP: When adding nuts, fruits,
or chocolate chips to your waffle,
reduce the waffle batter by
2 Tablespoons (30 ml).
4
Waffles are done in about 6 to
8 minutes, depending on the
setting, recipe, when the green
READY light turns back on, or
when steaming begins to stop.
Do not preheat or operate unit
unless grids are in place.
Page 7

How to Use Nonstick Skillet
321 4
Before using skillet, move handle
to the left or right until it clicks
into place and the handle is
straight.
5
Lower skillet does not lock into
place. NOTE: Do not operate unit
unless skillet is securely in place.
Only preheat and operate with
skillets in place.
Add food and close cover. Lift cover to check for doneness and turn
foods over when necessary. Only use wooden or plastic cooking
utensils to prolong the life of the nonstick coating.
TIPS:
• For best results and faster cooking, keep lid closed.
• Lower skillet has two easy-pour areas for draining.
Plug cord into wall outlet.
The red Power ON light will glow.
TIP: A small amount of nonstick
cooking spray can be used on the
bottom skillet before preheating.
Burn Hazard.
w WARNING
Do not carry or move the skillet when it contains hot oil or
food. To reduce the risk of burns due to oil spatter, do not
put a large amount of oil in a skillet. When frying, pour oil
in skillet and then preheat unit.
Choose desired skillet
temperature setting and preheat
5 to 7 minutes.
TIP: Drain grease from skillet
when cooking bacon, sausage,
or other meats for even cooking.
7
840216601 ENv01.indd 7840216601 ENv01.indd 7 7/9/12 9:54 AM7/9/12 9:54 AM
Page 8

How to Use Nonstick Skillet
Turn control to “MIN.” Unplug
6
Cooking Chart
TEMPERATURE APPROXIMATE
FOOD SETTING INTERNAL TEMP. COOKING TIME*
Fried Egg 160°F (72°C) 2 to 3 minutes (no turning)
French Toast ---------- 2 to 4 minutes
Pancakes ---------- 2 to 4 minutes
Bacon Crisp 4 to 6 minutes
Sausage Links and Patties (1/2” [1.3 cm] thick) 160°F (72°C) 6 to 8 minutes
unit when through cooking.
Let cool.
The skillet is recommended to cook any foods that produce grease.
*Cooking times are based on fresh, never frozen, ingredients.
Visit www.foodsafety.gov for more information on safe internal cooking temperatures.
(cont.)
7
Hold lower skillet in your left
hand and hold the handle in your
right hand. Using your thumb,
move button back towards the
end of the handle. Turn handle
to the left or right to fold.
8
840216601 ENv01.indd 8840216601 ENv01.indd 8 7/9/12 9:49 AM7/9/12 9:49 AM
Page 9

Usage Tips
• To make your family a quick, hot breakfast, use any of the waffle
mixes currently available on the market.
• Use a cooking spray before pouring batter into the grids, especially
for dessert waffles or recipes with a lot of sugar.
• If your waffles start to stick, the grids may need to be scrubbed with
a nylon brush to remove any cooked-on food particles.
• If using nuts in waffle batter, use chopped nuts and/or evenly
spread batter to allow lid to fully close.
• Waffles can be made ahead of time and kept warm in a 200ºF
(93ºC) oven.
• Reheat in a microwave oven, a toaster oven, or a regular oven.
• Most waffles are done in about 6–8 minutes, depending on the
setting selected. Some of the recipes which are made from scratch
may take a little longer. Check for doneness at about 5 minutes.
If the cover of the waffle maker doesn’t lift up easily, then let the
waffle cook a minute more before checking again. Another indicator
that the waffle is done is when the green READY light comes on or
when the steaming slows or stops.
• To store, let waffles cool and pack in an airtight container; store in
refrigerator or freezer for reheating later.
IF YOU LIVE IN A HIGH-ALTITUDE AREA:
The Extension service will have detailed information about cooking
for your area. To locate the Cooperative Extension service in your
county, please visit: http://www.csrees.usda.gov/Extension/.
9
840216601 ENv01.indd 9840216601 ENv01.indd 9 7/9/12 9:50 AM7/9/12 9:50 AM
Page 10

Care and Cleaning
w WARNING
Electrical Shock Hazard.
Disconnect power before cleaning. Do not immerse
cord, plug, or base in any liquid.
1
Turn control to “MIN.” Unplug
unit when through cooking. Let
cool.
2 3
Wipe outside of unit with a
damp, soapy cloth.
Do not use steel wool, scouring
pads, or abrasive cleansers on
any part of the unit. Never use
sharp or pointed objects for
cleaning.
DISHWASHER-SAFE
DO NOT use the “SANI” setting
when washing in the dishwasher.
“SANI” cycle temperatures could
damage your product.
The back sides of waffle and
skillet grids may discolor. This
is normal.
After cleaning, skillet handle can
be folded for ease of storage.
Hold lower skillet in one hand
and handle in other. Using
thumb, slide button back and
turn handle to either side for
storage position.
Troubleshooting
PROBLEM
Low, poor, or
slow heating.
Cooking too slow.
Waffles are too
light.
10
840216601 ENv01.indd 10840216601 ENv01.indd 10 7/9/12 9:50 AM7/9/12 9:50 AM
PROBABLE CAUSE
• Allow waffle maker/skillet to heat for 5 to 7 minutes before use.
• Ensure grids are fully installed.
• Adjust temperature towards MAX (darker setting).
Page 11

Suggested Toppings and Spreads for Waffles
Maple Syrup
Chocolate Syrup
Powdered Sugar
Honey
Jams and Jellies
Suggested ideas to stir into batter before cooking: small pieces of fresh fruit, dried fruit, chocolate chips, chocolate covered raisins, or nuts.
TIP: Certain fresh fruits like blueberries will turn batter blue. Do not stir into batter; sprinkle over batter before cooking.
Cinnamon Sugar
Maple Butter
Apple Butter
Whipped Cream
Applesauce
Brown Sugar
Chocolate Sprinkles
Cake Frosting
Peanut Butter
Recipes
Basic Waffles
2 cups (500 ml) flour
2 Tablespoons (30 ml) sugar
1 Tablespoon (15 ml) baking
powder
Combine flour, sugar, baking powder, and salt. Stir together milk,
oil, and eggs. Gradually add milk mixture to the dry ingredients. Stir
until just blended. Pour two premeasured scoops of batter into the
middle of the waffle maker. Serves: 6 (1/2 waffle each)
1 teaspoon (5 ml) salt
1 3/4 cups (430 ml) milk
1/3 cup (80 ml) vegetable oil
2 eggs
Blueberry Waffles: After pouring batter onto waffle grids, sprinkle
fresh blueberries over batter; then close lid. Do not stir berries into
batter; this makes blue-gray waffles.
To Make a Savory Waffle: Add your favorite freshly chopped or
dried savory spices to the batter. Follow How to Use Waffle Grids.
11
840216601 ENv01.indd 11840216601 ENv01.indd 11 7/9/12 9:50 AM7/9/12 9:50 AM
Page 12

Recipes (cont.)
Stuffed French Toast
1 large egg
1 large egg white
1 Tablespoon (15 ml)
strawberry preserves
1 Tablespoon (15 ml) cream cheese
1 Tablespoon (15 ml) chopped pecans
2 slices cinnamon bread
Preheat Breakfast Master skillet on medium heat. Beat egg and egg
white in medium bowl; set aside. Mix cream cheese and pecans
in small bowl; spread on one slice of bread. Spread strawberry
preserves on remaining bread slice. Top bread with cream cheese
mixture with remaining bread slice, strawberry-side down. Place
bread in egg mixture for 2 minutes; turn and soak for an additional
2 minutes. Add bread to skillet; close cover. Cook 4 to 5 minutes
or until cooked through. Serve with confectioners’ sugar or maple
syrup. Serves: 1
Western Omelet
2 large eggs
1 Tablespoon (15 ml) milk
1 Tablespoon (15 ml) chopped onion
2 Tablespoons (30 ml) chopped mushrooms
2 Tablespoons (30 ml) chopped green pepper
2 Tablespoons (30 ml) chopped red pepper
1 slice ham, chopped
Salt and pepper to taste
Preheat Breakfast Master with skillet grids on medium heat. Beat
eggs, milk, salt, and pepper until well blended. Spray skillet with
nonstick cooking spray. Place onions, mushrooms, green peppers,
and red peppers in skillet. Close cover and cook 2 minutes. Pour
egg mixture over onion mixture. Top with ham; close cover. Cook
3 minutes or until cooked through. Sprinkle with cheese; remove
from skillet. Serve with salsa and sour cream, if desired. Serves: 1
12
840216601 ENv01.indd 12840216601 ENv01.indd 12 7/9/12 9:50 AM7/9/12 9:50 AM
Page 13

Recipes (cont.)
Sausage and Potato Omelet
2 large eggs, beaten
1 Tablespoon (15 ml) sour cream
1/4 teaspoon (1.3 ml) Italian seasoning
1/8 teaspoon (0.6 ml) salt
1/8 teaspoon (0.6 ml) pepper
1/4 cup (60 ml) bulk sausage
1/4 cup (60 ml) diced hash browns
2 Tablespoons (30 ml) chopped onion
2 Tablespoons (30 ml) chopped pepper
2 Tablespoons (30 ml) shredded cheddar cheese
Preheat Breakfast Master with skillet grids on medium heat. Beat
eggs, sour cream, Italian seasoning, salt, and pepper. Spray skillet
with nonstick cooking spray. Add sausage; close cover and cook
2 minutes. Drain fat if necessary. Add potatoes, onion, and
pepper to sausage. Close cover and cook 2 minutes. Pour egg
mixture over potato mixture. Close cover and cook 3 minutes.
Sprinkle with cheese and remove from skillet. Serves: 1
Creamy Bacon and Tomato Omelet
2 slices bacon, cut into 1/2-inch pieces
2 large eggs, beaten
1 Tablespoon (15 ml) snipped chives
1/4 teaspoon (1.3 ml) dried basil leaves
Salt and pepper to taste
3 Tablespoons (45 ml) chopped tomatoes
1 Tablespoon (15 ml) cream cheese, cut into pieces
Preheat Breakfast Master with skillet grids on medium heat. Place
bacon in skillet; close cover. Cook 3 to 4 minutes or until crisp.
Drain skillet and place bacon on paper towels. Mix eggs, basil,
salt, and pepper. Pour egg mixture into skillet; close cover. Cook
3 minutes; add cream cheese, bacon, and tomato to half of omelet.
Fold in half to cover mixture. Close cover; cook an additional
2 minutes or until cooked through. Serves: 1
13
840216601 ENv01.indd 13840216601 ENv01.indd 13 7/9/12 9:50 AM7/9/12 9:50 AM
Page 14

Limited Warranty
This warranty applies to products purchased and used in the U.S. and Canada. This is the only express warranty for this product and
is in lieu of any other warranty or condition.
This product is warranted to be free from defects in material and workmanship for a period of one (1) year from the date of original
purchase. During this period, your exclusive remedy is repair or replacement of this product or any component found to be defective,
at our option; however, you are responsible for all costs associated with returning the product to us and our returning a product or
component under this warranty to you. If the product or component is no longer available, we will replace with a similar one of equal
or greater value.
This warranty does not cover glass, filters, wear from normal use, use not in conformity with the printed directions, or damage to
the product resulting from accident, alteration, abuse, or misuse. This warranty extends only to the original consumer purchaser or
gift recipient. Keep the original sales receipt, as proof of purchase is required to make a warranty claim. This warranty is void if the
product is used for other than single-family household use or subjected to any voltage and waveform other than as specified on the
rating label (e.g., 120V ~ 60 Hz).
We exclude all claims for special, incidental, and consequential damages caused by breach of express or implied warranty. All
liability is limited to the amount of the purchase price. Every implied warranty, including any statutory warranty or condition
of merchantability or fitness for a particular purpose, is disclaimed except to the extent prohibited by law, in which case such
warranty or condition is limited to the duration of this written warranty. This warranty gives you specific legal rights. You may have
other legal rights that vary depending on where you live. Some states or provinces do not allow limitations on implied warranties or
special, incidental, or consequential damages, so the foregoing limitations may not apply to you.
To make a warranty claim, do not return this appliance to the store. Please call 1.800.851.8900 in the U.S. or 1.800.267.2826 in Canada
or visit hamiltonbeach.com in the U.S. or hamiltonbeach.ca in Canada. For faster service, locate the model, type, and series numbers
on your appliance.
14
840216601 ENv01.indd 14840216601 ENv01.indd 14 7/9/12 9:50 AM7/9/12 9:50 AM
Page 15

PRÉCAUTIONS IMPORTANTES
Pendant l’utilisation d’appareils électriques, respecter les mesures de sécurité fondamentales y compris les suivantes :
1.
Lire toutes les instructions.
2. Ne pas toucher aux surfaces chaudes. Utiliser les poignées
ou les boutons.
3. Pour éviter les risques d’électrocution, ne pas immerger le
cordon, la fiche ou l’appareil dans l’eau ou tout autre liquide.
4. L’utilisation de tout appareil par ou près des enfants exige une
surveillance accrue.
5. Débrancher de la prise dès la fin de l’utilisation et avant le
nettoyage. Laisser refroidir l’appareil avant d’installer ou de
retirer des pièces et avant de le nettoyer.
6. Ne pas faire fonctionner aucun appareil dont le cordon ou la prise
sont endommagés ou suite à une défectuosité, si l’appareil est
tombé ou endommagé de quelque manière que ce soit. Appeler
notre numéro sans frais de service à la clientèle pour des
renseignements concernant l’examen, la réparation ou
l’ajustement.
7. L’utilisation de tout accessoire auxiliaire contre-indiqué par
le fabricant de l’appareil peut causer des blessures.
8. Ne pas utiliser à l’extérieur.
9. Ne pas laisser pendre le cordon de la table ou du comptoir
et éviter que le cordon n’entre en contact avec des surfaces
chaudes, y compris la cuisinière.
10. Ne pas placer sur ou près d’un brûleur à gaz ou electrique chaud
ou dans un four chauffé.
11. Une très grande prudence doit être exercée lors du déplacement
de tout appareil contenant des huiles ou des liquides chauds.
N’utiliser cet appareil que pour les fonctions auxquelles il est destiné.
12.
13.
Ne pas laisser l’appareil sans surveillance pendant le fonctionnement.
14. Pendant le fonctionnement, prévoir de 10 à 15 cm (4 à 6 po)
d’espace tout autour de l’appareil.
15. Ne jamais retirer les aliments à l’aide d’ustensiles de cuisine
métalliques ou tout autre dispositif de coupe.
16. Toujours permettre le refroidissement de l’appareil avant de
le ranger et ne jamais enrouler le cordon autour de l’appareil
pendant qu’il est chaud.
17. Cet appareil n’est pas conçu pour la grande friture des aliments.
CONSERVER CES INSTRUCTIONS !
Autres consignes de sécurité pour le consommateur
Cet appareil est conçu pour une utilisation domestique seulement.
AVERTISSEMENT ! Risque d’électrocution : Cet appareil électro-
ménager possède une fiche polarisée (une broche large) qui réduit le
risque d’électrocution. Cette fiche n’entre que dans un seul sens dans
une prise polarisée. Ne contrecarrez pas l’objectif sécuritaire de cette
fiche en la modifiant de quelque manière que ce soit ou en utilisant
un adaptateur. Si vous ne pouvez pas insérer complètement la fiche
dans la prise, inversez la fiche. Si elle refuse toujours de s’insérer,
faire remplacer la prise par un électricien.
La longueur du cordon installé sur cet appareil a été sélectionnée afin
de réduire les risques d’enchevêtrement ou de faux pas causés par
un fil trop long. L’utilisation d’une rallonge approuvée est permise
si le cordon est trop court. Les caractéristiques électriques de la rallonge doivent être équivalentes ou supérieures aux caractéristiques
de l’appareil. Prendre toutes les précautions nécessaires pour installer
la rallonge de manière à ne pas la faire courir sur le comptoir ou sur
une table pour éviter qu’un enfant ne tire sur le cordon ou trébuche
accidentellement.
Pour éviter la surcharge du circuit électrique, ne pas utiliser un autre
appareil à haute puissance sur le même circuit que cet appareil.
15
840216601 FRv01.indd 15840216601 FRv01.indd 15 7/9/12 9:51 AM7/9/12 9:51 AM
Page 16

Pièces et caractéristiques
Verrou de couvercle
Couvercle
Grille pour gaufre
supérieure
amovible
Bouton de
dégagement
des grilles
Poignées
Plaque de cuisson
inférieure amovible
Plaque de cuisson
supérieure amovible
Déverrouillage de
la poignée repliable
Poignée repliable
Sélecteur de température
Témoin
d’alimentation
rouge
Le témoin d’alimentation rouge
s’illumine lors du branchement de
l’appareil. Ce témoin restera illuminé
jusqu’au débranchement de l’appareil.
Le témoin de prêt vert s’illumine
lorsque l’appareil a atteint le degré
de température désirée. Pour des
résultats optimaux, attendre que le
témoin vert de prêt s’illumine avant
de verser la pâte à gaufres. Ce témoin
s’éteindra et s’allumera pendant le
cycle de cuisson.
Témoin
de prêt
vert
= gaufres
= plaques de cuisson
Grille pour gaufre
inférieure amovible
16
840216601 FRv01.indd 16840216601 FRv01.indd 16 7/9/12 9:51 AM7/9/12 9:51 AM
Bouton de
dégagement
des grilles
Cuillère graduée
(125 ml [1/2 tasse])
= garde au chaud
Page 17

Trois méthodes sans dégât
1 2 3
Utiliser deux cuillères graduée
pour la quantité exacte de pâte.
Grilles de cuisson profondes
pour permettre le gonflement
des gaufres pendant la cuisson.
Le canal de trop-plein très profonds
permet l’écoulement de l’excès de
pâte vers des canaux de trop-plein
très profonds.
17
840216601 FRv01.indd 17840216601 FRv01.indd 17 7/9/12 9:51 AM7/9/12 9:51 AM
Page 18

Comment changer les grilles
de cuisson
POUR CHANGER LA GRILLE
SUPÉRIEURE :
1 2 3
Ouvrir le couvercle. Retirer la
grille installée en appuyant sur
le bouton de dégagement et le
pousser vers la petite flèche puis
retirer la grille.
Tenir les deux côtés de la grille
par les poignées. Insérer les deux
languettes dans les orifices situés
au bas du couvercle.
Appuyer sur le bouton de
dégagement et le pousser vers la
petite flèche, appuyer sur la grille
pour la fixer en place et relâcher
le bouton pour maintenir
solidement la grille en place.
w AVERTISSEMENT
Risque de brûlure.
Ne pas changer les grilles lorsqu’elles sont chaudes.
18
840216601 FRv01.indd 18840216601 FRv01.indd 18 7/9/12 9:51 AM7/9/12 9:51 AM
Page 19

Comment changer les grilles de cuisson (suite)
POUR CHANGER LA GRILLE
INFÉRIEURE :
1 2 3 4
Retirer la grille installée en
appuyant sur le bouton de
dégagement et le pousser vers la
petite flèche qui maintient la grille
puis la soulever pour la sortir.
Pour installer la grille, tenir les
poignées inférieures de la grille
pour gaufre et insérer les deux
languettes dans les orifices situés
sur la base.
Appuyer sur le bouton de
dégagement et le pousser vers
la petite flèche, appuyer sur grille
pour la fixer en place et relâcher
le bouton pour maintenir
solidement la grille en place.
Le couvercle de la plaque
inférieure ne se verrouille pas.
Placer simplement la plaque sur
la base puis tourner la poignée
pour aligner la fente avec le
bouton de dégagement pour
installer correctement la plaque.
19
840216601 FRv01.indd 19840216601 FRv01.indd 19 7/9/12 9:51 AM7/9/12 9:51 AM
Page 20

Comment utiliser des grilles à gaufres
AVANT LA PREMIÈRE UTILISATION : Laver les plaques dans au lave-vaiselle ou l’eau chaude savonneuse. Rincer et sécher. Essuyer ou brosser
les grilles avec de l’huile végétale. Cette étape est recommandée avant la première utilisation seulement. Le brunissage s’améliorera au cours des
lots subséquents.
1 2 3
Brancher la fiche dans la prise
murale. Le témoin d’alimentation
rouge s’illuminera.
CONSEIL : Utiliser une petite
quantité d’enduit pour cuisson
en vaporisateur antiadhésif sur
les grilles avant le préchauffage.
20
840216601 FRv01.indd 20840216601 FRv01.indd 20 7/9/12 9:51 AM7/9/12 9:51 AM
Choisir le réglage de température
à gaufres désirée, fermer le
couvercle et préchauffer jusqu’à
ce que le témoin de prêt vert
s’allume.
CONSEIL : L’intensité du
brunissage et de tendreté est
déterminée par la température
des grilles de cuisson. Plus la
température est élevée, plus la
gaufre sera brune et croquante.
Soulever le couvercle et verser
deux mesures PLEINES de pâte
au centre de la grille de cuisson
inférieure. Abaisser le couvercle.
CONSEIL : Réduire la quantité
de pâte à gaufre de 30 ml
(2 cuillères à soupe) pour pouvoir
ajouter des noix, fruits ou pépites
de chocolat à la gaufre.
4
Les gaufres sont prêtes en
environ 6 à 8 minutes, selon le
réglage, la recette, lorsque le
témoin de prêt vert s’allume, ou
le moment où elles commencent
à ne plus dégager de vapeur.
Ne pas préchauffer ou faire
fonctionner l’appareil sans avoir
installé correctement les grilles.
Page 21

Comment utiliser des grilles à gaufres (suite)
En utilisant un gant de cuisinier, ouvrir le couvercle. Retirer les
gaufres avec un ustensile en plastique ou en bois. Ne jamais
utiliser un ustensile en métal ; il endommagerait le fini antiadhésif.
Tourner la commande à « MIN ». Débrancher l’appareil dès que
vous avez terminé. Laisser refroidir.
AVERTISSEMENT ! Risque de brûlure.
5
de cuisinier pour protéger les mains au moment de l’ouverture d’un
gaufrier chaud. La vapeur dégagée peut causer des brûlures.
Toujours utiliser un gant
Comment utiliser plaque de cuisson antiadhésive
w AVERTISSEMENT
Risque de brûlures.
Ne jamais porter ou déplacer la poêle quand celle-ci contient de la nourriture ou de l’huile encore chaude. Afin d’éviter les risques de brûlure
dues aux projections d’huile, ne mettez pas trop d’huile dans la poêle. Pour la friture, verser l’huile dans la poêle puis préchauffer l’appareil.
Le couvercle de la plaque
inférieure ne se verrouille pas.
REMARQUE : Ne pas faire
fonctionner l’appareil sans avoir
Avant d’utiliser une plaque de
cuisson, déplacer la poignée
vers la gauche ou la droite
jusqu’à ce qu’elle s’enclenche
1
correctement et que la poignée
soit à l’horizontale.
2
installé correctement la plaque
de cuisson.
Le préchauffage et le
fonctionnement doivent se
faire alors que les plaques de
cuisson sont installées.
21
840216601 FRv01.indd 21840216601 FRv01.indd 21 7/9/12 9:51 AM7/9/12 9:51 AM
Page 22

Comment utiliser poêle à frire antiadhésive (suite)
Déposer les aliments et fermer le
couvercle. Soulever le couvercle
pour vérifier la cuisson et tourner
les aliments au besoin. Utiliser
seulement des ustensiles de
cuisson en bois ou en plastique
afin de prolonger la durée de vie
du revêtement antiadhésif.
CONSEILS :
• Garder le couvercle fermé pour
obtenir de meilleurs résultats et
3 4 5
Brancher la fiche dans la prise
murale. Le témoin d’alimentation
rouge s’illuminera.
CONSEIL : Utiliser une petite
quantité d’enduit pour cuisson
en vaporisateur antiadhésif sur le
plaque de cuisson inférieure avant
le préchauffage.
6
22
Choisir la réglage de
température à plaque cuisson
désirée et préchauffer de
5 à 7 minutes.
CONSEIL : Pour obtenir une
cuisson uniforme, égoutter la
graisse de la plaque de cuisson
lorsque l’on cuit du bacon, de la
saucisse ou d’autres sortes de
viandes.
Tourner la commande à
« MIN ». Débrancher l’appareil
dès que vous avez terminé.
Laisser refroidir.
7
cuire plus rapidement.
• La plaque de cuisson inférieure
est dotée de deux zones pour
un égouttement facile.
Tenir la plaque de cuisson
inférieure avec la main gauche
et tenir la poignée avec la main
droite. Avec le pouce, faire
reculer le bouton vers l’extrémité
de la poignée. Replier la poignée
en la tournant vers la gauche ou
la droite.
840216601 FRv01.indd 22840216601 FRv01.indd 22 7/9/12 9:51 AM7/9/12 9:51 AM
Page 23

La plaque de cuisson est recommandée pour cuire tous les aliments gras.
Guide de cuisson
TEMPS DE CUISSON
ALIMENTS TEMPÉRATURE TEMP. INTERNE APPROX.*
Oeufs au miroir 72 °C (160 °F) 2 à 3 minutes (pas de retour)
Pain doré ---------- 2 à 4 minutes
Crêpes ---------- 2 à 4 minutes
Bacon Croustillant 4 à 6 minutes
Chapelets et galettes de saucisses (1.3 cm [1/2 po] d’épaisseur) 72 °C (160 °F) 6 à 8 minutes
* Les temps de cuisson sont établis en fonction d’ingrédients frais, et non d’ingrédients
congelés.
Visitez foodsafety.gov pour plus d’information à propos des températures internes de
cuisson sécuritaires.
Conseils
• Utiliser des mélanges à gaufre offerts actuellement sur le marché
pour faire un déjeuner rapide et chaud pour toute la famille.
• Utiliser un enduit pour cuisson avant de verser la pâte sur les grilles,
surtout pour des gaufres desserts ou des recettes contenant
beaucoup de sucre.
• Si les gaufres ont collé, les grilles peuvent être récurées à l’aide
d’une brosse en nylon pour enlever toutes les particules d’aliments
cuits.
• Pour une pâte à gaufres contenant des noix, utiliser des noix
hachées et étendre uniformément la pâte pour permettre la
fermeture du couvercle.
• Les gaufres peuvent être préparées à l’avance et gardées au
chaud au four à 93 ºC (200 ºF).
• Réchauffer au four à microondes, grille-pain/four ou dans un four
classique.
•
La durée de cuisson de la plupart des gaufres est de 6 à 8 minutes
environ, selon le réglage choisi. Les recettes faites approximativement
peuvent nécessiter une durée de cuisson plus longue. Vérifier la
cuisson après 5 minutes environ. Si le couvercle du gaufrier ne
se soulève pas facilement, laisser cuire une minute de plus puis
revérifier la cuisson. Lorsque le témoin de prêt
que la vapeur ne s’échappe plus, signifie également
est cuite.
• Pour conserver les gaufres et les réchauffer ultérieurement, laisser
refroidir les gaufres et les emballer dans un contenant hermétique
puis mettre le contenant au réfrigérateur ou au congélateur.
SI VOUS HABITEZ DANS UNE RÉGION À HAUTE ALTITUDE :
Les services de vulgarisation offrent les informations au sujet
de la cuisson pour votre région. Pour trouver la coopérative
de services de vulgarisation, veuillez visiter le site
http://www.csrees.usda.gov/Extension/.
vert s’allume ou
que la gaufre
23
840216601 FRv01.indd 23840216601 FRv01.indd 23 7/9/12 9:51 AM7/9/12 9:51 AM
Page 24

Entretien et nettoyage
1
Tourner la commande à « MIN ». Débrancher l’appareil dès que
vous avez terminé. Laisser refroidir.
Essuyer l’extérieur de l’appareil avec un linge imbibé d’eau
savonneuse.
Ne pas utiliser de tampon métallique à récurer ou de poudre à
nettoyer sur aucune pièce de l’appareil. Ne jamais utiliser d’objets
affûtés ou pointus pour les besoins de nettoyage.
2 3
Dépannage
w AVERTISSEMENT
Risque d’électrocution.
Débrancher l’appareil avant le nettoyage. Ne pas
immerger
quelconque liquide.
le cordon, la fiche ou la base dans
LAVABLES AU
LAVE-VAISSELLE
NE PAS utiliser le réglage
« SANI » du lave-vaisselle. Les
températures du cycle « SANI »
peuvent endommager le produit.
Les parois arrière des grilles pour
gaufre et des plaques de cuisson
peuvent se décolorer. Ceci est
normal.
Replier la poignée après avoir
nettoyé l’appareil pour pouvoir le
ranger facilement. Tenir la plaque
de cuisson inférieure avec une
main et tenir la poignée avec
l’autre main. Avec le pouce, faire
reculer le bouton vers l’extrémité
et tourner la poignée à gauche
ou à droite afin de la positionner
pour le rangement.
PROBLÈME
Chauffage inférieur, faible
ou lent.
Cuisson trop lente.
Les gaufres ne sont pas
assez brunes.
24
840216601 FRv01.indd 24840216601 FRv01.indd 24 7/9/12 9:51 AM7/9/12 9:51 AM
CAUSE POSSIBLE
• Laisser gaufres/pôele à frire chauffer 5 à 7 minutes avant de commencer la cuisson.
• S’assurer que les grilles sont installées correctement.
• Régler le sélecteur de température à MAX (réglage plus intense).
Page 25

Garnitures et tartinades suggérées pour
accompagner les gaufres
Sirop d’érable
Sirop au chocolat
Sucre super fin
Miel
Confitures et gelées
Suggestions à incorporer à la pâte avant la cuisson : de petits morceaux de fruits frais, des fruits séchés, des pépites de chocolat, des raisins
enrobés de chocolat ou des noix.
CONSEIL : Certains fruits frais comme les bleuets coloreront la pâte de bleu. Ne pas les mélanger à la pâte. Parsemer ces fruits sur la pâte
avant de la cuire.
Sucre à la cannelle
Beurre d’érable
Beurre de pomme
Crème fouettée
Compote de pommes
Cassonade
Chocolat râpé
Glaçage à gâteaux
Beurre d’arachide
Recettes
Recette de base pour gaufres
500 ml (2 tasses) de farine
30 ml (2 cuillères à soupe) de sucre
15 ml (1 cuillère à soupe) de
levure chimique
Combiner la farine, le sucre, la levure chimique et le sel. Mélanger
le lait, l’huile et les œufs. Verser graduellement le mélange de lait
aux ingrédients secs. Remuer pour le tout. Verser deux mesures
de pâte au centre de la grille pour gaufre.
Donne 6 portions (1/2 gaufre chacune).
5 ml (1 cuillère à thé) de sel
430 ml (1 3/4 tasse) de lait
80 ml (1/3 de tasse) d’huile végétale
2 œufs
Gaufres aux bleuets : Après avoir versé la pâte sur les grilles
pour gaufre, parsemer des bleuets frais sur la pâte puis fermer le
couvercle. Ne pas mélanger les baies dans la pâte pour éviter une
coloration bleue des gaufres.
Pour faire une gaufre salée : Ajouter les épices fraîches hachées ou
séchées préférées à la pâte. Consulter le chapitre Comment utiliser
grilles à gaufres.
25
840216601 FRv01.indd 25840216601 FRv01.indd 25 7/9/12 9:51 AM7/9/12 9:51 AM
Page 26

Recettes (suite)
Pain doré farci
1 gros œuf
1 blanc d’œuf (gros)
15 ml (1 cuillère à soupe) de fraises séchées
15 ml (1 cuillère à soupe) de fromage à la crème
15 ml (1 cuillère à soupe) de pacanes hachées
2 tranches de pain à la cannelle
Préchauffer les plaques du maître-déjeuner à température moyenne.
Battre l’œuf et le blanc d’œuf dans un bol de grandeur moyenne et
réserver. Mélanger le fromage à la crème et les pacanes dans un
petit bol puis tartiner une tranche de pain de ce mélange. Parsemer
avec les fraises séchées sur l’autre tranche de pain. Recouvrir avec
l’autre tranche tartinée du mélange de fromage à la crème en
disposant les fraises vers le bas. Déposer le pain dans le mélange
d’œufs et laisser tremper 2 minutes ; tourner et laisser tremper
2 minutes de plus. Déposer le pain sur la plaque de cuisson et
fermer le couvercle. Cuire de 4 à 5 minutes ou jusqu’à ce que le
tout soit bien cuit. Servir avec du sucre glace ou du sucre d’érable.
Donne 1 portion.
Omelette de l’Ouest
2 gros œufs
15 ml (1 cuillère à soupe) de lait
15 ml (1 cuillère à soupe) d’oignon haché
30 ml (2 cuillères à soupe) de champignons hachés
30 ml (2 cuillères à soupe) de poivron vert haché
30 ml (2 cuillères à soupe) de poivron rouge haché
1 tranche de jambon hachée
Sel et poivre au goût
Préchauffer les plaques du maître-déjeuner à température moyenne.
Battre les œufs, le lait, le sel et le poivre jusqu’à homogénéité.
Enduire les plaques avec un enduit pour cuisson en vaporisateur.
Déposer les oignons, les champignons, le poivron vert et le poivron
rouge sur la plaque. Fermer le couvercle et cuire 2 minutes. Verser
le mélange d’œufs sur le mélange d’oignons. Garnir avec le jambon.
Fermer le couvercle. Cuire 3 minutes ou jusqu’à ce que le tout soit
bien cuit. Parsemer avec le fromage et retirer de la plaque. Servir
avec de la salsa ou de la crème sure. Donne 1 portion.
26
840216601 FRv01.indd 26840216601 FRv01.indd 26 7/9/12 9:51 AM7/9/12 9:51 AM
Page 27

Recettes (suite)
Omelette à la saucisse et aux pommes de terre
2 gros oeufs, battus
15 ml (1 cuillère à soupe) de crème sure
1,25 ml (1/4 de cuillère à café) d’épices italiennes
0,6 ml (1/8 de cuillère à café) de sel
0,6 ml (1/8 de cuillère à café) de poivre
60 ml (1/4 de tasse) de chair à saucisse
60 ml (1/4 de tasse) de pommes de terre rissolées
30 ml (2 cuillères à soupe) d’oignon haché
30 ml (2 cuillères à soupe) de poivron haché
30 ml (2 cuillères à soupe) de fromage cheddar râpé
Préchauffer les plaques du maître-déjeuner à température
moyenne. Battre les œufs, la crème sure, les épices italiennes,
le sel et le poivre. Enduire les plaques avec un enduit pour
cuisson en vaporisateur. Ajouter les pommes de terre, l’oignon
et le poivron à la saucisse. Fermer le couvercle et cuire 2 minutes.
Verser le mélange d’œufs sur le mélange de pommes de terre.
Fermer le couvercle et cuire 3 minutes. Parsemer de fromage
et retirer de la plaque. Donne 1 portion.
Omelette crémeuse au bacon et aux tomates
2 tranches de bacon coupées en morceaux de 1,25 cm (1/2 po)
2 gros oeufs, battus
15 ml (1 cuillère à soupe) de ciboulette hachée
1,25 ml (1/4 de cuillère à café) de basilic séché
Sel et poivre au goût
45 ml (3 cuillères à soupe) de tomates hachées
15 ml (1 cuillère à soupe) de fromage à la crème, coupé en morceaux
Préchauffer les plaques du maître-déjeuner à température moyenne.
Déposer le bacon sur la plaque puis fermer le couvercle. Cuire 3 à
4 minutes ou jusqu’à ce que le bacon soit croustillant. Égoutter la
plaque et déposer le bacon sur une serviette en papier. Mélanger
les œufs, le basilic, le sel et le poivre. Verser le mélange d’œufs
sur la plaque puis fermer le couvercle. Cuire 3 minutes ; ajouter
le fromage à la crème, le bacon et les tomates sur une moitié
de l’omelette. Plier en deux pour couvrir le mélange. Fermer le
couvercle et cuire 2 minutes de plus ou jusqu’à ce que le tout soit
bien cuit. Donne 1 portion.
27
840216601 FRv01.indd 27840216601 FRv01.indd 27 7/9/12 9:51 AM7/9/12 9:51 AM
Page 28

Garantie limitée
Cette garantie s’applique aux produits achetés et utilisées aux É.-U. et au Canada. C’est la seule garantie expresse pour ce
produit et est en lieu et place de tout autre garantie ou condition.
Ce produit est garanti contre tout défaut de matériaux et de main-d’oeuvre pour une période de un (1) an à compter de la
date d’achat d’origine. Au cours de cette période, votre seul recours est la réparation ou le remplacement de ce produit ou
tout composant s’avérant défectueux, à notre gré, mais vous êtes responsable de tous les coûts liés à l’expédition du produit
et le retour d’un produit ou d’un composant dans le cadre de cette garantie. Si le produit ou un composant n’est plus offert,
nous le remplacerons par un produit similaire de valeur égale ou supérieure.
Cette garantie ne couvre pas le verre, les filtres, l’usure d’un usage normal, l’utilisation non conforme aux directives imprimées,
ou des dommages au produit résultant d’un accident, modification, utilisation abusive ou incorrecte. Cette garantie s’applique
seulement à l’acheteur original ou à la personne l’ayant reçu en cadeau. La présentation du reçu de vente d’origine comme
preuve d’achat est nécessaire pour faire une réclamation au titre de cette garantie. Cette garantie s’annule si le produit est
utilisé autrement que par une famille ou si l’appareil est soumis à toute tension ou forme d’onde différente des caractéristiques
nominales précisées sur l’étiquette (par ex. : 120 V ~ 60 Hz).
Nous excluons toutes les réclamations au titre de cette garantie pour les dommages spéciaux, consécutifs et indirects causés
par la violation de garantie expresse ou implicite. Toute responsabilité est limitée au prix d’achat. Chaque garantie implicite,
y compris toute garantie ou condition de qualité marchande ou d’adéquation à un usage particulier, est exonérée, sauf
dans la mesure interdite par la loi, auquel cas la garantie ou condition est limitée à la durée de cette garantie écrite. Cette
garantie vous donne des droits légaux précis. Vous pouvez avoir d’autres droits qui varient selon l’endroit où vous habitez.
Certaines provinces ne permettent pas les limitations sur les garanties implicites ou les dommages spéciaux ou indirects de
telle sorte que les limitations ci-dessus ne s’appliquent peut-être pas à votre cas.
Ne pas retourner cet appareil au magasin lors d’une réclamation au titre de cette garantie. Téléphoner au 1.800.851.8900 aux
É.-U. ou au 1.800.267.2826 au Canada ou visiter le site internet www.hamiltonbeach.com aux É.-U. ou www.hamiltonbeach.ca
au Canada. Pour un service plus rapide, trouvez le numéro de modèle, le type d’appareil et les numéros de série sur votre
appareil.
28
840216601 FRv01.indd 28840216601 FRv01.indd 28 7/9/12 9:51 AM7/9/12 9:51 AM
Page 29

SALVAGUARDIAS IMPORTANTES
Cuando use aparatos eléctricos, siempre se deben seguir las precauciones básicas de seguridad incluyendo las siguientes:
1.
Lea todas las instrucciones.
2. Verifique que el voltaje de su instalación corresponda con
el del producto.
3. No toque superficies calientes. Use las manijas o perillas.
4. Para protegerse contra riesgos por descarga eléctrica, no sumerja
el cable, enchufe o el aparato en agua u otro líquido.
5. Se requiere de una estrecha supervisión cuando cualquier
aparato está siendo usado por o cerca de niños.
6. Desconecte de la toma cuando no esté en uso o antes de limpiar.
Deje que se enfríe antes de poner o quitar partes o antes de
limpiar.
7. No opere ningún aparato con un cable o enchufe dañado, o
después de que el aparato tenga un mal funcionamiento o se
haya caído o dañado de cualquier forma. Llame a nuestro
número gratuito de servicio al cliente para información sobre
examinación, reparación o ajuste.
8. El uso de aditamentos de accesorio no recomendados por el
fabricante del aparato puede causar lesiones.
9. No lo use en exteriores.
10. No deje que el cable cuelgue del borde de la mesa o cubierta, o que
toque superficies calientes, incluyendo la estufa.
11. No coloque sobre o cerca de quemadores de gas o eléctricos
calientes o en un horno calentado.
12. Se debe tener extrema precaución cuando se mueva un aparato
que contenga aceite caliente u otros líquidos calientes.
13. No use el aparato para otro uso que no sea para el que fue
hecho.
14. No use el aparato sin atenderlo.
15. Durante su uso, deje un espacio de 4 a 6 pulgadas por encima,
por detrás y a ambos lados para circulación del aire.
16. Nunca remueva el alimento con ningún tipo de dispositivo de
corte u otro utensilio de cocina metálico.
17. Siempre deje que el aparato se enfríe antes de guardarlo y nunca
enrolle el cable alrededor del aparato mientras esté caliente.
18. Este artefacto no está diseñado para freír alimentos.
¡GUARDE ESTAS INSTRUCCIONES!
Otra Información de Seguridad para el Cliente
Este aparato está planeado para uso doméstico.
¡ADVERTENCIA! Peligro de Descarga Eléctrica: Este aparato cuenta
con un enchufe polarizado (una pata más ancha) que reduce el
riesgo de una descarga eléctrica. El enchufe embona únicamente
en una dirección dentro de un tomacorriente polarizado. No trate
de obviar el propósito de seguridad del enchufe modificándolo de
alguna manera o utilizando un adaptador. Si el enchufe no entra
completamente en la toma, invierta el enchufe. Si aún no entra,
haga que un electricista reemplace la toma.
El largo del cable que se usa en este aparato fue seleccionado para
reducir el peligro de que alguien se enganche o tropiece con un
cable más largo. Si es necesario usar un cable más largo, se podrá
usar un cable de extensión aprobado. La clasificación eléctrica
nominal del cable de extensión debe ser igual o mayor que la
clasificación nominal del aparato. Es importante tener cuidado
de colocar el cable de extensión para que no se pliegue sobre el
mostrador o la mesera en donde niños puedan tirar del mismo
o tropezarse accidentalmente.
Para evitar una sobrecarga eléctrica del circuito, no use otro aparato
de alto voltaje en el mismo circuito con este aparato.
29
840216601 SPv01.indd 29840216601 SPv01.indd 29 7/9/12 9:51 AM7/9/12 9:51 AM
Page 30

Piezas y Características
Broche de Cubierta
Cubierta
Botón de
Liberación
de Parrillas
Parrilla Sartén
Superior Desmontable
Control de Temperatura
Luz de
Encendido
Roja
La luz de Encendido roja se
enciende cuando el aparato es
conectado por primera vez. La luz
Manijas
Parrilla para
Waffles Superior
Desmontable
Parrilla Sartén Inferior Desmontable
Parrilla para
Waffles Inferior
Desmontable
30
840216601 SPv01.indd 30840216601 SPv01.indd 30 7/9/12 9:51 AM7/9/12 9:51 AM
Botón de
Liberación
de Parrillas
Liberación de la Manija Plegable
Manija Plegable
Cuchara Medida
Previamente
(1/2 taza/125 ml)
permanecerá encendida hasta que
la unidad se desconecte.
La luz de Listo verde se enciende
cuando el aparato ha alcanzado
la temperatura deseada. Para
mejores resultados, espere hasta
que la luz de Listo verde se
encienda antes de agregar el
batido para waffles. Esta luz
se ciclará entre encendido y
apagado durante el cocinado.
= waffles
= cocina una sartén
= mantener caliente
Luz de
Listo
Verde
Page 31

Funciones Fáciles con 3 Opciones
1 2 3
Use dos cucharas medida
previamente con la cantidad
perfecta de masa.
Las profundas parrillas dejan
espacio para que los waffles
se eleven mientras se cocinan.
El canal de desborde extra
profundos permite que el exceso
de masa ingrese a canales de
desborde extra profundos.
31
840216601 SPv01.indd 31840216601 SPv01.indd 31 7/9/12 9:51 AM7/9/12 9:51 AM
Page 32

Cómo Cambiar las Parrillas
w ADVERTENCIA
Peligro de Quemaduras.
No cambie parrillas calientes.
PARA CAMBIAR LA PARRILLA
SUPERIOR:
1 2 3
Abra la tapa. Quite la parrilla
instalada presionando el botón
de liberación en la dirección de
la flecha pequeña, sacando la
parrilla.
Sostenga ambos lados de la otra
parrilla utilizando las manijas.
Introduzca las dos lengüetas
en las aberturas de la cubierta
inferior.
Presione el botón de liberación
de la parrilla en la dirección de
la flecha pequeña, presione la
parrilla en su lugar y libere el
botón para fijar la parrilla en
su lugar.
32
840216601 SPv01.indd 32840216601 SPv01.indd 32 7/9/12 9:51 AM7/9/12 9:51 AM
Page 33

Cómo Cambiar las Parrillas (cont.)
PARA CAMBIAR LA PARRILLA
INFERIOR:
1 2 3 4
Quite la parrilla instalada
presionando el botón de
liberación en la dirección de
la flecha pequeña, sosteniendo
la manija y sacando la parrilla.
Para volver a instalar la parrilla,
tome las manijas de la parte
inferior e introduzca las dos
lengüetas en las aberturas de
la base.
Presione el botón de liberación
de la parrilla en la dirección de
la flecha pequeña, presione la
parrilla en su lugar y libere el
botón para fijar la parrilla en
su lugar.
La parrilla sartén inferior no se
traba en su lugar. Simplemente
coloque la sartén en la base,
gire la manija para alinear el
área ranurada con el botón de
liberación y la sartén quedará
en su lugar.
33
840216601 SPv01.indd 33840216601 SPv01.indd 33 7/9/12 9:51 AM7/9/12 9:51 AM
Page 34

Como Usarlo Parrillas para Waffles
ANTES DEL PRIMER USO: Lave las parrillas en el lavavajillas o en agua caliente jabonosa. Enjuague y seque. Limpie o cepille las parrillas para
waffles con aceite vegetal. Esto se recomienda solamente antes del primer uso. El dorado del waffle mejorará con cada lote subsiguiente.
1 2 3
Enchufe el cable en una toma
eléctrica. La luz de Encendido
roja se encenderá.
CONSEJO: Puede usarse una
pequeña cantidad de aerosol
para cocción antiadherente en
las parrillas antes de precalentar.
34
840216601 SPv01.indd 34840216601 SPv01.indd 34 7/9/12 11:18 AM7/9/12 11:18 AM
Elija el ajuste de temperatura
de waffles deseada y precaliente
con la tapa cerrada hasta que
la luz de Listo verde se encienda.
CONSEJO: El color de los
waffles y cuán crujientes quedan
se ven determinados por la
temperatura de las parrillas.
Cuanto más elevada la
temperatura, más dorado y
crujiente quedará el waffle.
Levante la cubierta y vierta dos
cucharadas premedidas LLENAS
de masa en el centro de la
parrilla de cocción inferior.
Baje la cubierta.
CONSEJO: Cuando agregue
nueces, frutas o trocitos de
chocolate a su waffle, reduzca
la masa en 2 cucharadas (30 ml).
4
Los waffles se cocinan en
6–8 minutos, dependiendo
de la configuración, la receta,
cuando la luz de Listo verde se
encienden, o cuando el vapor
comienza a desaparecer.
No precaliente ni utilice la unidad
sin las parrillas en su lugar.
Page 35

Como Usarlo Parrillas para Waffles (cont.)
Usando un guante de cocina, abra la tapa. Quite el waffle con un
utensilio de plástico o de madera. Nunca utilice metal. Esto dañará
el revestimiento antiadherente. Gire el control a “MIN”. Desconecte
la unidad cuando acabe de cocinar. Deje enfriar.
¡ADVERTENCIA! Peligro de Quemarse.
5
de cocina para proteger las manos cuando abra la wafflera caliente.
El vapor que escapa puede quemar.
Siempre use unos guantes
Como Usarlo Sartén Antiadherente
w ADVERTENCIA
Peligro de Quemaduras.
No transporte o mueva la sartén cuando contenga aceite o alimentos calientes. Para reducir el riesgo de quemaduras debido a salpicaduras
de aceite, no coloque grandes cantidades de aceite en una sartén caliente. Cuando fría, vierta aceite en la sartén y luego precaliente la unidad.
La sartén inferior no se traba
en su lugar. NOTA: No utilice la
unidad a menos que la sartén se
Antes de usar la sartén, desplace
la manija hacia la izquierda o la
derecha hasta que se trabe en su
lugar y la manija quede recta.
21
encuentre bien colocada en su
lugar. Sólo precaliente y opere
la unidad con las sarténs en
su lugar.
35
840216601 SPv01.indd 35840216601 SPv01.indd 35 7/9/12 9:51 AM7/9/12 9:51 AM
Page 36

Como Usarlo Sartén Antiadherente (cont.)
3 4 5
Enchufe el cable en una toma
eléctrica. La luz de Encendido roja
se encenderá.
CONSEJO: Puede usarse una
pequeña cantidad de aerosol para
cocción antiadherente en parrilla
sartén inferior antes de precalentar.
6
36
Elija el ajuste de la temperatura
del sartén deseada y precaliente
de 5 a 7 minutos.
CONSEJO: Drene la grasa de
la sartén cuando cocine tocino,
salchichas u otras carnes para
una cocción pareja.
Gire el control a “MIN”.
Desconecte la unidad cuando
acabe de cocinar. Deje enfriar.
7
Agregue los alimentos y cierre
la cubierta. Levante la cubierta
para verificar el nivel de cocción
y gire los alimentos cuando
sea necesario. Sólo utilice
utensilios de cocción plásticos
o de madera para prolongar
la vida útil del revestimiento
antiadherente.
CONSEJOS:
• Para mejores resultados y
cocción más rápida, mantenga
la tapa cerrada.
• La sartén inferior cuenta con
dos áreas de servicio sencillo
para drenaje.
Sostenga la sartén inferior con
la mano izquierda y la manija
con la mano derecha. Utilizando
el pulgar, desplace el botón
hacia atrás hacia el extremo de
la manija. Gire la manija hacia la
izquierda o derecha para plegar.
840216601 SPv01.indd 36840216601 SPv01.indd 36 7/9/12 9:51 AM7/9/12 9:51 AM
Page 37

La sartén está recomendada para cualquier clase de alimento que produzca grasa.
Tabla para Cocinar
TIEMPO DE COCCIÓN
ALIMENTOS TEMPERATURA TEMP. INTERNA. APROX.*
Huevos Fritos 160°F (72°C) 2 a 3 minutos (no hay vuelta)
Pan Tostado ---------- 2 a 4 minutos
Hotcakes ---------- 2 a 4 minutos
Tocino Crujiente 4 a 6 minutos
Salchichas y Embutidos (1/2” [1.3 cm] de ancho) 160°F (72°C) 6 a 8 minutos
* Los tiempos de cocción están basados en ingredientes frescos, nunca
congelados.
Visite foodsafety.gov para más información sobre temperaturas de cocinado
internas seguras.
Consejos de Uso
• Para prepararle a su familia un desayuno rápido y caliente, utilice
cualquiera de las mezclas para waffles disponibles en el mercado
en la actualidad.
• Utilice un aerosol para cocción antes de verter la mezcla dentro
de las parrillas, especialmente para waffles de postre o recetas
con mucha azúcar.
• Si sus waffles comienzan a pegarse, las parrillas pueden necesitar
tallarse con una brocha de nylon para remover partículas cocidas
de alimento.
• Si usará nueces para la masa del wafle, agréguelos cortados y/o
de forma pareja esparza la masa de modo que la tapa se cierre
totalmente.
• Los waffles pueden hacerse antes de tiempo y mantenerse
calientes en un horno a 200ºF (93ºC).
• Vuelva a calentar en un horno de microondas, u horno tostador
o un horno normal.
840216601 SPv01.indd 37840216601 SPv01.indd 37 7/9/12 9:51 AM7/9/12 9:51 AM
• La mayoría de los waffles están listos en aproximadamente 6 a 8
minutos, dependiendo de la configuración seleccionada. Algunas
de las recetas que se preparan desde el inicio pueden tomar un
poco más. Revise si están preparados en aproximadamente 5
minutos. Si la cubierta de la wafflera no se levanta fácilmente,
entonces deje cocinar un minuto antes de revisar otra vez. Otro
indicador de que el waffle está listo es que la luz de Listo verde
se enciendan o que la formación de vapor se detenga.
• Para almacenarlos, deje que los waffles se enfríen y guárdelos en
un recipiente hermético; almacene en el refrigerador o congelador
para recalentarlos más tarde.
SI USTED VIVE EN UNA ÁREA DE ALTITUD ELEVADA:
El servicio de extensión tendrá información detallada sobre
cocción en su área. Para ubicar el servicio de extensión cooperativa
en su condado, tenga a bien visitar la siguiente página:
http://www.csrees.usda.gov/Extension/.
37
Page 38

Cuidado y Limpieza
1
Gire el control a “MIN”. Desconecte la unidad cuando acabe de
cocinar. Deje enfriar.
Limpie el exterior de la unidad con un trapo húmedo y jabonoso.
No use estropajos de fibra de acero, o limpiadores abrasivos sobre
cualquier parte de la unidad. Nunca use objetos afilados o picudos
con propósitos de limpieza.
2 3
Resolviendo Problemas
w ADVERTENCIA
Peligro de Descarga.
Desconecte de la toma antes de limpiar. No sumerja
el cable, enchufe o base en agua u otro líquido.
RESISTENTE AL
LAVAVAJILLAS
No utilice la configuración “SANI”
cuando la lave en el lavavajillas.
Las temperaturas del ciclo “SANI”
pueden dañar su producto.
Los lados traseros de las parrillas
para waffles y sartén pueden
decolorarse. Esto es normal.
Después de la limpieza, la manija
de la sartén puede plegarse
para facilitar el almacenamiento.
Sostenga la sartén inferior en
una mano y la manija en la otra.
Utilizando el pulgar, deslice el
botón hacia atrás y gire la manija
hacia la derecha o izquierda
para alcanzar la posición de
almacenamiento.
PROBLEMA
Calentamiento bajo, pobre
o lento.
Cocción muy lenta.
Los waffles están muy
pálidos.
38
840216601 SPv01.indd 38840216601 SPv01.indd 38 7/9/12 9:51 AM7/9/12 9:51 AM
CAUSA PROBABLE
• Deje que la parrillas para waffles/sartén se caliente por 5 a 7 minutos antes de usar.
• Verifique que las rejillas estén bien colocadas.
• Ajuste la temperatura hacia MAX (configuración más oscura).
Page 39

Coberturas y Pastas para Untar Sugeridas
para los Waffles
Jarabe de Arce
Jarabe de Chocolate
Azúcar en Polvo
Miel
Mermeladas y Jaleas
Sugerencias para mezclar en la masa antes de cocinar: Pedacitos de fruta fresca, fruta seca, chispas de chocolate, pasas cubiertas con
chocolate o nueces.
CONSEJO: Algunas frutas frescas, como los arándanos, tornarán azul el color de la masa. No las mezcle dentro de la masa; espárzalas
sobre la masa antes de cocinar.
Azúcar con Canela
Mantequilla de Arce
Mantequilla de Manzana
Crema Batida
Puré de Manzana
Azúcar Moreno
Trocitos de Chocolate
Glaseado de Pastel
Mantequilla de Maní
Recetas
Waffles Básicos
2 tazas (500 ml) de harina
2 cucharadas (30 ml) de azúcar
1 cucharada (15 ml) de polvo
para hornear
1 cucharadita (5 ml) de sal
Mezcle la harina, el azúcar, el polvo para hornear y la sal. Combine
la leche, el aceite y los huevos. Gradualmente agregue la mezcla
de leche a los ingredientes secos. Revuelva hasta apenas mezclar.
Vierta dos cucharadas premedidas de masa en el medio de la
wafflera. Rendimiento: 6 (1/2 waffle cada uno)
1 3/4 tazas (430 ml) de leche
1/3 taza (80 ml) de aceite vegetal
2 huevos
Waffles de Arándanos: Después de verter la mezcla sobre las
parrillas, esparza arándanos frescos sobre la mezcla y luego cierre
la tapa. No revuelva los arándanos dentro de la mezcla; esto crea
waffles de color gris azulado.
Para Preparar un Waffle Sabroso: Agregue sus especias favoritas
picadas frescas o secas a la masa. Siga las instrucciones de Cómo
Usarlo Parrillas para Waffles.
39
840216601 SPv01.indd 39840216601 SPv01.indd 39 7/9/12 9:51 AM7/9/12 9:51 AM
Page 40

Recetas (cont.)
Tostadas Francesas Rellenas
1 huevo grande
1 clara de huevo grande
1 cucharada (15 ml) de conserva de frutilla
1 cucharada (15 ml) de queso crema
1 cucharada (15 ml) de pecanas picadas
2 rebanadas de pan de canela
Precaliente la sartén Breakfast Master en fuego medio. Bata el huevo
y la clara de huevo en un tazón medio; separe. Mezcle el queso
crema y las pecanas en un tazón pequeño; unte sobre una rebanada
de pan. Unte la conserva de frutilla sobre la otra rebanada de pan.
Cubra el pan con la mezcla de queso crema en el último pan, con el
lado de la frutilla hacia abajo. Coloque el pan en la mezcla de huevo
durante 2 minutos; gire y deje sumergido por otros 2 minutos.
Coloque el pan en la sartén; cierre la cubierta. Cocine de 4 a 5
minutos o hasta que se hayan cocido bien. Sirva con azúcar en
polvo o jarabe de arce. Rendimiento: 1
Omelet del Oeste
2 huevos grandes
1 cucharada (15 ml) de leche
1 cucharada (15 ml) de cebollas picadas
2 cucharadas (30 ml) de hongos picados
2 cucharadas (30 ml) de pimientos verdes picados
2 cucharadas (30 ml) de pimientos rojos picados
1 rebanada de jamón picada
Sal y pimienta a gusto
Precaliente la Breakfast Master con las parrillas sartén en fuego
medio. Bata los huevos, la leche, sal y pimienta hasta mezclar bien.
Rocíe la sartén con aerosol para cocción antiadherente. Coloque las
cebollas, hongos, pimientos verdes y rojos en la sartén. Cierre la
cubierta y cocine por 2 minutos. Vierta la mezcla de huevos sobre
la mezcla de cebolla. Cubra con jamón; cierre la tapa. Cocine por
3 minutos o hasta que se haya cocido bien. Espolvoree con queso;
quite de la sartén. Sirva con salsa y crema agria, si así lo desea.
Rendimiento: 1
40
840216601 SPv01.indd 40840216601 SPv01.indd 40 7/9/12 9:51 AM7/9/12 9:51 AM
Page 41

Recetas (cont.)
Omelet de Salchichas y Papas
2 huevos batidos grandes
1 cucharada (15 ml) de crema agria
1/4 de cucharadita (1.3 ml) de aderezo italiano
1/8 de cucharadita (0.6 ml) de sal
1/8 de cucharadita (0.6 ml) de pimienta
1/4 taza (60 ml) de salchicha a granel
1/4 taza (60 ml) de hash browns en cubos
2 cucharadas (30 ml) de cebollas picadas
2 cucharadas (30 ml) de pimientos picados
2 cucharadas (30 ml) de queso cheddar en hebras
Precaliente la Breakfast Master con las parrillas sartén en fuego
medio. Bata los huevos, la crema agria, el aderezo italiano, la sal y
pimienta. Rocíe la sartén con aerosol para cocción antiadherente.
Agregue la salchicha; cierre la cubierta y cocine por 2 minutos.
Escurra la grasa si fuera necesario. Agregue las papas, la cebolla y
el pimiento a la salchicha. Cierre la cubierta y cocine por 2 minutos.
Vierta la mezcla de huevos sobre la mezcla de papas. Cierre la
cubierta y cocine por 3 minutos. Espolvoree con queso y quite
de la sartén. Rendimiento: 1
Omelet Cremoso de Tocino y Tomate
2 rebanadas de tocino cortadas en trozos de 1/2 pulgada
2 huevos batidos grandes
1 cucharada (15 ml) de cebollinos picados
1/4 cucharadita (1.3 ml) de hojas de albahaca secas
Sal y pimienta a gusto
3 cucharadas (45 ml) de tomates picados
1 cucharada (15 ml) de queso crema cortado en pedazos
Precaliente la Breakfast Master con las parrillas para sartén en fuego
medio. Coloque el tocino en la sartén; cierre la cubierta. Cocine de 3
a 4 minutos o hasta que quede crujiente. Escurra la sartén y coloque
el tocino sobre toallas de papel. Mezcle los huevos, albahaca, sal y
pimienta. Vierta la mezcla de huevo en la sartén; cierre la cubierta.
Cocine por 3 minutos; agregue el queso crema, tocino y el tomate
a la mitad de la omelet. Pliegue para cubrir la mezcla. Cierre la
cubierta; cocine por 2 minutos adicionales o hasta que se haya
cocido bien. Rendimiento: 1
41
840216601 SPv01.indd 41840216601 SPv01.indd 41 7/9/12 9:51 AM7/9/12 9:51 AM
Page 42

Grupo HB PS, S.A. de C.V.
Monte Elbruz No. 124 Int. 601
Col. Palmitas Polanco
México, D.F. C.P. 11560
01-800-71-16-100
PÓLIZA DE GARANTÍA
PRODUCTO:
MARCA:
Grupo HB PS, S.A. de C.V. cuenta con una Red de Centros de Servicio Autorizada, por favor consulte en la lista anexa el nombre y dirección de los establecimientos en la
República Mexicana en donde usted podrá hacer efectiva la garantía, obtener partes, componentes, consumibles y accesorios; así como también obtener servicio para
productos fuera de garantía. Para mayor información llame sin costo: Centro de Atención al consumidor: 01 800 71 16 100
Grupo HB PS, S.A. de C.V. le otorga a partir de la fecha de compra:
GARANTÍA DE 1 AÑO.
COBERTURA
• Esta garantía ampara, todas las piezas y componentes del producto que resulten con defecto de fabricación incluyendo la mano de obra.
Grupo HB PS,
•
todo lo anterior sin costo adicional para el consumidor.
• Esta garantía incluye los gastos de transportación del producto que deriven de su cumplimiento dentro de su red de servicio.
S.A. de C.V. se obliga a reemplazar, reparar o reponer, cualquier pieza o componente defectuoso; proporcionar la mano de obra necesaria para su diagnóstico y reparación,
LIMITACIONES
• Esta garantía no ampara el reemplazo de piezas deterioradas por uso o por desgaste normal, como son: cuchillas, vasos, vasos, fi ltros, etc.
• Grupo HB PS, S.A. de C.V. no se hace responsable por los accidentes producidos a consecuencia de una instalación eléctrica defectuosa, ausencia de toma de tierra, clavija de enchufe
en mal estado, etc.
EXCEPCIONES
Esta garantía no será efectiva en los siguientes casos:
a) Cuando el producto se hubiese utlizado en condiciones distintas a las normales. (Uso industrial, semi-industrial o comercial.)
b) Cuando el producto no hubiese sido operado de acuerdo con el instructivo de uso.
c) Cuando el producto hubiese sido alterado o reparado por personas no autorizadas por Grupo HB PS, S.A. de C.V. el fabricante nacional, importador o comercializador responsable
respectivo.
d) Esta garantía pierde su validez si el producto es utilizado en un medio diferente a una vivienda unifamiliar o se somete a cualquier voltaje o forma de onda diferente a la especifi cada
en la etiqueta de clasifi cación (ej., 120V ~ 60 Hz).
El consumidor puede solicitar que se haga efectiva la garantía ante la propia casa comercial donde adquirió su producto, siempre y cuando Grupo HB PS, S.A. de C.V. no cuente con talleres de
servicio.
MODELO:
42
840216601 SPv01.indd 42840216601 SPv01.indd 42 7/9/12 9:51 AM7/9/12 9:51 AM
Page 43

PROCEDIMIENTO PARA HACER EFECTIVA LA GARANTÍA
• Para hacer efectiva la garantía no deben exigirse mayores requisitos que la presentación del producto y la póliza correspondiente, debidamente sellada por el establecimiento que lo vendió.
• Para hacer efectiva la garantía, lleve su aparato al Centro de Servicio Autorizado más cercano a su domicilio (consulte la lista anexa).
• Si no existe Centro de Servicio Autorizado en su localidad llame a nuestro Centro de Atención al Consumidor para recibir instrucciones de como hacer efectiva su garantía.
• El tiempo de reparación, en ningún caso será mayor de 30 días naturales contados a partir de la fecha de recepción del producto en nuestros Centros de Servicio Autorizados.
• En caso de que el producto haya sido reparado o sometido a mantenimiento y el mismo presente defi ciencias imputables al autor de la reparación o del mantenimiento dentro de los treinta
días naturales posteriores a la entrega del producto al consumidor, éste tendrá derecho a que sea reparado o mantenido de nuevo sin costo alguno. Si el plazo de la garantía es superior a
los treinta días naturales, se estará a dicho plazo.
• El tiempo que duren las reparaciones efectuadas al amparo de la garantía no es computable dentro del plazo de la misma. Cuando el bien haya sido reparado se iniciará la garantía respecto
de las piezas repuestas y continuará con relación al resto. En el caso de reposición del bien deberá renovarse el plazo de la garantía.
Si desea hacer comentarios o sugerencias con respecto a nuestro servicio o tiene alguna queja derivada de la atención recibida en
alguno de nuestros Centros de Servicio Autorizados, por favor dirigirse a:
DÍA___ MES___ A—O___
GERENCIA INTERNACIONAL DE SERVICIO
Email: mexico.service@hamiltonbeach.com.mx
01 800 71 16 100
RED DE CENTROS DE SERVICIO AUTORIZADA GRUPO HB PS, S.A. DE C.V.
Distrito Federal
ELECTRODOMÉSTICOS
Av. Plutarco Elias Cailes No. 1499
Zacahuitzco MEXICO 09490 D.F.
Tel: 01 55 5235 2323 • Fax: 01 55 5243 1397
CASA GARCIA
Av. Patriotismo No. 875-B
Mixcoac MEXICO 03910 D.F.
Tel: 01 55 5563 8723 • Fax: 01 55 5615 1856
Nuevo Leon
FERNANDO SEPULVEDA REFACCIONES
Ruperto Martínez No. 238 Ote.
Centro MONTERREY, 64000 N.L.
Tel: 01 81 8343 6700 • Fax: 01 81 8344 0486
Jalisco
SERVICIOS DE MANTENIMIENTO CASTILLO
Garibaldi No. 1450
Ladrón de Guevara
GUADALAJARA 44660 Jal.
Tel: 01 33 3825 3480 • Fax: 01 33 3826 1914
Chihuahua
DISTRIBUIDORA TURMIX
Av. Paseo Triunfo de la Rep. No. 5289 Local 2 A.
Int. Hipermart
Alamos de San Lorenzo
CD. JUAREZ 32340 Chih.
Tel: 01 656 617 8030 • Fax: 01 656 617 8030
43
840216601 SPv01.indd 43840216601 SPv01.indd 43 7/9/12 9:51 AM7/9/12 9:51 AM
Page 44

Modelo:
26046
Tipo:
ST28
Características Eléctricas:
120V~ 60Hz 650W
Los modelos incluídos en el instructivo de Uso y Cuidado pueden ir seguidos o no por un sufijo correspondiente a una
o varias letras del alfabeto y sus combinaciones, separadas o no por un espacio, coma, diagonal, o guión. Como ejemplos
los sufijos pueden ser: “Y” y/o “MX” y/o “MXY” y/o “Z”.
840216601
840216601 SPv01.indd 44840216601 SPv01.indd 44 7/9/12 9:51 AM7/9/12 9:51 AM
7/12
 Loading...