

Page 1
00062748/03.07
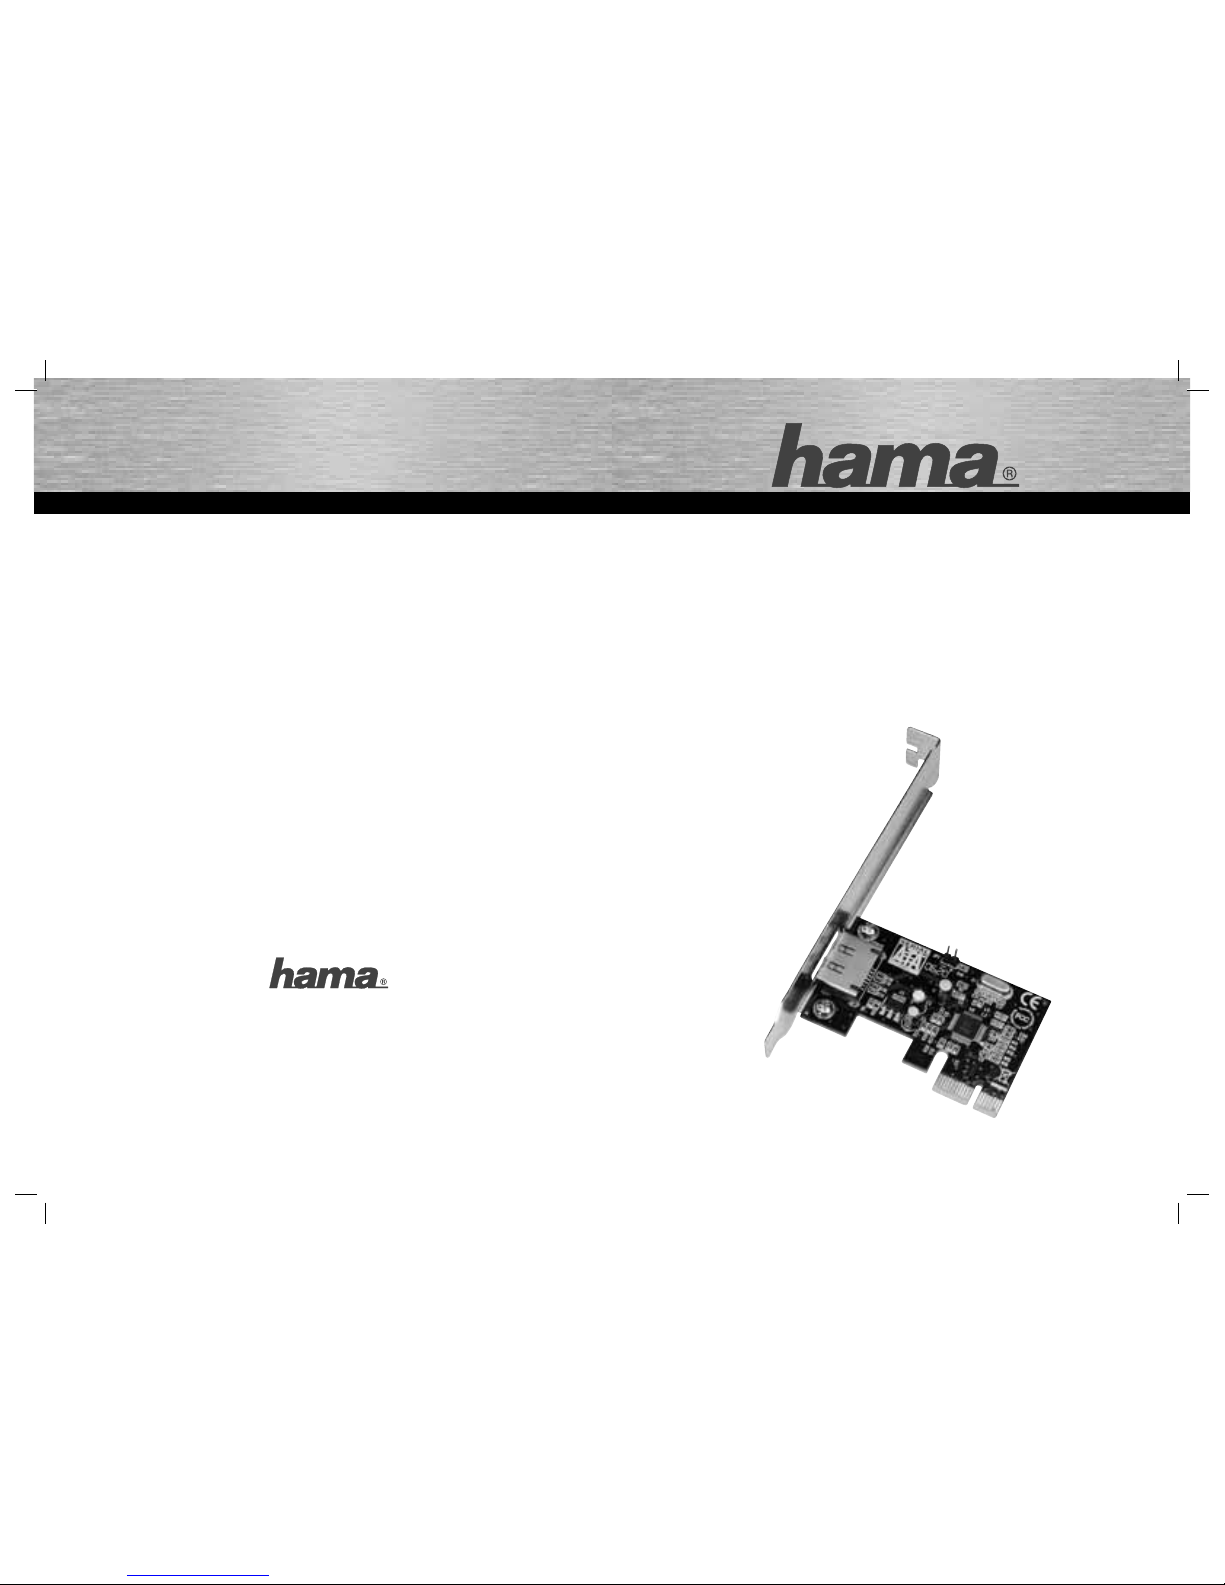
PCI-Express Karte, 1fach
» eSATA«
PCI-Express Card, 1port
Carte eSATA PCI-Express, 1 port
COMPUTER
All listed b rands are tra demarks of the c orrespondin g companies. Errors and omissions excepted,
and subject to technical changes. Our general terms of delivery and payment are applied.
PO Box 80 · 86651 Monheim/Germany
Phone: +49 9091 502-0
Fax: +49 9091 502-458
http://www.hama.com
00062748
Page 2
2
3
Übersicht:
1. Verpackungsinhalt
2. Hardwareinstallation
3. Treiberinstallation
3.1 Windows 2000/XP
3.2 Windows Vista
4. Kontakt- und Supporthinweise
1. Verpackungsinhalt
- PCI-Express eSATA Karte
- Benutzerhandbuch
- TreiberCD
- Hinweis zum Umweltschutz
2. Hardware-Installation:
Um die Karte zu installieren, müssen Sie Ihren Computer öffnen.
Achten Sie daher unbedingt darauf, dass Sie Ihren Computer
vom Stromnetzt getrennt haben. Sollten Sie mit dem internen
Aufbau Ihres Computers nicht so sehr vertraut sein, lesen Sie
bitte im Handbuch Ihres Computers nach oder fragen Sie einen
Fachmann.
1. Schalten Sie alle angeschlossenen Geräte und Ihren
Computer ab.
2. Stecken Sie den PC aus, bevor Sie mit der Installation
beginnen.
3. Öffnen Sie die Abdeckung Ihres Computers.
Hinweis: Achten Sie darauf, dass statische
Elektrizität, sowohl die Karte als auch, Ihren
Computer beschädigen kann. Entladen Sie sich
durch Berühren eines metallischen Gegenstandes.
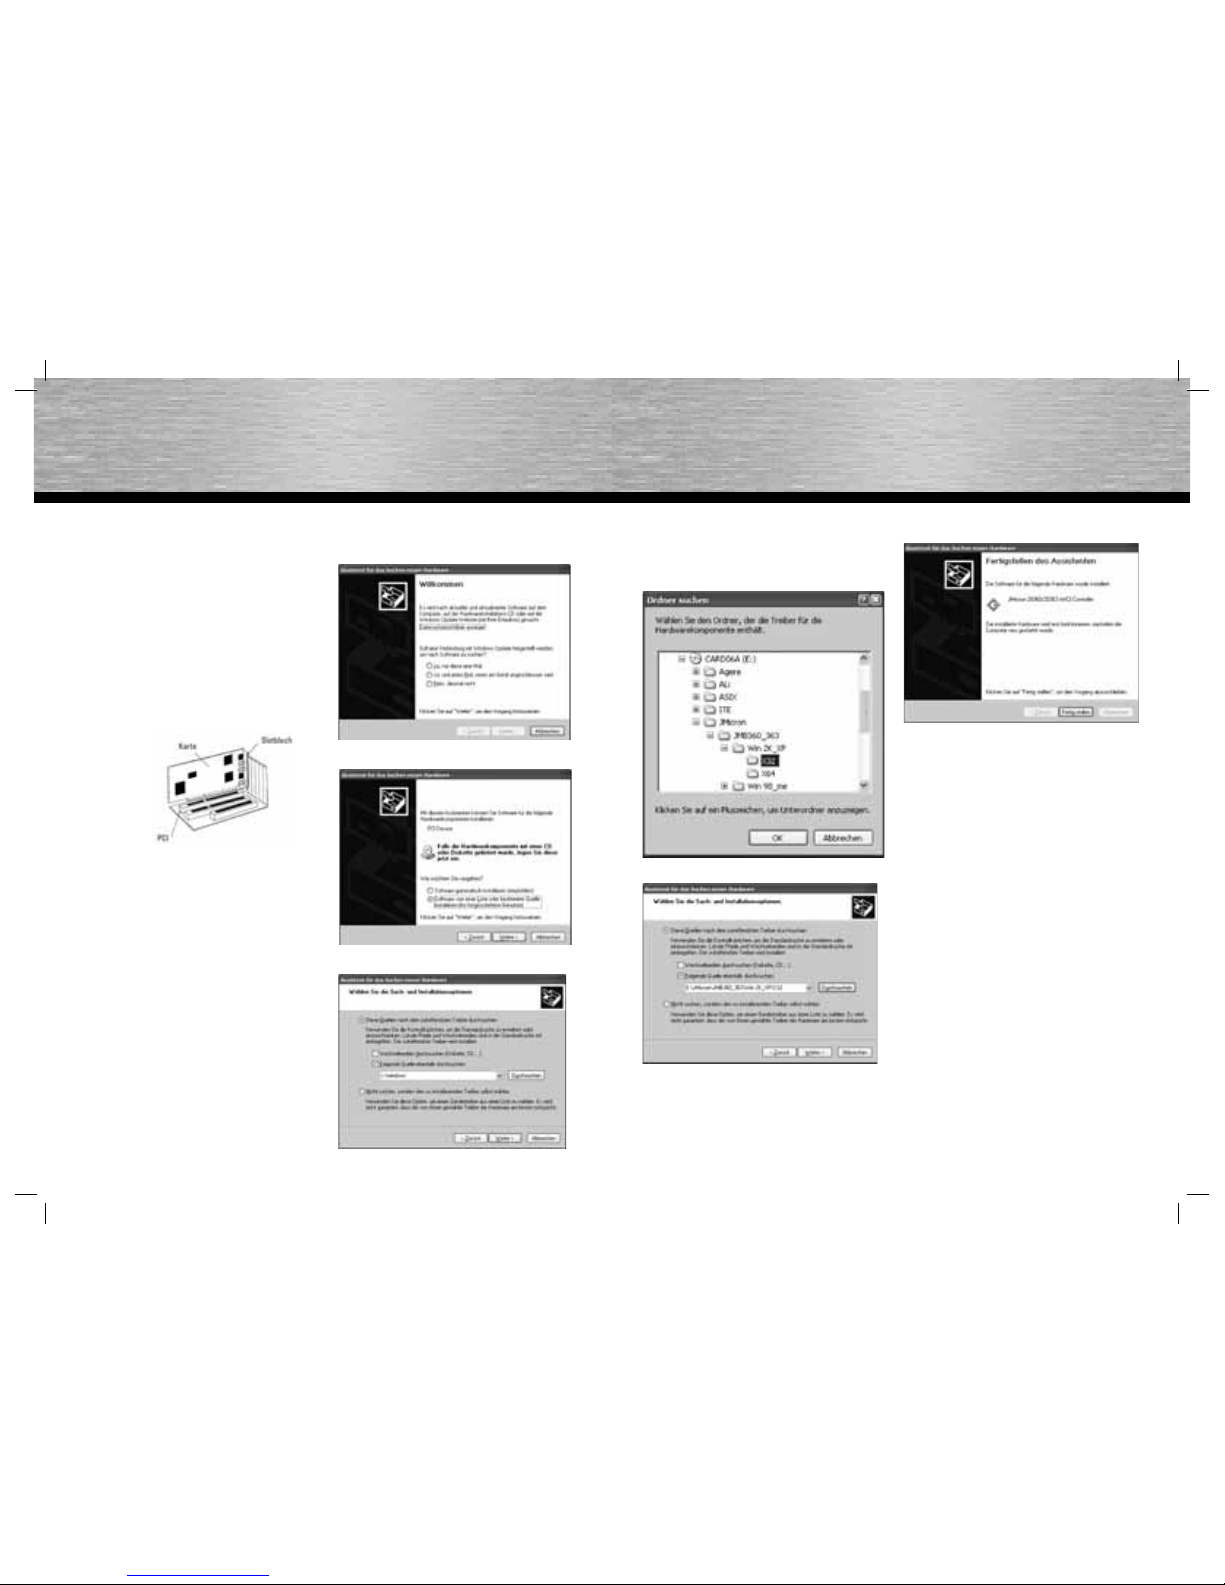
4. Suchen Sie einen freien PCI-Express-Steckplatz. Entfernen
Sie das Slot-Blech für diesen Steckplatz. Bewahen Sie die
Schraube gut auf, Sie benötigen sie später zum Befestigen
der Karte.
5. Halten Sie die Karte an den Ecken der Platine und stecken
Sie diese in den freien Steckplatz. Drücken Sie die Karte
nun vorsichtig in den Steckplatz bis der Haltewinkel
aufl iegt und die vergoldeten Steckkontakte vollständig im
Steckplatz verschwunden sind.
6. Befestigen Sie die Karte mit der zuvor entfernten SlotBlech-Schraube.
7. Schließen Sie das Gehäuse Ihres Computers und
verbinden Sie ihn wieder mit der Spannungsversorgung.
8. Schalten Sie nun Ihren Rechner wieder ein.
3. Treiberinstallation
3.1 Windows 2000 / XP
1. Legen Sie die mitgelieferte InstallationsCD in das CD-Rom
Laufwerk ein.
2. Der Assistent für das Suchen neuer Hardware erscheint.
Wählen Sie „Nein, diesmal nicht“ und fahren Sie mit weiter fort.
3. Wählen Sie „Software von einer Liste oder bestimmten
Quelle installieren.“ aus
4. Markieren Sie „Folgende Quelle ebenfalls durchsuchen:“ und
klicken Sie nun auf Durchsuchen
d
Bedienungsanleitung
5. Navigieren Sie nun zum CD-Rom Laufwerk und öffnen Sie den
Ordner „JMicron“. Nun öffnen Sie den Ordner „JMB360_363“.
Wählen Sie dann den Unterorder „X32“ aus, dieser befi ndet
sich im Ordner Win 2k_XP . Bestätigen Sie Ihre Auswahl mit OK.
Sollten Sie ein 64-Bit Betriebssystem verwenden, wählen Sie
bitte den Ordner „X64“.
6. Fahren Sie nun mit Weiter fort.
7. Klicken Sie auf „Fertigstellen“ um die Treiberinstallation
abzuschließen.
8. Starten Sie anschließend Ihren PC neu.
3.2 Windows Vista
Die benötigten Treiber sind bereits in Windows Vista integriert.
Nach erfolgter automatischer Treiberinstallation muss der PC
neu gestartet werden.
4. Kontakt- und Supportinformationen
Bei defekten Produkten:
Bitte wenden Sie sich bei Produktreklamationen an Ihren Händler oder an die Hama Produktberatung.
Internet/World Wide Web
Produktunterstützung, neue Treiber oder Produktinformationen
bekommen Sie unter www.hama.com
Support Hotline – Hama Produktberatung:
Tel. +49 (0) 9091 / 502-115
Fax +49 (0) 9091 / 502-272
e-mail: [email protected]
Page 3
4
5
Overview:
1. Package contents
2. Installing the hardware
3. Installing the driver
3.1 Windows 2000/XP
3.2 Windows Vista
4. Contact and support information
1. Package contents
- PCI Express eSATA card
- User manual
- Driver CD
- Note on environmental protection
2. Installing the hardware:
You must open your computer to install the card. Ensure that
you have disconnected your computer from power. If you are
not familiar with the internal setup of your computer then please
consult your computer manual or ask an expert.
1. Switch off all connected devices and your computer.
2. Unplug your PC before beginning installation.
3. Open the cover of your computer.
Note: Be aware that static electricity can damage
both the card and your computer. Discharge yourself
by touching a metal object.
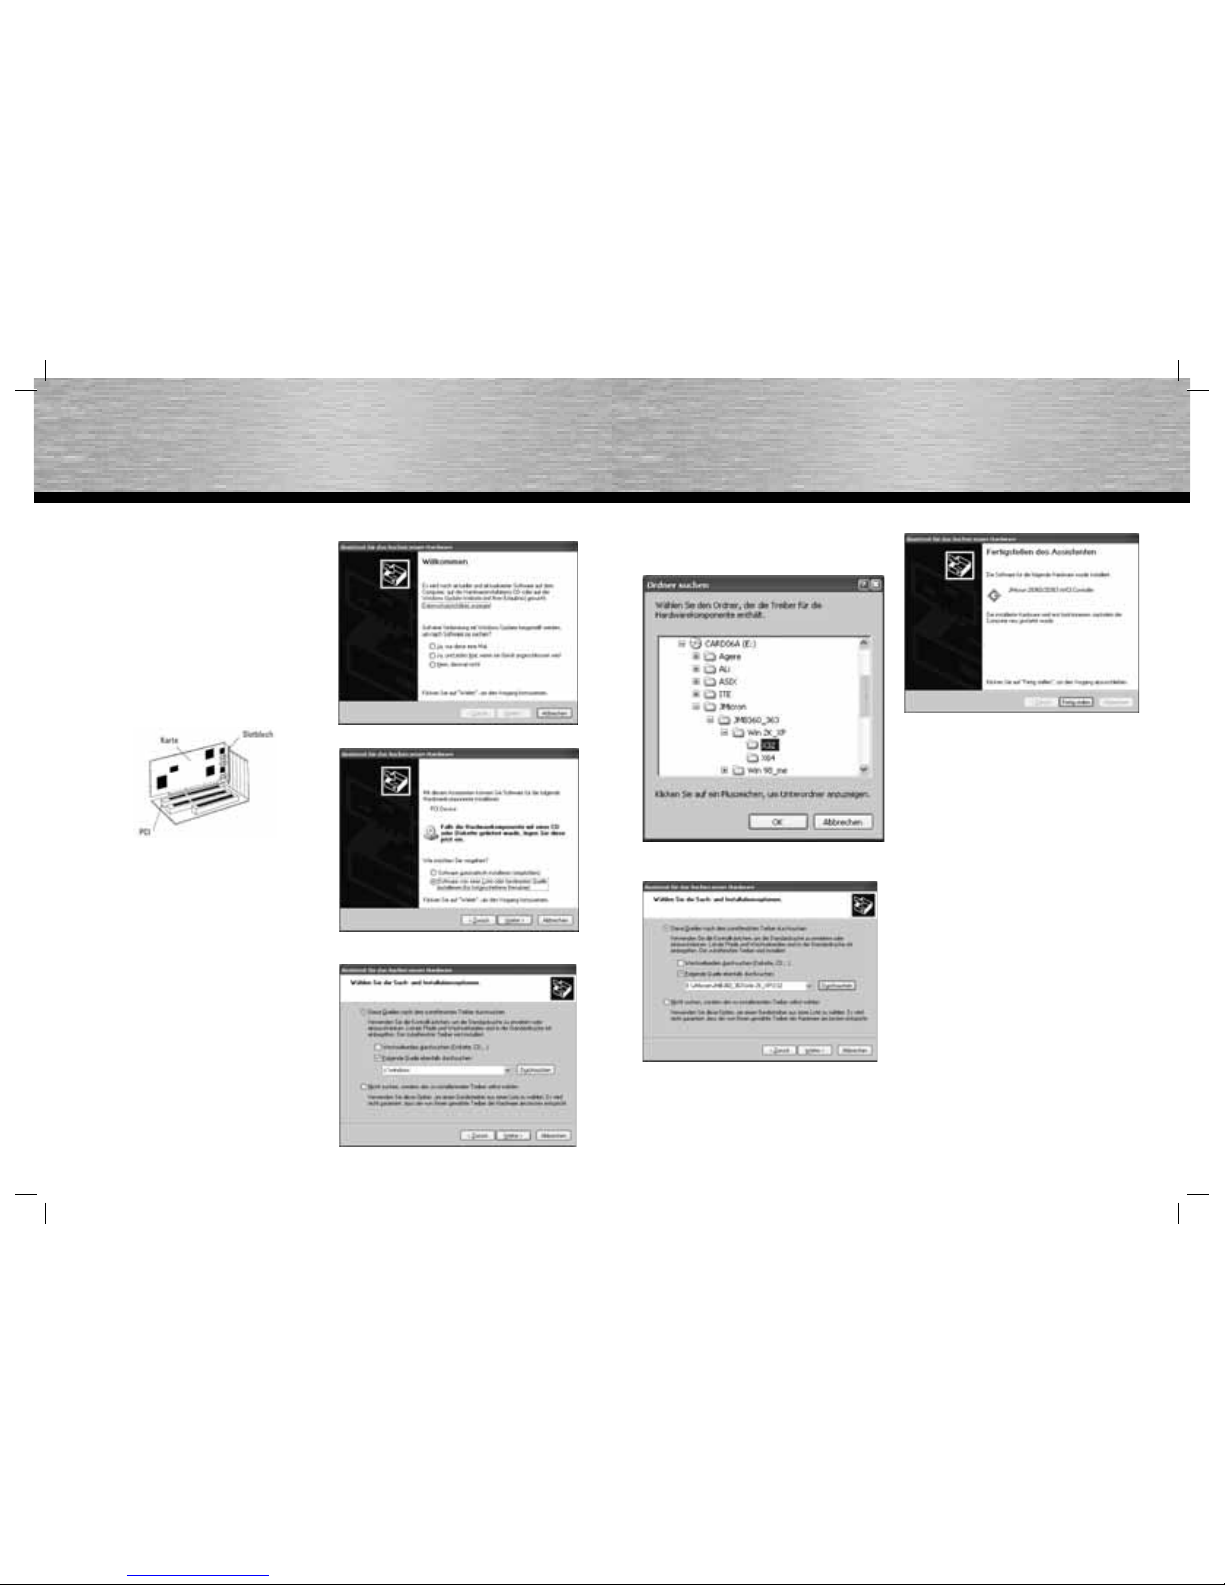
4. Find a free PCI Express slot. Remove the cover plate for
this slot. Keep the screw – you will need it to secure the
card later.
5. Hold the card on the edges of the board and insert it into
the free slot. Carefully press the card into the slot until the
holding bracket is lined up with the casing and the goldplated contacts have disappeared within the slot.
6. Secure the card using the slot plate screw you removed
earlier.
7. Close the case of your computer, and plug it into the power
supply again.
8. Restart your computer.
3. Installing the driver
3.1 Windows 2000/XP
1. Place the enclosed installation CD into your CD-ROM drive.
2. The Add New Hardware Wizard appears.
Select “No, not this time” and then click Next to continue.
3. Select “Install from a list or specifi c location”.
4. Select “Include this location in the search:”, and click
Browse.
g Operating Instruction
5. Navigate to the CD-Rom drive and open the folder “JMicron”.
Open the folder “JMB360_363”. In the folder Win 2k_XP, select
the sub-folder “X32”. Click OK to confi rm your selection. If you
use a 64-bit operating system, select the folder “X64”.
6. Click Next to continue.
7. Click Finish to complete the driver installation process.
8. Restart your PC.
3.2 Windows Vista
All drivers required are already installed in Windows Vista.
After installation is automatically executed and completed,
you must restart your PC.
4. Support and Contact Information
If products are defective:
Please contact your dealer or Hama Product Consulting if you
have any product claims.
Internet / World Wide Web:
Product support, new drivers or product information can be
found at www.hama.com
Support Hotline – Hama Product Consulting:
Tel. +49 (0) 9091 / 502-115
Fax +49 (0) 9091 / 502-272
E-mail: [email protected]
Page 4
6
7
g
Operating Instruction
Sommaire :
1. Contenu de l´emballage
2. Installation du matériel
3. Installation des pilotes
3.1 Windows 2000/XP
3.2 Windows Vista
4. Informations de support et de contact
1. Contenu
- Carte PCI-Express eSATA
- Guide de l´utilisateur
- Pilote CD
- Informations sur la protection de l´environnement
2. Installation du matériel :
Avant d´installer la carte, ouvrez votre ordinateur. Pour cela,
vérifi ez bien que votre ordinateur n´est plus raccordé au réseau.
Si vous n´êtes pas trop familiarisé avec la construction interne
de votre ordinateur, lisez bien le manuel d´utilisation de votre
ordinateur ou demandez conseil auprès d´un spécialiste.
1. Eteignez votre ordinateur et tous les appareils branchés.
2. Avant de débuter l´installation, débranchez votre PC.
3. Ouvrez le couvercle de votre ordinateur.
Remarque : Notez que l´électricité statique peut
endommager la carte ainsi que votre ordinateur.
Déchargez-vous en touchant un objet métallique.
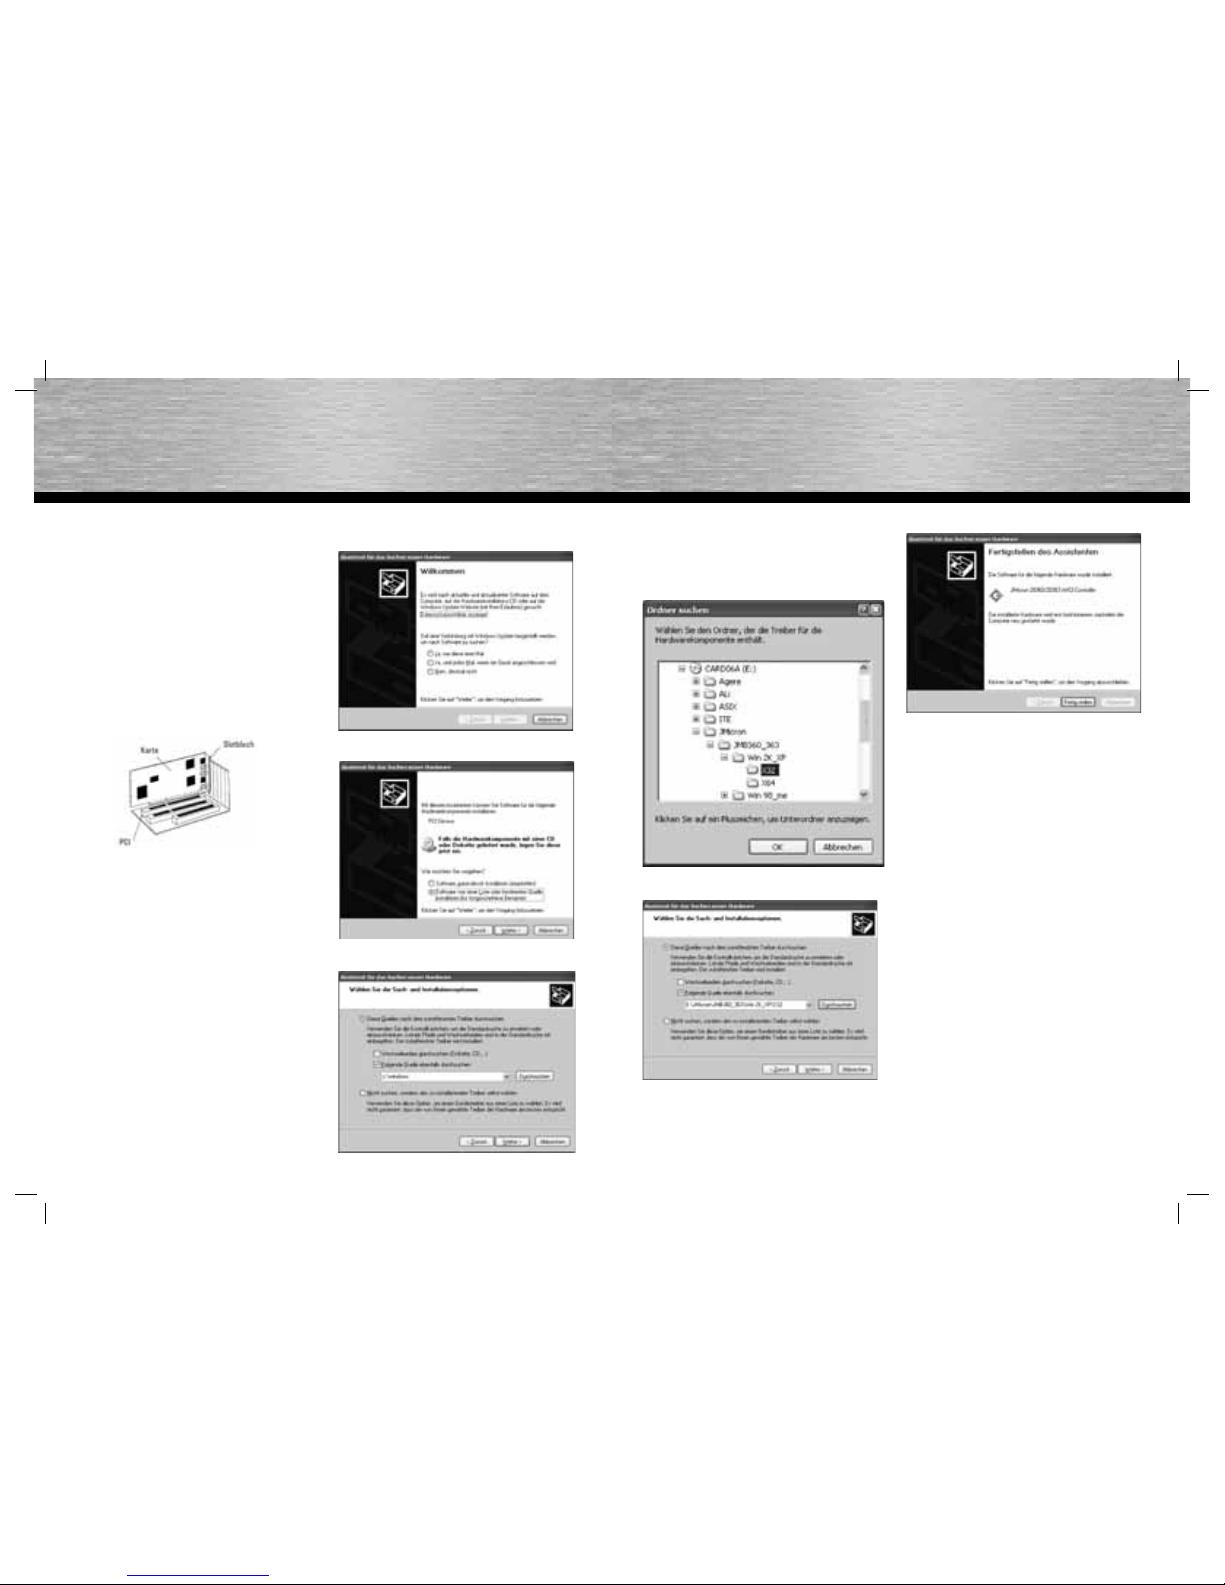
4. Cherchez un emplacement PCI-Express disponible. Enlevez
le couvercle de cet emplacement. Conservez bien la visse,
vous en aurez besoin plus tard pour installer la carte.
5. Tenez la carte aux coins de la platine et insérez-la dans
l´emplacement disponible. Poussez maintenant la carte
avec précaution dans l´emplacement jusqu´à ce que
l´angle de support soit enclenché et que les contacts dorés
soient entièrement disparus dans l´emplacement.
6. Fixez la carte avec la vis du couvercle de l´emplacement
enlevée auparavant.
7. Veuillez refermer le boîtier de votre ordinateur et
rebranchez-le.
8. Allumez maintenant votre ordinateur.
3. Installation du pilote
3.1 Windows 2000 / XP
1. Insérez le CD d´installation ci-joint dans le lecteur de
CD-ROM.
2. L´Assistant de recherche de nouveaux équipements s´affi che
alors à l´écran. Cliquez sur „Non, pas cette fois“ et poursuivez
en cliquant sur Continuer.
3. Sélectionnez „Installer un logiciel d´une liste ou d´une
certaine source.“
4. Double-cliquez sur „Rechercher également la source
suivante :“ puis cliquez sur Rechercher.
f Mode d‘emploi
5. Naviguez maintenant vers le lecteur CD-Rom et ouvrez le
répertoire „JMicron“. A présent, ouvrez le répertoire
„JMB360_363“. Sélecttionnez alors le sous-repertoire „X32“,
celui-ci est situé dans le répertoire Win 2k_XP . Confi rmez
votre choix en cliquant sur OK. Si vous utilisez un système
d´exploitation de 64 Bits, veuillez sélectionner le répertoire
„X64“.
6. Poursuivez en cliquant sur Continuer.
7. Cliquez sur „Achever“ pour terminer l´installation du pilote.
8. Ensuite, redémarrez votre PC.
3.2 Windows Vista
Les pilotes nécessaires sont déjà intégrés dans Windows Vista.
Après l´installation réussie des pilotes, il est nécessaire de
redémarrer le PC.
4. Support technique et contact
En cas d’appareil défectueux :
En cas de réclamation concernant le produit, veuillez vous
adresser à votre revendeur ou au département conseil produits
de Hama.
Internet / World Wide Web
Notre support technique, les nouveaux pilotes et les informations produits sont disponibles sous :
www.hama.com
Ligne téléphonique directe d’assistance – Conseil produits
Hama :
Tél. +49 (0) 9091 / 502-115
Fax +49 (0) 9091 / 502-272
e-mail : [email protected]
 Loading...