

Page 1
00039741_07.2004
00039741
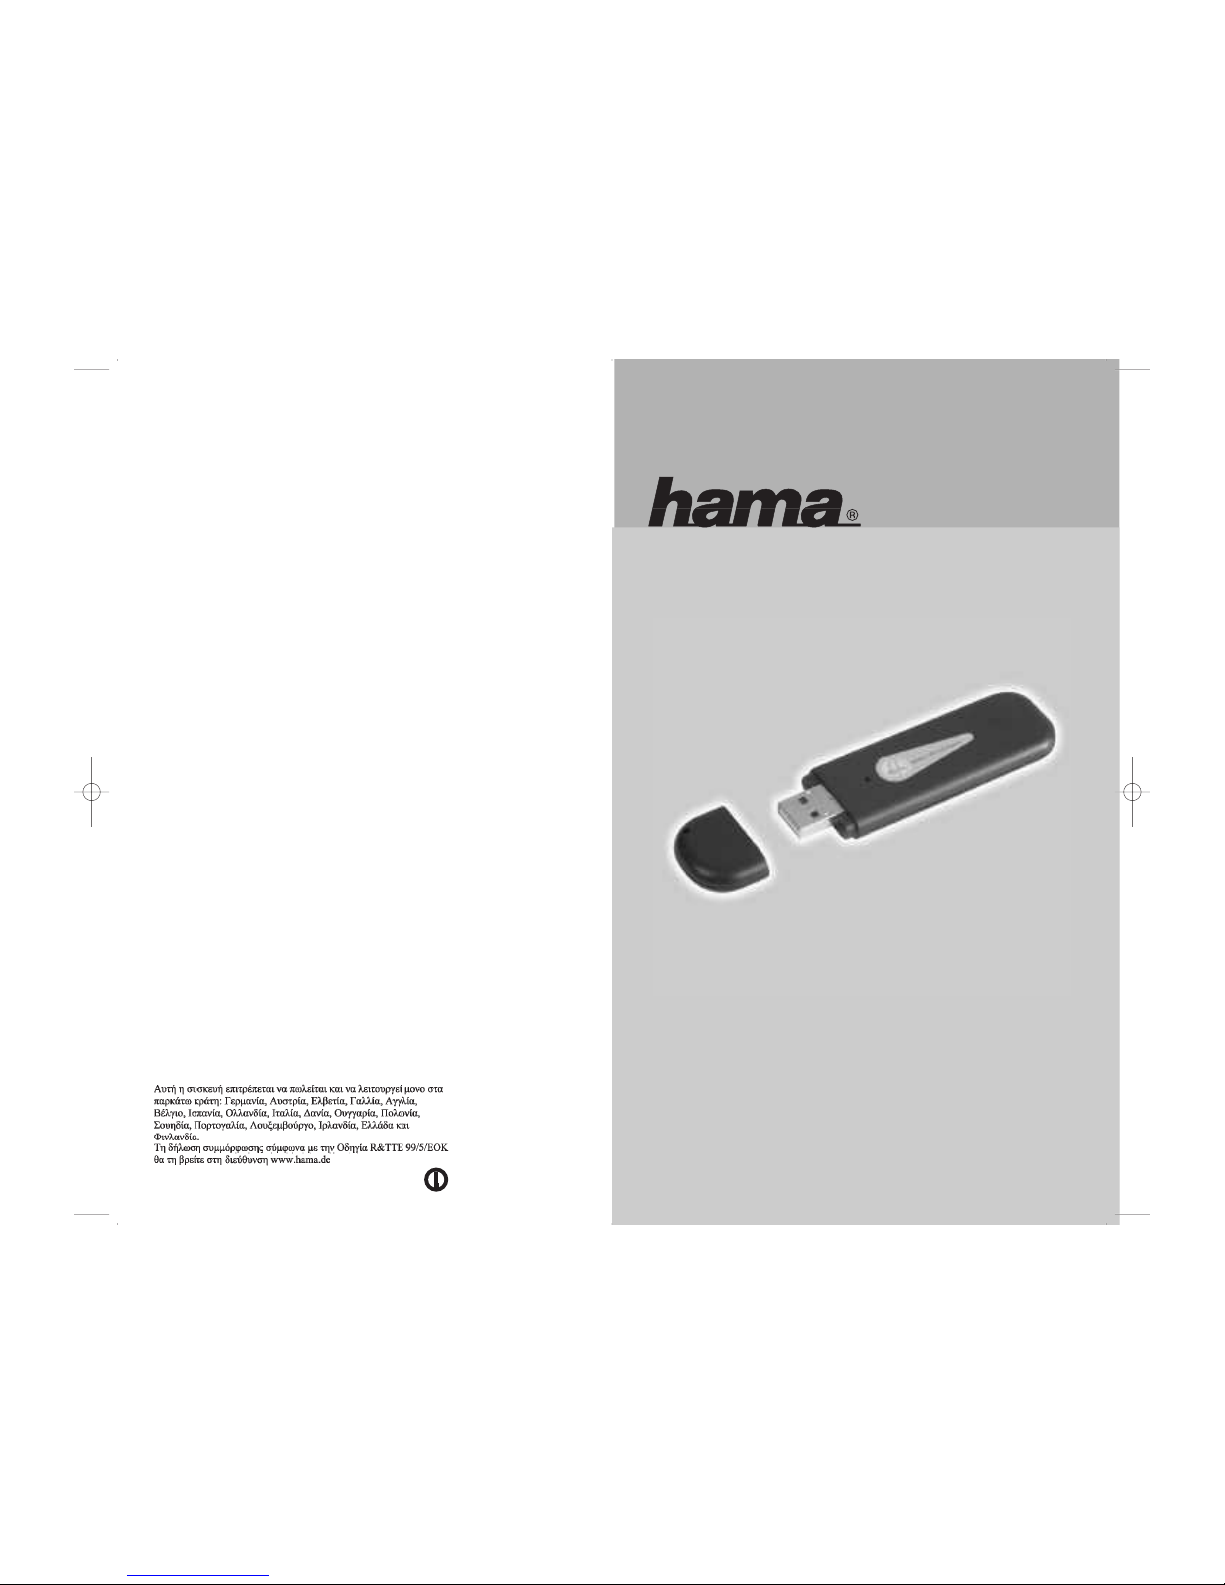
Wireless LAN Netzwerkadapter USB 2.0 54 Mbps
Hama GmbH & Co KG
D-86651 Monheim/Germany
Tel. (09091) 5 02-0
Fax 502-2 74
e-mail: [email protected]
www.hama.de
fl
Este aparato se puede operar sólo en Alemania, Austria, Suiza, Francia, Inglaterra, Bélgica, España,
Países Bajos, Italia, Dinamarca, Hungría, Polonia, Suecia, Portugal, Luxemburgo, Irlanda, Grecia y Finlandia.
La declaratión de conformidad según la directiva R&TTE 99/5/EC la encontratá en www.hama.de
Fabricado en Taiwan
.
È consentito l'impiego di questo apparecchio solamente in Germania, Austria, Svizzera, Francia, Inghilterra, Belgio, Spagna, Olanda, Italia, Danimarca, Ungheria, Polonia; Svezia, Portogallo, Lussemburgo,
Irlanda, Grecia e Finlandia.
La dichiarazione di conformitá secondo la direttiva R&TTE 99/5/EC é disponibile sul sito www.hama.de
:
Dit toestel mag uitsluitend in Duitsland, Oostenrijk, Zwitserland, Frankrijk, Engeland, België, Spanje,
Nederland, Italië, Denemarken, Hongarije, Polen, Zweden, Portugal, Luxemburg, Ierland, Griekenland en
Finland gebruikt worden.
De verklaring van overeenstemming conform de
R&TTE-richtlijn 99/5/EC vindt u onder www.hama.de
÷
Dette apparat må kun anvendes i Tyskland, Østrig, Schweiz, Frankrig, England, Belgien, Spanien,
Holland, Italien, Danmark, Ungarn, Polen, Sverige, Portugal, Luxemburg, Irland, Grækenland og Finland.
Konformitetserklæringen iflg. R & TTE-retningslinierne 99/5/EC finder du under www.hama.de
ø
Urzàdzenie dopuszczone do u˝ytku w nast´pujàcych krajach: Niemcy, Austria, Szwajcaria, Francja, Anglia,
Belgia, Hiszpania, Holandia, W∏ochy, Dania, W´gry, Polska, Szwecja, Portugalia, Luksemburg, Irlandia, Grecja,
Finlandia. TreÊç Deklaracji Zgodno´sci na podstawie dyrektywy R&TTE 99/5/EC mo˝na znaleêç na stronach
www.hama.de
k
Ez a készülék csak Németországban, Ausztriában, Svájcban, Franciaországban, Angliában, Belgiumban,
Spanyolországban, Hollandiában, Olaszországban, Dániában, Magyarországon, Lengyelországban, Svédországban, Portugáliában, Luxemburgban, Írországban, Görögországban, és Finnországban használható!
A megfelelıségi nyilatkozat a 99/5/EC R&TTE-irányelv szeritiy, amely megtalálható a www.hama.de honlapon.
–
Este aparelho pode ser utilizado somente na Alemanha, Áustria, Suíça, França, Inglaterra, Bélgica,
Espanha, Holanda, Itália, Dinamarca, Hungria, Polónia, Suécia, Portugal, Luxemburgo, Irlanda, Grécia e
Finlândia.
Em http://www.hama.de pode consultar a declaração de conformidade segundo a directiva R&TTE
99/5/UE.
ø
Tätä laitetta saa käyttää vain Saksassa, Itävallassa, Sveitsissä, Ranskassa, Englannissa, Belgiassa,
Espanjassa, Alankomaissa, Italiassa, Tanskassa, Unkarissa, Puolassa, Ruotsissa, Portugalissa, Luxemburgissa, Irlannissa, Kreikassa ja Suomessa.
Radio- ja telepäätelaitteita koskevan direktiivin 99/5/EY
mukainen vaatimustenmukaisuusvakuutus löytyy osoitteesta www.hama.de.
…
Denna apparat får endast användas i Tyskland, Österrike, Schweiz, Frankrike, England , Belgien, Spanien, Nederländerna, Italien, Danmark, Ungern, Polen, Sverige, Portugal, Luxemburg, Irland, Grekland och
Finland.
Konformitetserklæringen R&TTE-retningslinierne 99/5/EC finder du under www.hama.de
ø
Fin
GR
PL
e
Page 2
nen Sie unter Start -> Einstellungen -> Systemsteuerung -> System -> Hardware -> GeräteManager -> Netzwerkadapter nachsehen. Dort muss der Eintrag ”(ZD1211) IEEE 802.11b+g USB
Adapter ” ohne gelbes Ausrufezeichen vorhanden sein.
Konfiguration des Wireless LAN und Optionen des Utility
Klicken Sie auf Start -> Programme -> ZyDAS IEE 802.g Wireless LAN USB -> ZDWLAN Utility um
den USB Stick in Ihr Wlan zu integrieren.
Optionen im Hauptmenu:
Bei „Available Network“ werden die in Reichweite befindlichen Netzwerke aufgelistet. Für eine
erneute Suche (Scan) klicken Sie bitte auf „Refresh“. Um den Adapter mit einem mit einem
gefundenen Wireless LAN zu verbinden, doppelklicken Sie bitte auf das gewünschte Netzwerk ,
oder markieren es und klicken dann auf „Connect to this site“.
Optionen im Menü „More Setting“:
General Connection Setting:
Klicken Sie auf “change” um diese Einstellung zu ändern:
Channel:
Nur für Ad-hoc Modus. Verwendeter Kanal, muss für alle Geräte eines
Netzwerkes gleich sein
TxRate:
Auto: Es wird automatisch die geeignete Sender Datenrate gewählt. Alle
anderen Optionen: Entsprechende Sender- Datenrate manuell festlegen.
SSID:
Bis zu 32 Zeichen langer Name des Wireless LANs, muss für alle Geräte
eines Netzwerkes identisch sein.
Network type:
Infrastructure bei Betrieb mit Access Point bzw. Router mit Wireless
LAN-Funktion. Ad-Hoc wenn kein Access Point bzw. Router im Wireless
LAN vorhanden ist.
Bestätigen Sie Änderungen mit „Apply“.
Encrypting Setting:
Wir empfehlen Ihnen, hier die Verschlüsselung unbedingt zu aktivieren. Markieren Sie hierzu
"Enable WEP" und klicken dann auf „WEP More...“ und im neuen Fenster auf „Change“. Die Einstellungen müssen für alle Geräte eines Netzwerks identisch sein. Bitte stellen Sie dies vor der
Schlüssel-Eingabe entsprechend ein. Wenn möglich, sollten Sie 128 Bit (26 Hex-Zeichen 0-9, a-f
und A-F) oder 64 Bit (10 Hex-Zeichen 0-9, a-f und A-F) lange Schlüssel verwenden.
Beispiele: 128 Bit-Schlüssel “645645645ed354a354caef45ae!
64 Bit-Schlüssel “da64650c4f“.
Übernehmen Sie die Einstellungen anschließend mit einem Klick auf "OKAY". Das Verwerfen von
Änderungen ermöglicht "Cancel"
Sie können bis zu 4 Schlüssel festlegen und diese bei „Default Key ID“ umschalten. Es genügt
aber, einen Key bei „1“ einzugeben und diesen zu aktivieren.
Übernehmen Sie die Einstellungen anschließend mit einem Klick auf „Apply“
Profile:
Die Profile ermöglichen das Festlegen von Einstellungen für verschiedene Netzwerke.
Other:
Advanced setting:
Ermöglicht Einstellung des Energiesparmodus, Fragmentation Threshold und RTS/CTS Threhold.
Hier sind normalerweise Keien Änderungen erforderlich.
Information:
Hier können Sie die Version des Treibers, der Firmware sowie des Utilities und die MAC-Adresse
des USB-Sticks nachsehen.
Anmerkung:
Diese Karte darf nur in Deutschland, Österreich, Schweiz, Frankreich, England, Belgien, Spanien,
Niederlande, Italien, Dänemark, Ungarn, Polen, Schweden, Portugal, Luxemburg, Irland, Griechenland und Finnland betrieben werden!
Die Konformitätserklärung nach der R&TTE-Richtlinie 99/5/EG finden Sie unter www.hama.de
Beginn der Installation:
Bitte verbinden Sie den USB-Stick vor der Installation noch nicht mit dem USB-Anschluss!
Legen Sie die Treiber-CD-ROM in das entsprechende Laufwerk. Klicken Sie dann auf -> Start ->
Ausführen -> Durchsuchen. Wählen Sie bei „Suchen in“ Ihr CD-ROM Laufwerk. Markieren Sie
dann „ZD1211USB.exe“ und bestätigen Sie mit -> Öffnen -> OK. Es erscheint nun ein neues Fenster „Install Wizard“. Klicken Sie auf -> Next. Wir empfehlen die Standardeinstellungen zu belassen. Fahren Sie fort mit -> Next
Hinweis für Windows ME/98SE –Benutzer:
Wählen Sie jetzt „Yes, I want to restart my computer now.“
Und klicken dann auf -> OK. Windows startet anschließend neu.
Hinweis für Windows 2000/XP-Benutzer.
Starten Sie Windows jetzt bitte manuell neu.
Nehmen Sie die CD-ROM wieder aus dem Laufwerk. Verbinden Sie dann den USB-Stick mit
einem freien USB-Anschluss und beginnen mit der Treiber Installation.
Treiber-Installation unter Windows XP:
Der „Assistent für das Suchen neuer Hardware“ wird gestartet. Markieren Sie „Software automatisch installieren“ und klicken Sie auf -> Weiter. Falls Windows jetzt Informationen zum Windows-Logo-Test anzeigt, klicken Sie bitte auf -> Installation fortsetzen. Klicken Sie danach auf ->
Fertig stellen.
Ob Windows den Wireless LAN USB-Stick ordnungsgemäß ins System eingebunden hat, können
Sie im Geräte-Manager überprüfen. Klicken Sie hierzu auf -> Start -> Systemsteuerung (im klassischen Startmenü -> Start -> Einstellungen -> Systemsteuerung) -> Drucker und andere Hardware und dann auf System unter siehe auch (In der klassischen Ansicht Doppelklick auf System).
Im Fenster Systemeigenschaften fahren Sie fort mit -> Hardware -> Geräte-Manager. In der Sektion Netzwerkadapter muss der Eintrag ”(ZD1211) IEEE 802.11b+g USB Adapter” ohne gelbes
Ausrufezeichen vorhanden sein.
Hinweis zum Windows XP-Utility:
Im Betriebssystem ist ein Konfigurations-Hilfsprogramm enthalten. Wir empfehlen Ihnen aber,
das Utility des Sticks zu verwenden. Klicken Sie hierzu neben der Task-Leiste unten rechts auf
das Symbol mit den zwei Computern, das zur drahtlosen Netzwerkverbindung gehört. Fahren Sie
dann fort mit -> Erweitert -> Drahtlose Netzwerke. Entfernen Sie hier das Häkchen vor "Windows
zum Konfigurieren der Einstellungen verwenden" -> OK. Die Beschreibung der Optionen bezieht
sich das Utility des Sticks das am Ende diese Handbuches erläutert wird..
Treiber-Installation unter Windows 2000 Professional:
Die Installation startet vollautomatisch. Falls nun ein Fenster „Digitale Signatur nicht gefunden“
erscheint, klicken Sie zum Fortsetzen auf -> Ja.
Ob Windows den Wireless LAN USB Adapter ordnungsgemäß ins System eingebunden hat, können Sie unter Start -> Einstellungen -> Systemsteuerung -> System -> Hardware -> GeräteManager -> Netzwerkadapter nachsehen. Dort muss der Eintrag ”(ZD1211) IEEE 802.11b+g USB
Adapter ” ohne gelbes Ausrufezeichen vorhanden sein.
Treiber-Installation unter Windows ME:
Legen Sie die mitgelieferte CD-ROM ins Laufwerk und öffnen Sie das Verzeichnis "D:\ " ein (evtl.
müssen Sie einen anderen Laufwerksbuchstaben für Ihr CD-ROM eingeben), dort klicken Sie
doppelt auf die Datei ZD1211USB.exe um den Treiber zu installieren -> Next -> Next -> Fertig
stellen. Beantworten Sie die Frage nach dem Neustart mit -> Ja.
Verbinden Sie nun den USB Stecker mit ihrer USB Buchse ihres Computers. Der Computer
erkennt den Stick und bindet automatisch den benötigten Treiber in Ihr System ein.
Ob der Wireless LAN USB Adapter ordnungsgemäß installiert wurde, können Sie unter Start ->
Einstellungen -> Systemsteuerung -> System -> Geräte-Manager -> Netzwerkkarten nachsehen.
Dort muss der Eintrag "( ZDD1211 ) IEEE 802.11b+g USB Adapter" ohne gelbes Ausrufezeichen
vorhanden sein.
Treiber-Installation unter Windows 98SE (Zweite Ausgabe)
Die Installation startet vollautomatisch. Wenn Sie dazu aufgefordert werden, legen Sie die Windows 98SE CD ein und klicken danach auf „OK“ ( evtl. müssen Sie anschließend den Laufwerksbuchstaben für Ihr CD-ROM Laufwerk eingeben ).
Ob Windows den Wireless LAN USB Adapter ordnungsgemäß ins System eingebunden hat, kön-
l Kurzanleitung Wireless LAN USB Adapter 54 Mbps
Page 3
Configuring the Wireless LAN and Utility Options
Click Start -> Programs -> ZyDAS IEE 802.g Wireless LAN USB -> ZDWLAN Utility to integrate the
USB stick in your WLAN.
Options in the main menu:
All networks within range are listed under Available Network. Click “Refresh” to scan again. To
connect the adapter to a wireless LAN, double click the selected network or select and click
“Connect to this site”.
Options in the “More Settings” menu:
General Connection Setting:
Click Change to change this setting:
Channel:
For ad-hoc mode only. Channel used, must be identical for all devices in
a network
TxRate:
Auto: The appropriate transmitter data rate is selected automatically.
All other options: Set corresponding transmitter data rates manually.
SSID:
Name for wireless LAN with up to 32 characters. It must be the same
for each device using the network.
Network type:
Infrastructure if used with an access point or router with wireless LAN
function. Ad-hoc if no access point or router with wireless LAN is
available.
Click “Apply” to confirm your entries.
Encrypting Setting:
We recommend always activating the encryption option. To do so, select “Enable WEP”, then
click “WEP More…” and on “Change” in the new window. Settings must be identical for each
device in network. Please make corresponding settings before entering key. If possible use a 128
bit (26 hex characters 0-9, A-F and a-f) key or 64 bit (10 hex characters 0-9, A-F and a-f) key for
configuration.
Examples:
128 bit key “645645645ed354a354caef45ae“
64 bit key “da64650c4f“.
Click “OKAY” to apply the settings. Click “Cancel” to cancel the changes.
You can specify up to 4 keys and toggle between them under “Default Key ID”. However, only
one key must be entered and activated for "1”.
Click “Apply” to accept the settings.
Profiles:
The profiles allow settings to be made for various networks.
Other:
Advanced settings:
Allow you to set the power saving mode, fragmentation threshold and RTS/CTS threshold. As a
rule, no changes must be made here.
Information:
This allows you to view the version of the driver, firmware and utility and the MAC address of the
USB stick.
Note:
This card is for use in Germany, Austria, Switzerland, France, England, Belgium, Spain, Holland,
Italy, Denmark, Hungary, Poland, Sweden, Portugal, Luxemburg, Ireland, Greece and Finland.
See www.hama.de for the declaration of conformity with R&TTE Directive 99/5/EC.
Starting installation:
Do not connect the USB stick to the USB port before installation!
To do so, insert the driver CD-ROM in the corresponding drive. Then click -> Start -> Execute ->
Search. Select your CD-ROM drive under "Search in". Then select “ZD1211USB.exe“ and click ->
Open -> OK to confirm. The "Install Wizard" opens in a new window. Click -> Next. We recommend using the standard settings. Click -> Next to proceed.
Note for Windows ME/98SE users:
Select “Yes, I want to restart my computer now.” Click -> OK. Windows then restarts.
Note for Windows 2000/XP users.
Re-start Windows manually.
Remove the CD-ROM from the drive. Connect the USB stick to a free USB port and start installing
the driver.
Installing Drivers for Windows XP:
The New Hardware Wizard will start. Select Install the software automatically and click -> Next.
If information on the Windows Logo Test appears, click -> Continue Installation Click -> Finish.
You can check whether Windows properly integrated the Wireless LAN USB Stick in the system
in the Device Manager. Click -> Start -> Control Panel (in traditional Start menu, -> Start -> Settings -> Control Panel) -> Printers and Other Hardware and then System under see also (in traditional view, double-click System). In the System Properties window, select -> Hardware -> Device Manager. The entry ”(ZD1211) IEEE 802.11g USB Adapter” must appear in the Network Adapter section without a yellow exclamation mark.
Note on Windows XP utility:
The operating system contains a configuration assistant. We recommend that you use the utility
for the stick. To do so, click the symbol with the two computers for the wireless network connection beside the task bar at the bottom right of the screen. Click -> Advanced -> Wireless networks to continue. Deselect the "Use Windows to configure the settings" checkbox -> OK. The
description of the options refers to the utility for the stick, which is explained at the end of this
manual.
Installing Drivers for Windows 2000 Professional:
Installation starts automatically. If a “Digital signature not found” window appears, click -> Yes
to continue.
You can check whether Windows properly integrated the wireless LAN USB adapter in the
system under Start -> Settings -> Control Panel -> System -> Hardware -> Device Manager ->
Network adapters. The entry “(ZD1211) IEEE 802.11b+g USB Adapter“ should now appear without
a yellow exclamation mark.
Installing Drivers for Windows ME:
Insert the supplied CD-ROM into the drive and open the “D:\” directory (you may have to enter a
different drive letter for your CD-ROM). Double-click ZD1211USB.exe to install the driver -> Next > Next -> Finish. When asked whether you want to restart the system, click -> Yes.
Connect the USB Stick to the USB port of your computer. The computer recognises the stick and
automatically integrates the required drivers in your system.
You can check whether Windows properly installed the wireless LAN USB adapter in the system
under Start -> Settings -> Control Panel -> System -> Hardware -> Device Manager -> Network
cards. The entry “(ZDD1211) IEEE 802.11b+g USB Adapter“ should now appear without a yellow
exclamation mark.
Installing Drivers on Windows 98SE (second edition)
Installation starts automatically. If prompted, place the Windows 98SE CD in our CD-ROM drive
and click OK (you may have to enter the letter of your CD-ROM drive).
You can check whether Windows properly integrated the wireless LAN USB adapter in the
system under Start -> Settings -> Control Panel -> System -> Hardware -> Device Manager ->
Network adapters. The entry “(ZD1211) IEEE 802.11b+g USB Adapter“ should now appear without
a yellow exclamation mark.
L 54 Mbps Wireless LAN USB Adapter Quick Guide
Page 4
USB Adapter » doit s’y trouver sans point d’exclamation jaune.
Configuration du réseau local sans fil (Wireless LAN) et options de l’utilitaire
Cliquez sur Démarrer -> Programmes -> ZyDAS IEE 802.g Wireless LAN USB fi ZDWLAN Utility pour
intégrer la clé USB dans votre réseau local.
Options dans le menu principal
Une liste des réseaux se trouvant à portée apparaît dans « Available Network ». Cliquez sur « Refresh
» pour lancer une nouvelle recherche (Scan). Double-cliquez sur le réseau désiré ou sélectionnez-le,
puis cliquez sur « Connect to this site » afin de connecter l'adaptateur à un réseau local sans fil.
Options du menu « More Setting » :
General Connection Setting :
Cliquez sur « change » afin de modifier ce réglage :
Channel :
Seulement pour le mode Ad-hoc. Le canal utilisé doit être le même pour tous
les appareils d'un même réseau.
TxRate :
Auto : le taux de transmission de l’émetteur approprié est sélectionné
automatiquement. Toutes les autres options : à définir manuellement selon le
taux de transmission de l’émetteur.
SSID :
Nom du réseau local sans fil pouvant compter 32 caractères doit être
identique pour tous les appareils d'un même réseau.
Network Type :
Infrastructure pour le fonctionnement avec un point d’accès ou un routeur
avec fonction de réseau local sans fil. Ad-hoc lorsqu'aucun point d’accès
ni routeur avec fonction de réseau local sans fil n'est disponible.
Confirmez les modifications par « Apply ».
Encrypting Setting :
Nous vous conseillons instamment d’activer le codage. Marquez, à cet effet, « Enable WEP » et cliquez ensuite sur « WEP More... » et dans la nouvelle fenêtre sur « Change ». Cette configuration doit
être identique pour tous les appareils d'un même réseau. Assurez-vous de la conformité de cette configuration avant de saisir la clé. Si possible, utilisez une clé de 128 bits (26 caractères hexadécimaux
0-9, A-F et a-f) ou de 64 bits (10 caractères hexadécimaux 0-9, A-F et a-f).
Exemples :
Clé de 128 bits "645645645ed354a354caef45ae!"
Clé de 64 bits "da64650c4f".
Appliquez finalement ces paramètres en cliquant sur « OKAY ». « Cancel » vous permet d’annuler ces
modifications.
Vous pouvez définir jusqu'à 4 clés et les faire permuter dans « Default Key ID ». Mais il est suffisant
d'entrer une clé « 1 » et de l'activer.
Appliquez finalement ces paramètres en cliquant sur « Apply ».
Profils :
Les profils permettent de déterminer les réglages des différents réseaux.
Other :
Advanced setting :
Permet le réglage du mode d’économie d’énergie, fragmentation Threshold et RTS/CTS Threhold.
Aucune modification n’est nécessaire ici.
Information :
Vous pouvez ici consulter des informations concernant la version du pilote, du firmware, de l’utilitaire
ainsi que l’adresse de la clé USB.
Remarque :
Cette carte ne doit être utilisée qu’en Allemagne, Autriche, Suisse, France, Angleterre, Belgique, Espagne, aux Pays-Bas, en Italie, au Danemark, en Hongrie, Pologne, Suède, au Portugal, Luxembourg, en
Grèce et Finlande !
La déclaration de conformité à la directive R&TTE 99/5/CE se trouve sur www.hama.de
Début de l'installation :
Veuillez ne pas raccorder la clé USB à la prise USB avant l'installation !
Insérez le CD-ROM contenant le pilote dans votre lecteur. Cliquez ensuite sur -> Démarrer-> Exécuter
-> Parcourir. Sélectionnez votre lecteur de CD-ROM dans « Rechercher dans ». Sélectionnez ensuite
«ZD1211USB.exe» et confirmez par -> Ouvrir -> OK. Une nouvelle fenêtre « Install Wizard » apparaît à
l’écran. Cliquez sur -> Suivant. Nous vous conseillons de conserver les paramètres standard. Poursuivez en cliquant sur -> Suivant
Consignes pour les utilisateurs de Windows ME/98SE :
Sélectionnez maintenant « Oui, je veux redémarrer l'ordinateur ».
Cliquez ensuite sur -> OK. Votre système Windows redémarre alors.
Consignes pour les utilisateurs de Windows 2000/XP :
Veuillez redémarrer manuellement Windows.
Sortez le CD-ROM du lecteur. Raccordez ensuite la clé USB à la prise USB libre et commencez l'installation du pilote.
Installation du pilote sous Windows XP :
L'« assistant de recherche de nouveau périphérique » démarre. Sélectionnez « Installation automatique du logiciel » et cliquez sur -> Suivant. Si Windows affiche des informations concernant le test
de logo Windows, cliquez sur -> Continuer l’installation. Cliquez ensuite sur -> Terminer.
Vous pouvez vérifier dans le gestionnaire de périphérique si Windows a correctement intégré la clé
USB pour réseau local sans fil dans le système. Pour ce faire, cliquez sur -> Démarrer -> Panneau de
configuration (dans le menu Démarrer classique -> Démarrer -> Paramètres -> Panneau de configuration) -> Imprimante et autre périphérique, puis sur Système dans "voir aussi" (dans l'affichage classique, double-cliquez sur Système). Continuez dans la fenêtre « Propriétés système » avec -> Matériel > Gestionnaire de périphériques. L’entrée « (ZD1211) IEEE 802.11b+g USB Adapter » doit être affichée
sans point d’exclamation jaune dans la section « Adaptateur de réseau ».
Remarque concernant l’utilitaire de Windows XP :
Un auxiliaire de configuration est contenu dans le système d’exploitation. Nous vous conseillons toutefois d’utiliser l’utilitaire de configuration de la clé. Pour ce faire, cliquez sur le symbole comportant
deux ordinateurs en bas à droite à côté de votre barre de tâches qui se réfère à la connexion en
réseau. Continuez avec -> Avancé -> Réseaux sans fil. Décochez « Utiliser Windows pour configurer
les paramètres » -> OK. La description des options se réfère à l’utilitaire de la clé décrit à la fin de ce
manuel.
Installation du pilote sous Windows 2000 Professional :
L'installation démarre automatiquement. Au cas où une fenêtre « Signature numérique non trouvée »
apparaît, cliquez sur -> Oui afin de continuer.
Vous pouvez vérifier si Windows a correctement intégré l'adaptateur USB de réseau local sans fil
dans le système en consultant Démarrer -> Paramètres -> Panneau de configuration -> Système ->
Matériel -> Gestionnaire de périphériques -> Adaptateur de réseau. L’entrée « (ZD1211) IEEE 802.11b+g
USB Adapter » doit s’y trouver sans point d’exclamation jaune.
Installation du pilote sous Windows ME :
Insérez le CD-ROM fourni dans le lecteur et ouvrez le répertoire "D:\ " (vous devrez éventuellement saisir une autre lettre de lecteur pour votre CD-ROM), puis double-cliquez sur le fichier ZD1211USB.exe
pour installer le pilote, -> Suivant -> Suivant -> Terminer. Répondez « Oui » à la question concernant
un redémarrage.
Vous pouvez maintenant raccorder le connecteur USB à la prise USB de votre ordinateur. L'ordinateur
reconnaît automatiquement la clé et ajoute automatiquement le pilote approprié à son système.
Vous pouvez vérifier si l’adaptateur USB de réseau local sans fil a été correctement installé dans le
système en consultant Démarrer -> Paramètres -> Panneau de configuration -> Système -> Matériel > Gestionnaire de périphériques -> Cartes de réseau. L’entrée « (ZDD1211) IEEE 802.11b+g USB Adapter » doit s’y trouver sans point d’exclamation jaune.
Installation du pilote sous Windows 98SE (deuxième édition) :
L'installation démarre automatiquement. Insérez le CD Windows 98SE si l'ordinateur vous le demande
et cliquez ensuite sur « OK » (vous serez éventuellement prié de saisir les lettres de lecteur de votre
lecteur de CD ROM).
Vous pouvez vérifier si Windows a correctement intégré l'adaptateur USB de réseau local sans fil
dans le système en consultant Démarrer -> Paramètres -> Panneau de configuration -> Système ->
Matériel -> Gestionnaire de périphériques -> Adaptateur de réseau. L’entrée « (ZD1211) IEEE 802.11b+g
¬ Brève introduction à l’adaptateur USB réseau local sans fil 54 Mbit/s
 Loading...