

Page 1

00039627/07.07
All listed br ands are tr ademarks of the corr esponding companies. Errors and omissions excepted,
and subject to technical changes. Our general terms of delivery and payment are applied.
Hama GmbH & Co KG
D-86651 Monheim/Germany
www.hama.com
00039627bda.indd Abs1:200039627bda.indd Abs1:2 25.07.2007 13:38:17 Uhr25.07.2007 13:38:17 Uhr
Page 2
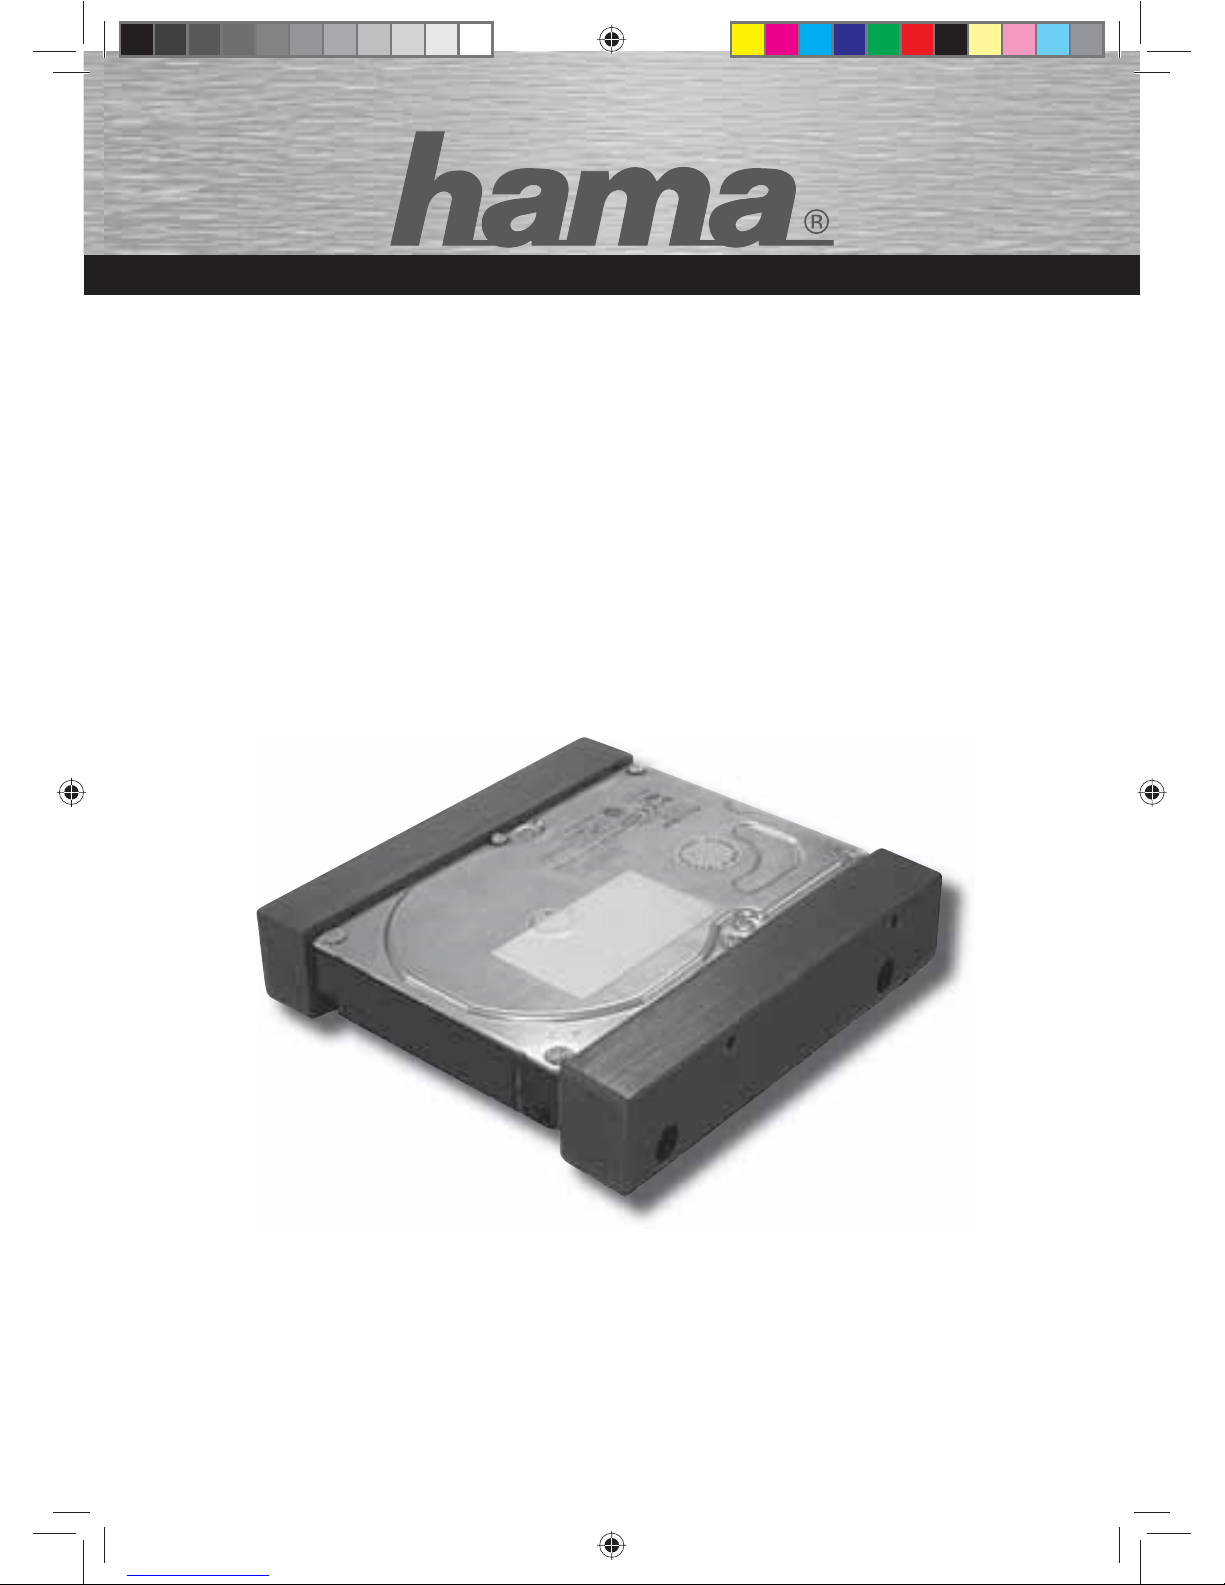
Schwingungsdämpfer 3,5"
Vibration Absorber
Amortisseur de vibrations
COMPUTER
00039627
00039627bda.indd Abs2:100039627bda.indd Abs2:1 25.07.2007 13:38:18 Uhr25.07.2007 13:38:18 Uhr
Page 3
2
Einbauanleitung Hama - Festplatten Entkoppelung
Wir wünschen Ihnen viel Spass beim Einbau des Hama Festplatten Entkoppelungssets. Damit die Montage
problemlos klappt, möchten wir Sie bitten, die nachfolgende Anleitung genau durchzulesen und zu beachten !
Bitte führen Sie alle Arbeiten NUR bei ausgeschaltetem und vom Stromnetz getrennten PC durch !!
Lassen Sie den Einbau nur von geschultem Fachpersonal durchführen !
Einbauvorbereitung:
Bitte kontrollieren Sie, ob folgende Teile enthalten sind:
- 2x Entkoppler
- Schrauben mit Feingewinde
- Schrauben mit Zollgewinde
- diese Anleitung
Um die Festplatten Entkoppelung zu montieren, benötigen Sie nur noch einen passenden Schaubendreher.
Montage:
• Lösen Sie alle elektrischen Anschlüsse von der Platte (Stromversorgung und Daten) und bauen Sie
die Platte vorsichtig aus Ihrem Computer aus.
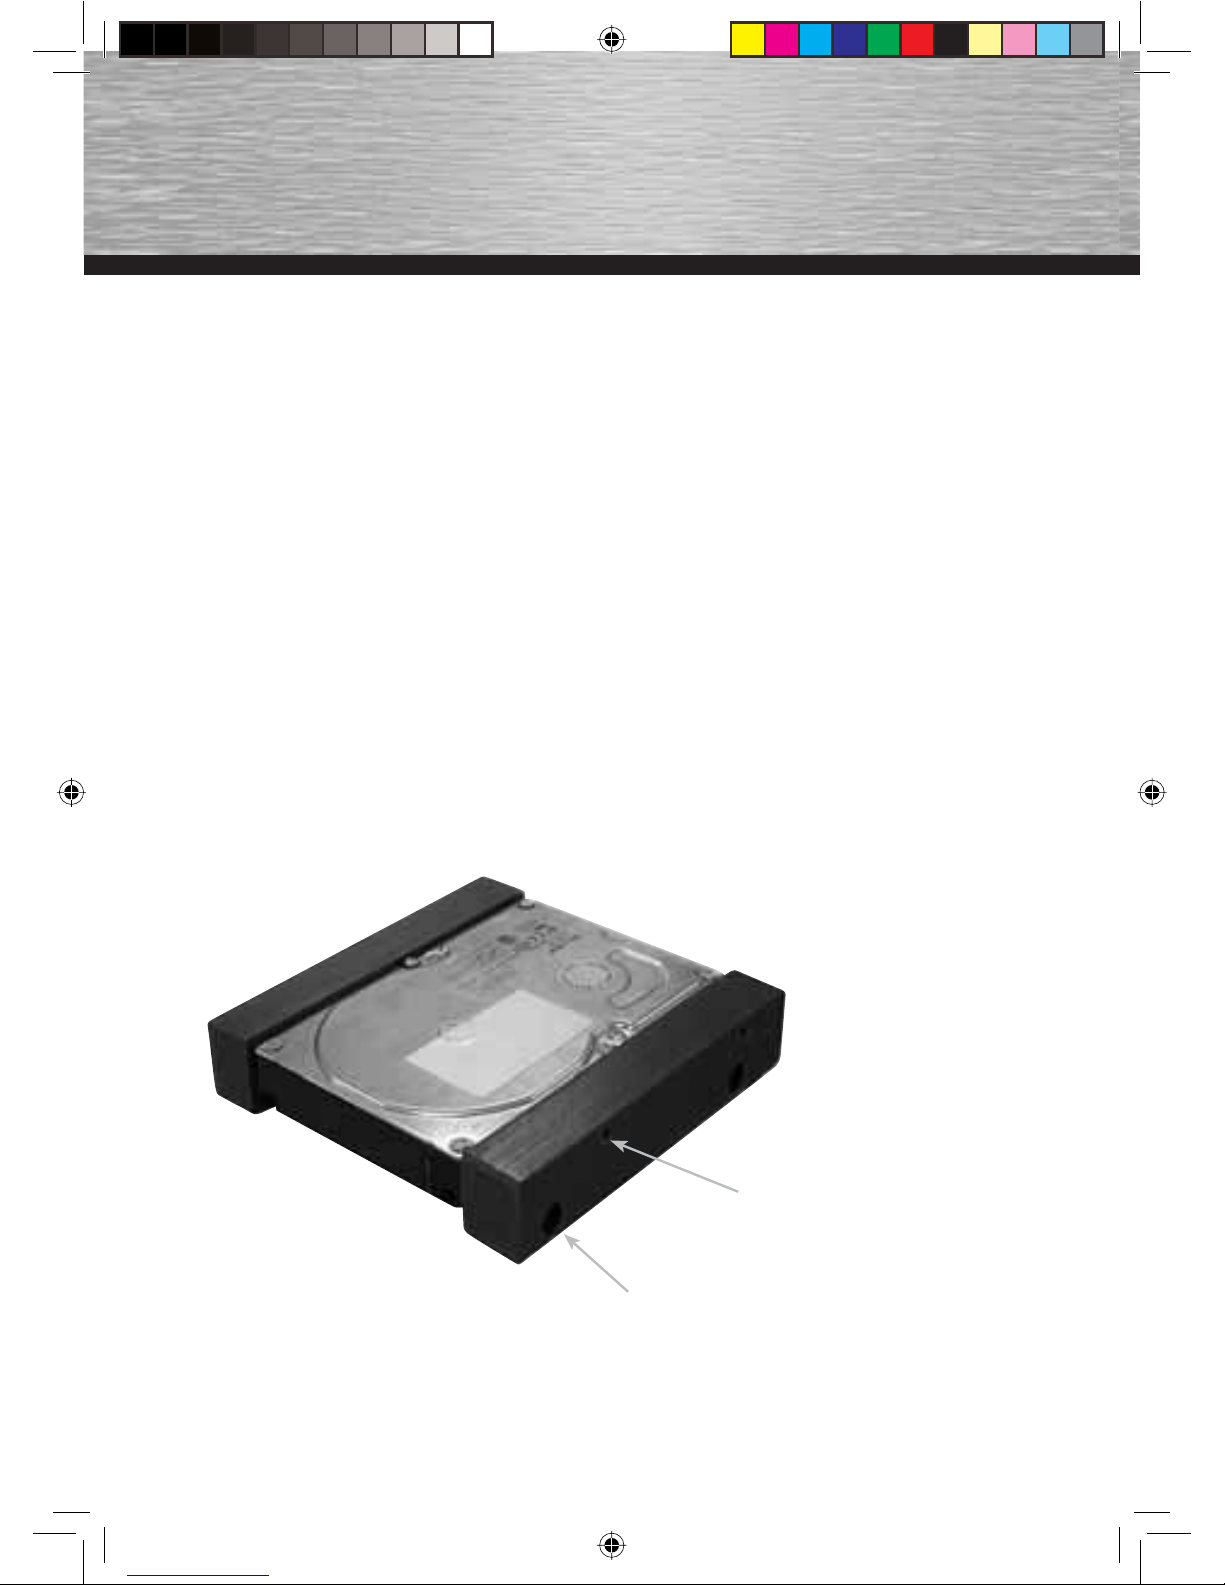
• Montieren Sie jetzt die Entkoppelrahmen links und rechts an der Platte wie unten auf der Skizze zu sehen.
• Jetzt können Sie die Platte wieder in einen freien 5 ¼ Schacht einbauen. Dabei werden die Gummipuffer
etwas gestaucht, da diese etwas breiter sind als der 5 ¼ Schacht, um die Platte sicher zu lagern.
d
Bedienungsanleitung
Schrauben zur Befestigung
im 5 ¼ Schacht
Schrauben zur Befestigung
des Rahmens an der Platte
00039627bda.indd Abs2:200039627bda.indd Abs2:2 25.07.2007 13:38:19 Uhr25.07.2007 13:38:19 Uhr
Page 4
3
g
Operating Instruction
Installation instructions: Hama hard drive decoupling
Have a lot of fun when installing the Hama decoupling set for hard drives. Please observe the following
operating instructions and read them carefully in order to ensure a smooth mounting!
ONLY carry out all works when the PC is switched off and separated from the mains!!
The installation must only be carried out by qualifi ed and trained personnel!
Installation preparation:
Please check if the following parts are included in the delivery package:
- 2x decoupler
- Screws with fi ne thread
- Screws with inch thread
- These operating instructions
You also need an appropriate screwdriver to mount the hard drive decoupling.
Mounting:
• Disconnect all electrical connections from the plate (power supply and data) and remove the plate
carefully from the computer.
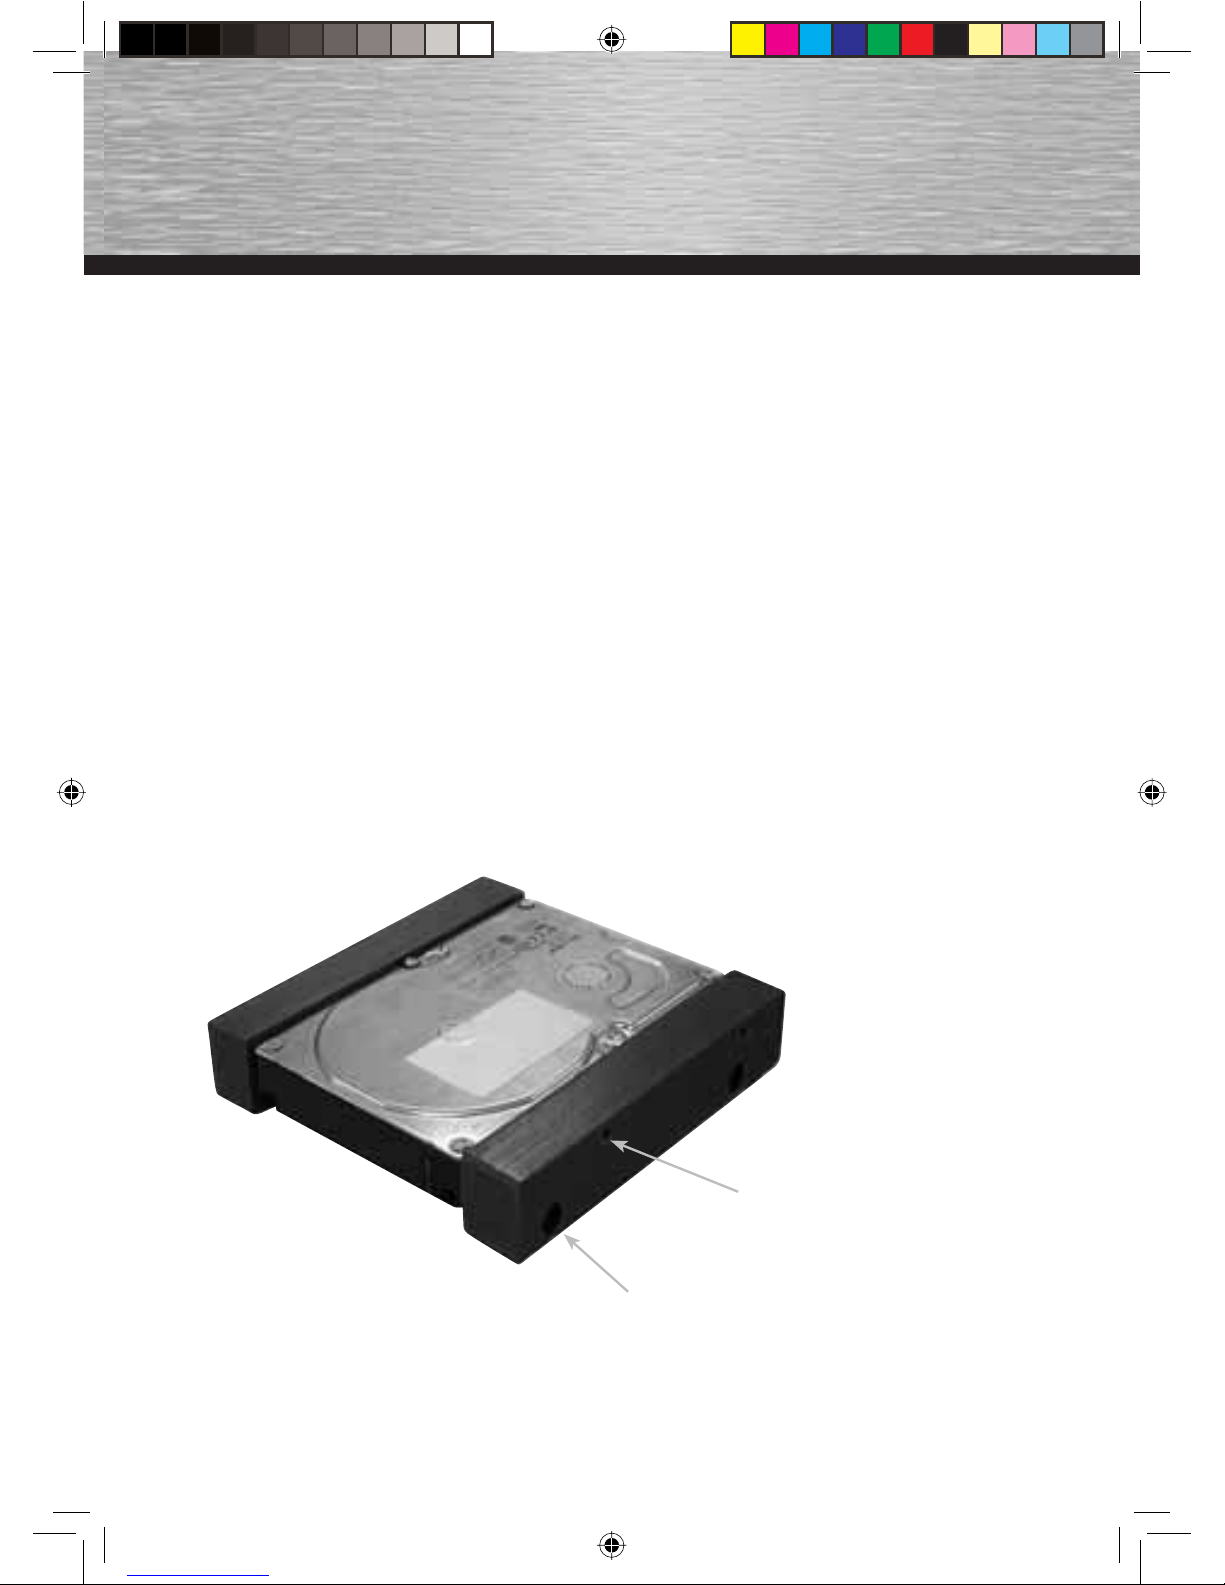
• Mount the decoupling frames to the lef t and right of the plate - see picture below.
• Now you can remount the plate in a free 5 ¼” slot. On the occasion, the rubber pads are a lit tle bit
compressed since they are a bit wider than the 5 ¼” slot in order to ensure a safe mounting of the plate.
Screws for attachment in
5 ¼” slot.
Screws to attach the frame
to the plate.
00039627bda.indd Abs2:300039627bda.indd Abs2:3 25.07.2007 13:38:19 Uhr25.07.2007 13:38:19 Uhr
Page 5
4
Mode d‘emploi
Instructions d’installation : kit de neutralisation de Hama pour disques durs
Amusez-vous bien lors de l’installation du kit de neutralisation de Hama pour disques durs. Pour un
montage sans problème, nous vous prions d’observer et de lire attentivement le mode d’emploi suivant !
Effectuez tous les travaux UNIQUEMENT lorsque le PC est éteint et débranché !!
L’installation ne doit être effectuée que par du personnel qualifi é et formé !
Préparation de l’installation :
Veuillez contrôler si les pièces suivantes sont incluses :
- 2x découpleur
- Vis avec fi let fi n
- Vis avec pas anglais
- Ces instructions
Pour monter le kit de neutralisation pour disques durs, il ne vous faut plus qu’un tournevis approprié.
Montage :
• Débranchez toutes les connexions électriques de la plaque (alimentation en courant et données) et
démontez la plaque prudemment de votre ordinateur.
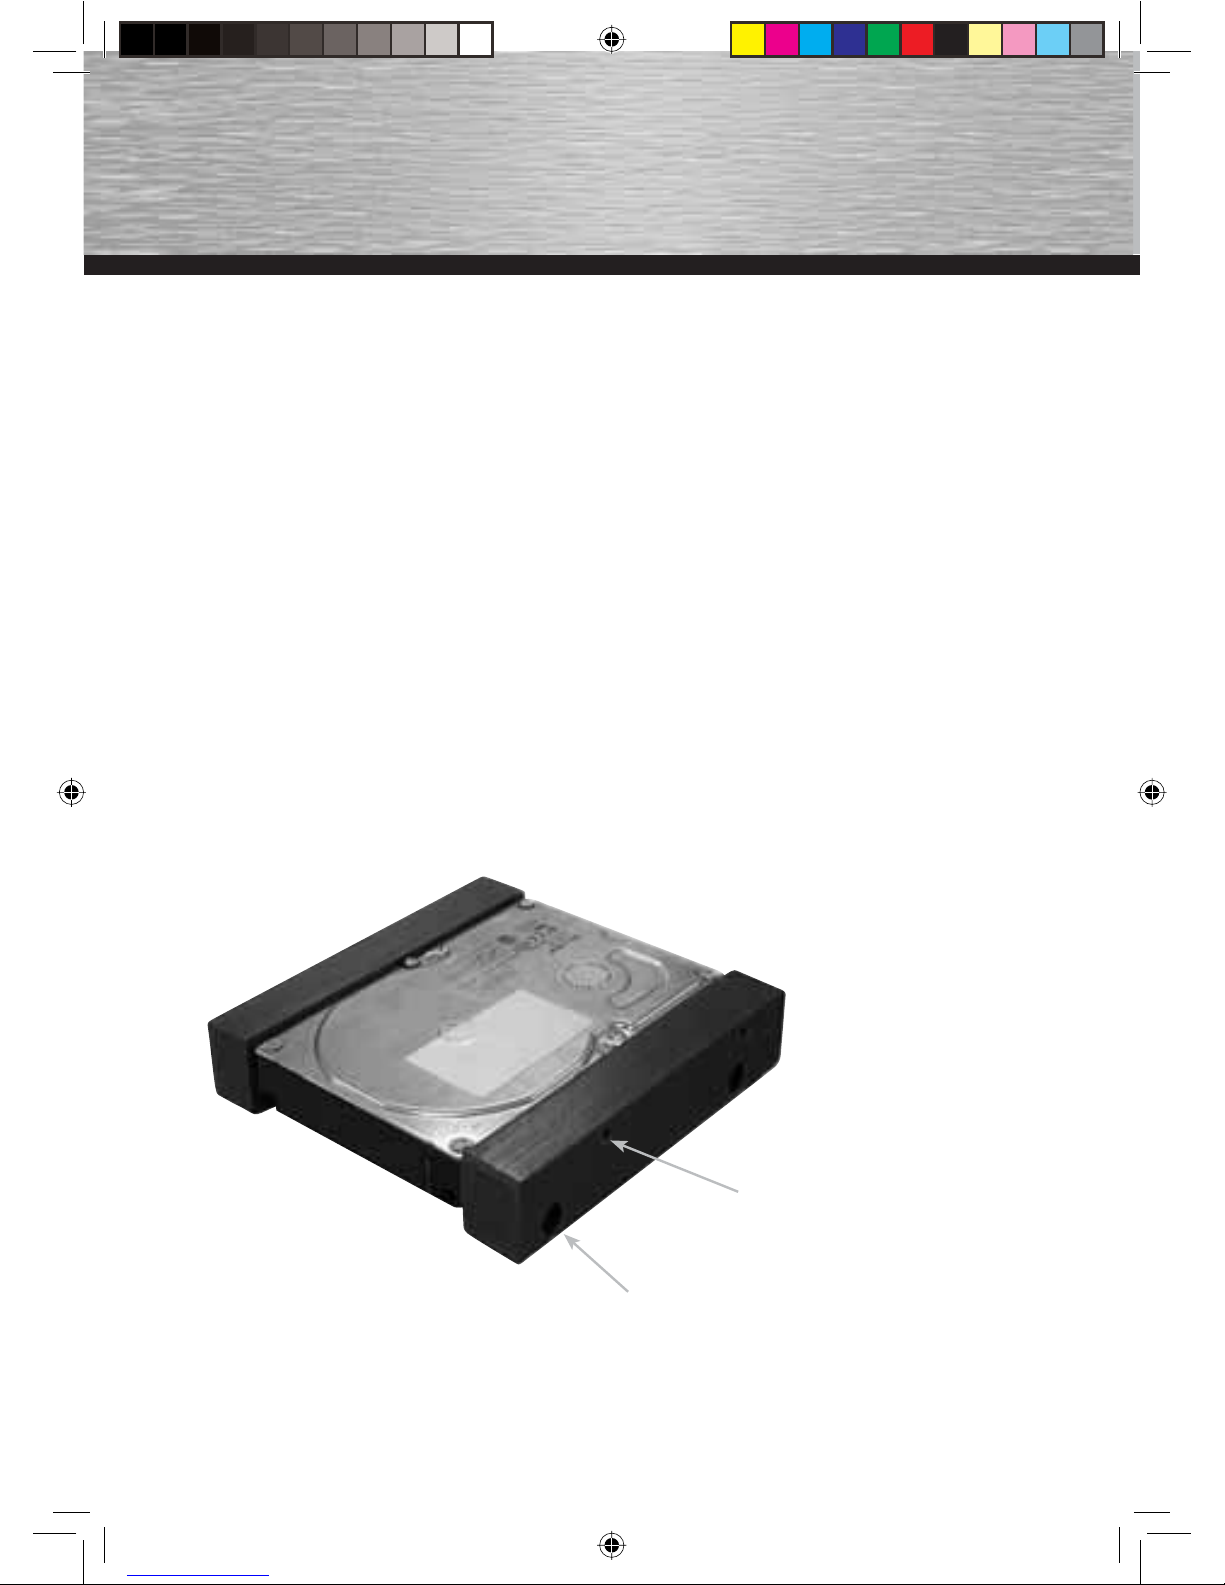
• Montez maintenant les cadres de découplage à gauche et à droite de la plaque, voir image ci-dessous.
• Maintenant, vous pouvez réinstaller la plaque dans un emplacement disponible pour 5 ¼’’. En faisant
cela, les tampons en caoutchouc sont un peu comprimés parce que ceux-ci sont un peu plus larges que
l’emplacement 5 ¼‘‘ce qui assure un logement sûr de la plaque.
Vis pour un montage dans un
emplacement 5,25”
Vis pour fi xer le cadre à la
plaque
f
00039627bda.indd Abs2:400039627bda.indd Abs2:4 25.07.2007 13:38:20 Uhr25.07.2007 13:38:20 Uhr
 Loading...