

Page 1
All listed brands are trademarks of the corresponding companies. Errors and omissions excepted,
and subject to technical changes. Our general terms of delivery and payment are applied.
00123190/07.14
Hama GmbH & Co KG
86652 Monheim
/Germany
www.hama.com
00
123190
RC 170
World Travel Alarm Clock
Weltreisewecker
E
F
D
GB
NL
GR
PL
RUS
I
Operating Instructions
Bedienungsanleitung
Mode d‘emploi
Instrucciones de uso
Руководство по эксплуатации
Istruzioni per l‘uso
Οδηγίες χρήσης
Instrukcja obsługi
Page 2

23
Controls and Displays
A Controls
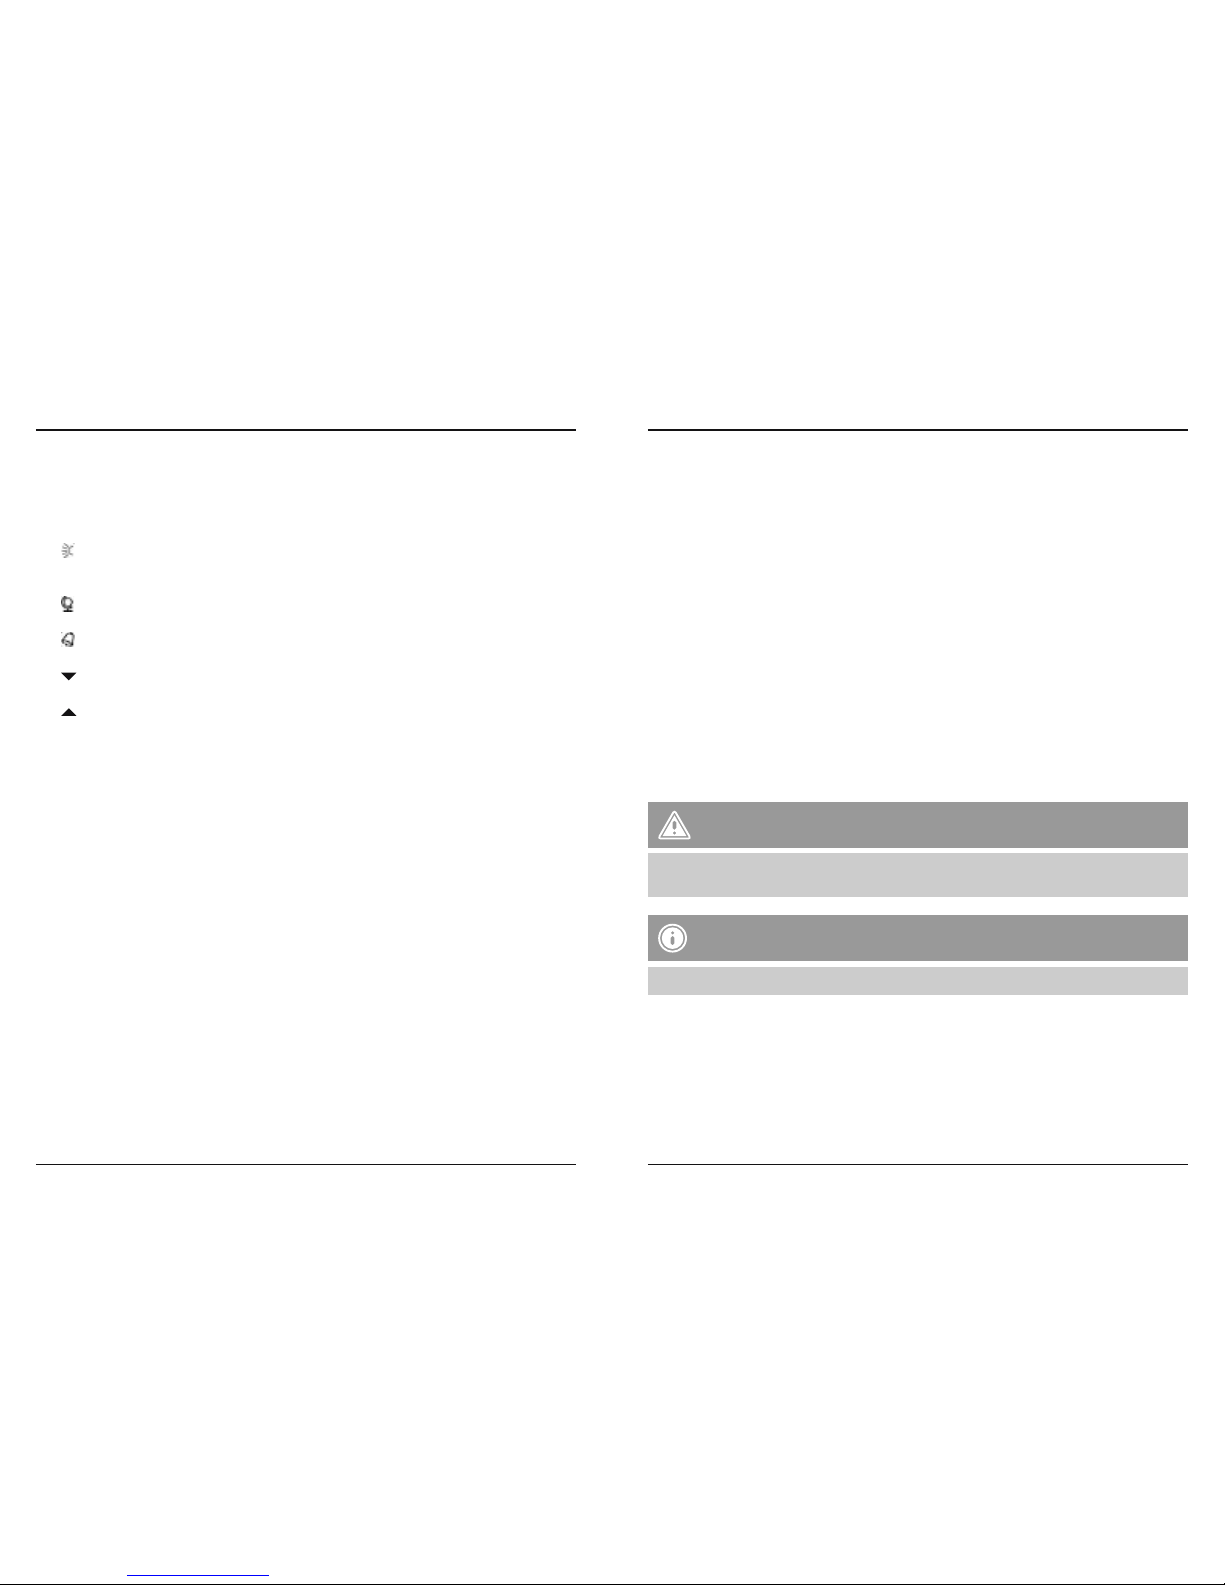
1. SNOOZE/LIGHT button = activates the backlight (approx. 5 seconds)/postpones the
alarm for 5 minutes
2. button = switches the torch on/off
3. LED torch
4. Display
5. button = switches between home time/city and global time/city; used for setting home
time/city
6. button = displays alarm time (approx. 5 seconds); used for setting alarm
7. Alarm slide switch = activates/deactivates the alarm
8. button = reduces the current set value/switches among cities in global time mode
(westwards)
9. button = increases the current set value/switches among cities in global time mode
(eastwards)
10. RC ON/OFF/ DST slide switch = activates/deactivates the radio signal; activates summer
time and deactivates radio signal
11. WAVE button = switches between °C and °F; activates/deactivates manual radio signal
reception
12. CLOCK button = sets the time
13. RESET button = restores factory settings
14. Key lock slide switch = activates/deactivates all buttons
(except for the RESET button (13) and the Alarm slide switch (7))
15. Battery compartment
B Normal time
1. Time
2. Day
3. Month
4. Day of the week
5. Signal strength
6. Summer time
7. Temperature
C Home time
1. Home time display icon
2. Home time
3. Home city
D Global time
1. Global time display icon
2. Global time
3. Home time
4. Global city
5. Time zone
E Alarm
1. Alarm display icon
2. Alarm time
3. Alarm clock icon
Thank you for choosing a Hama product.
Take your time and read the following instructions and information completely. Please keep
these instructions in a safe place for future reference. If you sell the device, please pass these
operating instructions on to the new owner.
1. Explanation of Warning Symbols and Notes
Warning
This symbol is used to indicate safety instructions or to draw your attention to
specic hazards and risks.
Note
This symbol is used to indicate additional information or important notes.
2. Package Contents
• RC 170 global travel alarm clock
• 2 AAA batteries
• These operating instructions
G Operating instruction
1
1
1
1
2
3
2
2
2
7
6
5
5
1
3
3
3
4
4
4
2
5
10
11 13 15 3
14
12
6 7 8 9
A
B
D
C
E
Page 3
45
3. Safety Notes
• The product is intended for private, non-commercial use only.
• Protect the product from dirt, moisture and overheating, and only use it in a dry
environment.
• Do not use the product in areas where the use of electronic devices is not permitted.
• Only connect the product to a socket that has been approved for the device. The socket
must be installed close to the product and easily accessible.
• Do not drop the product and do not expose it to any major shocks.
• Do not attempt to service or repair the product yourself. Leave any and all service work to
qualied experts.
• Do not modify the product in any way. Doing so voids the warranty.
• Remove the batteries from the product if you will not be using it for an extended
period, unless it is being kept ready for emergencies.
• Keep the packaging material out of the reach of children due to the risk of suffocation.
• Dispose of packaging material immediately according to locally applicable regulations.
WARNING – Batteries
• Immediately remove and dispose of dead batteries from the product.
• Only use batteries (or rechargeable batteries) that match the specied type.
• Do not mix old and new batteries or batteries of a different type or make.
• When inserting batteries, note the correct polarity (+ and - markings) and insert
the batteries accordingly. Failure to do so could result in the batteries leaking or
exploding.
• Do not overcharge batteries.
• Keep batteries out of the reach of children.
• Do not short circuit the batteries/rechargeable batteries and keep them away from
uncoated metal objects.
4. Getting Started
• Open the battery compartment (15), insert two AAA batteries with the correct polarity
and close the battery compartment (15).
• If nothing is shown on the display after new batteries have been inserted, press the RESET
button (13) with a pointed object to restart the device.
5. Operation
Note – Input
• Hold down the button (8) or the button (9) to select values faster.
5.1. Automatic date/time setting using the DCF signal
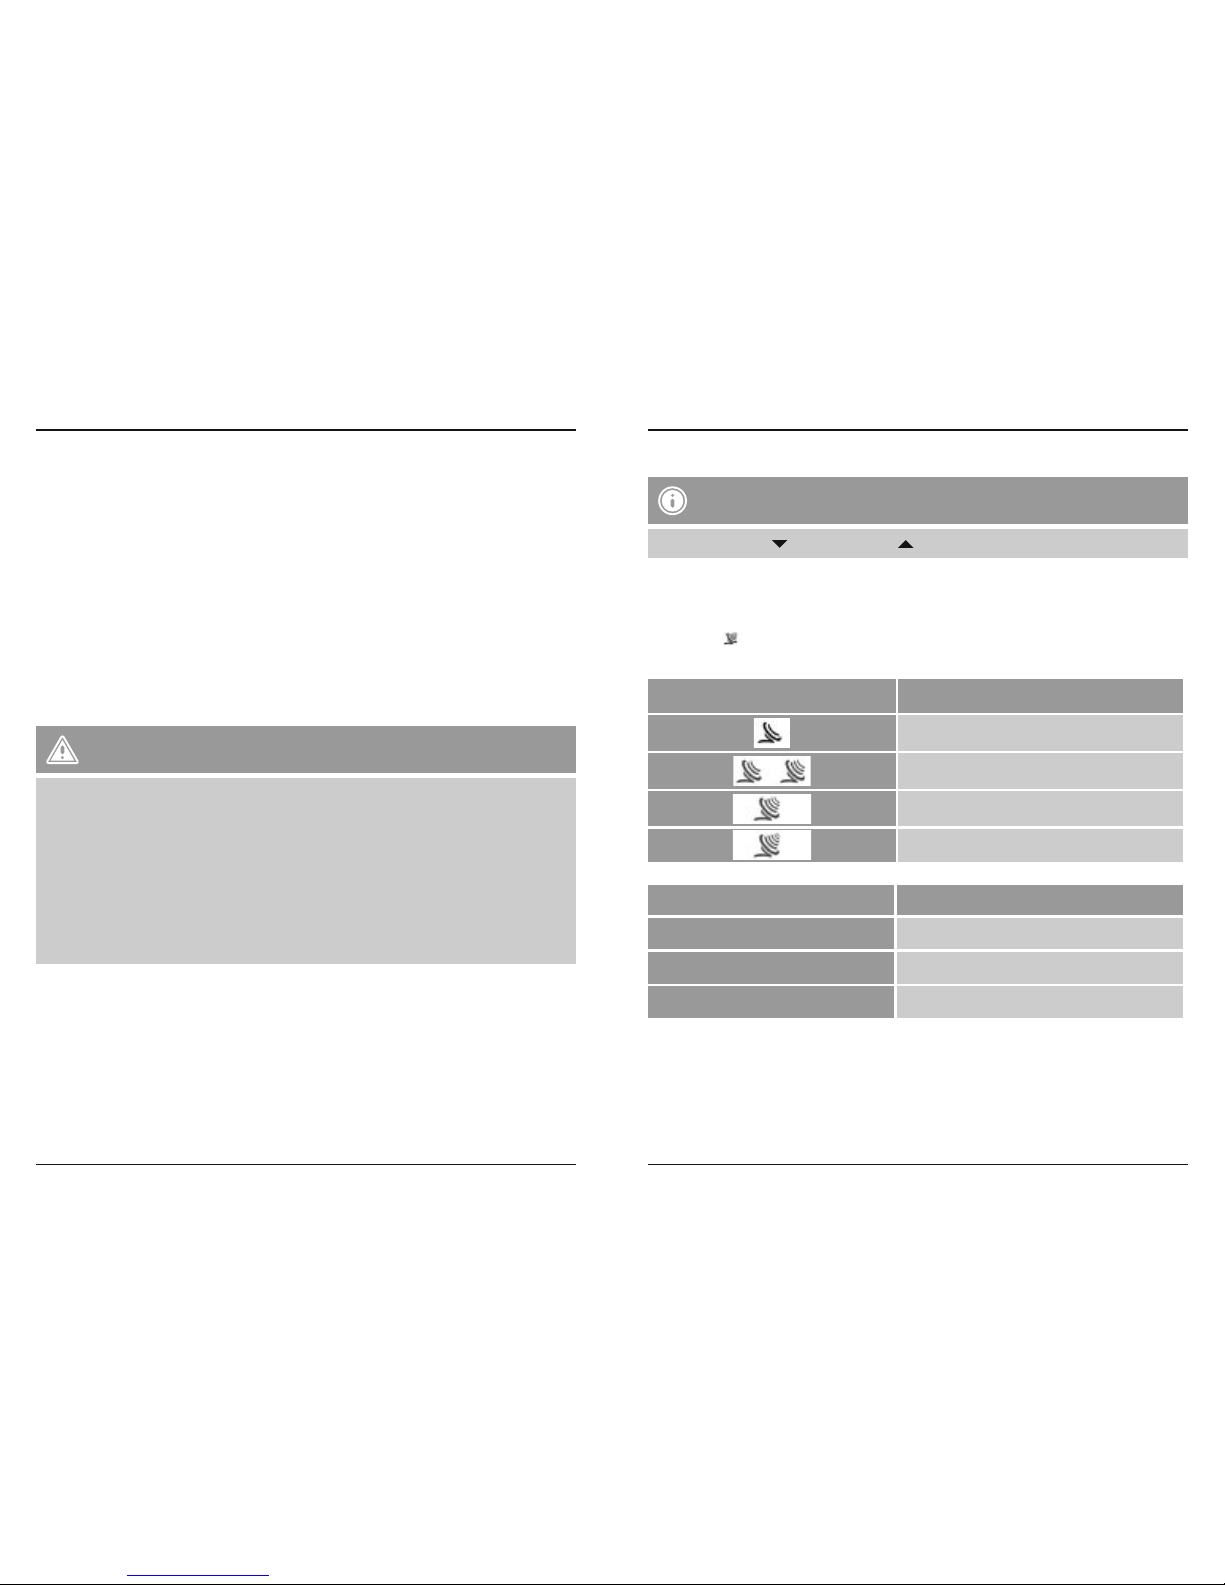
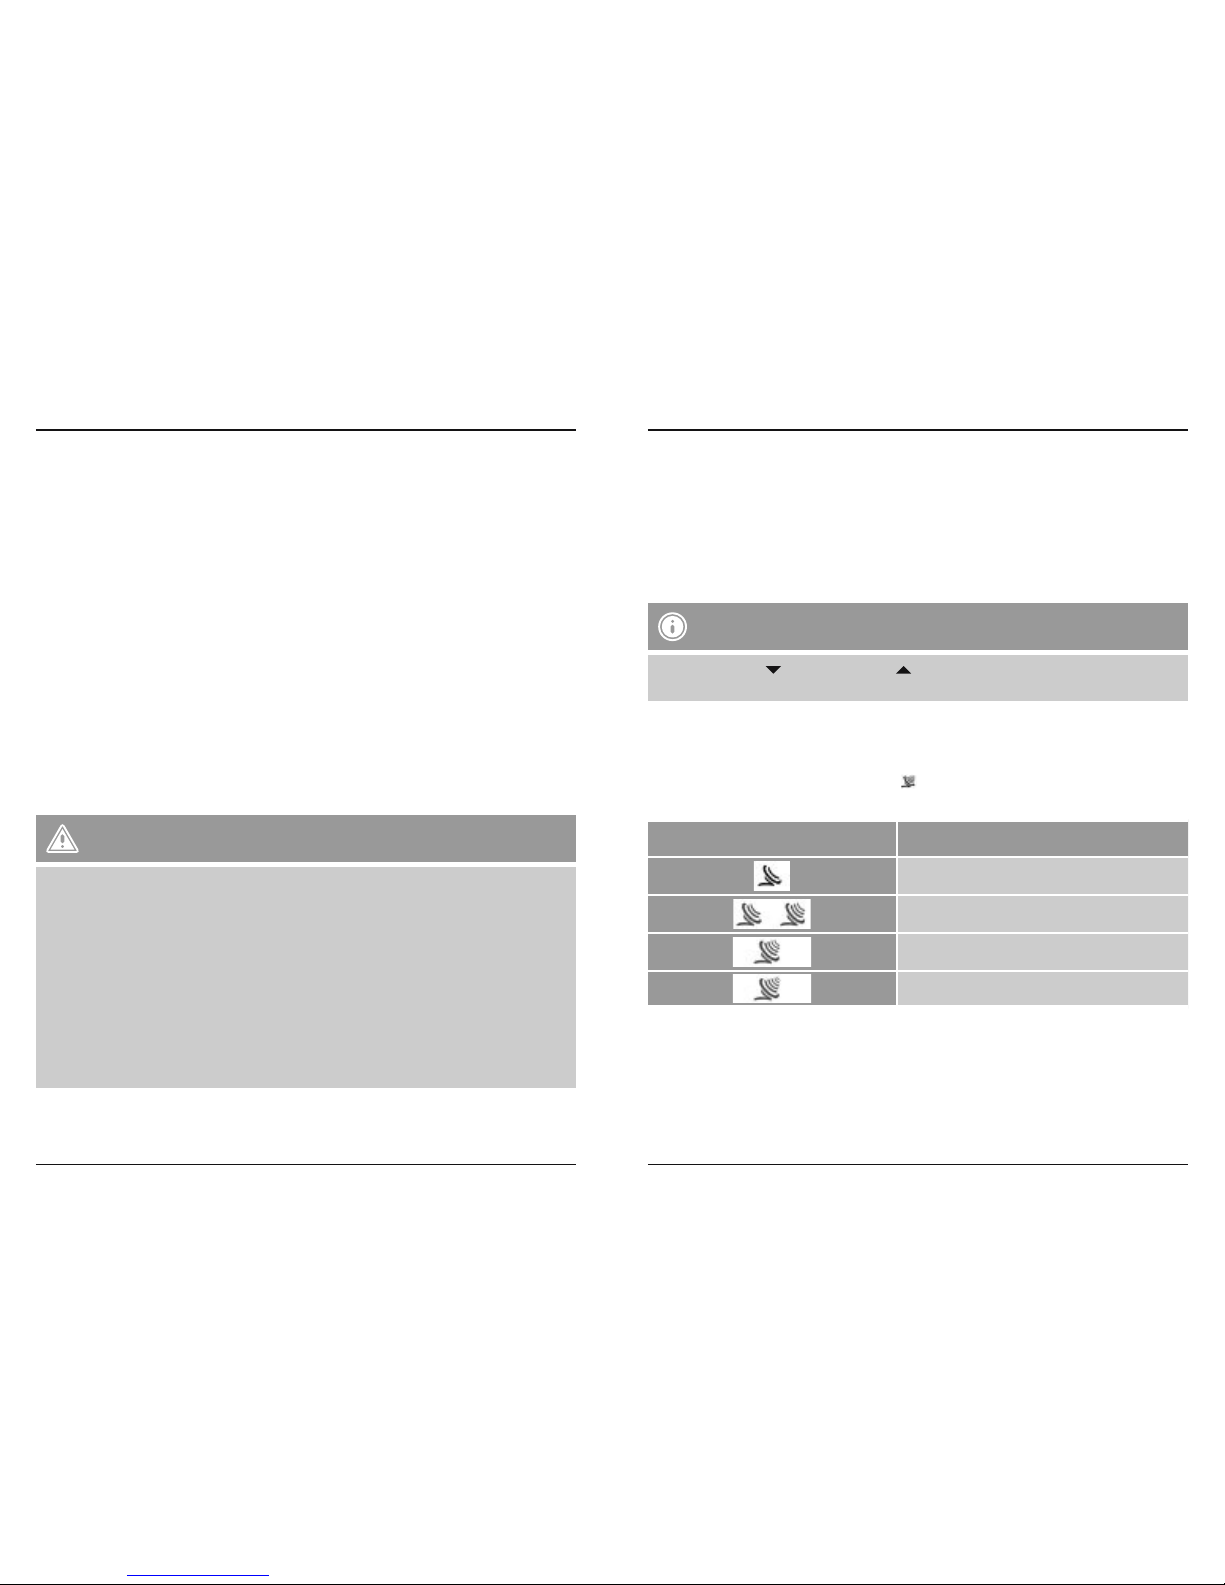
• Once you have inserted the batteries, the display is switched on, an acoustic signal sounds
and the alarm clock automatically starts searching for a DCF signal. During the search, the
radio icon will ash. This process can take 3 to 5 minutes.
• When the radio signal is received, the date and time are automatically set.
Radio icon Signal strength
No reception
Poor
Fair
Excellent
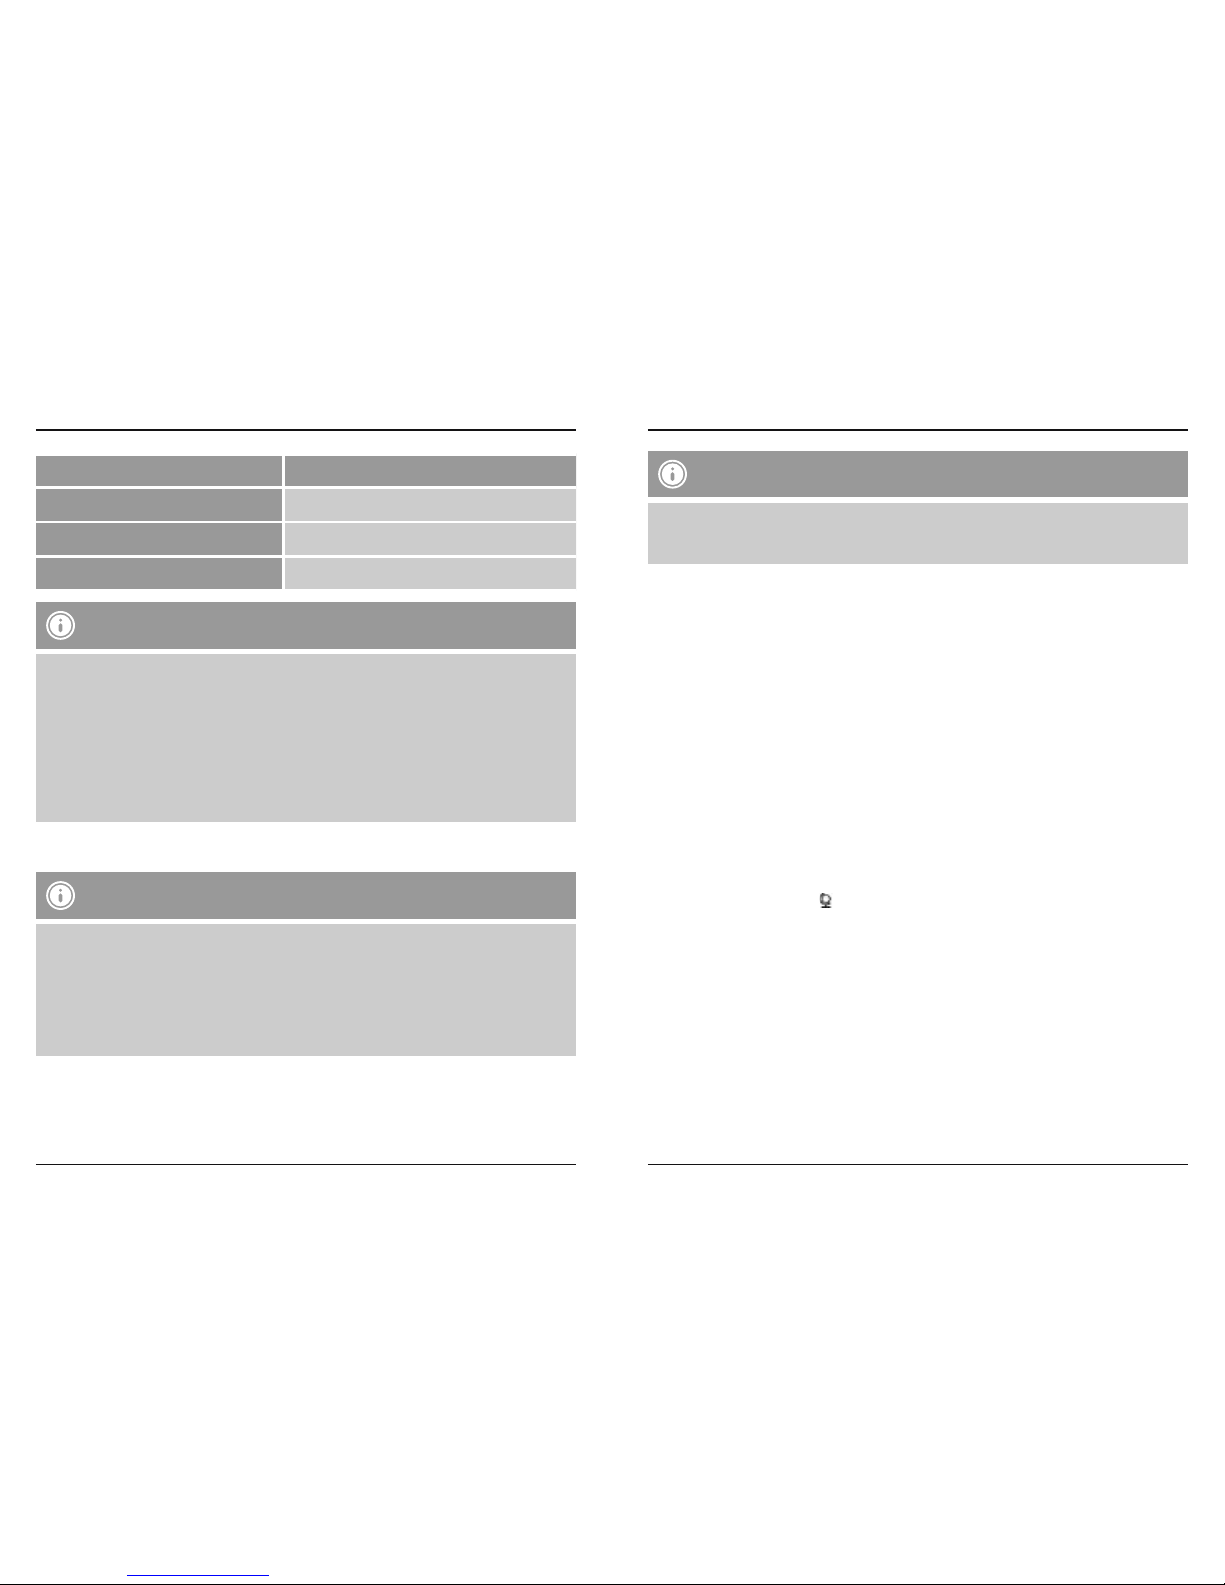
Radio icon appearance DCF signal search
Flashing Active
Displayed continuously Successful – signal is being received
No display Inactive
Page 4
67
Note – Time settings
• If, during initial setup of the device, a DCF signal is not received within the rst few
minutes, the search is aborted. The radio icon disappears.
• If there are reception problems, we recommend leaving the clock to sit overnight, since
interference is generally less at night.
• In the meantime, you can start a manual search for the DCF signal at another location
or you can manually set the time and date.
• The clock automatically continues to search for the DCF signal on a daily basis. If the
signal is received successfully, the manually set time and date are overwritten.
• Press the WAVE button (11) to start the manual search for the DCF signal.
Note – Manual search
• The manual search function using the WAVE button (11) is only possible if the radio
signal is activated (RC ON) – see 5.2. Activating/deactivating the radio signal
and summer time.
• The manual search is automatically aborted after 6-16 minutes.
• Using the WAVE button (11) frequently will drain the battery. We recommend only
using this function to seek out an optimal location for the device.
• Press the WAVE button (11) again to end the manual search.
5.2. Activating/deactivating the radio signal and summer time
• Move the slide switch for RC ON/OFF / DST (10) to the RC ON position (left) to activate
continuous synchronisation with the DCF signal.
Note – Summer time
• When the radio signal is active (RC ON), the clock automatically switches over to
summer time. When summer time is active, DST (Daylight Saving Time) is shown on the
display and the time is set one hour ahead.
• Move the slide switch for RC ON/OFF / DST (10) to the OFF position (centre) to deactivate
continuous synchronisation with the DCF signal and the automatic switch to summer time.
Use these settings when you are in a region where you cannot or are not permitted to
receive a radio signal.
• Then you must manually carry out the settings described in 5.3. Manually setting the
date/time (normal time).
• Move the slide switch for RC ON/OFF / DST (10) to the OFF position DST (right) to
deactivate continuous synchronisation with the DCF signal and activate the automatic
switch to summer time.
Use these settings when you are in a region where you cannot or are not permitted to
receive a radio signal.
The changeover to summer time will still be carried out based on the manually set date
and time.
• Then you must manually carry out the settings described in 5.3. Manually setting the
date/time (normal time).
5.3. Manually setting the date/time (normal time)
• Press the button (5) repeatedly until the normal time (B) is displayed.
• Press and hold the t button (12) for approx. 2 seconds until the year display begins to
ash.
• Set the following information in the order listed:
•Year
•Month/day or day/month display (B – 2/B – 3)
•Month (B – 3)
•Day (B – 2)
•12/24 hour format
•Hours
•Minutes
•Seconds (only zeroes possible)
•Time zone
•Day of the week language
•
DST AUTO/OFF
• To select the individual values, press the
button (8) or the button (9) and conrm
each selection by pressing the CLOCK button (12).
• Press the CLOCK button (12) immediately to adopt the set value displayed and skip ahead.
• If you do not make an entry for 30 seconds, the device automatically exits the settings
mode and the settings you made are saved.
Page 5
89
Note – Time zone
• The DCF signal can be received over long distances, but it always corresponds to
Central European Time, which is valid in Germany. Make sure you account for the time
difference in countries with another time zone.
• If you are in Moscow, the time is 3 hours later than in Germany. This means that you
should set +3 for the time zone. The clock then automatically sets itself 3 hours ahead
after receiving the DCF signal or according to the manually set time.
• Please see the table in order to save the appropriate time zone and time difference.
Note – Day of the week
• You can choose from English (GB), French (FR), German (DE), Spanish (ES) and Italian
(IT) for the display of the day of the week.
5.4. Home time and global time
• Press the button (5) repeatedly until the home time (C) is displayed.
• The default for this value (C – 3) is Berlin (BER).
• Press and hold the button (5) for approx. 2 seconds until the home city (C – 3) begins
to ash.
• To select the city, press the button (8) or the button (9) and conrm the selection by
pressing the button (5).
• When setting the home city, please observe the table provided above, including the display
abbreviations, time difference to UTC and availability of the DST function (summer time).
• The set home time is then automatically adopted as the normal time.
• Press the button (5) repeatedly until the global time (D) is displayed.
• This allows you to display the time for a different city/time zone.
• To select the city, press the button (8) to browse westwards or the button (9) to
browse eastwards and conrm the selection by pressing the button (5).
5.5. Alarm
Setting the alarm time
• Press the button (5) repeatedly until the normal time (B) is displayed.
• Press and hold the button (6) for approx. 2 seconds until the hours display (E – 2)
begins to ash.
• Set the following information in the order listed:
•Hours
•Minutes
• To select the individual values, press the
button (8) or the button (9) and conrm
your selection by pressing the button (6).
• If you do not make an entry for 30 seconds, the device automatically exits the settings
mode and the settings you made are saved.
• Press the button (6) to display the set alarm time for approx. 5 seconds.
Activating/deactivating the alarm
• Move the alarm slide switch (7) upwards. A red surface will be visible underneath the
slide switch.
The alarm is activated and the alarm clock icon (E – 3) is shown on the display (4).
• Move the alarm slide switch (7) downwards. The surface underneath the slide switch is
black.
The alarm is deactivated and the alarm clock icon (E – 3) disappears from the display (4).
Stopping the alarm/snooze function
• If the alarm is activated, it is triggered at the set time and an alarm signal sounds for one
minute. The alarm automatically stops after this time and is then triggered again the next
day at the set alarm time.
• To stop the alarm early, move the alarm slide switch (7) downwards until the surface
underneath the slide switch is black. The alarm is now deactivated.
Move the alarm slide switch (7) upwards again to activate the alarm for the next day.
Note – Snooze function
• While the alarm signal is sounding, press the SNOOZE/LIGHT button (1) to activate
the snooze function. The alarm clock icon (E – 3) on the display (4) begins to ash. The
alarm signal will be stopped for 5 minutes, after which it will sound again.
• The snooze function can be activated four consecutive times.
Page 6

10 11
5.6. Temperature display
• Press the button (5) repeatedly until the normal time (B) is displayed.
• Press and hold the WAVE button (11) for approx. 2 seconds to switch the temperature
display (B – 7) between °C and °F.
• If the measured values are outside the measurement range, the temperature display (B – 7)
will show Lo (< -40 °C/-40 °F) or HI (> 70 °C/158 °F).
5.7. Backlight and torch function
• If you press the SNOOZE/LIGHT button (1), the display (4) will light up for approx.
5 seconds.
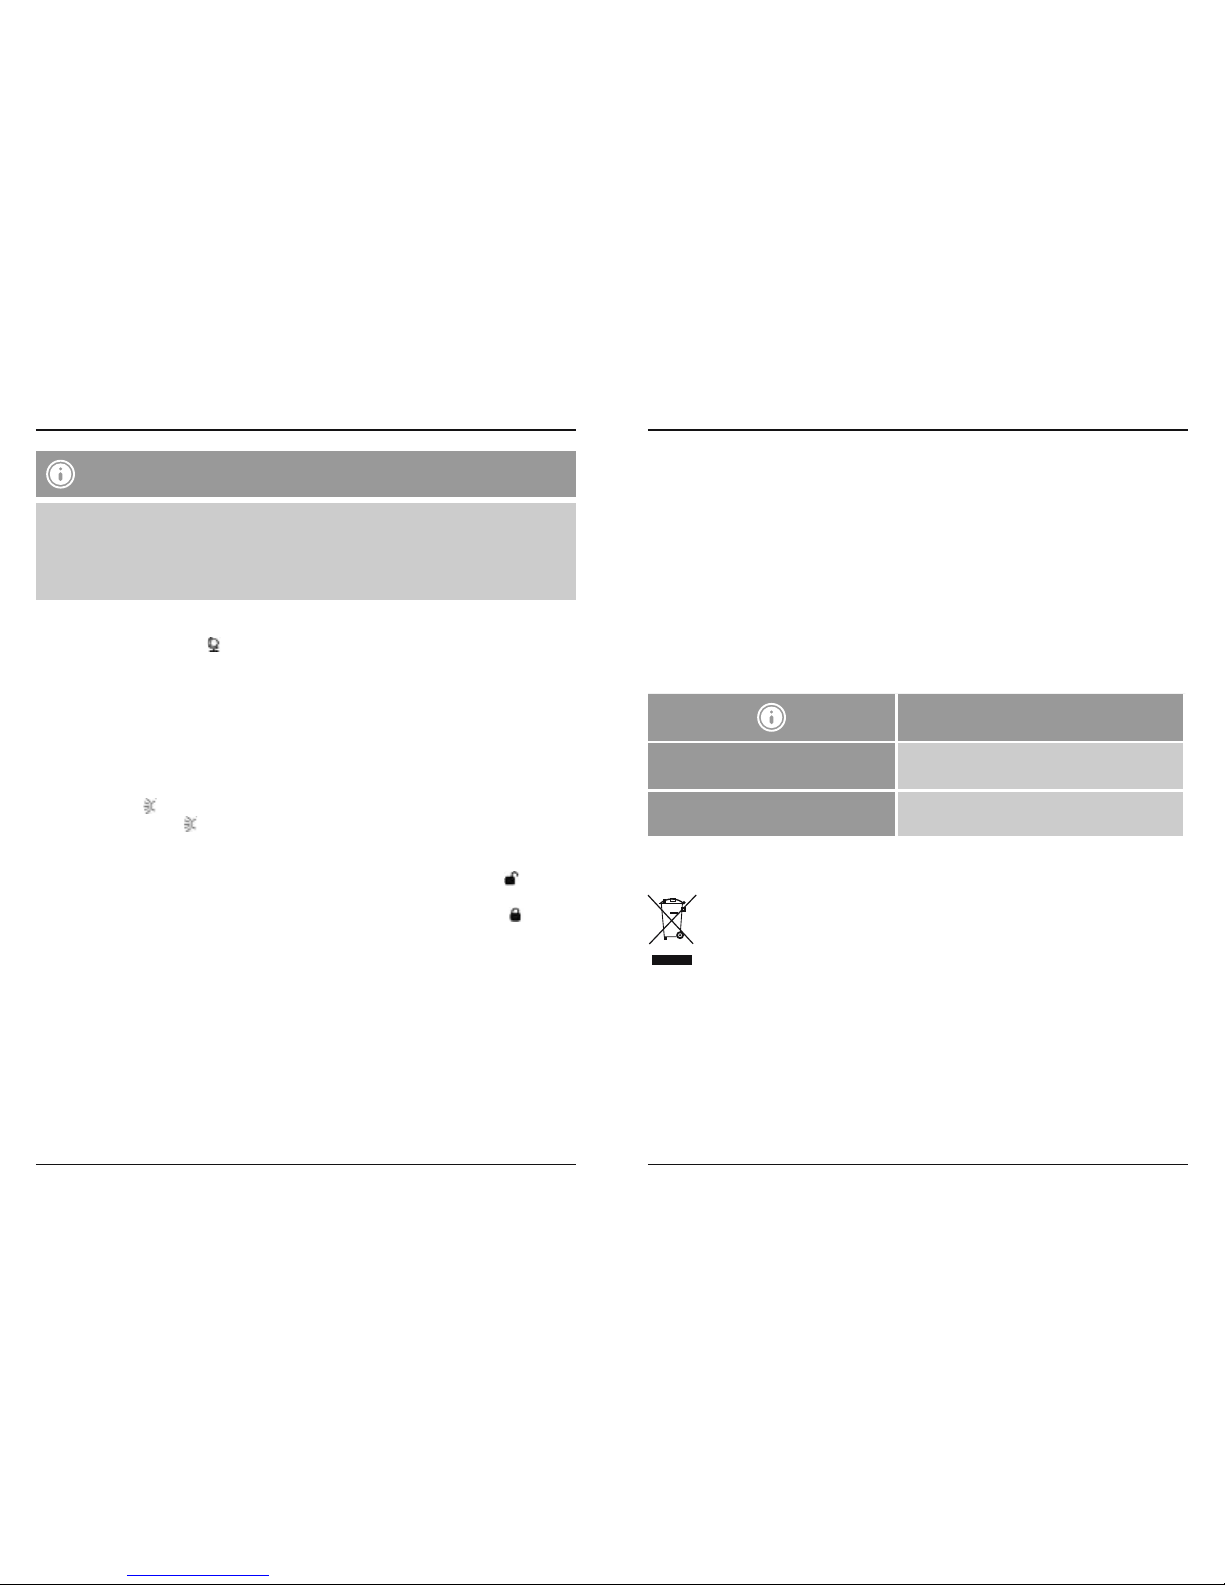
• Press the button (2) to switch on the integrated LED torch (3).
• Press the button (2) again to switch off the LED torch (3).
5.8. Key lock
• Move the key lock slide switch (14) upwards to the position in order enable all buttons
for use.
• Move the key lock slide switch (14) downwards to the position in order to deactivate all
button functions.
• Only the RESET button (13) and the alarm slide switch (7) can still be used.
5.9. Replacing the batteries
• Once the elements on the display (4) begin to dim, replace the batteries as described
in 4. Getting Started.
6. Care and Maintenance
Only clean this product with a slightly moist, lint-free cloth, and do not use aggressive
cleaning agents. Make sure that water does not get into the product.
7. Warranty Disclaimer
Hama GmbH & Co. KG assumes no liability and provides no warranty for damage resulting
from improper installation/mounting, improper use of the product or from failure to observe
the operating instructions and/or safety notes.
8. Service and Support
Please contact Hama Product Consulting if you have any questions about this product.
Hotline: +49 9091 502-115 (German/English)
Further support information can be found here:
www.hama.com
9. Technical Data
RC 170 global travel alarm clock
Power supply
3.0 V
2 x AAA batteries
Measuring range
Temperature
-40 °C – +70 °C
-40 °F – +158 °F
10. Recycling Information
Note on environmental protection:
After the implementation of the European Directive 2002/96/EU and 2006/66/EU
in the national legal system, the following applies: Electric and electronic devices
as well as batteries must not be disposed of with household waste. Consumers are
obliged by law to return electrical and electronic devices as well as batteries at the
end of their service lives to the public collecting points set up for this purpose or
point of sale. Details to this are dened by the national law of the respective country. This
symbol on the product, the instruction manual or the package indicates that a product is
subject to these regulations. By recycling, reusing the materials or other forms of utilising old
devices/Batteries, you are making an important contribution to protecting our environment.
11. Declaration of Conformity
Hereby, Hama GmbH & Co. KG, declares that 00106834 is in compliance with the
essential requirements and other relevant provisions of Directive 1999/5/EC.
See www.hama.com for declaration of conformity according to R&TTE Directive
99/5/EC guidelines.
Page 7
12 13
Bedienungselemente und Anzeigen
A Bedienungselemente
1. SNOOZE / LIGHT-Taste = Aktivierung Hintergrundbeleuchtung (ca. 5 Sekunden) /
Unterbrechung des Wecksignals für 5 Minuten
2. -Taste = Ein-/ Ausschalten der Taschenlampe
3. Taschenlampen-LED
4. Display
5. -Taste = Wechsel zwischen Heimatzeit/ Stadt und Weltzeit/ Stadt / Einstellung
Heimatzeit/ Stadt
6. -Taste = Anzeige Weckzeit (ca. 5 Sekunden) / Einstellung Wecker
7. Alarm-Schiebeschalter = Aktivierung/ Deaktivierung Wecker
8. -Taste = Verringerung des aktuellen Einstellungswerts / Wechsel zwischen Städten in
Weltzeitmodus (westwärts)
9. -Taste = Erhöhung des aktuellen Einstellungswerts / Wechsel zwischen Städten in
Weltzeitmodus (ostwärts)
10. RC ON / OFF / DST-Schiebeschalter = Aktivierung/ Deaktivierung Funksignal /
Aktivierung Sommerzeit und Deaktivierung Funksignal
11. WAVE-Taste = Wechsel zwischen °C und °F / Aktivierung/ Deaktivierung manueller
Funksignal-Empfang
12. CLOCK-Taste = Einstellung Uhrzeit
13. RESET-Knopf = Zurücksetzung auf Werkseinstellung
14. Tastensperre-Schiebeschalter = Aktivierung/ Deaktivierung aller Tasten
(ausgenommen RESET-Knopf (13) und Alarm-Schiebeschalter (7) )
15. Batteriefach
B Normalzeit
1. Uhrzeit
2. Tag
3. Monat
4. Wochentag
5. Signalstärke
6. Sommerzeit
7. Temperatur
C Heimatzeit
1. Anzeigesymbol Heimatzeit
2. Heimatzeit
3. Heimatstadt
D Weltzeit
1. Anzeigesymbol Weltzeit
2. Weltzeit
3. Heimatzeit
4. Weltstadt
5. Zeitzone
E Wecker
1. Anzeigesymbol Wecker
2. Weckzeit
3. Weckersymbol
Vielen Dank, dass Sie sich für ein Hama Produkt entschieden haben!
Nehmen Sie sich Zeit und lesen Sie die folgenden Anweisungen und Hinweise zunächst ganz
durch. Bewahren Sie diese Bedienungsanleitung anschließend an einem sicheren Ort auf, um
bei Bedarf darin nachschlagen zu können. Sollten Sie das Gerät veräußern, geben Sie diese
Bedienungsanleitung an den neuen Eigentümer weiter.
1. Erklärung von Warnsymbolen und Hinweisen
Warnung
Wird verwendet, um Sicherheitshinweise zu kennzeichnen oder um Aufmerksamkeit auf
besondere Gefahren und Risiken zu lenken.
Hinweis
Wird verwendet, um zusätzlich Informationen oder wichtige Hinweise zu kennzeichnen.
2. Packungsinhalt
• Weltreisewecker RC 170
• 2 AAA Batterien
• diese Bedienungsanleitung
D Bedienungsanleitung
Page 8
14 15
3. Sicherheitshinweise
• Das Produkt ist für den privaten, nicht-gewerblichen Haushaltsgebrauch vorgesehen.
• Schützen Sie das Produkt vor Schmutz, Feuchtigkeit und Überhitzung und verwenden Sie es
nur in trockenen Umgebungen.
• Benutzen Sie das Produkt nicht in Bereichen, in denen elektronische Produkte nicht erlaubt
sind.
• Positionieren Sie das Produkt nicht in der Nähe von Störfeldern, Metallrahmen, Computern
und Fernsehern etc. Elektronische Geräte sowie Fensterrahmen beeinträchtigen die
Funktion des Produktes negativ.
• Lassen Sie das Produkt nicht fallen und setzen Sie es keinen heftigen Erschütterungen aus.
• Versuchen Sie nicht, das Produkt selbst zu warten oder zu reparieren. Überlassen Sie
jegliche Wartungsarbeit dem zuständigen Fachpersonal.
• Nehmen Sie keine Veränderungen am Produkt vor. Dadurch verlieren sie jegliche
Gewährleistungsansprüche.
• Entnehmen Sie Batterien aus dem Produkt, wenn dieses für längere Zeit nicht genutzt wird,
außer das Produkt wird für Notfälle bereitgehalten.
• Halten Sie Kinder unbedingt von dem Verpackungsmaterial fern, es besteht
Erstickungsgefahr.
• Entsorgen Sie das Verpackungsmaterial sofort gemäß den örtlich gültigen
Entsorgungsvorschriften.
Warnung
• Entfernen und entsorgen Sie verbrauchte Batterien unverzüglich aus dem Produkt.
• Verwenden Sie ausschließlich Akkus (oder Batterien), die dem angegebenen Typ
entsprechen.
• Mischen Sie alte und neue Batterien nicht, sowie Batterien unterschiedlichen Typs oder
Herstellers.
• Beachten Sie unbedingt die korrekte Polarität (Beschriftung + und -) der Batterien
und legen Sie diese entsprechend ein. Bei Nichtbeachtung besteht die Gefahr des
Auslaufens oder einer Explosion der Batterien.
• Laden Sie Batterien nicht.
• Bewahren Sie Batterien außerhalb der Reichweite von Kindern auf.
• Schließen Sie Akkus/Batterien nicht kurz und halten Sie sie von blanken
Metallgegenständen fern.
4. Inbetriebnahme
• Öffnen Sie das Batteriefach (15), legen Sie zwei AAA Batterien polrichtig ein und
schließen Sie das Batteriefach (15) wieder.
• Wird nach dem Einsetzen einer neuen Batterie nichts auf dem LCD-Display angezeigt,
drücken Sie mit einem spitzen Gegenstand den RESET-Knopf (13), um einen Neustart zu
generieren.
5. Betrieb
Hinweis – Eingabe
• Halten Sie die -Taste (8) oder die -Taste (9) gedrückt, um die Werte schneller
auswählen zu können.
5.1. Automatische Einstellung Datum/ Uhrzeit nach DCF-Signal
• Nach dem Einlegen der Batterie wird das Display eingeschaltet, es ertönt ein akustisches
Signal und der Wecker beginnt automatisch die Suche nach einem DCF-Signal. Während
des Suchvorgangs blinkt das Funksymbol
. Dieser Vorgang kann 3 bis 5 Minuten dauern.
• Bei Empfang des Funksignals werden Datum und Uhrzeit automatisch eingestellt.
Funksymbol Signalstärke
Kein Empfang
Schlecht
Annehmbar
Hervorragend
Page 9
16 17
Anzeige Funksymbol Suche nach DCF-Signal
Blinkende Anzeige Aktiv
Dauerhafte Anzeige Erfolgreich – Signal wird empfangen
Keine Anzeige Inaktiv
Hinweis – Uhrzeiteinstellung
• Wird innerhalb der ersten Minuten während der Ersteinrichtung kein DCF-Signal
empfangen, wird die Suche beendet. Das Funksymbol erlischt.
• Bei Empfangsstörungen wird empfohlen, die Uhr über Nacht stehen zu lassen, da hier
die Störsignale in der Regel geringer sind.
• Sie können währenddessen eine manuelle Suche nach dem DCF-Signal an einem
anderen Aufstellungsort starten oder die manuelle Einstellung von Uhrzeit und Datum
vornehmen.
• Die Uhr sucht automatisch weiterhin täglich nach dem DCF-Signal. Bei erfolgreichem
Signalempfang werden die manuell eingestellte Uhrzeit und das Datum überschrieben.
• Drücken Sie die WAVE-Taste(11), um die manuelle Suche nach dem DCF-Signal zu starten.
Hinweis – manueller Suchvorgang
• Der manuelle Suchvorgang über die WAVE-Taste (11) ist nur bei aktiviertem Funksignal
(RC ON) – siehe 5.2. Aktivierung/ Deaktivierung Funksignal und Sommerzeit
– möglich.
• Der manuelle Suchvorgang schaltet sich automatisch nach 6 – 16 Minuten ab.
• Eine häuge Nutzung der WAVE-Taste (11) geht zu Lasten der Batteriekapazität. Es
wird empfohlen, diese Funktion nur zur Ausmachung eines optimalen Aufstellungsorts
zu nutzen.
• Drücken Sie die WAVE-Taste erneut(11), um den manuellen Suchvorgang zu beenden.
5.2. Aktivierung/ Deaktivierung Funksignal und Sommerzeit
Schieben Sie den RC ON / OFF / DST-Schiebeschalter (10) auf die Position RC ON (links), um
die dauerhafte Synchronisation mit dem DCF-Signal zu aktivieren.
Hinweis – Sommerzeit
• Die Uhrzeit stellt sich bei aktiviertem Funksignal (RC ON) automatisch auf die
Sommerzeit um. Solange die Sommerzeit aktiv ist, wird auf dem Display DST angezeigt
und die Uhrzeit um eine Stunde vorgestellt.
• Schieben Sie den RC ON / OFF / DST-Schiebeschalter (10) auf die Position OFF (mittig),
um die dauerhafte Synchronisation mit dem DCF-Signal sowie die automatische Umstellung
auf Sommerzeit zu deaktivieren.
Nutzen Sie diese Einstellungen, wenn Sie sich in einer Region benden, in der kein
Funksignal empfangen werden kann und/ oder darf.
• Nehmen Sie anschließend die Einstellungen – wie in 5.3. Manuelle Einstellung Datum/
Uhrzeit (Normalzeit) beschrieben – manuell vor.
• Schieben Sie den RC ON / OFF / DST-Schiebeschalter (10) auf die Position DST
(rechts), um die dauerhafte Synchronisation mit dem DCF-Signal zu deaktivieren und die
automatische Umstellung auf Sommerzeit zu aktivieren.
Nutzen Sie diese Einstellungen, wenn Sie sich in einer Region benden, in der kein
Funksignal empfangen werden kann und/ oder darf.
Die Umstellung auf die Sommerzeit erfolgt weiterhin auf Basis des manuell eingestellten
Datums und Uhrzeit.
• Nehmen Sie anschließend die Einstellungen – wie in 5.3. Manuelle Einstellung Datum/
Uhrzeit (Normalzeit) beschrieben – manuell vor.
5.3. Manuelle Einstellung Datum/ Uhrzeit (Normalzeit)
• Drücken Sie wiederholt die -Taste (5), bis die Normalzeit (B) angezeigt wird.
• Drücken und halten Sie die CLOCK-Taste (12) für ca. 2 Sekunden, bis die Jahresanzeige zu
blinken beginnt.
• Stellen Sie die folgenden Informationen nacheinander ein:
•Jahr
•Anzeige Monat/ Tag – Tag/ Monat (B – 2/B – 3)
•Monat (B – 3)
•Tag (B – 2)
•12/24-Stunden-Format
•Stunden
•Minuten
•Sekunden (nur Nullen möglich)
•Zeitzone
•Sprache Wochentag
Page 10

18 19
• DST AUTO/OFF
• Drücken Sie zum Auswählen der einzelnen Werte die -Taste (8) oder die -Taste (9) und
bestätigen Sie die jeweilige Auswahl durch Drücken der CLOCK-Taste (12).
• Drücken Sie direkt die CLOCK-Taste (12), um den angezeigten Einstellungswert zu
übernehmen und zu überspringen.
• Erfolgt 30 Sekunden keine Eingabe, wird der Einstellungsmodus automatisch verlassen und
die vorgenommenen Einstellungen gespeichert.
Hinweis – Zeitzone
• Das DCF-Signal kann weitläug empfangen werden, entspricht jedoch immer der MEZ,
die in Deutschland gilt. Beachten Sie daher, dass Sie in Ländern mit anderer Zeitzone
die Zeitverschiebung entsprechend einstellen müssen.
• Benden Sie sich in Moskau, ist es dort bereits 3 Stunden später als in Deutschland.
Stellen Sie daher bei der Zeitzone +3 ein. Die Uhr stellt sich dann immer nach Empfang
des DCF-Signals bzw. in Bezug auf die manuell eingestellte Uhrzeit automatisch 3
Stunden weiter.
• Beachten Sie die Tabelle, um die entsprechende Zeitzone und Zeitverschiebung
abzuspeichern.
Hinweis – Wochentag
• Sie können für die Wochentaganzeige die Sprachen Englisch (GB), Französisch (FR),
Deutsch (DE), Spanisch (ES) oder Italienisch (IT) wählen.
5.4. Heimatzeit und Weltzeit
• Drücken Sie wiederholt die -Taste (5), bis die Heimatzeit (C) angezeigt wird.
• Als Standardwert ist hier (C – 3) Berlin (BER) eingestellt.
• Drücken und halten Sie die -Taste (5) für ca. 2 Sekunden, bis die Heimatstadt (C – 3) zu
blinken beginnt.
• Drücken Sie zum Auswählen der Städte die -Taste (8) oder die -Taste (9) und
bestätigen Sie die jeweilige Auswahl durch Drücken der -Taste (5).
• Beachten Sie für die Einstellung Ihrer Heimatzeit die anfangs angegebene Tabelle
inkl. Anzeigekürzeln, Zeitverschiebung zur UTC und Verfügbarkeit der DST-Funktion
(Sommerzeit).
• Die eingestellte Heimatzeit wird dann automatisch für die Normalzeit übernommen.
• Drücken Sie wiederholt die -Taste (5), bis die Weltzeit (D) angezeigt wird.
• Hier können Sie die Uhrzeit für eine andere Stadt/ Zeitzone anzeigen lassen.
• Drücken Sie zum Auswählen der Städte westwärts die -Taste (8) oder ostwärts die
-Taste (9) und bestätigen Sie die jeweilige Auswahl durch Drücken der -Taste (5).
5.5. Wecker
Einstellung Weckzeit
• Drücken Sie wiederholt die -Taste (5), bis die Normalzeit (B) angezeigt wird.
• Drücken und halten Sie die -Taste (6) für ca. 2 Sekunden, bis die Stundenanzeige (E – 2)
zu blinken beginnt.
• Stellen Sie die folgenden Informationen nacheinander ein:
•Stunden
•Minuten
• Drücken Sie zum Auswählen der einzelnen Werte die -Taste (8) oder die -Taste (9) und
bestätigen Sie die jeweilige Auswahl durch Drücken der -Taste (6).
• Erfolgt 30 Sekunden keine Eingabe, wird der Einstellungsmodus automatisch verlassen und
die vorgenommenen Einstellungen gespeichert.
• Drücken Sie die -Taste (6), um die eingestellte Weckzeit für ca. 5 Sekunden anzuzeigen.
Aktivierung/ Deaktivierung Wecker
• Schieben Sie den Alarm-Schiebeschalter (7) nach oben. Unter dem Schiebeschalter wird
eine rote Fläche sichtbar.
Der Wecker ist aktiviert und auf dem Display (4) wird das Weckersymbol (E – 3) angezeigt.
• Schieben Sie den Alarm-Schiebeschalter (7) nach unten, die Fläche hinter dem
Schiebeschalter ist schwarz.
Der Wecker ist deaktiviert und das Weckersymbol (E – 3) auf dem Display (4) erlischt.
Wecker beenden/ Schlummerfunktion
• Ist der Wecker aktiviert, wird dieser zur entsprechenden Uhrzeit ausgelöst und es ertönt
für eine Minute ein Wecksignal. Danach wird der Wecker automatisch beendet und am
nächsten Tag zur eingestellten Weckzeit wieder ausgelöst.
• Um den Wecker vorzeitig zu beenden, schieben Sie den Alarm-Schiebeschalter (7)
nach unten, bis die Fläche hinter dem Schiebeschalter schwarz ist. Der Wecker ist nun
deaktiviert.
Schieben Sie den Alarm-Schiebeschalter (7) wieder nach oben, um den Wecker für den
nächsten Tag zu aktivieren.
Page 11
20 21
Hinweis – Schlummerfunktion
• Drücken Sie während des Wecksignals die SNOOZE / LIGHT-Taste (1), um die
Schlummerfunktion zu aktiveren. Das Weckersymbol (E – 3) auf dem Display (4)
beginnt zu blinken. Das Wecksignal wird für 5 Minuten unterbrochen und dann erneut
ausgelöst.
• Die Schlummerfunktion kann viermal hintereinander ausgelöst werden.
5.6. Anzeige Temperatur
• Drücken Sie wiederholt die -Taste (5), bis die Normalzeit (B) angezeigt wird.
• Drücken und halten Sie die WAVE-Taste (11) für ca. 2 Sekunden, um bei der
Temperaturanzeige (B – 7) zwischen °C und °F zu wechseln.
• Liegen die Messwerte außerhalb des Messbereichs, wird in der Temperaturanzeige (B – 7)
Lo (< -40°C/ -40°F) bzw. HI (> 70°C/ 158°C) angezeigt.
5.7. Hintergrundbeleuchtung und Taschenlampe
• Drücken Sie die SNOOZE / LIGHT-Taste (1), wird das Display (4) für ca. 5 Sekunden
beleuchtet.
• Drücken Sie die -Taste (2), um die integrierte Taschenlampen-LED (3) einzuschalten.
• Drücken Sie erneut die -Taste (2), um die Taschenlampen-LED (3) wieder auszuschalten.
5.8. Tastensperre
• Schieben Sie den Tastensperre-Schiebeschalter (14) nach oben auf die Position , um alle
Tasten nutzen zu können.
• Schieben Sie den Tastensperre-Schiebeschalter (14) nach unten auf die Position , um alle
Tastenfunktionen zu deaktivieren.
• Lediglich der RESET-Knopf (13) sowie der Alarm-Schiebeschalter (7) können weiterhin
betätigt werden.
5.9. Batteriewechsel
• Sobald die Anzeige auf dem Display (4) schwächer wird, wechseln Sie die Batterien – wie
in 4. Inbetriebnahme beschrieben – aus.
6. Wartung und Pflege
Reinigen Sie dieses Produkt nur mit einem fusselfreien, leicht feuchten Tuch und verwenden
Sie keine aggressiven Reiniger. Achten Sie darauf, dass kein Wasser in das Produkt eindringt.
7. Haftungsausschluss
Die Hama GmbH & Co. KG übernimmt keinerlei Haftung oder Gewährleistung für Schäden,
die aus unsachgemäßer Installation, Montage und unsachgemäßem Gebrauch des Produktes
oder einer Nichtbeachtung der Bedienungsanleitung und/oder der Sicherheitshinweise
resultieren.
8. Service und Support
Bitte wenden Sie sich bei Fragen zum Produkt gerne an die Hama-Produktberatung.
Hotline: +49 9091 502-115 (Deu/Eng)
Weitere Supportinformationen nden sie hier:
www.hama.com
9. Technische Daten
Weltreisewecker RC 170
Stromversorgung
3,0 V
2 x AAA Batterie
Messbereich
Temperatur
-40°C – +70°C
-40°F – +158°F
10. Entsorgungshinweise
Hinweis zum Umweltschutz:
Ab dem Zeitpunkt der Umsetzung der europäischen Richtlinien 2002/96/EG und
2006/66/EG in nationales Recht gilt folgendes: Elektrische und elektronische
Geräte sowie Batterien dürfen nicht mit dem Hausmüll entsorgt werden. Der
Verbraucher ist gesetzlich verpichtet, elektrische und elektronische Geräte sowie
Batterien am Ende ihrer Lebensdauer an den dafür eingerichteten, öffentlichen
Sammelstellen oder an die Verkaufsstelle zurückzugeben. Einzelheiten dazu regelt das
jeweilige Landesrecht. Das Symbol auf dem Produkt, der Gebrauchsanleitung oder der
Verpackung weist auf diese Bestimmungen hin. Mit der Wiederverwertung, der stoichen
Verwertung oder anderen Formen der Verwertung von Altgeräten/Batterien leisten Sie einen
wichtigen Beitrag zum Schutz unserer Umwelt.
Page 12
22 23
11. Konformitätserklärung
Hiermit erklärt Hama GmbH & Co. KG, dass sich dieses Gerät in Übereinstimmung
mit den grundlegenden Anforderungen und den übrigen einschlägigen
Bestimmungen der Richtlinie 1999/5/EG bendet. Die Konformitäts-erklärung nach
der R&TTE Richtlinie 99/5/EG nden Sie unter www.hama.com.
Éléments de commande et d'affichage
A Éléments de commande
1. Touche SNOOZE / LIGHT = allumage du rétro-éclairage (env. 5 secondes) / interruption
de la sonnerie de réveil pour 5 minutes
2. Touche = allumage(/extiction de la lampe de poche
3. Lampe de poche à LED
4. Écran
5. Touche = commutation entre heure du lieu de résidence/ ville et heure universelle/ ville /
réglage heure du lieu de résidence/ ville
6. Touche = achage de l’heure de réveil (pendant env. 5 secondes) / réglage du réveil
7. Sélecteur Alarm = activation / désactivation du réveil
8. Touche
= diminution de la valeur en cours de réglage / commutation entre villes et
temps universel (vers l’ouest)
9. Touche = augmentation de la valeur en cours de réglage / commutation entre villes et
temps universel (vers l’est)
10. Sélecteur RC ON / OFF / DST = activation / désactivation de la réception du signal radio
/ activation de l’heure d’été et désactivation du signal radio
11. Touche WAVE = commutation entre °C et °F / activation / désactivation de la réception
manuelle du signal radio
12. Touche CLOCK = réglage de l‘heure
13. Touche RESET = réinitialisation des réglages d‘usine
14. Sélecteur de blocage des touches = activation / désactivation de toutes les touches
(à l’exception du bouton RESET (13) et du sélecteur Alarm (7) )
15. Compartiment à piles
B Heure normale
1. Heure
2. Jour
3. Mois
4. Jour de la semaine
5. Intensité du signal
6. Heure d‘été
7. Température
C Heure du lieu de résidence
1. Symbole d’achage de l’heure du lieu de résidence
2. Heure du lieu de résidence
3. Ville de résidence
F Mode d‘emploi
Page 13

24 25
D Temps universel
1. Symboles d’achage du temps universel
2. Temps universel
3. Heure du lieu de résidence
4. Ville du monde
5. Fuseau horaire
E Réveil
1. Symboles d’achage du réveil
2. Heure de réveil
3. Symbole de réveil
Nous vous remercions d’avoir choisi un produit Hama.
Veuillez prendre le temps de lire l‘ensemble des remarques et consignes suivantes. Veuillez
conserver ce mode d‘emploi à portée de main an de pouvoir le consulter en cas de besoin.
Transmettez-le au nouveau propriétaire avec l’appareil le cas échéant.
1. Explication des symboles d‘avertissement et des remarques
Avertissement
Ce symbole est utilisé pour indiquer des consignes de sécurité ou pour attirer votre
attention sur des dangers et risques particuliers.
Remarque
Ce symbole est utilisé pour indiquer des informations supplémentaires ou des
remarques importantes.
2. Contenu de l‘emballage
• Réveil tour du monde RC 170
• 2 piles LR03/AAA
• Mode d‘emploi
3. Consignes de sécurité
• Ce produit est destiné à une installation domestique non commerciale.
• Protégez le produit de toute saleté, humidité, surchauffe et utilisez-le uniquement dans
des locaux secs.
• N‘utilisez pas le produit dans les zones dans lesquelles l‘utilisation d‘appareils
électroniques est interdite.
• Utilisez l‘appareil exclusivement branché à une prise de courant appropriée. La prise de
courant doit être située à proximité du produit et doit être facilement accessible.
• Protégez le produit des secousses violentes et évitez tout choc ou toute chute.
• Ne tentez pas de réparer l’appareil vous-même ni d’effectuer des travaux d’entretien.
Déléguez tous travaux d‘entretien à des techniciens qualiés.
• N’apportez aucune modication à l’appareil. Des modications vous feraient perdre
vos droits de garantie.
• Retirez les piles du produit si vous ne comptez pas l’utiliser pendant un certain temps, à
part s‘il est utilisé en veille en tant que produit d‘alarme.
• Tenez les emballages d‘appareils hors de portée des enfants, risque d‘étouffement.
• Recyclez les matériaux d’emballage conformément aux prescriptions locales en
vigueur.
Avertissement concernant les piles
• Retirez les piles usagées immédiatement du produit pour les recycler.
• Utilisez exclusivement des batteries (ou des piles) du type indiqué.
• N’utilisez pas simultanément des piles usagées et des piles neuves ou des piles de
différents types.
• Respectez impérativement la polarité de la pile (marquage + et -) lors de l‘insertion
dans le boîtier ; risques d‘écoulement et d‘explosion des piles si tel n‘est pas le cas.
• Ne surchargez pas les piles.
• Conservez les piles hors de portée des enfants.
• Ne court-circuitez pas les batteries/piles et éloignez-les des objets métalliques.
4. Mise en service
• Ouvrez le compartiment à piles (15), Insérez deux piles LR03/AAA conformément aux
indications de polarité, puis refermez le compartiment (15).
• Si, après l’insertion des piles, aucun achage n’apparaît à l’écran, appuyez avec un objet
pointu sur le bouton RESET (13) an de provoquer un redémarrage du réveil.
Page 14

26 27
5. Fonctionnement
Remarque concernant la saisie
• Maintenez la touche (8) ou la touche (9) enfoncée an de faire déler
rapidement les chiffres.
5.1. Réglage automatique de la date / de l'heure sur la base du signal
horaire DCF
• L‘écran s‘allume après avoir inséré les piles ; un signal sonore retentit et le réveil recherche
automatiquement le signal horaire DCF. L’ icône radio clignote pendant la recherche du
signal horaire . Cette procédure dure de 3 à 5 minutes.
• La date et l‘heure sont réglées automatiquement dès que l‘unité détecte le signal radio.
Symbole radio Intensité du signal
Aucune réception
Mauvaise réception
Réception acceptable
Réception excellente
Achage du symbole radio Recherche du signal horaire DCF
Achage clignotant Recherche active
Achage permanent
Recherche aboutie - signal en cours de
réception
Aucun achage Inactif
Remarque concernant le réglage de l‘heure
• En cas d‘échec de réception du signal horaire DCF pendant la minute suivant la
première conguration, la station termine la recherche. Le symbole radio s‘éteint.
• En cas de problème de réception, nous vous conseillons d’attendre une nuit ; les
signaux parasites sont généralement plus faibles pendant la nuit.
• Vous pouvez égale,ment lancer une nouvelle recherche manuelle du signal radio en
changeant d’emplacement, ou encore effectuer un réglage manuel de l’heure et de
la date.
• L‘horloge continue à rechercher quotidiennement le signal horaire DCF. Les réglages
manuels de l‘heure et de la date seront corrigés dès que la station reçoit correctement
le signal horaire DCF.
• Appuyez sur la touche WAVE an de lancer une recherche manuelle du signal DCF.
Remarque concernant la recherche manuelle
• La recherche manuelle à l’aide de la touche WAVE (11) est disponible uniquement en
présence d’un signal radio actif (RC ON) – voir 5.2. Activation / désactivation du
signal radio et de l’heure d’été – possible.
• La recherche manuelle se termine automatiquement au bout de 6 – 16 minutes.
• Une utilisation répétée de la touche WAVE (11) épuise les piles. Nous vous
recommandons d’utiliser cette fonction uniquement an de localiser un emplacement
idéal.
• Appuyez à nouveau sur la touche WAVE (11) an de quitter la recherche manuelle du
signal.
5.2. Activation / désactivation du signal radio et de l’heure d’été
• Faites glisser le sélecteur RC ON / OFF / DST (10) en position RC ON (vers la gauche) an
de sélectionner la synchronisation permanente avec le signal DCF.
Page 15

28 29
Remarque concernant l‘heure d‘été
• L’heure commute automatiquement à l’heure d’été dans le cas où vous activez le signal
radio (RC ON) . DST apparaît à l’écran et l’achage horaire est avancé d’une heure
pendant toute la durée de l’heure d’été.
• Faites glisser le sélecteur RC ON / OFF / DST (10) en position RC ON (au milieu) an de
sélectionner la synchronisation permanente avec le signal DCF et activer la commutation
automatique à l’heure d’été.
Utilisez ce réglage uniquement dans une région dans laquelle vous ne pouvez par recevoir
de signal radio ou n’en avez pas le droit.
• Poursuivez ensuite le réglage manuel conformément aux étapes décrites au point
5.3. Réglage manuel de la date / de l’heure (heure normale) .
• Faites glisser le sélecteur RC ON / OFF / DST (10) en position DST (vers la droite) an de
désactiver la synchronisation permanente avec le signal DCF et d’activer la commutation
automatique à l’heure d’été.
Utilisez ce réglage uniquement dans une région dans laquelle vous ne pouvez par recevoir
de signal radio ou n’en avez pas le droit.
• La commutation à l’heure d’été est effectuée sur la base de de la date et de l’heure
congurées manuellement
Poursuivez ensuite le réglage manuel conformément aux étapes décrites au point
5.3. Réglage manuel de la date / de l’heure (heure normale) .
5.3. Réglage manuel de la date / de l'heure (heure normale)
• Appuyez plusieurs fois sur la touche (5) jusqu’à ce que l’heure normale (B) apparaisse
à l‘écran.
• Appuyez sur la touche CLOCK (12) pendant env. 2 secondes jusqu’à ce que les chiffres de
l’année se mettent à clignoter.
• Vous pouvez régler successivement les valeurs suivantes :
•Année
•Achage mois/jour – jour/mois (B – 2/B – 3)
•Mois (B – 3)
•Jour (B – 2)
•Format horaire 12/24 heures
•Heures
•Minutes
•Secondes (uniquement zéro)
•Fuseau horaire
•Langue des jours de la semaine
• DST AUTO/OFF
• Appuyez sur la touche
(8) ou la touche (9) an de sélectionner les différentes
valeurs, puis conrmez votre sélection en appuyant sur la touche CLOCK (12).
• Appuyez directement sur la touche CLOCK (12) an d‘adopter la valeur achée et passer
au réglage suivant.
• Le mode de réglage s‘interrompt automatiquement lorsque vous n‘appuyez sur aucune
touche pendant plus de 30 secondes.
Remarque concernant les fuseaux horaires
• Il est possible de recevoir le signal horaire à grande distance ; ce signal ne correspond
toutefois pas toujours à GMT + 1, l‘heure en vigueur en Allemagne. Veuillez donc noter
que vous devrez adopter un décalage horaire dans les pays situés dans un autre fuseau
horaire.
• Si vous vous trouvez, par exemple, à Moscou, le décalage horaire entre Moscou et
l‘Allemagne est de 3 heures (l‘heure de Moscou est en avance). Réglez donc le fuseau
horaire sur +3. L‘ horloge s‘adaptera alors automatiquement à l‘heure captée par le
signal horaire DCF (ou à l‘heure réglée manuellement) et lui ajoutera 3 heures.
• Veuillez consulter le tableau an de sauvegarder le fuseau horaire et le décalage
concernés.
Remarque concernant l‘achage des jours de la semaine
• Vous pouvez acher le jour de la semaine dans les langues suivantes : anglais (GB),
français (FR), allemand (DE), espagnol (ES) ou italien (IT).
5.4. Heure du lieu de résidence et temps universel
• Appuyez plusieurs fois sur la touche (5) jusqu’à ce que l’heure du lieu de résidence (B)
apparaisse à l‘écran.
• (C – 3) Berlin (BER) est réglé par défaut.
• Appuyez sur la touche
(5) pendant env. 2 secondes jusqu’à ce que les chiffres de l’année
se mettent à clignoter.
• Appuyez sur la touche
(8) ou sur la touche (9) an de sélectionner les villes, puis
conrmez votre sélection en appuyant sur la touche
(5).
Page 16
30 31
• Lors du réglage de votre lieu de résidence, veuillez consulter le tableau mentionné
ci-dessus , y compris les abréviations d’achage, le décalage horaire par rapport au TUC
(Temps universel coordonné), ainsi que la disponibilité de la fonction d’heure d’été (DST).
• L’heure réglée pour votre lieu de résidence sera reprise automatiquement en tant que heure
normale.
• Appuyez plusieurs fois sur la touche (5) jusqu’à ce que l’heure en temps universel (B)
apparaisse à l‘écran.
• Vous pouvez ici acher l’heure d’une autre ville / d’un autre fuseau horaire.
• Appuyez sur la touche (8) an de sélectionner une ville située à l’ouest ou sur la
touche (9) an de sélectionner une ville située à l’est, puis conrmez votre sélection en
appuyant sur la touche (5).
5.5. Réveil
Réglage de l’heure de réveil
• Appuyez plusieurs fois sur la touche (5) jusqu’à ce que l’heure normale (B) apparaisse
à l‘écran.
• Appuyez sur la touche (6) pendant env. 2 secondes jusqu’à ce que les chiffres de l’heure
(E – 2) se mettent à clignoter.
• Vous pouvez régler successivement les valeurs suivantes :
•Heures
•Minutes
• Appuyez sur la touche (8) ou sur la touche (9) an de sélectionner les différentes
valeurs, puis conrmez votre sélection en appuyant sur la touche (6).
• Le mode de réglage s‘interrompt automatiquement lorsque vous n‘appuyez sur aucune
touche pendant plus de 30 secondes.
• Appuyez sur la touche (6) an d’acher l’heure de réveil sélectionnée pendant environ
5 secondes.
Activation / désactivation du réveil
• Faite glisser le sélecteur Alarm (7) vers le haut. Une surface rouge apparaît sous le
sélecteur.
Le réveil est activé et le symbole de réveil (E – 3) apparaît à l’écran (4).
• Faite glisser le sélecteur Alarm (7) vers le bas ; la surface derrière le sélecteur est noire.
Le réveil est désactivé et le symbole de réveil (E – 3) disparaît de l’écran (4).
Arrêt de la sonnerie / fonction de répétition de la sonnerie
• Si le réveil est activé, une alarme sonore retentit pendant une minute. Le réveil s’arrête
ensuite automatiquement, puis retentit à nouveau le jour suivant à la même heure.
• Pour arrêter le réveil avant la sonnerie, faites glisser le sélecteur ALARM (7) vers le bas,
jusqu’à ce que la surface derrière le sélecteur devienne noire. Le réveil est alors désactivé.
Faite glisser le sélecteur ALARM (7) à nouveau vers le haut an d’activer le réveil pour le
jour suivant.
Remarque concernant la fonction de répétition de l‘alarme
• Appuyez sur la touche SNOOZE / LIGHT (1) pendant la sonnerie an d‘activer la
fonction de répétition de la sonnerie. Le symbole de réveil (E – 3) se met à clignoter à
l’écran (4). La sonnerie s‘interrompt pendant 5 minutes, puis retentit à nouveau.
• Vous pouvez proter de la fonction de répétition d’alarme quatre fois successivement.
5.6. Affichage de la température
• Appuyez plusieurs fois sur la touche (5) jusqu’à ce que l’heure normale (B) apparaisse
à l‘écran.
• Appuyez sur la touche WAVE (11) pendant env. 2 secondes an de commuter l’achage
de la température (B – 7) entre °C et °F.
• L’achage de la température indique (B – 7) Lo (< -40 °C/ -40 °F) ou HI (> 70 °C/ 158 °C)
dans la cas où la température mesurée est hors de la plage de mesure.
5.7. Rétro-éclairage et lampe de poche
• Appuyez sur la touche SNOOZE / LIGHT (1) an d‘allumer l‘écran pendant environ 5
secondes.
• Appuyez sur la touche
(2) an d’allumer la lampe de poche LED intégrée (3).
• Appuyez à nouveau sur la touche (2) an d’éteindre la lampe de poche LED (3).
5.8. Blocage des touches
• Faites glisser le sélecteur de blocage des touches (14) vers le haut, en position an de
pouvoir utiliser toutes les touches.
• Faites glisser le sélecteur de blocage des touches (14) vers le bas, en position an de
bloquer toutes les touches.
Vous pourrez utiliser uniquement le bouton RESET (13), ainsi que le sélecteur Alarm (7).
Page 17

32 33
5.9. Remplacement des piles
• Veuillez remplacer les piles dès que l’achage piles faibles apparaît à l’écran (4) ; suivez
les indications de 4. Mise en service .
6. Nettoyage et entretien
Nettoyez ce produit uniquement à l’aide d’un chiffon non pelucheux légèrement humide ;
évitez tout détergent agressif. Veillez à ce qu’aucun liquide ne pénètre dans le produit.
7. Exclusion de garantie
La société Hama GmbH & Co. KG décline toute responsabilité en cas de dommages provoqués
par une installation, un montage ou une utilisation non conformes du produit ou encore
provoqués par un non respect des consignes du mode d‘emploi et/ou des consignes de
sécurité.
8. Service et assistance
En cas de question concernant le produit, veuillez vous adresser au service de conseil produits
de Hama.
Ligne téléphonique directe : +49 9091 502-115 (allemand/anglais)
Vous trouverez ici de plus amples informations concernant l‘assistance : www.hama.com
9. Caractéristiques techniques
Réveil tour du monde RC 170
Alimentation en électricité
3,0 V
2 piles LR03/AAA-
Plage de mesure
Température
- 40 °C – + 70 °C
- 40 °F – + 158 °F
10. Consignes de recyclage
Remarques concernant la protection de l’environnement:
Conformément à la directive européenne 2002/96/CE et 2006/66/CE, et an
d‘atteindre un certain nombre d‘objectifs en matière de protection de
l‘environnement, les règles suivantes doivent être appliquées: Les appareils
électriques et électroniques ainsi que les batteries ne doivent pas être éliminés
avec les déchets ménagers. Le pictogramme “picto” présent sur le produit, son
manuel d‘utilisation ou son emballage indique que le produit est soumis à cette
réglementation. Le consommateur doit retourner le produit/la batterie usager aux points de
collecte prévus à cet effet. Il peut aussi le remettre à un revendeur. En permettant enn le
recyclage des produits ainsi que les batteries, le consommateur contribuera à la protection de
notre environnement. C‘est un acte écologique.
11. Déclaration de conformité
La société Hama GmbH & Co. KG certie que cet appareil est conforme aux
exigences de base et aux dispositions de la directive 1999/5/ en vigueur. Vous
trouverez la déclaration de conformité à la directive R&TTE 99/5/CE sur www.hama
de.
Page 18

34 35
Elementos de manejo e indicadores
A Elementos de manejo
1. Tecla SNOOZE / LIGHT = activa la retroiluminación (aprox. 5 segundos)/interrumpe la
señal del despertador durante 5 minutos
2. Tecla - = Activar/desactivar la linterna
3. LED/linterna
4. Pantalla
5. Tecla - = Conmutación entre hora en la localidad natal/ ciudad y hora mundial/ ciudad
/ ajuste de la hora en la localidad natal/ ciudad
6. Tecla - = Visualización de la hora programada para el despertador (5 segundos) /
ajuste del despertador
7. Interruptor corredizo alarma = Activación/desactivación del despertador
8. Tecla = Reducción del valor ajustado actual / conmutación entre ciudades en el modo
de hora mundial (de este a oeste)
9. Tecla = Aumento del valor ajustado actual / conmutación entre ciudades en el modo
de hora mundial (de oeste a este)
10. Interruptor corredizo RC ON / OFF / DST = Activación/desactivación de la señal
de radiofrecuencia/activación del horario de verano y desactivación de la señal de
radiofrecuencia
11. Tecla WAVE = Conmutación entre °C y °F/activación/desactivación de la recepción
manual de la señal de radiofrecuencia
12. Tecla CLOCK = Ajuste de la hora
13. Botón RESET = Restauración de la conguración de fábrica
14. Interruptor corredizo para el bloqueo de las teclas = Activación/desactivación de todas
las teclas (excepto el botón RESET (13) y el interruptor corredizo Alarm [7])
15. Compartimento para pilas
B Hora normal
1. Hora
2. Día
3. Mes
4. Día de la semana
5. Intensidad de la señal
6. Horario de verano
7. Temperatura
C Hora de la localidad natal
1. Símbolo de visualización para la hora de la localidad natal
2. Hora de la localidad natal
3. Localidad natal
D Hora mundial
1. Símbolo de visualización para la hora mundial
2. Hora mundial
3. Hora de la localidad natal
4. Ciudad el mundo
5. Zona horaria
E Despertador
1. Símbolo de visualización para el despertador
2. Hora programada para el despertador
3. Símbolo del despertador
Le agradecemos que se haya decidido por un producto de Hama.
Tómese tiempo y léase primero las siguientes instrucciones e indicaciones. Después, guarde
estas instrucciones de manejo en un lugar seguro para poder consultarlas cuando sea
necesario. Si vende el aparato, entregue estas instrucciones de manejo al nuevo propietario.
1. Explicación de los símbolos de aviso y de las indicaciones
Aviso
Se utiliza para caracterizar las indicaciones de seguridad o para llamar la
atención sobre peligros y riesgos especiales.
Nota
Se utiliza para caracterizar informaciones adicionales o indicaciones importantes.
2. Contenido del paquete
• Despertador de viaje apto para todo el mundo RC 170
• 2 pilas AAA
• Estas instrucciones de manejo
c Instrucciones de uso
Page 19

36 37
3. Instrucciones de seguridad
• El producto es para el uso doméstico privado, no comercial.
• Proteja el producto de la suciedad, la humedad y el sobrecalentamiento y utilícelo sólo en
recintos secos.
• No utilice el producto en áreas donde no se permitan aparatos electrónicos.
• Utilice el producto sólo conectado a una toma de corriente autorizada. La toma de
corriente debe estar colocada cerca del producto y de forma accesible.
• No deje caer el producto ni lo someta a sacudidas fuertes.
• No intente mantener o reparar el aparato por cuenta propia. Encomiende cualquier trabajo
de mantenimiento al personal especializado competente.
• No realice cambios en el aparato. Esto conllevaría la pérdida de todos los derechos
de la garantía.
• Saque las pilas del producto si éste no se va a utilizar durante un periodo prolongado de
tiempo, a no ser que el producto esté pensado para casos de emergencia.
• Mantenga el material de embalaje fuera del alcance de los niños, existe peligro de asxia.
• Deseche el material de embalaje en conformidad con las disposiciones locales sobre el
desecho vigentes.
Aviso – Pilas
• Retire y deseche de inmediato las pilas gastadas del producto.
• Utilice exclusivamente pilas recargables (o pilas) que sean del mismo tipo.
• No mezcle pilas viejas y nuevas, ni tampoco pilas de tipos o fabricantes diferentes.
• Observe siempre la correcta polaridad (inscripciones + y -) de las pilas y coloque éstas
de forma correspondiente. La no observación de lo anterior conlleva el riesgo de
derrame o explosión de las pilas.
• No sobrecargue las pilas.
• Mantenga las pilas fuera del alcance de los niños.
• No cortocircuite las pilas recargables/baterías y manténgalas alejadas de objetos
metálicos.
4. Puesta en funcionamiento
• Abra el compartimento para pilas (15), coloque dos pilas AAA prestando atención a que
la polaridad sea correcta y vuelva a cerrar el compartimento para pilas (15).
• Si tras colocar una pila nueva no se visualiza nada en la pantalla LCD, pulse, con un objeto
puntiagudo, el botón RESET (13) para reiniciar el dispositivo.
5. Funcionamiento
Nota – Introducción de datos
• Mantenga pulsadas las teclas (8) o (9) para seleccionar los valores más
rápidamente.
5.1. Ajuste automático de la fecha/hora según la señal DCF
• Cuando se colocan las pilas, se enciende la pantalla, suena una señal acústica y
el despertador empieza a buscar una señal DCF automáticamente. El símbolo de
radiofrecuencia parpadea durante el proceso de búsqueda. Este proceso puede durar
de 3 a 5 minutos.
• Cuando se recibe la señal de radiofrecuencia, la fecha y la hora se ajustan
automáticamente.
Símbolo de radiofrecuencia Intensidad de la señal
No hay recepción
Mala
Aceptable
Excelente
Visualización del símbolo de
radiofrecuencia
Búsqueda de señal DCF
Parpadea Activa
Visualización permanente
La búsqueda ha nalizado con éxito,
se recibe la señal
Sin visualización Inactiva
Page 20

38 39
Nota – Ajuste de hora
• Su durante el primer minuto del ajuste inicial no se recibe señal DCF alguna, la
búsqueda naliza. El símbolo de radiofrecuencia se apaga.
• En caso de problemas en la recepción se recomienda no mover o manipular el reloj
durante la noche, ya que durante la misma se producen menos interferencias.
• Mientras tanto, puede iniciar una búsqueda manual de la señal DCF desde otro lugar o
llevar a cabo un ajuste manual de la fecha y la hora.
• En cualquier caso, el reloj sigue buscando la señal DCF diariamente. En caso de
recibirse la señal correctamente, la hora y la fecha ajustadas se sobrescriben.
• Pulse la tecla WAVE (11) para iniciar la búsqueda manual de la señal DCF.
Nota – Procedimiento de búsqueda manual
• El procedimiento de búsqueda manual mediante la tecla WAVE (11) solo es posible con
la señal de radiofrecuencia activada (RC ON) – véase 5.2. Activación/desactivación
de la señal de radiofrecuencia y del horario de verano.
• El procedimiento de búsqueda manual se desconecta automáticamente tras 6 – 16
minutos.
• El uso frecuente de la tecla WAVE (11) se reeja en la carga de las pilas. Se
recomienda utilizar esta opción únicamente para la determinación de un lugar de
colocación óptimo.
• Pulse nuevamente la tecla WAVE (11) para nalizar el procedimiento de búsqueda manual.
5.2. Activación/desactivación de la señal de radiofrecuencia y del horario
de verano
• Desplace el interruptor corredizo RC ON / OFF / DST (10) a la posición RC ON (izquierda)
para activar la sincronización permanente con la señal DCF.
Nota – Horario de verano
• La hora se ajusta de forma automática al horario de verano si la señal de
radiofrecuencia está activa (RC ON) . Mientras permanece activo el horario de verano,
se visualiza DST en la pantalla y la hora se adelanta una hora.
• Desplace el interruptor corredizo RC ON / OFF / DST (10) a la posición OFF (central) para
desactivar la sincronización permanente con la señal DCF y el ajuste automático del horario
de verano.
Utilice estos ajustes cuando se encuentre en una región en la que no sea posible o no se
deba recibir señales de radiofrecuencia.
• Seguidamente, realice los ajustes tal y como se describe en 5.3. Ajuste manual de la
fecha/hora (hora normal) de forma manual.
• Desplace el interruptor corredizo RC ON / OFF / DST (10) a la posición DST (derecha) para
desactivar la sincronización permanente con la señal DCF y activar el ajuste automático del
horario de verano.
Utilice estos ajustes cuando se encuentre en una región en la que no sea posible o no se
deba recibir señales de radiofrecuencia.
El ajuste del horario de verano se realiza conforme a la fecha y la hora ajustada
manualmente.
• Seguidamente, realice los ajustes tal y como se describe en 5.3. Ajuste manual de la
fecha/hora (hora normal), de forma manual.
5.3. Ajuste manual de fecha/hora (hora normal)
• Pulse repetidamente la tecla - (5) hasta que se muestre la hora normal (B).
• Pulse y mantenga pulsada la tecla CLOCK (12) durante aprox. 2 segundos hasta que
comience a parpadear la visualización del año.
• Ajuste sucesivamente los siguientes datos:
•Año
•Visualización mes/día – día/mes (B – 2/B – 3)
•Mes (B – 3)
•Día (B – 2)
•Formato de 12/24 horas
•Horas
•Minutos
•Segundos (sólo es posible utilizar ceros)
•Zona horaria
•Idioma para el día de la semana
Page 21

40 41
• DST AUTO/OFF
• Para seleccionar cada valor, pulse la tecla (8) o la tecla (9) y conrme la selección
correspondiente pulsando la tecla CLOCK (12).
• Pulse directamente la tecla CLOCK (12) para aceptar y saltar el valor de ajuste visualizado.
• Si no se introduce ningún dato en 30 segundos, se sale automáticamente del modo de
ajuste y se guardan los ajustes realizados.
Nota – Zona horaria
• La señal DCF puede recibirse a gran distancia, correspondiéndose siempre con la HCE
vigente en Alemania. Por ello, tenga en cuenta que debe ajustar la diferencia horaria
correcta en países situados en otra zona horaria.
• Si se encuentra en Moscú, la diferencia es de 3 horas de adelanto con respecto a
Alemania. Por ello, debe ajustar la zona horaria +3. Se sumarán automáticamente 3
horas a la hora recibida o ajustada manualmente tras la recepción de la señal DCF.
• Consulte la tabla para guardar la zona horaria y la diferencia horaria correspondiente.
Nota – Día de la semana
• Para la indicación de los días de la semana, puede elegir entre los idiomas inglés (GB),
francés (FR), alemán (DE), español (ES) o italiano (IT).
5.4. Hora de la localidad natal y hora mundial
• Pulse repetidamente la tecla - (5) hasta que se muestre la hora de la localidad natal (C).
• El valor ajustado por defecto en este caso es (C – 3) Berlín (BER).
• Pulse y mantenga pulsada la tecla -
(5) durante aprox. 2 segundos hasta que comience
a parpadear la hora de la localidad natal (C – 3).
• Para seleccionar las ciudades/localidades, pulse la tecla
(8) o la tecla (9 ) y conrme
la selección pulsando la tecla -
(5).
• Consulte, al ajustar la hora de la localidad natal, la tabla contenida al principio de este
documento incl. las abreviaturas visualizadas, la diferencia horaria con respecto a la UTC y
la disponibilidad de la función DST (horario de verano).
• La hora de la localidad natal se registra automáticamente como hora normal.
• Pulse repetidamente la tecla -
(5) hasta que se muestre la hora mundial (D).
• Con ella puede visualizar la hora de otra ciudad/zona horaria.
• Para seleccionar las ciudades/localidades de este a oeste, pulse ,la tecla (8) , o bien,
si desea seleccionarlas de oeste a este, pulse la tecla (9) y conrme la selección
correspondiente pulsando la tecla - (5).
5.5. Despertador
Ajuste de la hora programada para el despertador
• Pulse repetidamente la tecla - (5) hasta que se muestre la hora normal (B).
Pulse y mantenga pulsada la tecla - (6) durante aprox. 2 segundos hasta que comience
a parpadear la visualización de la hora (E – 2).
• Ajuste sucesivamente los siguientes datos:
•Horas
•Minutos
• Para seleccionar cada valor, pulse la tecla (8) o la tecla (9) y conrme la selección
correspondiente pulsando la tecla - (6).
• Si no se introduce ningún dato en 30 segundos, se sale automáticamente del modo de
ajuste y se guardan los ajustes realizados.
• Pulse la tecla - (6) para visualizar la hora programada para el despertador durante
aprox. 5 segundos.
Activación/desactivación del despertador
• Desplace el interruptor corredizo Alarm (7) hacia arriba. Bajo el interruptor corredizo se
aprecia una supercie roja.
El despertador se activa y en la pantalla (4) se muestra el símbolo del despertador (E – 3).
• Desplace el interruptor corredizo Alarm (7) hacia abajo. Se aprecia una supercie negra
bajo el interruptor corredizo.
El despertador queda desactivado y el símbolo del despertador (E – 3) desaparece de la
pantalla (4).
Apagar el despertador/función de repetición de alarma
• Si el despertador está activado, se disparará a la hora correspondiente, sonando una señal
durante un minuto. Seguidamente, la alarma del despertador naliza automáticamente,
volviéndose a disparar al día siguiente, a la hora ajustada.
• Para apagar el despertador antes de que transcurra el minuto durante el cual suena la
alarma, desplace el interruptor corredizo Alarm (7) hacia abajo hasta poder apreciar una
supercie negra bajo el interruptor. En ese momento, el despertador está desactivado.
Vuelva a desplazar el interruptor corredizo (7) hacia arriba para volver a activar el
despertador para el día siguiente.
Page 22

42 43
Nota – Función de repetición de alarma
• Pulse, mientras suena la señal de alarma, la tecla SNOOZE / LIGHT (1) para activar
la función de repetición de alarma. El símbolo del despertador (E – 3) de la pantalla
(4) comienza a parpadear. La señal de alarma se interrumpe durante 5 minutos,
disparándose a continuación de forma automática.
• La función de repetición de alarma puede activarse hasta cuatro veces consecutivas.
5.6. Visualización de la temperatura
• Pulse repetidamente la tecla - (5) hasta que se muestre la hora normal (B).
• Pulse y mantenga pulsada la tecla WAVE (11) durante aprox. 2 segundos para alternar, en
la visualización de la temperatura (B – 7), entre °C y °F.
• Si los valores de medición se encuentran fuera del rango de medición, en la visualización
de la temperatura se mostrará (B – 7) Lo (< -40°C/ -40°F) o HI (> 70°C/ 158°C).
5.7. Retroiluminación y linterna
• Si pulsa la tecla SNOOZE / LIGHT (1),la pantalla (4) se ilumina durante aprox. 5 segundos.
• Pulse la tecla - (2) para activar la linterna LED (3) integrada.
• Vuelva a pulsar la tecla - (2) para desactivar la linterna LED (3).
5.8. Bloqueo de teclas
• Desplace el interruptor corredizo (14) hacia arriba hasta la posición para poder utilizar
todas las teclas.
• Desplace el interruptor corredizo (14) hacia abajo hasta la posición para desactivar
todas las funciones de las teclas.
Solo conservarán su funcionalidad el botón RESET (13) y el interruptor corredizo Alarm (7).
5.9. Cambio de la pila
• Cambie las pilas en cuanto disminuya el contraste de la visualización en pantalla (4) tal y
como se describe en 4. Puesta en funcionamiento.
6. Mantenimiento y cuidado
Limpie este producto sólo con un paño que no suelte pelusas ligeramente humedecido y no
utilice limpiadores agresivos. Asegúrese de que no entre agua en el producto.
7. Exclusión de responsabilidad
Hama GmbH & Co KG no se responsabiliza ni concede garantía por los daños que surjan por
una instalación, montaje o manejo incorrectos del producto o por la no observación de las
instrucciones de manejo y/o de las instrucciones de seguridad.
8. Servicio y soporte
Si tiene que hacer alguna consulta sobre el producto, diríjase al asesoramiento de productos
Hama.
Línea directa: +49 9091 502-115 (Alemán/Inglés)
Encontrar más información de soporte aquí:
www.hama.com
9. Datos técnicos
Despertador de viaje apto para todo el
mundo RC 170
Alimentación de corriente
3,0 V
2 pilas AAA
Rango de medición
Temperatura
-40°C – +70°C
-40°F – +158°F
10. Instrucciones para desecho y reciclaje
Nota sobre la protección medioambiental:
Después de la puesta en marcha de la directiva Europea 2002/96/EU y 2006/66/EU
en el sistema legislativo nacional, se aplicara lo siguiente: Los aparatos eléctricos y
electrónicos, así como las baterías, no se deben evacuar en la basura doméstica. El
usuario está legalmente obligado a llevar los aparatos eléctricos y electrónicos, así
como pilas y pilas recargables, al nal de su vida útil a los puntos de recogida
comunales o a devolverlos al lugar donde los adquirió. Los detalles quedaran denidos por la
ley de cada país. El símbolo en el producto, en las instrucciones de uso o en el embalaje hace
referencia a ello. Gracias al reciclaje, al reciclaje del material o a otras formas de reciclaje de
aparatos/pilas usados, contribuye Usted de forma importante a la protección de nuestro
medio ambiente.
Page 23

44 45
11. Declaración de conformidad
Mediante la presente, Hama GmbH &Co. KG declara que este aparato cumple con
los requisitos básicos y los demás reglamentos relevantes de la directiva 1999/5/
CE. La declaración de conformidad según la directiva R&TTE 99/5/CE la encontrará
en www.hama.com.
Органы управления и индикации
A Органы управления
1. Кнопка SNOOZE / LIGHT = включение подсветки (ок .5 секунд) / автоповтор
сигнала будильника (пауза 5 минут)
2. Кнопка = включение/выключение фонарика
3. Светодиодный фонарик
4. Дисплей
5. Кнопка = переключение индикации: Местное время/ Город и Всемирное время/
Город / Настройки Местное время/ Го род
6. Кнопка = время срабатывания будильника (ок. 5 секунд) / настройка будильника
7. Ползунок Alarm = включение и отключение будильника
8. Кнопка = уменьшение значения текущего значения во время настройки /
переключение между режимом индикации по городам и часовым поясам
(на запад)
9. Кнопка = увеличение значения текущего значения во время настройки /
переключение между режимом индикации по городам и часовым поясам (на
восток)
10. Ползунок RC ON / OFF / DST = включение/выключение приема радиосигнала /
включение летнего времени и выключение приема радиосигнала
11. Кнопка WAVE = выбор единицы измерения °C и °F / включение/ выключение
принудительного приема радиосигнала
12. Кнопка CLOCK = настройка времени
13. Кнопка RESET = восстановление настроек по умолчанию
14. Ползунок блокировки кнопок = включение и отключение всех кнопок
(кроме кнопки RESET (13) и ползунка Alarm (7) )
15. Отсек батарей
B Обычный режим
1. Время
2. Число месяца
3. Месяц
4. День недели
5. Уровень приема сигнала
6. Индикация летнего времени
7. Температура
R Руководство по эксплуатации
Page 24

46 47
C Местное время
1. Значок местного времени
2. Местное время
3. Город по умолчанию
D Всемирное время
1. Значок будильника
2. Всемирное время
3. Местное время
4. Город всемирного времени
5. Часовой пояс
E Будильник
1. Значок индикации будильника
2. Время срабатывания будильника
3. Значок будильника
Благодарим за покупку изделия фирмы Hama.
внимательно ознакомьтесь с настоящей инструкцией. Храните инструкцию в надежном
месте для справок в будущем. В случае передачи изделия другому лицу приложите и
эту инструкцию.
1. Предупредительные пиктограммы и инструкции
Внимание
Данным значком отмечены инструкции, несоблюдение которых может
привести к опасной ситуации.
Примечание
Дополнительная или важная информация.
2. Комплект поставки
• Международный будильник RC 170
• 2 батареи ААА
• Настоящая инструкция
3. Техника безопасности
• Изделие предназначено только для домашнего применения.
• Беречь от грязи, влаги и источников тепла. Эксплуатировать только в сухих условиях.
• Не применять в запретных зонах.
• Прибор разрешается подключать только к соответствующей розетке электросети.
Розетка электросети должна находиться рядом с устройством в легко доступном
месте.
• Не ронять. Беречь от сильных ударов.
• Запрещается самостоятельно ремонтировать устройство. Ремонт разрешается
производить только квалифицированному персоналу.
• Запрещается вносить изменения в конструкцию. В противном случае гарантийные
обязательства аннулируются.
• Перед длительным перерывом в эксплуатации удалить батареи из устройства, кроме
случаев, когда устройство применяется в качестве аварийного.
• Упаковку не давать детям: опасность асфиксии.
• Утилизировать упаковку в соответствии с местными нормами.
Батареи. Техника безопасности
• Израсходованные батареи немедленно удалять из прибора и утилизировать.
• Разрешается применять аккумуляторы только указанного типа.
• Не применять различные типы или новые и старые батареи вместе.
• Соблюдать полярность батарей (+ и -). Несоблюдение полярности может стать
причиной взрыва батарей.
• Не подвергать аккумуляторы чрезмерной зарядке.
• Батареи хранить в безопасном месте и не давать детям.
• Не закорачивать контакты батарей. Не хранить рядом с металлическими
объектами.
4. Ввод в эксплуатацию
• Откройте отсек батарей (15), вставьте 2 батареи ААА, соблюдая полярность, затем
закройте отсек батарей (15).
Page 25

48 49
• Если после загрузки батарей не произойдет включение дисплея, острым предметом
нажмите Кнопку RESET (13), чтобы выполнить перезагрузку.
5. Эксплуатация
Ввод данных
• Чтобы ускорить изменение значения во время настройки,
удерживайтекнопку (8) или кнопку (9) .
5.1. Автоматическая настройка времени и календаря по сигналу DCF
• После загрузки батарей включается дисплей и подается звуковой сигнал. Затем
прибор автоматически начинают поиск радиосигнала точного времени (DCF). Во
время этого процесса на дисплее мигает значок радиосигнала . Этот процесс
длится 3-5 минут.
• Если сигнал принят часы автоматически настраивают время и календарную дату.
Значок коррекции по
радиосигналу точного времени
Уровень приема сигнала
Прием отсутствует
Плохой сигнал
Удовлетворительный
Превосходный
Значок радиосигнала Поиск сигнала DCF
мигает активный
горит непрерывно сигнал принят успешно
не горит неактивный
Настройка часов. Примечание
• Если в течение первых минут радиосигнал DCF принять не удается, поиск
радиосигнала отключается. Значок радиосигнала точного времени гаснет.
• При наличии помех поиск сигнала рекомендуется производить ночью, так как, как
правило, в это время уровень помех ниже.
• Имеется также возможность включить принудительный поиск радиосигнала
DCF, перенеся часы в другое местоположение, или выполнить настройку часов
вручную.
• Режим поиска радиосигнала DCF включается ежедневно автоматически. При
успешном приеме радиосигнала введенные вручную значения времени и
календаря заменяются.
• Нажмите кнопку WAVE (11), чтобы принудительно включить поиск радиосигнала
DCF.
Принудительный поиск радиосигнала. Примечание
• Принудительное включение поиска радиосигнала кнопкой WAVE (11)
возможно только при включенном радиосигнале (RC ON) (см. 5.2. Включение/
выключение поиска радиосигнала и индикация летнего времени).
• Принудительный поиск радиосигнала выключается автоматически через 6 - 16
минут.
• Частое нажатие кнопки WAVE (11) приводит к разряду батареи. Данную функцию
рекомендуется применять, перенеся часы в оптимальное местоположение.
• Нажмите кнопку WAVE (11) еще раз, чтобы принудительно завершить поиск
радиосигнала.
5.2. Включение/выключение поиска радиосигнала и индикация летнего
времени.
Переведите ползунок RC ON / OFF / DST (10) в положение RC ON (влево), чтобы
полностью деактивировать синхронизацию с радиосигналом DCF.
Page 26

50 51
Индикация летнего времени. Примечание
Текущее время при включенном приеме радиосигнала (RC ON) переключается
на летнее время автоматически. Если летнее время включено, на дисплее
отображается значок DST, а часы показывают время с поправкой на один час.
• Переведите ползунок RC ON / OFF / DST (10) в положение RC OFF (в середину),
чтобы полностью деактивировать синхронизацию с радиосигналом DCF и
автоматическую настройку на летнее время.
Данная настройка предназначена для регионов, в которых невозможно осуществить
прием радиосигнала.
Выполните затем настройки, которые приводятся в главе 5.3. Настройка часов и
календаря вручную (обычный режим).
• Переведите ползунок RC ON / OFF / DST (10) в положение DST (вправо), чтобы
полностью деактивировать синхронизацию с радиосигналом DCF, но активировать
автоматическую настройку на летнее время.
Данная настройка предназначена для регионов, в которых невозможно осуществить
прием радиосигнала.
Переключение на летнее время в этом случае осуществляется по ручной настройке
даты и часов.
• Выполните затем настройки, которые приводятся в главе 5.3. Настройка часов и
календаря вручную (обычный режим).
5.3. Настройка календаря и часов вручную (обычный режим)
• Нажимайте кнопку (5), пока на дисплее не появятся показания текущего времени
(В).
• Нажмите и ок. 2 секунд удерживайте кнопку CLOCK (12) , чтобы начало мигать
значение года.
• Настройка параметров осуществляется в следующей последовательности:
•Год
•Индикация Месяц/Число месяца – Число месяца/Месяц (B – 2/B – 3)
•Месяц (B – 3)
•Число месяца (B – 2)
•Формат индикации времени (12/24)
•Час
•Минуты
•Секунды (только «00»)
•Часовой пояс
•Язык индикации дня недели
• DST AUTO/OFF
• Установите значение с помощью кнопки (8) или кнопки (9) и подтвердите
выбор кнопкой CLOCK (12).
• Чтобы применить значение и перейти к следующему параметру, нажмите кнопку
CLOCK (12).
• Если нажатий на кнопки не производилось в течение 30 секунд, то прибор сохраняет
установленные значения и выходит из режима настройки.
Часовые пояса
• Радиосигнал точного времени DCF соответствует среднеевропейскому времени.
Если часы эксплуатируются в другом часовом поясе, то их необходимо настроить
соответствующим образом.
• Например, разница во времени между Москвой и Берлином составляет 3 часа. В
Москве, таким образом, необходимо сделать поправку в +3 часа. В этом случае
к показателю времени (установленному автоматически по радиосигналу DCF или
вручную) часы автоматически будут прибавлять 3 часа.
• Для настройки времени по часовым поясам смотрите таблицу.
День недели. Примечание
• Дни недели могут отображаться на следующих языках: английский (GB),
французский (FR), немецкий (DE), испанский (ES), итальянский (IT).
5.4. Местное время и всемирное время
• Нажимайте кнопку (5), пока на дисплее не появятся показания местного времени
(С).
• По умолчанию установлен (С - 3) Берлин (BER).
• Нажмите и ок. 2 секунд удерживайте кнопку (2) , чтобы начал мигать город (С - 3).
• Выберите городс помощью кнопки (8) или (9) и подтвердите выбор кнопкой
(5).
• Для настройки воспользуйтесь таблицей выше, вкл. сокращения, с учетом смещения
времени относительно UTC и наличия функции DST (летнее время).
• Местное время автоматически устанавливается в качестве времени обычного
режима.
• Нажимайте кнопку (5), пока на дисплее не появятся показания всемирного
времени (D).
Page 27

52 53
• Здесь можно просмотреть время другого города/часового пояса.
• Чтобы переключать города на запад, нажимайте кнопку (8) . Чтобы переключать
города на восток, нажимайте кнопку (9). Подтвердите выбор кнопкой (5).
5.5. Будильник
Настройка будильника
• Нажимайте кнопку (5), пока на дисплее не появятся показания текущего времени
(В).
• Нажмите и ок. 2 секунд удерживайте кнопку (6), пока не начнет мигать значение
часа (E – 2).
• Настройка параметров осуществляется в следующей последовательности:
•Час
•Минуты
• Установите значение кнопкой (8) или кнопкой (9), затем подтвердите выбор
кнопкой (6).
• Если нажатий на кнопки не производилось в течение 30 секунд, то прибор сохраняет
установленные значения и выходит из режима настройки.
• Чтобы просмотреть текущее время срабатывания будильника, нажмите кнопку (6).
Включение и отключение будильника
• Переведите ползунок Alarm (7) вверх. Под ползунком виден красный индикатор.
• Будильник теперь включен. На дисплее (4) отображается значок будильника (Е – 3).
• Переведите ползунок Alarm (7) вниз, так чтобы под ползунком отображался черный
индикатор.
• Будильник теперь выключен. Значок (Е – 3) на дисплее (4) не отображается.
Отключение сигнала будильника. Автоповтор сигнала будильника
• Если будильник включен, то в установленное время он сработает и будет подавать
сигнал в течение одной минуты. После этого будильник автоматически выключает
сигнал и в следующий раз сработает через сутки.
• Чтобы принудительно отключить сигнал, переведите ползунок ALARM (7) вниз,
так чтобы под ползунком отображался индикатор черного цвета. Будильник теперь
выключен.
• Переведите ползунок Alarm (7) вверх, чтобы будильник сработал на следующий
день.
Автоповтор сигнала будильника. Примечание
• Во время подачи сигнала будильника нажмите кнопку SNOOZE / LIGHT (1), чтобы
включить функцию автоповтора сигнала. Значок будильника (Е - 3) на дисплее
(4) начнет мигать. Подача сигнала прерывается на 5 минут, после чего сигнал
подается снова.
• Автоповтор можно активировать много раз подряд.
5.6. Индикация температуры
• Нажимайте кнопку (5), пока на дисплее не появятся показания текущего времени
(В).
• Нажмите и ок. 2 секунд удерживайте кнопку WAVE (11), чтобы в режиме индикации
температуры (B – 7) установить единицу измерения температуры (°C или °F).
• Если зафиксированная температура находится вне диапазона измерения, то на
дисплее отображается (B – 7) Lo (< -40°C/ -40°F) или HI (> 70°C/ 158°C).
5.7. Подсветка и фонарик
• Нажмите кнопку SNOOZE / LIGHT (1), чтобы на 5 секунд включить дисплей (4).
• Чтобы включить светодиодный фонарик (3), нажмите кнопку (2).
• Чтобы выключить фонарик (3), нажмите кнопку (2) еще раз.
5.8. Блокировка кнопок
• Переведите ползунок блокировки кнопок (14) вверх , чтобы разблокировать
кнопки.
• Переведите ползунок блокировки кнопок (14) вниз , чтобы заблокировать кнопки.
Кнопка RESET (13) и ползунок Alarm (7) не блокируются.
5.9. Порядок замены батареи
• Если индикация на дисплее (4) тускнеет, замените батарею (см. 4. Ввод в
эксплуатацию).
6. Техническое обслуживание и уход
Чистку изделия производить только безворсовой слегка влажной салфеткой.
Запрещается применять агрессивные чистящие средства. Следите за тем, чтобы в
устройство не попала вода.
Page 28

54 55
7. Отказ от гарантийных обязательств
Компания Hama GmbH & Co. KG не несет ответственность за ущерб, возникший
вследствие неправильного монтажа, подключения и использования изделия не по
назначению, а также вследствие несоблюдения инструкции по эксплуатации и техники
безопасности.
8. Отдел техобслуживания
По вопросам ремонта или замены неисправных изделий обращайтесь к продавцу или в
сервисную службу компании Hama.
Горячая линия отдела техобслуживания:
+49 9091 502-115 (немецкий, английский)
Подробнее смотрите здесь: www.hama.com
9. Технические характеристики
Международный будильник RC 170
Питание
3,0 В
2 батареи ААА
Диапазон измерения
Температура
от -40° C до +70° C
от -40°F – до +158°F
10. Инструкции по утилизации
Охрана окружающей среды:
С момента перехода национального законодательства на европейские
нормативы 2002/96/EU и 2006/66/EU действительно следующее:
Электрические и электронные приборы, а также батареи запрещается
утилизировать с обычным мусором. Потребитель, согласно закону, обязан
утилизировать электрические и электронные приборы, а также батареи и
аккумуляторы после их использования в специально предназначенных для этого
пунктах сбора, либо в пунктах продажи. Детальная регламентация этих требований
осуществляется соответствующим местным законодательством. Необходимость
соблюдения данных предписаний обозначается особым значком на изделии,
инструкции по эксплуатации или упаковке. При переработке, повторном использовании
материалов или при другой форме утилизации бывших в употреблении приборов Вы
помогаете охране окружающей среды. В соответствии с предписаниями по обращению
с батареями, в Германии вышеназванные нормативы действуют для утилизации
батарей и аккумуляторов.
11. Декларация производителя
Компания Hama GmbH & Co. KG настоящим подтверждает, что данное
изделие полностью соответствует основным требованиям, а также
предписаниям и положениям нормативов 1999/5/EG. Заявление о
соответствии товара нормам R&TTE 99/5/EG см. на вебузле www.hama.com.
Page 29

56 57
Bedienungselemente und Anzeigen
A Elementi di comando e indicazioni
1. Tasto SNOOZE / LIGHT = attivazione della retroilluminazione (ca. 5 secondi) /
interruzione del segnale di sveglia per 5 minuti
2. Tasto = accensione/spegnimento della lampada tascabile
3. LED della lampada tascabile
4. Display
5. Tasto = commutazione tra ora locale/città e ora universale/città/impostazione ora
locale/città
6. Tasto = indicazione ora sveglia (ca. 5 secondi)/regolazione sveglia
7. Interruttore scorrevole allarme = attivazione/disattivazione sveglia
8. Tasto = riduzione del valore di impostazione corrente/passaggio da una città all’altra
nella modalità ora universale (verso ovest)
9. Tasto = aumento del valore di impostazione corrente/passaggio da una città all’altra
nella modalità ora universale (verso est)
10. Interruttore scorrevole RC ON / OFF / DST = attivazione e disattivazione del segnale
radio/attivazione dell’ora legale e disattivazione del segnale radio
11. Tasto WAVE = alternanza tra °C e °F/attivazione e disattivazione manuale della ricezione
del segnale radio
12. Tasto CLOCK = impostazione dell’ora
13. Pulsante RESET = ripristino delle impostazioni di fabbrica
14. Interruttore scorrevole blocco dei tasti = attivazione/disattivazione di tutti i tasti (ad
eccezione del pulsante RESET (13) e dell’interruttore scorrevole Allarme (7)
15. Vano batterie
B Ora ufficiale
1. Ora
2. Giorno
3. Mese
4. Giorno della settimana
5. Intensità del segnale
6. Ora legale
7. Temperatura
C Ora locale
1. Simbolo di indicazione ora locale
2. Ora locale
3. Città di residenza
D Ora universale
1. Simbolo di indicazione ora universale
2. Ora universale
3. Ora locale
4. Metropoli
5. Fuso orario
E Sveglia
1. Simbolo di indicazione sveglia
2. Orario sveglia
3. Simbolo sveglia
Grazie per avere acquistato un prodotto Hama!
Prima della messa in esercizio, leggete attentamente le seguenti istruzioni e avvertenze,
quindi conservatele in un luogo sicuro per una eventuale consultazione. In caso di cessione
dell‘apparecchio, consegnate anche le presenti istruzioni al nuovo proprietario.
1. Spiegazione dei simboli di avvertimento e delle indicazioni
Attenzione
Viene utilizzato per contrassegnare le indicazioni di sicurezza oppure per rivolgere
l‘attenzione verso particolari rischi e pericoli.
Avvertenza
Viene utilizzato per contrassegnare informazioni supplementari o indicazioni importanti.
2. Contenuto della confezione
• Sveglia da viaggio con orologio mondiale RC 170
• 2 batterie AAA
• queste istruzioni per l’uso
3. Avvertenze di sicurezza
• Il prodotto è concepito per l’uso domestico privato, non commerciale.
• Proteggere il prodotto da sporcizia, umidità e surriscaldamento e utilizzarlo solo in
ambienti asciutti.
I Istruzioni per l‘uso
Page 30

58 59
• Non utilizzare il prodotto in zone in cui non sono ammesse le apparecchiature elettroniche.
• Non posizionare il prodotto nelle vicinanze di campi di disturbo, telai metallici, computer
e televisori ecc. Gli apparecchi elettronici compromettono negativamente il funzionamento
del prodotto.
• Non fare cadere il prodotto e non sottoporlo a forti scossoni!
• Non tentare di aggiustare o riparare l’apparecchio da soli. Fare eseguire qualsiasi lavoro di
riparazione al personale specializzato competente.
• Non apportare modiche all’apparecchio per evitare di perdere i diritti di garanzia.
• Rimuovere le batterie dal prodotto se non viene utilizzato per un lungo periodo a meno che
non venga tenuto a disposizione per le emergenze.
• Tenere l’imballo fuori dalla portata dei bambini, pericolo di soffocamento!
• Smaltire immediatamente il materiale d‘imballaggio attenendosi alle prescrizioni locali
vigenti
Avvertenza – Batterie
• Rimuovere e smaltire immediatamente le batterie scariche
• Utilizzare unicamente accumulatori (o batterie) conformi al tipo indicato
• Non utilizzare batterie di tipi o costruttori diversi, né mischiare batterie vecchie e nuove
• Attenersi sempre alla corretta polarità (scritte + e -) delle batterie e inserirle di
conseguenza. La mancata osservanza comporta la perdita di potenza o il rischio di
esplosione delle batterie
• Non scaricare completamente le batterie
• Conservare le batterie al di fuori della portata dei bambini
• Non cortocircuitare le batterie e tenerle lontano da oggetti metallici
4. Messa in esercizio
• Aprire il vano batterie (15), introdurre due batterie AAA con la polarità corretta e
richiudere il vano batterie (15)
• Se dopo aver inserito una nuova batteria non appare nulla sul display LCD, premere con un
oggetto appuntito il pulsante RESET (13) per riavviare la sveglia
5. Funzionamento
Nota – Immissione
• Tenere premuto il tasto (8) o il tasto (9) per selezionare i valori più
velocemente
5.1. Impostazione automatica di data/ora dopo il segnale DCF
• Dopo avere inserito la batteria, il display si accende, viene emesso un segnale acustico e la
sveglia inizia automaticamente a cercare un segnale DCF. Durante la ricerca, lampeggia il
simbolo della radio . Questo procedimento può durare da 3 a 5 minuti
• Durante la ricezione del segnale radio, la data e l‘ora vengono impostate automaticamente
Simbolo radio Intensità del segnale
Nessuna ricezione
Scarsa
Accettabile
Eccellente
Indicazione simbolo radio Ricerca del segnale DCF
Indicazione Attiva
Indicazione ssa Ricerca riuscita - il segnale
Nessuna indicazione Non attivo
Page 31

60 61
Nota – Impostazione dell‘ora
• La ricerca viene terminata se non si riceve un segnale DCF entro i primi minuti durante
la prima congurazione. Il simbolo della radio si spegne
• In caso di disturbi di ricezione, si consiglia di lasciare accesa la radio tutta la notte,
essendo ridotti qui, in linea di massima, i segnali di disturbo
• Nel frattempo è possibile avviare una ricerca manuale del segnale DCF su un altro
punto di installazione o procedere a un’impostazione manuale di ora e data
• L‘orologio continua a cercare automaticamente ogni giorno il segnale DCF. Se il
tentativo di ricezione ha successo, l‘ora e la data impostate manualmente vengono
sovrascritte
• Premere il tasto WAVE (11) per avviare la ricerca manuale del segnale DCF.
Nota – Ricerca manuale
• La ricerca manuale tramite il tasto WAVE (11) è possibile solo con segnale radio attivo
(RC ON) – vedi 5.2. Attivazione/disattivazione segnale radio e ora legale –
possibile
• La ricerca manuale si disattiva automaticamente dopo 6 – 16 minuti
• Un utilizzo frequente del tasto WAVE (11) va a scapito della capacità delle batterie.
Si consiglia di ricorrere a questa funzione solo per localizzare un luogo di installazione
ottimale
• Premere nuovamente il tasto WAVE (11) per terminare la ricerca manuale.
5.2. Attivazione/disattivazione segnale radio e ora legale
Spingere l’interruttore scorrevole RC ON/OFF/DST (10) sulla posizione RC ON (a sinistra) per
attivare la sincronizzazione permanente con il segnale DCF.
Nota – Ora legale
• Con segnale radio attivo (RC ON) l’orario commuta automaticamente sull’ora legale.
Finché è attiva l’ora legale, sul display appare DST e l’orario viene spostato avanti di
un’ora.
• Spingere l’interruttore scorrevole RC ON/OFF/DST (10) sulla posizione OFF (al centro) per
disattivare la sincronizzazione permanente con il segnale DCF, nonché la commutazione
automatica sull’ora legale
• Ricorrere a queste impostazioni se ci si trova in una regione nella quale è impossibile, e/o
non è consentito, ricevere segnali radio
• Procedere inne manualmente alle impostazioni – come descritto in 5.3. Impostazione
manuale data/ora (ora uciale)
• Spingere l’interruttore scorrevole RC ON/OFF/DST (10) sulla posizione DST (a destra) per
disattivare la sincronizzazione permanente con il segnale DCF e attivare la commutazione
automatica sull’ora legale
• Ricorrere a queste impostazioni se ci si trova in una regione nella quale è impossibile, e/o
non è consentito, ricevere segnali radio
• La commutazione sull’ora legale continua ad aver luogo sulla base di data e ora impostate.
• Procedere inne manualmente alle impostazioni – come descritto in 5.3. Impostazione
manuale data/ora (ora uciale)
5.3. Impostazione manuale data/ora (ora ufficiale)
• Premere ripetutamente il tasto (5) nché non appare l’ora uciale (B)
• Premere e tenere premuto il tasto CLOCK (12) per ca. 2 secondi, nché non inizia a
lampeggiare l’indicazione dell’anno
• Impostare in sequenza le seguenti informazioni:
•Anno
•Indicazione mese/giorno – giorno/mese (B – 2/B – 3)
•Mese B – 3)
•Giorno (B – 2)
•Formato da 12/24 ore
•Ore
•Minuti
•Secondi (possibili solo gli zeri)
•Fuso orario
•Lingua giorno della settimana
•
DST AUTO/OFF
• Per selezionare i singoli valori, premere il tasto (8) oppure il tasto (9) e confermare
la selezione corrispondente premendo il tasto CLOCK (12)
• Premere direttamente il tasto CLOCK (12) per applicare il valore di impostazione
visualizzato e procedere oltre.
• Se per 30 secondi non hanno luogo immissioni, si esce automaticamente dalla modalità di
impostazione e vengono salvate le impostazioni eseguite.
Page 32

62 63
Nota – Fuso orario
• Il segnale DCF può essere ricevuto in tutto il mondo ma corrisponde sempre al CET
vigente in Germania. Tener presente che nei paesi con fuso orario diverso deve essere
impostato adeguatamente lo spostamento del fuso orario.
• Se ci si trova a Mosca, dove l‘ora è spostata in avanti di 3 ore rispetto alla Germania,
occorre impostare per il fuso orario +3. Dopo la ricezione del segnale DCF o
dell‘impostazione manuale, l‘orologio si porta quindi sempre automaticamente 3 ore
avanti.
• Osservare la tabella per memorizzare il fuso orario corrispondente e il rispettivo
spostamento.
Nota – Giorno della settimana
• Per l’indicazione dei giorni della settimana è possibile optare per le lingue inglese (GB),
francese (FR), tedesco (DE), spagnolo (ES) o italiano (IT).
5.4. Ora locale e ora
• Premere ripetutamente il tasto (5), nché non viene visualizzata l’ora locale (C)
• È impostato qui come valore standard (C – 3) Berlino (BER)
• Premere e tenere premuto il tasto (5) per ca. 2 secondi nché non inizia a lampeggiare
la città natale (C – 3)
• Per selezionare le città, premere il tasto (8) o il tasto (9) e confermare di volta in
volta la selezione con il tasto (5)
• Per l’impostazione dell’ora locale tener conto della tabella menzionata all’inizio incl
abbreviazioni di indicazione, spostamento del fuso orario rispetto a UTC e disponibilità
della funzione DST (ora legale)
• L’ora locale impostata verrà quindi applicata automaticamente per l’ora uciale
• Premere ripetutamente il tasto (5), nché non viene visualizzata l’ora universale (D)
• Ciò consente la visualizzazione degli orari per altre città / fusi orari
• Per selezionare le città verso ovest, premere il tasto (8) oppure verso est il tasto (9)
e confermare di volta in volta la selezione con il tasto (5)
5.5. Sveglia
Impostazione ora sveglia
• Premere ripetutamente il tasto (5) nché non appare l’ora uciale (B)
• Premere e tenere premuto il tasto (6) per ca. 2 secondi nché non inizia a lampeggiare
l’indicazione dell’ora (E – 2)
• Impostare in sequenza le seguenti informazioni:
• Ore
• Minuti
• Per selezionare i singoli valori, premere il tasto
(8) oppure il tasto (9) e confermare
la selezione corrispondente premendo il tasto (6)
• Se per 30 secondi non hanno luogo immissioni, si esce automaticamente dalla modalità di
impostazione e vengono salvate le impostazioni eseguite
• Premere il tasto (6) per visualizzare per ca. 5 secondi l’ora impostata della sveglia
Attivazione / disattivazione sveglia
• Spingere l’interruttore scorrevole Allarme (7) verso l’alto. Sotto l’interruttore scorrevole
appare una supercie rossa.
La sveglia è attivata e sul display (4) appare il simbolo della sveglia (E – 3)
• Spingere l’interruttore scorrevole Allarme (7) verso il basso, la supercie dietro
l’interruttore scorrevole è nera.
La sveglia è disattivata e il simbolo della sveglia (E – 3) sul display (4) si spegne
Disattivazione sveglia/funzione snooze
• Se la sveglia è attivata scatta all’ora corrispondente e per la durata di un minuto risuona
un segnale di sveglia. Al termine, la sveglia si disattiva automaticamente per scattare
nuovamente il giorno successivo all’ora impostata
• Per disattivare anticipatamente la sveglia, spingere l’interruttore scorrevole Allarme (7)
verso il basso nché la supercie dietro l’interruttore scorrevole non è nera. La sveglia è
ora disattivata
• Spingere nuovamente l’interruttore scorrevole Allarme (7) verso l’alto per attivare la sveglia
per il giorno successivo
Page 33

64 65
Nota – Funzione snooze
• Quando suona la sveglia, premere il tasto SNOOZE / LIGHT (1) per attivare la funzione
snooze. Il simbolo della sveglia (E – 3) sul display (4) inizia a lampeggiare. La sveglia
viene disattivata per 5 minuti, quindi suona nuovamente
• La funzione snooze viene attivata per quattro volte consecutivamente
5.6. Indicazione temperatura
• Premere ripetutamente il tasto (5) nché non appare l’ora uciale (B)
• Premere e tenere premuto il tasto WAVE (11) per ca. 2 secondi, per alternare l’indicazione
della temperatura (B – 7) tra °C e °F
• Se i valori misurati non rientrano nel campo di misurazione, appare nell’indicazione di
temperatura (B – 7) Lo (< -40°C/ -40°F) o HI (> 70°C/ 158°C)
5.7. Retroilluminazione e lampada tascabile
• Se si preme il tasto SNOOZE / LIGHT (1), il display (4) si illumina per ca. 5 secondi
• Premere il tasto (2) per accendere il LED della lampada tascabile (3) integrato
• Premere ancora il tasto (2) per spegnere nuovamente il LED della lampada tascabile (3)
5.8. Tastensperre
• Spingere l’interruttore scorrevole del blocco tasti (14) verso l’alto sulla posizione per
consentire l’utilizzo di tutti i tasti
• Spingere l’interruttore scorrevole del blocco tasti (14) verso il basso sulla posizione per
disattivare tutte le funzioni dei tasti
• Possono essere ancora azionati solo il pulsante RESET (13) e l’interruttore scorrevole
Allarme (7)
5.9. Sostituzione della batteria
Non appena inizia a offuscarsi l’indicazione sul display (4) sostituire le batterie – come
descritto in 4. Messa in esercizio.
6. Manutenzione e cura
Pulire il prodotto unicamente con un panno che non lascia pelucchi e appena inumidito e non
utilizzare detergenti aggressivi. Fare attenzione a non fare penetrare acqua nel prodotto.
7. Esclusione di garanzia
Hama GmbH & Co.KG non si assume alcuna responsabilità per i danni derivati dal montaggio
o l‘utilizzo scorretto del prodotto, nonché dalla mancata osservanza delle istruzioni per l‘uso
e/o delle indicazioni di sicurezza.
8. Assistenza e supporto
In caso di domande sul prodotto, rivolgersi alla Consulenza prodotto Hama.
Hotline: +49 9091 502-115 (ted./ing.)
Ulteriori informazioni sul supporto sono disponibili qui: www.hama.com
9. Dati tecnici
Sveglia da viaggio con orologio mondiale
RC 170
Alimentazione elettrica
3,0 V
2 batterie AAA
Campo di misurazione
Temperatura
-40°C – +70°C
-40°F – +158°F
10. Indicazioni per lo smaltimento
Informazioni per protezione ambientale:
Dopo l’implementazione della Direttiva Europea 2002/96/EU e 2006/66/EU nel
sistema legale nazionale, ci sono le seguenti applicazioni: Le apparecchiature
elettriche ed elettroniche e le batterie non devono essere smaltite con i riuti
domestici. I consumatori sono obbligati dalla legge a restituire I dispositivi elettrici
ed elettronici e le batterie alla ne della loro vita utile ai punti di raccolta pubblici
preposti per questo scopo o nei punti vendita. Dettagli di quanto riportato sono deniti dalle
leggi nazionali di ogni stato. Questo simbolo sul prodotto, sul manuale d’istruzioni o
sull’imballo indicano che questo prodotto è soggetto a queste regole. Riciclando,
ri-utilizzando i materiali o utilizzando sotto altra forma i vecchi prodotti/le batterie, darete un
importante contributo alla protezione dell’ambiente.
11. Dichiarazione di conformità
Hama GmbH & Co. KG dichiara che questo apparecchio soddisfa i requisiti
fondamentali ed è conforme alle norme vigenti della direttiva 1999/5/CE. La
dichiarazione di conformità secondo la direttiva R&TTE 99/5/CE è disponibile sul
sito www.hama.com.Bedieningselementen en weergaven.
Page 34

66 67
Bedieningselementen en weergaven
A Bedieningselementen
1. SNOOZE / LIGHT-toets = activering achtergrondverlichting (ca. 5 secunden) /
onderbreking van het weksignaal gedurende 5 minuten
2. -toets = in-/ uitschakelen van de zaklamp
3. Zaklamp-LED
4. Display
5. -toets = omschakelen tussen tijd thuis/ stad en wereldtijd/ stad / instellen tijd thuis/
stad
6. -toets = weergave wektijd (ca. 5 seconden) / instelling wekker
7. Alarm-schuifschakelaar = activeren/ deactiveren van de wekker
8. -toets = verlagen van de actuele ingestelde waarde / omschakelen tussen steden in
wereldtijdmodus (in westelijke richting)
9. -toets = verhogen van de actuele ingestelde waarde / omschakelen tussen steden in
wereldtijdmodus (in oostelijke richting)
10. RC ON / OFF / DST-schuifschakelaar = activeren/ deactiveren radiograsch tijdsignaal /
activeren zomertijd en deactiveren radiograsch tijdsignaal
11. WAVE-toets = activeren/deactiveren handmatige ontvangst radiograsch tijdsignaal /
omschakelen tussen °C en °F
12. KLOK-toets = instelling tijd
13. RESET-knop = resetten naar fabrieksinstellingen
14. Toetsenblokkering-schuifschakelaar = activeren/ deactiveren van alle toetsen
(behoudens RESET-knop (13) en Alarm-schuifschakelaar (7) )
15. Batterijvak
B Normale tijd
1. Tijd
2. Dag
3. Maand
4. Dag van de week
5. Signaalsterkte
6. Zomertijd
7. Temperatuur
C Tijd thuisland
1. Weergavesymbool tijd thuisland
2. Tijd thuisland
3. Woonplaats thuisland
D Wereldtijd
1. Weergavesymbool wereldtijd
2. Wereldtijd
3. Tijd thuisland
4. Wereldstad
5. Tijdzone
E Wekker
1. Weergavesymbool wekker
2. Wektijd
3. Wekkersymbool
Hartelijk dank dat u voor een product van Hama heeft gekozen.
Neem de tijd om de volgende aanwijzingen en instructies volledig door te lezen. Berg deze
gebruiksaanwijzing vervolgens op een goede plek op zodat u hem als naslagwerk kunt
gebruiken. Op zodat u hem als naslagwerk kunt gebruiken. Mocht u het toestel verkopen,
geeft u dan ook deze gebruiksaanwijzing aan de nieuwe eigenaar.
1. Verklaring van waarschuwingssymbolen en instructies
Waarschuwing
Wordt gebruikt voor veiligheidsinstructies of om de aandacht te trekken op
bijzondere gevaren en risico‘s.
Aanwijzing
Wordt gebruikt voor extra informatie of belangrijke informatie.
2. Inhoud van de verpakking
• Wereldreiswekker RC 170
• 2 AAA batterijen
• deze bedieningsinstructies
N Gebruiksaanwijzing
Page 35

68 69
3. Veiligheidsinstructies
• Het product is bedoeld voor niet-commercieel privegebruik in huiselijke kring.
• Bescherm het product tegen vuil, vocht en oververhitting en gebruik het alleen in droge
omgevingen.
• Gebruik het product niet binnen omgevingen, waarin elektronische apparatuur niet is
toegestaan.
• Sluit het product alleen aan op een daarvoor geschikt en intact stopcontact. Het
stopcontact moet in de buurt van het product zijn aangebracht en goed bereikbaar zijn.
• Laat het product niet vallen en stel het niet bloot aan zware schokken of stoten.
• Probeer niet het product zelf te onderhouden of te repareren. Laat onderhouds- en
reparatiewerkzaamheden door vakpersoneel uitvoeren.
• Verander niets aan het toestel. Daardoor vervalt elke aanspraak op garantie.
• Verwijder batterijen uit het product indien dit gedurende langere tijd niet worden gebruikt,
behoudens indien het product voor noodgevallen stand-by moeten blijven.
• Het verpakkingsmateriaal mag absoluut niet in handen van kinderen komen;
verstikkingsgevaar.
• Het verpakkingsmateriaal direct en overeenkomstig de lokaal geldende afvoervoorschriften
afvoeren.
Waarschuwing - batterijen
• Lege batterijen direct uit het product verwijderen en afvoeren.
• Gebruik uitsluitend accu’s (of batterijen), welke met het vermelde type
• overeenstemmen.
• Gebruik geen oude en nieuwe batterijen tegelijkertijd alsmede geen batterijen van een
verschillende soort of fabrikaat.
• Let absoluut op de correcte polariteit (opschrift + en -) van de batterijen en plaats deze
dienovereenkomstig in het batterijvakje. Indien de batterijen verkeerd worden geplaatst
kunnen deze gaan lekken of zelfs exploderen.
• De batterijen niet overontladen.
• Batterijen buiten het bereik van kinderen opbergen.
• De accu‘s/batterijen niet kortsluiten en uit de buurt van blanke metalen voorwerpen
houden.
4. Werkomgeving
• Open het batterijvak(15), plaats twee AAA batterijen met de polen (+) en (-) in de juiste
richting en sluit hetbatterijvak (15) weer.
• Indien na het plaatsen van nieuwe batterijen niets op de LCD-display wordt weergegeven,
druk dan met een spits voorwerp op de RESET-knop (13), teneinde een nieuwe start in
werking te stellen.
5. Gebruik
Aanwijzing – invoeren
• Houd de -toets (8) of de -toets (9) ingedrukt teneinde de waarden sneller te
kunnen selecteren.
5.1. Automatische instelling datum/ tijd aan de hand van het DCF-signaal
• Na het plaatsen van de batterij wordt de display ingeschakeld, er klinkt een akoestisch
signaal en de klok start automatisch met het zoeken naar het DCF-signaal. Tijdens het
zoeken knippert het zendsymbool . Dit kan 3 tot 5 minuten duren.
• Bij ontvangst van het radiograsche tijdsignaal worden de datum en tijd automatisch
ingesteld.
Zendsymbool Signaalsterkte
Geen ontvangst
Slecht
Redelijk
Uitstekend
Weergave zendsymbool Zoeken naar DCF-signaal
Knipperende indicatie Actief
Continue indicatie Succesvol – signaal wordt ontvangen
Geen indicatie Inactief
Page 36

70 71
Aanwijzing – instellen van de tijd
• Word binnen de eerste minuten tijdens de eerste inbedrijfstelling geen DCF-signaal
ontvangen, dan wordt het zoeken beëindigd. Het zendsymbool gaat uit.
• Bij ontvangststoringen adviseren wij de klok in de nacht te laten staan omdat in deze
periode de stoorsignalen normaliter geringer zijn.
• U kunt ondertussen een handmatige zoektocht naar het DCF-signaal op een andere
plaats starten of de tijd en datum handmatig instellen.
• De klok zoekt dagelijks automatisch verder naar het DCF-signaal. Bij een succesvolle
signaalontvangst worden de handmatig ingestelde tijd en datum overschreven.
• Druk op de WAVE-toets (11) teneinde het handmatig zoeken naar het DCF-signaal te
starten.
Aanwijzing – handmatig zoeken
• Het handmatig zoeken via de WAVE-toets (11) is alleen bij geactiveerd radiograsch
tijdsignaal (RC ON) – zie 5.2. Activeren/ deactiveren radiograsch tijdsignaal en
zomertijd – mogelijk.
• Het handmatig zoeken schakelt zich automatisch na 6 – 16 minuten uit.
• Een frequente gebruikmaking van de WAVE-toets (11) gaat ten koste van de
batterijcapaciteit. Wij adviseren deze functie alleen te gebruiken voor het bepalen van
een optimale plaats van opstelling.
• Druk opnieuw op de WAVE-toets (11) teneinde het handmatig zoeken te beëindigen.
5.2. Activeren/ deactiveren radiografisch tijdsignaal en zomertijd
• Schuif de RC ON / OFF / DST-schuifschakelaar (10) in de stand RC ON (links) teneinde de
continue synchronisatie met het DCF-signaal te activeren.
Aanwijzing – zomertijd
• De tijd stelt zich bij een geactiveerd radiograsch signaal (RC ON) automatisch op de
zomertijd in. Zolang de zomertijd actief is, wordt op de display DST weergegeven en de
tijd met een uur vooruit ingesteld.
• Schuif de RC ON / OFF / DST-schuifschakelaar (10) in de stand OFF (in het midden)
teneinde de continue synchr
onisatie met het DCF-signaal benevens de automatische
omschakeling op zomertijd te deactiveren.
Maak gebruik van deze instellingen indien u zich in een regio bevindt waarin geen
radiograsch tijdsignaal kan of mag worden ontvangen.
• Voer aansluitend de instellingen – zoals in 5.3. Handmatige instelling datum/ tijd
(normale tijd) is beschreven – handmatig uit.
• Schuif de RC ON / OFF / DST-schuifschakelaar (10) in de stand DST (rechts) teneinde
de continue synchronisatie met het DCF-signaal te deactiveren en de automatische
omschakeling op zomertijd te activeren.
• Maak gebruik van deze instellingen indien u zich in een regio bevindt waarin geen
radiograsch tijdsignaal kan of mag worden ontvangen.
De omschakeling naar de zomertijd wordt verder op basis van de handmatig ingestelde
datum en tijd uitgevoerd.
• Voer aansluitend de instellingen – zoals in 5.3. Handmatige instelling datum/ tijd
(normale tijd)is beschreven – handmatig uit.
5.3. Handmatige instelling datum/ tijd (normale tijd)
• Druk bij herhaling op de -toets (5), totdat de normale tijd (B) wordt weergegeven.
• Houd de CLOCK-toets (12) gedurende ca. 2 seconden ingedrukt totdat de jaarweergave
begint te knipperen.
• Stel de volgende informatie achter elkaar in:
•Jaar
•Weergave maand/ dag – dag/ maand (B – 2/B – 3)
•Maand(B – 3)
•Dag (B – 2)
•12h-/24h-formaat
•Uren
•Minuten
•Seconden (alleen nullen mogelijk)
•Tijdzone
•Taal dag van de week
• DST AUTO/OFF
• Druk voor het selecteren van de afzonderlijke waarden op de
-toets(8) of de -toets (9)
en bevestig de desbetreffende selectie door op de CLOCK-toets (12) te drukken.
• Druk direct op de CLOCK-toets (12) teneinde de weergegeven ingestelde waarde over te
nemen en verder te gaan.
Page 37

72 73
• Indien er gedurende 30 seconden niets wordt ingevoerd, dan wordt de modus voor de
instellingen automatisch verlaten en de uitgevoerde instellingen opgeslagen.
Aanwijzing – tijdzone
• Het DCF-signaal kan over een enorme oppervlakte worden ontvangen, komt echter te
allen tijde overeen met de MEZ welke in Duitsland geldt. Let er om die reden op dat
u, in landen met een andere tijdzone, de tijdverschuiving dienovereenkomstig dient in
te stellen.
• Bevindt u zich bijv. in Moskou, dan is het daar reeds 3 uur later dan in Duitsland. Dan
dient u dus in dit geval bij de tijdzone +3 in te stellen. De klok zal zich dan altijd, na
de ontvangst van het DCF-signaal resp. in relatie tot de handmatig ingestelde tijd,
automatisch 3 uur verder instellen.
• Neem de tabel in acht teneinde de betreffende tijdzone en tijdverschuiving op te slaan.
Aanwijzing – dag van de week
• U kunt voor de weergave van de dag van de week de talen Engels (GB), Frans (FR),
Duits (DE), Spaans (ES) of Italiaans (IT) selecteren.
5.4. Tijd thuisland en wereldtijd
• Druk bij herhaling op de -toets (5), totdat de tijd thuisland (C) wordt weergegeven.
• Als standaardwaarde is hier (C – 3) Berlijn (BER) ingesteld.
• Houd de
-toets (5) gedurende ca. 2 seconden ingedrukt totdat de woonplaats thuis
(C - 3) begint te knipperen.
• Druk voor het selecteren van de steden de
-toets (8) of de -toets (9) en bevestig de
desbetreffende selectie door op de
-toets (5) te drukken.
• Neem voor het instellen van uw tijd thuisland de aan het begin vermelde tabel incl.
weergave-afkortingen, tijdverschuiving t.o.v. UTC en beschikbaarheid van de DST-functie
(zomertijd) in acht.
• De ingestelde tijd thuisland wordt dan automatisch voor de normale tijd overgenomen.
• Druk bij herhaling op de
-toets (5), totdat de wereldtijd (D) wordt weergegeven.
• Hier kunt u de tijd voor een andere stad/ tijdzone laten weergeven.
• Druk voor het selecteren van de steden in westelijke richting de
-toets (8) of in
oostelijke richting de
-toets (9) en bevestig de desbetreffende selectie door op de
-toets (5) te drukken.
5.5. Wekker
Instelling wektijd
• Druk bij herhaling op de -toets (5), totdat de normale tijd (B) wordt weergegeven.
• Houd de -toets (6) gedurende ca. seconden ingedrukt totdat de urenweergave (E – 2)
begint te knipperen.
• Stel de volgende informatie achter elkaar in:
•Uren
•Minuten
• Druk voor het selecteren van de afzonderlijke waarden op de
-toets (8) of de -toets (9)
en bevestig de desbetreffende selectie door op de -toets (6) te drukken.
• Indien er gedurende 30 seconden niets wordt ingevoerd, dan wordt de modus voor de
instellingen automatisch verlaten en de uitgevoerde instellingen opgeslagen.
• Druk op de -toets (6) teneinde de ingestelde wektijd gedurende 5 seconden te laten
weergeven.
Activeren/ deactiveren wekker
• Schuif de Alarm-schuifschakelaar (7) naar boven. Onder de schuifschakelaar wordt een
rood vlakje zichtbaar.
De wekker is geactiveerd en op de display (4) wordt het wekkersymbool (E – 3)
weergegeven.
• Schuif de Alarm-schuifschakelaar (7) naar beneden, het vlakje achter de schuifschakelaar
is zwart.
De wekker is gedeactiveerd en het wekkersymbool (E – 3) op de display (4) gaat uit.
Wekker beëindigen/ snooze-functie
• Indien de wekker is geactiveerd, dan wordt deze op de desbetreffende wektijd in werking
gesteld en er weerklinkt gedurende één minuut een akoestisch weksignaal. Daarna wordt
de wekfunctie automatisch beëindigd en op de volgende dag op de ingestelde wektijd
wederom in werking gesteld.
• Teneinde de wekker voortijdig te beëindigen, schuif dan de Alarm-schuifschakelaar
(7) naar beneden totdat het vlakje achter de schuifschakelaar zwart is. De wekker is nu
gedeactiveerd.
• Schuif de Alarm-schuifschakelaar (7) weer naar boven teneinde de wekker voor de
volgende dag te activeren.
Page 38

74 75
Aanwijzing – snooze-functie
• Druk tijdens het weksignaal op de SNOOZE / LIGHT-toets (1) teneinde de snooze-
functie te activeren. Het wekkersymbool (E – 3) op de display (4) begint te knipperen.
Het weksignaal wordt gedurende 5 minuten onderbroken en dan opnieuw in werking
gesteld.
• De snooze-functie kan viermaal achter elkaar in werking worden gesteld.
5.6. Weergave temperatuur
• Druk bij herhaling op de -toets (5), totdat de normale tijd (B) wordt weergegeven.
• Houd de WAVE-toets (11) gedurende ca. 2 seconden ingedrukt teneinde tijdens de
temperatuurweergave (B – 7) tussen °C en °F om te schakelen.
• Liggen de meetwaarden buiten het meetbereik, dan wordt in de temperatuurweergave (B –
7) Lo (< -40°C/ -40°F) resp. HI (> 70°C/ 158°C) getoond.
5.7. Achtergrondverlichting en zaklamp
• Indien u op de SNOOZE / LIGHT-toets drukt (1), dan wordt de display (4) gedurende ca.
5 seconden verlicht.
• Druk op de -toets teneinde de geïntegreerde zaklamp-LED (3) in te schakelen.
• Druk wederom op de -toets teneinde de zaklamp-LED (3) weer uit te schakelen.
5.8. Toetsenblokkering
• Schuif de toetsenblokkering-schuifschakelaar (14) naar boven in de stand teneinde
alle toetsen te kunnen gebruiken.
• Schuif de toetsenblokkering-schuifschakelaar (14) naar beneden in de stand
teneinde alle toetsfuncties te deactiveren.
• Slechts de RESET-knop (13) benevens de Alarm-schuifschakelaar (7) kunnen verder
worden gebruikt.
5.9. Batterijen vervangen
• Zodra de weergave op de display (4) zwakker wordt, dan vervangt u de batterijen – zoals
in 4. Inbedrijfstelling is beschreven – direct.
6. Onderhoud en verzorging
Reinig dit product alleen met een pluisvrije, licht vochtige doek en gebruik geen agressieve
reinigers. Let erop dat er geen water in het product binnendringt.
7. Uitsluiting van garantie en aansprakelijkheid
Hama GmbH & Co. KG aanvaardt geen enkele aansprakelijkheid of garantieclaims voor
schade of gevolgschade, welke door ondeskundige installatie, montage en ondeskundig
gebruik van het product ontstaan of het resultaat zijn van het niet in acht nemen van de
bedieningsinstructies en/of veiligheidsinstructies.
8. Service en support
Neem bij vragen over het product contact op met de afdeling Productadvies van HAMA.
Hotline: +49 9091 502-115 (Duits/Engels)
Meer support-informatie vindt u hier:
www.hama.com
9. Technische specificaties
Wereldreiswekker RC 170
Spanningsvoorziening
3,0 V
2 x AAA batterij
Spanningsvoorziening
Meetbereik
Temperatuur
-40°C – +70°C
-40°F – +158°F
10. Aanwijzingen over de afvalverwerking
Notitie aangaande de bescherming van het milieu:
Ten gevolge van de invoering van de Europese Richtlijn 2002/96/EU en 2006/66/
EU in het nationaal juridisch system, is het volgende van toepassing: Elektrische en
elektronische apparatuur, zoals batterijen mag niet met het huisvuil weggegooid
worden. Consumenten zijn wettelijk verplicht om electrische en elctronische
apparaten zoals batterijen op het einde van gebruik in te dienen bij openbare
verzamelplaatsen speciaal opgezet voor dit doeleinde of bij een verkooppunt. Verdere
specicaties aangaande dit onderwerp zijn omschreven door de nationale wet van het
betreffende land. Dit symbool op het product, de gebruiksaanwijzing of de verpakking duidt
erop dat het product onderworpen is aan deze richtlijnen. Door te recycleren, hergebruiken
van materialen of andere vormen van hergebruiken van oude toestellen/batterijen, levert u
een grote bijdrage aan de bescherming van het mileu.
Page 39

76 77
11. Conformiteitsverklaring
Hiermee verklaart Hama GmbH & Co. KG, dat dit apparaat voldoet aan de vereisten
en de overige relevante voorschriften van de richtlijn 1999/5/EG. De verklaring van
overeenstemming conform de R&TTE-richtlijn 99/5/EG vindt u op internet onder
www.hama.com.
Στοιχεία χειρισμού και ενδείξεις
Α Στοιχεία χειρισμού
1. Πλήκτρο SNOOZE / LIGHT = Ενεργοποίηση του φωτισμού οθόνης (5 δευτερόλεπτα) /
διακοπή του σήματος αφύπνισης για 5 λεπτά
2. Πλήκτρο = Ενεργοποίηση/ απενεργοποίηση του φακού
3. LED Φακού
4. Οθόνη
5. Πλήκτρο = Αλλαγή μεταξύ τοπικής ώρας/ πόλης και παγκόσμιας ώρας/ πόλης /
ρύθμισης τοπικής ώρας/ πόλης
6. Πλήκτρο = Ένδειξη ώρας αφύπνισης (5 δευτερόλεπτα) / ρύθμιση αφύπνισης
7. Διακόπτης Alarm = Ενεργοποίηση/ απενεργοποίηση αφύπνισης
8. Πλήκτρο = Μείωση της τρέχουσας τιμής ρύθμισης / αλλαγή μεταξύ πόλεων στη
λειτουργία παγκόσμιας ώρας (προς τα δυτικά)
9. Πλήκτρο = Αύξηση της τρέχουσας τιμής ρύθμισης / αλλαγή μεταξύ πόλεων στη
λειτουργία παγκόσμιας ώρας (προς τα ανατολικά)
10. Διακόπτης RC ON / OFF / DST = Ενεργοποίηση/ απενεργοποίηση ασύρματου σήματος /
ενεργοποίηση θερινής ώρας και απενεργοποίηση ασύρματου σήματος
11. Πλήκτρο WAVE = Αλλαγή μεταξύ °C και °F / ενεργοποίηση/ απενεργοποίηση
χειροκίνητης λήψης ασύρματου σήματος
12. Πλήκτρο CLOCK = Ρύθμιση ώρας
13. Πλήκτρο RESET = Επαναφορά εργοστασιακής ρύθμισης
14. Διακόπτης κλειδώματος πλήκτρων = Ενεργοποίηση/ απενεργοποίηση όλων των πλήκτρων
(εκτός του πλήκτρου RESET (13) και του διακόπτη Alarm (7) )
15. Θήκη μπαταριών
B Κανονική ώρα
1. Ώρα
2. Ημέρα
3. Μήνας
4. Ημέρα
5. Ένταση σήματος
6. Θερινή ώρα
7. Θερμοκρασία
C Τοπική ώρα
1. Σύμβολο ένδειξης τοπικής ώρας
2. Τοπική ώρα
3. Πόλη στην οποία βρίσκεστε
J Οδηγίες χρήσης
Page 40

78 79
D Παγκόσμια ώρα
1. Σύμβολο ένδειξης αφύπνισης
2. Παγκόσμια ώρα
3. Τοπική ώρα
4. Παγκόσμια πόλη
5. Ζώνη ώρας
E Ξυπνητήρι
1. Σύμβολο ένδειξης αφύπνισης
2. Ώρα αφύπνισης
3. Σύμβολο αφύπνισης
4. Σας ευχαριστούμε για την αγορά αυτού του προϊόντος. της Hama!
5. Διαβάστε προσεκτικά τις παρακάτω οδηγίες και υποδείξεις. Στη συνέχεια, φυλάξτε αυτό
το εγχειρίδιο σε ασφαλές μέρος για μελλοντική χρήση. Σε περίπτωση που πουλήσετε της
συσκευή, παραδώστε αυτό το εγχειρίδιο στον επόμενο αγοραστή.
1. Επεξήγηση συμβόλων προειδοποίησης και υποδείξεων
Προειδοποίηση
Χρησιμοποιείται για τη σήμανση υποδείξεων ασφαλείας ή για να επιστήσει την
προσοχή σε ιδιαίτερους κινδύνους.
Υπόδειξη
Χρησιμοποιείται για τη σήμανση επιπλέον πληροφοριών ή σημαντικών υποδείξεων.
2. Περιεχόμενα συσκευασίας
• Ξυπνητήρι με παγκόσμια ώρα RC 170
• 2 μπαταρίες AAA
• Αυτό το εγχειρίδιο χειρισμού
3. Υποδείξεις ασφαλείας
• Το προϊόν προορίζεται για σκοπούς οικιακής χρήσης.
• Πρέπει να προστατεύετε το προϊόν από βρομιά, υγρασία και υπερθέρμανση και να το
χρησιμοποιείτε μόνο σε στεγνά περιβάλλοντα.
• Μην χρησιμοποιείτε το προϊόν σε περιοχές όπου δεν επιτρέπονται ηλεκτρονικές συσκευές.
• Το προϊόν πρέπει να λειτουργεί μόνο συνδεδεμένο σε κατάλληλη πρίζα. Η πρίζα πρέπει να
βρίσκεται κοντά στο προϊόν και να είναι εύκολα προσβάσιμη.
• Το προϊόν δεν επιτρέπεται να πέφτει κάτω, ούτε και να δέχεται δυνατά χτυπήματα.
• Μην επιχειρήσετε να συντηρήσετε ή να επισκευάσετε τη συσκευή εσείς οι ίδιοι. Οι εργασίες
συντήρησης πρέπει να γίνονται από εξειδικευμένα άτομα.
• Μην κάνετε μετατροπές στη συσκευή. Κατ‘ αυτόν τον τρόπο παύει να ισχύει η εγγύηση.
• Αφαιρέστε τις μπαταρίες από το προϊόν αν αυτό δεν έχει χρησιμοποιηθεί για πολύ καιρό,
εκτός αν θέλετε να το χρησιμοποιήσετε σε περιπτώσεις έκτακτης ανάγκης.
• Τα παιδιά δεν επιτρέπεται να έρχονται σε επαφή με το υλικό της συσκευασίας, υπάρχει
κίνδυνος ασφυξίας.
• Απορρίψτε κατευθείαν το υλικό συσκευασίας σύμφωνα με τους ισχύοντες τοπικούς
κανονισμούς απόρριψης.
Προειδοποίηση - Μπαταρίες
• Αφαιρέστε και απορρίψτε τις χρησιμοποιημένες μπαταρίες αμέσως από το προϊόν
• Χρησιμοποιείτε αποκλειστικά απλές ή επαναφορτιζόμενες μπαταρίες του
προβλεπόμενου τύπου.
• Μην μπερδεύετε παλιές και καινούριες μπαταρίες, καθώς και μπαταρίες διαφορετικού
τύπου και κατασκευαστή.
• Προσέξτε οπωσδήποτε τη σωστή πολικότητα (επιγραφή + και -) των μπαταριών και
τοποθετήστε τις ανάλογα. Η μη τήρηση μπορεί να οδηγήσει σε διαρροή του υγρού ή σε
έκρηξη των μπαταριών.
• Μην αποφορτίζετε υπερβολικά τις μπαταρίες.
• Φυλάτε τις μπαταρίες μακριά από παιδιά.
• Μην βραχυκυκλώνετε τις απλές/επαναφορτιζόμενες μπαταρίες και μην τις φέρνετε σε
επαφή με γυμνά μεταλλικά αντικείμενα.
4. Έναρξη χρήσης
• Ανοίξτε τη θήκη μπαταριών (15), τοποθετήστε δύο μπαταρίες AAA με σωστή πολικότητα
και κλείστε πάλι τη θήκη μπαταριών (15).
• Αν μετά την τοποθέτηση μιας καινούριας μπαταρίας δεν προβάλλεται τίποτα στην οθόνη
LCD πατήστε με ένα αιχμηρό αντικείμενο το κουμπί RESET (13), για να γίνει επανεκκίνηση.
Page 41

80 81
5. Λειτουργία
Υπόδειξη – Πληκτρολόγηση
• Για να ρυθμίσετε τις τιμές γρηγορότερα κρατήστε πατημένο το πλήκτρο (8) ή
το πλήκτρο (9).
5.1. Αυτόματη ρύθμιση ημερομηνίας/ώρας με το σήμα DCF
• Μετά την τοποθέτηση της μπαταρίας ενεργοποιείται η οθόνη, ακούγεται ένα σήμα και
το ξυπνητήρι αρχίζει αυτόματα την αναζήτηση σήματος DCF. Όσο διαρκεί η αναζήτηση
αναβοσβήνει το σύμβολο ασύρματης λήψης . Αυτή η διαδικασία μπορεί να διαρκέσει
3-5 λεπτά.
• Όταν εντοπιστεί το σήμα ρυθμίζονται αυτόματα η ημερομηνία και η ώρα.
Σύμβολο ασύρματης λήψης Ένταση σήματος
Κανένα σήμα
Χαμηλό
Μέτριο
Εξαιρετικό
Ένδειξη συμβόλου ασύρματης
λήψης
Αναζήτηση του σήματος DCF
Η ένδειξη αναβοσβήνει Ενεργή
Μόνιμη ένδειξη Επιτυχώς - Γίνεται λήψη του σήματος
Καμία ένδειξηΑνενεργή
Υπόδειξη - Ρύθμιση της ώρας
• Αν εντός των πρώτων λεπτών μετά την πρώτη εγκατάσταση δεν γίνει λήψη του σήματος
DCF η αναζήτηση ολοκληρώνεται. Το σύμβολο ασύρματης λήψης σβήνει.
• Αν παρουσιαστούν προβλήματα λήψης συνιστάται να αφήσετε το ρολόι σε ένα σημείο
όλη τη νύχτα διότι τότε υπάρχουν λιγότερες παρεμβολές.
• Μπορείτε στο μεταξύ να ξεκινήσετε χειροκίνητη αναζήτηση του σήματος DCF σε άλλο
σημείο τοποθέτησης ή να κάνετε χειροκίνητη ρύθμιση ώρας και ημερομηνίας.
• Το ρολόι συνεχίζει καθημερινά να αναζητά αυτόματα σήμα DCF. Αν γίνει επιτυχής λήψη
σήματος διαγράφονται η ώρα και η ημερομηνία που ρυθμίστηκαν χειροκίνητα.
• Πατήστε το πλήκτρο WAVE (11), για να ξεκινήσετε χειροκίνητη αναζήτηση του ασύρματου
σήματος.
Υπόδειξη - Χειροκίνητη αναζήτηση
• Η χειροκίνητη αναζήτηση μέσω του πλήκτρου WAVE (11) γίνεται μόνο όταν το
ασύρματο σήμα είναι ενεργοποιημένο (RC ON) – βλέπε 5.2.Ενεργοποίηση/
απενεργοποίηση ασύρματου σήματος και θερινής ώρας.
• Η λειτουργία αναζήτησης απενεργοποιείται αυτόματα μετά από 6 – 16 λεπτά.
• Η συχνή χρήση του πλήκτρου WAVE (11) επιβαρύνει την μπαταρία. Συνιστάται η χρήση
αυτής της λειτουργίας μόνο για την εύρεση ενός ιδανικού σημείου τοποθέτησης.
• Πατήστε πάλι το πλήκτρο WAVE (11) για να ολοκληρώσετε τη χειροκίνητη αναζήτηση.
5.2. Ενεργοποίηση/ απενεργοποίηση του ασύρματου σήματος και της
θερινής ώρας
Ωθήστε το διακόπτη RC ON / OFF / DST (10) στη θέση RC ON (αριστερά) για να
ενεργοποιήσετε το μόνιμο συγχρονισμό με το σήμα DCF.
Υπόδειξη – Θερινή ώρα
• Όταν το ασύρματο σήμα είναι ενεργοποιημένο (RC ON) η ώρα ρυθμίζεται αυτόματα στη
θερινή ώρα. Όσο είναι ενεργοποιημένη η θερινή ώρα στην οθόνη προβάλλεται DST και
η ώρα πηγαίνει μια ώρα προς τα εμπρός.
Page 42

82 83
• Ωθήστε το διακόπτη RC ON / OFF / DST (10) στη θέση OFF (στη μέση), για να
απενεργοποιήσετε το μόνιμο συγχρονισμό με το σήμα DCF, καθώς και την αυτόματη
μετάβαση στη θερινή ώρα.
Χρησιμοποιήστε τις ρυθμίσεις αυτές εάν βρίσκετε σε περιοχή στην οποία δεν μπορεί και/ή
δεν επιτρέπεται να γίνει λήψη ασύρματου σήματος.
Στη συνέχεια κάνετε χειροκίνητα τις ρυθμίσεις – όπως περιγράφονται στο 5.3.
Χειροκίνητη ρύθμιση ημερομηνίας/ώρας (κανονική ώρα) .
• Ωθήστε το διακόπτη RC ON / OFF / DST (10) στη θέση DST (δεξιά), για να
απενεργοποιήσετε το μόνιμο συγχρονισμό με το σήμα DCF και να ενεργοποιήσετε την
αυτόματη μετάβαση στη θερινή ώρα.
Χρησιμοποιήστε τις ρυθμίσεις αυτές εάν βρίσκετε σε περιοχή στην οποία δεν μπορεί και/ή
δεν επιτρέπεται να γίνει λήψη ασύρματου σήματος.
Η μετάβαση στη θερινή ώρα συνεχίζει να γίνεται βάσει της ημερομηνίας και ώρας που
έχουν ρυθμιστεί χειροκίνητα.
•
Στη συνέχεια κάνετε χειροκίνητα ρυθμίσεις – όπως περιγράφονται στο 5.3. Χειροκίνητη
ρύθμιση ημερομηνίας/ ώρας (κανονική ώρα) .
5.3. Χειροκίνητη ρύθμιση ημερομηνίας/ ώρας (κανονική ώρα)
• Πατήστε επανειλημμένα το πλήκτρο (5), μέχρι να εμφανιστεί η κανονική ώρα (B).
• Πατήστε και κρατήστε πατημένο το πλήκτρο CLOCK (12) για 2 δευτερόλεπτα μέχρι να
αρχίσει να αναβοσβήνει η ένδειξη έτους.
• Ρυθμίστε διαδοχικά τα παρακάτω:
•Έτος
•Ένδειξη μήνα/ ημέρας – ημέρας/ μήνα (B – 2/B – 3)
•Μήνας (B – 3)
•Ημέρα (B – 2)
•12/24ωρη μορφή ώρας
•Ώρες
•Λεπτά
•Δευτερόλεπτα (μόνο μηδενισμός))
•Ζώνη ώρας
•Γλώσσα ημέρας
• DST AUTO/OFF
• Για επιλογή των τιμών πατήστε το πλήκτρο
(8) ή το πλήκτρο (9) και επιβεβαιώστε την
επιλογή πατώντας το πλήκτρο CLOCK (12).
• Πατήστε απευθείας το πλήκτρο CLOCK (12) για να εισάγετε ή να προσπεράσετε την
προβαλλόμενη τιμή ρύθμισης.
• Αν δεν γίνει κάποια εισαγωγή δεδομένων για 30 δευτερόλεπτα, η συσκευή εξέρχεται
αυτόματα από τη λειτουργία ρυθμίσεων και οι ρυθμίσεις που έγιναν αποθηκεύονται.
Υπόδειξη – Ζώνη ώρας
• Μπορεί να γίνει ευρεία λήψη σήματος DCF, αυτό όμως αντιστοιχεί πάντα στην Ώρα
Κεντρικής Ευρώπης (CET) που ισχύει στη Γερμανία. Ως εκ τούτου, σε χώρες με άλλη
ζώνη ώρας πρέπει να ρυθμίσετε αντίστοιχα τη διαφορά ώρας.
• Αν βρίσκεστε στη Μόσχα είστε 3 ώρες μπροστά από τη Γερμανία. Ως εκ τούτου, στη
ζώνη ώρας πρέπει να ρυθμίσετε +3. Το ρολόι θα ρυθμιστεί αυτόματα μετά τη λήψη του
σήματος DCF ή ανάλογα με την ώρα που ρυθμίστηκε χειροκίνητα 3 ώρες αργότερα.
• Λάβετε υπόψη τον πίνακα για να αποθηκεύσετε την αντίστοιχη ζώνη ώρας και τη
διαφορά ώρας.
Υπόδειξη – Ημέρα
• Για την ένδειξη ημέρας μπορείτε να επιλέξετε Αγγλικά (GB), Γαλλικά (FR), Γερμανικά
(DE), Ισπανικά (ES) ή Ιταλικά (IT).
5.4. Τοπική ώρα και παγκόσμια ώρα
• Πατήστε επανειλημμένα το πλήκτρο (5), μέχρι να προβληθεί η τοπική ώρα (C) .
Ως προκαθορισμένη τιμή έχει ρυθμιστεί εδώ (C – 3) Βερολίνο (BER).
• Πατήστε και κρατήστε πατημένο το πλήκτρο (5) για 2 δευτερόλεπτα μέχρι να αρχίσει να
αναβοσβήνει η πόλη στην οποία βρίσκεστε (C – 3).
• Για επιλογή τωνπόλεωνπατήστε το πλήκτρο (8) ή το πλήκτρο (9) και επιβεβαιώστε
την επιλογή πατώντας το πλήκτρο (5).
• Για τη ρύθμιση της τοπικής ώρας λάβετε υπόψη τον αρχικό πίνακα με τις συντομογραφίες,
τη διαφορά ώρας για UTC και τη διαθεσιμότητα της λειτουργίας DST (θερινή ώρα).
Η ρυθμισμένη τοπική ώρα γίνεται αυτόματα η κανονική ώρα.
• Πατήστε επανειλημμένα το πλήκτρο (5), μέχρι να προβληθεί η παγκόσμια ώρα (D).
Εδώ προβάλλεται η ώρα για άλλη πόλη/ ζώνη ώρας.
• Για επιλογή τωνπόλεων προς τα δυτικάπατήστε το πλήκτρο (8) ή προς ανατολικά το
πλήκτρο (9) και επιβεβαιώστε την επιλογή πατώντας το πλήκτρο (5).
Page 43

84 85
5.5. Ξυπνητήρι
Ρύθμιση της ώρας αφύπνισης
• Πατήστε επανειλημμένα το πλήκτρο (5), μέχρι να εμφανιστεί η κανονική ώρα (B).
Πατήστε και κρατήστε πατημένο το πλήκτρο (6) για 2 δευτερόλεπτα μέχρι να αρχίσει να
αναβοσβήνει η ένδειξη ώρας (Ε – 2) .
• Ρυθμίστε διαδοχικά τα παρακάτω:
•Ώρα αφύπνισης (E – 2)
•Λεπτά
• Για επιλογή των τιμών πατήστε το πλήκτρο
(8) ή το πλήκτρο (9) και επιβεβαιώστε την
επιλογή με πάτημα του πλήκτρου (6).
• Αν δεν γίνει κάποια εισαγωγή δεδομένων για 30 δευτερόλεπτα, η συσκευή εξέρχεται
αυτόματα από τη λειτουργία ρυθμίσεων και οι ρυθμίσεις που έγιναν αποθηκεύονται.
• Πατήστε το πλήκτρο (6), για να προβληθεί η ρυθμισμένη ώρα αφύπνισης για 5
δευτερόλεπτα.
Ενεργοποίηση/ απενεργοποίηση αφύπνισης
• Ωθήστε το διακόπτη Alarm (7) προς τα πάνω. Κάτω από το διακόπτη εμφανίζεται μια
κόκκινη επιφάνεια.
Η αφύπνιση είναι ενεργοποιημένη και στην οθόνη (4) προβάλλεται το σύμβολο αφύπνισης
(Ε – 3).
• Ωθήστε το διακόπτη Alarm (7) προς τα κάτω, η επιφάνεια κάτω από το διακόπτη είναι
μαύρη.
Η αφύπνιση είναι απενεργοποιημένη και το σύμβολο αφύπνισης (Ε – 3) σβήνει από την
οθόνη (4).
Ολοκλήρωση αφύπνισης/ λειτουργία αναβολής αφύπνισης
• Όταν η αφύπνιση είναι ενεργοποιημένη αυτή ξεκινά στον αντίστοιχο χρόνο και για ένα
λεπτό ηχεί ένα σήμα αφύπνισης. Στη συνέχεια η αφύπνιση ολοκληρώνεται αυτόματα και
ενεργοποιείται την επόμενη μέρα τη ρυθμισμένη ώρα.
• Για να σταματήσετε την αφύπνιση πρόωρα ωθήστε το διακόπτη Alarm (7) προς τα κάτω
μέχρι η επιφάνεια πίσω από το διακόπτη να γίνει μαύρη. Η αφύπνιση τώρα είναι τώρα
απενεργοποιημένη.
Ωθήστε το διακόπτη Alarm πάλι προς τα πάνω (7), για να ενεργοποιήσετε την αφύπνιση
για την επόμενη μέρα.
Υπόδειξη - Αναβολή αφύπνισης
• Όσο ηχεί το σήμα αφύπνισης πατήστε το πλήκτρο SNOOZE / LIGHT (1) για να
ενεργοποιήσετε τη λειτουργία αφύπνισης. Το σύμβολο αφύπνισης (E – 3) στην οθόνη
(4) αρχίζει να αναβοσβήνει. Το σήμα αφύπνισης διακόπτεται για 5 λεπτά και στη
συνέχεια ενεργοποιείται πάλι.
• Η αναβολή αφύπνισης μπορεί να ενεργοποιηθεί τέσσερις φορές στη σειρά.
5.6. Ένδειξη θερμοκρασίας
• Πατήστε επανειλημμένα το πλήκτρο (5), μέχρι να εμφανιστεί η κανονική ώρα (B).
• Πατήστε και κρατήστε πατημένο το πλήκτρο WAVE (11) για περίπου 2 δευτερόλεπτα ώστε
η ένδειξη θερμοκρασίας (B – 7) να μεταβεί από °C σε °F.
• Αν οι τιμές μέτρησης βρίσκονται εκτός του εύρους μέτρησης προβάλλεται η ένδειξη
θερμοκρασίας (B – 7) Lo (< -40°C/ -40°F) ή HI (> 70°C/ 158°C).
5.7. Φωτισμός οθόνης και φακός
• Αν πατήστε το πλήκτρο SNOOZE / LIGHT (1), η οθόνη (4) φωτίζεται για 5 δευτερόλεπτα.
• Πατήστε το πλήκτρο (2),για να ενεργοποιήσετε την ενσωματωμένη LED του φακού (3).
• Πατήστε πάλι το πλήκτρο (2), για να απενεργοποιήσετε τη LED του φακού (3).
5.8. Κλείδωμα πλήκτρων
• Ωθήστε το διακόπτη κλειδώματος πλήκτρων (14) προς τα πάνω στη θέση , για να
μπορέσετε να χρησιμοποιήσετε όλα τα πλήκτρα.
• Ωθήστε το διακόπτη κλειδώματος πλήκτρων (14) προς τα πάνω στη θέση , για να
απενεργοποιήσετε όλες τις λειτουργίες των πλήκτρων.
• Μόνο το πλήκτρο RESET (13) καθώς και ο διακόπτης Alarm (7) μπορούν να συνεχίσουν
να χρησιμοποιούνται.
5.9. Αλλαγή μπαταριών
• Όταν η ένδειξη στην οθόνη (4) γίνει πιο αδύναμη αλλάξτε τις μπαταρίες όπως περιγράφεται
στο 4. Έναρξη χρήσης.
6. Συντήρηση και φροντίδα
• Καθαρίζετε αυτό το προϊόν μόνο με ένα ελαφρώς βρεγμένο πανί χωρίς χνούδια και μην
χρησιμοποιείτε καυστικά καθαριστικά.
• Στο προϊόν δεν πρέπει να μπει νερό.
Page 44

86 87
7. Απώλεια εγγύησης
Η εταιρεία Hama GmbH & Co KG δεν αναλαμβάνει καμία ευθύνη ή εγγύηση για ζημιές, οι
οποίες προκύπτουν από λανθασμένη εγκατάσταση και συναρμολόγηση ή λανθασμένη χρήση
του προϊόντος ή μη τήρηση των οδηγιών λειτουργίας και/ή των υποδείξεων ασφαλείας.
8. Σέρβις και υποστήριξη
Για ερωτήσεις σχετικά με το προϊόν απευθυνθείτε στην υπηρεσία εξυπηρέτησης πελατών της
Hama.
Γραμμή υποστήριξης: +49 9091 502-115 (Γερμανικά/Αγγλικά)
Περισσότερες πληροφορίες υποστήριξης θα βρείτε στη διεύθυνση: www.hama.com
9. Τεχνικά χαρακτηριστικά
Ξυπνητήρι με παγκόσμια ώρα RC 170
Ηλεκτρική τροφοδοσία
3,0 V
2 x μπαταρίες AAA
Εύρος μέτρησης
Θερμοκρασία
-40°C – +70°C
-40°F – +158°F
10. Υποδείξεις απόρριψης
Υπόδειξη σχετικά με την προστασία περιβάλλοντος:
Από τη στιγμή που η Ευρωπαϊκή Οδηγία 2002/96/EΕ και 2006/66/EE
ενσωματώνεται στο εθνικό δίκαιο ισχύουν τα εξής: Οι ηλεκτρικές και οι
ηλεκτρονικές συσκευές καθώς και οι μπαταρίες δεν επιτρέπεται να πετιούνται στα
οικιακά απορρίμματα. Οι καταναλωτές υποχρεούνται από τον νόμο να επιστρέφουν
τις ηλεκτρικές και ηλεκτρονικές συσκευές καθώς και τις μπαταρίες στο τέλος της
ζωής τους στα δημόσια σημεία περισυλλογής που έχουν δημιουργηθεί γι’ αυτό το σκοπό ή στα
σημεία πώλησης. Οι λεπτομέρειες ρυθμίζονται στη σχετική νομοθεσία. Το σύμβολο πάνω στο
προϊόν, στο εγχειρίδιο χρήσης ή στη συσκευασία παραπέμπει σε αυτές τις διατάξεις. Με την
ανακύκλωση, επαναχρησιμοποίηση των υλικών ή με άλλες μορφές χρησιμοποίησης παλιών
συσκευών / Μπαταριών συνεισφέρετε σημαντικά στην προστασία του περιβάλλοντος. Στη
Γερμανία ισχύουν αντίστοιχα οι παραπάνω κανόνες απόρριψης σύμφωνα με τον κανονισμό για
μπαταρίες και συσσωρευτές.
11. Δήλωση συμμόρφωσης
Η εταιρία Hama GmbH & Co. KG δηλώνει πως η συσκευή αυτή εκπληρώνει τις
βασικές απαιτήσεις και τις λοιπές σχετικές διατάξεις της οδηγίας 1999/5/EG Τη
δήλωση συµµόρφωσης σύµφωνα µε την οδηγία R&TTE 99/5/ΕΚ θα τη βρείτε στη
διεύθυνση www.hama.de.
Page 45

88 89
Elementy obsługi i sygnalizacji
A Elementy obsługi
1. Przycisk SNOOZE/LIGHT (drzemka / podświetlenie) = aktywacja podświetlenia ekranu
(przez ok. 5 sekund) / przerywanie sygnału budzenia na 5 minut
2. - Przycisk = włączanie/ wyłączanie latarki
3. Latarki LED
4. Wyświetlacz
5. -Przycisk = zmiana między czas w miejscu zamieszkania/ Miasto i Czas na świecie/
Miasto / Ustawienie Czas w miejscu zamieszkania/ Miasto
6. - Przycisk = wyświetlanie czasu budzenia (ok. 5 sekund) / ustawianie budzika
7. Przełącznik suwakowyAlarm = włączanie / wyłączanie budzika
8. Przycisk = zmniejszanie aktualnie ustawionej wartości / zmiana między miastami w
trybie czasu na świecie (na zachód)
9. Przycisk = zwiększanie aktualnie ustawionej wartości / zmiana między miastami w
trybie czasu na świecie( na wschód)
10. Przełącznik suwakowy RC ON / OFF / DST = włączanie/ wyłączanie sygnału radiowego /
aktywacja czasu letniego i wyłączanie sygnału radiowego
11. Przycisk WAVE = zmiana między °C i °F / włączanie/ wyłączanie ręcznego odbioru
sygnału radiowego
12. Przycisk CLOCK = ustawianie godziny
13. Przycisk RESET = przywracanie ustawień fabrycznych
14. Przełącznik suwakowy blokada przycisków = włączanie / blokowanie wszystkich
przycisków (z wyjątkiem przycisku RESET (13) i przełącznika suwakowego Alarm (7) )
15. Schowek na baterię
B Czas normalny
1. Godzina
2. Dzień
3. Miesiąc
4. Dzień tygodnia
5. Siła sygnału
6. Czas letni
7. Temperatura
C Czas w miejscu zamieszkania
1. Wyświetlany symbol czasu w miejscu zamieszkania
2. Czas w miejscu zamieszkania
3. Miasto zamieszkania
D Czas na świecie
1. Wyświetlany symbol czasu na świecie
2. Czas na świecie
3. Czas w miejscu zamieszkania
4. Miasto na świecie
5. Strefa czasowa
E Budzik
1. Wyświetlany symbol budzika
2. Czas budzenia
3. Symbol budzika
Dziękujemy za zakup naszego produktu!
Przed pierwszym użyciem należy dokładnie przeczytać instrukcję obsługi. Instrukcję należy
przechować, gdyż może być jeszcze potrzebna.
1. Objaśnienie symboli ostrzegawczych i wskazówek
Ostrzeżenie
Używane w celu zwrócenia uwagi na szczególne niebezpieczeństwo lub ryzyko.
Wskazówki
Używane w celu zwrócenia uwagi na szczególnie przydatne informacje.
2. Zawartość opakowania
• Budzik podróżny RC 170
• 2 baterie AAA
• Niniejsza instrukcja obsługi
3. Wskazówki bezpieczeństwa
• Produkt jest przeznaczony do prywatnego, niekomercyjnego użytku domowego.
• Chronić produkt przed zanieczyszczeniem, wilgocią i przegrzaniem oraz stosować go tylko
w suchym otoczeniu.
• Nie używać produktu w miejscach, gdzie nie jest dozwolone stosowanie urządzeń
P Instrukcja obsługi
Page 46

90 91
elektronicznych.
• Podłączać produkt tylko do odpowiedniego gniazda wtykowego. Gniazdo wtykowe musi
znajdować się w pobliżu produktu i być łatwo dostępne.
• Chronić produkt przed upadkiem i silnymi wstrząsami.
• Nie próbować naprawiać samodzielnie urządzenia. Prace serwisowe zlecać
wykwalikowanemu personelowi fachowemu.
• Nie modykować urządzenia. Prowadzi to do utraty wszelkich roszczeń z tytułu gwarancji.
• Wyjąć baterie z produktu, jeżeli nie jest on używany przez dłuższy czas, chyba że produkt
musi być w pogotowiu w razie sytuacji awaryjnych.
• Materiały opakowaniowe trzymać koniecznie z dala od dzieci, istnieje niebezpieczeństwo
uduszenia.
• Materiały opakowaniowe należy natychmiast poddać utylizacji zgodnie z obowiązującymi
przepisami miejscowymi.
Ostrzeżenie - baterie
• Natychmiast usunąć z produktu zużyte baterie i poddać je utylizacji.
• Używać wyłącznie akumulatorów (lub baterii) odpowiadających podanemu typowi.
• Nie mieszać starych i nowych baterii ani baterii różnych typów lub producentów.
• Wkładając baterie, zwrócić koniecznie uwagę na właściwe podłączenie biegunów (znak
+ i -). Nieprzestrzeganie grozi wyciekiem lub wybuchem baterii.
• Nie przeciążać baterii.
• Przechowywać baterie poza zasięgiem dzieci.
• Nie zwierać akumulatorów / baterii oraz trzymać je z dala od odkrytych przedmiotów
metalowych.
4. Uruchamianie
• Otworzyć schowek na baterie (15), włożyć dwie baterie AAA, zwracając uwagę na
właściwą biegunowość i ponownie zamknąć schowek na baterie (15).
• Jeżeli po włożeniu nowych baterii na ekranie LCD nie pojawi się żaden komunikat, nacisnąć
za pomocą spiczastego przedmiotu przycisk RESET (13), aby wykonać restart.
5. Obsługa
Wskazówka – wpr
owadzanie danych
• Trzymać wciśnięty przycisk (8) lub (9) , aby przyspieszyć nastawę wartości.
5.1. Automatyczne ustawianie daty / godziny wg radiowego sygnału
czasowego DCF
• Po włożeniu baterii włączany jest ekran, rozlega się sygnał akustyczny i zegar rozpoczyna
automatycznie wyszukiwanie sygnału DCF. Podczas wyszukiwania symbol sygnału
radiowego zaczyna migać . Proces ten może potrwać 3-5 minut.
• Po odbiorze radiowego sygnału czasowego godzina i data są automatycznie ustawiane.
Symbol sygnału radiowego Siła sygnału
Brak odbioru
Zły
Średni
Doskonały
Wskaźnik symbolu radiowego Wyszukiwanie sygnału czasowego DCF
Migający wskaźnik Aktywne
Stały wskaźnik Proces powiódł się - sygnał jest odbierany
Brak symbolu Nieaktywny
Wskazówka – ustawianie zegara
• Jeżeli w trakcie pierwszych minut podczas pierwszej konguracji nie jest odbierany
sygnał DCF, wyszukiwanie kończy się. Symbol sygnału radiowego gaśnie.
• W razie zakłóceń w odbiorze zaleca się pozostawienie zegara na noc, gdyż wtedy
zakłócenia są z reguły mniejsze.
• W tym czasie można uruchomić ręczne wyszukiwanie sygnału DCF w innym miejscu
ustawienia lub ręcznie skongurować godzinę i datę
• Zegar będzie codziennie szukał automatycznie sygnału DCF. Po pomyślnym odbiorze
sygnału ręcznie ustawiona godzina i data są nadpisywane.
Page 47

92 93
• Nacisnąć przycisk WAVE (11), aby uruchomić ręczne wyszukiwanie sygnału DCF.
Wskazówka - proces ręcznego wyszukiwania
• Proces ręcznego wyszukiwania za pomocą przycisku WAVE (11) możliwy jest tylko
w przypadku aktywnego sygnału radiowego (RC ON) – patrz 5.2. Włączanie/
wyłączanie sygnału radiowego i czasu letniego.
• Proces ręcznego wyszukiwania wyłącza się automatycznie po upływie 6-16 minut.
• Częste korzystanie z przycisku WAVE (11) obciąża pojemność baterii. Zaleca się
stosowanie tej opcji tylko do ustalania optymalnego miejsca ustawienia.
• Ponownie nacisnąć przycisk WAVE (11), aby zakończyć ręczne wyszukiwanie sygnału.
5.2. Włączanie/wyłączanie sygnału radiowego i czasu letniego
• Przesunąć przełącznik suwakowy RC ON / OFF / DST (10) na pozycję RC ON (w lewo),
aby włączyć stałą synchronizację z sygnałem DCF.
Wskazówka – czas letni
• Przy aktywnym sygnale radiowym (RC ON) czas przestawia się automatycznie na czas
letni. Jeżeli czas letni jest ustawiony, na ekranie wyświetlane jest DST i czas ustawiony
jest na godzinę do przodu.
• Przesunąć przełącznik suwakowy RC ON / OFF / DST (10) na pozycję OFF (na środku),
aby wyłączyć stałą synchronizację z sygnałem DCF i funkcję automatycznego przestawiania
na czas letni.
• Z tego ustawienia należy korzystać w regionie, w którym odbiór sygnału radiowego jest
ograniczony lub niemożliwy.
• Następnie dokonać konguracji - jak opisano w 5.3. Ręczne ustawianie daty/ godziny
(czas normalny)- ręcznie.
• Przesunąć przełącznik suwakowy RC ON / OFF / DST (10) na pozycję DST (w prawo),
aby wyłączyć stałą synchronizację z sygnałem DCF i włączyć funkcję automatycznego
przestawiania na czas letni.
• Z tego ustawienia należy korzystać w regionie, w którym odbiór sygnału radiowego jest
ograniczony lub niemożliwy.
• Proces przestawiania na czas letni odbywa się nadal na podstawie ręcznie ustawionej daty
i godziny.
• Następnie dokonać konguracji - jak opisano w 5.3. Ręczne ustawianie daty/ godziny
(czas normalny)- ręcznie.
5.3. Ręczne ustawianie daty / godziny (czas normalny)
• Naciskać kolejno przycisk (5), aż pojawi się czas normalny (B) .
• Nacisnąć i trzymać wciśnięty przez ok. 2 sekundy przycisk CLOCK (2), aż wskaźnik roku
zacznie migać.
• Po kolei ustawić następujące informacje:
•Rok
•Wskaźnik Miesiąc/ Dzień – Dzień/ Miesiąc (B – 2/B – 3)
•Miesiąc (B-3)
•Dzień (B – 2)
•Format 12/24-godzinny
•Godziny
•Minuty
•Sekundy (tylko zera możliwe)
•Strefa czasowa
•Język, dzień tygodnia
• DST AUTO/OFF
• Aby wybrać poszczególne wartości, nacisnąć przycisk▼ (8) lub ▼ (9) i potwierdzić wybór
przyciskiem CLOCK (12).
• Bezpośrednio nacisnąć przycisk CLOCK (12), aby przejąć lub pominąć wyświetlaną
ustawioną wartość.
• Jeżeli w ciągu 30 sekund nie zostanie wprowadzona żadna wartość, tryb ustawiania jest
automatycznie zamykany i dokonane ustawienia są zapisywane.
Wskazówka – strefa czasowa
• Sygnał czasowy DCF może być odbierany na całym świecie, jednakże odpowiada on
zawsze stree czasu środkowoeuropejskiego (CET) obowiązującego w Niemczech.
Dlatego należy pamiętać, aby w krajach o innej stree czasowej przesunąć czas.
• Np. w Moskwie jest 3 godziny później niż w Niemczech. Przy stree czasowej należy
wtedy ustawić wartość +3. Po odbiorze sygnału czasowego DCF, wzgl. w odniesieniu do
ręcznie ustawionego czasu zegara, zegar ustawia się wtedy zawsze o 3 godziny później.
• Zwrócić uwagę na tabelę, aby zapisać odpowiednie strefy czasowe i przesunięcia czasu.
Page 48

94 95
Wskazówka – dzień tygodnia
• Do wskazywania dnia tygodnia dostępne są następujące języki: angielski (GB),
francuski (FR), niemiecki (DE), hiszpański (ES) lub włoski (IT).
5.4 Czas w miejscu zamieszkania i czas na świecie
• Naciskać kolejno przycisk (5), aż pojawi się czas w miejscu zamieszkania (C).
Jako wartość standardową ustawiono tutaj (C – 3) Berlin (BER).
• Nacisnąć i trzymać wciśnięty przez ok. 2 sekundy przycisk (5), aż czas w miejscu
zamieszkania (C-3) zacznie migać.
• Aby wybrać Miastanacisnąć przycisk (8) lub (9) i potwierdzić wybór naciskając
przycisk - (5).
• Ustawiając czas w miejscu zamieszkania, należy uwzględnić podana na początku tabelę
wraz ze skrótami wskaźników, przesunięciem czasu do UTC i dostępnością funkcji DST
(czas letni).
• Ustawiony czas w miejscu zamieszkania jest przejmowany wtedy automatycznie jako czas
normalny.
• Naciskać kolejno przycisk
(5), aż pojawi się czas na świecie (D).
Można tutaj wyświetlić godzinę w innym mieście/innej stree czasowej.
• Aby wybrać Miasta na zachódnacisnąć przycisk (8) lub na wschód przycisk (9) i
potwierdzić wybór naciskając przycisk (5).
5.5. Budzik
Ustawianie czasu na świecie
• Naciskać kolejno przycisk (5), aż pojawi się czas normalny (B).
• Nacisnąć i trzymać wciśnięty przez ok. 2 sekundy przycisk (6), aż wskaźnik godzin (E-2)
zacznie migać.
• Po kolei ustawić następujące informacje:
•Godzin (E – 2)
•Minuty
• Aby wybrać poszczególne wartości, nacisnąć przycisk (8) lub (9) i potwierdzić wybór
przyciskiem (6).
• Jeżeli w ciągu 30 sekund nie zostanie wprowadzona żadna wartość, tryb ustawiania jest
automatycznie zamykany i dokonane ustawienia są zapisywane.
• Nacisnąć przycisk (6), aby przez ok. 5 sekund wyświetlić ustawiony czas budzenia.
Włączanie / wyłączanie budzika
• Przesunąć do góry przełącznik suwakowy Alarm (7). Pod przełącznikiem suwakowym
widoczna jest czerwona powierzchnia.
Budzik jest aktywny, a na ekranie (4) wyświetlany jest symbol budzika (E – 3).
• Przesunąć na dół przełącznik suwakowy Alarm (7), powierzchnia z tyłu przełącznika
suwakowego jest czarna.
Budzik jest wyłączony i na ekranie (4) gaśnie symbol budzika (E – 3).
Wyłączanie budzika/ funkcja drzemki
• Jeżeli funkcja budzika jest aktywna, budzik włącza się o odpowiedniej godzinie i przez
minutę rozlega się sygnał budzenia. Następnie budzik wyłącza się automatycznie i
ponownie włącza się następnego dnia o ustawionej godzinie budzenia.
• Aby wcześniej wyłączyć budzik, przesunąć przełącznik suwakowy Alarm (7) w dół,
aż powierzchnia z tyłu przełącznika suwakowego stanie się czarna. Budzik jest teraz
wyłączony.
• Przesunąć przełącznik suwakowy Alarm (7) ponownie do góry, aby uaktywnić budzik na
następny dzień.
Wskazówka – funkcja drzemki
• W trakcie sygnału alarmowego nacisnąć przycisk SNOOZE / LIGHT (1), aby włączyć
funkcję drzemki. Symbol budzika (E – 3) na ekranie (4) zaczyna migać. Sygnał budzika
jest przerywany na 5 minut, a następnie ponownie wyzwalany.
• Funkcję drzemki można wyzwolić cztery razy pod rząd.
5.6. Wskaźnik temperatury
• Naciskać kolejno przycisk (5), aż pojawi się czas normalny (B).
• Nacisnąć i trzymać wciśnięty przez ok. 2 sekundy przycisk WAVE (11), aby zmieniać
wskaźnik temperatury (B – 7) między °C i °F.
• Jeżeli wartości pomiarowe leżą poza granicami zakresu pomiarowego, wyświetlany jest
wskaźnik temperatury (B – 7) Lo (< -40°C/ -40°F) lub HI (> 70°C/ 158°C).
5.7. Podświetlenie ekranu i latarka
• Naciśnięcie przycisku SNOOZE / LIGHT (1) podświetla ekran (4) przez ok. 5 sekund.
• Nacisnąć przycisk (2), aby włączyć zintegrowaną latarkę LED (3).
• Ponownie nacisnąć przycisk (2), aby wyłączyć latarkę LED (3).
Page 49

96 97
5.8. Blokada przycisków
• Przesunąć przełącznik suwakowy Blokada przycisków (14) do góry, na pozycję , aby móc
korzystać ze wszystkich przycisków.
• Przesunąć przełącznik suwakowy Blokada przycisków (14) w dół, na pozycję , aby
wyłączyć wszystkie funkcje przycisków.
• Nadal można jedynie używać przycisku RESET (13) oraz przełącznika suwakowego Alarm
(7).
5.9. Wymiana baterii
• Jeżeli wskaźnik na ekranie (4) staje się słabiej widoczny, należy wymienić baterie – jak
opisano w 4. Uruchamianie .
6. Konserwacja i czyszczenie
Czyścić produkt tylko przy użyciu niestrzępiącej się, lekko zwilżonej szmatki i nie stosować
agresywnych detergentów. Uważać, aby do wnętrza produktu nie wniknęła woda.
7. Wyłączenie odpowiedzialności
Hama GmbH & Co. KG nie udziela gwarancji ani nie odpowiada za szkody wskutek
niewłaściwej instalacji, montażu oraz nieprawidłowego stosowania produktu lub
nieprzestrzegania instrukcji obsługi i/lub wskazówek bezpieczeństwa.
8. Serwis i pomoc techniczna
W razie pytań dotyczących produktu prosimy zwrócić się do infolinii Hama.
Gorąca linia: +49 9091 502-115 (niem./ang.)
Dodatkowe informacje są dostępne na stronie: www.hama.com
9. Dane techniczne
Budzik podróżny RC 170
Zasilanie elektryczne
3,0 V
2 baterie typu AAA
Zakres pomiarowy
Temperatura
-40°C – +70°C
-40°F – +158°F
10. Informacje dotycząca recyklingu
Wskazówki dotyczące ochrony środowiska:
Od czasu wprowadzenia europejskiej dyrektywy 2002/96/EU i 2006/66/EU do
prawa narodowego obowiązują następujące ustalenia: Urządzeń elektrycznych,
elektronicznych oraz baterii jednorazowych nie należy wyrzucać razem z
codziennymi odpadami domowymi! Użytkownik zobowiązany prawnie do
odniesienia zepsutych, zniszczonych lub niepotrzebnych urządzeń elektrycznych i
elektronicznych do punktu zbiórki lub do sprzedawcy. Szczegółowe kwestie regulują przepisy
prawne danego kraju. Informuje o tym symbol przekreślonego kosza umieszczony na
opakowaniu. Segregując odpady pomagasz chronić środowisko!
11. Deklaracja zgodności
Hama GmbH & Co. KG oświadcza niniejszym, że urządzenie to spełnia podstawowe
wymagania i pozostałe właściwe postanowienia dyrektywy 1999/5/WE. Deklaracja
zgodności wg dyrektywy 99/5WE dotyczącej urządzeń radiowych i
telekomunikacyjnych dostępna jest na stronie www.hama.com.
Page 50

98 99
Display City Time
difference
(UTC)
DST
function
Time
zone
LIS Lisbon 0
LONLondon 0
BCN Barcelona +1
PARParis +1
BRU Brussels +1
AMS Amsterdam +1
LUXLuxemburg+1
BRN Bern +1
MIL Milan +1
OSL Oslo +1
CPH Copenhagen +1
ROM Rome +1
BER Berlin +1
PRG Prague +1
VIE Vienna +1
STOStockholm +1
ATHAthens +2
HEL Helsinki +2
JNB Johannesburg+2
Display City Time
difference
(UTC)
DST
function
Time
zone
ISTIstanbul +2
CAICario +2
JRS Jerusalem +2
JED Jeddah +3
THR Tehran +3:30
MOW Moscow +4
DXB Dubai +4
KBL Kabul +4:30
KHI Karachi +5
MLE Male +5
DEL New Delhi +5:30
DAC Dhaka +6
RGNYangon +6:30
BKKBangkok +7
KULKuala Lumpur +8
SINSingapore +8
HKGHong Kong +8
BJSBeijing+8
TPETaiwan+8
SELSeoul +9
Page 51

100 101
Display City Time
difference
(UTC)
DST
function
Time
zone
TYOTokyo +9
ADLAdelaide+9:30
SYDSydney+10
GUMGuam+10
NOU Noumea +11
WLGWellington +12
PPGPago Pago -11
HNL Honolulu -10
ANCAnchorage -9
AST
YVRVancouver -8
SFOSan Francisco -8 PST
LAXLos Angeles-8 PST
DENDenver-7 MST
MEXMexico City -6
CHIChicago -6 CST
MIAMiami -5 EST
TORToronto -5
WASWashington -5 EST
NYCNew York City -5 EST
CCSCaracas -4:30
Display City Time
difference
(UTC)
DST
function
Time
zone
YYTSt. Johns,
Newfoundland
-3:30
RIO Rio de Janeiro-3
RAIPraia
 Loading...