

Hama 00108838, 62108838 Operating Instructions Manual
E
D
GB
I
P
TR
BG
RUS
Operating Instructions
Bedienungsanleitung
Instrucciones de uso
Руководство по эксплуатации
Istruzioni per l‘uso
Manual de instruções
Kullanma kılavuzu
Работна инструкция
“Premium”Digital Weekly Timer
Digitale Wochenzeitschaltuhr
CLOCK
SET
PROG
UP
CLEAR
OK RESET
ON
1
MO
00108838
62108838

1
2 6
3 5
4
2
G Operating instruction
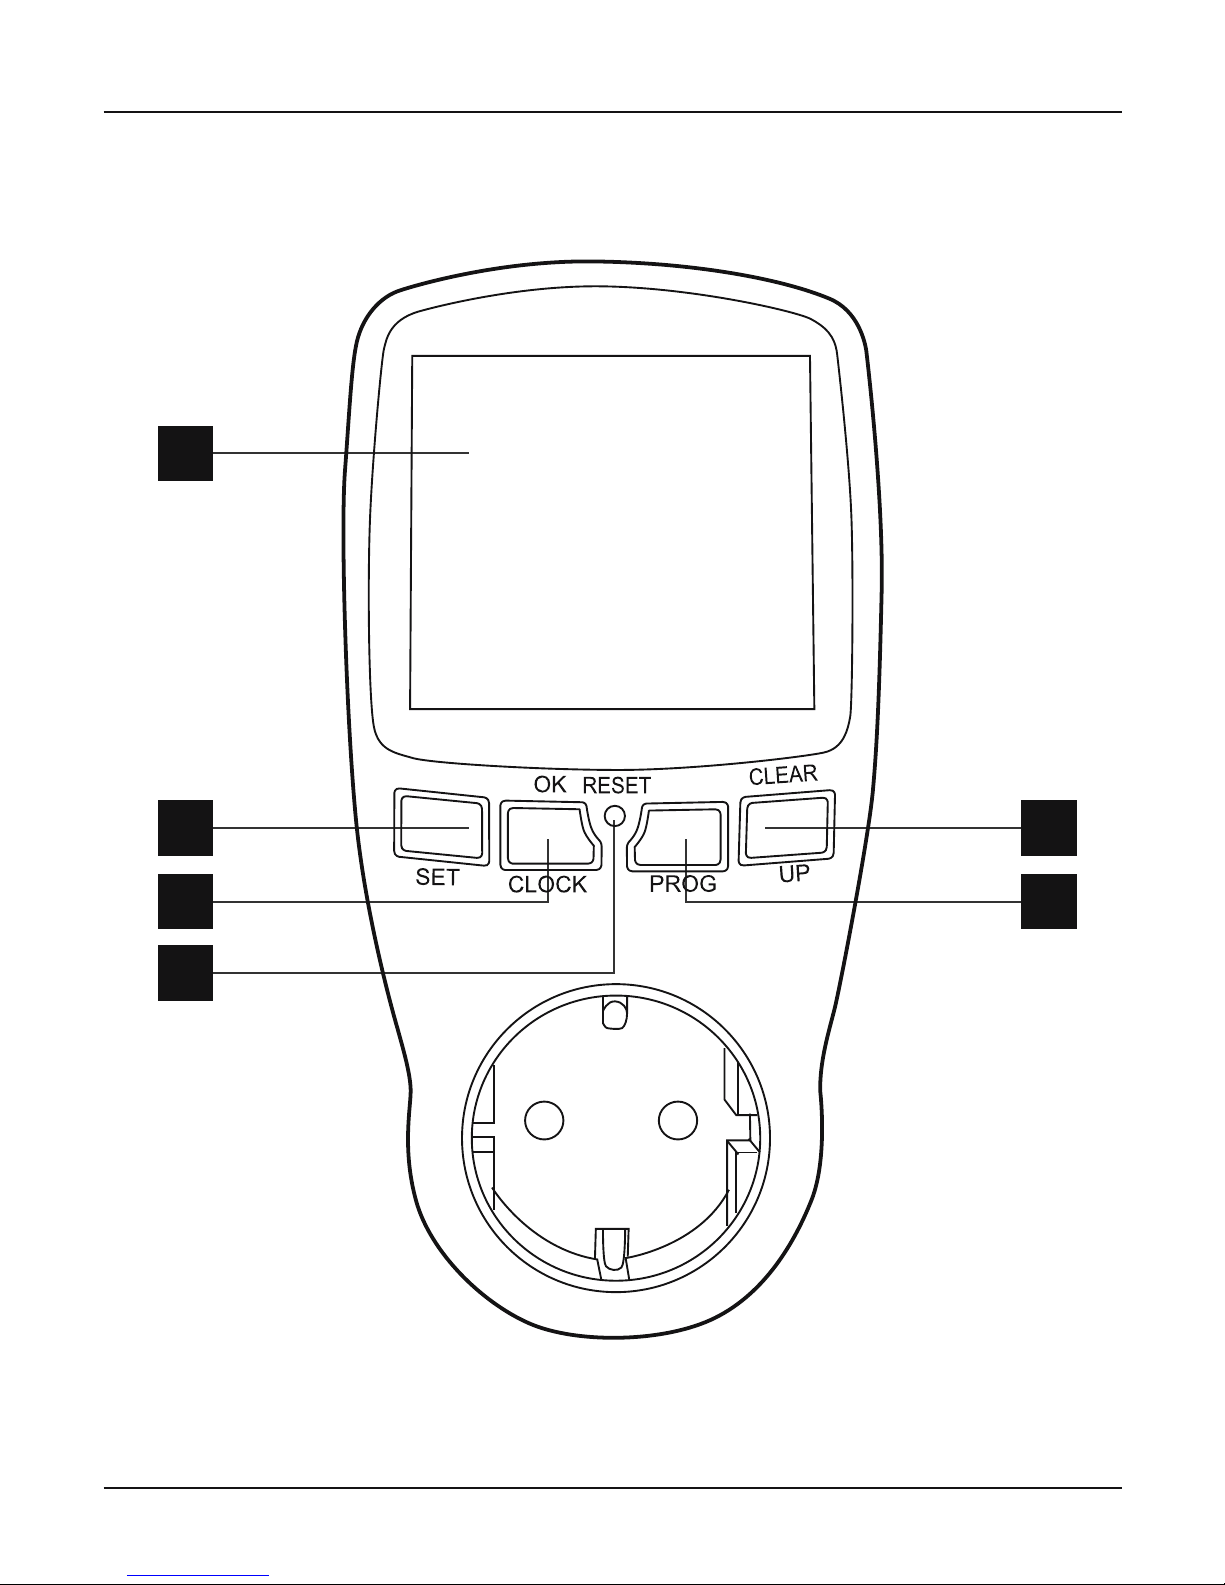
Controls and Displays
1. LCD screen = Displays the time and programme
status
2. SET = Use to select the operating mode or to
adjust hours, minutes and days when entering
the time or setting a programme
3. CLOCK / OK = Sets the time (entry mode) or
conrms the time or programme
4. RESET = Resets all entries
5. PROG = Switches to programming mode
6. UP / CLEAR = Enters values for the time and day
of the week or deletes a programme
Thank you for choosing a Hama product.
Take your time and read the following instructions
and information completely. Please keep these
instructions in a safe place for future reference. If
you sell the device, please pass these operating
instructions on to the new owner.
1. Explanation of Warning Symbols and Notes
Risk of electric shock
This symbol indicates product parts energized
with a dangerous voltage of sucient magnitude
to constitute a risk of electric shock.
Warning
This symbol is used to indicate safety instructions
or to draw your attention to specific hazards
and risks.
Note
This symbol is used to indicate additional
information or important notes.
2. Package Contents
•Digital Weekly Timer
•These operating instructions
3. Safety Notes
•Do not operate the product outside the power
limits given in the specications.
•Protect the product from dirt, moisture and overheating, and only use it in a dry environment.
•The product is intended for indoor use only.
•Do not drop the product and do not expose it to
any major shocks.
•Keep this product, as all electrical products, out of
the reach of children!
•Dispose of packaging material immediately according to locally applicable regulations.
•Do not modify the product in any way. Doing so
voids the warranty.
Warning
• Only connect the product to a socket that has
been approved for the device. The socket must
be installed close to the product and easily
accessible.
•Never connect multiple units of this product
in series.
•Never connect the timer switch to an extension
cable or adapter. It must be plugged directly
into a mains socket. Connecting the timer in
any other way may cause it to overheat.
•Do not use any heat-generating devices (such
as electric blankets, coffee machines, etc.) with
this product. There is a risk of re and injury.
•Do not use this product with any devices
that are motorised or any devices that have a
rotating component or workpiece. There is a
risk of injury.

3
Risk of electric shock
• Do not open the product. Do not continue to
operate the product if it is damaged, which may
be indicated by smoke, odour or loud noises.
Immediately contact your dealer or our service
department (see item “Service and Support”).
•Do not attempt to service or repair the product
yourself. Leave any and all service work to
qualied experts.
•The rechargeable battery may only be replaced
by an authorised technician.
4. Getting Started
With the digital weekly timer switch (also referred to
below as the “timer” or “timer switch”), you can set
user-dened switch-on and switch-off times for your
electric devices.
Note
•If the timer cannot be put into operation, press
and hold the RESET button for a few seconds.
•The device contains a rechargeable battery.
This ensures that the time continues to run
even if the timer switch is not plugged into an
electrical socket. The times that have already
been programmed also remain saved.
•The rechargeable battery is charged during
operation.
•The internal rechargeable battery will discharge
if the timer switch is not used for longer periods
of time. Plug the timer switch into a mains plug
for approx. 24 hours every 3 months to charge
the internal rechargeable battery.
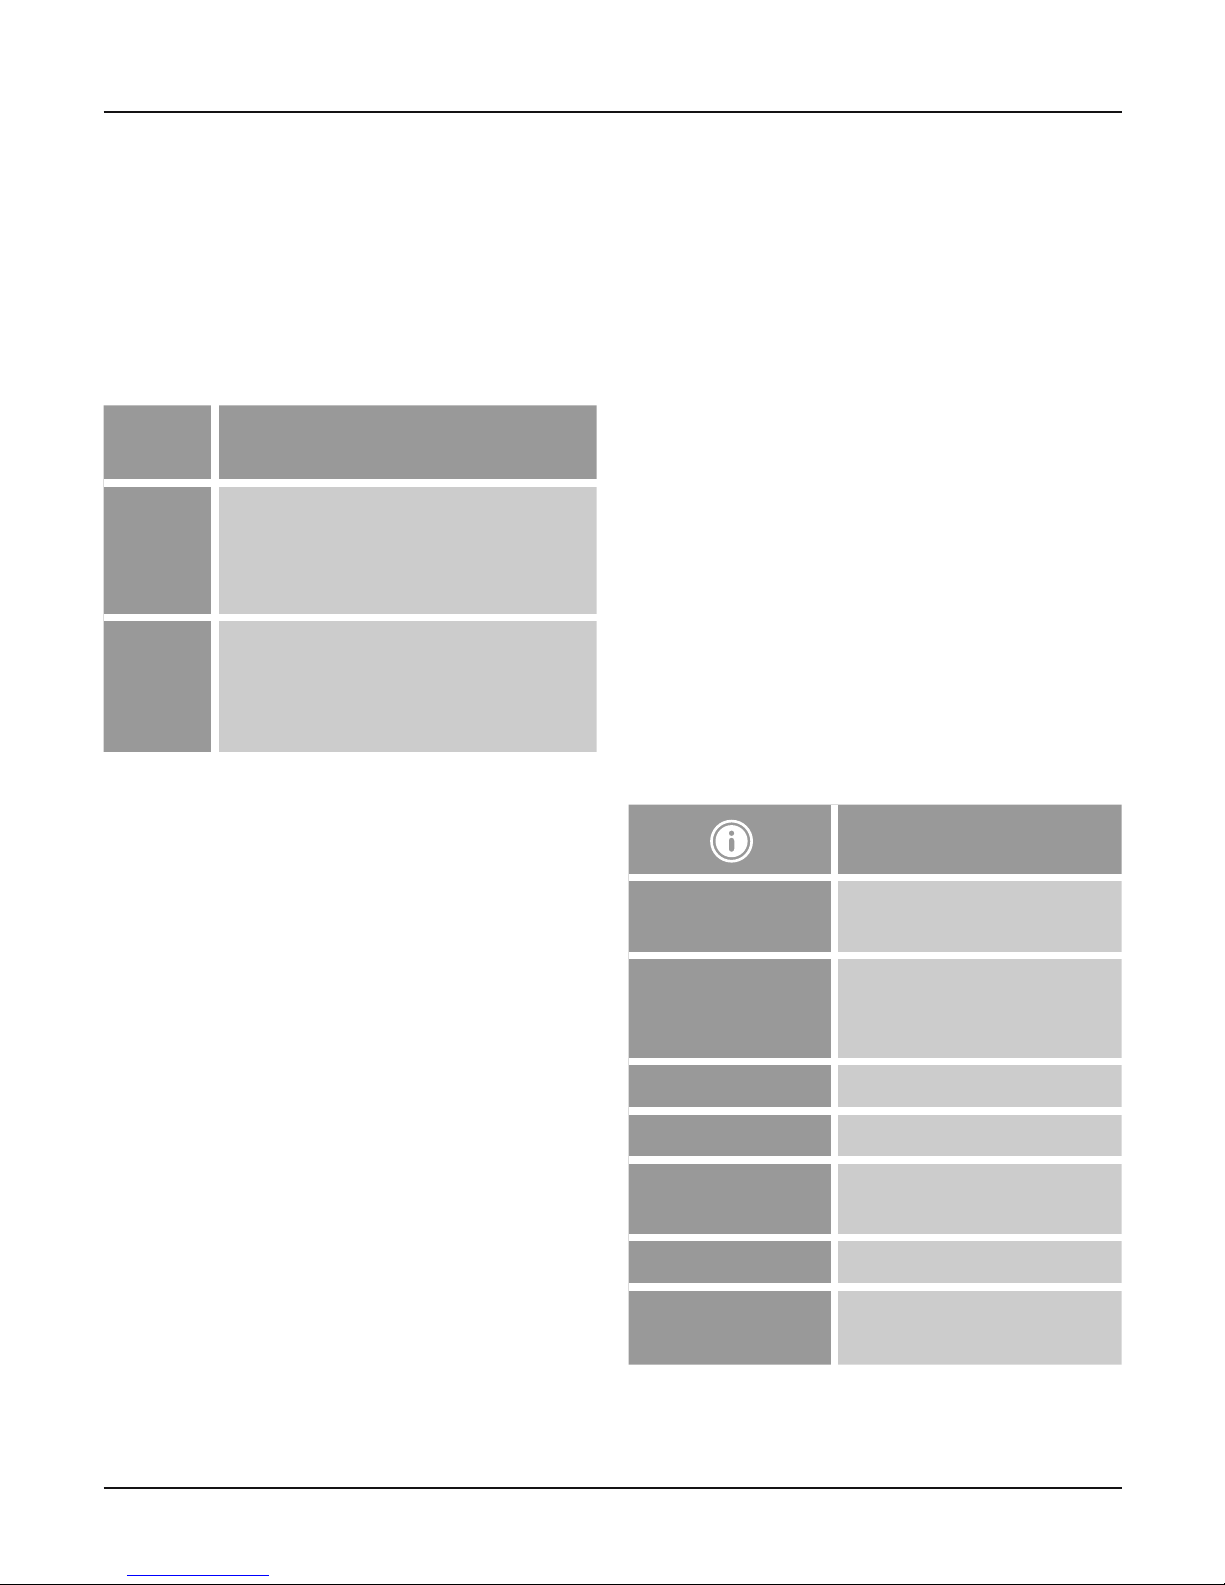
4.1 Setting the time and day of the week
You can choose to display the time in 12-hour or
24-hour format.
In 24-hour mode, the time runs from 0:00 to 23:59.
In 12-hour mode, the clock differentiates between
morning (AM) and afternoon (PM) hours:
Morning – AM –
00:00 AM to 12:59 AM
Afternoon/evening – PM –
01:00 PM to 11:59 PM
•Simultaneously press the CLOCK / OK and PROG
buttons to switch between the two time display
modes.
•To set the current time and the day of the week,
hold down the CLOCK / OK button for three
seconds.
CLOCK, HOURS, MINUTES
and
WEEKS
are displayed on the LCD. You are now in entry
mode.
•When you press the SET button, a small triangle in
front of the HOURS display begins to ash. Enter
the current hour by pressing UP / CLEAR.
•To switch to the minute setting, press SET again.
A small triangle in front of the
MINUTES
display
ashes. Press the UP / CLEAR button until the
desired minute value is displayed.
•After you have entered the time, you can select the
day of the week. To do so, press the SET button
again. The small triangle in front of
WEEKS
begins
to ash, signalling that the device is ready for your
entry. Select the day in the same way as the time,
using UP / CLEAR.
•Once you have entered all data correctly, press
CLOCK / OK. This causes you to exit entry mode.
•If no button is pressed for an extended period of
time when you are entering the time or day of the
week, the timer switch automatically exits entry
mode. The last conrmed entries are applied.
Special summer time feature
•You can switch between winter time and summer
time by simultaneously pressing the CLOCK and
SET buttons. Summer time is indicated on the
display by
SUMMER
, meaning that the time has
been automatically set one hour ahead of winter
time.
•The switch-on and switch-off times that have
been set remain unchanged and must be adjusted
manually to summer time if required.
4
4.2 Programming the switch-on and switch-off
times
You can set up to 16 switching times using the
“Premium” digital timer switch. The programming
required can be performed in just a few steps.
•Press the PROG button to switch to programming
mode. As when setting the time,
HOURS, MIN-
UTES
and
WEEKS
appears on the display.
•
PROGRAM
is also displayed on the bottom left.
1 ON
is displayed next to this.
1 ON
refers to the
switch-on time of the rst programme.
•Pressing PROG a second time changes the display
from
1 ONto1 OFF
. This refers to the switch-off
time of the rst programme.
•To select programmes 2 to 16, press PROG the
corresponding number of times.
1 ON 1 OFF
……
16 ON 16 OFF
•After you have chosen a programme number, press
the SET button. A small triangle ashes in front of
the
HOURS
display. Set the desired hour using the
UP / CLEAR button.
•To switch to the minute setting, press SET again.
A small triangle ashes in front of the
MINUTES
display. Press the UP / CLEAR button until the
desired minute value is displayed.
•After you have entered the time, you can select the
day of the week. To do so, press the SET button again.
The small triangle begins to ash in front of
WEEKS
,
indicating that the device is ready for your entry.
•You can choose from the following options using
UP / CLEAR:
MO > TU > WE > TH > FR > SA > SU
MO TU WE TH FR
SA SU
MO TU WE TH FR SA
MO WE FR
TU TH SA
MO TU WE
TH FR SA
MO TU WE TH FR SA SU
•If you have correctly entered the time and day(s) of
the week for the switch-on time (e.g.
1 ON
), press
PROG again in order to set the switch-off time
(e.g.
1 OFF
). To enter the time, repeat the steps
outlined above.
•Press CLOCK / OK to leave programming mode.
•If no button is pressed for an extended period of
time during programming, the display returns to the
current time. Your conrmed entries will be saved.
Note
•To change a program that has already been
created, repeat the steps outlined above.
•To delete a switch-on or switch-off time, rst
press PROG, then UP / CLEAR.
4.3 Manual and automatic operation
You can toggle between the operating modes
AUTO,
ON
and
OFF
using the SET button.
•
AUTO
: the device connected to the timer is
switched on and off at the times that have been
programmed.
•
ON
: the device connected to the timer remains on
at all times; the programmes are not executed.
•
OFF
: the device connected to the timer is turned
off at all times; the programmes are not executed.
4.4 Countdown
•Switch into operating mode
ONorOFF
.
•To enable or disable the countdown function, rst
press PROG and UP / CLEAR at the same time
and then press SET.
•To set the desired countdown length, press UP /
CLEAR and then press CLOCK / OK to conrm.
Operating
mode
Countdown function
OFF
When the countdown is complete
(00:00), the connected terminal
device is switched on and the timer
switch goes into operating mode
ON
.
ON
When the countdown is complete
(00:00), the connected terminal device
is switched off and the timer switch
goes into operating mode
OFF
.

5
4.5 Random mode
When random mode is activated, the connected
terminal device is switched on/off at irregular
intervals between 18:00 and 06:00.
•First plug the timer switch and terminal device into
a mains socket as described in section
5. Operation
.
•Random mode can only be activated or
deactivated when the timer switch and a terminal
device are plugged in.
•Switch into operating mode
AUTO
.
•Press SET and UP / CLEAR at the same time to
activate or deactivate random mode.
When random mode is activated, programs 1–16 are
automatically deactivated.
5. Operation
•Please note that the electrical device must be
switched on.
•Set the on/off programmes and the operating
mode (AUTO, ON, OFF) on the timer as instructed
above.
•Connect the power cable of the device to be connected (e.g. fairy lights) to the timer socket, then
plug the timer switch into a mains socket.
•The electrical device is then controlled accordingly
by the timer switch.
6. Care and Maintenance
•Disconnect the device from the mains before
cleaning it.
•Only clean this product with a slightly damp, lint-free
cloth and do not use aggressive cleaning agents.
7. Warranty Disclaimer
Hama GmbH & Co. KG assumes no liability and
provides no warranty for damage resulting from
improper installation/mounting, improper use of
the product or from failure to observe the operating
instructions and/or safety notes.
8. Service and Support
Please contact Hama Product Consulting if you have
any questions about this product.
Hotline: +49 9091 502-115 (German/English)
Further support information can be found here:
www.hama.com
9. Technical Data
Digital Weekly Timer
Voltage 230 V ~ / 50 Hz
Maximum connection power
16(2) A, 3,500 W; i.e. up to
16 A for resistive loads and
up to 2 A for inductive loads
Protection Class 1
Degree of protection
IP20
Operating temperature
0°C – +50°C
Standby power approx. 0.6 W
Minimum timesetting interval
1 minute
10. Recycling Information
Note on environmental protection:
After the implementation of the European
Directive 2012/19/EU and 2006/66/EU in
the national legal system, the following
applies: Electric and electronic devices as
well as batteries must not be disposed of
with household waste. Consumers are obliged by law
to return electrical and electronic devices as well as
batteries at the end of their service lives to the public
collecting points set up for this purpose or point of
sale. Details to this are dened by the national law of
the respective country. This symbol on the product,
the instruction manual or the package indicates that
a product is subject to these regulations. By
recycling, reusing the materials or other forms of
utilising old devices/Batteries, you are making an
important contribution to protecting our
environment.
6
D Bedienungsanleitung
Bedienungselemente und Anzeigen
1. LCD-Display (unbeleuchtet)
2. SET = Wechsel zwischen den Betriebsmodi (
ON/
AUTO/ OFF
) / Bestätigung des Einstellungswerts
3.
CLOCK / OK = Einstellung der Uhrzeit / Bestäti-
gung bei Uhrzeit und Programmierung
4. RESET = Zurücksetzung auf Werkseinstellung
5. PROG = Wechsel Programmiermodus
6. UP / CLEAR = Erhöhung des Einstellungswerts /
Löschen von Programmen
Vielen Dank, dass Sie sich für ein Hama Produkt
entschieden haben!
Nehmen Sie sich Zeit und lesen Sie die folgenden
Anweisungen und Hinweise zunächst ganz durch.
Bewahren Sie diese Bedienungsanleitung anschließend an einem sicheren Ort auf, um bei Bedarf
darin nachschlagen zu können. Sollten Sie das Gerät
veräußern, geben Sie diese Bedienungsanleitung an
den neuen Eigentümer weiter.
1. Erklärung von Warnsymbolen und Hinweisen
Gefahr eines elektrischen Schlages
Dieses Symbol weist auf eine Berührungsgefahr
mit nicht isolierten Teilen des Produktes hin,
die möglicherweise eine gefährliche Spannung
von solcher Höhe führen, dass die Gefahr eines
elektrischen Schlags besteht.
Warnung
Wird verwendet, um Sicherheitshinweise zu
kennzeichnen oder um Aufmerksamkeit auf
besondere Gefahren und Risiken zu lenken.
Hinweis
Wird verwendet, um zusätzlich Informationen
oder wichtige Hinweise zu kennzeichnen.
2. Packungsinhalt
•Digitale Wochenzeitschaltuhr
•diese Bedienungsanleitung
3. Sicherheitshinweise
•Betreiben Sie das Produkt nicht außerhalb
seiner in den technischen Daten angegebenen
Leistungsgrenzen.
•Schützen Sie das Produkt vor Schmutz, Feuchtigkeit und Überhitzung und verwenden Sie es nur in
trockenen Umgebungen.
•Das Produkt ist nur für den Gebrauch innerhalb
von Gebäuden vorgesehen.
•Lassen Sie das Produkt nicht fallen und setzen Sie
es keinen heftigen Erschütterungen aus.
•Dieses Produkt gehört, wie alle elektrischen
Produkte, nicht in Kinderhände!
•Entsorgen Sie das Verpackungsmaterial sofort gemäß den örtlich gültigen Entsorgungsvorschriften.
•Nehmen Sie keine Veränderungen am Produkt vor.
Dadurch verlieren Sie jegliche Gewährleistungsansprüche.
Warnung
• Betreiben Sie das Produkt nur an einer dafür
zugelassenen Steckdose. Die Steckdose muss in
der Nähe des Produktes angebracht und leicht
zugänglich sein.
•Stecken Sie niemals mehrere Exemplare dieses
Produktes hintereinander in Reihe.
•Schließen Sie die Zeitschaltuhr niemals an ein
Verlängerungskabel oder einen Adapter an,
sondern nur direkt an die Steckdose, da dies
sonst zu Überhitzung führen kann.
•Betreiben Sie keine wärmeerzeugenden
Endgeräte (z.B. Heizdecken, Kaffeemaschinen,
etc.) an diesem Produkt. Es besteht Brand- und
Verletzungsgefahr!
•Betreiben Sie keine motorgetriebenen
Endgeräte oder Endgeräte, die ein rotierendes
Geräteteil oder Werkzeug antreiben, mit diesem
Produkt. Es besteht Verletzungsgefahr!
7
Gefahr eines elektrischen Schlages
•Öffnen Sie das Produkt nicht und betreiben Sie
es bei Beschädigungen, davon ausgehender
Rauchentwicklung, Geruchsbildung oder lauten
Geräuschen nicht weiter. Wenden Sie sich
umgehend an Ihren Händler oder unsere Servi
-
ceabteilung (siehe Pkt. Service und Support).
•Versuchen Sie nicht, das Produkt selbst zu warten oder zu reparieren. Überlassen Sie jegliche
Wartungsarbeit dem zuständigen Fachpersonal.
•Der wiederauadbare Akku darf nur von einer
autorisierten Fachkraft gewechselt werden.
4. Inbetriebnahme
Hinweis
•Sollte sich die Zeitschaltuhr nicht in Betrieb
nehmen lassen, drücken Sie für einige Sekunden RESET.
•In der Zeitschaltuhr bendet sich ein wiederauadbarer Akku. Dadurch wird gewährleistet,
dass die Uhrzeit weiterläuft, auch wenn die
Zeitschaltuhr einmal nicht mit einer Steckdose
verbunden ist. Die bereits programmierten
Zeiten bleiben ebenfalls gespeichert.
•Der wiederauadbare Akku wird während dem
Betrieb geladen.
• Bei längerer Nichtbenutzung entlädt sich der
interne Akku. Stecken Sie die Zeitschaltuhr
alle 3 Monate für ca. 24 Stunden in eine
Steckdose, um den internen Akku zu laden.
•Stecken Sie die Zeitschaltuhr in eine zugelassene
und leicht erreichbare Steckdose, um den integrierten Akku aufzuladen.
4.1 Grundeinstellungen
12/24-Stunden-Format
•Drücken Sie CLOCK / OK und PROG gleichzeitig,
um zwischen dem 12- und 24-Stunden-Format zu
wechseln.
Zeitanzeige Vormittag Nachmittag
12-StundenFormat
AM 00:00 –
12:59
PM 01:00 –
11:59
24-StundenFormat
00:00 – 11:59 12:00 – 23:59
Wochentag & Uhrzeit
•Drücken und halten Sie CLOCK / OK bis
CLOCK,
HOURS, MINUTES
und
WEEKS
auf dem LCD-
Display angezeigt werden.
•Drücken Sie SET, um folgende Informationen
nacheinander einzustellen:
- Stunden (aktuelle Uhrzeit)
- Minuten (aktuelle Uhrzeit)
- Wochentag (
MO, TU, WE, TH, FR, SA, SO
)
•V
or der aktuell einzustellenden Option blinkt ein
Dreieck auf.
•Drücken Sie zum Auswählen der einzelnen Werte
UP / CLEAR und bestätigen Sie die jeweilige
Auswahl durch Drücken von SET.
•Nach Auswahl des Wochentages drücken Sie
CLOCK / OK, um die Einstellungen zu speichern.
•Erfolgt ca. 20 Sekunden keine Eingabe, wird der
Einstellungsmodus automatisch verlassen und die
vorgenommenen Einstellungen gespeichert.
Sommer-/ Winterzeit
•Drücken Sie CLOCK / OK und SET gleichzeitig, um
die Sommerzeit zu aktivieren. Die Uhrzeit wird eine
Stunde vorgestellt und auf dem LCD-Display wird
SUMMER
angezeigt.
•Drücken Sie erneut CLOCK / OK und SET
gleichzeitig, um die Sommerzeit zu deaktivieren
bzw. die Winterzeit zu aktivieren. Die Uhrzeit wird
eine Stunde zurückgestellt und
SUMMER
auf dem
Display erlischt.
Hinweis – Sommer-/Winterzeit
Beachten Sie, dass die programmierten Ein- und
Ausschaltzeiten der Zeitschaltuhr beim Wechsel
auf Sommer-/ Winterzeit unverändert bleiben und
bei Bedarf manuell angepasst werden müssen.

8
4.2 Programmierung
•Drücken Sie PROG, um von der Anzeige der
aktuellen Uhrzeit in den Programmiermodus
zu wechseln. Es wird
HOURS, MINUTES
und
WEEKS
sowie
1ON
angezeigt.
•Drücken Sie wiederholt PROG, um zwischen den
Programmen (1-16) und deren Ein (
ON
)- und
Ausschaltzeiten (
OFF
) zu wechseln.
•Abfolge:
1 ON 1 OFF
……
16 ON 16 OFF
•Wird das gewünschte Programm – z.B.
3ON
–
angezeigt, drücken Sie SET, bis das Dreieck vor
HOURS
zu blinken beginnt.
•Stellen Sie folgende Informationen nacheinander ein:
-
Stunden: Uhrzeit, zu der das angeschlossene
Endgerät ein-/ ausgeschaltet werden soll
- Minuten: Uhrzeit, zu der das angeschlossene
Endgerät ein-/ ausgeschaltet werden soll
-
Wochentage, an denen das angeschlossene Endgerät ein-/ ausgeschalten werden soll (siehe Tabelle)
Anzeige Programm gültig für
MO > TU > WE > TH
> FR > SA > SU
Einzelnen Tag: Montag >
Dienstag > Mittwoch >
Donnerstag > Freitag >
Samstag ODER Sonntag
MO TU WE TH FR
Montag bis Freitag
SA SU
Samstag und Sonntag
MO TU WE TH FR SA
Montag bis Samstag
MO WE FR
Montag, Mittwoch und
Freitag
TU TH SA
Dienstag, Donnerstag
und Samstag
MO TU WE
Montag bis Mittwoch
TH FR SA
Donnerstag bis
Samstag
MO TU WE TH FR
SA SU
Jeden Wochentag
•Drücken Sie zum Auswählen der einzelnen Werte
UP / CLEAR und bestätigen Sie die jeweilige
Auswahl durch Drücken von SET.
•Drücken Sie erneut PROG, um ggf. weitere
Programme auszuwählen und nehmen Sie die
Einstellungen entsprechend vor.
•Drücken Sie CLOCK /OK, um den Programmiermodus zu verlassen
•Erfolgt ca. 20 Sekunden keine Eingabe, wird der
Programmiermodus automatisch verlassen und die
vorgenommenen Einstellungen gespeichert.
Hinweis
•Achten Sie darauf, zu jedem Programm die Einund Ausschaltzeit zu programmieren.
•Um ein bereits erstelltes Programm zu
verändern, nehmen Sie die Einstellungen wie
oben beschrieben erneut vor und überspeichern
dadurch die ursprüngliche Programmierung.
•Zum Löschen eines Ein- bzw. Ausschaltzeitpunktes drücken Sie zuerst PROG und
anschließend UP / CLEAR.
4.3 Betriebsmodus
Drücken Sie wiederholt SET, um zwischen den
Betriebsmodi (
AUTO/ OFF/ ON
) zu wechseln. Der ak-
tuelle Betriebsmodus wird auf dem Display angezeigt.
Betriebsmodus
Funktion
AUTO
Das angeschlossene Endgerät wird zu
den programmierten Zeiten ein- bzw.
ausgeschaltet.
OFF
Das angeschlossene Endgerät bleibt
dauerhaft ausgeschalten. Eingestellte
Programme werden nicht ausgeführt.
ON
Das angeschlossene Endgerät bleibt
dauerhaft eingeschalten. Eingestellte
Programme werden nicht ausgeführt.
9
4.4 Countdown
•Wechseln Sie in den Betriebsmodus
ON
oder
OFF
.
•Drücken Sie PROG und UP / CLEAR gleichzeitig
und danach SET, um die Countdown-Funktion zu
aktivieren/ deaktivieren.
•Drücken Sie zum Einstellen der gewünschten
Countdown-Dauer UP / CLEAR und bestätigen Sie
durch Drücken von CLOCK / OK.
Betriebsmodus
Countdown-Funktion
OFF
Nach Ablauf der Countdown-Dauer
(00:00) wird das angeschlossene Endgerät eingeschaltet und die Zeitschaltuhr wechselt in den BetriebsmodusON.
ON
Nach Ablauf der Countdown-Dauer
(00:00) wird das angeschlossene Endgerät ausgeschaltet und die Zeitschaltuhr
wechselt in den Betriebsmodus
OFF
.
4.5 Random (Zufallsmodus)
Bei aktiviertem Zufallsmodus wird das angeschlossene Endgerät zwischen 18:00 und 06:00 Uhr in
unregelmäßigen Abständen ein- bzw. ausgeschalten.
•Stecken Sie zunächst Zeitschaltuhr und Endgerät
wie in
5. Betrieb
beschrieben an die Steckdose an.
•Aktivierung/ Deaktivierung vom Zufallsmodus ist
nur bei eingesteckter Zeitschaltuhr inkl. Endgerät
möglich.
•Wechseln Sie in den Betriebsmodus
AUTO
.
•Drücken Sie SET und UP / CLEAR gleichzeitig, um
den Zufallsmodus zu aktivieren/ deaktivieren.
Während des aktivierten Zufallsmodus sind die
Programme 1-16 automatisch deaktiviert.
5. Betrieb
•Beachten Sie, dass Ihr Endgerät eingeschalten
sein muss.
•Stecken Sie das Endgerät über den Netzstecker an
der Steckdose der Zeitschaltuhr an.
•Stecken Sie die Zeitschaltuhr in eine zugelassene
und leicht erreichbare Steckdose.
•Das Endgerät wird dann entsprechend Ihrer Einstellungen über die Zeitschaltuhr ein- und ausgeschaltet.
6. Wartung und Pege
•Gerät vor der Reinigung vom Netz trennen.
•Reinigen Sie dieses Produkt nur mit einem fusselfreien, leicht feuchten Tuch und verwenden Sie
keine aggressiven Reiniger. Achten Sie darauf, dass
kein Wasser in das Produkt eindringt.
7. Haftungsausschluss
Die Hama GmbH & Co. KG übernimmt keinerlei
Haftung oder Gewährleistung für Schäden, die
aus unsachgemäßer Installation, Montage und
unsachgemäßem Gebrauch des Produktes oder einer
Nichtbeachtung der Bedienungsanleitung und/oder
der Sicherheitshinweise resultieren.
8. Service und Support
Bitte wenden Sie sich bei Fragen zum Produkt gerne
an die Hama-Produktberatung.
Hotline: +49 9091 502-115 (Deu/Eng)
Weitere Supportinformationen nden sie hier:
www.hama.com
9. Technische Daten
Zeitschaltuhr
Elektrische
Spannung
230 V ~ / 50 Hz
Max. Anschlussleistung
16 (2) A, 3500 W; d.h. bei
ohmscher Last max. 16 A /
bei induktiver Last max. 2 A
Schutzklasse 1
Schutzart IP20
Betriebstemperatur
0°C – +50°C
Standby-Power ca. 0.6 W
Zeiteinstellungsintervall
1 Minute

10
10. Entsorgungshinweise
Hinweis zum Umweltschutz:
Ab dem Zeitpunkt der Umsetzung der
europäischen Richtlinien 2012/19/EU und
2006/66/EG in nationales Recht gilt
folgendes: Elektrische und elektronische
Geräte sowie Batterien dürfen nicht mit
dem Hausmüll entsorgt werden. Der Verbraucher ist
gesetzlich verpichtet, elektrische und elektronische
Geräte sowie Batterien am Ende ihrer Lebensdauer
an den dafür eingerichteten, öffentlichen
Sammelstellen oder an die Verkaufsstelle
zurückzugeben. Einzelheiten dazu regelt das
jeweilige Landesrecht. Das Symbol auf dem Produkt,
der Gebrauchsanleitung oder der Verpackung weist
auf diese Bestimmungen hin. Mit der
Wiederverwertung, der stoichen Verwertung oder
anderen Formen der Verwertung von Altgeräten/
Batterien leisten Sie einen wichtigen Beitrag zum
Schutz unserer Umwelt.

11
E Instrucciones de uso
Elementos de manejo e indicadores
1. Pantalla LCD = Indicación de la hora y del estado
del programa
2. SET = Selección del modo de funcionamiento o
de horas, minutos y días de la semana cuando se
introduce la hora o durante la programación
3. CLOCK / OK = Ajuste de la hora (modo de
entrada) o tecla de conrmación para la hora y
la programación
4. RESET = Restablecer todas las entradas
5. PROG = Cambio al modo de programación
6. UP / CLEAR = Entrada de valores de hora y día
de la semana o borrar un programa
Le agradecemos que se haya decidido por un
producto de Hama.
Tómese tiempo y léase primero las siguientes instrucciones e indicaciones. Después, guarde estas instrucciones
de manejo en un lugar seguro para poder consultarlas
cuando sea necesario. Si vende el aparato, entregue
estas instrucciones de manejo al nuevo propietario.
1.
Explicación de los símbolos de aviso y de las
indicaciones
Peligro de sufrir una descarga
eléctrica
Este símbolo hace referencia al peligro de contacto
con partes no aisladas del producto que pueden
conducir una tensión peligrosa de una intensidad
tal que puede provocar una descarga eléctrica.
Aviso
Se utiliza para caracterizar las indicaciones de
seguridad o para llamar la atención sobre peligros
y riesgos especiales.
Nota
Se utiliza para caracterizar informaciones
adicionales o indicaciones importantes.
2. Contenido del paquete
•Temporizador semanal digital
•Instrucciones de uso
3. Instrucciones de seguridad
• No opere el producto fuera de los límites de
potencia indicados en los datos técnicos.
•Proteja el producto de la suciedad, la humedad y
el sobrecalentamiento y utilícelo sólo en recintos
secos.
•El producto está diseñado sólo para el uso dentro
de edicios.
•No deje caer el producto ni lo someta a sacudidas
fuertes.
•Este aparato, como todos los aparatos eléctricos,
no debe estar en manos de los niños.
•Deseche el material de embalaje en conformidad
con las disposiciones locales sobre el desecho
vigentes.
•No realice cambios en el aparato. Esto conllevaría
la pérdida de todos los derechos de la garantía.
Aviso
• Utilice el producto sólo conectado a una toma
de corriente autorizada. La toma de corriente
debe estar colocada cerca del producto y de
forma accesible.
•Nunca conecte en serie varios ejemplares de
este producto.
•No conecte nunca el temporizador a un cable
de prolongación o a un adaptador, sino sólo
directamente a la toma de corriente; de otro
modo, hay peligro de sobrecalentamiento.
•No conecte terminales generadores de calor
(como mantas eléctricas, cafeteras, etc.) a este
producto. Existe peligro de incendio y de sufrir
lesiones.
•No utilice terminales a motor o terminales que
accionen partes o herramientas rotatorias con
este producto. Existe peligro de sufrir lesiones.
 Loading...