

Page 1

P O Box 80 · 86651 Monheim/Germany
Phone: +49 9091 502-0
Fax: +49 9091 502-458
http://www.hama.com
All listed brands are trademarks of the corresponding companies. Errors and omissions excepted,
and subject to technical changes. Our general terms of delivery and payment are applied.
0 0062870-62871/02.07
Page 2
COMPUTER
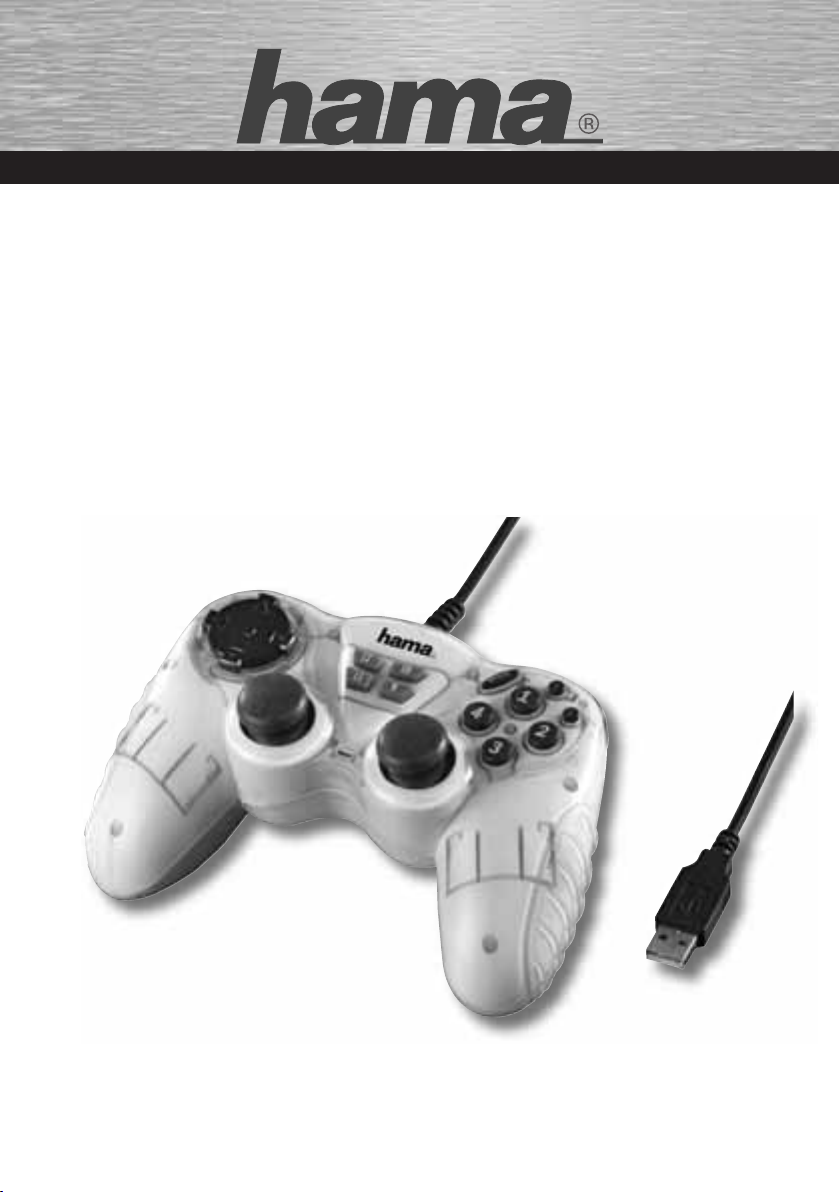
PC-Gamepad
»Flashlight Blue« (62870)
»Flashlight Red« (62871)
00062870
00062871
Page 3
2
1
7
6
3
4
5
Rückseite
Reverse
Revers
8
2
Page 4
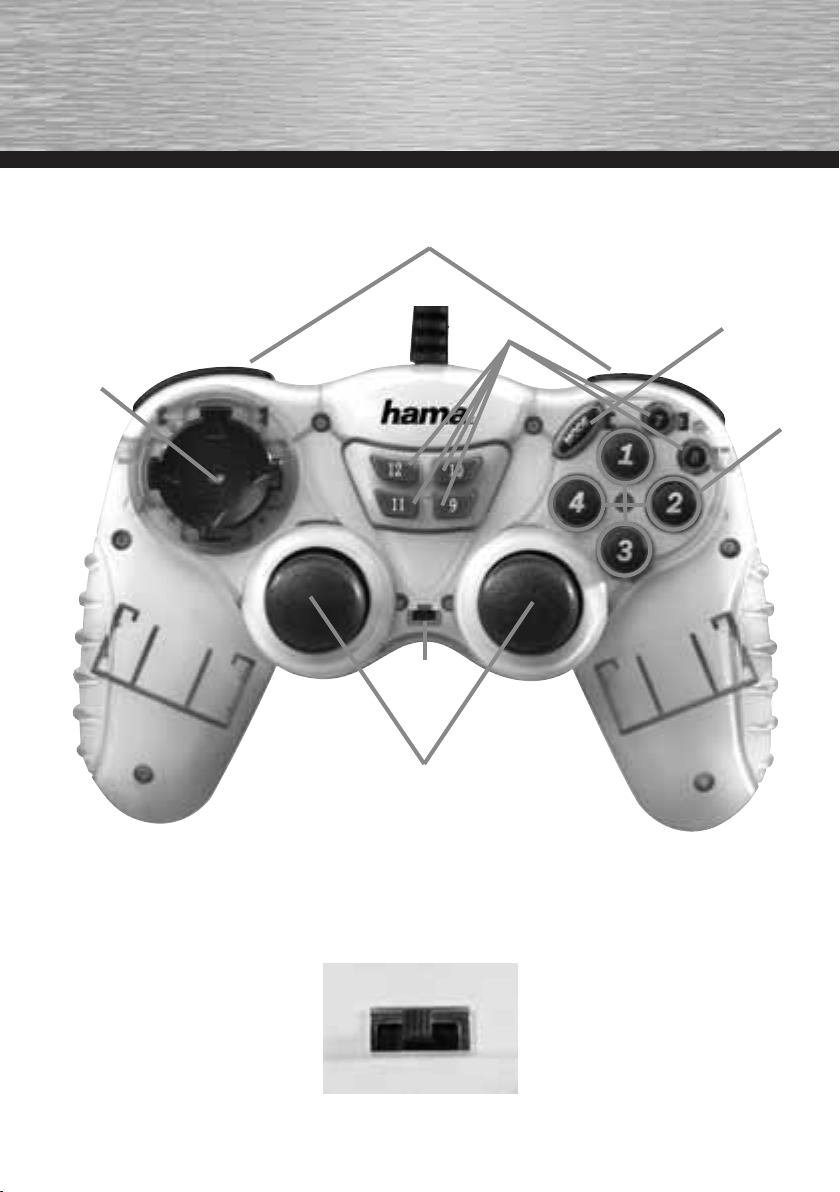
1 . 8-Wege Steuerkreuz 2. 2 Schultertasten 3. Sekundäre Funktionstasten
4. Umschalttaste Digital/Analog/Wheel 5. Primäre Funktionstasten 6. Analogsticks
7. Mode-LED 8. Lichtschalter
1. Eight-way controller 2. Two shoulder buttons 3. Secondary function keys
Digital/analogue/wheel switching button
4.
7. Mode LED 8. Light switch
5. Primary function buttons 6. Analogue sticks
1. Croix octodirectionnelle 2. 2 gâchettes 3.
4. Touche de commutation analogique/
numérique/wheel
7. DEL de mode 8. Commutateur d‘éclairage
5.
To uches de fonction primaires
To uches de fonction secondaires
6. Sticks analogiques
3
Page 5
d
Bedienungsanleitung
I. Vorstellung
Wir freuen uns, dass Sie die das Hama Flashlight
Pad gewählt haben und gratulieren Ihnen zu dieser
Entscheidung. Wir sind überzeugt, dass Ihnen unser
Produkt in den nächsten Jahren eine Menge Spaß
beim Spielen bereiten wird. Diese Kurzanleitung
enthält wertvolle Hinweise zur Bedienung und
Konfi guration des Gamepads. Bitte bewahren
Sie diese Anleitung zum Nachschlagen an einem
sicheren Ort auf.
II. Produkt-Eigenschaften
• 12 programmierbare Tasten
• 2 Analog-Sticks 360°
• Analog-/Digital-/Wheelfunktion umschaltbar
• 2 eingebaute Motoren für Vibration
• Lichteffekte in 3 Stufen (Leuchten/Blinken/Aus)
(blau: 62870; rot: 62871)
III. Systemvoraussetzungen
• für Windows 98SE/ME/2000/XP/Vista
• USB-Port
Hinweis:
Bitte beachten Sie, dass USB-Betrieb nicht von
Windows 95 / NT unterstützt wird.
IV. Installation
Software Installation
1. Legen Sie die mitgelieferte Treiber-CD in ihr
Laufwerk ein.
2. Das Installationsprogramm wird automatisch
gestartet.
3. Sollte dies nicht der Fall sein, so führen Sie
folgende Aktion durch: START > Ausführen >
Durchsuchen
Und wählen Sie ihr CD-Laufwerk aus.
4. Doppelklicken Sie dann auf die Datei autorun.exe.
5. Folgen Sie dann den Schritten des Installations programm.
6. Starten Sie Ihren PC neu.
Hardware Installation
1. Verbinden Sie das USB-Kabel Ihres Gamepads
nach der Softwareinstallation mit dem USB Anschluss Ihres Computers. Unter Umständen
wird ihr Betriebssystem Sie auffordern ihre
Windows-CD einzulegen, um die neue Hardware Komponente zu installieren.
2. Zur Konfi guration klicken Sie auf: START >
Einstellungen > Systemsteuerung > Gamecontroller
(Windows XP in der Standard-Ansicht: Start >
Systemsteuerung > Drucker und andere Hardware >
Gamecontroller)
Bitte beachten Sie, dass die Anwendung Game controller bei Windows ME als Spieleoptionen
bezeichnet wird.
3. Wählen Sie Hama Flashlight Pad.
4. Klicken Sie nun auf Eigenschaften, um im Menü
alle Funktionen inklusive Vibration zu testen und
zu kalibrieren.
V. Funktionen
Vibrations-Funktion
Das Flashlight Pad verfügt über zwei interne
Motoren, die nur in Spielen funktionieren, die
auch Force Feedback unterstützen und wenn alle
beiliegenden Treiber installiert sind. Informationen
ob das Spiel Vibration unterstützt, sollten Sie im
Handbuch des Spieles fi nden. Sollten weiterhin
Probleme auftreten, kontrollieren sie in den
Spieloptionen, ob die Vibrations-Unterstützung
aktiviert wurde.
Mode-Funktionen
Das Hama Flashlight Pad lässt Ihnen die Wahl
zwischen drei Modi:
1. Digital
Hier können Sie speziell über das 8-WegeSteuerkreuz die Aktionsrichtungen bestimmen – die
Sticks sind zumeist deaktiviert
4
Page 6
2. Analog
Im Analog-Modus sind die Sticks die perfekte
Unterstützung für 3D-Spiele. Neben dem linken
Stick, der für die Bewegungen zuständig ist, können
weitere Funktionen über den rechten Stick, wie zB
Drehen ausgeführt werden. Das Steuerkreuz kommt
dabei für schnelle Rundumsicht zur Hilfe.
3. Wheel-Mode
Speziell in Rennspielen ein Vorteil! Die Funktionen
der Sticks sind hier auf das Essentielle
programmiert. Der linke Stick dient zur Lenkung
(links/rechts) und der Rechte Stick fungiert als Gas/Bremspedal (oben/unten)
Leucht-Funktion
Den Namen hat das Flashlight Pad von seinem
Feature, dem Leuchten. Dies wird aktiviert,
indem der Schalter auf der Unterseite auf ON
für Dauerleuchten oder auf FLASH für einen
angenehmen Blinkeffekt gestellt wird.
Somit ist der Controller nicht nur ein Hingucker,
sondern hilft auch im Dunkeln ein falsches
Ta stendrücken zu verhindern.
Anmerkungen
1. Vergewissern Sie sich, dass Ihre Spielesoftware
Gamecontroller unterstützt.
2. Zur Nutzung der Vibrations-Funktion muss Ihre
Spielesoftware Force Vibration / Force Feedback
unterstützen.
3. Sollten einige Tasten im Spiel nicht funktionieren
prüfen Sie im Optionsmenü die Tastenbelegung,
zumeist kann diese dort auch konfi guriert werden.
Lesen Sie dazu auch im zugehörigen Handbuch
des jeweiligen Spiels.
(blau: 62870; rot: 62871)
Sicherheitshinweise
1. Versuchen Sie nicht, das Gerät selbst zu warten
oder zu reparieren. Überlassen Sie jegliche
Wartungsarbeit dem zuständigen Fachpersonal.
2. Nehmen Sie keine Veränderungen am
Gerät vor. Dadurch verlieren sie jegliche
Gewährleistungsansprüche.
5
Page 7
g
Operating Instruction
I. Introduction
Thank you for choosing the Hama Flashlight Pad and
congratulations on your decision. We are certain
that our product will provide you with plenty of
gaming pleasure for years to come. These short instructions contain valuable information on operating
and confi guring the gamepad. Please keep these
instructions in a safe location for future reference.
II. Product Features
• Twelve programmable buttons
• 2 analogue sticks, 360° with button functionality
• Analogue-/digital-/wheel function can be selected
• 2 integrated motors for Force Feedback effects
• Light effects in three stages (ON/fl ashing/OFF)
(blue: 62870; red: 62871)
III. System Requirements
• For Windows 98SE/ME/2000/XP/Vista
• USB port
Note:
USB operation is not supported by Windows 95/NT.
IV. Installation
Installing the Software
1. Place the enclosed driver CD in your CD-ROM
drive.
2. The installation program is started automatically.
3. If this does not happen, proceed as follows:
START > Run > Browse
Select your CD-ROM drive.
4. Double-click the autorun.exe fi le.
5. Then follow the steps in the installation program.
6. Restart your PC.
Installing the Hardware
1. Connect the USB cable of your gamepad to a USB
port on your computer after installing the soft ware. Your operating system may prompt you to
insert your Windows CD to install the new
hardware components.
2. To confi gure the device, click:
START > Settings > Control Panel > Game Controller
(Windows XP in standard view: Start > Control
Panel > Printers and Other Hardware > Game
Controller)
Note that the Game Controller control panel is
called Gaming Options in Windows ME.
3. Select the Hama Flashlight Pad
4. Now click Properties to test and adjust all
functions in the menu, including vibration.
V. Functions
Vibration function
The Hama Flashlight Pad has two internal motors,
which only function in games that support Force
Feedback and when all supplied drivers have been
installed. Refer to the manual of your game to discover whether the game supports vibration or not.
If problems persist, check whether vibration support
has been activated in the game options.
Mode functions
The Hama Flashlight Pad allows you to choose
between two modes:
1. Digital
In this mode, you can specifi cally control the direction of action using the eight-way D-pad – the sticks
are deactivated for the most part
2. Analogue
In analogue mode, the sticks are ideal for 3D games.
In addition to the left stick, which controls movement, you can perform other functions using the
right stick, including rotation. The D-pad provides
you with fast, all-around viewing.
6
Page 8
3. Wheel Mode
An advantage especially in racing games! Here,
the functions of the sticks are programmed to the
essential. The left stick serves for steering (left/right)
and the right stick serves as accelerator/brake pedal
(above/below)
Luminance function
The Flashlight Pad owes its name to its feature, the
lighting. It is activated, if the switch on the bottom
side is set to ON for permanent lighting or to FLASH
for an agreeable fl ash effect.
The controller is therefore not only an eyecatcher;
when it is dark, it helps you to avoid pressing a
wrong key.
Notes
1. Ensure that your game software supports game
controllers.
2. In order to use the vibration function, your game
software must support Force Vibration/Force
Feedback.
3. If some buttons do not function in the game, check
the button settings in the option menu. They can
generally be confi gured there as well. Also refer
to the manual of the game in question.
(blue: 62870; red: 62871)
Safety instructions
1. Do not attempt to service or repair the device
yourself. Leave any service work to qualifi ed
experts.
2. Do not modify the device in any way. Doing so
voids the warranty.
7
Page 9
f
Mode d‘emploi
I. Présentation
Nous vous remercions et félicitons d´avoir choisi la
manette de jeux Flashlight de Hama. Nous sommes
convaincus que notre produit vous procurera beaucoup de joie lors de vos sessions de jeux pendant les
années à venir. Ce petit manuel d´utilisation contient
des informations importantes pour l´utilisation et la
confi guration de la manette de jeux. Veuillez le conserver s´il vous plaît dans un lieu sûr pour pouvoir
vous y référer lorsque vous en aurez besoin.
II. Propriétés du produit
• 12 touches programmables
• 2 sticks analogiques 360° avec fonction de touche
• Fonctionnement analogique / numérique /
wheel, commutable
• 2 moteurs de vibration intégrés
• Effets de lumière à 3 niveaux (allumage /
clignotement / éteint); (bleu: 62870; rouge: 62871)
III. Systèmes requis
• Pour Windows 98SE/ME/2000/XP/Vista
• Port USB
Remarque :
Veuillez noter que Windows 95 / NT ne supporte pas
le fonctionnement USB.
IV. Installation
Installation du logiciel
1. Insérez le pilote CD fourni dans votre lecteur.
2. Le programme d´installation va démarrer
automatiquement.
3. Si ce n´est pas le cas, procédez comme suit et
cliquez sur :DÉMARRER > Exécuter > Rechercher
Puis sélectionnez votre lecteur CD.
4. Double-cliquez alors sur le fi chier autorun.exe.
5. Suivez les instructions du programme
d´installation.
6. Redémarrez votre PC.
Installation du matériel
1. Après l´installation du logiciel; reliez le cordon
USB de votre manette de jeux au port USB de
votre ordinateur. Il se peut que votre système
d´exploitation vous demande d´insérer votre CD Windows pour installer les nouveaux composants
du matériel.
2. Pour procéder à la confi guration cliquez sur :
DEMARRER > Paramètres > Panneau de
confi guration > Game controller
(Windows XP : Démarrer >Panneau de
confi guration > Imprimante et autres matériels >
Game controller)
Veuillez observer que l´utilisation Game controller
dans Windows ME est caractérisée comme
Option de jeux.
3. Sélectionnez l´appareil souhaité.
4. Cliquez à présent sur Propriétés afi n de tester
et de calibrer dans le menu toutes les fonctions,
fonction de vibration y comprise.
V. Fonctions
Fonction de vibration
Le Pad Flashlight dispose de deux moteurs intégrés
qui fonctionnent uniquement avec les jeux qui
supportent aussi Force Feedback et quand tous les
pilotes fournis sont installés.
Pour savoir si le jeu supporte la fonction de vibration, consultez le manuel du jeu. Si vous rencontrez
d´autres problèmes vérifi ez dans les options du jeu si
le support de vibration a été activé.
Fonctions Mode
Le Pad Flashlight de Hama vous laisse le choix entre
deux modes :
1. Numérique
Dans ce mode, vous pouvez décider des mouvements d´action avec la croix octodirectionnelle– la
plupart des sticks sont désactivés
8
Page 10
2. Analogique
Dans le mode analogique, les sticks sont le support
parfait des jeux en 3D. Le stick gauche sert pour
les déplacements, avec le stick droit vous pouvez
exécuter d´autres fonctions, comme par ex. tourner.
La croix octodirectionnelle vient juste en aide pour
un rapide tour d´horizon.
3. Mode Wheel
Avantageux, surtout pour les jeux de course! Les
fonctions des sticks sont programmées dans ce cas
pour l´essentiel. Le stick gauche sert pour le pilotage
(gauche/droite) et le stick droit sert de pédale
d´accélération et de frein (en haut/en bas)
Fonction lumineuse
Le nom Flashlight Pad provient de sa caractéristique,
l´éclairage. Cette fonction est activée quand
l´interrupteur au-dessous est sur ON pour un
éclairage continu ou sur FLASH pour un effet de
clignotement agréable.
Le contrôleur n´est donc pas seulement un article
attirant l´attention mais permet d´empêcher
d´appuyer sur des touches non souhaitées,
également dans l´obscurité.
Remarques
1. Assurez-vous que votre logiciel de jeux supporte
le contrôleur de jeu.
2. Pour l´utilisation de la fonction de vibration, votre
logiciel de jeux doit supporter les fonctions Force
Vibration / Force Feedback.
3. Si certaines touches ne fonctionnent pas pendant
le jeu, vérifi ez dans le menu d´options l´attribution
des touches; celle-cie peut également être
confi gurée, la plupart du temps. Pour cela, lisez le
manuel d´utilisation du jeu concerné.
(bleu: 62870; rouge: 62871)
Mesures de sécurité
1. N´essayez pas d´entretenir ou de réparer
vous-même cet appareil. Adressez-vous à des
personnes spécialisées.
2. Ne procédez à aucune modifi cation de l´appareil,
auquel cas aucune garantie ne vous sera
octroyée.
9
 Loading...