

Page 1
F
D
GB
I
Operating Instructions
Bedienungsanleitung
Mode d‘emploi
Istruzioni per l‘uso
DR1500BTDigital Radio
Digitalradio
00
054812
Page 2

Page 3

5
25
1
Page 4

2
G Operating Instructions
Controls and Displays (Pic.1)
1. SCROLL/OK ►I I
2. MENU/ I◄◄ button
3. LCD display
4. INFO/ ►►I button
5. Volume control
6. Loudspeakers
7. MEMORY button
8. G button
9. MODE button
10. Display lights
11. ALARM/SNOOZE button
12. SLEEP button
13. Telescopic antenna
14. Headphone jack
15. AUX input jack
16. USB connection
17. Jack for mains connection
Thank you for choosing a Hama product.
Take your time and read the following instructions and
information completely. Please keep these instructions
in a safe place for future reference. If you sell the device,
please pass these operating instructions on to the new
owner.
1. Explanation of Warning Symbols and Notes
Warning
This symbol is used to indicate safety instructions or to
draw your attention to specic hazards and risks.
Note
This symbol is used to indicate additional information or
important notes.
Risk of electric shock
This symbol indicates product parts energized with a
dangerous voltage of sucient magnitude to constitute
a risk of electric shock.
2. Package Contents
• Bluetooth/DAB/FM radio
• Power cable
• These operating instructions
3. Safety Notes
• The product is intended for private, non-commercial use
only.
• Protect the product from dirt, moisture and overheating
and use it in dry r
ooms only
.
• As with all electrical devices, this device should be kept
out of the reach of children.
• Do not drop the product and do not expose it to any
major shocks.
• Do not operate the product outside the power limits
given in the specications.
• Keep the packaging material out of the reach of children
due to the risk of suffocation.
• Dispose of packaging material immediately according to
locally applicable regulations.
• Do not modify the device in any way. Doing so voids the
warranty.
Risk of electric shock
• Do not open the device or continue to operate it if it
becomes damaged.
• Do not use the product if the AC adapter, adapter
cable or power cable is damaged.
• Do not attempt to service or repair the device
yourself. Leave any service work to qualied experts.
4. Getting started
Note – Optimal reception
This product has a built-in DAB/FM telescopic antenna
that can be adjusted for optimal reception by using the
hinged joint at the base of the antenna. Note:
• Always fully pull out the antenna.
• For optimal reception we recommend positioning the
antenna vertically
4.1 Switching on
• Connect the enclosed power cable to the power input of
your radio.
• Connect the power cable to a properly installed power
socket.
• Press G to switch on the radio.
Page 5
3
Warning
• Only connect the product to a socket that has been
approved for the device. The electrical socket must
always be easily accessible.
• Disconnect the product from the network using the
power button – if this is not available, unplug the
power cord from the socket.
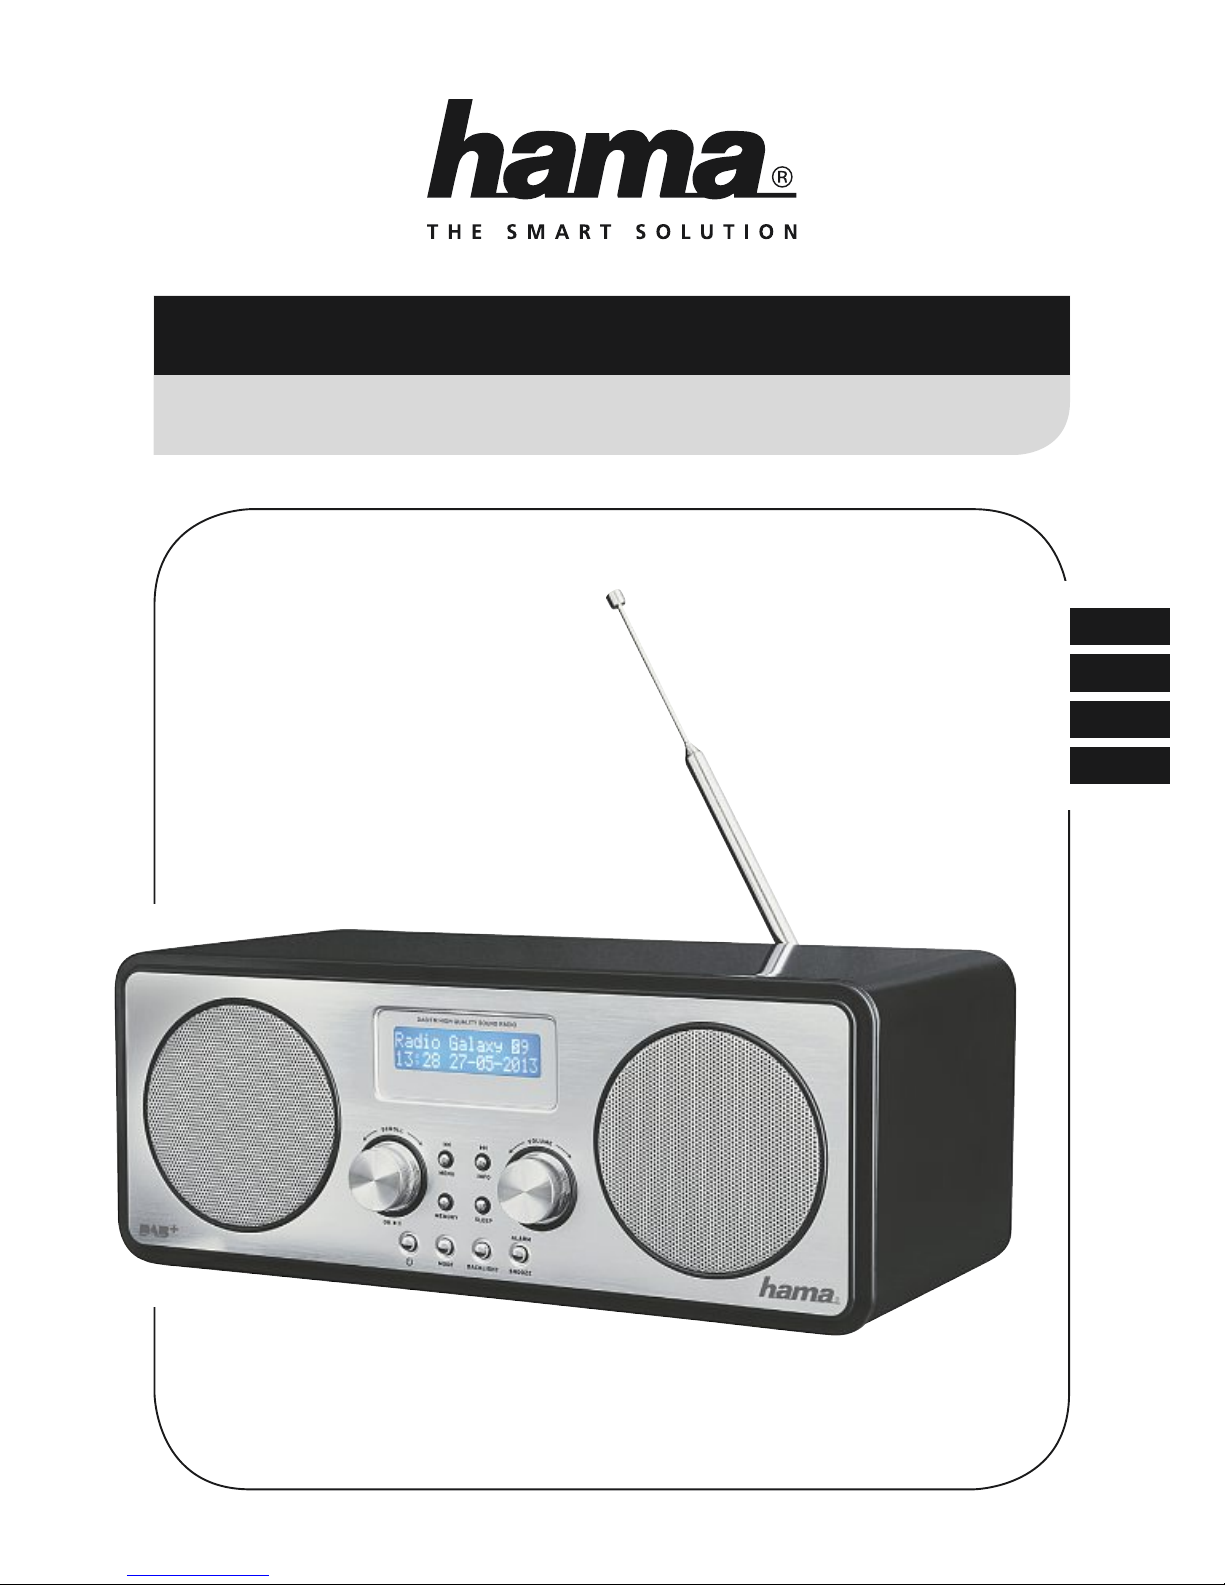
Note – Switching on for the rst time
• The radio switches on automatically with the greeting
(F1) in DAB mode and rst of all sets the time
automatically. This may take several seconds.
• The radio then runs the Auto Scan function.
• During Auto Scan the display shows the message
‚Scanning…‘, a progress bar and the number of
stations currently found. (F2)
• After the Auto Scan process has completed turn SCROLL/
OK ►I I to select a station that you want to listen to from
those found.
• Press SCROLL/OK ►I I to listen to your chosen station.
Note – Auto Scan
• If Auto Scan is unable to nd any stations, switch the
radio to the Tune Select menu.
• Turn SCROLL/OK ►I I to choose between Manual
Tune or Auto Scan.
• Press SCROLL/OK ►I I to conrm your choice.
Note – Alarm function features
It is not necessary to set the time on the radio and in fact
not even possible as the radio receives the local time via
the DAB signal and sets itself automatically accordingly.
However, this is not always possible in FM mode as time
data is not transmitted by all stations on that frequency.
Note – Alarm function features
• The DAB radio offers two alarm times that can be set
individually.
• The alarm can be set to a ring tone or to a previously
tuned radio station (DAB/FM)
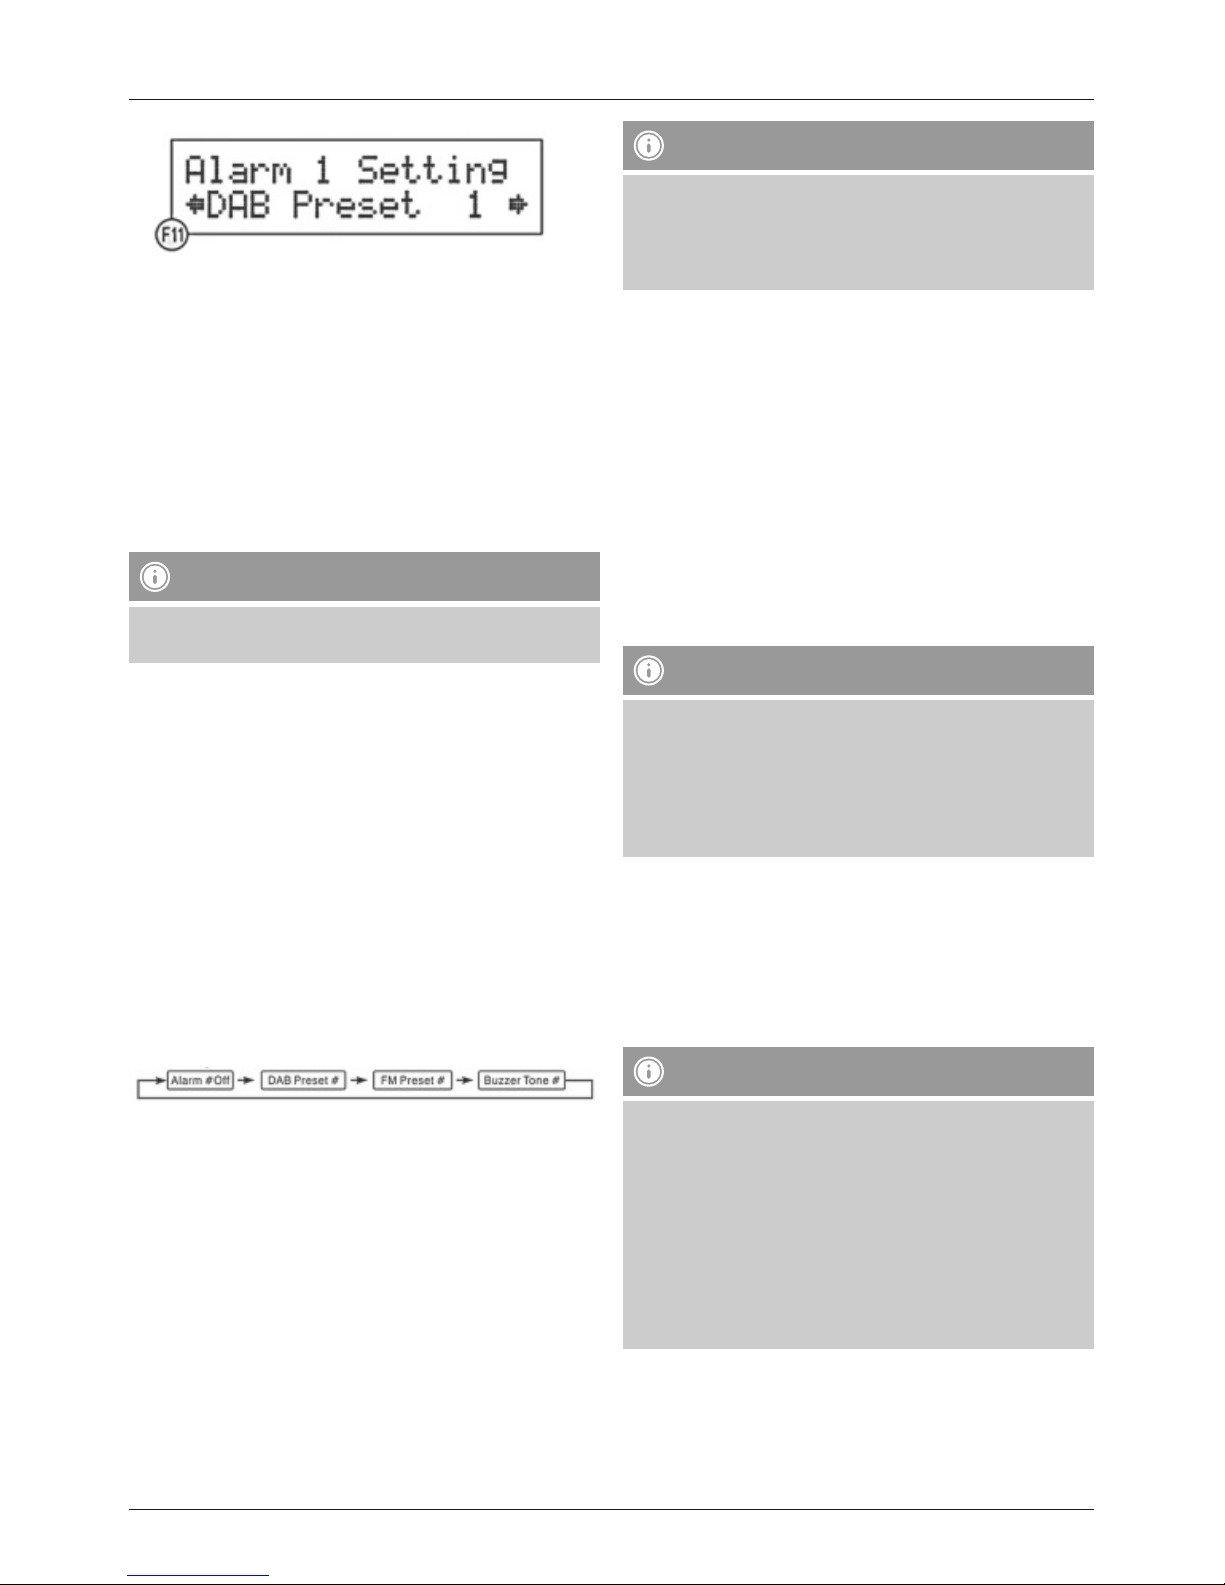
5.1 Setting the alarm time and type
• Press ALARM to open the Alarm menu.
• Use SCROLL/OK ►I I to select Alarm 1 or 2.
• Press SCROLL/OK ►I I to conrm your choice.
• Press SCROLL/OK ►I I again and use SCROLL/OK ►I I to
choose the Alarm Setting menu item.
• Press SCROLL/OK ►I I to conrm your choice. The hour
shown on the display ashes and can be set (F10).
• Turn SCROLL/OK ►I I to set the hour of your desired
alarm time.
• Press SCROLL/OK ►I I to conrm your setting.
• Then turn SCROLL/OK ►I I to set the minute of your
desired alarm time.
• Press SCROLL/OK ►I I to conrm your setting. After
saving the minute the alarm time is saved and you are
automatically taken to alarm type settings.
• Turn SCROLL/OK ►I I to choose the preset (see section
6.7) DAB or FM station that you want to wake up to
(F11).
• Press SCROLL/OK ►I I to save your setting.
• Turn SCROLL/OK ►I I to choose the ring tone (1 or 2) for
the alarm.
• Press SCROLL/OK ►I I to save your setting.
• Turn SCROLL/OK ►I I to adjust the volume of the alarm
(1 - 20) with which you want to be woken up (F10).
• Press SCROLL/OK ►I I to save your setting.
Note
• Repeat the complete process for the other alarm (1 or
2) if desired.
Page 6

4
5.2 Activate alarm function
• Press ALARM to open the Alarm menu.
• Use SCROLL/OK ►I I to select Alarm 1 or 2.
• Press SCROLL/OK ►I I to conrm your choice.
• Then use SCROLL/OK ►I I to choose the Alarm Source
menu item.
• Press SCROLL/OK ►I I to conrm your choice.
• Use SCROLL/OK ►I I to choose the alarm type desired.
Turn SCROLL/OK ►I I to cycle through the following
sequence:
• Press SCROLL/OK ►I I to conrm the selection once the
display shows the desired alarm type. The alarm is now
activated and on the display you will see a bell icon along
with the number 1 or 2 for the selected alarm.
• The alarm sounds at the set time.
• Press G if you wish to switch off the alarm.
Note
• Take care that the volume has been set at a sucient
level if you wish to be woken up by a DAB or FM
station.
• The tuned station will play for approx. 1 hour, as will a
ring tone if set as an alternative.
5.3 Automatic repeat of alarm and switching off
alarm function
The alarm will automatically repeat every day at the set
time for as long as the alarm function is switched on.
Press ALARM, select Alarm 1 or 2 and then select Alarm
# off under the Alarm Source menu item in order to switch
off the relevant alarm function (1 or 2).
5.4 Snooze function
Note
• The snooze function only works on the currently active
alarm. If the second one sounds when the rst alarm
is active, this second alarm has to be interrupted
separately with the snooze function.
• Press SNOOZE if you wish to interrupt the alarm but not
fully switch it off. The alarm sounds again after around 5
minutes‘ silence. An active snooze function is indicated
by ‚Zz‘ on the display.
5.5 Timer function
Note
• When the timer function is switched on, the radio
automatically switches off after the chosen time
period.
• The display indicates an activated timer function
using the letter S and a number. The number reects
the chosen time period (e.g. S6 = timer active,
automatic shut-off after 60 minutes).
• To check on timer status press INFO repeatedly in
order to show the relevant information on the display.
• Press SLEEP to switch on the timer function. The display
shows Sleep Timer and switches on using the standard
time period of 90 minutes.
• Press SLEEP repeatedly to choose another time period
after which the radio should switch off automatically.
• You can select from the following sequence, where the
numbers represent the possible shut-off times in minutes:
• Select the desired shut-off time by not pressing SLEEP for
at least 2 seconds. The currently displayed shut-off time is
then adopted automatically.
6. Operation of DAB/FM radio
6.1 Automatic DAB station search
The automatic DAB station search scans the DAB III
band for stations with reception. Following the search all
interference-free stations that have been found and can be
received are saved in alphabetical order.
• Press MENU to open the Tune Select menu.
• Turn SCROLL/OK ►I I to chose Autoscan and press
SCROLL/OK ►I I to conrm the selection.
The automatic DAB station search starts automatically and
is shown on the display by ‚Scanning…‘ and a progress
bar. (F2)
Page 7
5
• Turn SCROLL/OK ►I I , in order to view all located
stations in alphabetical order.
• Press SCROLL/OK ►I I to choose a station to play.
6.2 Manual DAB station search
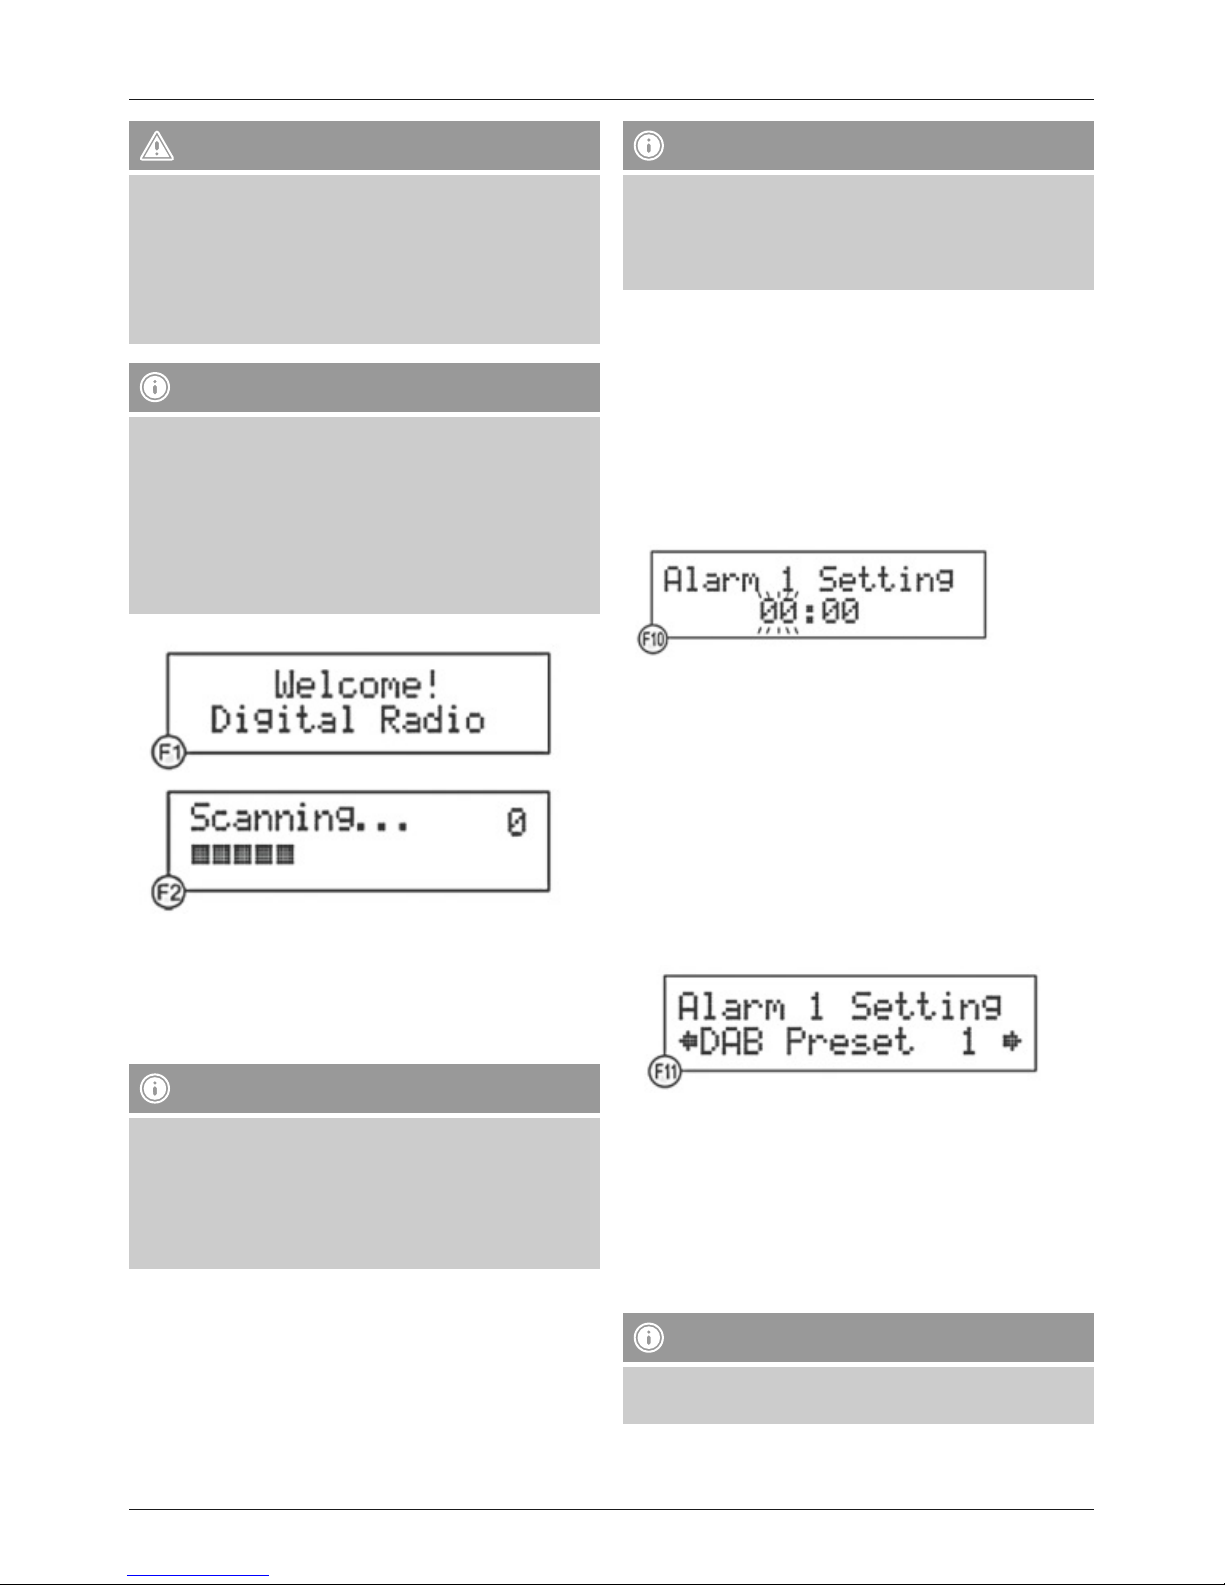
• Press MENU to open the Tune Select menu.
• Turn SCROLL/OK ►I I to chose Manual tune and press
SCROLL/OK ►I I to conrm the selection (F4).
• Turn SCROLL/OK ►I I to scan through the DAB
channels.
The display has a reception range of 5A to 13F and
displays the associated frequencies. (F5)
• Turn SCROLL/OK ►I I to select a frequency. The station
name and station group (ensemble/multiplex) are
displayed.
• Press SCROLL/OK ►I I to choose a station to play.
6.3 Additional DAB information
A > after the displayed station name indicates that this
station offers additional information.
• Press INFO repeatedly to display additional information
in the following order:
Time/Date:
Time and date are updated automatically by the broadcast
information. If no time/date information is available the
display just shows <TIME/DATE>.
Frequency:
The frequency of the station received is displayed.
Audio bit rate:
The currently received digital bit rate of the received
station is displayed.
Signal strength:
The signal strength of the received station is displayed via
a bar and its length.
DLS:
Dynamic Label Segment displays additional information
from the station about the programme as a scrolling ticker.
Programme type:
The style of the programme received is displayed. If no
programme information is available the display just shows
<Programme Type>.
Ensemble/Multiplex (Group name):
Ensemble/Multiplex is a combination of various stations
that broadcast on a shared frequency. Usually these
stations have something in common in terms of their local
origin, their style of music or the information they provide.
6.4 Automatic FM station search
• Press MODE repeatedly until ‚Switch to FM‘ is shown
on the display. The display then shows FM and the
current frequency.
• Press and hold SCROLL/OK ►I I until the automatic
station search starts.
While scanning the display shows ‚Searching…‘ (F6). If a
station is found, the search stops and the station plays.
• Start the search again as described above in order to
search for other stations.
Page 8
6
6.5 Manual FM station search
• Press JOG MODE/SELECT.
• Turn VOLUME/SELECT to tune to a specic frequency as
soon as the display shows <Tuning>.
6.6 Mono/stereo mode
While a station is playing, press SCROLL/OK ►I I in order
switch between Auto and Mono.
Note
• This device has a default setting of Auto mode, and
so automatically switches between stereo and mono
depending on the signal strength received.
• However, reception situations may occur where
the reception quality or clarity can be improved if
automatic tuning using the above specied method is
manually overridden.
6.7 Saving and accessing presets
Both DAB and FM mode can each save up to 10 stations as
‚Presets‘. In this way you can quickly access your preferred
stations.
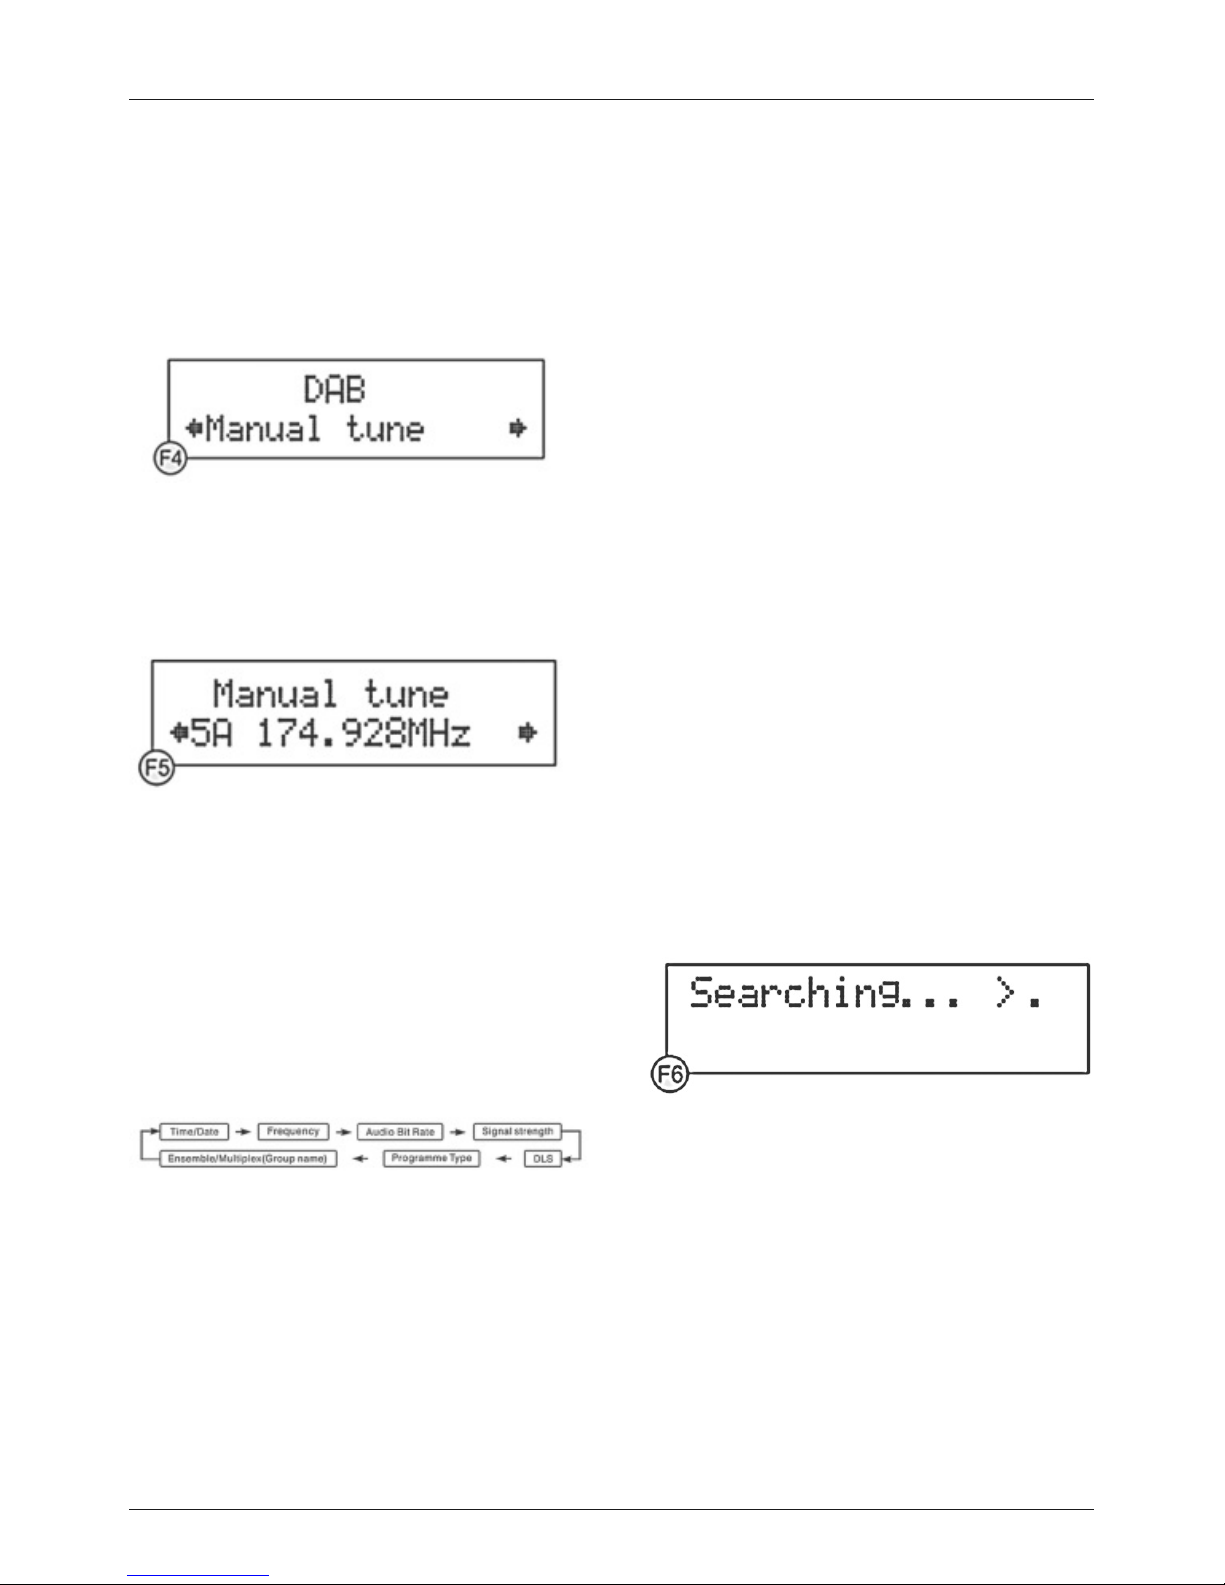
• Tune the radio to the station that you want to save as a
preset.
• Press and hold MEMORY until Save to P is shown on
the display and the number belonging to this empty
preset is displayed. (F8)
• If you wish to use the offered empty preset to save the
tuned station, go directly to the next step. If not, turn
SCROLL/OK ►I I in order to choose another preset
number.
• Conrm your choice with SCROLL/OK ►I I , this saves the
tuned station as this preset. As conrmation the display
shows the message ‚Preset # saved‘ (F9).
• To access a preset press MEMORY and use SCROLL/
OK ►I I to choose the desired preset number. The station
saved here previously will play automatically if you do not
use the controls for a few seconds.
6.8 Bluetooth mode
You have the option to connect your digital devices
wirelessly to the radio via Bluetooth.
Two different Bluetooth proles are supported:
• Advanced Audio Distribution Prole (A2DP)
- High-quality audio transmission
- Streaming of audio data from a PC, mobile phone, etc.
• Audio Video Remote Control Prole (AVRCP)
- Use of connected device as remote control for radio.
Note – Bluetooth
• Only one device (PC, Notebook, mobile phone, etc.)
can connect to the radio for each prole mentioned
above.
• Note that the quality of the Bluetooth connection can
vary according to the model of the device and the age
of its integrated Bluetooth driver.
• If possible, use devices with Bluetooth 2.1 and take
care that the most up-to-date rmware from your
device manufacturer has been installed.
• It is not possible to guarantee compatibility with all
devices and media types on the market.
• Take care that no other Bluetooth devices and
connections within a radius of approx 10m are active.
• Take care that there are no walls, bookcases, groups
of people or similar between the radio and your
Bluetooth device. The range and transmission quality
can be sharply reduced due to such obstacles.
Page 9
7
6.9 Connecting and playing music files in Bluetooth
mode
Note – Bluetooth connection
• Also follow all instructions and notes regarding
Bluetooth in the operating instructions for the
device you wish to connect. The exact process for
establishing a Bluetooth connection between the radio
and your device can vary.
• Ensure that your device supports the A2DP Bluetooth
prole.
• Take care that Bluetooth is activated on your device.
• Ensure that the radio and your device are not more than
1m apart from each other.
• Press MODE repeatedly until Switch to BT appears on
the display. The radio switches a few seconds later into
the Bluetooth Pairing mode.
• Start the search for Bluetooth devices on your device in
the Bluetooth settings. If the radio is found it will display
on your device as BT speakerN. If you are asked for a
key for pairing, enter 0000.
• Select BT speakerN on your device and run the pairing
process. This may take several seconds. The radio signals
successful pairing by means of a signal tone and by
displaying
- Icons on the display.
• After successfully pairing, press SCROLL/OK ►I I or begin
playback on your device.
• To pause playback press SCROLL/OK ►I I again or the
corresponding pause or stop buttons on your device.
• In order to rewind or forward through music les during
playback press ►►I or I◄◄ , or the corresponding
buttons on your device.
Note – Mobile phones
• Some mobile phones interrupt the Bluetooth
connection when receiving calls. This is not a problem
with your radio, but rather your mobile phone‘s
specic way of behaving during Bluetooth operation,
which can vary by manufacturer.
7. Additional functions
7.1 Display light
This radio has a display light that can be dimmed to three
different levels.
• Press BACKLIGHT repeatedly until the desired level of
brightness is reached.
7.2 Displaying firmware version of radio
Press and hold INFO longer than 2 seconds in order to
display the current rmware version of your radio.
7.3 Reverting to factory settings
• Connect the enclosed power cable to the 220V input of
your DAB/FM radio.
• Connect the power cable to a properly installed 220V
power socket.
• Press STANDBY to switch on the radio.
• Press and hold MENU until the display shows the
message ‚Press SELECT to conrm reset‘.
• Press SCROLL/OK ►I I . The display shows the message
‚Restarting…‘ and then goes into standby mode.
• Switch on the radio as described in section 4.1 and
perform the subsequent steps for setup and station
search.
Warning
• All saved DAB and FM presets are wiped when
reverting to factory settings.
7.4 Headphone connection
On the rear of the radio is a headphone connection (14),
which is suitable for headphones with a 3.5mm stereo jack.
When headphones are being used the built-in speakers are
deactivated automatically.
Warning - high volume
• Always keep the volume at a reasonable level. Loud
volumes, even over short periods, can cause hearing
loss.
Page 10

8
7.5 AUX input
There is an AUX input (15) on the rear of the radio. This
enables you to play external sources (MP3 player, iPods,
etc.) over the radio.
• Press MODE repeatedly until ‚Switch to AUX‘ is shown
on the display. Playback is then automatically switched to
the source connected to the AUX input.
Note – Energy saving mode
• If the radio remains in AUX mode for longer than 3
hours without activity, it switches automatically to
standby mode.
• To switch energy saving mode on or off press MODE
for at least 2 seconds until the display shows either
ECO off or ECO on.
7.6 USB connection
On the rear of the radio there is a USB connection (16),
which offers the standard USB voltage of 5V with 500mA.
Note
• The USB connection is for charging external USB
devices and does not support any data transfer.
8. Care and Maintenance
• Only clean this product with a slightly damp, lint-free
cloth and do not use aggressive cleaning agents.
9. Warranty Disclaimer
Hama GmbH & Co. KG assumes no liability and provides no
warranty for damage resulting from improper installation/
mounting, improper use of the product or from failure to
observe the operating instructions and/or safety notes.
10. Service and Support
Please contact Hama Product Consulting if you have any
questions about this product.
Hotline: +49 9091 502-115 (German/English)
Further support information can be found here:
www.hama.com
11. Technical Data
Voltage AC: 100-240V~60/50Hz
Output power 5 W x 2
Frequency range
DAB 174 - 240MHz /
FM 87.5 - 108MHz
Dimensions 345 (L) x215 (W) x 155 (H) mm
Weight 2.2 kg
12. Recycling Information
Note on environmental protection:
After the implementation of the European Directive
2002/96/EU and 2006/66/EU in the national legal
system, the following applies: Electric and
electronic devices as well as batteries must not be
disposed of with household waste. Consumers are obliged
by law to return electrical and electronic devices as well as
batteries at the end of their service lives to the public
collecting points set up for this purpose or point of sale.
Details to this are dened by the national law of the
respective country. This symbol on the product, the
instruction manual or the package indicates that a product
is subject to these regulations. By recycling, reusing the
materials or other forms of utilising old devices/Batteries,
you are making an important contribution to protecting our
environment.
Page 11
9
D Bedienungsanleitung
Bedienungselemente und Anzeigen (Pic.1)
1. SCROLL/OK ►I I
2. MENU/ I◄◄ Taste
3. LCD Display
4. INFO/ ►►I Taste
5. Lautstärkeregler
6. Lautsprecher
7. MEMORY TASTE
8. G TASTE
9. MODE TASTE
10. Displaybeleuchtung
11. ALARM/SNOOZE Taste
12. SLEEP Taste
13. Teleskopantenne
14. Kopfhörerbuchse
15. AUX Eingangsbuchse
16. USB Anschluss
17. Buchse für Netzanschluss
Vielen Dank, dass Sie sich für ein Hama Produkt
entschieden haben!
Nehmen Sie sich Zeit und lesen Sie die folgenden
Anweisungen und Hinweise zunächst ganz durch.
Bewahren Sie diese Bedienungsanleitung anschließend an
einem sicheren Ort auf, um bei Bedarf darin nachschlagen
zu können.
1. Erklärung von Warnsymbolen und Hinweisen
Warnung
Wird verwendet, um Sicherheitshinweise zu
kennzeichnen oder um Aufmerksamkeit auf besondere
Gefahren und Risiken zu lenken.
Hinweis
Wird verwendet, um zusätzlich Informationen oder
wichtige Hinweise zu kennzeichnen.
Gefahr eines elektrischen Schlages
Dieses Symbol weist auf eine Berührungsgefahr
mit nicht isolierten Teilen des Produktes hin, die
möglicherweise eine gefährliche Spannung von solcher
Höhe führen, dass die Gefahr eines elektrischen Schlags
besteht.
2. Packungsinhalt
• DAB+/FM Radio
• Netzanschlußkabel
• diese Bedienungsanleitung
3. Sicherheitshinweise
• Das Produkt ist für den privaten, nicht-gewerblichen
Haushaltsgebrauch vorgesehen.
• Schützen Sie das Produkt vor Schmutz, Feuchtigkeit und
Überhitzung und verwenden Sie es nur in trockenen
Räumen.
• Dieses Produkt gehört, wie alle elektrischen Produkte,
nicht in Kinderhände!
• Lassen Sie das Produkt nicht fallen und setzen Sie es
keinen heftigen Erschütterungen aus.
• Betreiben Sie das Produkt nicht außerhalb seiner in den
technischen Daten angegebenen Leistungsgrenzen.
• Halten Sie Kinder unbedingt von dem
Verpackungsmaterial fern, es besteht Erstickungsgefahr.
• Entsorgen Sie das Verpackungsmaterial sofort gemäß
den örtlich gültigen Entsorgungsvorschriften.
• Nehmen Sie keine Veränderungen am Gerät vor. Dadurch
verlieren sie jegliche Gewährleistungsansprüche.
Gefahr eines elektrischen Schlages
• Öffnen Sie das Produkt nicht und betreiben Sie es bei
Beschädigungen nicht weiter.
• Verwenden Sie das Produkt nicht, wenn der
AC-Adapter, das Adapterkabel oder die Netzleitung
beschädigt sind.
• Versuchen Sie nicht, das Produkt selbst zu warten
oder zu reparieren. Überlassen Sie jegliche Wartungsarbeit dem zuständigen Fachpersonal.
4. Inbetriebnahme
Hinweis - optimaler Empfang
Dieses Produkt verfügt über eine eingebaute DAB+/FM
Teleskopantenne, die für einen optimalen Empfang über
das Gelenk an der Antennenbasis ausgerichtet werden
kann. Beachten Sie:
• Ziehen Sie die Antenne immer vollständig aus.
• Für einen optimalen Empfang empfehlen wir die
Antenne vertikal auszurichten.
4.1 Einschalten mit Netzanschluss
• Verbinden Sie das beiliegende Netzanschlußkabel mit
dem Netzeingang Ihres Radios.
• Verbinden Sie das Netzkabel mit einer ordnungsgemäß
installierten Steckdose
• Drücken Sie G, um das Radio einzuschalten.
Page 12

10
Warnung
• Betreiben Sie das Produkt nur an einer dafür
zugelassenen Steckdose. Die Netzsteckdose muss
jederzeit leicht erreichbar sein.
• Trennen Sie das Produkt mittels des Ein-/Ausschalters
vom Netz – wenn dieser nicht vorhanden ist, ziehen
Sie die Netzleitung aus der Steckdose.
Hinweis - beim ersten Einschalten
• Das Radio schaltet sich automatisch mit der
Begrüßung (F1) im DAB Modus ein und stellt zunächst
automatisch die Uhrzeit ein. Dies kann einige
Sekunden dauern.
• Das Radio führt dann die Auto Scan Funktion aus.
• Während des Auto Scans erscheinen Scanning…, ein
Fortschrittsbalken und die Anzahl der z.Zt. gefundenen
Sender im Display. (F2)
• Drehen Sie nach abgeschlossenem Auto Scan Vorgang
SCROLL/OK ►I I , um aus den gefundenen Sendern
denjenigen auszuwählen, den Sie hören möchten.
• Drücken Sie die Taste SCROLL/OK ►I I , um den
ausgewählten anzuhören.
Hinweis - Auto Scan
• Wenn der Auto Scan keine Sender nden kann,
wechselt das Radio in das Tune Select Menü.
• Drehen Sie SCROLL/OK ►I I , um zwischen Manual
Tune oder Auto Scan auszuwählen.
• Drücken Sie SCROLL/OK ►I I , um die Auswahl zu
bestätigen.
5. Uhren- ,Weck- und Timerfunktion
Ein Einstellen der Uhrzeit des Radios ist nicht nötig und
auch nicht möglich, da das Radio die lokale Zeiteinstellung
über das DAB Signal bezieht und sich automatisch einstellt.
Im FM-Modus ist dies jedoch nicht immer möglich, da dort
nicht von allen Sendern eine Zeitinformation übertragen
wird.
Hinweis - Eigenschaften Weckfunktion
• Das DAB Radio ermöglich zwei individuell einstellbare
Weckzeiten.
• Der Alarm kann durch einen Klingelton oder einen
vorher eingestellten Radiosender (DAB/FM) erfolgen.
5.1 Einstellen der Weckzeit und des Alarmtyps
• Drücken Sie ALARM, um das Alarm Menü zu öffnen.
• Wählen Sie mit SCROLL/OK ►I I Alarm 1 oder 2 aus.
• Drücken Sie SCROLL/OK ►I I , um die Auswahl zu
bestätigen.
• Drücken Sie nochmals SCROLL/OK ►I I und wählen Sie
mit SCROLL/OK ►I I den Menüpunkt Alarm Setting aus.
• Drücken Sie SCROLL/OK ►I I , um die Auswahl zu
bestätigen. Die im Display dargestellte Stundenanzeige
blickt und kann eingestellt werden (F10).
• Drehen Sie SCROLL/OK ►I I , um die Stunde der
gewünschten Alarmzeit einzustellen.
• Drücken Sie SCROLL/OK ►I I , um die Einstellung zu
speichern.
• Drehen Sie anschließend SCROLL/OK ►I I , um die
Minuten der gewünschten Alarmzeit einzustellen.
• Drücken Sie SCROLL/OK ►I I , um die Einstellung zu
speichern. Nach dem Abspeichern der Minuten ist die
Alarmzeit gespeichert und Sie gelangen automatisch zu
den Einstellungen des Alarmtyps.
• Drehen Sie SCROLL/OK ►I I , um das Preset (siehe dazu
Punkt 6.7) des DAB oder FM Senders auszuwählen, mit
dem Sie geweckt werden möchten (F11).
• Drücken Sie SCROLL/OK ►I I , um die Einstellung zu
speichern.
• Drehen Sie SCROLL/OK ►I I , um den Klingelton (1 oder
2) des Alarms auszuwählen.
• Drücken Sie SCROLL/OK ►I I , um die Einstellung zu
speichern.
• Drehen Sie SCROLL/OK ►I I , um die Lautstärke des
Alarms auszuwählen (1 - 20), mit dem Sie geweckt
werden möchten (F10).
• Drücken Sie SCROLL/OK ►I I , um die Einstellung zu
speichern.
Page 13

11
Hinweis
• Wiederholen Sie den kompletten Vorgang für den
zweiten Alarm (1 oder 2), wenn gewünscht.
5.2 Aktivieren der Weckfunktion
• Drücken Sie ALARM, um das Alarm Menü zu öffnen.
• Wählen Sie mit SCROLL/OK ►I I Alarm 1 oder 2 aus.
• Drücken Sie SCROLL/OK ►I I , um die Auswahl zu
bestätigen.
• Wählen Sie anschließend mit SCROLL/OK ►I I den
Menüpunkt Alarm Source aus.
• Drücken Sie SCROLL/OK ►I I , um die Auswahl zu
bestätigen.
• Wählen Sie mit SCROLL/OK ►I I den gewünschten
Alarmtyp aus. Durch drehen von SCROLL/OK ►I I
durchlaufen Sie folgende Sequenz:
• Drücken Sie SCROLL/OK ►I I , um die Auswahl zu
bestätigen, wenn das Display den gewünschten Alarmtyp
anzeigt. Der Alarm ist hiermit aktiviert und im Display
sehen Sie ein Glockensymbol mit der Ziffer 1 oder 2 für
den ausgewählten Alarm.
• Der Alarm ertönt zur eingestellten Zeit.
• Drücken Sie G, wenn Sie den Alarm abstellen möchten.
Hinweis
• Achten Sie darauf, dass die Lautstärke auf ein
ausreichendes Niveau eingestellt ist, wenn Sie sich
durch einen DAB oder FM Sender wecken lassen
möchten.
• Der eingestellte Sender wird ca. 1 Stunde
wiedergegeben, ebenso ein alternativ eingestellter
Klingelton.
5.3 Automatische Wiederholung des Alarms und
Ausschalten der Weckfunktion
Der Alarm wird automatisch jeden Tag zur eingestellten Zeit
wiederholt, solange die Weckfunktion eingeschaltet ist.
Drücken Sie ALARM, wählen Sie Alarm 1 oder 2 aus und
wählen Sie dann Alarm # off im Menüpunkt Alarm
Source, um die entsprechende Weckfunktion (1 oder 2)
auszuschalten.
5.4 Schlummerfunktion
Hinweis
• Die Schlummerfunktion wirkt sich jeweils nur auf
den aktuell aktiven Alarm aus – ertönt innerhalb der
Aktivität eines Alarms der zweite, muss dieser separat
mit der Schlummerfunktion unterbrochen werden.
• Drücken Sie SNOOZE, wenn Sie den Alarm unterbrechen,
aber nicht vollständig abschalten möchten. Der Alarm
ertönt nach ca. 5 Minuten Ruhe erneut. Die aktive
Schlummerfunktion wird durch ein “Zz” im Display
angezeigt.
5.5 Timerfunktion
Hinweis
• Bei eingeschalteter Timerfunktion schaltet sich das
Radio nach der ausgewählten Zeit automatisch ab.
• Das Display zeigt die aktivierte Timerfunktion durch
den Buchstaben S und eine Ziffer an, wobei die Ziffer
die ausgewählte Zeit repräsentiert (z.B. S6 = Timer
aktiv, automatisches Abschalten nach 60min).
• Zum Überprüfen des Timerstatus, drücken
Sie wiederholt INFO, um die entsprechenden
Information im Display angezeigt zu bekommen.
• Drücken Sie SLEEP, um die Timerfunktion einzuschalten.
Das Display zeigt Sleep Timer und schaltet sich mit der
Standardzeit von 90 Minuten ein.
• Drücken Sie wiederholt auf SLEEP, um eine andere
Zeit auszuwählen, nach der sich das Radio automatisch
ausschalten soll.
• Sie können aus folgender Sequenz auswählen, wobei
die Zahlen die möglichen Ausschaltzeiten in Minuten
repräsentieren:
• Wählen Sie die gewünschte Ausschaltzeit aus, indem
Sie SLEEP mind. 2 Sek. lang nicht mehr betätigen.
Die aktuell angezeigte Ausschaltzeit wird automatisch
übernommen.
6. Betrieb des DAB/FM Radios
6.1 Automatischer DAB Sendersuchlauf
Der automatische DAB Sendersuchlauf durchsucht das DAB
III Band nach empfangbaren Sendern. Nach dem Suchlauf
werden alle gefundenen und störungsfrei empfangbaren
Sender in alphabetischer Reihenfolge gespeichert.
Page 14

12
• Drücken Sie MENU, um in das Tune Select Menu zu
gelangen.
• Drehen Sie SCROLL/OK ►I I , um Autoscan
auszuwählen und drücken Sie SCROLL/OK ►I I , um die
Auswahl zu bestätigen.
Der automatische DAB Sendersuchlauf startet
automatisch, anzeigt im Display durch Scanning… und
einen Fortschrittsbalken. (F2)
• Drehen Sie SCROLL/OK ►I I , um alle gefundenen Sender
in alphabetischer Reihenfolge anzusehen.
• Drücken Sie SCROLL/OK ►I I , um einen Sender zur
Wiedergabe auszuwählen.
6.2 Manuelle DAB Sendersuche
• Drücken Sie MENU, um in das Tune Select Menu zu
gelangen.
• Drehen Sie SCROLL/OK ►I I , um Manual tune
auszuwählen und drücken Sie SCROLL/OK ►I I , um die
Auswahl zu bestätigen (F4).
• Drehen Sie SCROLL/OK ►I I , um die DAB Kanäle zu
durchsuchen.
Das Display hat einen Einstellbereich von 5A bis 13F und
zeigt die dazugehörigen Frequenzen an. (F5)
• Drehen Sie SCROLL/OK ►I I , um eine Frequenz
auszuwählen. Es werden der Sendername und die
Sendergruppe (Ensemble/Multiplex) angezeigt.
• Drücken Sie SCROLL/OK ►I I , um den Sender zur
Wiedergabe auszuwählen.
6.3 Zusätzliche DAB Informationen
Ein > hinter dem angezeigten Sendernamen zeigt an, dass
dieser Sender zusätzliche Informationen anbietet.
• Drücken Sie INFO wiederholt, um zusätzliche
Informationen in folgender Reihenfolge anzuzeigen:
Time/Date:
Uhrzeit und Datum werden automatisch durch mit
gesendete Informationen aktualisiert. Ist keine Information
zu Uhrzeit und Datum verfügbar, zeigt das Display
lediglich <TIME/DATE>.
Frequency:
Die Frequenz des empfangenen Senders wird angezeigt.
Audio Bit Rate:
Die aktuell empfangene digitale Bitrate des empfangenen
Senders wird angezeigt.
Signal strength:
Die Signalstärke des empfangenen Senders wird durch
einen Balken und seine Länge angezeigt.
DLS:
Dynamic Label Segment zeigt zusätzliche Informationen
des Senders zum Programm als Laufband-Text an.
Programme Type:
Der Stil des empfangenen Programms wird angezeigt. Ist
keine Information zu Uhrzeit und Datum verfügbar, zeigt
das Display lediglich <Programme Type>.
Ensemble/Multiplex (Group name):
Ensemble/Multiplex ist eine Zusammenstellung
verschiedener Sender, die auf einer gemeinsamen
Frequenz senden. Meist haben diese Sender eine
Gemeinsamkeit in ihrer lokalen Herkunft, ihrem Musikoder Informationsstil.
6.4 Automatischer FM Sendersuchlauf
• Drücken Sie wiederholt MODE, bis Switch to FM im
Display angezeigt wird. Das Display zeigt dann FM und
die aktuelle Frequenz an.
• Drücken Sie und halten Sie SCROLL/OK ►I I , bis der
automatische Sendersuchlauf startet.
Das Display zeigt während des Suchens Searching…
(F6). Wird ein Sender gefunden, stoppt der Suchlauf und
der Sender wird wiedergegeben.
Page 15

13
• Starten Sie den Suchlauf erneut wie oben beschrieben,
um weitere Sender zu suchen.
6.5 Manueller FM Sendersuchlauf
• Drücken Sie JOG MODE/SELECT.
• Drehen Sie VOLUME/SELECT, um eine bestimmte
Frequenz einzustellen, sobald das Display <Tuning>
anzeigt.
6.6 Mono/Stereo Modus
Drücken Sie während der Wiedergabe SCROLL/OK ►I I , um
zwischen Auto und Mono umzuschalten.
Hinweis
• Dieses Gerät bendet sich als Standardeinstellung
im Auto Modus schaltet so automatisch je nach
empfangener Signalstärke zwischen Stereo und Mono
um.
• Es können jedoch Empfangssituationen eintreten, in
denen die Empfangsqualität oder Verständlichkeit
verbessert werden kann, wenn Sie die automatische
Einstellung mit o.g. Methode manuell überschreiben.
6.7 Speichern und Aufrufen von Presets
Sowohl im DAB, als auch im FM Modus können bis zu
jeweils 10 Sender auf Speicherplätzen, sogenannten
Presets, abgespeichert werden. So können bevorzugte
Sender direkt abgerufen werden.
• Stellen Sie den Sender ein, den Sie als Preset speichern
möchten.
• Drücken und halten Sie MEMORY, bis im Display Save
to P und die zu diesem leeren Preset gehörige Nummer
angezeigt werden (F8).
• Möchten Sie das angebotene leere Preset als Speicherort
für den eingestellten Sender verwenden, gehen Sie direkt
zum nächsten Schritt. Wenn nicht, drehen Sie SCROLL/
OK ►I I , um eine andere Presetnummer auszuwählen.
• Bestätigen Sie die Auswahl mit SCROLL/OK ►I I damit wird der eingestellte Sender auf diesem Preset
gespeichert. Das Display zeigt zur Bestätigung Preset #
saved (F9).
• Zum Aufrufen eines Presets drücken Sie MEMORY
und wählen Sie mit SCROLL/OK ►I I die gewünschte
Presetnummer an. Der vorher hier gespeicherte Sender
wird automatisch wiedergegeben, sobald einige
Sekunden keine weitere Aktion stattndet.
6.8 Bluetooth Modus
Sie haben die Möglichkeit, mittels Bluetooth ihre digitalen
Endgeräte drahtlos mit dem Radio zu verbinden.
Zwei verschiedene Bluetooth Prole werden unterstützt:
• Advanced Audio Distribution Prole (A2DP)
- Qualitativ hochwertige Audio Übertragung
- Streaming von Audiodaten von einem PC, Handy…etc.
• Audio Video Remote Control Prole (AVRCP)
- Nutzung des verbundenen Endgerätes als
Fernbedienung für das Radio.
Page 16

14
Hinweis – Bluetooth
• Es kann pro oben genanntem Prol nur ein Endgerät
(PC, Notebook, Mobiltelefon…etc.) mit dem Radio
verbunden werden.
• Beachten Sie, dass die Qualität der Bluetooth
Verbindung je nach Modell des Endgerätes und Alter
des darin integrierten Bluetooth-Treibers variieren
kann.
• Verwenden Sie nach Möglichkeit Endgeräte mit
Bluetooth 2.1 und achten Sie darauf, dass die
aktuellste von Ihrem Gerätehersteller angebotene
Firmware installiert ist.
• Eine Kompatibilität mit allen auf dem Markt
bendlichen Endgeräten und allen Medientypen kann
nicht garantiert werden.
• Achten Sie darauf, dass keine anderen Bluetooth
Endgeräte und Verbindungen im Umkreis von ca. 10
Metern aktiv sind.
• Achten Sie darauf, dass sich zwischen dem Radio
und Ihrem Bluetooth Endgerät keine Wände,
Bücherregale, Personengruppen o.ä. benden.
Durch diese Hindernisse wird die Reichweite und
Übertragungsqualität stark reduziert.
6.9 Verbinden und Wiedergabe von Musikdaten im
Bluetooth Modus
Hinweis
• Beachten Sie auch alle Anweisungen und
Hinweise zu Bluetooth in der Bedienungsanleitung
ihres zu verbindenden Endgerätes. Die genaue
Vorgehensweise, um eine Bluetooth Verbindung
zwischen dem Radio und ihrem Endgerät herzustellen,
kann variieren.
• Achten Sie darauf, daß Ihr Endgerät das A2DP Bluetooth
Prol unterstützt.
• Achten Sie darauf, daß auf Ihrem Endgerät Bluetooth
eingeschaltet ist.
• Achten Sie darauf, daß das Radio und Ihr Endgerät nicht
weiter als 1 Meter voneinander entfernt sind.
• Drücken Sie wiederholt MODE, bis im Display Switch
to BT erscheint und das Radio einige Sekunden später in
den Bluetooth Pairing Modus wechselt.
• Aktivieren Sie auf Ihrem Endgerät in den BluetoothEinstellungen die Suche nach Bluetooth Geräten. Wird
das Radio gefunden, wird es auf Ihrem Endgerät als BT
speakerN angezeigt. Wenn Sie nach einem Key für das
Pairing gefragt werden, geben Sie 0000 ein.
• Wählen Sie auf Ihrem Endgerät BT speakerN aus und führen
Sie das Pairing durch. Dies kann einige Sekunden dauern.
Ein erfolgreiches Pairing signalisiert das Radio mit einem
Signalton und der Anzeige eines
- Symbols im Display.
• Drücken Sie nach dem erfolgreichen Pairing SCROLL/OK
►I I oder starten Sie die Wiedergabe auf ihrem Endgerät.
• Um die Wiedergabe anzuhalten, drücken Sie erneut
SCROLL/OK ►I I oder die entsprechenden Pause, bzw. Stop
Tasten oder Schaltächen auf Ihrem Endgerät.
• Um während der Wiedergabe durch die Musikdateien vor
oder zurück zu springen, drücken Sie ►►I oder I◄◄ , bzw.
die entsprechenden Tasten oder Schaltächen auf Ihrem
Endgerät.
Hinweis – Mobiltelefone
• Manche Mobiltelefone unterbrechen die Bluetooth
Verbindung bei eingehenden Anrufen. Dies ist kein
Problem Ihres Radios, sondern ein spezielles Verhalten
Ihres Mobiltelefons im Bluetooth Betrieb, welches je
nach Hersteller variiert.
7. Weitere Funktionen
7.1 Displaybeleuchtung
Dieses Radio verfügt über eine in drei Stufen dimmbare
Displaybeleuchtung.
• Drücken Sie wiederholt BACKLIGHT, bis die gewünschte
Helligkeitsstufe erreicht ist.
7.2 Anzeige der Firmwareversion des Radios
Drücken und halten Sie INFO länger als 2 Sekunden, um
die aktuelle Firmware-Version ihres Radios anzuzeigen.
7.3 Zurücksetzen auf Werkseinstellungen
• Verbinden Sie das beiliegende Netzanschlußkabel mit
dem 220V Eingang Ihres DAB/FM Radios.
• Verbinden Sie das Netzkabel mit einer ordnungsgemäß
installierten 220V Steckdose.
• Drücken Sie STANDBY, um das Radio einzuschalten.
• Drücken und halten Sie MENU, bis das Display „Press
SELECT to conrm reset” anzeigt.
• Drücken Sie SCROLL/OK ►I I . Das Display zeigt
Restarting… und geht anschließend in den Standby-
Modus.
• Starten Sie das Radio wie unter 4.1 beschrieben und
führen Sie die nachfolgenden Schritte zur Einstellung und
Sendersuche durch.
Warnung
• Alle gespeicherten DAB und FM Presets gehen
durch das Zurücksetzen auf die Werkseinstellungen
verloren!
Page 17

15
7.4 Kopfhöreranschluss
Auf der Rückseite des Radios bendet sich ein
Kopfhöreranschluß (14), der für Kopfhörer mit einem
3.5mm Stereoklinkenstecker geeignet ist.
Bei Verwendung eines Kopfhörers deaktivieren sich die
eingebauten Lautsprecher automatisch.
Warnung
• Halten Sie die Lautstärke immer auf einem
vernünftigen Niveau. Hohe Lautstärken können –
selbst bei kurzer Dauer – zu Hörschäden führen.
7.5 AUX Buchse
Auf der Rückseite des Radios bendet sich eine AUX
Buchse(15). Diese ermöglicht Ihnen, externe Quellen (MP3
Player, iPods etc.) über das Radio wiederzugeben.
• Drücken Sie wiederholt MODE, bis im Display Switch
to AUX angezeigt wird. Die Wiedergabe wird dann
automatisch auf die an der AUX Buchse angeschlossene
Quelle umgeschaltet.
Hinweis - Energiesparmodus
• Wenn das Radio länger als 3 Stunden ohne Aktivität
im AUX Modus verbleibt, wechselt es automatisch in
den Standby Modus.
• Um den Energiesparmodus an- oder auszuschalten,
drücken Sie MODE mind. 2 Sek., bis das Display ECO
off oder ECO on anzeigt.
7.6 USB Anschluss
Auf der Rückseite des Radios bendet sich ein USB
Anschluss (16), der die Standard USB-Spannung von 5Volt
mit max. 500mA zur Verfügung stellt.
Hinweis
• Der USB Anschluss dient zum Laden von externen USB
Geräten und unterstützt keine Datenübertragung.
8. Wartung und Pflege
• Reinigen Sie dieses Produkt nur mit einem fusselfreien,
leicht feuchten Tuch und verwenden Sie keine aggressiven
Reiniger.
9. Gewährleistungsausschluß
Die Hama GmbH & Co. KG übernimmt keinerlei Haftung
oder Gewährleistung für Schäden, die aus unsachgemäßer
Installation, Montage und unsachgemäßem Gebrauch
des Produktes oder einer Nichtbeachtung der
Bedienungsanleitung und/oder der Sicherheitshinweise
resultieren.
10. Service und Support
Bitte wenden Sie sich bei Fragen zum Produkt gerne an die
Hama-Produktberatung.
Hotline: +49 9091 502-115 (Deu/Eng)
Weitere Supportinformationen nden sie hier:
www.hama.com
11. Technische Daten
Spannung AC: 100-240V~60/50Hz
Ausgangsleistung: 5 W x 2
Frequenzbereich
DAB 174 - 240MHz /
FM 87.5 - 108MHz
Abmessungen 345 (L) x215 (W) x 155 (H) mm
Gewicht 2.2 kg
12. Entsorgungshinweise
Hinweis zum Umweltschutz:
Ab dem Zeitpunkt der Umsetzung der europäischen
Richtlinien 2002/96/EG und 2006/66/EG in
nationales Recht gilt folgendes: Elektrische und
elektronische Geräte sowie Batterien dürfen nicht
mit dem Hausmüll entsorgt werden. Der Verbraucher ist
gesetzlich verpichtet, elektrische und elektronische Geräte
sowie Batterien am Ende ihrer Lebensdauer an den dafür
eingerichteten, öffentlichen Sammelstellen oder an die
Verkaufsstelle zurückzugeben. Einzelheiten dazu regelt das
jeweilige Landesrecht. Das Symbol auf dem Produkt, der
Gebrauchsanleitung oder der Verpackung weist auf diese
Bestimmungen hin. Mit der Wiederverwertung, der
stoichen Verwertung oder anderen Formen der
Verwertung von Altgeräten/Batterien leisten Sie einen
wichtigen Beitrag zum Schutz unserer Umwelt.
Page 18

16
F Mode d‘emploi
Éléments de commande et d'affichage (Pic.1)
1. SCROLL/OK ►I I
2. Touche MENU/ I◄◄
3. Écran LCD
4. Touche INFO/ ►►I
5. Réglage du volume
6. Haut-parleur
7. Touche MEMORY
8. Touche G
9. Touche MODE
10. Éclairage de l‘écran
11. Touche ALARM/SNOOZE (alarme/répétition de
l‘alarme)
12. Touche SLEEP (sommeil)
13. Antenne télescopique
14. Prise de casque
15. Prise de l‘entrée AUX
16. Connexion USB
17. Prise de raccordement secteur
Nous vous remercions d’avoir choisi un produit Hama.
Veuillez prendre le temps de lire l‘ensemble des remarques
et consignes suivantes. Veuillez conserver ce mode
d‘emploi à portée de main an de pouvoir le consulter
en cas de besoin. Transmettez-le au nouveau propriétaire
avec l’appareil le cas échéant.
1. Explication des symboles d‘avertissement et des
remarques
Avertissement
Ce symbole est utilisé pour indiquer des consignes de
sécurité ou pour attirer votre attention sur des dangers et
risques particuliers.
Remarque
Ce symbole est utilisé pour indiquer des informations
supplémentaires ou des remarques importantes.
Risque d’électrocution
Ce symbole indique un risque de contact avec des
parties non isolées du produit susceptibles de conduire
un courant électrique capable de provoquer un risque
d‘électrocution.
2. Contenu de l‘emballage
• Radio Bluetooth/DAB/FM
• Câble secteur
• Mode d‘emploi
3. Consignes de sécurité
• Ce produit est destiné à une installation domestique non
commerciale.
• Protégez le produit de toute saleté, humidité, surchauffe
et utilisez-le uniquement dans des locaux secs.
• Cet appareil, comme tout appareil électrique, doit être
gardé hors de portée des enfants !
• Protégez le produit des secousses violentes et évitez tout
choc ou toute chute.
• N‘utilisez pas le produit en dehors des limites
de puissance indiquées dans les caractéristiques
techniques.
• Tenez les emballages d‘appareils hors de portée des
enfants, risque d‘étouffement.
• Recyclez les matériaux d’emballage conformément aux
prescriptions locales en vigueur.
• N’apportez aucune modication à l’appareil. Des
modications vous feraient perdre vos droits de garantie.
Risque d’électrocution
• Ne tentez pas d‘ouvrir le produit en cas de
détérioration et cessez de l’utiliser.
• Cessez d‘utiliser le produit si l‘adaptateur CA, le
câble adaptateur ou le câble d‘alimentation est
endommagé.
• N‘ouvrez pas l‘appareil et cessez de l’utiliser en
cas de détérioration, de dégagement de fumée, de
formation d‘odeurs ou de niveau de bruit élevé.
Adressez-vous dans les plus brefs délais à votre
revendeur ou à notre service clientèle (voir point
Service et assistance).
4. Mise en service
Remarque - Réception optimale
Ce produit dispose d‘une antenne télescopique DAB/
FM intégrée garantissant une réception optimale grâce
à l‘articulation située dans la base de l‘antenne et
permettant d‘orienter cette dernière. Autres consignes:
• Extrayez l’antenne entièrement.
• Nous conseillons de placer l‘antenne à la verticale an
de garantir une réception optimale.
4.1 Mise sous tension
• Insérez la prise du câble secteur dans l‘entrée secteur
de la radio.
• Branchez le câble secteur de la radio internet à une prise
de courant.
• Appuyez sur la touche G an de mettre la radio sous
tension.
Page 19

17
Avertissement
• Branchez l‘appareil à une prise de courant appropriée.
La prise de courant doit être facilement accessible à
tout moment.
• Coupez le produit du secteur à l‘aide de l‘interrupteur
- débranchez la prise de courant en cas d‘absence
d‘interrupteur.
Remarque - Première mise sous tension
• Le message de bienvenue (F1) apparaît à l‘écran,
la radio sélectionne le mode DAB, puis règle
automatiquement l‘heure. Cette opération peut durer
plusieurs secondes.
• La radio exécute ensuite la fonction auto-scan.
• Scanning… ainsi qu‘une barre de progression et le
nombre des stations captées apparaissent à l‘écran
pendant l‘auto-scan (F2).
• À la n de l‘auto-scan, tournez la molette SCROLL/
OK ►I I an de sélectionner la station que vous désirez
écouter parmi les stations captées.
• Appuyez sur la molette SCROLL/OK ►I I an de lancer
la lecture.
Remarque - Auto-scan
• Le menu « Tune Select » s‘ouvre automatiquement
sur la radio dans le cas aucune station n‘est captée
pendant l‘auto-scan.
• Tournez la molette SCROLL/OK ►I I an de
sélectionner « Manual Tune » ou « Auto Scan ».
• Appuyez sur la molette SCROLL/OK ►I I an de
conrmer votre sélection.
5. Fonctions horaire, réveil et minuterie
Il n‘est pas nécessaire (ni possible) de régler l‘heure sur la
radio ; l‘unité détecte l‘heure locale via le signal DAB et
effectue automatiquement le réglage horaire. Ce réglage
n‘est toutefois pas toujours possible en mode FM, car les
informations horaires ne sont pas forcément transmises
pour la totalité des stations.
Remarque - Fonction de réveil
• La radio DAB permet de sélectionner deux heures de
réveil différentes.
• Vous pouvez sélectionner une sonnerie ou la lecture
d‘un programme radio présélectionné au préalable
pour l‘alarme.
5.1 Réglage de l'heure et du type d'alarme
• Appuyez sur la touche ALARM an d‘ouvrir le menu
« Alarm ».
• Utilisez la molette SCROLL/OK ►I I an de sélectionner
l‘alarme 1 ou 2.
• Appuyez sur la molette SCROLL/OK ►I I an de conrmer
votre sélection.
• Appuyez une nouvelle fois sur la molette SCROLL/OK
►I I , puis sélectionnez l‘option de menu « Alarm Setting
» à l‘aide de la molette SCROLL/OK ►I I .
• Appuyez sur la molette SCROLL/OK ►I I an de conrmer
votre sélection. Les chiffres des heures clignotent à
l‘écran et peuvent être réglés (F10).
• Tournez la molette SCROLL/OK ►I I an de sélectionner
l‘heure d‘alarme.
• Appuyez sur la molette SCROLL/OK ►I I an de conrmer
votre sélection.
• Tournez ensuite la molette SCROLL/OK ►I I an de
sélectionner les minutes de l‘heure d‘alarme.
• Appuyez sur la molette SCROLL/OK ►I I an de conrmer
votre sélection. L‘heure d‘alarme est sélectionnée après
avoir conrmé les minutes ; l‘option de réglage du type
d‘alarme s‘ouvre alors automatiquement.
• Tournez la molette SCROLL/OK ►I I an de choisir la
station présélectionnée (voir le point 6.7) DAB ou FM que
vous désirez entendre à votre réveil (F11).
Page 20
18
• Appuyez sur la molette SCROLL/OK ►I I an de conrmer
votre sélection.
• Tournez la molette SCROLL/OK ►I I an de sélectionner
le type de sonnerie de l‘alarme (1 ou 2).
• Appuyez sur la molette SCROLL/OK ►I I an de conrmer
votre sélection.
• Tournez la molette SCROLL/OK ►I I an de sélectionner
le volume de l‘alarme (1 - 20).
• Appuyez sur la molette SCROLL/OK ►I I an de conrmer
votre sélection.
Remarque
• Veuillez répétez toute la procédure si vous désirez
utiliser l‘alarme 2.
5.2 Activation de la fonction de réveil
• Appuyez sur la touche ALARM an d‘ouvrir le menu «
Alarm ».
• Utilisez la molette SCROLL/OK ►I I an de sélectionner
l‘alarme 1 ou 2.
• Appuyez sur la molette SCROLL/OK ►I I an de conrmer
votre sélection.
• Utilisez la molette SCROLL/OK ►I I an de sélectionner
l‘option de menu « Alarm Source ».
• Appuyez sur la molette SCROLL/OK ►I I an de conrmer
votre sélection.
• Utilisez la molette SCROLL/OK ►I I an de sélectionner
le type d‘alarme. Tournez la molette SCROLL/OK ►I I an
de parcourir la séquence suivante :
• Appuyez sur la molette SCROLL/OK ►I I an de conrmer
votre sélection dès que le type d‘alarme souhaité apparaît
à l‘écran. L‘alarme est ainsi activée et l‘icône de cloche
apparaît à l‘écran accompagné du chiffre 1 ou 2 (pour
l‘alarme concernée).
• L‘alarme retentit à l‘heure sélectionnée.
• Appuyez sur la touche G pour éteindre l‘alarme.
Remarque
• Veuillez contrôler le niveau du volume lorsque vous
utilisez une station DAB ou FM pour vous réveiller.
• La station sélectionnée, ou le type de sonnerie
sélectionné, retentira pendant une heure.
5.3 Répétition automatique de l'alarme et mise hors
service de la fonction de réveil
L‘alarme est automatiquement activée chaque jour à l‘heure
sélectionnée aussi longtemps que la fonction de réveil est
activée.
Appuyez sur la touche ALARM, sélectionnez l‘alarme 1 ou
2, puis sélectionnez « Alarm # off » dans l‘option de menu
« Alarm Source » an de mettre la fonction de réveil (1 ou
2) hors service.
5.4 Fonction de répétition de l'alarme
Remarque
• La fonction de répétition de l‘alarme est opérationnelle
uniquement en fonction de l‘alarme activée ; si la
deuxième alarme retentit pendant la période d‘activité
de la première alarme, vous devrez interrompre la
deuxième alarme à l‘aide de la fonction de répétition
de l‘alarme.
• Appuyez sur la touche SNOOZE, pour interrompre
momentanément l‘alarme. L‘alarme retentit à nouveau
au bout d‘environ cinq minutes. La fonction de répétition
d‘alarme est signalée à l‘écran par « Zz ».
5.5 Minuterie
Remarque
• La minuterie permet de mettre la radio hors service au
bout d‘un délai prédéni.
• La minuterie est signalée à l‘écran par un « S » et le
chiffre correspondant au délai sélectionné (exemple : «
S6 » = minuterie activé, mise hors service automatique
au bout de 60 min).
• Appuyez plusieurs fois sur la touche INFO, an de
contrôler l‘état de la minuterie et les informations
concernées.
• Appuyez sur la touche SLEEP an de mettre la fonction
de minuterie sous tension. « Sleep Timer » apparaît à
l‘écran et la minuterie est activée avec une durée par
défait de 90 minutes.
Page 21

19
• Appuyez plusieurs fois sur la touche SLEEP, an de
sélectionner un autre délai au bout duquel la radio se
mettra hors service.
• Vous pouvez sélectionner ce délai à l‘aide de la
séquence suivante ; les chiffres représentent le délai de
fonctionnement de la radio en minutes :
• Sélectionnez le délai souhaité en n‘appuyant pas sur la
touche SLEEP pendant au moins 2 secondes. Le délai
aché sera repris automatiquement.
6. Fonctionnement de la radio DAB/FM
6.1 Recherche automatique de stations DAB
La recherche automatique de stations DAB effectue une
recherche de la bande DAB III an de détecter les stations
captables. Toutes les stations détectées et captables sans
interférences seront mémorisées par ordre alphabétique
après la recherche automatique.
• Appuyez sur la touche MENU an d‘ouvrir l‘option de
menu « Tune Select ».
• Tournez la molette SCROLL/OK ►I I an de sélectionner
« Autoscan », puis appuyez sur la molette SCROLL/OK
►I I an conrmer votre sélection.
La recherche automatique DAB de stations démarre
automatiquement ; elle est achée à l‘écran par
Scanning… et une barre de progression (F2).
• Tournez la molette SCROLL/OK ►I I an de visualiser
toutes les stations par ordre alphabétique.
• Appuyez sur la molette SCROLL/OK ►I I an de
sélectionner une station et lancer la lecture.
6.2 Recherche manuelle de stations DAB
• Appuyez sur la touche MENU an d‘ouvrir l‘option de
menu « Tune Select ».
• Tournez la molette SCROLL/OK ►I I an de sélectionner
« Manual Tune », puis appuyez sur la molette SCROLL/
OK ►I I an conrmer votre sélection (F4).
• Appuyez sur la molette SCROLL/OK ►I I an de
parcourir les canaux DAB.
L‘écran propose une plage de réglage de 5A à 13F ; les
fréquences correspondantes apparaissent également à
l‘écran (F5).
• Tournez la molette SCROLL/OK ►I I an de sélectionner
une fréquence. Le nom de la station et le groupe de
stations (ensemble/multiplex) apparaissent à l‘écran.
• Appuyez sur la molette SCROLL/OK ►I I an de
sélectionner une station et lancer la lecture.
6.3 Informations DAB supplémentaires
Le signe « > » après le nom de la station indique la
disponibilité d‘informations supplémentaires pour cette
station.
• Appuyez plusieurs fois sur la touche INFO an d‘acher
des informations supplémentaires dans l‘ordre suivant :
Heure / date :
L‘heure et la date sont mises à jour automatiquement
avec les informations envoyées. Seul <TIME/DATE> Seul
apparaît à l‘écran dans le cas où aucune information
concernant l‘heure et la date n‘est disponible.
Page 22

20
Fréquence :
La fréquence de la station captable est achée.
Taux de bits audio :
Le taux de bits numériques audio de la station captable est
aché.
Intensité du signal :
L‘intensité du signal de la station captable est achée à
l‘aide d‘une barre.
DLS :
Le « Dynamic Label Segment » ache des informations
supplémentaires concernant le programme de la station
sous forme de texte déroulant.
Type de programme :
Le type du programme capté est aché. Seul
<Programme Type> apparaît à l‘écran dans le cas où
aucune information n‘est disponible.
Ensemble/Multiplex (Group name) :
Ensemble/Multiplex est une compilation de plusieurs
stations émettant sur une fréquence commune. Ces stations
ont généralement une origine commune ou un style de
musique ou d‘informations commun.
6.4 Recherche automatique de stations FM
• Appuyez plusieurs fois sur la touche MODE, jusqu‘à
ce que « Switch to FM » apparaisse à l‘écran. L’écran
indique « FM » et la fréquence sélectionnée.
• Appuyez sur la molette SCROLL/OK ►I I et maintenez-
la enfoncée jusqu‘au démarrage de la recherche
automatique.
Searching… apparaît à l‘écran pendant la recherche (F6).
La recherche s’interrompt automatiquement et la lecture de
la première station détectée démarre.
• Lancez à nouveau la recherche automatique comme
indiqué plus haut an de rechercher d‘autres stations.
6.5 Recherche manuelle de stations FM
• Appuyez sur la touche JOG MODE/SELECT.
• Tournez la molette VOLUME/SELECT, an de syntoniser
une certaine fréquence dès que <Tuning> apparaît à
l'écran.
6.6 Mode mono/stéréo
Pendant la lecture, appuyez sur la molette SCROLL/OK ►I I
an de commuter entre Auto et Mono.
Remarque
• En réglages par défaut, cette unité est en mode auto
et commute donc automatiquement en mode mono
ou stéréo en fonction de l‘intensité du signal de la
station captée.
• Il est toutefois possible que des conditions de
réception surviennent au cours desquelles vous
pouvez améliorer la qualité de réception ou la netteté
en supprimant le réglage automatique à l‘aide de la
méthode mentionnée plus haut.
6.7 Sauvegarde et ouverture de stations
présélectionnées
Dix emplacements mémoire sont disponibles en mode DAB
et dix autres en mode FM pour sauvegarder des stations
présélectionnées. Vous pourrez ainsi ouvrir directement vos
stations favorites.
• Rechercher la station que vous désirez dénir en tant que
station présélectionnée.
• Appuyez sur la touche MEMORY et maintenez-la
enfoncée jusqu‘à ce que « Save to P » et que le numéro
de présélection concerné apparaissent à l‘écran (F8).
• Continuez à l‘étape suivante dans le cas où vous
désirez sélectionner la présélection proposée pour la
station syntonisée. Dans le cas contraire, tournez la
molette SCROLL/OK ►I I an de sélectionner une autre
présélection.
• Conrmez votre sélection à l‘aide de la molette SCROLL/
OK ►I I pour sauvegarder la station sur le numéro
indiqué. Preset # saved apparaît à l‘écran pour
conrmer votre sélection (F9).
Page 23

21
• Appuyez sur la touche MEMORY an d'ouvrir une station
présélectionnée, puis sélectionnez le numéro concerné
à l'aide de la molette SCROLL/OK ►I I . La lecture de la
station présélectionnée démarre automatiquement si vous
n'appuyez sur aucune autre touche pendant quelques
secondes.
6.8 Mode Bluetooth
Bluetooth vous permet de connecter sans l vos appareils
numériques à la radio.
Deux prols Bluetooth différents sont pris en charge :
• Advanced Audio Distribution Prole (A2DP)
- Transmission audio de qualité supérieure
- Lecture en ux de chiers audio provenant d‘un
ordinateur, d‘un téléphone portable, etc.
• Audio Video Remote Control Prole (AVRCP)
- Utilisation de l‘appareil connecté en tant que
télécommande pour la radio.
Remarque – Bluetooth
• Un seul appareil (ordinateur, ordinateur portable,
téléphone portable, etc.) peut être connecté à la radio
par prol (mentionné plus haut).
• Veuillez noter que la qualité Bluetooth dépend du
type d‘appareil et de la version du pilote Bluetooth
intégrée.
• Utilisez, dans le mesure du possible, des appareils
équipés de Bluetooth 2.1 et veuillez contrôler que la
dernière version du microprogramme est bien installée
sur votre appareil.
• Il est impossible de garantir la compatibilité avec tous
els appareils et tous els types de médias disponibles
sur le marché.
• Veuillez contrôler qu‘aucun autre appareil Bluetooth ni
aucune autre connexion ne soit actifs dans un rayon
d‘environ 10 mètres.
• Aucune paroi, bibliothèque, groupe de personnes ne
doit se trouver entre la radio et l‘appareil Bluetooth.
Ces obstacles diminuent signicativement la portée et
la qualité de la transmission.
6.9 Connexion et lecture de fichiers musicaux en
mode Bluetooth
Remarque
• Veuillez respecter toutes les consignes et remarques
concernant Bluetooth mentionnées dans le manuel de
votre appareil. Il est possible que la marche à suivre
exacte pour établir une connexion Bluetooth entre la
radio et votre appareil varie.
• Veuillez contrôler que votre appareil prenne en charge le
prol Bluetooth A2DP.
• Veuillez contrôler que la fonction Bluetooth de votre
appareil soit activée.
• Veuillez contrôler que la distance entre la radio et votre
appareil n‘excède pas un mètre.
• Appuyez plusieurs fois sur la touche MODE jusqu‘à ce
que « Switch to BT » apparaisse à l‘écran et que la radio
commute en mode de couplage Bluetooth au bout de
quelques secondes.
• Lancez la recherche d‘appareils Bluetooth sur votre
appareil. « BT speakerN » apparaîtra à l‘écran de
votre appareil dès que la radio a été détectée. Saisissez
« 0000 » si votre appareil exige un code de couplage.
• Sélectionnez « BT speakerN » sur votre appareil et
exécutez la procédure de couplage. Cette opération peut
durer plusieurs secondes. La radio indique la bonne
exécution du couplage par un bip et «
» apparaît à
l‘écran.
• À la n du couplage, appuyez sur la molette SCROLL/OK
►I I ou démarrez la lecture sur votre appareil.
• Appuyez à nouveau sur la molette SCROLL/OK ►I I ou
sur la touche/le bouton de pause ou d‘arrêt de votre
appareil an d‘interrompre la lecture.
• Utilisez les touches ►►I ou I◄◄ (ou les touches/les
boutons correspondants de votre appareil) an de faire
une avance rapide / un retour rapide pendant la lecture
d‘une piste.
Remarque – Téléphones portables
• Certains téléphones portables interrompent la
connexion Bluetooth en cas d‘appels entrants. Il ne
s‘agit donc pas d‘un problème de votre radio, mais
bien du fonctionnement normal de votre portable en
mode Bluetooth, différent en fonction du fabricant.
Page 24

22
7. Autres fonctions
7.1 Éclairage de l'écran
Cette radio dispose d‘un éclairage d‘écran à trois niveaux.
• Appuyez plusieurs sur la touche BACKLIGHT jusqu‘à
obtention de la luminosité souhaitée.
7.2 Affichage de la version du microprogramme de
la radio
Appuyez pendant plus de 2 s sur la touche INFO an
d'acher la version du microprogramme de la radio.
7.3 Rétablissement des paramètres par défaut
• Insérez la prise du câble secteur dans l‘entrée 220 V de
votre radio DAB/FM.
• Branchez le câble secteur à une prise de courant 220 V.
• Appuyez sur la touche STANDBY an de mettre la radio
sous tension.
• Appuyez sur la touche MENU, et maintenez-la enfoncée
jusqu‘à ce que « Press SELECT to conrm reset »
apparaisse à l‘écran.
• Appuyez sur la touche SCROLL/OK ►I I .
« Restarting… » apparaît à l‘écran et l‘unité se met en
mode veille.
• Redémarrez la radio comme indiqué au point 4.1, puis
exécutez les étapes de paramétrage et de recherche des
stations
Avertissement
Toutes les présélections DAB et FM seront effacées après
la réinitialisation des réglages d‘usine.
7.4 Sortie casque
Une sortie casque (jack stéréo 3,5 mm) (14) se trouve sur la
face arrière de la radio.
Le branchement d'un casque met automatiquement les
haut-parleurs intégrés en sourdine.
Avertissement
Maintenez en permanence un niveau de volume
raisonnable. Un volume excessif - même à courte
durée - est susceptible d‘endommager votre ouïe.
7.5 Prise AUX
Une prise AUX (15) se trouve sur la face arrière de la radio.
Cette connexion vous permet de brancher une source
externe (lecteur MP3, iPod, etc.) et d‘utiliser cette dernière
via la radio.
• Appuyez plusieurs fois sur la touche MODE, jusqu‘à ce
que « Switch to AUX » apparaisse à l‘écran. La lecture
commute automatiquement vers la source branchée à la
prise AUX.
Remarque - Économie d‘énergie
• La radio en mode AUX commute automatiquement en
mode veille en cas d‘inactivité pendant plus de trois
heures.
• Appuyez sur la touche MODE pendant plus de 2 s,
jusqu‘à ce que « ECO off » ou « ECO on » apparaisse
à l‘écran an d‘activer ou désactiver le mode
d‘économie d‘énergie.
7.6 Connexion USB
Un port USB, doté de la tension USB standard de 500 mA
maxi, (16) se trouve sur la face arrière de la radio.
Remarque
• Le port USB est utilisé pour la charge d‘appareils USB
externes et ne prend pas en charge de transmission de
données.
8. Soins et entretien
Nettoyez la balance uniquement à l’aide d’un chiffon non
breux légèrement humide ; évitez tout détergent agressif.
9. Exclusion de garantie
La société Hama GmbH & Co. KG décline toute
responsabilité en cas de dommages provoqués par une
installation, un montage ou une utilisation non conformes
du produit ou encore provoqués par un non respect des
consignes du mode d‘emploi et/ou des consignes de
sécurité.
10. Service et assistance
En cas de question concernant le produit, veuillez vous
adresser au service de conseil produits de Hama.
Ligne téléphonique directe : +49 9091 502-115 (allemand/
anglais)
Vous trouverez ici de plus amples informations concernant
l‘assistance : www.hama.com
Page 25

23
11. Caractéristiques techniques
Alimentation AC: 100-240V~60/50Hz
Puissance de sortie: 5 W x 2
Plage de fréquence
DAB 174 - 240MHz /
FM 87.5 - 108MHz
Dimensions de l’unité 345 (L) x215 (W) x 155 (H) mm
Poids 2.2 kg
12. Consignes de recyclage
Remarques concernant la protection de
l’environnement:
Conformément à la directive européenne 2002/96/
CE et 2006/66/CE, et an d‘atteindre un certain
nombre d‘objectifs en matière de protection de
l‘environnement, les règles suivantes doivent être
appliquées: Les appareils électriques et électroniques ainsi
que les batteries ne doivent pas être éliminés avec les
déchets ménagers. Le pictogramme “picto” présent sur le
produit, son manuel d‘utilisation ou son emballage indique
que le produit est soumis à cette réglementation. Le
consommateur doit retourner le produit/la batterie usager
aux points de collecte prévus à cet effet. Il peut aussi le
remettre à un revendeur. En permettant enn le recyclage
des produits ainsi que les batteries, le consommateur
contribuera à la protection de notre environnement. C‘est
un acte écologique.
Page 26

24
I Istruzioni per l‘uso
Elementi di comando e indicazioni
1. SCORRI/OK ►I I
2. Tasto MENU/ I◄◄
3. Display LCD
4. Tasto INFO/ ►►I
5. Regolatore volume
6. Altoparlante
7. Tasto MEMORIA
8. Tasto G
9. Tasto MODALITÀ
10. Illuminazione display
11. Tasto ALLARME/SNOOZE
12. Tasto SPEGNIMENTO A TEMPO
13. Antenna telescopica
14. Presa cue
15. Presa di ingresso AUX
16. Attacco USB
17. Presa per allacciamento alla rete
Grazie per avere acquistato un prodotto Hama!
Prima della messa in esercizio, leggete attentamente le
seguenti istruzioni e avvertenze, quindi conservatele in un
luogo sicuro per una eventuale consultazione. In caso di
cessione dell‘apparecchio, consegnate anche le presenti
istruzioni al nuovo proprietario.
1. Spiegazione dei simboli di avvertimento e delle
indicazioni
Attenzione
Viene utilizzato per contrassegnare le indicazioni
di sicurezza oppure per rivolgere l‘attenzione verso
particolari rischi e pericoli.
Nota
Viene utilizzato per contrassegnare informazioni
supplementari o indicazioni importanti.
Pericolo dovuto a scossa elettrica
Questo simbolo indica un pericolo dovuto al contatto
con parti non isolate del prodotto che potrebbero
provocare una tensione pericolosa di entità tale da
generare il pericolo di una scossa elettrica.
2. Contenuto della confezione
• radio Bluetooth/DAB/FM
• cavo di alimentazione
• e presenti istruzioni per l’uso
3. Indicazioni di sicurezza:
• Il prodotto è concepito per l’uso domestico privato, non
commerciale.
• Proteggere il prodotto da sporcizia, umidità e
surriscaldamento e utilizzarlo soltanto in ambienti
asciutti.
• Tenere questo apparecchio, come tutte le
apparecchiature elettriche, fuori dalla portata dei
bambini!
• Non fare cadere il prodotto e non sottoporlo a forti
scossoni!
• Non mettere in esercizio il prodotto al di fuori dei suoi
limiti di rendimento indicati nei dati tecnici.
• Tenere l’imballo fuori dalla portata dei bambini, pericolo
di soffocamento!
• Smaltire immediatamente il materiale d‘imballaggio
attenendosi alle prescrizioni locali vigenti.
• Non apportare modiche all’apparecchio per evitare di
perdere i diritti di garanzia.
Pericolo dovuto a scossa elettrica
• Non aprire il prodotto e non utilizzarlo più se
danneggiato
• Non utilizzare il prodotto se l‘adattatore AC, il cavo
adattatore o il cavo di rete sono danneggiati.
• Non tentare di aggiustare o riparare l’apparecchio da
soli. Fare eseguire qualsiasi lavoro di riparazione al
personale specializzato competente.
4. Messa in funzione
Nota – ricezione ottimale
Il presente prodotto è dotato di un‘antenna telescopica
incorporata DAB/FM orientabile, a ni ricezione ottimale,
tramite lo snodo sulla base dell‘antenna. Importante:
• Estrarre sempre completamente l‘antenna.
• Per una ricezione ottimale, consigliamo di orientare
perpendicolarmente l‘antenna.
4.1 Accensione con allacciamento alla rete
• Collegare il cavo di alimentazione allegato all‘ingresso
rete della radio.
• Collegare il cavo di rete a una presa correttamente
installata.
• Premere G per accendere la radio.
Page 27

25
Attenzione
• Collegare il prodotto solo a una presa di rete
appositamente omologata. La presa di rete deve
poter essere raggiungibile in qualsiasi momento.
• Scollegare il prodotto dalla rete mediante l‘interruttore
on/off; se questo non è presente, estrarre il cavo di
rete dalla presa.
Nota – quando si accede per la prima volta
• La radio si accende automaticamente nella modalità
DAB con formula di saluto (F1) e imposta innanzitutto
l‘ora. Ciò può richiedere alcuni secondi.
• La radio esegue quindi la funzione di scansione
automatica.
• Durante la scansione automatica appaiono sul
display Scanning… (scansione in corso), una barra di
avanzamento e il numero di stazioni radio attualmente
localizzate. (F2)
• Una volta completata la scansione automatica, procedere
con SCORRI/OK ►I I , per selezionare tra le stazioni
localizzate quella che si desidera ascoltare.
• Premere il tasto SCORRI/OK ►I I per ascoltare la stazione
selezionata.
Nota– scansione automatica
• Se la scansione automatica non è in grado di
localizzare stazioni, la radio passa al menu Tune Select
(Selezione sintonizzazione).
• Ruotare SCORRI/OK ►I I per optare tra
sintonizzazione manuale (Manual Tune) o scansione
manuale..
• Premere SCORRI/OK ►I I per confermare la selezione.
5. Funzione orologio, sveglia e timer
Non occorre regolare l‘ora, essendo oltremodo impossibile
in quanto la radio acquisisce l‘impostazione temporale
locale tramite il segnale DAB e si regola automaticamente.
Nella modalità FM ciò non è tuttavia sempre possibile,
dal momento che non tutte le stazioni radio trasmettono
un‘informazione temporale.
Nota – proprietà della funzione sveglia
• La radio DAB consente di regolare due orari di sveglia
individuali.
• L‘allarme può avvenire con suoneria o con una
stazione radio precedentemente impostata (DAB/FM).
5.1 Regolazione dell'ora di sveglia e del tipo di
allarme
• Premere ALLARME per aprire il menu dell‘allarme.
• Selezionare con SCORRI/OK ►I I l‘allarme 1 o 2.
• Premere SCORRI/OK ►I I per confermare la selezione.
• Premere ancora una volta SCORRI/OK ►I I e selezionare
con SCORRI/OK ►I I l‘opzione di menu Alarm Setting
(Impostazione allarme).
• Premere SCORRI/OK ►I I per confermare la selezione.
Lampeggia l‘indicazione oraria sul display e può essere
regolata (F10).
• Ruotare SCORRI/OK ►I I per regolare l‘ora del tempo di
allarme desiderato.
• Premere SCORRI/OK ►I I per salvare l‘impostazione.
• Ruotare inne SCORRI/OK ►I I per regolare i minuti del
tempo di allarme desiderato.
• Premere SCORRI/OK ►I I per salvare l‘impostazione.
Dopo aver memorizzato i minuti è memorizzato il
tempo di allarme e si perviene automaticamente alle
impostazioni del tipo di allarme.
• Ruotare SCORRI/OK ►I I per selezionare la preselezione
(vedi al riguardo il punto 6.7) della stazione DAB o FM
con la quale si intende attivare la sveglia (F11).
Page 28

26
• Premere SCORRI/OK ►I I per salvare l‘impostazione.
• Ruotare SCORRI OK ►I I per selezionare la suoneria
(1 o 2) dell‘allarme.
• Premere SCORRI/OK ►I I per salvare l‘impostazione.
• Ruotare SCORRI/OK ►I I per selezionare il volume
dell‘allarme (1 - 20), con il quale si intende attivare la
sveglia (F10).
• Premere SCORRI/OK ►I I per salvare l‘impostazione.
Nota
• Se desiderato, ripetere l‘intera procedura per il
secondo allarme (1 o 2).
5.2 Attivazione della funzione sveglia
• Premere ALLARME per aprire il menu dell‘allarme.
• Selezionare con SCORRI/OK ►I I l‘allarme 1 o 2.
• Premere SCORRI/OK ►I I per confermare la selezione.
• Selezionare inne con SCORRI/OK ►I I l‘opzione di menu
Alarm Source (Sorgente allarme).
• Premere SCORRI/OK ►I I per confermare la selezione.
• Selezionare con SCORRI/OK ►I I il tipo di allarme
desiderato. Se si ruota SCORRI/OK ►I I si percorre la
sequenza seguente:
• Premere SCORRI/OK ►I I , per confermare la selezione
quando sul display appare il tipo di allarme desiderato.
Si attiva in questo modo l‘allarme e sul display appare il
simbolo di una campana con la cifra 1 o 2 per l‘allarme
selezionato.
• L‘allarme verrà emesso all‘ora impostata.
• Premere G se si intende disattivare l‘allarme.
Nota
• Vericare che il livello del volume impostato sia
suciente, se si desidera essere svegliati da una
stazione DAB o FM.
• La stazione impostata viene riprodotta per ca. 1 ora, la
stessa durata vale anche per una suoneria impostata
come alternativa.
5.3 Ripetizione automatica dell'allarme e
disattivazione della funzione sveglia
L‘allarme si ripete automaticamente ogni giorno all‘ora
impostata, ntantoché è attiva la funzione sveglia.
Premere ALLARME, selezionare l‘allarme 1 o 2 e
selezionare quindi Allarme # off nell‘opzione di menu
Sorgente allarme, per disattivare la funzione sveglia
corrispondente (1 o 2).
5.4 Funzione snooze
Nota
• La funzione snooze ha effetto solo sull‘allarme di volta
in volta attivo – se mentre è attivo un allarme viene
emesso un secondo allarme, quest‘ultimo dovrà essere
interrotto separatamente con la funzione snooze.
• Premere SNOOZE quando si intende interrompere
l‘allarme ma non disattivarlo del tutto. L‘allarme verrà
emesso nuovamente dopo una pausa di circa 5 minuti.
L‘attivazione della funzione snooze è visualizzata sul
display da “Zz”.
5.5 Funzione timer
Nota
• Quando è attiva la funzione timer, la radio si spegne
automaticamente al termine del tempo selezionato.
• Sul display, l‘attivazione della funzione timer è
indicata dalla lettera S e una cifra, dove la cifra
rappresenta il tempo selezionato (ad es. S6 = timer
attivo, disattivazione automatica dopo 60min).
• Per vericare lo stato di timer premere ripetutamente
INFO e visualizzare sul display l‘informazione
corrispondente.
• Premere il tasto di SPEGNIMENTO A TEMPO per
attivare la funzione timer. Sul display appare Timer
spegnimento a tempo e si passa all‘intervallo di tempo
standard di 90 minuti.
• Premere ripetutamente il tasto di SPEGNIMENTO
A TEMPO, per selezionare un altro intervallo di
tempo al termine del quale la radio deve spegnersi
automaticamente.
• Sono selezionabili gli intervalli della sequenza seguente,
le cui cifre indicano i tempi di spegnimento possibili in
minuti:
• Wählen Sie die gewünschte Ausschaltzeit aus, indem
Sie SLEEP mind. 2 Sek. lang nicht mehr betätigen.
Die aktuell angezeigte Ausschaltzeit wird automatisch
übernommen.
Page 29

27
6. Funzionamento radio DAB/FM
6.1 Ricerca automatica di stazioni DAB
La ricerca automatica di stazioni DAB scandisce la banda
DAB III alla ricerca di emittenti radio. Al termine della
scansione vengono salvate in ordine alfabetico tutte le
emittenti radio localizzate e prive di disturbi.
• Premere MENU per pervenire al menu di selezione
sintonizzazione (Tune Select).
• Ruotare SCORRI/OK ►I I per selezionare Scansione
automatica e premere SCORRI/OK ►I I per confermare
la selezione.
Si avvia automaticamente la ricerca di stazioni DAB,
visualizzata sul display da Scansione in corso… e da
una barra di avanzamento. (F2)
• Ruotare SCORRI/OK ►I I per prendere visione di tutte le
stazioni radio localizzate in ordine alfabetico.
• Premere SCORRI/OK ►I I per selezionare la riproduzione
di una stazione.
6.2 Ricerca manuale di stazioni DAB
• Premere MENU per pervenire al menu di selezione
sintonizzazione (Tune Select).
• Ruotare SCORRI/OK ►I I per selezionare
Sintonizzazione manuale (Manual tune) e premere
SCORRI/OK ►I I per confermare la selezione.
• Ruotare SCORRI/OK ►I I per scandire tutti i canali DAB.
Il display presenta un campo di regolazione da 5A a 13F e
visualizza le frequenze che ne fanno parte. (F5)
• Ruotare SCORRI/OK ►I I per selezionare una frequenza.
Vengono visualizzati il nome e il gruppo della stazione
(ensemble/multiplex).
• Premere SCORRI/OK ►I I per selezionare la stazione da
riprodurre.
6.3 Ulteriori informazioni DAB
Se il nome visualizzato della stazione è seguito da >, vuol
dire che la stazione offre informazioni supplementari.
• Premere ripetutamente INFO per visualizzare le
informazioni supplementari nell‘ordine seguente:
Time/Date (Ora/Data):
l‘ora e la data vengono aggiornate automaticamente
insieme alle informazioni inviate. Se non sono disponibili
informazioni su ora e data, sul display appare unicamente
<TIME/DATE>.
Frequency (Frequenza):
viene visualizzata la frequenza della stazione ricevuta.
Audio Bit Rate (Velocità di trasmissione audio):
viene visualizzata l‘attuale velocità di trasmissione digitale
della stazione ricevuta.
Signal strength (intensità del segnale):
l‘intensità del segnale della stazione ricevuta viene
visualizzata da una barra e dalla rispettiva lunghezza.
DLS:
Dynamic Label Segment (intestazione del segmento
dinamico) visualizza informazioni supplementari sul
programma della stazione sotto forma di testo scorrevole.
Programme Type (Tipo di programma):
viene visualizzato lo stile del programma ricevuto. Se non
sono disponibili informazioni su ora e data, sul display
appare unicamente <Programme Type>.
Ensemble/Multiplex (nome del gruppo):
Ensemble/Multiplex è una combinazione di stazioni diverse
che trasmettono su una frequenza comune. Le stazioni
sono per lo più ani nella provenienza locale, nello stile
musicale o informativo.
Page 30

28
6.4 Ricerca automatica di stazioni FM
• Premere ripetutamente MODALITÀ, nché non appare
sul display Switch to FM (Commuta su FM). Sul display
appaiono quindi FM e la frequenza corrente.
• Premere e tenere premuto SCORRI/OK ►I I , nché non si
avvia la ricerca di stazioni automatica.
Durante la ricerca appare sul display Searching…
(F6) (Ricerca in corso). Quando viene individuata una
stazione, la funzione di ricerca si arresta e la stazione viene
riprodotta.
• Per cercare ulteriori stazioni, avviare nuovamente la
ricerca come descritto qui sopra.
6.5 Ricerca manuale di stazioni FM
• Premere MODALITÀ JOG/SELEZIONE.
• Ruotare VOLUME/SELEZIONE per impostare una
determinata sequenza non appena sul display appare
<Sintonizzazione> (Tuning).
6.6 Modalità mono/stereo
Durante la riproduzione premere SCORRI/OK ►I I per
commutare tra Auto e Mono.
Nota
• Il dispositivo risulta di default nella modalità
automatica e commuta pertanto, a seconda
dell‘intensità del segnale, tra le modalità Stereo e
Mono.
• Possono tuttavia vericarsi situazioni nelle quali
è possibile migliorare la qualità di ricezione o
la comprensibilità se si corregge l‘impostazione
automatica con il metodo manuale qui menzionato.
6.7 Salvataggio e richiamo di preselezioni
Sia nella modalità DAB, sia in quella FM possono essere
salvate su locazioni di memoria rispettivamente no a 10
stazioni, cosiddette preselezioni. È possibile in questo modo
richiamare direttamente le stazioni preferite.
• Impostare la stazione che si desidera salvare come
preselezione.
• Premere e tenere premuto MEMORIA, nché sul display
non appare Save to P (Salva su) e viene visualizzato
il numero corrispondente alla preselezione non ancora
assegnata.(F7)
• Se si desidera ricorrere alla preselezione non ancora
assegnata come locazione di memoria per la stazione
impostata, passare direttamente all‘operazione
successiva. Altrimenti, ruotare SCORRI/OK ►I I per
selezionare un altro numero di preselezione.
• Confermare la selezione con SCORRI/OK ►I I , sulla
preselezione si salva così la stazione impostata. Sul
display appare a titolo di conferma Preset # saved
(Salvata # preselezione) (F9).
• Per richiamare una preselezione premere MEMORIA
e selezionare con SCORRI/OK ►I I il numero della
preselezione desiderata. La stazione precedentemente
salvata viene riprodotta automaticamente, non appena
non hanno luogo altre azioni per alcuni secondi.
6.8 Modalità Bluetooth
Via Bluetooth è consentita una connessione senza li dei
terminali digitali alla radio.
Vengono supportati due proli Bluetooth differenti:
• Advanced Audio Distribution Prole (A2DP)
- trasmissione audio di elevata qualità
- trasferimento di dati audio da un PC, telefono
cellulare…ecc.
• Audio Video Remote Control Prole (AVRCP)
- utilizzo del terminale connesso come telecomando
per la radio.
Page 31

29
Nota – Bluetooth
• Per ogni prolo menzionato qui sopra può essere
connesso alla radio solo un terminale (PC, notebook,
telefono cellulare…ecc.).
• Tener presente che la qualità della connessione
Bluetooth può variare a seconda del modello del
terminale e della versione del driver Bluetooth
installato nel terminale.
• Ricorrere possibilmente a terminali dotati di Bluetooth
2.1 e controllare che sia installato il rmware più
aggiornato tra quelli offerti dal costruttore.
• Non è possibile garantire la compatibilità con tutti i
terminali e tutti i tipi di mezzi trasmissivi disponibili
sul mercato.
• Prestare attenzione che in un raggio di ca. 10 metri
non siano attivi altri terminali e connessioni Bluetooth.
• Prestare attenzione che tra la radio e il rispettivo
terminale Bluetooth non risultino pareti, scaffali con
libri, gruppi di persone o simili. Tali ostacoli riducono
infatti considerevolmente la portata e la qualità della
trasmissione.
6.9 Connessione e riproduzione di dati musicali
nella modalità Bluetooth
Nota – connessione Bluetooth
• •Osservare anche tutte le istruzioni e avvertenze
in merito a Bluetooth, riportate nelle istruzioni per
l’uso del terminale da connettere. Può variare infatti
il procedimento esatto per stabilire una connessione
Bluetooth tra la radio e il rispettivo terminale.
• Controllare che il terminale supporti il prolo Bluetooth
A2DP.
• Controllare che sul terminale sia attivo Bluetooth.
• Controllare che tra distanza tra la radio e il terminale non
superi 1 metro.
• Premere ripetutamente MODALITÀ, nché sul display
non appare Switch to BT (Commuta su BT) e la radio
non passa dopo alcuni secondi nella modalità di
accoppiamento del Bluetooth.
• Attivare nelle impostazioni Bluetooth sul terminale la
ricerca di dispositivi Bluetooth. Una volta localizzata,
la radio viene visualizzata sul terminale come BT
speakerN. Se appare la richiesta di un codice per
l‘accoppiamento, immettere 0000.
• Selezionare sul terminale BT speakerN ed eseguire
l‘accoppiamento. Ciò può richiedere alcuni secondi. Un
accoppiamento completato viene segnalato dalla radio con
un segnale acustico e l‘indicazione di un simbolo
sul display.
• Ad accoppiamento avvenuto, premere SCORRI/OK ►I I o
avviare la riproduzione sul terminale.
• Per arrestare la riproduzione, premere nuovamente
SCORRI/OK ►I I oppure il tasto o pulsante di pausa o
stop corrispondente sul terminale.
• Per saltare avanti o indietro da un le musicale all‘altro
durante la riproduzione, premere ►► I o I◄◄ , oppure i
tasti o pulsanti corrispondenti sul terminale.
Nota – telefoni cellulari
• All‘arrivo di chiamate, alcuni telefoni cellulari
interrompono la connessione Bluetooth. Il problema
non risiede nella radio, bensì è da attribuire a un
comportamento particolare del telefono cellulare
durante il funzionamento Bluetooth, che varia da
costruttore a costruttore.
7. Ulteriori funzioni
7.1 Illuminazione del display
La radio è dotata di un‘illuminazione del display con tre
livelli di intensità regolabili.
• Premere ripetutamente RETROILLUMINAZIONE no a
raggiungere il livello di luminosità desiderato.
7.2 Visualizzazione della versione firmware della
radio
Premere e tenere premuto INFO per oltre 2 secondi per
visualizzarne la versione rmware corrente.
7.3 Ripristino delle impostazioni di fabbrica
• Collegare il cavo di alimentazione allegato all‘ingresso da
220V della radio DAB/FM.
• Collegare il cavo di rete a una presa correttamente
installata da 220V.
• Premere STANDBY per accendere la radio.
• Premere e tenere premuto MENU nché sul display
non appare „Press SELECT to conrm reset” (Premi
SCORRI/OK ►I I per confermare reimpostazione).
• Premere SCORRI/OK ►I I . Il display visualizza
Restarting… (Riavvio in corso) e passa inne alla
modalità Standby.
• Riavviare la radio come descritto al punto 4.1 e procedere
quindi alle operazioni seguenti per l‘impostazione e la
ricerca delle stazioni.
Attenzione
• Se si ripristinano le impostazioni di fabbrica andranno
perse tutte le preselezioni DAB e FM salvate!
Page 32

30
7.4 Allacciamento cuffie
Sul retro della radio si trova una presa (14), adatta per
l'allacciamento di cue dotate di spina jack stereo da
3.5mm.
Se si utilizzano le cue, si disattivano automaticamente gli
altoparlanti incorporati.
Attenzione - grande disponibilità
• Regolare il volume su un livello adeguato. Il volume
troppo forte può causare danni all’udito, anche per
breve durata.
7.5 Presa AUX
Sul retro della radio si trova una presa AUX (15). Essa
consente la riproduzione di sorgenti esterne (MP3 Player,
iPod ecc.) tramite la radio.
• Premere ripetutamente MODALITÀ, nché non appare
sul display Switch to AUX (Commuta su AUX). La
riproduzione verrà quindi commutata automaticamente
sulla sorgente allacciata alla presa AUX.
Nota - modalità di risparmio energetico
• Quando la radio resta inattiva per oltre 3 ore nella
modalità AUX, passa automaticamente alla modalità
Standby.
• Per attivare o disattivare la modalità di risparmio
energetico, premere MODALITÀ per almeno 2 sec.,
nché sul display non appare ECO off o ECO on.
7.6 Attacco USB
Sul retro della radio si trova un attacco USB (16), che mette
a disposizione la tensione standard USB di 5Volt con max.
500mA.
Nota
• L‘attacco USB serve per caricare dispositivi USB esterni
e non supporta la trasmissione di dati.
8. Cura e manutenzione
• Pulire questo prodotto solo con un panno umido e
che non lascia pelucchi e non utilizzare mai detergenti
aggressivi.
9. Esclusione di garanzia
Hama GmbH & Co.KG non si assume alcuna responsabilità
per i danni derivati dal montaggio o l‘utilizzo scorretto del
prodotto, nonché dalla mancata osservanza delle istruzioni
per l‘uso e/o delle indicazioni di sicurezza.
10. Assistenza e supporto
In caso di domande sul prodotto, rivolgersi alla Consulenza
prodotto Hama.
Hotline: +49 9091 502-115 (ted./ing.)
Ulteriori informazioni sul supporto sono disponibili qui: www.
hama.com
11. Dati tecnici
Tensione AC: 100-240V~60/50Hz
Potenza di uscita: 5 W x 2
Campo di frequenza
DAB 174 - 240MHz /
FM 87.5 - 108MHz
Dimensioni 345 (L) x215 (W) x 155 (H) mm
Peso 2.2 kg
12. Indicazioni di smaltimento
Informazioni per protezione ambientale:
Dopo l’implementazione della Direttiva Europea
2002/96/EU e 2006/66/EU nel sistema legale
nazionale, ci sono le seguenti applicazioni: Le
apparecchiature elettriche ed elettroniche e le
batterie non devono essere smaltite con i riuti domestici. I
consumatori sono obbligati dalla legge a restituire I
dispositivi elettrici ed elettronici e le batterie alla ne della
loro vita utile ai punti di raccolta pubblici preposti per
questo scopo o nei punti vendita. Dettagli di quanto
riportato sono deniti dalle leggi nazionali di ogni stato.
Questo simbolo sul prodotto, sul manuale d’istruzioni o
sull’imballo indicano che questo prodotto è soggetto a
queste regole. Riciclando, ri-utilizzando i materiali o
utilizzando sotto altra forma i vecchi prodotti/le batterie,
darete un importante contributo alla protezione
dell’ambiente.
Page 33

31
G English
Hama GmbH & Co. KG hereby declares that this device is in compliance with the basic requirements and other relevant regulations of the 1999/5/EC guideline.
You will nd the declaration of conformity with R&TTE directive 99/5/EC on the internet at www.hama.com.
D Deutsch [German]
Hiermit erklärt Hama GmbH & Co. KG, dass sich dieses Gerät in Übereinstimmung mit den grundlegenden Anforderungen und den übrigen einschlägigen
Bestimmungen der Richtlinie 1999/5/EG bendet. Die Konformitätserklärung nach der R&TTE Richtlinie 99/5/EG nden Sie unter www.hama.com.
F Français [French]
La société Hama GmbH & Co. KG certie que cet appareil est conforme aux exigences de base et aux dispositions de la directive 1999/5/ en vigueur. Vous
trouverez la déclaration de conformité à la directive R&TTE 99/5/CE sur www.hama.de.
E Español [Spanish]
Mediante la presente, Hama GmbH &Co. KG declara que este aparato cumple con los requisitos básicos y los demás reglamentos relevantes de la directiva
1999/5/CE. La declaración de conformidad según la directiva R&TTE 99/5/CE la encontrará en www.hama.com, buscando el código mencionado en el recuadro
superior “nd”, y luego dentro de la carpeta “downloads”. O bien en la www.hama.es , buscando el mismo código en el aparato de búsqueda rápida.
R Россия [Russian]
Компания Hama GmbH & Co. KG настоящим подтверждает, что данное изделие полностью соответствует основным требованиям, а также
предписаниям и положениям нормативов 1999/5/EG. Заявление о соответствии товара нормам R&TTE 99/5/EG см. на вебузле www.hama.com.
I Italiano [Italian]
Hama GmbH & Co. KG dichiara che questo apparecchio soddisfa i requisiti fondamentali ed è conforme alle norme vigenti della direttiva 1999/5/CE. La
dichiarazione di conformità secondo la direttiva R&TTE 99/5/CE è disponibile sul sito www.hama.com.
N Nederlands [Dutch]
Hiermee verklaart Hama GmbH & Co. KG, dat dit apparaat voldoet aan de vereisten en de overige relevante voorschriften van de richtlijn 1999/5/EG. De
verklaring van overeenstemming conform de R&TTE-richtlijn 99/5/EG vindt u op internet onder www.hama.com.
J Ελληνική [Greek]
Η εταιρία Hama GmbH & Co. KG δηλώνει πως η συσκευή αυτή εκπληρώνει τις βασικές απαιτήσεις και τις λοιπές σχετικές διατάξεις της οδηγίας 1999/5/EG Τη
δήλωση συµµόρφωσης σύµφωνα µε την οδηγία R&TTE 99/5/ΕΚ θα τη βρείτε στη διεύθυνση www.hama.de.
P Polski [Polish]
Hama GmbH & Co. KG oświadcza niniejszym, że urządzenie to spełnia podstawowe wymagania i pozostałe właściwe postanowienia dyrektywy 1999/5/WE.
Deklaracja zgodności wg dyrektywy 99/5WE dotyczącej urządzeń radiowych i telekomunikacyjnych dostępna jest na stronie www.hama.com.
H Magyar [Hungarian]
A Hama GmbH & Co. KG ezúton kijelenti, hogy a jelen készülék összhangban van az 1999/5/EK irányelv alapvető követelményeivel és az egyéb vonatkozó
rendelkezésekkel. A 99/5/EK R&TTE irányelv szerinti megfelelőségi nyilatkozatot a www.hama.com címen találja meg.
C Česky [Czech]
Tímto rma Hama GmbH & Co. KG potvrzuje, že tento přístroj odpovídá základním požadavkům a ostatním relevantním předpisům směrnice 1999/5/ES.
Prohlášení o shodě podle směrnice R&TTE 99/5/ES najdete na internetových stránkách www.hama.com.
Q Slovensky [Slovak]
Spoločnosť Hama GmbH & Co. KG týmto prehlasuje, že tento prístroj zodpovedá základným požiadavkám a ostatným relevantným ustanoveniam Smernice
1999/5/ES. Vyhlásenie o zhode podľa smernice R&TTE 99/5/ES si môžete pozrieť na adrese www.hama.com.
O Português [Portuguese]
A Hama GmbH & Co. KG declara, deste modo, que este aparelho respeita as exigências básicas e restantes requisitos relevantes da directiva 1999/5/CE. Pode
consultar a declaração de conformidade, segundo a directiva R&TTE 99/5/CE, em www.hama.com
T Türkiye [Turkish]
Hama GmbH & Co. KG bu cihazın 1999/5/EC Direkti’nin ilgili talimatlarına ve bu direktif tarafından istenen koşullara uygunluğunu beyan eder. R&TTE Direkti
99/5/EC’ye göre uygunluk beyanı için www.hama.com adresine bakınız.
M România [Romanian]
Hama GmbH & Co. KG, declară prin prezenta ca acest aparat este în conformitate cu cerinţele esenţiale şi celelalte hotărâri relevante ale Directivei 1999/5/EC.
Declaraţia de conformitate conform Directivei R&TTE 99/5/EC o găsiţi în Internet la www.hama.com.
S Svenska [Swedish]
Hama GmbH & Co. KG försäkrar härmed att den här apparaten överensstämmer med de grundläggande kraven och övriga relevanta bestämmelser i direktivet
1999/5/EG. Försäkran om överensstämmelse enligt R&TTE-direktivet 99/5/EG hittar du på www.hama.de.
L Suomi [Finnish]
Hama GmbH & Co. KG vakuuttaa täten, että tämä laite on direktiivin 1999/5/EY perusvaatimusten ja muiden oleellisten säännösten mukainen. Radio- ja
telepäätelaitteita koskevan direktiivin 99/5/EY mukainen vaatimustenmukaisuusvakuutus löytyy osoitteesta www.hama.com.
Page 34
32
g Note on environmental protection:
After the implementation of the European Directive 2002/96/EU and 2006/66/EU in the national legal system, the following applies:
Electric and electronic devices as well as batteries must not be disposed of with household waste. Consumers are obliged by law to return
electrical and electronic devices as well as batteries at the end of their service lives to the public collecting points set up for this purpose or
point of sale. Details to this are dened by the national law of the respective country.
This symbol on the product, the instruction manual or the package indicates that a product is subject to these regulations.
By recycling, reusing the materials or other forms of utilising old devices/Batteries, you are making an important contribution to protecting
our environment.
e Nota sobre la protección medioambiental:
Después de la puesta en marcha de la directiva Europea 2002/96/EU y 2006/66/EU en el sistema legislativo nacional, se aplicara lo siguiente:
Los aparatos eléctricos y electrónicos, así como las baterías, no se deben evacuar en la basura doméstica. El usuario está legalmente
obligado a llevar los aparatos eléctricos y electrónicos, así como pilas y pilas recargables, al nal de su vida útil a los puntos de recogida
comunales o a devolverlos al lugar donde los adquirió. Los detalles quedaran denidos por la ley de cada país. El símbolo en el producto, en
las instrucciones de uso o en el embalaje hace referencia a ello. Gracias al reciclaje, al reciclaje del material o a otras formas de reciclaje
de aparatos/pilas usados, contribuye Usted de forma importante a la protección de nuestro medio ambiente.
o
Notitie aangaande de bescherming van het milieu:
Ten gevolge van de invoering van de Europese Richtlijn 2002/96/EU en 2006/66/EU in het nationaal juridisch system, is het volgende van
toepassing:
Elektrische en elektronische apparatuur, zoals batterijen mag niet met het huisvuil weggegooid worden. Consumenten zijn wettelijk verplicht
om electrische en elctronische apparaten zoals batterijen op het einde van gebruik in te dienen bij openbare verzamelplaatsen speciaal
opgezet voor dit doeleinde of bij een verkooppunt. Verdere specicaties aangaande dit onderwerp zijn omschreven door de nationale wet
van het betreffende land. Dit symbool op het product, de gebruiksaanwijzing of de verpakking duidt erop dat het product onderworpen is aan
deze richtlijnen. Door te recycleren, hergebruiken van materialen of andere vormen van hergebruiken van oude toestellen/batterijen, levert u
een grote bijdrage aan de bescherming van het mileu.
k
Υπόδειξη σχετικά με την προστασία περιβάλλοντος:
Από τη στιγμή που η Ευρωπαϊκή Οδηγία 2002/96/EΕ και 2006/66/EE ενσωματώνεται στο εθνικό δίκαιο ισχύουν τα εξής:
Οι ηλεκτρικές και οι ηλεκτρονικές συσκευές καθώς και οι μπαταρίες δεν επιτρέπεται να πετιούνται στα οικιακά απορρίμματα. Οι καταναλωτές
υποχρεούνται από τον νόμο να επιστρέφουν τις ηλεκτρικές και ηλεκτρονικές συσκευές καθώς και τις μπαταρίες στο τέλος της ζωής τους στα
δημόσια σημεία περισυλλογής που έχουν δημιουργηθεί γι’ αυτό το σκοπό ή στα σημεία πώλησης. Οι λεπτομέρειες ρυθμίζονται στη σχετική
νομοθεσία. Το σύμβολο πάνω στο προϊόν, στο εγχειρίδιο χρήσης ή στη συσκευασία παραπέμπει σε αυτές τις διατάξεις. Με την ανακύκλωση,
επαναχρησιμοποίηση των υλικών ή με άλλες μορφές χρησιμοποίησης παλιών συσκευών / Μπαταριών συνεισφέρετε σημαντικά στην προστασία του
περιβάλλοντος. Στη Γερμανία ισχύουν αντίστοιχα οι παραπάνω κανόνες απόρριψης σύμφωνα με τον κανονισμό για μπαταρίες και συσσωρευτές.
s
Not om miljöskydd:
Efter implementeringen av EU direktiv 2002/96/EU och 2006/66/EU i den nationella lagstiftningen, gäller följande:
Elektriska och elektroniska apparater samt batterier får inte kastas i hushållssoporna. Konsumenter är skyldiga att återlämna elektriska och
elektroniska apparater samt batterier vid slutet av dess livslängd till, för detta ändamål, offentliga uppsamlingsplatser. Detaljer för detta
denieras via den nationella lagstiftningen i respektive land. Denna symbol på produkten, instruktionsmanualen eller på förpackningen
indikerar att produkten innefattas av denna bestämmelse. Genom återvinning och återanvändning av material/batterier bidrar du till att
skydda miljön och din omgivning.
m Ympäristönsuojelua koskeva ohje:
Siitä lähtien, kun Euroopan unionin direktiivi 2002/96/EU ja 2006/66/EU otetaan käyttöön kansallisessa lainsäädännössä, pätevät seuraavat
määräykset:
Sähkö- ja elektroniikkalaitteita ja paristoja ei saa hävittää talousjätteen mukana. Kuluttajalla on lain mukaan velvollisuus toimittaa sähkö- ja
elektroniikkalaitteet niiden käyttöiän päätyttyä niille varattuihin julkisiin keräyspisteisiin tai palauttaa ne myyntipaikkaan. Tähän liittyvistä
yksityiskohdista säädetään kulloisenkin osavaltion laissa. Näistä määräyksistä mainitaan myös tuotteen symbolissa, käyttöohjeessa tai
pakkauksessa. Uudelleenkäytöllä, materiaalien/paristoja uudelleenkäytöllä tai muilla vanhojen laitteiden uudelleenkäyttötavoilla on tärkeä
vaikutus yhteisen ympäristömme suojelussa.
q
Wskazówki dotyczące ochrony środowiska:
Od czasu wprowadzenia europejskiej dyrektywy 2002/96/EU i 2006/66/EU do prawa narodowego obowiązują następujące ustalenia:
Urządzeń elektrycznych, elektronicznych oraz baterii jednorazowych nie należy wyrzucać razem z codziennymi odpadami domowymi!
Użytkownik zobowiązany prawnie do odniesienia zepsutych, zniszczonych lub niepotrzebnych urządzeń elektrycznych i elektronicznych do
punktu zbiórki lub do sprzedawcy. Szczegółowe kwestie regulują przepisy prawne danego kraju. Informuje o tym symbol przekreślonego
kosza umieszczony na opakowaniu. Segregując odpady pomagasz chronić środowisko!
h
Környezetvédelmi tudnivalók:
Az európai irányelvek 2002/96/EU és 2006/66/EU ajánlása szerint, a megjelölt időponttól kezdve, minden EU-s tagállamban érvényesek a
következők:
Az elektromos és elektronikai készülékeket és az elemeket nem szabad a háztartási szemétbe dobni! A leselejtezett elektromos és
elektronikus készülékeket és elemeket, akkumulátorokat nem szabad a háztartási szemétbe dobni. Az elhasznált és működésképtelen
elektromos és elektronikus készülékek gyűjtésére törvényi előírás kötelez mindenkit, ezért azokat el kell szállítani egy kijelölt gyűjtő
helyre vagy visszavinni a vásárlás helyére. A termék csomagolásán feltüntetett szimbólum egyértelmű jelzést ad erre vonatkozóan a
felhasználónak. A régi készülékek begyűjtése, visszaváltása vagy bármilyen formában történő újra hasznosítása közös hozzájárulás
környezetünk védelméhez.
Page 35

33
c
Ochrana životního prostředí:
Evropská směrnice 2002/96/EG a 2006/66/EU ustanovujete následující:
Elektrická a elektronická zařízení stejně jako baterie nepatří do domovního odpadu.
Spotřebitel se zavazuje odevzdat všechna zařízení a baterie po uplynutí jejich životnosti do příslušných sběren.
Podrobnosti stanoví zákon příšlušné země. Symbol na produktu, návod k obsluze nebo balení na toto poukazuje.
Recyklací a jinými způsoby zužitkování přispíváte k ochraně životního prostředí.
v
Ochrana životného prostredia:
Európska smernica 2002/96/EU a 2006/66/EU stanovuje:
Elektrické a elektronické zariadenia, rovnako ako batérie sa nesmú vyhadzovať do domáceho odpadu. Spotrebiteľ je zo zákona povinný
zlikvidovať elektrické a elektronické zariadenia, rovnako ako batérie na miesta k tomu určené.
Symbolizuje to obrázok v návode na použitie, alebo na balení výrobku. Opätovným zužitkovaním alebo inou formou recyklácie starých
zariadení/batérií prispievate k ochrane životného prostredia.
p
Nota em Protecção Ambiental:
Após a implementação da directiva comunitária 2002/96/EU e 2006/66/EU no sistema legal nacional, o seguinte aplica-se:
Os aparelhos eléctricos e electrónicos, bem como baterias, não podem ser eliminados juntamente com o lixo doméstico. Consumidores
estão obrigados por lei a colocar os aparelhos eléctricos e electrónicos, bem como baterias, sem uso em locais públicos especícos para
este efeito ou no ponto de venda. Os detalhes para este processo são denidos por lei pelos respectivos países. Este símbolo no produto, o
manual de instruções ou a embalagem indicam que o produto está sujeito a estes regulamentos. Reciclando, reutilizando os materiais dos
seus velhos aparelhos/baterias, esta a fazer uma enorme contribuição para a protecção do ambiente.
u
Охрана окружающей среды:
С момента перехода национального законодательства на европейские нормативы 2002/96/EU и 2006/66/EU действительно следующее:
Электрические и электронные приборы, а также батареи запрещается утилизировать с обычным мусором. Потребитель, согласно
закону, обязан утилизировать электрические и электронные приборы, а также батареи и аккумуляторы после их использования
в специально предназначенных для этого пунктах сбора, либо в пунктах продажи. Детальная регламентация этих требований
осуществляется соответствующим местным законодательством. Необходимость соблюдения данных предписаний обозначается
особым значком на изделии, инструкции по эксплуатации или упаковке. При переработке, повторном использовании материалов
или при другой форме утилизации бывших в употреблении приборов Вы помогаете охране окружающей среды. В соответствии
с предписаниями по обращению с батареями, в Германии вышеназванные нормативы действуют для утилизации батарей и
аккумуляторов.
t
Çevre koruma uyarısı:
Avrupa Birliği Direktifi 2002/96/EU ve 2006/66/EU ulusal yasal uygulamalar için de geçerli olduğu tarihten itibaren:
Elektrikli ve elektronik cihazlarla piller normal evsel çöpe atılmamalıdır. Tüketiciler için, artık çalışmayan elektrikli ve elektronik cihazları piller,
kamuya ait toplama yerlerine götürme veya satın alındıkları yerlere geri verme yasal bir zorunluluktur. Bu konu ile ilgili ayrıntılar ulusal yasalarla
düzenlenmektedir. Ürün üzerinde, kullanma kılavuzunda veya ambalajda bulunan bu sembol tüketiciyi bu konuda uyarır. Eski cihazların geri
kazanımı, yapıldıkları malzemelerin değerlendirilmesi veya diğer değerlendirme şekilleri ile, çevre korumasına önemli bir katkıda bulunursunuz.
Yukarıda adı geçen atık toplama kuralları Almanya’da piller ve aküler için de geçerlidir.
r
Instrucţiuni pentru protecţia mediului înconjurător:
Din momentul aplicării directivelor europene 2002/96/UE în dreptul național sunt valabile următoarele:
Aparatele electrice şi electronice nu pot fi salubrizate cu gunoiul menajer. Consumatorul este obigat conform legii să predea
aparatele electrice și electronice la sfârșitul duratei de utilizare la locurile de colectare publice sau înapoi de unde au fost cumpărate.
Detaliile sunt reglementate de către legislaţia țării respective. Simbolul de pe produs, în instrucţiunile de utilizare sau pe ambalaj
indică aceste reglementări. Prin reciclarea, revalorificarea materialelor sau alte forme de valorificare a aparatelor scoase din uz
aduceți o contribuție importată la protecția mediului nostru înconjurător.
j
Anvisninger til beskyttelse af miljøet:
Fra og med indførelsen af EU-direktiverne 2002/96/EF og 2006/66/EF i national ret gælder følgende:
Elektrisk og elektronisk udstyr samt batterier må ikke bortskaffes sammen med almindeligt husholdningsaffald. Forbrugeren er lovmæssigt
forpligtet til at aevere udtjent elektrisk og elektronisk udstyr samt batterier til dertil indrettede, offentlige indsamlingssteder eller
til forhandleren. De nærmere bestemmelser vedr. dette fastlægges af lovgivningen i det pågældende land. Symbolet på produktet,
brugsvejledningen eller emballagen henviser til disse bestemmelser. Ved genbrug, genvinding eller andre former for nyttiggørelse af udtjent
udstyr/batterier giver du et vigtigt bidrag til beskyttelse af miljøet.
n Informasjon om beskyttelse av miljøet:
Fra tidspunktet for omsetning av de europeiske direktivene 2002/96/EF og 2006/66/EF i nasjonal rett gjelder følgende:
Elektriske og elektroniske apparater og batterier må ikke deponeres sammen med husholdningssøppelet. Forbrukeren er lovmessig
forpliktet til å levere elektriske og elektroniske apparater og batterier til de offentlige samlestedene eller tilbake til stedet hvor produktene
ble kjøpt. Detaljer angående dette reguleres av hvert land. Symbolet på produktet, bruksanvisningen eller emballasjen henviser om disse
bestemmelsene. Med resirkulering, gjenbruk av stoffer eller andre former av gjenbruk av gamle apparater/batterier bidrar du betydelig til å
beskytte miljøet vårt.
Page 36

00054812/04.14
All listed brands are trademarks of the corresponding companies. Errors and omissions excepted,
and subject to technical changes. Our general terms of delivery and payment are applied.
Hama GmbH & Co KG
D-86652 Monheim
www.hama.com
 Loading...