

Page 1
Universal Fernbedienung
00012306
00012307
4in1 / 8in1Universal Remote Control
Operating Instructions
Bedienungsanleitung
Mode d‘emploi
Instrucciones de uso
Руководство по эксплуатации
Istruzioni per l‘uso
Gebruiksaanwijzing
Οδηγίες χρήσης
Instrukcja obsługi
Használati útmutató
Návod k použití
Návod na použitie
Manual de instruções
Kullanma kılavuzu
Manual de utilizare
Bruksanvisning
Käyttöohje
Работна инструкция
GB
D
F
E
RUS
I
NL
GR
PL
H
CZ
SK
P
TR
RO
S
FIN
BG
Page 2

Page 3
4in1
8in1
11
22
TV DVDSAT VC R
33
44
20 20
AUXDVBT CBL AMP
TV DVDSAT VC R
19
18
19
18
55
66
SHIFT
GUIDE
EPG
17 17
SHIFT
GUIDE
EPG
16 16
OK
77
99
MENU
FAV
V
SETUP
15 15
EXIT
14 14
P
8
OK
MENU
V
MODE
SETUP
EXIT
P
10 10
123
11 11
12 12
456
789
AV
SMARTTV
0
APPS
13 13
Art.Nr.: 00012306
123
456
789
AV
SMARTTV
0
APPS
Art.Nr.: 00012307
AAA
Page 4

G Operating instruction
Universal Remote Control
Thank you for your decision for a Hama product.
Take your time and read the following instructions
and information completely. Please keep these
instructions in a safe place for future reference.
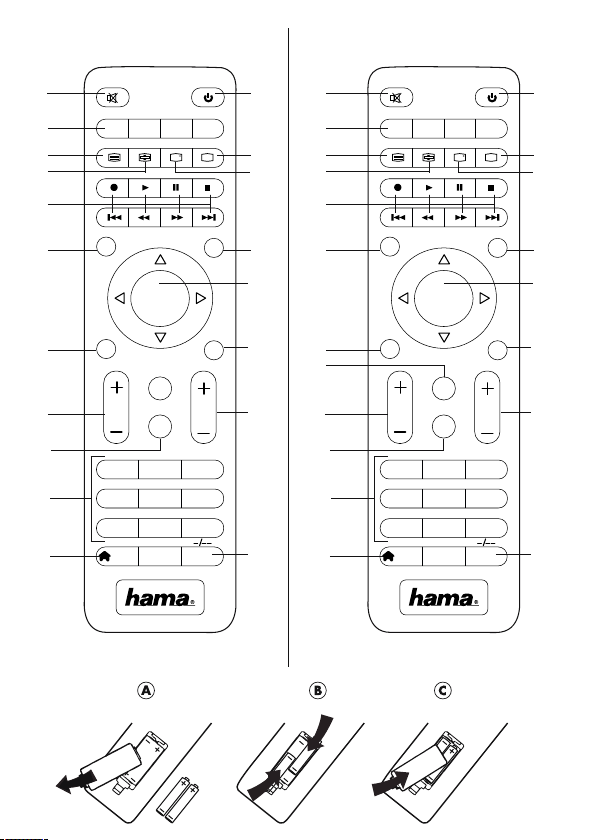
Function buttons (Models 4 in 1, 8 in 1)
1. Mute Switch
2. Device selection keys
3. Text ON: Switch on Teletext
4. Hold: Hold the current Teletext page
5. ◄◄ Rewind/red
► Play/yellow
►► Fast forward/blue
● Start recording
■ Stop/green
ll Pause/magenta
6. Shift key
7. Menu: Open device menu
8. Mode key for selection of secondary device
group (only 8 in 1 model: AUX,DVBT,CBL,AMP)
9. Vol+/Vol-: Volume control
10. Setup: Remote control settings
11. Number Keys 0-9
12. Smart TV: open smart TV menu (if supported by
the terminal device)
Shift+Smart TV: select external AV source
13. APPS: open app menu (if supported by the
terminal device)
Shift+APPS: switch to two-digit TV station numbers
14. PROG+/PROG-:Programme selection up/down
EXIT: exits device menu
15.
16. OK: Confirms a selection
17. EPG: Electronic Programme Guide (if supported
by selected A/V device)
18. Info: On-Screen information (if supported by
A/V device)
19. Text OFF: exits Teletext
20. Power: ON/OFF / LED indicator
1. Explanation of the Note symbol
Note
► This symbol is used to indicate additional
information or important notes.
2
2. Package Contents
- Universal Remote Control (URC)
- Code List
- This operating instructions
3. Safety notes
• Do not use the Universal Remote Control in moist or wet environments and avoid spray-water
contact.
• Do not expose the Universal Remote Control to
heat sources or direct sunlight.
• Do not drop the Universal Remote Control.
• Never open the Universal Remote Control.
It contains no user-serviceable parts.
• As with all electrical devices, keep the Universal
Remote Control away from children.
4. Getting started – installing the Batteries
Note
► Alkaline batteries are recommended. Use
2 „AAA“ (LR 03/Micro) type batteries.
► Remove the battery compartment lid on the
back of your URC (A).
► Check the required battery polarity and in-
sert batteries according to the “+/–” marks
inside the compartment (B).
► Close battery compartment lid (C).
Note: Code saver
► Any codes you have programmed remain
stored for up to 10 minutes while you replace the battery. Make sure you do not
press any buttons before you have placed
new batteries inside the remote control.
All the codes will be erased if a button is
pressed while there are no batteries in the
remote control.
Page 5

Note: Battery saving function
► The remote control switches off automatically
when a button is pressed down for more than
15 seconds. This conserves battery power if
the remote control gets stuck in a position
where the buttons are continually pressed
down, such as between sofa cushions.
5. Setup
Note
► To obtain a proper infrared (IR) transmission,
allways point your Remote control in the approximate direction of the device you want
to control.
► Press the “MODE” key to select the seconda-
ry device group: AUX, AMP, DVB-T, CBL (only
8 in1 Model).
► Press the Shift key to operate the blue func-
tion keys. The Shift function deactivates by
pressing the Shift key again, or automatically
after approx. 30 sec. without use.
► No entry for approx. 30 seconds will time out
the Setup mode. The LED indicator shows six
ashes and turns off.
► Each device type can be programmed under
any device key, i.e a TV can be programmed
under DVD, AUX, etc.
► If you want to control a device , it´s not pos-
sible while the Universal Remote Control is
in the Setup Mode. Exit the Setup mode and
select the device you want to control using
the device selection keys.
5.1 Direct Code Entry
Your Universal Remote Control Package contains a
code list. The code list shows 4-digit codes for most
A/V device manufacturers in alphabetical order and
grouped by device type (e.g. TV, DVD, etc.). If the
device you want to control is covered by the code
list, the Direct Code Entry is the most convenient
entry method.
5.1.1 Turn on the device you want to control
5.1.2 Press the SETUP key until the LED indicator is
permanently lit.
5.1.3 Select the device you want to control using
the device key (e.g. TV). A successful selection
is indicated by the LED with one ash followed by permanent light.
5.1.4 Check code list for brand and type of the
device you want to control.
5.1.5 Enter the corresponding 4-digit code using
the 0 – 9 keys. The LED indicator conrms
each entered digit via a short ash and turns
off after the fourth digit.
Note
► If the code is valid, it is saved automatically.
► If code is invalid, the LED indicator ashes
six times and then turns off. Repeat steps
5.1.1 to 5.1.5 or use a different code entry
method.
5.2 Manual code search
Your Universal Remote Control is equipped with
an internal memory, which is preloaded with up to
350 codes per device type for the most common
A/V devices. You can zap through these codes until
the device you want to control shows a reaction.
This might be that the device you want to control
switches off (POWER key) or changes the channel
(PROG+/PROG- keys).
5.2.1 Turn on the device you want to control
5.2.2 Press the SETUP key until the LED indicator is
permanently lit.
3
Page 6
5.2.3 Select the device you want to control using
the device key (e.g. TV). A successful selection
is indicated by the LED with one ash followed by permanent light.
5.2.4 Press the “POWER” or the PROG+/PROG- key
to zap through the preloaded codes until the
device you want to control reacts.
5.2.5 Press MUTE(OK) to save the code and exit the
code search. The LED indicator turns off.
Note
► Internal memory limitations allow only up to
350 most common device codes to be preloaded. Due to the extensive number of
different available A/V devices on the market, it may be possible that only the most
common main functions are available. If so,
repeat steps 5.2.1 to 5.2.5 to nd a more
compatible code. No code may be available
for some special device models.
5.3 Auto Code Search
Auto Code Search uses the same preloaded codes
as the Manual Code Search (5.2) but your Universal
Remote Control scanns through the codes automatically until the device you want to control shows
a reaction. This might be that the device you want
to control switches off (POWER key) or changes the
channel (P+/P- keys).
5.3.1 Turn on the device you want to control
5.3.2 Press the SETUP key until the LED indicator is
permanently lit.
5.3.3 Select the device you want to control using
the device key (e.g. TV). A successful selection
is indicated by the LED with one ash followed by permanent light.
5.3.4 Press the PROG+/PROG- keys or POWER to
start the Auto Code Search. The LED indicator
ashes once followed by permanent light.
The Universal Remote Control has a latency of
6 seconds before the rst scan starts.
Note: Scan Speed Settings
► Scan Speed Settings can be set at either 1 or
3 seconds. The default setting for the scan
time per single code is 1 sec. If this feels uncomfortable , you can switch to 3 sec. scan
time per single code. To switch between the
scan times, press PROG+ or PROG- during
the 6 sec. latency before Auto Code Search
starts scanning.
5.3.5 The LED indicator conrms each single code
scan with a single ash.
5.3.6 Press MUTE(OK) to save the code and exit the
code search. The LED indicator turns off.
5.3.7 To stop the Auto Code Search during the scan
process, press the EXIT key.
Note
► When all codes are searched without suc-
cess, the Universal Remoote Control exits
Auto Code Search and returns to operational
mode automatically. Currently stored code
is not changed.
5.4 Code Identification
The Code identication offers you the possibility, to
determine an already entered code.
5.4.1 Press the SETUP key until the LED indicator is
permanently lit.
5.4.2 Select the device you want to control using
the device key (e.g. TV). A successful selection
is indicated by the LED with one ash followed by permanent light.
5.4.3 Press SETUP key. The LED indicator ashes
once followed by permanent light.
5.4.4 To nd the rst digit, press the numeric keys
from 0 to 9. The LED indicator ashes once
to indicate the rst digit of the 4-digit code
number.
5.4.5 Repeat step 5.4.4 for the second, third and
fourth digit.
4
Page 7
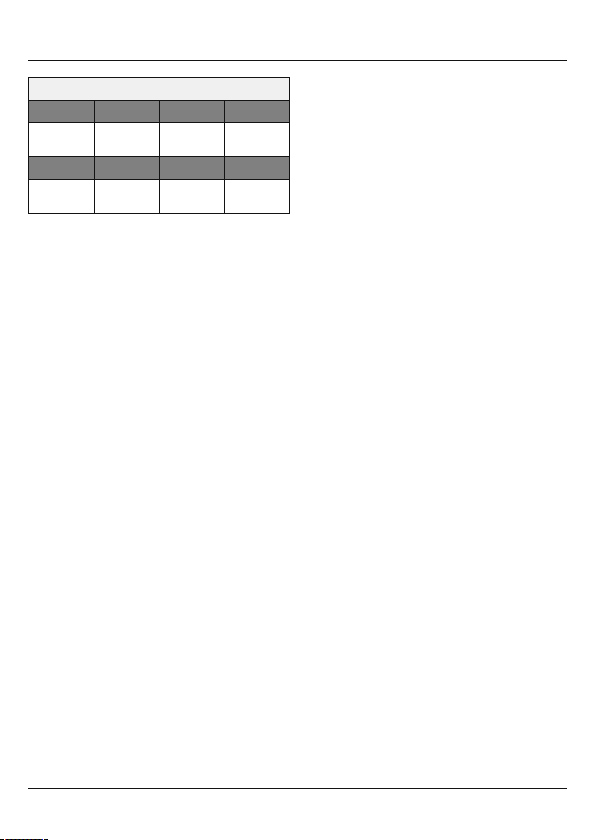
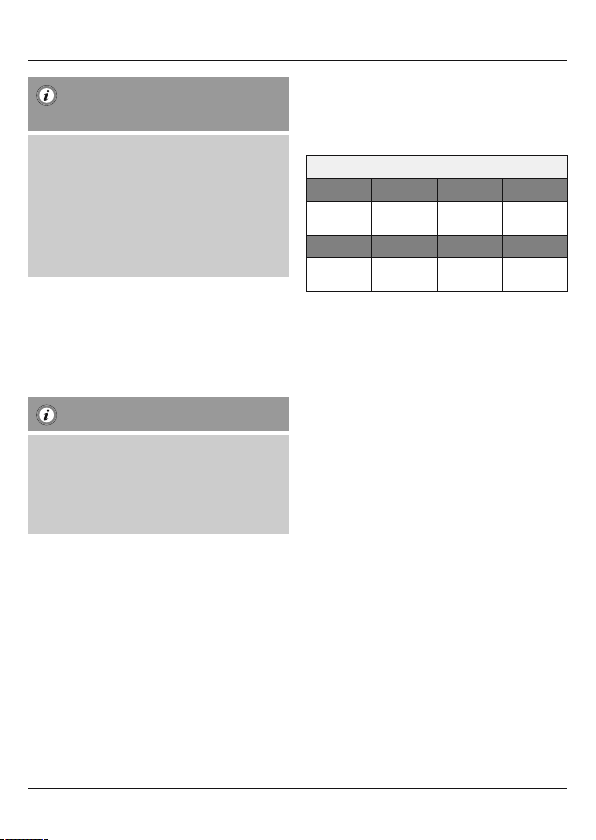
CODES
TV VCR SATDVD
AUX AMP CBL DVBT
6. Special Functions
6.1 Punch Through Channel
The Punch Through Channel allows the PROG+ or
PROG- commands to bypass the currently controlled
device and switch the channels on a second device.
All other commands remain uninuenced.
To activate the punch through channel setting:
•Press desired device mode key (e.g. TV).
•Press and hold “PROG+” key.
•Press desired device mode key (e.g. SAT).
•Release “PROG+” (the indicator ashes once if
the setting is activated).
To deactivate the punch through channel setting:
•Press desired device mode key (e.g. TV).
•Press and hold “PROG-” key.
•Press desired device mode key (e.g. SAT).
•Release “PROG-” (the indicator is ashing twice
if the setting is deactivated).
6.2 Punch Through Volume
The Punch Through Volume allows the VOL+ or
VOL- commands to bypass the currently controlled
device and adjust the volume on a second device.
All other commands remain uninuenced.
To activate the punch through volume setting:
•Press desired device mode key (e.g. TV).
•Press and hold “VOL+” key.
•Press desired device mode key (e.g. SAT).
•Release “VOL+” (the indicator ashes once if
the setting is activated).
To deactivate the punch through volume setting:
•Press desired device mode key (e.g. TV).
•Press and hold “VOL-” key.
•Press desired device mode key (e.g. SAT).
•Release “VOL-” (the indicator is ashing twice if
the setting is deactivated).
6.3 Macro Power
Macro Power enables you to turn two A/V devices
on/off simultaneously.
To activate the macro power setting:
•Press desired device mode key (e.g. TV).
•Press and hold “POWER” key.
•Press desired device mode key (e.g. SAT).
•Release “POWER” (the indicator ashes once if
the setting is activated).
To deactivate the macro power setting:
•Press desired device mode key (e.g. TV).
•Press and hold “POWER” key.
•Press desired device mode key (e.g. SAT).
•Release “POWER” (the indicator is ashing
twice if the setting is deactivated).
7. Maintenance
• Do not mix new and used batteries for
powering the Universal Remote Control, as old
batteries tend to leak and may cause power
drain.
• Do not use corrosive or abrasive cleaners on
your Universal Remote Control.
• Keep the Universal Remote Control dust free by
wiping it with a soft, dry cloth.
5
Page 8

8. Troubleshooting
Q. My Universal Remote Control does not work at
all!
A. Check your A/V device. If the device’s main
switch is turned off, your URC cannot operate
your device.
A. Check whether your batteries are inserted
properly and are in the correct +/- position.
A. Check whether you have pressed the correspon-
ding device mode key for your device.
A. If the batteries are low, replace the batteries.
Q. If several Device Codes are listed under the
brand of my A/V device, how
can I select the correct Device Code?
A. To determine the correct Device Code for your
A/V device, test the codes one by one until most
keys work properly.
Q. My A/V equipment responds only to some of the
commands.
A. Try other codes until most keys work properly.
9. Service and Support
If you have questions on the product, you are
welcome to contact Hama Product Consulting.
Hotline: +49 9091 502-115
For further support information please visit:
www.hama.com
10. Recycling Information
Note on environmental protection:
After the implementation of the European
Directive 2012/19/EU and 2006/66/EU in
the national legal system, the following
applies: Electric and electronic devices as
well as batteries must not be disposed of
with household waste. Consumers are obliged by
law to return electrical and electronic devices as
well as batteries at the end of their service lives to
the public collecting points set up for this purpose
or point of sale. Details to this are dened by the
national law of the respective country. This symbol
on the product, the instruction manual or the
package indicates that a product is subject to these
regulations. By recycling, reusing the materials or
other forms of utilising old devices/Batteries, you
are making an important contribution to protecting
our environment.
6
Page 9

D Bedienungsanleitung
Universal-Fernbedienung
Danke, dass Sie sich für den Kauf eines HamaProdukts entschieden haben.
Nehmen Sie sich die Zeit, und lesen Sie die folgenden
Anweisungen und Informationen vollständig durch.
Bitte bewahren Sie diese Anleitung zum späteren
Nachschlagen an einem sicheren Platz auf.
Funktionstasten (Modelle 4 in 1, 8 in 1)
1. Stummschalter
2. Tasten zur Geräteauswahl
3. Text EIN: Teletext einschalten
4. Halten: Aktuelle Teletextseite halten
5. ◄◄ Rücklauf/rot
► Wiedergabe/gelb
►► Schneller Vorlauf/blau
● Aufnahme starten
■ Stopp/grün
ll Pause/magenta
6. Shift-Taste
7. Menu: Gerätemenü öffnen
8. Modustaste zur Auswahl der sekundären
Gerätegruppe (nur Modell 8 in 1:
AUX,DVBT,CBL,AMP)
9. Vol+/Vol-: Lautstärkeregulierung
10. Setup: Einstellungen der Fernbedienung
11. Zifferntasten 0-9
12. Smart TV: Smart TV Menü öffnen (wenn vom
Endgerät unterstützt)
Shift+Smart TV: externe AV Quelle wählen
13. APPS: App-Menü öffnen (wenn vom Endgerät
unterstützt)
Shift+APPS : Zu zweistelligen Sendernummern
wechseln
14. PROG+/PROG-: Programmauswahl, nach oben/
nach unten
15. EXIT: Gerätemenü verlassen
16. OK: Auswahl bestätigen
17. EPG: Elektronischer Programmführer (wenn
vom ausgewählten AV-Gerät unterstützt)
18. Info: On-Screen-Informationen (wenn vom AVGerät unterstützt)
19. Text AUS: Teletext verlassen
20. Power: EIN/AUS / LED
1. Erläuterung des Hinweissymbols
Hinweis
► Dieses Symbol deutet auf zusätzliche Informa-
tionen oder wichtige Hinweise hin.
2. Lieferumfang
- Universal-Fernbedienung
- Codeliste
- Diese Bedienungsanleitung
3. Sicherheitshinweise
• Verwenden Sie die Universal-Fernbedienung
nicht in feuchten Umgebungen, und vermeiden
Sie Kontakt mit Spritzwasser.
• Halten Sie die Universal-Fernbedienung von
Wärmequellen fern, und setzen Sie sie keinem
direkten Sonnenlicht aus.
• Lassen Sie die Universal-Fernbedienung nicht
fallen.
• Öffnen Sie die Universal-Fernbedienung nicht.
Sie enthält keine vom Benutzer zu wartenden
Teile.
• Die Universal-Fernbedienung gehört wie alle
elektrischen Geräte nicht in Kinderhände.
4. Erste Schritte – Einsetzen der Batterien
Hinweis
► Es werden Alkalibatterien empfohlen. Ver-
wenden Sie zwei Batterien vom Typ „AAA”
(LR 03/Micro).
► Entfernen Sie die Batteriefachabdeckung auf
der Rückseite der Universal-Fernbedienung (A).
► Setzen Sie die Batterien unter Berücksichti-
gung der „+/-”-Markierungen für die Polarität ein (B).
► Schließen Sie das Batteriefach (C).
7
Page 10

Hinweis: Codespeicher
► Beim Ersetzen der Batterien bleiben alle von
Ihnen programmierten Codes bis zu 10 Minuten gespeichert. Achten Sie darauf, dass
Sie keine Tasten drücken, bis die neuen Batterien in der Fernbedienung eingesetzt sind.
Wenn Sie eine Taste drücken und sich keine
Batterien in der Fernbedienung benden,
werden alle Codes gelöscht.
Hinweis: Energiesparfunktion
► Die Fernbedienung schaltet sich automa-
tisch aus, wenn eine Taste länger als 15
Sekunden gedrückt wird. Dies verlängert die
Lebensdauer der Batterien, sollte die Fernbedienung an einer Stelle feststecken, an der
die Tasten dauerhaft gedrückt werden, z. B.
zwischen Sofakissen.
5. Setup
Hinweis
► Halten Sie die Fernbedienung für eine ordnungs-
gemäße Infrarotübertragungimmer in die ungefähre Richtung des zu bedienenden Geräts.
► Drücken Sie die „MODE“-Taste zur Auswahl
der sekundären Geräte-Gruppe: AUX, AMP,
DVB-T, CBL (nur beim 8in1 Modell).
► Drücken Sie die „SHIFT“-Taste zur Steuerung
der blauen Funktions-Tasten. Die Shift-Funktion wird durch erneutes Drücken der „SHIFT“Taste deaktiviert oder automatisch nach
30 Sekunden wenn keine Taste gedrückt wird.
► Falls innerhalb von 30 Sekunden keine Ein-
gabe erfolgt, wird der SETUP-Mode automatisch beendet. Die LED blinkt sechsmal und
geht dann aus.
8
► Jeder Gerätetyp kann unter einer beliebigen
Gerätetaste programmiert werden, z. B.
kann ein Fernseher unter DVD, AUX usw.
programmiert werden.
► Sie können mit der Universal-Fernbedienung
kein Gerät bedienen, solange sich diese im
Setup-Modus bendet. Verlassen Sie den
Setup-Modus, und wählen Sie das zu bedienende Gerät über die Tasten zur Geräteauswahl aus.
5.1 Direkte Codeeingabe
Im Lieferumfang der Universal-Fernbedienung
ist eine Codeliste enthalten. Die Codeliste zeigt
vierstellige Codes der meisten AV-Gerätehersteller
in alphabetischer Reihenfolge an, gruppiert
nach Gerätetyp (z. B. TV, DVD usw.). Wenn das
zu bedienende Gerät in der Codeliste enthalten
ist, ist die direkte Codeeingabe die einfachste
Eingabemethode.
5.1.1 Schalten Sie das zu bedienende Gerät ein.
5.1.2 Drücken Sie die Taste „SETUP”, bis die LED
dauerhaft leuchtet.
5.1.3 Wählen Sie über die Gerätetaste das zu
bedienende Gerät aus (z. B. TV). Bei erfolgreicher Auswahl blinkt die LED einmal und
leuchtet danach dauerhaft.
5.1.4 Suchen Sie in der Codeliste nach Marke und
Typ des zu bedienenden Geräts.
5.1.5 Geben Sie den entsprechenden vierstelligen
Code über die Zifferntasten 0-9 ein. Die LED
bestätigt die Eingabe der einzelnen Ziffern
jeweils mit einem kurzen Blinken und erlischt
nach der vierten Ziffer.
Page 11
Hinweis
► Ein gültiger Code wird automatisch
gespeichert.
► Bei einem ungültigem Code blinkt die LED
sechsmal und erlischt anschließend. Wiederholen Sie die Schritte 5.1.1 bis 5.1.5, oder
verwenden Sie eine andere Methode zur
Codeeingabe.
5.2 Manuelle Codesuche
Die Universal-Fernbedienung verfügt über einen
internen Speicher, in dem bereits bis zu 350 Codes
pro Gerätetyp für die gängigsten AV-Geräte enthalten sind. Sie können diese Codes durchgehen,
bis das zu bedienende Gerät eine Reaktion zeigt.
Beispielsweise schaltet sich das zu bedienende Gerät aus (Taste „POWER”) oder wechselt den Sender
(Taste „PROG+/PROG-”).
5.2.1 Schalten Sie das zu bedienende Gerät ein.
5.2.2 Drücken Sie die SETUP-Taste, bis die LED
dauerhaft leuchtet.
5.2.3 Wählen Sie über die Gerätetaste das zu
bedienende Gerät aus (z. B. TV). Bei erfolgreicher Auswahl blinkt die LED einmal und
leuchtet danach dauerhaft.
5.2.4 Drücken Sie die Taste „POWER” oder
„PROG+/PROG-”, um durch die voreingestellten Codes zu blättern, bis das zu bedienende
Gerät eine Reaktion zeigt.
5.2.5 Drücken Sie „MUTE(OK)”, um den Code zu
speichern und die Codesuche zu verlassen.
Die LED erlischt.
Hinweis
► Im internen Speicher können maximal
350 Codes der gängigsten Geräte gespeichert werden. Aufgrund der zahlreichen auf
dem Markt erhältlichen AV-Geräte kann es
passieren, dass nur die gängigsten Hauptfunktionen verfügbar sind. Ist dies der Fall,
wiederholen Sie die Schritte 5.2.1 bis 5.2.5,
um einen kompatibleren Code zu nden. Für
einige spezielle Gerätemodelle ist möglicherweise kein Code verfügbar.
5.3 Automatische Codesuche
Die automatische Codesuche verwendet dieselben
voreingestellten Codes wie die manuelle Codesuche
(5.2). Die Universal-Fernbedienung durchsucht die
Codes jedoch automatisch, bis das zu bedienende
Gerät eine Reaktion zeigt. Beispielsweise schaltet
sich das zu bedienende Gerät aus (Taste „POWER”)
oder wechselt den Sender (Tasten „PROG+/PROG-”).
5.3.1 Schalten Sie das zu bedienende Gerät ein.
5.3.2 Drücken Sie die Taste „SETUP”, bis die LED
dauerhaft leuchtet.
5.3.3 Wählen Sie über die Gerätetaste das zu
bedienende Gerät aus (z. B. TV). Bei erfolgreicher Auswahl blinkt die LED einmal und
leuchtet danach dauerhaft.
5.3.4 Drücken Sie die Taste „PROG+/PROG-” oder
„POWER”, um die automatische Codesuche
zu starten. Die LED blinkt einmal und leuchtet
danach dauerhaft. Es dauert 6 Sekunden, bis
die Universal-Fernbedienung mit der ersten
Suche beginnt.
9
Page 12
Hinweis: Einstellen der
Suchgeschwindigkeit
► Die Standardeinstellung für die Suchzeit pro
Code ist 1 Sekunde. Wenn Ihnen dies nicht
zusagt, können Sie zu einer Suchzeit von
3 Sekunden pro Code wechseln. Um zwischen den Suchzeiten zu wechseln, drücken
Sie „PROG+” oder „PROG-” innerhalb der
6 Sekunden vor dem Beginn der automatischen Codesuche.
5.3.5 Die LED bestätigt die jeweiligen Codesuchen
mit einem einzelnen Blinken.
5.3.6 Drücken Sie „MUTE(OK)”, um den Code zu
speichern und die Codesuche zu verlassen.
Die LED erlischt.
5.3.7 Um die automatische Suche während des
Suchvorgangs abzubrechen, drücken Sie die
Taste „EXIT”.
Hinweis
► Wenn alle Codes ohne Erfolg durchsucht
wurden, verlässt die Universal-Fernbedienung die automatische Codesuche und kehrt
automatisch in den Betriebsmodus zurück.
Der aktuell gespeicherte Code bleibt unverändert.
5.4 Codeerkennung
Die Codeerkennung bietet Ihnen die Möglichkeit,
einen bereits eingegebenen Code zu ermitteln.
5.4.1 Drücken Sie die Taste „SETUP”, bis die LED
dauerhaft leuchtet.
5.4.2 Wählen Sie über die Gerätetaste das zu
bedienende Gerät aus (z. B. TV). Bei erfolgreicher Auswahl blinkt die LED einmal und
leuchtet danach dauerhaft.
5.4.3 Drücken Sie die Taste „SETUP”. Die LED blinkt
einmal und leuchtet danach dauerhaft.
5.4.4 Drücken Sie zur Suche der ersten Ziffer eine
der Nummerntasten von 0 bis 9. Die LED
blinkt einmal für die erste Ziffer der vierstelligen Codenummer.
5.4.5 Wiederholen Sie den Schritt 5.4.4 für die
zweite, dritte und vierte Ziffer.
CODES
TV VCR SATDVD
AUX AMP CBL DVBT
6. Sonderfunktionen
6.1 Sender-Punch-Through
Mit der Sender-Punch-Through-Funktion können die
Befehle PROG+ oder PROG- das aktuell gesteuerte
Gerät umgehen, und die Sender eines zweiten
Gerätes wechseln. Alle anderen Befehle sind davon
nicht betroffen.
So aktivieren Sie die Sender-Punch-Through-Funktion:
•Drücken Sie die gewünschte Gerätetaste (z.B. TV).
•Halten Sie die Taste „PROG+” gedrückt.
•Drücken Sie die gewünschte Gerätetaste (z.B. SAT).
•Lassen Sie die Taste „PROG+” wieder los (die LED
blinkt einmal bei aktivierter Einstellung).
So deaktivieren Sie die Sender-Punch-Through-Funktion:
•Drücken Sie die gewünschte Gerätetaste (z.B. TV).
•Halten Sie die Taste „PROG-” gedrückt.
•Drücken Sie die gewünschte Gerätetaste (z.B. SAT).
•Lassen Sie die Taste „PROG-” wieder los (die LED
blinkt zweimal wenn die Einstellung deaktiviert wird).
6.2 Lautstärke-Punch-Through
Mit der Lautstärke-Punch-Through-Funktion können die
Befehle VOL + oder VOL- das aktuell gesteuerte Gerät
umgehen, und die Lautstärke eines zweiten Gerätes einstellen. Alle anderen Befehle sind davon nicht betroffen.
10
Page 13

So aktivieren Sie die Lautstärke-Punch-Through-Funktion:
•Drücken Sie die gewünschte Gerätetaste (z.B. TV).
•Halten Sie die Taste „VOL+” gedrückt.
•Drücken Sie die gewünschte Gerätetaste (z.B. SAT).
•Lassen Sie die Taste „VOL+” wieder los (die LED
blinkt einmal bei aktivierter Einstellung).
So deaktivieren Sie die Sender-Punch-Through-Funktion:
•Drücken Sie die gewünschte Gerätetaste (z.B. TV).
•Halten Sie die Taste „VOL-” gedrückt.
•Drücken Sie die gewünschte Gerätetaste (z.B. SAT).
•Lassen Sie die Taste „VOL-” wieder los (die LED
blinkt zweimal wenn die Einstellung deaktiviert wird).
6.3 Macro Power
Mit Macro Power können Sie zwei AV-Geräte
gleichzeitig ein-/ausschalten.
So aktivieren Sie die Macro Power-Funktion:
•Drücken Sie die gewünschte Gerätetaste (z.B. TV).
•Halten Sie die Taste „POWER” gedrückt.
•Drücken Sie die gewünschte Gerätetaste (z.B. SAT).
•Lassen Sie die Taste „POWER” wieder los (die LED
blinkt einmal bei aktivierter Einstellung).
So deaktivieren Sie die Macro Power-Funktion:
•Drücken Sie die gewünschte Gerätetaste (z.B. TV).
•Halten Sie die Taste „POWER” gedrückt.
•Drücken Sie die gewünschte Gerätetaste (z.B. SAT).
•Lassen Sie die Taste „POWER” wieder los (die LED
blinkt zweimal wenn die Einstellung deaktiviert wird)
7. Wartung
•
Verwenden Sie nie gleichzeitig alte und neue
Batterien in der Universal-Fernbedienung, da
alte Batterien zum Auslaufen neigen und zu
einem Leistungsverlust führen können.
•
Reinigen Sie die Universal-Fernbedienung keinesfalls
mit Scheuermitteln oder scharfen Reinigungsmitteln.
Halten Sie die Universal-Fernbedienung frei
•
von Staub, indem Sie sie mit einem trockenen
weichen Tuch reinigen.
8. Fehlerbehebung
F.
Meine Universal-Fernbedienung funktioniert nicht!
A.
Überprüfen Sie das AV-Gerät. Wenn der Hauptschalter des Geräts ausgeschaltet ist, kann die
Universal-Fernbedienung das Gerät nicht bedienen.
Überprüfen Sie, dass die Batterien korrekt ein-
A.
gesetzt sind und die Polarität beachtet wurde.
A. Überprüfen Sie, ob Sie die entsprechende
Gerätetaste für das Gerät gedrückt haben.
A. Tauschen Sie die Batterien bei niedrigem Batte-
riestand aus.
F. Wenn für die Marke meines AV-Geräts mehrere
Gerätecodes aufgelistet sind, wie wähle ich den
korrekten Gerätecode aus?
A. Um den korrekten Gerätecode für das AV-Gerät
zu bestimmen, testen Sie die Codes nacheinander, bis die meisten Tasten ordnungsgemäß
funktionieren.
F.
Mein AV-Gerät reagiert nur auf einige Tastenbefehle.
Probieren Sie andere Codes, bis die meisten
A.
Tasten ordnungsgemäß funktionieren.
9. Service und Support
Bitte wenden Sie sich bei Fragen zum Produkt
gerne an die Hama-Produktberatung.
Hotline: +49 9091 502-115 (Deu/Eng)
Weitere Supportinformationen nden sie hier:
www.hama.com
10. Entsorgungshinweise
Hinweis zum Umweltschutz:
Ab dem Zeitpunkt der Umsetzung der
europäischen Richtlinien 2012/19/EU und
2006/66/EG in nationales Recht gilt
folgendes: Elektrische und elektronische
Geräte sowie Batterien dürfen nicht mit
dem Hausmüll entsorgt werden. Der Verbraucher ist
gesetzlich verpichtet, elektrische und elektronische
Geräte sowie Batterien am Ende ihrer Lebensdauer
an den dafür eingerichteten, öffentlichen
Sammelstellen oder an die Verkaufsstelle
zurückzugeben. Einzelheiten dazu regelt das
jeweilige Landesrecht. Das Symbol auf dem
Produkt, der Gebrauchsanleitung oder der
Verpackung weist auf diese Bestimmungen hin. Mit
der Wiederverwertung, der stoichen Verwertung
oder anderen Formen der Verwertung von
Altgeräten/Batterien leisten Sie einen wichtigen
Beitrag zum Schutz unserer Umwelt.
11
Page 14

F Mode d‘emploi
Télécommande universelle
Nous vous remercions d’avoir choisi un produit Hama.
Veuillez prendre le temps de lire l'ensemble des
consignes et informations suivantes. Veuillez
conserver ces instructions dans un endroit sûr afin
de pouvoir les consulter en cas de besoin.
Touches de fonction (modèles 4 en 1, 8 en 1)
1. Commutateur sourdine
2. Touches de sélection de l’appareil
3. Texte ON : activation du télétexte
4. Pause : pause sur la page télétexte actuelle
5. ◄◄ retour rapide / voyant rouge
► lecture / voyant jaune
►► avance rapide / voyant bleu
● démarrage de l'enregistrement
■ stop / voyant vert
ll pause / voyant magenta
6. Touche Shift
7. Menu: ouverture du menu de l’appareil
8. Touche de mode pour la sélection du deuxième
groupe d'appareils (uniquement modèle 8 in 1:
AUX, DVBT, CBL, AMP)
9. Vol+ / Vol- : réglage du volume
10. Configuration : paramètres de la télécommande
11. Bloc numérique 0-9
12. Smart TV : Ouvrir le menu Smart TV (si supporté
par l’appareil)
Shift+Smart TV : sélection de la source AV externe
13. APPLIS : Ouvrir le menu de l’application (si
supporté par l’appareil)
Shift+APPLIS : Sélection de numéros de stations
à deux chiffres
14. PROG+ / PROG- : sélection du programme vers
le haut / vers le bas
15.
EXIT : quitter le menu de l’appareil
16. OK : confirmer la sélection
17. EPG : guide électronique de programmes (si
pris en charge par l'appareil AV)
18. Info : informations à l'écran (si pris en charge
par l'appareil AV)
19. Texte OFF : désactivation du télétexte
20. Alimentation : MARCHE / ARRÊT / LED
1. Explication des symboles
Remarque
► Ce symbole est utilisé pour indiquer des infor-
mations supplémentaires ou des remarques
importantes.
2. Matériel livré
- Télécommande universelle
- Liste de codes
- Mode d‘emploi
3. Consignes de sécurité
• N‘utilisez pas la télécommande universelle
dans un environnement humide et évitez toute
projection d‘eau.
• Protégez votre télécommande universelle de
toute source de chaleur et ne l‘exposez pas aux
rayons directs du soleil.
• Ne laissez pas votre télécommande tomber par
terre.
• N‘ouvrez pas votre télécommande ; elle ne comprend aucune pièce nécessitant un entretien.
• Cette télécommande universelle, comme tout
autre appareil électrique, ne doit pas se trouver
à portée des enfants.
4. Premiers pas - insertion des piles
Remarque
► Nous vous recommandons d‘utiliser des
piles alcalines. Utilisez 2 piles LR03 (AAA /
Micro).
► Ouvrez le couvercle du compartiment à piles
sur la face arrière de la télécommande.
► Insérez deux piles dans le logement en re-
spectant les indications de polarité (+/-).
► Refermez le compartiment à piles.
12
Page 15
Remarque: mémoire des codes
► Tous les codes programmés restent enregis-
trés pendant 10 minutes lorsque vous remplacez les piles. Assurez-vous de n‘appuyer
sur aucune touche avant d‘insérer de nouvelles piles dans la télécommande. Tous les
codes seront effacés si vous appuyez sur une
touche alors que la télécommande ne contient aucune pile.
Remarque: Fonction d‘économie
des piles
► La télécommande se met automatiquement
hors service lorsque vous appuyez sur une
touche pendant plus de 15 secondes. Cette fonction permet de ne pas vider les piles
de votre télécommande si cette dernière est
coincée (entre les coussins d‘un divan, par
exemple) et qu‘une touche reste enfoncée.
5. Configuration
Remarque
► Pointez la télécommande en direction de
l‘appareil que vous désirez piloter an de
garantir une excellente transmission infrarouge.
► Appuyez sur la touche « MODE » an de sé-
lectionner le deuxième groupe d‘appareils :
AUX, AMP, DVB-T, CBL (uniquement modèle
8 en 1).
► Appuyez sur la touche Shift an d‘utiliser
les touches de fonction bleues. Vous pouvez
désactiver la fonction Shift en appuyant à
nouveau sur la touche Shift ; elle se désactive automatiquement si vous n‘appuyez sur
aucune touche pendant 30 secondes.
► Le mode de conguration s‘interrompt auto-
matiquement lorsque vous n‘appuyez sur au
cune touche pendant plus de 30 secondes.
► La LED clignote six fois, puis s’éteint.
► Vous pouvez programmer chaque type
d‘appareil à l‘aide de n‘importe quelle
touche ; vous pouvez, par exemple, programmer un téléviseur sous DVD, AUX etc.
► Vous ne pouvez pas piloter un appareil à
l‘aide de la télécommande lorsqu‘il se trouve
en mode de conguration. Vous pouvez quitter le mode de conguration et sélectionner
l‘appareil que vous désirez piloter à l‘aide
des touches de sélection de l’appareil.
5.1 Saisie directe du code
Une liste de codes fait partie des éléments fournis
avec la télécommande. La liste de codes comprend
des codes de quatre chiffres provenant de la
plupart des constructeurs d‘appareils AV classés par
ordre alphabétique, groupés par type d‘appareils
(TV, DVD, etc.). La saisie directe du code est la
méthode la plus simple dans le cas où le code de
votre appareil est compris dans la liste.
5.1.1 Mettez l’appareil que vous désirez utiliser
sous tension.
5.1.2 Appuyez sur la touche « SETUP » jusqu‘à ce
que la LED s‘allume en vert en permanence.
5.1.3 Sélectionnez l’appareil que vous désirez
piloter (TV, etc.) à l‘aide de la touche de
l‘appareil. La LED clignote une fois, puis
s‘allume en permanence en cas de sélection
correcte.
5.1.4 Recherchez le code de l’appareil que vous
désirez utiliser à l’aide de la liste des codes
par marque et par type.
5.1.5 Saisissez ensuite le code à quatre chiffres cor-
respondant à l‘aide du bloc numérique 0-9.
La LED conrme la saisie de chaque chiffre en
clignotant brièvement, puis s‘éteint après le
quatrième chiffre.
13
Page 16
Remarque
► Un code valide est sauvegardé automatique-
ment.
► En cas de code erroné, la LED clignote six
fois, puis s‘éteint. Répétez les étapes 5.1.1
à 5.1.5 ou utilisez une autre méthode pour
la saisie du code.
5.2 Recherche manuelle du code
La télécommande dispose d‘une mémoire interne
contenant jusqu‘à 350 codes par type d‘appareil
adaptés à tous les appareils AV courants. Vous
pouvez passer tous ces codes en revue jusqu‘à ce
que l‘appareil que vous désirez utiliser réagisse ;
l‘appareil se met, par exemple, hors tension (touche
« POWER ») ou change de station (touche « PROG+
/ PROG- »).
5.2.1 Mettez l’appareil que vous désirez utiliser sous
tension.
5.2.2
Appuyez sur la touche « SETUP » jusqu‘à ce
que la LED s‘allume en permanence.
5.2.3
Sélectionnez l’appareil que vous désirez piloter (TV, etc.) à l‘aide de la touche de l‘appareil.
La LED clignote une fois, puis s‘allume en
permanence en cas de sélection correcte.
5.2.4
Appuyez sur la touche « POWER » ou « PROG+
/ PROG- » an de faire déler les codes
présélectionnés jusqu‘à ce que l‘appareil que
vous désirez utiliser réagisse.
Appuyez sur la touche « MUTE (OK) » an de
5.2.5
sauvegarder le code et quitter la recherche du
code ; la LED s’éteint.
Remarque
► La télécommande dispose d‘une mémoire
interne contenant 350 codes adaptés aux
appareils AV courants. En raison de la quantité d‘appareils AV disponibles sur le marché, il est possible que seules les fonctions
principales soient disponibles. Si tel est le
cas, répétez les étapes 5.2.1 à 5.2.5 an de
trouver un code compatible. Il est possible
qu‘aucun code ne fonctionne pour certains
modèles spéciaux.
5.3 Recherche automatique du code
La recherche automatique du code utilise les
mêmes codes présélectionnés que ceux de la
recherche manuelle (5.2). La télécommande universelle recherche automatiquement le code jusqu‘à
ce que l‘appareil que vous désirez utiliser réagisse ;
l‘appareil se met, par exemple, hors tension
(touche « POWER ») ou change de station (touches
« PROG+ / PROG- »).
5.3.1 Mettez l’appareil que vous désirez utiliser
sous tension.
5.3.2 Appuyez sur la touche « SETUP » jusqu‘à ce
que la LED s‘allume en vert en permanence.
5.3.3 Sélectionnez l’appareil que vous désirez
piloter (TV, etc.) à l‘aide de la touche de
l‘appareil. La LED clignote une fois, puis
s‘allume en permanence en cas de sélection
correcte.
5.3.4 Appuyez sur la touche « PROG+ / PROG- »
ou « POWER » an de lancer une recherche
automatique de code. La LED clignote
une fois, puis s‘allume en permanence. La
télécommande universelle commence la
première recherche après 6 secondes.
14
Page 17
Remarque : réglage de la vitesse
de recherche
► Le réglage par défaut de la vitesse de recher-
che par code est de 1 seconde. Vous pouvez
modier ce réglage et congurer une vitesse
de 3 secondes par code. Appuyez sur la touche
« PROG+ / PROG- » pendant les 6 secondes précédent le début de la recherche automatique.
5.3.5
La LED conrme la recherche du code à l‘aide
d‘un clignotement unique.
5.3.6 Appuyez sur la touche « MUTE (OK) » an de
sauvegarder le code et quitter la recherche du
code ; la LED s’éteint.
5.3.7 Appuyez sur la touche « EXIT » an
d‘interrompre la recherche automatique.
Remarque
► La télécommande universelle quitte le mode
de recherche automatique et retourne en
mode de fonctionnement normal si elle ne
détecte aucun code adapté. Le code sauvegardé actuellement ne change pas.
5.4 Reconnaissance de code
La reconnaissance de code vous permet de rechercher un code déjà attribué.
5.4.1 Appuyez sur la touche « SETUP » jusqu‘à ce
que la LED s‘allume en vert en permanence.
5.4.2
Sélectionnez l’appareil que vous désirez piloter (TV, etc.) à l‘aide de la touche de l‘appareil.
La LED clignote une fois, puis s‘allume en
permanence en cas de sélection correcte.
5.4.3
Appuyez sur la touche « SETUP ». La LED clignote une fois, puis s‘allume en permanence.
5.4.4 Appuyez sur une des touches numériques de
0 à 9 an de lancer la recherche du premier
chiffre. La LED clignote une fois pour le
premier chiffre du code à quatre chiffres.
5.4.5 Répétez les étapes 5.4.4 pour le deuxième, le
troisième et le quatrième chiffre.
CODES
TV VCR SATDVD
AUX AMP CBL DVBT
6. Fonctions spéciales
6.1 Recherche de stations en maintenant la
touche enfoncée (« punch through »)
La fonction de recherche de Chaînes en maintenant
la touche enfoncée (« punch through ») vous
permet de contourner les commandes PROG+ ou
PROG- de l‘appareil utilisé actuellement et piloter
un deuxième appareil. Les autres commandes ne
sont pas affectées.
Activadon de la fonction de recherche de chaînes
(« punch through »):
•Appuyez sur la touche de l‘appareil désiré (TV, etc.).
•Maintenez la touche « PROG+ » enfoncée.
•Appuyez sur la touche de l‘appareil désiré (SAT, etc.).
•Relâchez la touche « PROG+ » (la LED clignote
une fois en cas d‘activation du paramètre).
Désactivadon de la fonction de recherche de chaînes
(« punch through »):
•Appuyez sur la touche de l‘appareil désiré (TV, etc.).
•Maintenez la touche « PROG- » enfoncée.
•Appuyez sur la touche de l‘appareil désiré (SAT, etc.).
•Relâchez la touche « PROG- » (la LED clignote
deux fois en cas de désactivation du paramètre).
6.2 Réglage du volurne en maintenant la
touche enfoncée (« punch through »)
La fonction de réglage du volume en maintenant la
touche enfoncée (« punch through ») vous permet
de contourner les commandes VOL+ ou VOL- de
l‘appareil utilisé actuellement et régler Ie volume
d‘un deuxième appareil. Les autres commandes ne
sont pas affectées.
Activation de la fonction de réglage du volume par
touche enfoncée « punch through »:
15
Page 18
•Appuyez sur la touche de l‘appareil désiré (TV, etc.).
•Maintenez la touche « VOL+ » enfoncée.
•Appuyez sur la touche de l‘appareil désiré (SAT, etc.).
•Relâchez la touche « VOL+ » (la LED clignote une
fois en cas d‘activation du paramètre).
Désactivation de la fonction de réglage du volume
par touche enfoncée « punch through »:
•Appuyez sur la touche de l‘appareil désiré (TV, etc.).
•Maintenez la touche « VOL- » enfoncée.
•Appuyez sur la touche de l‘appareil désiré (SAT, etc.).
•Relâchez la touche « VOL- » (la LED clignote deux
fois en cas de désactivation du paramètre).
6.3 Macro Power
La fonction MACRO POWER vous permet de mettre
deux appareils AV simultanément sous/hors tension.
Activation de la fonction MACRO POWER:
•Appuyez sur la touche de l‘appareil désiré (TV, etc.).
•Maintenez la touche « POWER » enfoncée.
•Appuyez sur la touche de l‘appareil désiré (SAT, etc.).
•Relâchez la touche « POWER » (la LED clignote une
fois en cas d‘activation du paramètre).
Désactivation de la fonction MACRO POWER:
•Appuyez sur la touche de l‘appareil désiré (TV, etc.).
•Maintenez la touche « POWER » enfoncée.
•Appuyez sur la touche de l‘appareil désiré (SAT, etc.).
•Relâchez la touche « POWER » (la LED clignote
deux fois en cas de désactivation du paramètre).
7. Entretien
N‘utilisez pas de piles neuves avec des piles
•
usagées dans la télécommande universelle; les
piles usagées sont susceptibles de couler et
provoquer une détérioration de l‘appareil.
• N‘utilisez en aucun cas des produits abrasifs
ou des produits nettoyants agressifs pour le
nettoyage de votre télécommande universelle.
•
Vous pouvez éliminer la poussière de votre télécommande en l‘essuyant à l‘aide d‘un chiffon sec et doux.
8. Élimination des pannes
Q.
Ma télécommande universelle ne fonctionne pas.
R.
Contrôlez l’appareil AV. Vous ne pourrez pas utiliser
la télécommande sur un appareil mis hors tension
à l’aide de la touche d’alimentation principale.
16
Vériez que les piles sont correctement insérées
R.
dans la télécommande (polarité +/–).
R. Vériez que vous avez bien appuyé sur la touche
de l‘appareil correspondant au système désiré.
R. Remplacez les piles en cas de niveau faible.
Q.
Plusieurs codes d’appareils sont mentionnés
pour la marque de mon appareil ; lequel choisir ?
Pour déterminer le bon code de votre appareil
R.
AV, testez successivement les codes, l’un après
l’autre, jusqu’à ce que la plupart des fonctions
de votre appareil fonctionnent correctement.
Q. Mon appareil AV réagit uniquement à certaines
commandes de la télécommande.
R. Te stez d‘autres codes jusqu’à ce que la plupart
des fonctions de votre appareil fonctionnent
correctement.
9. Service et assistance
En cas de question concernant le produit, veuillez
vous adresser au service de conseil produits de Hama.
Ligne téléphonique directe : +49 9091 502-115
(allemand/anglais)
Vous trouverez ici de plus amples informations
concernant l‘assistance :
www.hama.com
10. Consignes de recyclage
Remarques concernant la protection de
l’environnement:
Conformément à la directive européenne
2012/19/EU et 2006/66/CE, et an
d‘atteindre un certain nombre d‘objectifs en
matière de protection de l‘environnement, les
règles suivantes doivent être appliquées: Les
appareils électriques et électroniques ainsi que les
batteries ne doivent pas être éliminés avec les déchets
ménagers. Le pictogramme “picto” présent sur le
produit, son manuel d‘utilisation ou son emballage
indique que le produit est soumis à cette
réglementation. Le consommateur doit retourner le
produit/la batterie usager aux points de collecte prévus
à cet effet. Il peut aussi le remettre à un revendeur. En
permettant enn le recyclage des produits ainsi que les
batteries, le consommateur contribuera à la protection
de notre environnement. C‘est un acte écologique.
Page 19
E Instrucciones de uso
Mando a distancia universal
Le agradecemos que se haya decidido por la
compra de un producto de Hama.
Tómese tiempo y léase primero las siguientes
instrucciones e informaciones. Por favor, guarde
estas instrucciones en un lugar seguro para poder
consultarlas cuando sea necesario.
Teclas de función (modelos 4 en 1, 8 en 1)
1. Conmutador de reproducción sin sonido
2. Teclas de selección de aparatos
3. Text EIN: Encender el teletexto
4. Halten: Parar la página actual del teletexto
5. ◄◄ Retroceso/rojo
► Reproducción /amarillo
►► Avance rápido/azul
● Iniciar grabación
■ Stop/verde
ll Pausa/fucsia
6. Tecla Shift
7. Menu: Abrir el menú del aparato
8. Tecla de modo para seleccionar el grupo de
aparatos secundario (sólo modelo 8 en 1: AUX,
DVBT, CBL, AMP)
9. Vol+/Vol-: Regulación de volumen
10. Setup: Ajustes del mando a distancia
11. Cifras numéricas 0-9
12. Smart TV: Abrir el menú de Smart TV (si es
compatible con el terminal)
Shift+Smart TV: seleccionar fuente AV externa
13. APPs: Abrir el menú de aplicaciones (si es
compatible con el terminal)
Shift+APPS : Cambiar a números de emisoras
de dos cifras
14. PROG+/PROG-: Selección de programa, hacia
arriba/hacia abajo
15. EXIT: Salir del menú del aparato
16. OK: Confirmar selección
17. EPG: Guía electrónica de programas (si el
aparato AV seleccionado la soporta)
18. Info: Informaciones en pantalla (si el aparato
AV las soporta)
19. Text AUS: Salir del teletexto
20. Power: ON/OFF / LED
1. Explicación del símbolo de nota
Nota
► Este símbolo hace referencia a informaciones
adicionales o indicaciones importantes.
2. Volumen de suministro
- Mando a distancia universal
- Lista de códigos
- Estas instrucciones de manejo
3. Instrucciones de seguridad
• No utilice el mando a distancia universal en
entornos húmedos y evite el contacto con las
salpicaduras de agua.
• Mantenga alejado el mando a distancia de las
fuentes de calor y no lo exponga a la radiación
directa del sol.
• No deje caer el mando a distancia universal.
• No abra el mando a distancia universal. No
contiene piezas que pueda reparar el usuario.
• El mando a distancia universal, como todos los
aparatos eléctricos, no debe estar en manos de
los niños.
4. Primeros pasos – Colocar las pilas
Nota
► Se recomienda utilizar pilas alcalinas. Utilice
dos pilas del tipo „AAA” (LR 03/Micro).
► Retire la cubierta del compartimento de pilas
en el lado posterior del mando a distancia
universal.
► Teniendo en cuenta las marcas de polaridad
“+/ -”, coloque las pilas.
► Cierre el compartimento de las pilas.
17
Page 20
Nota: Memoria de códigos
► Todos los códigos que haya programado se
conservan guardados durante 10 minutos
mientras usted cambia la pila. Asegúrese de
no pulsar ninguna tecla antes de haber colocado nuevas pilas en el mando a distancia.
Si se pulsa una tecla cuando no hay pilas en
el mando a distancia, todos los códigos se
borran.
Nota: Función de ahorro de la pila
► El mando a distancia se apaga automáti-
camente si se mantiene pulsada una tecla
durante más de 15 segundos. Esto conserva
la carga de la pila si el mando a distancia se
queda atrapado en un lugar donde las teclas
se vean continuamente pulsadas, como entre los cojines de un sofá.
5. Configuración
Nota
► Para que la transmisión de infrarrojos sea
correcta, sujete el mando a distancia siempre orientado hacia el aparato a manejar.
► Pulse la tecla „MODE” de selección del gru-
po de aparatos secundario: AUX, AMP, DVBT, CBL (sólo modelo 8 en 1).
► Pulse la tecla Shift para utilizar las teclas de
función azules. La función Shift se desactiva
pulsando de nuevo la tecla Shift, o automáticamente si no se pulsa ninguna otra tecla
durante aprox. 30 segundos.
► Si no se realiza ninguna entrada en 30 se-
gundos, el modo de conguración naliza. El
LED parpadea seis veces y se apaga.
► Cada tipo de aparato se puede programar
en cualquier tecla del aparato, es decir, un
televisor se puede programar en la tecla
DVD, AUX, etc.
► Con el mando a distancia universal no se
puede manejar ningún aparato que se encuentre en el modo de conguración. Salga
del modo de conguración y seleccione el
aparato a manejar con ayuda de las teclas
de selección de aparatos.
5.1 Entrada directa de códigos
El volumen de suministro del mando a distancia
universal incluye una lista de códigos. La lista de
códigos muestra códigos de cuatro cifras de la
mayoría de fabricantes de aparatos de AV en orden
alfabético, agrupados por tipo de aparato (p. ej.,
TV, DVD, etc.). Si el aparato a manejar se encuentra
en la lista de códigos, la entrada directa del código
es el método más sencillo para introducir el código.
5.1.1 Encienda el aparato a manejar.
5.1.2 Pulse y mantenga pulsada la tecla „SETUP”
hasta que el LED luzca de forma permanente.
5.1.3 Seleccione el aparato a manejar (p. ej., TV)
mediante la tecla de selección de aparatos. Si
la selección se ha realizado con éxito, el LED
parpadea una vez y después luce de forma
permanente.
5.1.4 En la lista de códigos, busque la marca y el
modelo del aparato a manejar.
5.1.5 Introduzca el código de cuatro cifras corre-
spondiente con ayuda de las teclas numéricas
0-9. El LED conrma la entrada de cada una
de las cifras con un breve parpadeo y se
apaga tras la cuarta cifra.
18
Page 21

Nota
► Si el código es correcto, éste se guarda au-
tomáticamente.
► Si el código no es correcto, el LED parpadea
seis veces y se apaga a continuación. Repita
los pasos 5.1.1 a 5.1.5 o utilice otro método
de entrada de códigos.
5.2 Búsqueda manual de códigos
El mando a distancia universal dispone de una
memoria interna que incluye hasta 350 códigos
por tipo de aparato para los aparatos de AV más
corrientes. Puede ir probando estos códigos hasta
que el aparato a manejar muestre una reacción.
Por ejemplo, el aparato a manejar se apaga (tecla
„POWER”) o cambia de emisora (tecla „PROG+/
PROG-”).
Encienda el aparato a manejar.
5.2.1
Pulse y mantenga pulsada la tecla SETUP
5.2.2
hasta que el LED luzca de forma permanente.
Seleccione el aparato a manejar (p. ej., TV)
5.2.3
mediante la tecla de selección de aparatos. Si
la selección se ha realizado con éxito, el LED
parpadea una vez y después luce de forma
permanente.
Pulse la tecla „POWER” o la tecla „PROG+/
5.2.4
PROG-” para desplazarse por los códigos
preajustados hasta que el aparato a manejar
muestre una reacción.
Pulse „MUTE(OK)” para guardar el código y
5.2.5
salir de la búsqueda de códigos. El LED se
apaga.
Nota
► En la memoria interna se pueden guardar
como máximo 350 códigos de los aparatos
más corrientes. Debido al gran número de
aparatos de AV existentes en el mercado,
puede ocurrir que sólo se disponga de las
funciones principales más corrientes. De ser
éste el caso, repita los pasos 5.2.1 a 5.2.5
para encontrar un código más compatible.
Es posible que para algunos modelos especiales de aparatos no se disponga de ningún
código.
5.3 Búsqueda automática de códigos
La búsqueda automática de códigos utiliza los mismos códigos preajustados que la búsqueda manual
de códigos (5.2). El mando a distancia universal
comprueba estos códigos automáticamente hasta
que el aparato a manejar muestra una reacción.
Por ejemplo, el aparato a manejar se apaga (tecla
„POWER”) o cambia de emisora (teclas „PROG+/
PROG-”).
5.3.1 Encienda el aparato a manejar.
5.3.2 Pulse y mantenga pulsada la tecla „SETUP”
hasta que el LED luzca de forma permanente.
5.3.3 Seleccione el aparato a manejar (p. ej., TV)
mediante la tecla de selección de aparatos. Si
la selección se ha realizado con éxito, el LED
parpadea una vez y después luce de forma
permanente.
5.3.4 Pulse la tecla „PROG+/PROG-” o „POWER”
para iniciar la búsqueda automática de
códigos. El LED parpadea una vez y luego
luce de forma permanente. Deben transcurrir
6 segundos hasta que el mando a distancia
universal inicie la primera búsqueda.
19
Page 22
Nota: Ajuste de la velocidad de
búsqueda
► El ajuste standard para el tiempo de bús-
queda por código es de 1 segundo. Si este
ajuste no es de su agrado, puede cambiar a
un tiempo de búsqueda de 3 segundos por
código. Para cambiar entre los tiempos de
búsqueda, pulse „PROG+” o „PROG-” en los
6 segundos previos al inicio de la búsqueda
automática de códigos.
5.3.5 El LED conrma cada búsqueda de código
con un solo parpadeo.
5.3.6 Pulse „MUTE(OK)” para guardar el código y
salir de la búsqueda de códigos. El LED se
apaga.
5.3.7 Para cancelar la búsqueda automática en
marcha, pulse la tecla “EXIT”.
Nota
► Si se han comprobado todos los códigos sin
éxito, el mando a distancia universal sale de
la búsqueda automática de códigos y vuelve
automáticamente al modo de funcionamiento. El código actualmente ajustado permanece invariable.
5.4 Detección de códigos
La detección de códigos le ofrece la posibilidad de
detectar un código ya introducido.
5.4.1 Pulse y mantenga pulsada la tecla „SETUP”
hasta que el LED luzca de forma permanente.
5.4.2 Seleccione el aparato a manejar (p. ej., TV)
mediante la tecla de selección de aparatos. Si
la selección se ha realizado con éxito, el LED
parpadea una vez y después luce de forma
permanente.
5.4.3 Pulse la tecla „SETUP”. El LED parpadea una
vez y luego luce de forma permanente.
5.4.4 Para buscar la primera cifra, pulse una de las
teclas numéricas de 0 a 9. El LED parpadea
20
una vez para la primera cifra del número de
código de cuatro cifras.
5.4.5 Repita el paso 5.4.4 para la segunda, tercera
y cuarta cifra.
CODES
TV VCR SATDVD
AUX AMP CBL DVBT
6. Funciones especiales
6.1 Punch-Through de emisora
Con la función Punch-Through de emisora, los comandos PROG+ o PROG- pueden evitar el aparato
actualmente controlado para cambiar la emisora de
un segundo aparato. Los dermás comandos no se
ven afectados por ello.
Para activar la función Punch-Through de emisora:
•Pulse la tecla del aparato que desee (p. ej., TV).
•Mantenga pulsada la tecla „PROG+”.
•Pulse la tecla del aparato que desee (p. ej., SAT).
•Suelte la tecla „PROG+” de nuevo (el LED
parpadea una vez con el ajuste activado).
Para desactivar la función Punch-Through de
emisora:
•Pulse la tecla del aparato que desee (p. ej., TV).
•Mantenga pulsada la tecla „PROG-”.
•Pulse la tecla del aparato que desee (p. ej., SAT).
•Suelte la tecla „PROG-” de nuevo (el LED
parpadea dos veces cuando se desactiva el
ajuste).
6.2 Punch-Through de volumen
Con la función Punch-Through de volumen, los
comandos VOL+ o VOL- pueden evitar el aparato
actualmente contralado para ajustar el volumen de
un segundo aparato. Los demás comandos no se
ven afectados por ello.
Page 23

Para activar la función Punch-Through de volumen:
•Pulse la tecla del aparato que desee (p. ej., TV).
•Mantenga pulsada la tecla „VOL+”.
•Pulse la tecla del aparato que desee (p. ej., SAT).
•Suelte la tecla „VOL+” de nuevo (el LED parpadea
una vez con el ajuste activado).
Para desactivar la función Punch-Through de volumen:
•Pulse la tecla del aparato que desee (p. ej., TV).
•Mantenga pulsada la tecla „VOL-”.
•Pulse la tecla del aparato que desee (p. ej., SAT).
•Suelte la tecla „VOL-” de nuevo (
dos veces cuando se desactiva el ajuste
6.3 Macro Power
Con Macro Power puede encender/apagar dos
aparatos de AV al mismo tiempo.
Para activar la función Macro Power:
•Pulse la tecla del aparato que desee (p. ej., TV).
•Mantenga pulsada la tecla „POWER”.
•Pulse la tecla del aparato que desee (p. ej., SAT).
•Suelte la tecla „POWER” de nuevo (el LED
parpadea una vez con el ajuste activado).
Para desactivar la función Macro Power:
•Pulse la tecla del aparato que desee (p. ej., TV).
•Mantenga pulsada la tecla „POWER”.
•Pulse la tecla del aparato que desee (p. ej., SAT).
•Suelte la tecla „POWER” de nuevo (el LED parpadea
dos veces cuando se desactiva el ajuste).
7. Mantenimiento
No utilice pilas viejas y nuevas al mismo tiempo
•
en el mando a distancia universal ya que las
pilas viejas tienden a derramarse y pueden
provocar una pérdida de rendimiento.
•
No limpie nunca el mando a distancia universal con
sustancias abrasivas ni con detergentes agresivos.
•
Mantenga el mando a distancia universal libre
de polvo limpiándolo con un paño suave y seco.
8. Solución de fallos
C. Mi mando a distancia universal no funciona.
R.
Compruebe el aparato de AV. Si el interruptor
principal del aparato está apagado, el mando a
distancia universal no puede manejar el aparato.
el LED parpadea
).
Compruebe si las pilas están correctamente
R.
colocadas y si la polaridad es correcta.
R. Compruebe si ha pulsado la tecla de aparato
correspondiente para el aparato.
R. Cambie las pilas si están próximas a gastarse.
C.
Si para la marca de mi aparato de AV se
encuentran varios códigos de aparato en la lista,
¿cómo selecciono el código de aparato correcto?
Para encontrar el código de aparato correcto
R.
para el aparato de AV, pruebe los códigos su-
cesivamente hasta que la mayoría de las teclas
funcionen correctamente.
C. Mi aparato de AV sólo reacciona a algunos
comandos de teclas.
R. Pruebe otros códigos hasta que funcione la
mayoría de las teclas.
9. Servicio y soporte
Si tiene que hacer alguna consulta sobre el producto, diríjase al asesoramiento de productos Hama.
Línea directa: +49 9091 502-115 (Alemán/Inglés)
Podrá encontrar más informacion:
www.hama.com
10. Instrucciones para desecho y reciclaje
Nota sobre la protección medioambiental:
Después de la puesta en marcha de la
directiva Europea 2012/19/EU y 2006/66/
EU en el sistema legislativo nacional, se
aplicara lo siguiente: Los aparatos
eléctricos y electrónicos, así como las
baterías, no se deben evacuar en la basura
doméstica. El usuario está legalmente obligado a
llevar los aparatos eléctricos y electrónicos, así
como pilas y pilas recargables, al nal de su vida
útil a los puntos de recogida comunales o a
devolverlos al lugar donde los adquirió. Los detalles
quedaran denidos por la ley de cada país. El
símbolo en el producto, en las instrucciones de uso
o en el embalaje hace referencia a ello. Gracias al
reciclaje, al reciclaje del material o a otras formas
de reciclaje de aparatos/pilas usados, contribuye
Usted de forma importante a la protección de
nuestro medio ambiente.
21
Page 24
R Руководство по эксплуатации
Универсальный пульт
дистанционного управления
Благодарим за покупку!
Перед началом эксплуатации внимательно
ознакомьтесь с настоящей инструкцией. Храните
инструкцию в надежном месте для справок в будущем.
Органы управления (модели "4 в 1", "8 в 1")
1. Выключатель звука
2. Кнопки выбора устройств
3. Text EIN: включение телетекста
4. Halten: замораживание текущей страницы
телетекста
5. ◄◄ быстрая перемотка назад (красная)
► воспроизведение (желтая)
►► быстрая перемотка вперед (синяя)
● включение записи
■ стоп (зеленая)
ll пауза (пурпурная)
6. Кнопка Shift
7. Menu: открыть меню устройства
8. Кнопка выбора дополнительной группы
устройств (только в модели "8 в 1":
AUX,DVBT,CBL,AMP)
9. Vol+/Vol-: регулировка громкости
10. Setup: настройка ПДУ
11. Кнопки с цифрами 0 - 9
12. Smart TV: Открыть меню Smart TV (при
наличии функции в устройстве).
Shift+Smart TV: выбор источника AV.
13. APPS: Открыть меню приложений
(при наличии функции в устройстве).
Shift+APPS : Переход к двухразрядным
номерам программ.
14. PROG+/PROG-: переключение программ
вперед/назад
15. EXIT: выйти из меню устройства
16. OK: ввод команды
17. EPG: электронная программа передач (при
наличии функции в AV-устройстве)
18. Info: экранная информация (при наличии
функции в AV-устройстве)
19.Text AUS: выключить телетекст
20. Power: включение/выключение питания /
Лампа
22
1. Описание значков
Примечание
► Дополнительная или важная информация.
2. Комплект поставки
- Универсальный пульт дистанционного
управления
- Список кодов
- Настоящая инструкция
3. Техника безопасности
• Берегите изделие от влаги и брызг воды.
• Не подвергайте изделие воздействию
прямых солнечных лучей. Не размещайте
изделие рядом с источниками тепла.
• Берегите изделие от ударов и падений.
• Запрещается разбирать изделие.
В устройстве нет узлов, которые
предназначены для техобслуживания
эксплуатационником.
• Не давать детям!
4. Загрузка батарей
Примечание
► Рекомендуется применять щелочные
батареи. Для питания применяются две
батареи ААА (LR 03/Micro).
► На задней панели устройства откройте
крышку отсека батарей.
► Загрузите батареи, соблюдая полярность.
► Закройте крышку отсека батарей.
Page 25
Примечание! Блок хранения
кодов
► Во время замены батареи записывающее
устройство пульта сохраняет все коды
до 10 минут, однако при этом нельзя
нажимать кнопки до загрузки батареи
в отсек. Если это произойдет, все коды
будут удалены.
Примечание! Экономичный режим
► ПДУ автоматически отключается через
15 секунд после последнего нажатия
на любую кнопку. Это предотвращает
нежелательный разряд батареи в
случае постоянного нажатия на кнопку,
например при попадании пульта между
подушками дивана.
5. Настройка
Примечание!
► Направьте ИК-излучатель ПДУ в сторону
управляемого устройства.
► Нажмите кнопку MODE, чтобы выбрать
дополнительную группу устройств: AUX,
AMP, DVB-T, CBL (только в модели „8
в 1”).
► Чтобы воспользоваться синими
кнопками, нажмите кнопку SHIFT.
Работа кнопки SHIFT отменяется при ее
повторном нажатии или автоматически
через 30 секунд после последнего
нажатия на любую кнопку.
► Режим настройки выключается
автоматически, если нажатий на кнопки
не производилось в течение 30 секунд.
Лампа индикации загорится шесть раз,
а затем погаснет.
► Все типы устройств можно назначить
на любую кнопку, например, кнопки
DVD, AUX и т.д. можно настроить на
управление телевизором.
► В режиме настройки управление
устройствами невозможно. Выйдите из
режима настройки, после чего выберите
кнопкой тип устройства, которым
требуется управлять.
5.1 Ввод кода из списка кнопками
В комплекте имеет список кодов устройств. В
списке приводятся четырехразрядные коды
большинства производителей визуальной
и звуковой техники. Список сортирован
по алфавиту и по типам устройств. Если
управляемое устройство находится в списке
кодов, то прямой ввод кода является самым
простым способом настройки ПДУ.
5.1.1 Включите управляемое устройство.
5.1.2 Нажмите и удерживайте кнопку SETUP,
пока не загорится лампа индикации.
5.1.3 Выберите управляемое устройство, нажав
кнопку типа устройства, например TV. Если
выбор правильный, лампа мигнет один
раз, а затем начнет гореть непрерывно
5.1.4 В списке кодов найдите тип и марку
управляемого устройства.
5.1.5 Введите четырехзначный код из списка.
При вводе каждой цифры загорается
лампа индикации. После ввода 4-й цифры
лампа гаснет.
23
Page 26
Примечание
► Действительный код сохраняется
автоматически.
► Если код введен неправильно, лампа
загорается 6 раз, а затем гаснет. В этом
случае повторите пункты 5.1.1 - 5.1.5,
либо воспользуйтесь другим методом
настройки.
5.2 Поиск кода вручную
ПДУ снабжен внутренним блоком памяти на
350 кодов. Поиск кода вручную заключается
в последовательном переборе сохраненных
кодов, пока не сработает управляемое
устройство. Например, управляемое устройство
может отключиться (кнопка POWER) или
переключить программу (PROG+/PROG-).
5.2.1 Включите управляемое устройство.
5.2.2 Нажмите и удерживайте кнопку SETUP,
пока не загорится лампа индикации.
5.2.3 Выберите управляемое устройство, нажав
кнопку типа устройства, например TV. Если
выбор правильный, лампа мигнет один
раз, а затем начнет гореть непрерывно
5.2.4 Нажимайте кнопку POWER или PROG+/
PROG-, переключая, таким образом, коды,
пока не сработает управляемое устройство.
5.2.5
Чтобы сохранить код и выйти из режима
поиска, нажмите MUTE(OK). Лампа
погаснет.
Примечание
► Встроенные блок памяти вмещает до 350
кодов. Так как количество AV-приборов
чрезвычайно велико, возможно будут
работать только основные функции ПДУ. В
этом случае повторите пункты 5.2.1 - 5.2.5,
чтобы найти более подходящий код. Для
некоторых специфичных моделей устройств,
возможно, коды не предусмотрены.
5.3 Автоматический поиск кодов
При автоматическом поиске применяются
те же коды, что и при поиске вручную (5.2).
ПДУ автоматически перебирает коды до
реагирования управляемого устройства.
Например, управляемое устройство может
отключиться (кнопка POWER) или переключить
программу (PROG+/PROG-).
Включите управляемое устройство.
5.3.1
5.3.2 Нажмите и удерживайте кнопку SETUP,
пока не загорится лампа индикации.
5.3.3 Выберите управляемое устройство, нажав
кнопку типа устройства, например TV. Если
выбор правильный, лампа мигнет один
раз, а затем начнет гореть непрерывно
5.3.4 Чтобы включить автопоиск кодов,
нажмите PROG+/PROG- или POWER. Лампа
мигнет один раз, а затем начнет гореть
непрерывно Поиск начнется через 6
секунд.
Примечание! Настройка
скорости поиска
► На каждый код выделена 1 секунда. При
необходимости коды можно переключат
каждые 3 секунды. Чтобы настроить
время переключения кода, нажмите
PROG+ или PROG- в период ожидания
начала автоматического кода (в первые 6
секунд после включения режима поиска).
5.3.5 При переключении кода мигает лампа
индикации.
5.3.6 Чтобы сохранить код и выйти из режима
поиска, нажмите MUTE(OK). Лампа
погаснет.
5.3.7 Чтобы прервать поиск, нажмите кнопку
EXIT.
24
Page 27
Примечание
► Если автоматический поиск не дал
результата, ПДУ автоматически переходит
в рабочий режим. Текущий сохраненный
код не изменяется.
5.4 Считывание кодов
Функция предназначена для определения
кодов, которые уже занесены в память пульта
дистанционного управления.
5.4.1 Нажмите и удерживайте кнопку SETUP,
пока не загорится лампа индикации.
5.4.2 Выберите управляемое устройство, нажав
кнопку типа устройства, например TV. Если
выбор правильный, лампа мигнет один
раз, а затем начнет гореть непрерывно.
5.4.3 Нажмите кнопку SETUP. Лампа мигнет один
раз, а затем начнет гореть непрерывно.
5.4.4 Чтобы найти первую цифру кода,
нажимайте кнопки от 0 до 9. При нажатии
правильной цифры лампа индикации
загорится один раз.
5.4.5 Повторите пункт 5.4.4 для поиска второй,
третьей и четвертой цифры.
CODES
TV VCR SATDVD
AUX AMP CBL DVBT
6. Дополнительные функции
6.1 Функция Punch Through для
переклочения программ
Данная функция „сквозных кoманд” (Punch
Тhrough) предназначена для переключения
программ другого устройства, не меняя тип
устройства. Функция не влияет на другие
команды.
Включение функции:
•Нажмите кнопку устройства, например, ТV.
•Нажмите и удерживайте кнопку PROG+.
•Нажмите
•Отпустите кнопку PROG+. Лампа мигнет один
Выключение функции:
•Нажмите кнопку устройства, например, ТV.
•Нажмите и удерживайте кнопку PROG–.
•Нажмите
•Отпустите кнопку PROG–. При отключении
6.2 Функция Punch Тhrough для реrулировки
rpoмкости
Данная функция „сквозных команд” (Puпch
Through) предназначена для реrулировкм
громкости другого устройства, не меняя тип
устpoйcтвa. Функция не впияет на другие
команды.
Включение функции:
•Нажмите кнопку устройства, например, ТV.
•Нажмите и удерживайте кнопку VOL+.
•Нажмите
•Отпустите кнопку VOL+. Лампа мигнет один
Выключение функции:
•Нажмите кнопку устройства, например, ТV.
•Нажмите и удерживайте кнопку VOL–.
•Нажмите
•Отпустите кнопку VOL–. При отключении
кнопку
другого
SAТ.
раз, показывая, что настройка включена.
кнопку
SAТ.
режима настройки лампа мигает два раза.
кнопку
SAТ.
раз, показывая, что настройка включена.
кнопку
SAТ.
режима настройки лампа мигает два раза.
устройства, например,
другого
устройства, например,
другого
устройства, например,
другого
устройства, например,
25
Page 28

6.3 Макрокоманда включения/выключения
питания
Функция предназначена для одновременного
включения/выключения питания двух устройств.
Включение функции:
•Нажмите кнопку устройства, например, ТV.
•Нажмите и удерживайте кнопку POWER.
•Нажмите
•Отпустите кнопку POWER. Лампа мигнет один
Выключение функции:
•Нажмите кнопку устройства, например, ТV.
•Нажмите и удерживайте кнопку POWER.
•Нажмите
•Отпустите кнопку POWER. При отключении
7. ТЕХОБСЛУЖИВАНИЕ
• Запрещается одновременно загружать новые
• Запрещается чистить прибор абразивными
• Берегите прибор от пыли. Протирать прибор
8. Устранение ошибки
B. ПДУ не работает.
O. Проверьте управляемое устройство. Главный
O. Проверьте состояние батарей и соблюдение
O. Убедитесь, что нажимаемые кнопки
O. Замените разряженные батареи.
B. Как выбрать правильный код при наличии
O. Чтобы найти правильный код для устройства,
кнопку
другого
SAТ.
раз, показывая, что настройка включена.
кнопку
SAТ.
режима настройки лампа мигает два раза.
и старые батареи.
средствами.
следует сухой мягкой тканью.
выключатель управляемого устройства
должен находиться в положении ВКЛ.
полярности.
соответствуют управляемому устройству.
нескольких кодов для управляемого
устройства.
попробуйте все коды поочередно, пока
не найдете тот, который поддерживает
наибольшее количество требуемых команд.
устройства, например,
другого
устройства, например,
B. Устройство реагирует только на некоторые
команды пульта дистанционного управления.
O. Попробуйте применить другой код.
9. Отдел техобслуживания
По вопросам ремонта или замены неисправных
изделий обращайтесь к продавцу или в
сервисную службу компании Hama.
Горячая линия отдела техобслуживания:
+49 9091 502-115 (немецкий, английский)
Подробнее смотрите здесь:
www.hama.com
10. Инструкции по утилизации
Охрана окружающей среды:
С момента перехода национального
законодательства на европейские
нормативы 2012/19/EU и 2006/66/EU
действительно следующее:
Электрические и электронные приборы,
а также батареи запрещается утилизировать с
обычным мусором. Потребитель, согласно
закону, обязан утилизировать электрические и
электронные приборы, а также батареи и
аккумуляторы после их использования в
специально предназначенных для этого пунктах
сбора, либо в пунктах продажи. Детальная
регламентация этих требований осуществляется
соответствующим местным законодательством.
Необходимость соблюдения данных
предписаний обозначается особым значком на
изделии, инструкции по эксплуатации или
упаковке. При переработке, повторном
использовании материалов или при другой
форме утилизации бывших в употреблении
приборов Вы помогаете охране окружающей
среды. В соответствии с предписаниями по
обращению с батареями, в Германии
вышеназванные нормативы действуют для
утилизации батарей и аккумуляторов.
26
Page 29

I Istruzioni per l‘uso
Telecomando universale
Grazie per avere acquistato un prodotto Hama.
Prima della messa in esercizio, leggete
attentamente le seguenti istruzioni e avvertenze.
Conservate le istruzioni in un luogo sicuro per una
eventuale consultazione.
Tasti funzione (modelli 4 in 1, 8 in 1)
1. Pulsante Mute
2. Tasti per la selezione apparecchio
3. Testo ON: attivare televideo
4. Hold: bloccare pagina televideo attuale
5. ◄◄ Ritorno/rosso
► Riproduzione/giallo
►► Avanti veloce / blu
● Avvio registrazione
■ Stop / verde
ll Pausa / magenta
6. Tasto Shift
7. Menu: menu apparecchi
8. Tasto modalità per la selezione del gruppo
apparecchi secondario (solo modello 8 in 1:
AUX,DVBT,CBL,AMP)
9. Vol+/Vol-: regolazione del volume
10. Setup: impostazioni del telecomando
11. Tasti numerici 0-9
12. Smart TV: Aprire il menu Smart TV (se
supportato dal terminale)
Shift+Smart TV: selezione sorgente AV esterna
13. APPS: Aprire il menu app (se supportato dal
terminale)
Shift+APPS : passare ai numeri del trasmettitore
a due cifre
14. PROG+/PROG-: scelta programma, verso l'alto/
verso il basso
15. EXIT: uscire dal menu apparecchio
16. OK: confermare la selezione
17. EPG: servizio di guida elettronica ai programmi
(se supportato dall'apparecchio AV)
18. Info: informazioni on screen (se supportate
dall'apparecchio AV)
19. Testo OFF: uscire da televideo
20. Power: ON/OFF / LED
1. Spiegazione del simbolo di avvertenza
Avvertenza
► Questo simbolo rimanda a informazioni sup-
plementari o indicazioni importanti.
2. Volume di fornitura
- Telecomando universale
- Elenco codici
- Queste istruzioni per l’uso
3. Indicazioni di sicurezza
• Non usare il telecomando universale in ambienti
umidi ed evitare il contatto con gli spruzzi.
• Te nere il telecomando universale lontano da
fonti di calore e non esporlo alla luce diretta del
sole.
• Non fare cadere il telecomando universale.
• Non aprire il telecomando universale. Non
contiene parti soggette a manutenzione da
parte dell‘utente.
• Te nere il telecomando universale, come tutte le
apparecchiature elettriche, fuori dalla portata
dei bambini.
4. Primi passi - inserimento delle batterie
Avvertenza
► Si consiglia di utilizzare batterie alcaline.
Utilizzare due batterie del tipo „AAA” (LR
03/Micro).
► Aprire il coperchio del vano batterie sul retro
del telecomando universale.
► Introdurre due batterie con la corretta pola-
rità (+ / -).
► Richiudere il vano batterie.
27
Page 30

Avvertenza: salvacodice
► Tutti i codici programmati restano memo-
rizzati per 10 minuti mentre si sostituisce la
batteria. Non premere alcun pulsante prima
di inserire la batteria nuova nel telecomando. Tutti i codici vengono cancellati se si
preme un pulsante mentre non ci sono batterie nel telecomando.
Avvertenza
: Funzione di risparmio
batteria
► Il telecomando si spegne automaticamente
se si tiene premuto un pulsante per più di
15 secondi. Questo consente di preservare
la batteria se il telecomando resta bloccato
in una posizione in cui i pulsanti vengono
continuamente premuti, come tra i cuscini
del divano.
5. Setup
Avvertenze
► Per una corretta trasmissione a infrarossi, te-
nere sempre il telecomando nella direzione
dell‘apparecchio da comandare.
► Premere il tasto „MODE” per scegliere il
gruppo apparecchi secondario: AUX, AMP,
DVB-T, CBL (solo modello 8 in 1).
► Premere il tasto Shift per utilizzare i tasti fun-
zione blu. La funzione Shift viene disattivata
premendo nuovamente il tasto Shift, oppure
automaticamente, se non si preme alcun tasto per ca. 30 secondi.
► Se per 30 secondi non si preme nulla, si esce
dal modo Setup. Il LED lampeggia 6 volte,
quindi si spegne.
► Tutti i tipi di apparecchi possono essere pro-
grammati premendo un tasto qualsiasi, ad
es. un televisore può essere programmato
con DVD, AUX ecc.
► Con il telecomando universale non si posso-
no comandare apparecchi che si trovano nel
modo Setup. Per uscire dal modo Setup, scegliere l‘apparecchioda comandare mediante
i tasti per la scelta apparecchio.
5.1 Immissione diretta del codice
Nella confezione del telecomando universale è
contenuto un elenco dei codici. L‘elenco riporta
i codici a quattro cifre della maggior parte dei
costruttori di apparecchi AV in ordine alfabetico,
raggruppati in base al tipo di apparecchio (ad es.
TV, DVD ecc.). Se l‘apparecchio da comandare è
riportato nell‘elenco, l‘immissione diretta del codice
è il metodo più immediato.
5.1.1 Accendere l’apparecchio da comandare.
5.1.2 Premere il tasto „SETUP”, nché il LED non si
accende a luce ssa.
5.1.3 Mediante il tasto apparecchio, scegliere
l‘apparecchio da comandare (ad es. TV). A
scelta avvenuta, il LED lampeggia una volta,
quindi resta acceso.
5.1.4 Nell‘elenco codici, cercare la marca e il tipo di
apparecchio da comandare.
5.1.5 Immettere il codice a quattro cifre corrispon-
dente mediante i tasti numerici 0-9. Il LED
conferma l’immissione delle singole cifre
lampeggiando brevemente e si spegne dopo
la quarta cifra.
Avvertenza
► Un codice valido viene salvato automatica-
mente.
► In caso di codice non valido, il LED lampeg-
gia sei volte, quindi si spegne. Ripetere i
passi da 5.1.1 a 5.1.5 o utilizzare un altro
metodo per l‘immissione dei codici.
28
Page 31

5.2 Ricerca codice manuale
Il telecomando universale dispone di una memoria
interna che contiene già 350 codici per apparecchio, per ciascuno dei più comuni apparecchi
AV. È possibile fare scorrere i vari codici, nché
l‘apparecchio da comandare non mostra una
reazione, ad esempio l’apparecchio da comandare
si spegne (tasto „POWER”) oppure cambia il
programma (tasto „PROG+/PROG-”).
5.2.1 Accendere l’apparecchio da comandare.
5.2.2 Premere il tasto „SETUP”, nché il LED non si
accende a luce ssa.
5.2.3 Mediante il tasto apparecchio, scegliere
l‘apparecchio da comandare (ad es. TV). A
scelta avvenuta, il LED lampeggia una volta,
quindi resta acceso.
5.2.4 Premere il tasto „POWER” o „PROG+/PROG-”
per scorrere i codici preimpostati, nché
l‘apparecchio da comandare non mostra una
reazione.
5.2.5 Premere „MUTE(OK)” per memorizzare il
codice e uscire dalla ricerca codice. Il LED si
spegne.
Avvertenza
► Nella memoria interna si possono memoriz-
zare massimo 350 codici degli apparecchi
più comuni. Per via dei numerosi apparecchi
AV presenti sul mercato, può accadere che
siano disponibili solo le funzioni principali
più comuni. In questo caso, ripetere i passaggi da 5.2.1 a 5.2.5 per trovare un codice
compatibile. Per alcuni modelli speciali di
apparecchi, potrebbero non esserci codici
disponibili.
5.3 Ricerca codice automatica
La ricerca automatica del codice utilizza gli stessi
codici preimpostati della ricerca manuale del codice
(5.2). Il telecomando universale ricerca i codici
manualmente, nché l‘apparecchio da comandare
non mostra una reazione, ad esempio l’apparecchio
da comandare si spegne (tasto „POWER”) oppure
cambia il programma (tasto „PROG+/PROG-”).
5.3.1 Accendere l’apparecchio da comandare.
5.3.2 Premere il tasto „SETUP”, nché il LED non si
accende a luce ssa.
5.3.3 Mediante il tasto apparecchio, scegliere
l‘apparecchio da comandare (ad es. TV). A
scelta avvenuta, il LED lampeggia una volta,
quindi resta acceso.
5.3.4 Premere il tasto „PROG+/PROG-” o „POWER”
per avviare la ricerca automatica del codice.
Il LED lampeggia una volta, quindi resta
acceso. Occorrono 6 secondi anché il
telecomando universale inizi a effettuare la
prima ricer
ca.
Avvertenza: impostazione della
velocità di ricerca
► L‘impostazione standard del tempo di ricerca
per ciascun codice è 1 secondo. Se si preferisce, si può passare a un tempo di ricerca di 3 secondi. Per passare tra i tempi di
ricerca, premere „PROG+” o „PROG-” entro
6 secondi dall‘avvio della ricerca automatica
del codice.
5.3.5 Il LED conferma le ricerche dei codici con un
singolo lampeggio.
5.3.6 Premere „MUTE(OK)” per memorizzare il
codice e uscire dalla ricerca codice. Il LED si
spegne.
5.3.7 Per interrompere la ricerca automatica,
premere il tasto „EXIT”.
Avvertenza
► Se si provano tutti i codici senza successo,
il telecomando universale esce dalla ricerca
automatica e torna automaticamente nel
modo di esercizio. Il codice attualmente memorizzato resta invariato.
29
Page 32

5.4 Riconoscimento del codice
Il riconoscimento del codice consente di rilevare i
codici già immessi.
5.4.1 Premere il tasto „SETUP”, nché il LED non si
accende a luce ssa.
5.4.2 Mediante il tasto apparecchio, scegliere
l‘apparecchio da comandare (ad es. TV). A
scelta avvenuta, il LED lampeggia una volta,
quindi resta acceso.
5.4.3 Premere il tasto SETUP. Il LED lampeggia una
volta, quindi resta acceso.
5.4.4 Per la ricerca della prima cifra, premere uno
dei tasti numerici da 0 a 9. Il LED lampeggia
una volta per la prima cifra del codice numerico a quattro cifre.
5.4.5 Ripetere il passaggio 5.4.4 per la seconda,
terza e quarta cifra.
CODES
TV VCR SATDVD
AUX AMP CBL DVBT
6. Funzioni speciali
6.1 Punch through canale
Con la funzione Punch through canale, i comandi
PROG+ o PROG- possono eludere l‘apparecchio
attualmente comandato e cambiare i programmi di
un secondo apparecchio. Tutti gli altri comandi non
sono interessati.
Ecco come attivare la funzione Punch through canale:
•Premere il tasto dell‘apparecchio desiderato
(ad es. TV)
•Tenere premuto il tasto „PROG+”.
•Premere il tasto dell‘apparecchio desiderato
(ad es. SAT)
•Rilasciare il tasto „PROG+” (il LED lampeggia una
volta quando l‘impostazione è attivata).
Ecco come disattivare la funzione Punch through
canale:
•Premere il tasto dell‘apparecchio desiderato
(ad es. TV)
•Tenere premuto il tasto „PROG-”.
•Premere il tasto dell‘apparecchio desiderato
(ad es. SAT)
•Rilasciare il tasto „PROG-” (il LED lampeggia due
volte se viene disattivata l‘impostazione).
6.2 Punch through volume
Con la funzione Punch through volume, i comandi
VOL+ o VOL- possono eludere l‘apparecchio
attualmente comandato e variare il volume di un
secondo apparecchio. Tutti gli altri comandi non
sono interessati.
Ecco come attivare la funzione Punch through
volume:
•Premere il tasto dell‘apparecchio desiderato
(ad es. TV)
•Tenere premuto il tasto „VOL+”.
•Premere il tasto dell‘apparecchio desiderato
(ad es. SAT)
•Rilasciare il tasto „VOL+” (il LED lampeggia una
volta quando l‘impostazione è attivata).
Ecco come disattivare la funzione Punch through
volume:
•Premere il tasto dell‘apparecchio desiderato
(ad es. TV)
•Tenere premuto il tasto „VOL-”.
•Premere il tasto dell‘apparecchio desiderato
(ad es. SAT)
•Rilasciare il tasto „VOL-” (il LED lampeggia due
volte se viene disattivata l‘impostazione).
30
Page 33

6.3 Macro Power
Con il tasto Macro Power è possibile accendere e
spegnere contemporaneamente due apparecchi AV.
Ecco come attivare la funzione Macro Power:
•Premere il tasto dell‘apparecchio desiderato
(ad es. TV)
•Tenere premuto il tasto „POWER”.
•Premere il tasto dell‘apparecchio desiderato
(ad es. SAT)
•Rilasciare il tasto „POWER” (il LED lampeggia
una volta quando l‘impostazio ne è attivata).
Ecco come disattivare la funzione Macro Power:
•Premere il tasto dell‘apparecchio desiderato
(ad es. TV)
•Tenere premuto il tasto „POWER”.
•Premere il tasto dell‘apparecchio desiderato
(ad es. SAT)
•Rilasciare il tasto „POWER” (il LED lampeggia
due volte se viene disattivata l‘impostazione).
7. Manutenzione
• Non inserire mai contemporaneamente batterie
vecchie e nuove nel telecomando universale,
poiché le batterie vecchie tendono a scaricarsi
causando una perdita di potenza.
• Non pulire mai il telecomando universale con
sostanze abrasive o detergenti aggressivi.
• To gliere la polvere con un panno morbido e
asciutto.
8. Ricerca Guasti
Q. Il mio telecomando universale non funziona!
R. Vericare l‘apparecchio AV. Se l‘interruttore
principale dell‘apparecchio è spento, non utilizzare il telecomando universale dell‘apparecchio.
R. Vericare che le batterie del telecomando siano
inserite correttamente e che la polarità +/–
corrisponda.
R. Vericare di avere premuto il corrispondente
tasto dell‘apparecchio.
R. Sostituire le batterie se sono scariche.
Q. Se per la marca del mio apparecchio AV sono
elencati numerosi codici, come scelgo quello
corretto?
R. Per determinare il codice corretto per
l‘apparecchio AV, provare i codici uno dopo
l‘altro nché la maggior parte dei tasti
dell‘apparecchio non funzionano correttamente.
Q. Il mio apparecchio AV reagisce solo ad alcuni
comandi dei tasti.
R. Provare un altro codice nché la maggior parte
dei tasti non funzionano correttamente.
9.
Assistenza e supporto
In caso di domande sul prodotto, rivolgersi alla Consulenza prodotto Hama.
Hotline: +49 9091 502-115 (ted./ing.)
Ulteriori informazioni sul supporto sono disponibili qui:
www.hama.com
10. Indicazioni di smaltimento
Informazioni per protezione ambientale:
Dopo l’implementazione della Direttiva
Europea 2012/19/EU e 2006/66/EU nel
sistema legale nazionale, ci sono le
seguenti applicazioni: Le apparecchiature
elettriche ed elettroniche e le batterie non
devono essere smaltite con i riuti domestici. I
consumatori sono obbligati dalla legge a restituire I
dispositivi elettrici ed elettronici e le batterie alla
ne della loro vita utile ai punti di raccolta pubblici
preposti per questo scopo o nei punti vendita.
Dettagli di quanto riportato sono deniti dalle leggi
nazionali di ogni stato. Questo simbolo sul
prodotto, sul manuale d’istruzioni o sull’imballo
indicano che questo prodotto è soggetto a queste
regole. Riciclando, ri-utilizzando i materiali o
utilizzando sotto altra forma i vecchi prodotti/le
batterie, darete un importante contributo alla
protezione dell’ambiente.
31
Page 34

N Gebruiksaanwijzing
Universele afstandsbediening
Hartelijk dank dat u voor een Hama-product heeft
gekozen.
Neemt u zich de tijd en lees de onderstaande
aanwijzingen en informatie allereerst geheel door.
Bewaar deze instructies op een veilige plek als
naslagwerk voor op een later tijdstip.
Functietoetsen (modellen 4 in 1, 8 in 1)
1. Mute-schakelaar
2. Toetsen voor de apparatuurselectie
3. Text IN: teletext inschakelen
4. Vasthouden: op actuele teletextpagina blijven
5. ◄◄ terug/rood
► weergave/geel
►► snel vooruit/blauw
● opname starten
■ stop/groen
ll pause/roze
6. Shift-toets
7. Menu: apparatuurmenu openen
8. Moduletoets voor de selectie van de secundaire
apparatuurgroep (alleen model 8 in 1:
AUX,DVBT,CBL,AMP)
9. Vol+/Vol-: volumeregeling
10. Setup: instellingen van de afstandsbediening
11. Cijfertoetsen 0-9
12. Smart TV: Smart TV menu openen (indien door
het eindtoestel wordt ondersteund)
Shift+Smart TV: externe AV bron selecteren
13. APPS: App-menu openen (indien door
het eindtoestel wordt ondersteund)
Shift+APPS : naar tweecijferig zendernummer
omschakelen
14. PROG+/PROG-: programmaselectie, naar boven/
naar beneden
15. EXIT: apparatuurmenu verlaten
16. OK: selectie bevestigen
17.
EPG: elektronische programmagids (mits deze functie
door het geselecteerde AV-toestel wordt ondersteund)
18. Info: On-Screen-informatie (mits deze functie
door het AV-toestel wordt ondersteund)
19.
Tekst UIT: teletext verlaten
20. Power: IN/UITä / LED
1. Verklaring van het aanwijzing-symbool
Aanwijzing
► Dit symbool duidt op extra informatie of bel-
angrijke aanwijzingen.
2. Bij de verpakking inbegrepen
- Universele afstandsbediening
- Codelijst
- Deze bedieningsinstructies
3. Veiligheidsinstructies
• Gebruik de universele afstandsbediening niet in
vochtige omgevingen en voorkom contact met
spatwater.
• Houd de universele afstandsbediening uit de
buurt van warmtebronnen en stel de afstandsbediening niet bloot aan direct zonlicht.
• Laat de universele afstandsbediening niet
vallen.
• De universele afstandsbediening niet openen.
De afstandsbediening bevat geen onderdelen
die door de gebruiker dienen te worden onderhouden.
• De universele afstandsbediening dient, net als
alle elektrische apparatuur, buiten het bereik
van kinderen gehouden te worden.
4. Eerste stappen – plaatsen van de batterijen
Aanwijzing
► Wij adviseren alkaline batterijen. Gebruik
twee batterijen van het type „AAA” (LR 03/
Micro).
► Verwijder het batterijdeksel aan de achter-
zijde van de universele afstandsbediening.
► Plaats vervolgens de batterijen met inacht-
neming van de polariteit (+/-), zoals in het
batterijvak is aangegeven.
► Sluit het batterijvak.
32
Page 35

Aanwijzing: Code-opslag
► Eventuele geprogrammeerde codes blijven
gedurende 10 minuten bewaard terwijl u
de batterijen vevangt. Druk a.u.b. geen enkele toets in voordat u nieuwe batterijen in
de afstandsbediening heeft geplaatst. Alle
geprogrammeerde codes zullen worden
verwijderd indien een toets wordt ingedrukt
terwijl er zich geen batterijen in de afstandsbediening bevinden.
Aanwijzing: Batterijspaarfunctie
► Indien er een toets langer dan 15 seconden
wordt ingedrukt, dan zal de afstandsbediening automatisch uitschakelen. Dit is een
energiebesparende functie voor de batterijen indien de afstandsbediening wordt
ingeklemd en dientengevolge toets(en) continu worden ingedrukt, zoals bijv. tussen de
kussens van het bankstel.
5. Setup
Aanwijzing
► Houd de afstandsbediening voor een cor-
recte infrarood-overdracht altijd in de richting van het te bedienen toestel.
► Druk op de toets „MODE” voor de selectie
van de secundaire apparatuurgroep: AUX,
AMP, DVB-T, CBL (alleen model 8 in 1).
► Druk de Shift-toets in teneinde de blauwe
functietoetsen te gebruiken. De Shift-functie
wordt door opnieuw op de Shift-toets te
drukken gedeactiveerd, of automatisch, indien ca. gedurende 30 seconden geen toets
wordt ingedrukt.
► Indien gedurende ca. 30 seconden niets
wordt ingevoerd, wordt de Setup-modus
beëindigd. De LED knippert zesmaal en gaat
vervolgens uit.
► Ieder type toestel kan onder een willekeurige
toets wordengeprogrammeerd, bijv. kan een
televisietoestel onder DVD, AUX worden geprogrammeerd.
► U kunt met de universele afstandsbediening
geen toestel bedienen, zolang zich dit in
de Setup-modus bevindt. Verlaat de Setupmodus, en selecteer het te bedienen toestel
met behulp van de toetsen voor de apparatuurselectie.
5.1 Directe code-invoer
Bij de levering van de universele afstandsbediening
is een codelijst inbegrepen. De codelijst toont
viercijferige codes van de meeste AV-apparatuurfabrikanten in alfabetische volgorde, gegroepeerd
naar het soort toestel (bijv. tv, dvd-speler enz.).
Indien het te bedienen toestel in de codelijst is
vermeld, is de directe code-invoer de eenvoudigste
invoermethode.
5.1.1 Schakel het toestel dat bediend moet worden
in.
5.1.2 Druk op de toets „SETUP” totdat de LED
continu brandt.
5.1.3 Selecteer met behulp van de apparatuurtoets
het toestel dat bediend moet worden, (bijv.
tv). Bij succesvolle selectie knippert de LED
eenmaal en brandt daarna continu.
5.1.4 Zoek in de codelijst naar het merk en type van
het te bedienen toestel.
5.1.5 Voer vervolgens de desbetreffende viercijfe-
rige code met behulp van de cijfertoetsen 0-9
in. De LED bevestigt de invoer van de afzonderlijke cijfers steeds met een kort knipperen
en gaat na het vierde cijfer uit.
33
Page 36

Aanwijzing
► Een geldige code wordt automatisch opges-
lagen.
► Bij een ongeldige code knippert de LED
zesmaal en gaat vervolgens uit. Herhaal de
stappen 5.1.1 tot 5.1.5, of maak gebruik
van een andere methode om de codes in te
voeren.
5.2 Handmatig codes zoeken
De universele afstandsbediening beschikt over een
intern geheugen, waarin reeds max. 350 codes per
soort toestel voor de meest gangbare AV-apparatuur zijn opgeslagen. U kunt deze codes doorlopen
totdat het te bedienen toestel een reactie toont.
Het te bedienen toestel schakelt zich bijvoorbeeld
uit (toets „POWER”) of schakelt om naar een
andere zender (toets „PROG+/PROG-”).
5.2.1 Schakel het toestel dat bediend moet worden
in.
5.2.2 Druk op de toets „SETUP” totdat de LED
continu brandt.
5.2.3 Selecteer met behulp van de apparatuurtoets
het toestel dat bediend moet worden, (bijv.
tv). Bij succesvolle selectie knippert de LED
eenmaal en brandt daarna continu.
5.2.4 Druk op de toets „POWER” of „PROG+/PROG”, teneinde door de vooraf reeds ingevoerde
codes te bladeren totdat het te bedienen
toestel een reactie toont.
5.2.5 Druk op „MUTE(OK)” teneinde de code op te
slaan en de code-zoekfunctie te verlaten. De
LED gaat uit.
Aanwijzing
► In het interne geheugen kunnen maximaal
350 codes van de meest gangbare apparatuur worden opgeslagen. Vanwege de talrijke
op de markt te verkrijgen AV-apparatuur kan
het voorkomen dat alleen de meest gebruikelijke hoofdfuncties te beschikking zijn.
Is dit het geval dan herhaalt u de stappen
5.2.1 tot 5.2.5 teneinde een meer compatibele code te vinden. Voor enige speciale
apparatuurmodellen is mogelijk geen code
ter beschikking.
5.3 Automatische code-zoekfunctie
De automatische code-zoekfunctie maakt gebruik
van dezelfde vooraf ingevoerde codes zoals de
handmatige code-zoekfunctie (5.2). De universele
afstandsbediening doorzoekt de codes echter
automatisch totdat het te bedienen toestel een
reactie toont. Het te bedienen toestel schakelt zich
bijvoorbeeld uit (toets „POWER”) of schakelt om
naar een andere zender (toets „PROG+/PROG-”).
5.3.1 Schakel het toestel dat bediend moet
worden in.
5.3.2 Druk op de toets „SETUP” totdat de LED
continu brandt.
5.3.3 Selecteer met behulp van de apparatuurtoets
het toestel dat bediend moet worden, (bijv.
tv). Bij succesvolle selectie knippert de LED
eenmaal en brandt daarna continu.
5.3.4 Druk op de toets „PROG+/PROG-” of
„POWER” teneinde de automatische codezoekfunctie te starten. De LED knippert
eenmaal en brandt daarna continu. Het duurt
6 seconden totdat de universele afstandsbediening met de eerste zoektocht begint.
34
Page 37

Aanwijzing: instellen van de
zoeksnelheid
► De standaardinstelling voor de zoektijd per
code is 1 seconde. Indien deze instelling u niet
bevalt kunt u naar een zoektijd van 3 seconden per code omschakelen. Om tussen de zoektijden om te schakelen drukt u op „PROG+”
of „PROG-” binnen de 6 seconden voor het
begin van de automatische code-zoekfunctie.
5.3.5
De LED bevestigt de desbetreffende codezoekfuncties door eenmaal te knipperen.
5.3.6 Druk op „MUTE(OK)” teneinde de code op te
slaan en de code-zoekfunctie te verlaten. De
LED gaat uit.
5.3.7 Teneinde de automatische zoekfunctie tijdens het
zoeken af te breken drukt u op de toets „EXIT”.
Aanwijzing
► Indien alle codes zonder succes werden door-
zocht, verlaat de universele afstandsbediening
de automatische code-zoekfunctie en keert
automatisch naar de bedrijfsmodus terug. De
actueel opgeslagen code blijft ongewijzigd.
5.4 Codeherkenning
De codeherkenning biedt aan u de mogelijkheid
een reeds ingevoerde code te achterhalen.
Druk op de toets „SETUP” totdat de LED
5.4.1
continu brandt.
5.4.2 Selecteer met behulp van de apparatuurtoets
het toestel dat bediend moet worden, (bijv.
tv). Bij succesvolle selectie knippert de LED
eenmaal en brandt daarna continu.
5.4.3 Druk op de toets „SETUP”. De LED knippert
eenmaal en brandt daarna continu.
5.4.4 Druk, om het eerste getal te zoeken, op één
van de cijfertoetsen 0 tot 9. De LED knippert
eenmaal voor het eerste getal van het viercijferige codenummer.
5.4.5 Herhaal de stap 5.4.4 voor het tweede, derde
en vier
de getal.
CODES
TV VCR SATDVD
AUX AMP CBL DVBT
6. Speciale functies
6.1 Sender-Punch-Through
Met de Sender-Punch-Through-functie kunnen de
commando‘s PROG+ of PROG- hel actueel bediende
toestel omzeilen, en de zenders va n een tweede
toestel omschakelen. Alle andere commando‘s zijn
daarvan uitgesloten.
Zo activeert u de Sender-Punch-Through-functie:
•Druk op de gewenste apparatuurtoets (bijv. tv).
•Houd de toets „PROG+” ingedrukt.
•Druk op de gewenste apparatuurtoets (bijv. SAl).
•Laat de toets „PROG+” weer los (de LED knippert
eenmaal bij geactiveerde instelling).
Zo deactiveert u de Sender-Punch-Through-functie:
•Druk op de gewenste apparatuurtoets (bijv. tv).
•Houd de toets „PROG-” ingedrukt.
•Druk op de gewenste apparatuurtoets (bijv. SAl).
•Laat de toets „PROG-” weer los (de LED
knippert tweemaal indien de instelling wordt
gedeactiveerd).
6.2 Geluidssterkte-Punch-Through
Met de Geluidssterkte-Punch-Through-functie
kunnen de commando‘s VOL+ of VOL- het actueel
bediende toestel omzeilen, en de geluidssterkte
van een tweede toestel instellen. Alle andere
commando‘s zijn daarvan uitgesloten.
Zo activeert u de Geluidssterkte-Punch-Throughfunctie:
•Druk op de gewenste apparatuurtoets (bijv. tv).
•Houd de toets „VOL+” ingedrukt.
35
Page 38

•Druk op de gewenste apparatuurtoets (bijv. SAl).
•Laat de toets „VOL+” weer los (de LED knippert
eenmaal bij geactiveerde instelling).
Zo deactiveert u de Geluidssterkte-Punch-Throughfunctie:
•Druk op de gewenste apparatuurtoets (bijv. tv).
•Houd de toets „VOL-” ingedrukt.
•Druk op de gewenste apparatuurtoets (bijv. SAl).
•Laat de toets „VOL-” weer los (de LED
knippert tweemaal indien de instelling wordt
gedeactiveerd).
6.3 Macro Power
Met Macro Power kunt u twee AV-toestellen
tegelijkertijd in-/uitschakelen.
Zo activeert u de Macro Power-functie:
•Druk op de gewenste apparatuurtoets (bijv. tv).
•Houd de toets „POWER” ingedrukt.
•Druk op de gewenste apparatuurtoets (bijv. SAl).
•Laat de toets „POWER” weer los (de LED knippert
eenmaal bij geactiveerde instelling).
Zo deactiveert u de Macro Power-functie:
•Druk op de gewenste apparatuurtoets (bijv. tv).
•Houd de toets „POWER” ingedrukt.
•Druk op de gewenste apparatuurtoets (bijv. SAl).
•Laat de toets „POWER” weer los (de LED
knippert tweemaal indien de instelling wordt
gedeactiveerd)
7. Onderhoud
• Gebruik nimmer tegelijkertijd oude en nieuwe
batterijen in de universele afstandsbediening
omdat oude batterijen kunnen lekken en tot
vermogensverlies kunnen leiden.
•
Reinig de universele afstandsbediening nimmer met
een schuurmiddel of scherpe reinigingsmiddelen.
Houd de universele afstandsbediening vrij van
•
stof door haar regelmatig met een droge zachte
doek te reinigen.
8. Het Oplossen van Storingen
V. Mijn universele afstandsbediening doet het niet!
A.
Controleer het AV-toestel. Indien de hoofdschakelaar van het toestel is uitgeschakeld kan de universele afstandsbediening het toestel niet bedienen.
36
A.
Controleer of de batterijen van de afstandsbediening juist zijn geplaatst en of de polariteit in orde is.
Controleer of de desbetreffende toets voor het
A.
toestel is ingedrukt.
A. Vervang de batterijen bij een laag laadniveau.
V. Indien voor het merk van mijn AV-toestel meer-
dere toestelcodes zijn opgesomd, hoe selecteer
dan de juiste toestelcode?
A. Om de correcte toestelcode voor het AV-toestel
te achterhalen, test u de codes één voor één uit
tot de meeste toetsen/functies van uw toestel
naar behoren functioneren.
V.
Mijn AV-toestel reageert alleen op een paar toetsen.
Probeer andere codes totdat de meeste toetsen
A.
correct functioneren.
9. Service en support
Neem bij vragen over het product contact op met
de afdeling Productadvies van HAMA.
Hotline: +49 9091 502-115 (Duits/Engels)
Meer support-informatie vindt u hier:
www.hama.com
10. Aanwijzingen over de afvalverwerking
Notitie aangaande de bescherming van het
milieu:
Ten gevolge van de invoering van de
Europese Richtlijn 2012/19/EU en 2006/66/
EU in het nationaal juridisch system, is het
volgende van toepassing: Elektrische en
elektronische apparatuur, zoals batterijen
mag niet met het huisvuil weggegooid worden.
Consumenten zijn wettelijk verplicht om electrische
en elctronische apparaten zoals batterijen op het
einde van gebruik in te dienen bij openbare
verzamelplaatsen speciaal opgezet voor dit doeleinde
of bij een verkooppunt. Verdere specicaties
aangaande dit onderwerp zijn omschreven door de
nationale wet van het betreffende land. Dit symbool
op het product, de gebruiksaanwijzing of de
verpakking duidt erop dat het product onderworpen
is aan deze richtlijnen. Door te recycleren,
hergebruiken van materialen of andere vormen van
hergebruiken van oude toestellen/batterijen, levert u
een grote bijdrage aan de bescherming van het mileu.
Page 39

J Οδηγίες χρήσης
Τηλεχειριστήριο γενικής χρήσης
Σας ευχαριστούμε για την αγορά αυτού του προϊόντος
της Hama.
Διαβάστε προσεκτικά όλες τις παρακάτω οδηγίες και
πληροφορίες. Φυλάξτε αυτό το εγχειρίδιο σε ασφαλές
μέρος για μετέπειτα χρήση.
Πλήκτρα λειτουργίας (μοντέλα 4 σε 1, 8 σε 1)
Διακόπτης σίγασης
1.
Πλήκτρα επιλογής συσκευής
2.
Text ΟΝ: Ενεργοποίηση teletext
3.
Hold: Παραμονή στην τρέχουσα σελίδα teletext
4.
◄◄ Μετακίνηση προς τα εμπρός/κόκκινο
5.
► Αναπαραγωγή/κίτρινο
►► Μετακίνηση προς τα πίσω/μπλε
● Έναρξη εγγραφής
■ Διακοπή/πράσινο
ll Προσωρινή διακοπή/ματζέντα
Πλήκτρο Shift
6.
Menu: Άνοιγμα μενού συσκευής
7.
Πλήκτρο λειτουργίας για επιλογή της
8.
δευτερεύουσας ομάδας συσκευών (μόνο στο
μοντέλο 8 σε 1: AUX,DVBT,CBL,AMP)
9.
Vol+/Vol-: Ρύθμιση της έντασης
Setup: Ρυθμίσεις του τηλεχειριστηρίου
10.
Αριθμητικά πλήκτρα 0-9
11.
Smart TV: Άνοιγμα μενού Smart TV (εφόσον
12.
υποστηρίζεται από τη συσκευή)
Shift+Smart TV: επιλογή εξωτερικής πηγής ήχου/
εικόνας
13. APPS: Άνοιγμα μενού εφαρμογών (εφόσον
υποστηρίζεται από τη συσκευή)
Shift+APPS : Μετάβαση σε διψήφιους αριθμούς
καναλιών
14. PROG+/PROG-: Επιλογή προγράμματος, προς τα
πάνω/κάτω
15.
EXIT: Έξοδος από το μενού συσκευών
OK: Επιβεβαίωση επιλογής
16.
17.
EPG: Ηλεκτρονικός οδηγός προγράμματος (εάν
υποστηρίζεται από την επιλεγμένη συσκευή
ήχου/εικόνας)
18. Info: Πληροφορίες στην οθόνη (εάν
υποστηρίζονται από την συσκευή ήχου/εικόνας)
19.
Text OFF: Έξοδος από το teletext
20. Power: Ενεργοποίηση/Απενεργοποίηση / Λυχνία LED
Επεξήγηση του συμβόλου υπόδειξης
1.
Υπόδειξη
► Αυτό το σύμβολο υποδεικνύει επιπλέον
πληροφορίες ή σημαντικές υποδείξεις.
2.
Περιεχόμενα συσκευασίας
- Τηλεχειριστήριο γενικής χρήσης
- Λίστα κωδικών
- Αυτό το εγχειρίδιο χρήσης
3.
Υποδείξεις ασφαλείας
•
Μην χρησιμοποιείτε το τηλεχειριστήριο γενικής
χρήσης σε υγρό περιβάλλον, και αποφεύγετε
επαφή με σταγόνες νερού.
•
Κρατήστε το τηλεχειριστήριο μακριά από πηγές
θερμότητας και μην το εκθέτετε σε άμεση ηλιακή
ακτινοβολία.
•
Μην αφήνετε το τηλεχειριστήριο να πέσει.
Μην ανοίγετε το τηλεχειριστήριο. Δεν περιέχει
•
εξαρτήματα που μπορεί να επισκευάσει ο χρήστης.
•
Το τηλεχειριστήριο, όπως και άλλες ηλεκτρικές
συσκευές, δεν είναι παιχνίδι για τα παιδιά.
4.
Πρώτα βήματα – Τοποθέτηση των μπαταριών
Υπόδειξη
► Συνίσταται η χρήση αλκαλικών μπαταριών.
Χρησιμοποιήστε δύο μπαταρίες „ΑΑΑ” (LR
03/Micro).
► Αφαιρέστε το κάλυμμα των μπαταριών στην
πίσω πλευρά του τηλεχειριστηρίου.
► Τοποθετήστε τις μπαταρίες λαμβάνοντας
υπόψη τα σύμβολα πολικότητας „+/-”.
► Κλείστε τη θήκη μπαταριών.
37
Page 40

Υπόδειξη: Μνήμη κωδικών
► Κατά την αντικατάσταση των μπαταριών
αποθηκεύονται για 10 λεπτά όλοι οι
κωδικοί που προγραμματίσατε. Δεν πρέπει
να πατήσετε κάποιο πλήκτρο μέχρι να
τοποθετηθούν οι νέες μπαταρίες στο
τηλεχειριστήριο. Αν πατηθεί κάποιο πλήκτρο
χωρίς να έχουν τοποθετηθεί οι μπαταρίες στο
τηλεχειριστήριο, χάνονται όλοι οι κωδικοί.
Υπόδειξη: Λειτουργία
εξοικονόμησης ενεργείας:
► Αν δεν πατηθεί κανένα πλήκτρο για
15 δευτερόλεπτα το τηλεχειριστήριο
απενεργοποιείται αυτόματα. Κατ‘ αυτόν τον
τρόπο γίνεται εξοικονόμηση μπαταριών,
σε περίπτωση που το τηλεχειριστήριο
σφηνώσει σε κάποιο μέρος όπου πατιούνται
συνεχώς τα πλήκτρα π. χ. ανάμεσα στα
μαξιλάρια του καναπέ.
5. Setup
Υποδείξεις
► Για σωστή μεταφορά υπέρυθρων κρατάτε
το τηλεχειριστήριο πάντα προς το μέρος της
συσκευής.
► Πατήστε το πλήκτρο „MODE” για επιλογή της
δευτερεύουσας ομάδας συσκευών: AUX, AMP,
DVB-T, CBL (μόνο στο μοντέλο 8 σε 1).
► Πατήστε το πλήκτρο Shift για να
χρησιμοποιήσετε τα μπλε πλήκτρα
λειτουργίας. Η λειτουργία Shift
απενεργοποιείται πατώντας ξανά το πλήκτρο
Shift, ή αυτόματα, εάν για 30 περίπου
δευτερόλεπτα δεν πατηθεί κανένα πλήκτρο
38
► Εάν δεν γίνει κάποια εισαγωγή δεδομένων για
περίπου 30 δευτερόλεπτα, ολοκληρώνεται
η λειτουργία εγκατάστασης. Η λυχνία LED
αναβοσβήνει έξι φορές και μετά σβήνει..
► Κάθε τύπος συσκευής μπορεί να
προγραμματιστεί μέσω του πλήκτρου
συσκευής που εσείς θέλετε π.χ. η τηλεόραση
μπορεί να προγραμματιστεί μέσω του DVD,
AUX κλπ.
► Ο χειρισμός της συσκευής μέσω του
τηλεχειριστηρίου δεν μπορεί να γίνει όσο αυτή
βρίσκεται στη λειτουργία εγκατάστασης. Βγείτε
από το μενού εγκατάστασης και επιλέξτε τη
συσκευή που θέλετε να χειριστείτε μέσω
πλήκτρων επιλογής συσκευής.
5.1 Άμεση εισαγωγή κωδικού
Στη συσκευασία του τηλεχειριστηρίου υπάρχει μια
λίστα κωδικών. Στη λίστα κωδικών αναγράφονται
τετραψήφιοι κωδικοί των περισσότερων
κατασκευαστών συσκευών ήχου/εικόνας σε
αλφαβητική σειρά, κατηγοριοποιημένοι κατά τύπο
συσκευής (π.χ. τηλεόραση, συσκευή DVD κλπ.). Εάν
η συσκευή που θέλετε να χειριστείτε δεν περιέχεται
στη λίστα κωδικών, η πιο εύκολη μέθοδος εισαγωγής
κωδικού είναι η άμεση εισαγωγή.
5.1.1
Ενεργοποιήστε τη συσκευή που θέλετε να
χειριστείτε.
5.1.2
Πατήστε το πλήκτρο „SETUP”, μέχρι η λυχνία
LED να μείνει αναμμένη.
5.1.3
Μέσω του πλήκτρου επιλογής συσκευής
επιλέξτε τη συσκευή που θέλετε να χειριστείτε
(π.χ. τηλεόραση). Εάν η επιλογή είναι επιτυχής,
η λυχνία LED αναβοσβήνει μία φορά και στη
συνέχεια μένει αναμμένη.
5.1.4
Αναζητήστε στη λίστα κωδικών τη μάρκα και τον
τύπο της συσκευής που θέλετε να χειριστείτε.
5.1.5.
Στη συνέχεια εισάγετε τον αντίστοιχο
τετραψήφιο κωδικό μέσω των αριθμητικών
πλήκτρων 0-9. Η λυχνία LED επιβεβαιώνει την
εισαγωγή κάθε αριθμού αναβοσβήνοντας μία
φορά σύντομα, ενώ μετά τον τέταρτο αριθμό
σβήνει.
Page 41

Υπόδειξη
► Αποθηκεύεται αυτόματα ένας έγκυρος κωδικός.
► Σε περίπτωση που ο κωδικός δεν είναι
έγκυρος, η λυχνία LED αναβοσβήνει έξι
φορές και στη συνέχεια σβήνει. Επαναλάβετε
τα βήματα 5.1.1 έως 5.1.5, ή χρησιμοποιήστε
μια άλλη μέθοδο για εισαγωγή κωδικών.
Χειροκίνητη αναζήτηση κωδικού
5.2
Το τηλεχειριστήριο διαθέτει εσωτερική μνήμη στην
οποία υπάρχουν ήδη έως και 350 κωδικοί ανά τύπο
συσκευής για τις πιο κοινές συσκευές ήχου/εικόνας.
Μπορείτε να πλοηγηθείτε σε αυτούς τους κωδικούς
μέχρι να αντιδράσει η συσκευή. Η συσκευή που θέλετε
να χειριστείτε π.χ. απενεργοποιείται (πλήκτρο „POWER”) ή αλλάζει το κανάλι (πλήκτρο „PROG+/PROG-”).
5.2.1
Ενεργοποιήστε τη συσκευή που θέλετε να
χειριστείτε.
5.2.2
Πατήστε το πλήκτρο SETUP , μέχρι η λυχνία LED
να μείνει αναμμένη.
5.2.3
Μέσω του πλήκτρου επιλογής συσκευής
επιλέξτε τη συσκευή που θέλετε να χειριστείτε
(π.χ. τηλεόραση). Εάν η επιλογή είναι επιτυχής,
η λυχνία LED αναβοσβήνει μία φορά και στη
συνέχεια μένει αναμμένη.
5.2.4 Πατήστε το πλήκτρο „POWER” ή „PROG+/PROG”, για να πλοηγηθείτε στους προρυθμισμένους
κωδικούς, μέχρι η συσκευή να αντιδράσει.
5.2.5
Πατήστε „MUTE(OK)”, για να αποθηκεύσετε
τον κωδικό και να βγείτε από την αναζήτηση
κωδικού. Η λυχνία LED σβήνει.
Υπόδειξη
► Στην εσωτερική μνήμη μπορούν να αποθηκευτούν το
πολύ 350 κωδικοί των πιο κοινών συσκευών. Λόγω
του μεγάλου αριθμού συσκευών ήχου/εικόνας που
υπάρχουν στην αγορά, ενδέχεται να διατίθενται μόνο
οι πιο συνήθεις βασικές λειτουργίες. Εάν συμβεί κάτι
τέτοιο επαναλάβετε τα βήματα 5.2.1 έως 5.2.5 για
να βρείτε έναν συμβατό κωδικό. Για κάποια ειδικά
μοντέλα συσκευών μπορεί να μην υπάρχει κωδικός.
5.3
Αυτόματη αναζήτηση κωδικού
Η αυτόματη αναζήτηση κωδικού χρησιμοποιεί τους
ίδιους προρυθμισμένους κωδικούς με την χειροκίνητη
αναζήτηση κωδικών (5.2). Το τηλεχειριστήριο όμως
ψάχνει τους κωδικούς αυτόματα, μέχρι να αντιδράσει
η συσκευή. Η συσκευή που θέλετε να χειριστείτε π.χ.
απενεργοποιείται (πλήκτρο „POWER”) ή αλλάζει κανάλι
(πλήκτρα „PROG+/PROG-”).
Ενεργοποιήστε τη συσκευή που θέλετε να
5.3.1
χειριστείτε.
5.3.2
Πατήστε το πλήκτρο „SETUP” , μέχρι η λυχνία
LED να μείνει αναμμένη.
5.3.3
Μέσω του πλήκτρου επιλογής συσκευής
επιλέξτε τη συσκευή που θέλετε να χειριστείτε
(π.χ. τηλεόραση). Εάν η επιλογή είναι επιτυχής,
η λυχνία LED αναβοσβήνει μία φορά και στη
συνέχεια μένει αναμμένη.
Πατήστε το πλήκτρο „PROG+/PROG-” ή „PO
5.3.4
WER”, για να ξεκινήσετε αυτόματη αναζήτηση
κωδικού. Η λυχνία LED αναβοσβήνει μία φορά
και στη συνέχεια μένει αναμμένη. Η έναρξη
της πρώτης αναζήτησης του τηλεχειριστηρίου
διαρκεί 6 λεπτά.
-
Υπόδειξη: Ρύθμιση της ταχύτητας
αναζήτησης
► Ο εργοστασιακός χρόνος αναζήτησης ανά
κωδικό είναι 1 δευτερόλεπτο. Μπορείτε εάν
θέλετε να αλλάξετε το χρόνο αναζήτησης
στα 3 λεπτά ανά κωδικό. Για να αλλάξετε τους
διάφορους χρόνους αναζήτησης πατήστε
„PROG+” ή „PROG-” εντός 6 δευτερολέπτων
πριν την έναρξη της αυτόματης αναζήτησης
κωδικού.
5.3.5 Η λυχνία LED επιβεβαιώνει την εκάστοτε
αναζήτηση κωδικού αναβοσβήνοντας μία μόνο
φορά.
5.3.6
Πατήστε „MUTE(OK)”, για να αποθηκεύσετε
τον κωδικό και να βγείτε από την αναζήτηση
κωδικού. Η λυχνία LED σβήνει.
5.3.7
Για να διακόψετε την αυτόματη αναζήτηση,
πατήστε το πλήκτρο „EXIT”.
39
Page 42

Υπόδειξη
► Εάν η αναζήτηση όλων των κωδικών είναι
ανεπιτυχής, το τηλεχειριστήριο βγαίνει από την
αυτόματη αναζήτηση κωδικού και επιστρέφει
αυτόματα στην κανονική λειτουργία. Ο τρέχων
κωδικός δεν αλλάζει.
5.4
Αναγνώριση κωδικού
Η αναγνώριση κωδικού σας παρέχει τη δυνατότητα να
αναζητήσετε έναν κωδικό που έχει ήδη εισαχθεί.
5.4.1
Πατήστε το πλήκτρο „SETUP” , μέχρι η λυχνία
LED να μείνει αναμμένη.
5.4.2
Μέσω του πλήκτρου επιλογής συσκευής
επιλέξτε τη συσκευή που θέλετε να χειριστείτε
(π.χ. τηλεόραση). Εάν η επιλογή είναι επιτυχής,
η λυχνία LED αναβοσβήνει μία φορά και στη
συνέχεια μένει αναμμένη.
Πατήστε μία φορά το πλήκτρο „SETUP”. Η
5.4.3
λυχνία LED αναβοσβήνει μία φορά και στη
συνέχεια μένει αναμμένη.
5.4.4
Για αναζήτηση του πρώτου αριθμού πατήστε
ένα από τα αριθμητικά πλήκτρα από 0 έως 9.
Η λυχνία LED αναβοσβήνει μία φορά για τον
πρώτο αριθμό του τετραψήφιου κωδικού.
Επαναλάβετε το βήμα 5.4.4 για το δεύτερο, τον
5.4.5
τρίτο και τον τέταρτο αριθμό.
CODES
TV VCR SATDVD
AUX AMP CBL DVBT
6. Ειδικές λειτουργίες
6.1 Punch Through καναλιού
Με τη λειτουργία Punch Through καναλιού, οι εντολές
PROG+ ή PROG- μπορούν να παρακαμφθούν τη
συσκευή και να αλλάξουν τα κανάλια μιας δεύτερης
συσκευής. Αυτό δεν αφορά όλες τις άλλες εντολές.
40
Η λειτουργία Punch Through καναλιού ενεργοποιείται ως εξής:
•Пατήστε το πλήκτρο της συσκευής που θέλετε (π.χ.
τηλεόραση).
•Κρατήστε πατημένο το πλήκτρο „PROG+”.
•Пατήστε το πλήκτρο της συσκευής που θέλετε (π.χ. SAT).
•Αφήστε πάλι το πλήκτρο „PROG+” (η LED
αναβοσβήνει μια φορά όταν ενεργοποιηθεί η
ρύθμιση).
Η λειτουργία Punch Through απενεργοποιείται ως εξής:
•Пατήστε το πλήκτρο της συσκευής που θέλετε (π.χ.
τηλεόραση).
•Κρατήστε πατημένο το πλήκτρο „PROG-”.Пατήστε
το πλήκτρο της συσκευής που θέλετε (π.χ. SAT).
•Αφήστε πάλι το πλήκτρο „PROG-” (η LED
αναβοσβήνει δύο φορές όταν απενεργοποιηθεί η
ρύθμιση).
6.2 Punch Through έντασης
Με τη λειτουργία Punch Through έντασης VOL+ ή
VOL- μπορούν να παρακάμψουν τη συσκευή και να
ρυθμίσουν την ένταση μιας δεύτερης συσκευής. Aυτό
δεν αφορά όλες τις άλλες εντολές.
Η λειτουργία Punch Through έντασης ενεργοποιείται
ως εξής:
•Пατήστε το πλήκτρο της συσκευής που θέλετε (π.χ.
τηλεόραση).
•Κρατήστε πατημένο το πλήκτρο „VOL+”.
•Пατήστε το πλήκτρο της συσκευής που θέλετε
(π.χ. SAT).
•Αφήοτε πάλι το πλήκτρο „VOL+” (η LED
αναβοσβήνει μια φορά όταν ενεργοποιηθεί η
ρύθμιση).
Η λειτουργία Punch Through απενεργοποιείται
ως εξής:
•Пατήστε το πλήκτρο της συσκευής που θέλετε (π.χ.
τηλεόραση).
•Κρατήστε πατημένο το πλήκτρο „VOL-”.
•Пατήστε το πλήκτρο της συσκευής που θέλετε
(π.χ. SAT).
•Αφήστε πάλι το πλήκτρο „VOL-” (η LED
αναβοσβήνει δύο φορές όταν απενεργοποιηθεί η
ρύθμιση).
Page 43

6.3 Macro Power
Με τη λειτουργία Macro Power μπορείτε να
ενεργοποιήοετε/απενεργοποιήοετε ταυτόχρονα δύο
συσκευές ήχου/εικόνας.
Η λειτουργία Macro Power ενεργοποιείται ως εξής:
•Пατήστε το πλήκτρο της συσκευής που θέλετε (π.χ.
τηλεόραση).
•Κρατήστε πατημένο το πλήκτρο „POWER”.
•Пατήστε το πλήκτρο της συσκευής που θέλετε (π.χ. SAT).
•Αφήοτε πάλι το πλήκτρο „POWER” (η LED
αναβοσβήνει μία φορά όταν ενεργοποιηθεί η
ρύθμιση).
Η λειτουργία Macro Power απενεργοποιείται ως εξής:
•Пατήστε το πλήκτρο της συσκευής που θέλετε (π.χ.
τηλεόραση).
•Κρατήστε πατημένο το πλήκτρο „POWER+”.
•Пατήστε το πλήκτρο της συσκευής που θέλετε (π.χ. SAT).
•Αφήστε πάλι το πλήκτρο „POWER ” (η LED
αναβοσβήνει δύο φορές όταν απενεργοποιηθεί η
ρύθμιση).
7.
ΣΥΝΤΗΡΗΣΗ
•
Μην χρησιμοποιείτε ποτέ ταυτόχρονα καινούριες
και παλιές μπαταρίες στο τηλεχειριστήριο, διότι οι
παλιές μπαταρίες μπορεί να εμφανίσουν διαρροή
και να προκαλέσουν απώλεια ισχύος.
Μην καθαρίζετε το τηλεχειριστήριο με διαβρωτικά
•
ή δυνατά καθαριστικά.
•
Αφαιρείτε τη σκόνη από το τηλεχειριστήριο,
καθαρίζοντάς το με ένα στεγνό, μαλακό πανί.
8.
ΑΝΤΙΜΕΤΩΠΙΣΗ ΠΡΟΒΛΗΜΑΤΩΝ
Ερ. Το τηλεχειριστήριό μου δεν λειτουργεί!
Aπ. Ελέγξτε τη συσκευή ήχου/εικόνας. Εάν είναι
κλειστός ο γενικός διακόπτης της συσκευής,
το τηλεχειριστήριο δεν μπορεί να χειριστεί τη
συσκευή.
Aπ. Ελέγξτε, εάν οι μπαταρίες του τηλεχειριστηρίου
έχουν τοποθετηθεί σωστά και εάν συμφωνεί η
πολικότητα.
Aπ. Ελέγξτε εάν πατήσατε το αντίστοιχο πλήκτρο
συσκευής για τη συσκευή.
Aπ. Αντικαταστήστε τις μπαταρίες εάν είναι χαμηλή η
στάθμη τους.
Ερ. Εάν για τη μάρκα της συσκευής μου αναγράφονται
πολλοί κωδικοί, πώς επιλέγω τον σωστό κωδικό;
Aπ. Για να καθορίσετε το σωστό κωδικό για τη
συσκευή σας, δοκιμάστε τους κωδικούς διαδοχικά,
μέχρι τα περισσότερα πλήκτρα να λειτουργήσουν
σωστά.
Ερ. Η συσκευή μου αντιδρά μόνο σε ορισμένες εντολές
πλήκτρων.
Aπ. Δοκιμάστε άλλους κωδικούς, μέχρι να
λειτουργήσουν σωστά τα περισσότερα πλήκτρα.
9.
Σέρβις και υποστήριξη
Για ερωτήσεις σχετικά με το προϊόν απευθυνθείτε στην
υπηρεσία εξυπηρέτησης πελατών της Hama.
Γραμμή υποστήριξης: +49 9091 502-115 (Γερμανικά/
Αγγλικά)
Περισσότερες πληροφορίες υποστήριξης θα βρείτε
στη διεύθυνση:
www.hama.com
10. Υποδείξεις απόρριψης
Υπόδειξη σχετικά με την προστασία
περιβάλλοντος:
Από τη στιγμή που η Ευρωπαϊκή Οδηγία
2012/19/EU και 2006/66/EE
ενσωματώνεται στο εθνικό δίκαιο ισχύουν
τα εξής: Οι ηλεκτρικές και οι ηλεκτρονικές
συσκευές καθώς και οι μπαταρίες δεν
επιτρέπεται να πετιούνται στα οικιακά απορρίμματα.
Οι καταναλωτές υποχρεούνται από τον νόμο να
επιστρέφουν τις ηλεκτρικές και ηλεκτρονικές
συσκευές καθώς και τις μπαταρίες στο τέλος της
ζωής τους στα δημόσια σημεία περισυλλογής που
έχουν δημιουργηθεί γι’ αυτό το σκοπό ή στα σημεία
πώλησης. Οι λεπτομέρειες ρυθμίζονται στη σχετική
νομοθεσία. Το σύμβολο πάνω στο προϊόν, στο
εγχειρίδιο χρήσης ή στη συσκευασία παραπέμπει σε
αυτές τις διατάξεις. Με την ανακύκλωση,
επαναχρησιμοποίηση των υλικών ή με άλλες
μορφές χρησιμοποίησης παλιών συσκευών /
Μπαταριών συνεισφέρετε σημαντικά στην
προστασία του περιβάλλοντος. Στη Γε ρμανία
ισχύουν αντίστοιχα οι παραπάνω κανόνες
απόρριψης σύμφωνα με τον κανονισμό για
μπαταρίες και συσσωρευτές.
41
Page 44

P Instrukcja obsługi
Uniwersalny pilota zdalnego
sterowania
Dziękujemy, że zdecydowali się Państwo na zakup
produktu firmy Hama.
Prosimy poświęcić trochę czasu na uważne
przeczytanie poniższych instrukcji i informacji.
Instrukcję należy przechowywać w bezpiecznym
miejscu do późniejszego użytku.
Przyciski funkcyjne (modele 4 in 1, 8 in 1)
1. Wyciszanie dźwięku
2. Przyciski wyboru urządzenia
3. Tekst ZAŁ.: włączanie teletekstu
4. Hold: zatrzymywanie aktualnej strony teletekstu
5. ◄◄ Szybkie przewijanie do tyłu/czerwony
► Odtwarzanie/żółty
►► Szybkie przewijanie do przodu/niebieski
● Start nagrywania
■ Stop/zielony
ll Pauza/magenta
6. Przycisk Shift
7. Menu: otwieranie menu urządzenia
8. Przycisk trybu do wyboru grupy urządzeń
peryferyjnych (tylko model 8 in 1:
AUX,DVBT,CBL,AMP)
9. Vol+/Vol-: regulacja głośności
10. Setup: ustawienia pilota
11. Przyciski numeryczne 0-9
12.
Smart TV: otwieranie menu Smart TV (o ile funkcja
jest obsługiwana przez urządzenie końcowe)
Shift+Smart TV: wybór zewnętrznego źródła AV
13. APPS: otwieranie menu App (o ile funkcja
jest obsługiwana przez urządzenie końcowe)
Shift+APPS : przełączanie na dwucyfrowy
numer radiostacji
14. PROG+/PROG-: wybór programu do góry/na dół
15.
EXIT: zamykanie menu urządzenia
16. OK: potwierdzanie wyboru
17.
EPG: elektroniczny przewodnik po programach (jeżeli
jest obsługiwany przez wybrane urządzenie AV)
18. Informacje: informacje wyświetlane na ekranie
(jeżeli są obsługiwane przez urządzenie AV)
19.Tekst WYŁ.: zamykanie teletekstu
20. Power (zasilanie): ZAŁ./WYŁ. / DIODA LED
1. Objaśnienie symboli informacyjnych
Wskazówka
► Symbol ten oznacza, że dostępne są dodatko-
we informacje lub ważne wskazówki.
2. Zakres dostawy
- uniwersalny pilota zdalnego sterowania
- lista kodów
- niniejsza instrukcja obsługi
3. Wskazówki bezpieczeństwa
• Uniwersalnego pilota zdalnego sterowania nie
należy używać w wilgotnym otoczeniu oraz
należy go chronić przed bryzgami wody.
• Tr zymać uniwersalny pilot zdalnego sterowania
z dala od źródeł ciepła i nie wystawiać na
bezpośrednie promieniowanie słoneczne.
• Chronić pilota przed upadkiem.
• Nie otwierać uniwersalnego pilota zdalnego
sterowania. Nie zawiera on żadnych części
wymagających konserwacji przez użytkownika.
• Tr zymać pilota, jak wszystkie urządzenia elektryczne, z dala od dzieci!
4. Pierwsze kroki – wkładanie baterii
Wskazówka
► Zaleca się używanie baterii alkalicznych.
Stosować dwie baterie typu „AAA” (LR 03/
Micro).
► Zdjąć pokrywę schowka na baterie z tyłu
uniwersalnego pilota zdalnego sterowania.
► Włożyć baterie, zwracając uwagę na ozna-
czenie biegunowości „+/-”.
► Zamknąć schowek na baterie.
42
Page 45

Wskazówka: Pamięć kodów
► Podczas wymiany baterii wszystkie zaprogra-
mowane kody są przechowywane w pamięci
przez maks. 10 minut. Nie naciskać żadnych
przycisków przed włożeniem nowych baterii
do pilota zdalnego sterowania. Jeżeli zostanie naciśnięty przycisk bez włożonych baterii
do pilota, wszystkie kody zostaną utracone.
Wskazówka: Funkcja
energooszczędna
► Pilot zdalnego sterowania wyłącza się auto-
matycznie, jeżeli przycisk będzie wciśnięty
przez dłużej niż 15 sekund. Wydłuża to
trwałość baterii, jeżeli przyciski zostaną przypadkowo zakleszczone, np. między poduszkami na wersalce.
5. Setup
Wskazówka
► Aby transfer danych w podczerwieni był
prawidłowy, zawsze trzymać pilota zwróconego w kierunku obsługiwanego urządzenia.
► Nacisnąćprzycisk „MODE”, aby wybrać grupę
urządzeń peryferyjnych: AUX, AMP, DVB-T,
CBL (tylko model 8 in 1).
► Nacisnąć przycisk Shift, aby użyć niebieskich
przycisków funkcyjnych. Funkcja Shift wyłącza
się po ponownym naciśnięciu przycisku Shift
lub automatycznie, jeżeli przez ok. 30 sekund
nie zostanie naciśnięty żaden przycisk.
► Jeżeli przez ok. 30 sekund nie zostanie wpro
wadzone żadne ustawienie, tryb ustawień
(Setup) jest zamykany. Dioda LED miga
sześciokrotnie i gaśnie.
► Każdy typurządzenia możnazaprogramować
pod dowolnym przyciskiem pilota, np. telewizor można zaprogramować pod DVD,
AUX itd.
► Jeżeli urządzenie znajduje się trybie Setup,
nie można obsługiwać go za pomocą uniwersalnego pilota zdalnego sterowania.
Zamknąć tryb Setup i przyciskami wyboru
urządzenia wybrać urządzenie, które ma być
obsługiwane.
5.1 Bezpośrednie wprowadzanie kodu
Do zakresu dostawy uniwersalnego pilota
zdalnego sterowania należy lista kodów. Lista
kodów zawiera czterocyfrowe kody większości producentów urządzeń AV w porządku alfabetycznym,
pogrupowanych wg typu urządzenia (np. TV, DVD
itd.). Jeżeli obsługiwane urządzenie znajduje się
na liście kodów, bezpośrednie wpisanie kodu jest
najprostszą metodą wprowadzenia kodu
5.1.1 Włączyć urządzenie, które ma być
obsługiwane.
5.1.2 Nacisnąć przycisk „SETUP”, aż dioda LED
zacznie świecić się ciągle.
5.1.3 Przyciskami wyboru urządzenia wybrać
urządzenie, które ma być obsługiwane (np.
TV). Po udanym wyborze dioda LED miga
jednokrotnie, a następnie świeci się ciągle.
5.1.4 W liście kodów wyszukać markę i typ
obsługiwanego urządzenia.
5.1.5 Za pomocą przycisków numerycznych 0-9
wprowadzić odpowiedni czterocyfrowy kod.
Dioda LED potwierdza krótkim mignięciem
wpisanie każdej cyfry i gaśnie po wprowadzeniu czwartej cyfry.
-
43
Page 46

Wskazówka
► Prawidłowy kod jest automatycznie
zapamiętywany.
► W przypadku wprowadzenia
nieprawidłowegokodu dioda LED miga
sześciokrotnie, a następnie gaśnie.
Powtórzyć punkty od 5.1.1 do 5.1.5 lub
użyć innej metody wprowadzania kodów.
5.2 Ręczne wyszukiwanie kodu
Uniwersalny pilot zdalnego sterowania posiada
wewnętrzną pamięć, która zawiera maks. 350
kodów dla najbardziej popularnych typów urządzeń
AV. Można wertować te kody, aż obsługiwane
urządzenie zareaguje. Na przykład obsługiwane
urządzenie wyłącza się (przycisk „POWER”) lub
zmienia program (przycisk „PROG+/PROG-”).
5.2.1 Włączyć urządzenie, które ma być
obsługiwane.
5.2.2 Nacisnąć przycisk SETUP, aż dioda LED
zacznie świecić się ciągle.
5.2.3 Przyciskami wyboru urządzenia wybrać
obsługiwane urządzenie (np. TV). Po udanym
wyborze dioda LED miga jednokrotnie, a
następnie świeci się ciągle.
5.2.4 Nacisnąć przycisk „POWER” lub „PROG+/
PROG-”, aby wertować zaprogramowane
kody, aż obsługiwane urządzenie zareaguje.
5.2.5 Nacisnąć „MUTE (OK)”, aby zapisać kod i
zamknąć funkcję wyszukiwania kodów. Dioda
LED gaśnie.
Wskazówka
► W wewnętrznej pamięci można zapisać
maks. 350 kodów dla najbardziej popularnych urządzeń. Ze względu na dużą
liczbę dostępnych na rynku urządzeń AV
może się zdarzyć, że funkcjonować będą
tylko podstawowe funkcje. W takim przypadku powtórzyć kroki od 5.2.1 do 5.2.5,
aby znaleźć bardziej kompatybilny kod. W
przypadku niektórych specjalnych modeli
urządzeń może się zdarzyć, że nie będzie
dostępny żaden kod.
5.3 Automatyczne wyszukiwanie kodu
Funkcja automatycznego wyszukiwania kodu używa
tego samego zaprogramowanego kodu jak funkcja
ręcznego wyszukiwania kodu (5.2). Jednakże
uniwersalny pilot zdalnego sterowania przeszukuje
automatycznie kody, aż obsługiwane urządzenie
zareaguje. Na przykład obsługiwane urządzenie
wyłącza się (przycisk „POWER”) lub zmienia
program (przyciski „PROG+/PROG-”).
5.3.1 Włączyć urządzenie, które ma być
obsługiwane.
5.3.2 Nacisnąć przycisk „SETUP”, aż dioda LED
zacznie świecić się ciągle.
5.3.3 Przyciskami wyboru urządzenia wybrać
obsługiwane urządzenie (np. TV). Po udanym
wyborze dioda LED miga jednokrotnie, a
następnie świeci się ciągle.
5.3.4 Nacisnąć przycisk „PROG+/PROG-” lub „POWER”, aby uruchomić automatyczne wyszukiwanie kodu. Dioda LED miga jednokrotnie,
a następnie świeci się ciągle. Po 6 sekundach
uniwersalny pilot zdalnego sterowania
rozpoczyna pierwsze wyszukiwanie.
44
Page 47

Wskazówka: ustawianie prędkości
wyszukiwania
► Domyślnym ustawieniem czasu wyszu-
kiwania jest 1 sekunda na kod. Jeżeli to
nie wystarcza, czas wyszukiwania można
zmienić na 3 sekundy na kod. Aby zmienić
czas wyszukiwania, w ciągu 6 sekund przed
rozpoczęciem automatycznego wyszukiwania kodu nacisnąć przycisk „PROG+” lub
„PROG-”.
5.3.5 Każdorazowe wyszukiwanie kodu potwierdzane jest jednym mignięciem diody LED.
5.3.6 Nacisnąć „MUTE (OK)”, aby zapisać kod i
zamknąć funkcję wyszukiwania kodów. Dioda
LED gaśnie.
5.3.7 Aby w trakcie procesu wyszukiwania
zakończyć automatyczne wyszukiwanie,
nacisnąć przycisk „EXIT”.
Wskazówka
► Jeżeli wyszukiwanie kodów nie zakończy
się pomyślnie, pilot automatycznie zamyka
funkcję wyszukiwania i automatycznie powraca do trybu pracy. Aktualnie zapisany kod
pozostaje niezmieniony.
5.4 Identyfikacja kodów
Funkcja identykacji kodów oferuje możliwość
rozpoznania wprowadzonego już kodu.
5.4.1 Nacisnąć przycisk „SETUP”, aż dioda LED
zacznie świecić się ciągle.
5.4.2 Przyciskami wyboru urządzenia wybrać
obsługiwane urządzenie (np. TV). Po udanym
wyborze dioda LED miga jednokrotnie, a
następnie świeci się ciągle.
5.4.3 Nacisnąć przycisk „SETUP”. Dioda LED miga
jednokrotnie, a następnie świeci się ciągle.
5.4.4 Aby wyszukać pierwszą cyfrę, nacisnąć jeden
z przycisków numerycznych od 0 do 9. Dioda
LED miga jednokrotnie dla pierwszej cyfry
czterocyfrowego numeru kodu.
5.4.5 Powtórzyć krok 5.4.4 dla drugiej, trzeciej i
czwartej cyfry.
CODES
TV VCR SATDVD
AUX AMP CBL DVBT
6. Funkcje specjalne
6.1 Funkcja przekierowania Punch-Through do
przełączania stacji
Za pomocą funkcji przekierowania Punch-Through do
przełączania stacji komendami PROG+ lub PROG- można
obejść aktualnie sterowane urządzenie i przełączac stacje
innego urządzenia. Nie dotyczy to żadnych innych komend.
Funkcję Punch-Through do przełączania stacji
włącza się w sposób następujący:
•Nadsnąć wybrany przycisk urządzenia (np. TV).
•Trzymać wciśnięty przycisk „PROG+”.
•Nadsnąć wybrany przycisk urządzenia (np. SAT).
•Ponownie zwolnić przydsk „PROG+” (przy aktywnym
ustawieniu dioda LED miga jednokrotnie).
Funkcję Punch-Through wyłącza się w sposób
następujący:
•Nadsnąć wybrany przycisk urządzenia (np. TV).
•Trzymać wciśnięty przycisk „PROG-”.
•Nadsnąć wybrany przycisk urządzenia (np. SAT).
•Ponownie zwolnić przydsk „PROG-” (dioda LED
miga dwukrotnie przy wyłączonym ustawieniu).
6.2 Funkcja przekierawania Punch-Through do
regulacji głośności
Za pomocą funkcji przekierowania Punch-Through
komendami VOL+ lub VOL- można obejść aktualnie
sterowane urządzenie i wyregulować głośności innego
urządzenia. Nie dotyczy to żadnych innych komend.
45
Page 48

Funkcję Punch-Through do regulacji głośności
włącza się w sposób następujący:
•Nadsnąć wybrany przycisk urządzenia (np. TV).
•Trzymać wciśnięty przycisk „VOL+”.
•Nadsnąć wybrany przycisk urządzenia (np. SAT).
•Ponownie zwolnić przydsk „VOL+” (przy aktywnym
ustawieniu dioda LED miga jednokrotnie).
Funkcję Punch-Through do regulacji głośności
wyłącza się w sposób następujący:
•Nadsnąć wybrany przycisk urządzenia (np. TV).
•Trzymać wciśnięty przycisk „VOL-”.
•Nadsnąć wybrany przycisk urządzenia (np. SAT).
•Ponownie zwolnić przydsk „VOL-” (dioda LED
miga dwukrotnie przy wyłączonym ustawieniu).
6.3 Macro Power
Za pomocą funkcji Macro Power można
jednoaeśnie włączać/wyłączać dwa urządzenia AV.
Sposób włączania funkcji Macro-Power.
•Nadsnąć wybrany przycisk urządzenia (np. TV).
•Trzymać wciśnięty przycisk „POWER”.
•Nadsnąć wybrany przycisk urządzenia (np. SAT).
•Ponownie zwolnić przydsk „POWER” (przy aktywnym
ustawieniu dioda LED miga jednokrotnie).
Sposób wyłączania funkcji Macro-Power.
•Nadsnąć wybrany przycisk urządzenia (np. TV).
•Trzymać wciśnięty przycisk „POWER”.
•Nadsnąć wybrany przycisk urządzenia (np. SAT).
•Ponownie zwolnić przydsk „POWER” (dioda LED
miga dwukrotnie przy wyłączonym ustawieniu).
7. Konserwacja
• W uniwersalnym pilocie zdalnego sterowania
nie stosować jednocześnie starych i nowych
baterii, gdyż w starych bateriach może dojść do
wycieku elektrolitu i zaniku mocy.
• Nie używać do czyszczenia pilota środków
szorujących ani ostrych przedmiotów.
• Chronić pilota przed zakurzeniem, czyszcząc go
suchą miękką ściereczką.
8. Usuwanie Usterek
P.
Mój uniwersalny pilot zdalnego sterowania nie działa!
O.
Sprawdzić urządzenie AV. Jeżeli główny
wyłącznik urządzenia jest wyłączony, pilot nie
może go obsługiwać.
46
O. Upewnić się, że baterie zostały prawidłowo
włożone z uwzględnieniem biegunowości.
O. Upewnić się, czy na pilocie wciśnięto właściwy
przycisk urządzenia.
O. W przypadku słabych baterii wymienić je.
P. Jeżeli w liście kodów znajduje się więcej kodów
dla marki mojego urządzenia AV, jak wybrać ten
właściwy?
O. Aby wybrać właściwy kod dla urządzenia AV,
sprawdzać po kolei kody, aż większość przycis-
ków będzie prawidłowo funkcjonowała.
P. Moje urządzenie AV reaguje tylko na niektóre
komendy przycisków.
O. Wypróbować inne kody, aż większość przycis-
ków będzie prawidłowo funkcjonowała.
9.
Serwis i pomoc techniczna
W razie pytań dotyczących produktu prosimy zwrócić
się do infolinii Hama.
Gorąca linia: +49 9091 502-115 (niem./ang.)
Dodatkowe informacje są dostępne na stronie:
www.hama.com
10. Informacje dotycząca recyklingu
Wskazówki dotyczące ochrony środowiska:
Od czasu wprowadzenia europejskiej
dyrektywy 2012/19/EU i 2006/66/EU do
prawa narodowego obowiązują
następujące ustalenia: Urządzeń
elektrycznych, elektronicznych oraz baterii
jednorazowych nie należy wyrzucać razem z
codziennymi odpadami domowymi! Użytkownik
zobowiązany prawnie do odniesienia zepsutych,
zniszczonych lub niepotrzebnych urządzeń
elektrycznych i elektronicznych do punktu zbiórki
lub do sprzedawcy. Szczegółowe kwestie regulują
przepisy prawne danego kraju. Informuje o tym
symbol przekreślonego kosza umieszczony na
opakowaniu. Segregując odpady pomagasz chronić
środowisko!
Page 49

H Használati útmutató
Univerzális távirányító
Köszönjük, hogy ezt a Hama-terméket választotta.
Kérjük, szánjon rá időt, és olvassa végig a
következő útmutatót és a használathoz szükséges
információkat. A későbbi fellapozáshoz biztonságos
helyen őrizze ezt az útmutatót.
Funkciógombok (4 az 1-ben, 8 az 1-ben modellek)
1.
Némító kapcsoló
2. Eszközkiválasztó gombok
3. Text BE: teletext bekapcsolása
4. Tartás: aktuális teletext-oldal tartása
5. ◄◄ gyors vissza/piros
► lejátszás/sárga
►► gyors előre/kék
● felvétel indítása
■ stop/zöld
ll szünet/ bíborvörös
6. Shift-gomb
7. Menü: eszközmenü megnyitása
8. Üzemmód gomb a másodlagos eszközcsoport
kiválasztásához (csak a 8 az 1-ben modellnél:
AUX, DVBT, CBL, AMP)
9. Vol+/Vol-: hangerőszabályozás
10. Setup: a távirányító beállításai
11. 0-9 számjegygombok
12. Smart TV: Smart TV menü megnyitása (ha az
eszköz támogatja)
Shift+Smart TV: külső AV-forrás kiválasztása
13. APPS: App menü megnyitása (ha az eszköz
támogatja)
Shift+APPS : Váltás a kétjegyű adószámokhoz
14. PROG+/PROG-: programkiválasztás, felfelé/
lefelé
15. EXIT: kilépés az eszközmenüből
16. OK: kiválasztás megerősítése
17. EPG: elektronikus programújság (ha a
kiválasztott AV-eszköz támogatja)
18. Info: képernyő információk (ha az AV-eszköz
támogatja)
19. Text KI: kilépés a teletextből
20. Főkapcsoló: BE/KI/LED
1. A megjegyzés ikon magyarázata
Megjegyzés
► Ez az ikon kiegészítő információkra vagy fon-
tos megjegyzésekre utal.
2. A doboz tartalma
- univerzális távirányító
- kódlista
- ez a használati útmutató
3. Biztonsági tudnivalók
• Ne használja az univerzális távirányítót
párás környezetben, és kerülje el, hogy víz
fröccsenjen rá.
• Ta rtsa távol az univerzális távirányítót
hőforrástól, és ne tegye ki közvetlen napfény
hatásának.
• Ne ejtse le az univerzális távirányítót.
• Ne bontsa szét az univerzális távirányítót. Az
eszköz nem tartalmaz a felhasználó által
karbantartandó alkatrészt.
• Az univerzális távirányító, mint minden más
elektromos eszköz, gyermek kezébe nem
adható, nem gyermekjáték.
4. Első lépések – az elemek behelyezése
Megjegyzés
► Alkálielemek használata ajánlott. Használ-
jon két „AAA” (LR 03/mini ceruza) típusú
elemet.
► Vegye ki az elemfészek fedelét az univerzális
távirányító hátoldalán.
► Tegye bele az elemeket, ügyelve a polaritás
„+/-” jelzésére.
► Tegye vissza az elemfészek fedelét.
47
Page 50

Megjegyzés: kódmemória
► Az elemek cseréje során az Ön által progra-
mozott összes kód akár 10 percig tárolva
marad. Ügyeljen arra, hogy egetlen gombot
sem nyomjon meg, amíg az új elemeket be
nem helyezte a távirányítóba. Ha megnyom
egy gombot, miközben nincs elem a távirányítóban, az összes kód törlődik.
Megjegyzés: Energiatakarékosság
funkció
► A távirányító automatikusan kikapcsol, ha
egy gomb 15 másodpercnél tovább van
nyomva tartva. Ez megnöveli elemek élettar
tamát, ha a távirányító olyan helyre van beszorulva, ahol a gombokfolyamatosan nyomva maradnak, pl. a díványpárnák között.
5. Használatba vétel
Megjegyzés
► A megfelelő infravörös átvitel érdekében a
távirányítót mindig nagyjából a kezelendő
készülék felé tartsa.
► Nyomja meg a „MODE” gombot a másod-
lagos eszközcsoport: AUX, AMP, DVB-T,
CBL (csak a 8 az 1-ben modellnél) kiválasztásához.
► Nyomja meg a Shift gombot a kék funkció-
gombok használatához. A Shift-funkció a
Shift gomb újabb megnyomására kikapcsol,
vagy automatikusan, ha kb. 30 másodpercig
nem történik gombnyomás.
► Ha mintegy 30 másodpercig nincs
működtetés, akkor a használatba vétel
befejeződik. A LED hatszor villan, majd kialszik.
► Minden készüléktípus tetszőleges készülék-
gomb alatt programozható, így pl. egy TVkészülék DVD, AUX stb. alatt is programozható.
► Az univerzális távirányítóval addig nem ke-
zelhet készüléket, amíg az a használatba
vételi üzemmódban van. Lépjen ki a használatba vételi üzemmódból, és válassza ki
a kezelendő készüléket az eszközkiválasztó
gombokkal.
5.1 Közvetlen kódbevitel
Az univerzális távirányítóhoz kódlistát is mellékelünk. A kódlista ABC-sorrendben mutatja a legtöbb
AV-készülékgyártó négyjegyű kódjait, készüléktípusonként (pl. TV, DVD stb.) szerint rendezve. Ha a
kezelendő készüléket a kódlista tartalmazza, akkor
a közvetlen kódbevitel a legegyszerűbb beviteli
módszer.
5.1.1 Kapcsolja be a kezelendő készüléket.
5.1.2 Nyomja meg a „SETUP” gombot, amíg a LED
folyamatosan nem világít.
5.1.3 Válassza ki a készülékgombbal a kezelendő
készüléket (pl. TV). Sikeres kiválasztásnál a
LED egyszer felvillan, majd folyamatosan ég.
5.1.4 Keresse meg a kódlistában a kezelendő
készülék márkáját és típusát.
5.1.5 Adja meg a megfelelő négyjegyű kódot a 0-9
számjegygombokkal. A LED az egyes számjegyek bevitelét egy-egy rövid felvillanással
nyugtázza, majd a negyedik számjegy után
kialszik.
48
Page 51

Megjegyzés
► Az érvényes kódot az eszköz automatikusan
eltárolja.
► Érvénytelen kód esetén hatszor villan a LED,
majd elalszik. Ismételje meg az 5.1.1 …
5.1.5 lépéseket, vagy használjon más módszert a kódbevitelre.
5.2 Manuális kódkeresés
Az univerzális távirányító belső memóriával rendelkezik, amely készüléktípusonként max. 350 kódot
tartalmaz a leggyakoribb AV-készülékekhez. Így
végigmehet ezeken a kódokon, amíg a kezelendő
készülék reakciót nem mutat. Pl.: a kezelendő
készülék kikapcsol („POWER” gomb), vagy adót vált
(„PROG+/PROG-” gomb).
5.2.1 Kapcsolja be a kezelendő készüléket.
5.2.2 Nyomja meg a SETUP gombot, amíg a LED
folyamatosan nem világít.
5.2.3 Válassza ki a készülékgombbal a kezelendő
készüléket (pl. TV). Sikeres kiválasztásnál a
LED egyszer felvillan, majd folyamatosan ég.
5.2.4 Nyomja meg a „POWER” vagy a „PROG+/
PROG-” gombot, hogy végigpróbálja az előre
beállított kódokat, amíg a kezelendő készülék
reakciót nem mutat.
5.2.5 Nyomja meg a „MUTE (OK)” gombot a kód
eltárolására és a kódkeresés befejezésére. A
LED kialszik.
Megjegyzés
► A belső memóriában max. 350 kód tárolható a
leggyakoribb készülékekhez. A kereskedelemben kapható számtalan AV-készülék alapján
előfordulhat, hogy csak a leggyakoribb fő funkciók állnak rendelkezésre. Ebben az esetben
ismételje meg az 5.2.1 … 5.2.5 szerinti lépéseket megfelelőbb kód megtalálásához. Néhány
különleges készüléktípushoz lehetséges, hogy
nem áll rendelkezésre a szükséges kód.
5.3 Automatikus kódkeresés
Az automatikus kódkeresésnél ugyanazon előre
beállított kódok használhatók, mint a manuális
kódkeresésnél (5.2). Az univerzális távirányító
azonban automatikusan kutatja át a kódokat,
amíg a kezelendő készülék reakciót nem mutat.
Pl.: a kezelendő készülék kikapcsol („POWER”
gomb), vagy adót vált („PROG+/PROG-” gomb).
Kapcsolja be a kezelendő készüléket.
5.3.1
5.3.2 Nyomja meg a „SETUP” gombot, amíg a LED
folyamatosan nem világít.
5.3.3 Válassza ki a készülékgombbal a kezelendő
készüléket (pl. TV). Sikeres kiválasztásnál a
LED egyszer felvillan, majd folyamatosan ég.
5.3.4 Nyomja meg a „PROG+/PROG-” vagy
„POWER” gombot az automatikus kódkeresés
indításához. A LED egyszer felvillan, majd
folyamatosan világít. 6 másodpercig tart,
amíg az univerzális távirányító megkezdi az
első keresést.
Megjegyzés: a keresési sebesség
beállítása
► A keresési idő alapbeállítása 1 másodperc
kódonként. Ha ez Önnek nem felel meg, kódonként 3 másodperc keresési időre válthat.
A keresési idők közötti váltáshoz nyomja
meg a „PROG+” vagy „PROG-” gombot 6
másodpercen belül az automatikus kódkeresés kezdete előtt.
5.3.5 A LED a megfelelő kódkereséseket egyedi
villanással jelzi.
5.3.6 Nyomja meg a „MUTE (OK)” gombot a kód
eltárolására és a kódkeresés befejezésére. A
LED kialszik.
5.3.7 Az automatikus keresés megszakítására a
keresési folyamat közben nyomja meg az
„EXIT” gombot.
49
Page 52

Megjegyzés
► Az összes kód eredménytelen végigkere-
sése esetén az univerzális távirányító kilép
az automatikus kódkeresésből és visszatér
az üzemi módba. Az aktuálisan tárolt kód
változatlan marad.
5.4 Kódfelismerés
A kódfelismerés lehetőséget kínál Önnek egy már
bevitt kód megállapítására.
5.4.1 Nyomja meg a „SETUP” gombot, amíg a LED
folyamatosan nem világít.
5.4.2 Válassza ki a készülékgombbal a kezelendő
készüléket (pl. TV). Sikeres kiválasztásnál a
LED egyszer felvillan, majd folyamatosan ég.
5.4.3 Nyomja meg a „SETUP” gombot. A LED
egyszer felvillan, majd folyamatosan világít.
5.4.4 Az első számjegy kereséséhez nyomja meg
a 0 … 9 számjegygombok egyikét. A LED
egyszer felvillan a négyjegyű kódszám első
jegye számára.
5.4.5 Ismételje meg az 5.4.4 lépést a második,
harmadik és negyedik számjegyre.
CODES
TV VCR SATDVD
AUX AMP CBL DVBT
6. Speciális funkciók
6.1 Adó „Punch Through”
Az adó punch through funkcióval a PROG+ vagy
PROG- parancsok kikerülhetik az aktuálisan vezérelt
eszközt, majd egy második készülékre válthatnak.
Az összes egyéb parancsot ez nem érinti.
Így aktiválja az adó punch through funkciót:
•Nyomja meg a kívánt készülékgombot (pl. TV).
•Tartsa a „PROG+” gombot lenyomva.
•Nyomja meg a kívánt készülékgombot (pl. SAT).
•Engedje el a „PROG+” gombot (a LED egyszer
villan aklivált beállitásnál).
Így kapcsolja ki az adó punch through funkciót:
•Nyomja meg a kívánt készülékgombot (pl. TV).
•Tartsa a „PROG-” gombot lenyomva.
•Nyomja meg a kívánt készülékgombot (pl. SAT).
•Engedje el a „PROG-” gombot (a beállítás
deaktiválásakor a LED kétszer felvillan).
6.2 Hangerő „Punch Through”
A hangerő punch through funkcióval a VOL+ vagy
VOL- parancsok kikenülhetik az aktuálisan vezérelt
eszközt, majd egy második készülék hangerejét
állíhatják be. Az összes egyéb parancsot ez nem
érinti.
Így aktiválja a hangerő punch through funkciót:
•Nyomja meg a kívánt készülékgombot (pl. TV).
•Tartsa a „VOL+” gombot lenyomva.
•Nyomja meg a kívánt készülékgombot (pl. SAT).
•Engedje el a „VOL+” gombot (a LED egyszer
villan aklivált beállitásnál).
Így kapcsolja ki a hangerő punch through funkciót:
•Nyomja meg a kívánt készülékgombot (pl. TV).
•Tartsa a „VOL-” gombot lenyomva.
•Nyomja meg a kívánt készülékgombot (pl. SAT).
•Engedje el a „VOL-” gombot (a beállítás
deaktiválásakor a LED kétszer felvillan).
6.3 Macro Power
A Macro Power segítségével két AV-eszközt
egyidejűleg tud be-/kikapcsolni.
Így aktiválja a Macro Power funkciót:
•Nyomja meg a kívánt készülékgombot (pl. TV).
•Tartsa a „POWER” gombot lenyomva.
•Nyomja meg a kívánt készülékgombot (pl. SAT).
•Engedje el a „POWER” gombot (a LED egyszer
villan aklivált beállitásnál).
50
Page 53

Így kapcsolja ki a Macro Power funkciót:
•Nyomja meg a kívánt készülékgombot (pl. TV).
•Tartsa a „POWER” gombot lenyomva.
•Nyomja meg a kívánt készülékgombot (pl. SAT).
•Engedje el a „POWER” gombot (beállítás
deaktiválásakor a LED kétszer felvillan).
7. Karbantartás
• Ne tegyen egyidejűleg régi és új elemet
az univerzális távirányítóba, mivel a régi
elemek kifolyásra hajlamosak és teljesítmény
csökkenéshez vezethetnek.
• Az univerzális távirányító tisztításához ne
használjon súrolószert vagy erős tisztítószert.
• Az univerzális távirányítót száraz, puha
törlőkendővel törölje le rendszeresen és így
tartsa pormentesen.
8. HIBAELHÁRÍTÁS
K. Nem működik az univerzális távirányító!
V. Ellenőrizze az AV-készüléket. Ha a készülék
főkapcsolója ki van kapcsolva, akkor az univerzális távirányító nem tudja kezelni a készüléket.
V. Ellenőrizze, hogy az elemek megfelelően,
helyes polaritással vannak-e betéve az elemfészekbe.
V. Ellenőrizze, hogy a készüléknek megfelelő
készülékgombot nyomta-e meg.
V. Ha alacsony az elem feszültségszintje, cserélje ki
az elemeket.
K. Ha az AV-készülékem márkájához több ké-
szülékkód van felsorolva, hogyan választom ki a
helyes készülékkódot?
V. Az AV-készülék számára a helyes készülékkód
megállapításához tesztelje egymás után a
kódokat, amíg a legtöbb gomb szabályosan
nem működik.
K. AV-készülékem csak néhány gombparancsra
reagál.
A. Próbáljon ki egyéb kódokat, amíg a legtöbb
gomb helyesen nem működik.
9. Szerviz és terméktámogatási információk
Kérjük, hogy a termékkel kapcsolatos kérdéseivel
forduljon a Hama terméktanácsadásához.
Közvetlen vonal Közvetlen vonal: +49 9091 502115 (Deu/Eng)
További támogatási információt itt talál:
www.hama.com
10. Ártalmatlanítási előírások
Környezetvédelmi tudnivalók:
Az európai irányelvek 2012/19/EU és
2006/66/EU ajánlása szerint, a megjelölt
időponttól kezdve, minden EU-s
tagállamban érvényesek a következők: Az
elektromos és elektronikai készülékeket és
az elemeket nem szabad a háztartási szemétbe
dobni! A leselejtezett elektromos és elektronikus
készülékeket és elemeket, akkumulátorokat nem
szabad a háztartási szemétbe dobni. Az elhasznált
és működésképtelen elektromos és elektronikus
készülékek gyűjtésére törvényi előírás kötelez
mindenkit, ezért azokat el kell szállítani egy kijelölt
gyűjtő helyre vagy visszavinni a vásárlás helyére. A
termék csomagolásán feltüntetett szimbólum
egyértelmű jelzést ad erre vonatkozóan a
felhasználónak. A régi készülékek begyűjtése,
visszaváltása vagy bármilyen formában történő újra
hasznosítása közös hozzájárulás környezetünk
védelméhez.
51
Page 54

C Návod k použití
Univerzální dálkové ovládání
Děkujeme Vám, že jste se rozhodli pro zakoupení
výrobku Hama.
V klidu a kompletně si přečtěte následující pokyny
a informace. Uchovávejte tento návod pro další
použití na bezpečném místě.
Funkční tlačítka (modely 4 v 1, 8 v 1)
1. Vypínač zvuku
2. Tlačítka pro volbu přístrojů
3. Text ZAP: Zapnutí teletextu
4. Držet: Držet aktuální stránku teletextu
5. ◄◄ Zpětný chod/červená
► Přehrávání/žlutá
►► Rychlý chod vpřed/modrá
● Spustit nahrávání
■ Stop/zelená
ll Pauza/purpurová
6. Tlačítko Shift
7. Menu: Otevření menu přístroje
8. Tlačítko režimu pro volbu sekundární
skupiny přístrojů (pouze model 8 v 1:
AUX,DVBT,CBL,AMP)
9. Vol+/Vol-: Regulace hlasitosti
10. Setup: Nastavení dálkového ovládání
11. Číselná tlačítka 0-9
12. Smart TV: Otevření Smart TV menu (pokud
koncové zařízení podporuje)
Shift+Smart TV: Výběr externího zdroje AV
13. APPS: Otevření menu aplikace (pokud koncové
zařízení podporuje)
Shift + APPS: Přechod k dvoumístným číslům
kanálů
14. PROG+/PROG-: Volba programu, nahoru/dolů
15. EXIT: Opustit menu přístroje
16. OK: Potvrdit volbu
17. EPG: Elektronický průvodce programem (pokud
je podporován zvoleným přístrojem AV)
18. Informace: Informace na obrazovce (pokud
podporováno přístrojem AV)
19. Text VYP: Opustit teletext
20. Power: ZAP/VYP / LED dioda
1. Vysvětlení symbolu upozornění
Upozornění
► Tento symbol poukazuje na dodatečné infor-
mace nebo důležitá upozornění.
2. Obsah balení
- Univerzální dálkové ovládání
- Seznam kódů
- Tento návod k obsluze
3. Bezpečnostní pokyny
• Univerzální dálkové ovládání nepoužívejte
ve vlhkém prostředí a zabraňte kontaktu se
stříkající vodou.
• Univerzální dálkové ovládání neumisťujte v
blízkosti tepelných zdrojů a nevystavujte ho
přímému slunečnímu záření.
• Zabraňte pádu univerzálního dálkového ovládání.
• Univerzální dálkové ovládání neotvírejte. Neobsahují žádné části vyžadující údržbu uživatelem.
• Univerzální dálkové ovládání, stejně jako
všechny ostatní elektrické přístroje, nepatří do
rukou dětí.
4. První kroky - vložení baterií
Upozornění
► Doporučujeme použití alkalických baterií.
Použijte dvě baterie typu „AAA” (LR 03/
micro).
► Sejměte kryt přihrádky na baterie na zadní
straně univerzálního dálkového ovládání.
► Vložte baterie, dbejte na označení polarity
„+/-”.
► Kryt přihrádky na baterie uzavřete.
52
Page 55

Upozornění: Paměť kódů
► Při výměně baterií zůstávají vámi napro-
gramované kódy uloženy až na 10 minut.
Dbejte na to, aby nebyla stisknuta žádná
tlačítka, pokud nejsou v dálkovém ovládání
ještě vložené nové baterie. Pokud stisknete tlačítko a v dálkovém ovládání nejsou
vložené baterie, všechny kódy se vymažou.
Upozornění: Funkce úspory energie
► Dálkové ovládání se vypíná automaticky, po-
kud je tlačítko stisknuto déle než 15 sekund.
To prodlužuje životnost baterií, pokud by
dálkové ovládání někde uvízlo a byla trvale
stisknuta tlačítka, např. mezi polštáři gauče.
5. Setup
Upozornění
► Pro správný přenos infračerveného signálu
držte dálkové ovládání vždy nasměrováno
v přibližném směru obsluhovaných přístrojů.
► Stiskněte tlačítko „MODE” pro volbu
sekundární skupiny přístrojů: AUX, AMP,
DVB-T, CBL (pouze model 8v1).
► Stiskněte tlačítko „SHIFT“ pro ovládání mo-
drých funkčních tlačítek. Funkce Shift se
deaktivuje opětovným stisknutím tlačítka
„SHIFT“ nebo automaticky po 30 sekundách,
pokud není stisknuto žádné tlačítko.
► Pokud během 30 sekund nedojde k žádnému
zadání, režim SETUP (nastavení) se automaticky ukončí. Dioda LED zabliká šestkrát a
pak zhasne.
► Každý typ přístroje je možné programovat
pod libovolným tlačítkem přístroje, např. je
možné televizor naprogramovat pod DVD,
AUX atd.
► Pomocí univerzálního dálkového ovládání
nemůžete obsluhovat žádný přístroj, pokud
se ovládání nachází v režimu Setup. Opusťte
režim Setup a pomocí tlačítek volby přístroje
zvolte ovládaný přístroj.
5.1 Přímé zadání kódu
Součástí dodávky univerzálního dálkového ovládání
je seznam kódů. Seznam kódů zobrazuje čtyřmístné
kódy většiny výrobců přístrojů AV v abecedním
pořadí, po skupinách podle typu přístroje (např. TV,
DVD atd.). Pokud se obsluhovaný přístroj nachází
na seznamu kódů, pak je nejsnadnějším postupem
zadání přímé zadání kódu.
5.1.1 Zapněte ovládaný přístr
5.1.2 Držte stisknuté tlačítko „SETUP”, dokud se
nerozsvítí LED dioda.
5.1.3 Pomocí tlačítka přístroje zvolte ovládaný
přístroj (např. TV). Při úspěšném výběru blikne
dioda LED jednou a poté svítí trvale.
5.1.4 Vyhledejte v seznamu kódů značku a typ
obsluhovaného přístroje.
5.1.5 Pomocí číselných tlačítek 0-9 zadejte
odpovídající čtyřmístný kód. Dioda LED
potvrdí zadání jednotlivých číslic vždy krátkým
bliknutím a po čtvrté číslici zhasne.
oj.
Upozornění
► Platný kód se automaticky uloží.
► V případě zadání neplatného kódu zabliká
dioda LED šestkrát a poté zhasne. Opakujte
kroky 5.1.1 až 5.1.5, nebo použijte pro zadání kódu jinou metodu.
53
Page 56

5.2 Manuální hledání kódu
Univerzální dálkové ovládání má k dispozici interní
paměť, ve které je již uloženo až 350 kódů každého
typu přístroje pro obvyklé přístroje AV. Můžete tyto
kódy procházet, až obsluhovaný přístroj zareaguje.
Například se obsluhovaný přístroj vypne (tlačítko
„POWER”) nebo změní předvolbu (tlačítko „PROG+/
PROG-”).
5.2.1 Zapněte ovládaný přístroj.
5.2.2 Držte stisknuté tlačítko „SETUP”, dokud se
nerozsvítí LED dioda.
5.2.3 Pomocí tlačítka přístroje zvolte ovládaný
přístroj (např. TV). Při úspěšném výběru blikne
dioda LED jednou a poté svítí trvale.
5.2.4 Stiskněte tlačítko „POWER” nebo „PROG+/
PROG-” pro listování předem nastavenými
kódy, až obsluhovaný přístroj zareaguje.
5.2.5 Stiskněte „MUTE(OK)” pro uložení kódu a
opuštění hledání kódu. Dioda LED zhasne.
Upozornění
► V interní paměti může být uloženo
maximálně 350 kódů obvyklých přístrojů.
Kvůli velkému množství přístrojů AV na trhu
se může stát, že jsou k dispozici pouze obvyklé nejdůležitější funkce. Pokud tomu tak
skutečně je, opakujte kroky 5.2.1 až 5.2.5
pro nalezení kódu, který je kompatibilnější.
Pro některé speciální modely přístrojů není
případně k dispozici žádný kód.
5.3 Automatické hledání kódu
Automatické hledání kódu používá stejné
přednastavené kódy jako manuální hledání kódu
(5.2). Univerzální dálkové ovládání prohledá
ale kódy automaticky, až obsluhovaný přístroj
zareaguje. Například se obsluhovaný přístroj vypne
(tlačítko „POWER”) nebo změní předvolbu (tlačítka
„PROG+/PROG-”).
5.3.1 Zapněte ovládaný přístroj.
5.3.2 Držte stisknuté tlačítko „SETUP”, dokud se
nerozsvítí LED dioda.
5.3.3 Pomocí tlačítka přístroje zvolte ovládaný
přístroj (např. TV). Při úspěšném výběru blikne
dioda LED jednou a poté svítí trvale.
5.3.4
Stiskněte tlačítko „PROG+/PROG-” nebo
„POWER” pro spuštění automatického hledání
kódu. Dioda LED zabliká jednou a poté svítí
trvale. Trvá 6 sekund, než univerzální dálkové
ovládání spustí první hledání.
Upozornění: Nastavení rychlosti
hledání
► Standardní nastavení intervalu hledání kódů
je 1 sekunda. Pokud s tímto nastavením nejste spokojeni, můžete nastavit interval 3 sekundy. Pro přepínání mezi intervaly stiskněte
tlačítko „PROG+” nebo „PROG-” během 6
sekund před spuštěním automatického hledání.
5.3.5 Dioda LED potvrdí příslušná hledání kódu
jednotlivým bliknutím.
5.3.6 Stiskněte „MUTE(OK)” pro uložení kódu a
opuštění hledání kódu. Dioda LED zhasne.
5.3.7 Pro přerušení automatického hledání během
vyhledávání stiskněte tlačítko „EXIT”.
Upozornění
► Pokud byly prohledány všechny kódy bez
úspěchu, opustí univerzální dálkové ovládání automatické hledání kódu a navrátí
se automaticky zpět do provozního režimu.
Aktuálně uložený kód zůstane nezměněný.
54
Page 57

5.4 Rozpoznání kódu
Rozpoznání kódu Vám nabízí možnost stanovit již
dříve zadaný kód.
5.4.1 Držte stisknuté tlačítko „SETUP”, dokud se
nerozsvítí LED dioda.
5.4.2 Pomocí tlačítka přístroje zvolte ovládaný
přístroj (např. TV). Při úspěšném výběru blikne
dioda LED jednou a poté svítí trvale.
5.4.3 Stiskněte tlačítko „SETUP”. Dioda LED zabliká
jednou a poté svítí trvale.
5.4.4 Pro hledání první číslice stiskněte některé z
číselných tlačítek 0 až 9. Dioda LED zabliká
jednou pro první číslici čtyřmístného čísla
kódu.
5.4.5 Opakujte krok 5.4.4 pro druhou, třetí a
čtvrtou číslici.
CODES
TV VCR SATDVD
AUX AMP CBL DVBT
6. Zvláštní funkce
6.1 Přepínání Punch-Through
Pomocí funkce přepínání Punch-Through mohou
příkazy PROG+ nebo PROG- obejít aktuálnĕ
obsluhovaný přístroj a přepnout předvolby druhého
přístroje. Všechny ostatní příkazy tím nejsou
ovlivněny.
Funkci přepínání Punch-Through aktivujete takto:
•Stiskněte požadované tlačítko přístroje (např. TV)
•Držte stisknuto tlačítko „PROG+”.
•Stiskněte požadované tlačítko přístroje (např.
SAT)
•Tlačítko „PROG+” opět pusťte (při aktivovaném
nastavení dioda LED jednou zabliká).
Funkci přepínání Punch-Through deaktivujete takto:
•Stiskněte požadované tlačítko přístroje (např. TV)
•Držte stisknuto tlačítko „PROG-”.
•Stiskněte požadované tlačítko přístroje (např.
SAT)
•Tlačítko .PROG-‘ opět pusťte (kontrolka LED bliká
dvakrát, pokud je nastavení deaktivováno).
6.2 Hlasitost Punch-Through
Pomocí funkce hlasitost Punch-Through mohou
příkazy VOL+ nebo VOL- obejít aktuálně
obsluhovaný přístroj pro změnu hlasitosti druhého
přístroje. Všechny ostatní příkazy tím nejsou
ovlivněny.
Funkci hlasitost Punch-Through aktivujete takto:
•Stiskněte požadované tlačítko přístroje (např. TV)
•Držte stisknuto tlačítko „VOL+”.
•Stiskněte požadované tlačítko přístroje (např.
SAT)
•Tlačítko „VOL+” opět pusťte (při aktivovaném
nastavení dioda LED jednou zabliká).
Funkci hlasitost Punch-Through deaktivujete takto:
•Stiskněte požadované tlačítko přístroje (např. TV)
•Držte stisknuto tlačítko „VOL-”.
•Stiskněte požadované tlačítko přístroje (např.
SAT)
•Tlačítko „VOL-” opět pusťte (kontrolka LED bliká
dvakrát, pokud je nastavení deaktivováno).
6.3 Macro Power
Pomocí funkce Macro Power můžete současně
zapínat/vypínat dva přístroje AV.
Funkci Macro Power aktivujete takto:
•Stiskněte požadované tlačítko přístroje (např. TV)
•Držte stisknuto tlačítko „POWER”.
•Stiskněte požadované tlačítko přístroje (např.
SAT)
•Tlačítko „POWER” opět pusťte (při aktivovaném
nastavení dioda LED jednou zabliká).
Funkci Macro Power deaktivujete takto:
•Stiskněte požadované tlačítko přístroje (např. TV)
•Držte stisknuto tlačítko „POWER”.
•Stiskněte požadované tlačítko přístroje (např.
SAT)
•Tlačítko „POWER” opět pusťte (kontrolka LED
bliká dvakrát, pokud je nastavení deaktivováno).
55
Page 58

7. ÚDRŽBA
• V univerzálním dálkovém ovládání nikdy
současně nepoužívejte staré a nové baterie,
staré baterie by mohly vytéct nebo způsobit
ztrátu výkonu.
• Univerzální dálkové ovládání nikdy nečistěte abrazivními nebo agresivními čisticími prostředky.
• Univerzální dálkové ovládání udržujte bez
prachu, čistěte ho suchým a měkkým hadříkem.
8. ODSTRANĚNÍ ZÁVAD
O. Mé univerzální dálkové ovládání nefunguje!
o. Zkontrolujte přístroj AV. Pokud je hlavní vypínač
přístroje vypnutý, pak nemůže univerzální
dálkové ovládání přístroj obsluhovat.
o. Zkontrolujte, zda jsou baterie správně vloženy a
zda je dodržena jejich polarita.
o. Zkontrolujte, zda jste stiskli odpovídající tlačítko
přístroje pro přístroj.
o. Při nízkém stavu nabití baterie vyměňte.
O. Pokud je pro značku mého přístroje AV na
seznamu uvedeno několik kódů přístroje, jak
zvolím správný kód přístroje?
o. Pro určení správného kódu přístroje pro přístroj
AV testujte postupně kódy tak dlouho, až
správně funguje většina tlačítek.
O. Můj přístroj AV reaguje pouze na některé
příkazy tlačítek.
o. Zkoušejte jiné kódy tak dlouho, až správně
funguje většina tlačítek.
9. Servis a podpora
Máte otázky k produktu ? Obraťte na na poradenské oddělení Hama.
Horká linka: +49 9091 502-115 (německy/anglicky)
Další podpůrné informace naleznete na adrese:
www.hama.com
10. Pokyny k likvidaci
Ochrana životního prostředí:
Evropská směrnice 2012/19/EU a
2006/66/EU ustanovujete následující:
Elektrická a elektronická zařízení stejně
jako baterie nepatří do domovního
odpadu. Spotřebitel se zavazuje odevzdat
všechna zařízení a baterie po uplynutí jejich
životnosti do příslušných sběren. Podrobnosti
stanoví zákon příšlušné země. Symbol na produktu,
návod k obsluze nebo balení na toto poukazuje.
Recyklací a jinými způsoby zužitkování přispíváte k
ochraně životního prostředí.
56
Page 59

Q Návod na použitie
Univerzálny diaľkový ovládač
Ďakujeme Vám, že ste sa rozhodli pre kúpu výrobku
Hama.
Venujte chvíľu času a prečítajte si všetky
nasledujúce pokyny a informácie. Návod na
použitie uschovajte na bezpečnom mieste pre
prípadné použitie v budúcnosti.
Funkčné tlačidlá (modely 4 v 1, 8 v 1)
1. Vypínač zvuku
2. Tlačidlá pre výber zariadení
3. Text ZAP: zapnutie teletextu
4. Podržať: podržať aktuálnu stránku teletextu
5. ◄◄ spätné pretáčanie/červená
► prehrávanie/žltá
►► rýchlo vpred/modrá
● spustenie nahrávania
■ Stop/zelená
ll pauza/fialová
6. Tlačidlo Shift
7. Menu: otvorenie menu zariadenia
8. Tlačidlo režimov pre výber sekundárnej
skupiny zariadení (len model 8 v 1:
AUX,DVBT,CBL,AMP)
9. Vol+/Vol-: regulácia hlasitosti
10. Setup: Nastavenia diaľkového ovládania
11. Číslicové tlačidlá 0-9
12. Smart TV: otvoriť ponuku Smart TV (ak ho
podporuje koncové zariadenie)
Shift + Smart TV: zvoliť externý AV zdroj
13. APPS: otvoriť ponuku aplikácie (ak ho
podporuje koncové zariadenie)
Shift + APPS: zmeniť na dvojmiestne čísla
kanálov
14. PROG+/PROG-: výber programov, nahor/nadol
15. EXIT: opustenie menu zariadenia
16. OK: potvrdenie voľby
17. EPG: elektronický sprievodca programom
(ak je táto funkcia zvoleným AV zariadením
podporovaná)
18. Info: informácie na obrazovke (ak AV zariadenie
túto funkciu podporuje)
19. Text VYP: opustenie teletextu
20. Power: ZAP/VYP / LED dióda
1. Vysvetlenie upozorňujúceho symbolu
Upozornenie
► Tento symbol označuje dodatočné informácie,
alebo dôležité poznámky.
2. Obsah dodávky
- Univerzálny diaľkový ovládač
- Zoznam kódov
- Tento návod na obsluhu
3. Bezpečnostné upozornenia
• Univerzálny diaľkový ovládač nepoužívajte
vo vlhkom prostredí a zabráňte kontaktu so
striekajúcou vodou.
• Univerzálny diaľkový ovládač odkladajte mimo
dosahu tepelných zdrojov a nevystavujte ho
priamemu slnečnému žiareniu.
• Univerzálny diaľkový ovládač chráňte pred
pádmi a veľkými otrasmi.
• Univerzálny diaľkový ovládač neotvárajte.
Neobsahuje časti, ktoré by si vyžadovali údržbu
zo strany zákazníka.
• Univerzálny diaľkový ovládač, rovnako ako iné
elektrické zariadenia, nepatrí do detských rúk.
4. Prvé kroky - vloženie batérií
Upozornenie
► Odporúča sa použiť alkalické batérie. Použite
dve batérie typu „AAA” (LR 03/Micro).
► Odstráňte kryt batériovej priehradky na
zadnej strane univerzálneho diaľkového ovládania.
► Vložte batérie, dbajte na správnu polaritu
(symboly +/-).
► Zatvorte batériovú priehradku.
57
Page 60

Upozornenie: Pamäť kódov
► Počas výmeny batérie zostanú všetky napro-
gramované kódy uložené na 10 minút. Dbajte na to, aby ste nestlačili žiadne tlačidlá
predtým, než boli vložené nové batérie do
diaľkového ovládača. Ak nejaké tlačidlo
stlačíte, kým v diaľkovom ovládači nie sú
vložené batérie, všetky kódy sa vymažú.
Upozornenie: Funkcia šetrenia
batérie
► Diaľkové ovládanie sa vypne automaticky, ak
bude tlačidlo stlačené dlhšie ako 15 sekúnd.
Takto sa šetrí energia batérie, ak diaľkové
ovládanie uviazne v polohe, v ktorej budú
tlačidlá stále stlačené, napríklad medzi
vankúšmi na pohovke.
5. Nastavenie
Upozornenie
► Pre správny prenos infračerveného signálu
nasmerujte diaľkový ovládač v približnom
smere ovládaného zariadenia.
► Stlačte tlačidlo „MODE” pre výber sekun-
dárnej skupiny zariadení AUX, AMP, DVB-T,
CBL)(len model 8 v 1).
► Stlačte tlačidlo Shift na použitie modrých
funkčných tlačidiel. Funkciu Shift je možné
deaktivovať opätovným stlačením tlačidla
Shift, alebo sa vypne automaticky, ak počas
cca. 30 sekúnd nestlačíte žiadne tlačidlo.
► Ak do cca 30 sekúnd nebudú zadané žiadne
údaje, ukončí sa nastavovací režim. LED dióda zabliká šesťkrát a zhasne.
► Každý typ zariadenia je možné programovať
pod ľubovoľným tlačidlom zariadenia, televízny prijímač môžete naprogramovať napr.
pod DVD, AUX atď.
► Pomocou univerzálneho diaľkového
ovládača nie je možné obsluhovať zariadenie, kým sa ešte nachádza v nastavovacom
režime. Opustite nastavovací režim a
zariadenie, ktoré sa má ovládať, vyberte
pomocou tlačidiel pre výber zariadení.
5.1 Priame zadanie kódu
Súčasťou dodávky univerzálneho diaľkového ovládania je zoznam kódov. Zoznam kódov zobrazuje
štvormiestne kódy väčšiny výrobcov AV zariadení v
abecednom poradí, zoradené podľa typu zariadenia
(napr. TV, DVD atď.). Ak je zariadenie, ktoré sa má
ovládať, v zozname kódov uvedené, je priame zadávanie kódov najjednoduchšia zadávacia metóda.
5.1.1 Zapnite zariadenie, ktoré má byť ovládané.
5.1.2 Stlačte a podržte tlačidlo „SETUP”, kým sa
rozsvieti LED dióda.
5.1.3 Pomocou tlačidla zariadenia zvoľte zaria-
denie, ktoré sa má ovládať (ňapr. TV). Pri
úspešnom výbere LED dióda zabliká raz a
ostane svietiť.
5.1.4 Vyhľadajte v zozname kódov značku a typ
ovládaného zariadenia.
5.1.5 Zadajte pomocou číselných tlačidiel 0-9
príslušný 4-miestny kód ovládaného zariadenia. LED dióda potvrdí zadanie jednotlivých
číslic vždy krátkym zablikaním a po zadaní
štvrtej číslice zhasne.
58
Page 61

Upozornenie
► Platný kód sa uloží automaticky.
► Pri zadaní neplatného kódu zabliká LED dió-
da šesťkrát a potom zhasne. Opakujte kroky
5.1.1 až 5.1.5 alebo použite inú metódu na
zadanie kódov.
5.2 Manuálne hľadanie kódov
Univerzálne diaľkové ovládanie je vybavené
internou pamäťou, v ktorej je pre najbežnejšie
AV zariadenia už uložených 350 kódov na každý
typ. Týmito kódmi môžete prechádzať, kým zari
adenie príslušne zareaguje. Ovládané zariadenie sa
napríklad vypne (tlačidlo „POWER”) alebo prepne
na iný program (tlačidlo „PROG+/PROG-”).
5.2.1 Zapnite zariadenie, ktoré má byť ovládané.
5.2.2
Stlačte a podržte tlačidlo SETUP, kým sa trvale
rozsvieti LED dióda.
5.2.3
Pomocou tlačidla zariadenia zvoľte zariadenie, ktoré sa má ovládať (napr. TV). Pri
úspešnom výbere LED dióda zabliká raz a
ostane svietiť.
5.2.4 Na listovanie medzi prednastavenými kódmi
stlačte tlačidlo „POWER” alebo „PROG+/
PROG-”, kým ovládané zariadenie príslušne
zareaguje.
5.2.5 Na uloženie kódu a opustenie režimu
vyhľadávania kódov stlačte tlačidlo
„MUTE(OK)”. LED dióda zhasne.
Upozornenie
► V internej pamäti je možné uložiť maximálne
350 kódov najbežnejších zariadení. Z dôvodu veľkého počtu na trhu dostupných AV
zariadení sa môže stať, že sú dostupné len
najbežnejšie hlavné funkcie. V takomto prípade opakujte kroky 5.2.1 až 5.2.5 pre nájdenie
kompatibilnejšieho kódu. Je možné, že pre niektoré špeciálnejšie modely zariadení, nebude
dostupný žiaden kód..
5.3 Automatické vyhľadanie kódu
Automatické vyhľadanie kódu používa tie isté
prednastavené kódy ako manuálne hľadanie
kódov (5.2). Univerzálne diaľkové ovládanie ale
prehľadáva kódy automaticky, kým ovládané zariadenie príslušne zareaguje. Ovládané zariadenie sa
napríklad vypne (tlačidlo „POWER”) alebo prepne
na iný kanál (tlačidlá „PROG+/PROG-”).
Zapnite zariadenie, ktoré má byť ovládané.
5.3.1
5.3.2 Stlačte a podržte tlačidlo „SETUP”, kým sa
rozsvieti LED dióda.
5.3.3 Pomocou tlačidla zariadenia zvoľte zariadenie, ktoré sa má ovládať (ňapr. TV). Pri
úspešnom výbere LED dióda zabliká raz a
ostane svietiť.
5.3.4 Na spustenie automatického vyhľadávania
kódov stlačte tlačidlo „PROG+/PROG-”
alebo „POWER”. LED dióda zabliká raz a
ostane svietiť. Trvá 6 sekúnd, než univerzálne diaľkové ovládanie začne s prvým
vyhľadávaním.
Upozornenie: Nastavenie rýchlosti
vyhľadávania
► Štandardné nastavenie intervalu hľadania
kódov je 1 sekunda. Ak s týmto nastavením
nie ste spokojní, môžete nastaviť interval 3
sekundy. Na prepínanie medzi intervalmi
stlačte tlačidlo „PROG+” alebo „PROG-” v
priebehu 6 sekúnd pred spustením automatického hľadania.
5.3.5 LED dióda potvrdzuje príslušné vyhľadanie
kódov jednotlivým zablikaním.
5.3.6 Na uloženie kódu a opustenie režimu
vyhľadávania kódov stlačte tlačidlo
„MUTE(OK)”. LED dióda zhasne.
5.3.7 Na prerušenie automatického hľadania v priebehu vyhľadávania, stlačte tlačidlo „EXIT”.
59
Page 62

Upozornenie
► Po neúspešnom prehľadaní všetkých kódov
opustí univerzálne diaľkové ovládanie režim
automatického vyhľadávania kódov a vráti
sa automaticky do prevádzkového režimu.
Aktuálne uložený kód zostane nezmenený.
5.4 Identifikácia kódu
Identikácia kódu Vám umožňuje zistenie už
zadaného kódu.
5.4.1 Stlačte a podržte tlačidlo „SETUP”, kým sa
rozsvieti LED dióda.
5.4.2 Pomocou tlačidla zariadenia zvoľte zariadenie, ktoré sa má ovládať (ňapr. TV). Pri
úspešnom výbere LED dióda zabliká raz a
ostane svietiť..
5.4.3 Stlačte tlačidlo „SETUP”. LED dióda zabliká
raz a ostane svietiť..
5.4.4 Na vyhľadanie prvej číslice stlačte niektoré z
číslicových tlačidiel od 0 do 9. LED zablikne
raz pre prvú číslicu štvormiestneho čísla kódu.
5.4.5 Zopakujte krok 5.4.4 pre druhú, tretiu a štvrtú
číslicu.
CODES
TV VCR SATDVD
AUX AMP CBL DVBT
6. Zvláštne funkcie
6.1 Prepínanie Punch-Through
Pomocou prepínania Punch-Through môžu príkazy
PROG+ alebo PROG- obísť aktuálne ovládané
zariadenie a môžu prepínať stanice druhého
zariadenia. Ostatné príkazy tým nie sú ovplyvnené.
Pri aktivácii funkcie Punch-Through postupujte
nasledovne:
•Stlačte želané tlačidlo zariadenia (napr. TV).
•Podržte tlačidlo „PROG+” stlačené.
•Stlačte želané tlačidlo zariadenia (napr. SAT)
•Teraz pustite tlačidlo „PROG+” (LED dióda blikne
raz pri aktivovanom nastavení).
Pri deaktivácii funkcie Punch-Through postupujte
nasledovne:
•Stlačte želané tlačidlo zariadenia (napr. TV).
•Podržte tlačidlo „PROG-” stlačené.
•Stlačte želané tlačidlo zariadenia (napr. SAT)
•Teraz pustite tlačidlo „PROG-” (LED dióda zabliká
dvakrát pri deaktivovaní nastavenia).
6.2 Funkcia Punch-Through pre hlasitosť
Pomocou funkcie Punch-Through pre hlasitosť môžu
príkazy VOL+ alebo VOL- obísť aktuálne ovládané
zariadenie a môžu nastaviť hlasitosť druhého
zariadenia. Ostatné príkazy tým nie sú ovplyvnené.
Pri aktivácii funkcie Punch-Through pre hlasitosť
postupujte nasledovne:
•Stlačte želané tlačidlo zariadenia (napr. TV).
•Podržte tlačidlo „VOL+” stlačené.
•Stlačte želané tlačidlo zariadenia (napr. SAT)
•Teraz pustite tlačidlo „VOL+” (LED dióda blikne
raz pri aktivovanom nastavení).
Pri deaktivácii funkcie Punch-Through pre hlasitosť
postupujte nasledovne:
•Stlačte želané tlačidlo zariadenia (napr. TV).
•Podržte tlačidlo „VOL-” stlačené.
•Stlačte želané tlačidlo zariadenia (napr. SAT)
•Teraz pustite tlačidlo „VOL-” (LED dióda zabliká
dvakrát pri deaktivovaní nastavenia).
6.3 Macro Power
Pomocou funkcie Macro Power môžete dve AV
zariadenia súčasne zapínať/vypínať.
Pri aktivácii funkcie Macro Power postupujte
nasledovne:
•Stlačte želané tlačidlo zariadenia (napr. TV).
•Podržte tlačidlo „POWER” stlačené.
•Stlačte želané tlačidlo zariadenia (napr. SAT)
60
Page 63

•Teraz pustite tlačidlo „POWER” (LED dióda blikne
raz pri aktivovanom nastavení).
Pri deaktivácii funkcie Macro Power postupujte
nasledovne:
•Stlačte želané tlačidlo zariadenia (napr. TV).
•Podržte tlačidlo „POWER” stlačené.
•Stlačte želané tlačidlo zariadenia (napr. SAT)
•Teraz pustite tlačidlo „POWER” (LED dióda
zabliká dvakrát pri deaktivovaní nastavenia).
7. ÚDRŽBA
• V univerzálnom diaľkovom ovládaní nikdy
nepoužívajte súčasne staré a nové batérie,
pretože staré batérie sú náchylné k vytečeniu
alebo môžu viesť k strate výkonu.
• Univerzálne diaľkové ovládanie v žiadnom
prípade nečistite abrazívnymi prostriedkami
alebo agresívnymi čistiacimi prostriedkami.
• Univerzálne diaľkové ovládanie zbavujte prachu
čistením suchou a mäkkou utierkou.
8. ODSTRAŇOVANIE PORÚCH
O. Môj univerzálny diaľkový ovládač nefunguje!
o. Skontrolujte AV zariadenie. Ak je vypnutý
hlavný vypínač zariadenia, nemôže univerzálne
diaľkové ovládanie zariadenie ovládať.
o. Ubezpečte sa, že sú správne vložené batérie a
že bola rešpektovaná správna polarita.
o. Ubezpečte sa, či bolo stlačené príslušné tlačidlo
pre voľbu zariadenia.
o. Vymeňte batérie pri nízkom stave nabitia batérií.
O. Ak sú pre značku môjho AV zariadenia uvedené
viaceré kódy, čo musím urobiť pre voľbu správ-
neho kódu zariadenia?
o. Na určenie správneho kódu pre AV zariadenie
testujte kódy postupne dovtedy, kým bude
väčšina tlačidiel správne fungovať.
O. Moje AV zariadenie reaguje len na niektoré
tlačidlové povely.
o. Skúšajte iné kódy dovtedy, kým bude väčšina
tlačidiel správne fungovať.
9. Servis a podpora
S otázkami týkajúcimi sa výrobku sa prosím obráťte
na poradenské oddelenie rmy Hama.
Hotline: +49 9091 502-115 (nem./angl.)
Ďalšie informácie o podpore nájdete tu:
www.hama.com
10. Pokyny pre likvidáciu
Ochrana životného prostredia:
Európska smernica 2012/19/EU a
2006/66/EU stanovuje: Elektrické a
elektronické zariadenia, rovnako ako
batérie sa nesmú vyhadzovať do
domáceho odpadu. Spotrebiteľ je zo
zákona povinný zlikvidovať elektrické a elektronické
zariadenia, rovnako ako batérie na miesta k tomu
určené. Symbolizuje to obrázok v návode na
použitie, alebo na balení výrobku. Opätovným
zužitkovaním alebo inou formou recyklácie starých
zariadení/batérií prispievate k ochrane životného
prostredia.
61
Page 64

O Manual de instruções
Telecomando universal
Agradecemos que se tenha decidido por este
produto Hama.
Antes de utilizar o produto, leia completamente
estas instruções e informações. Guarde estas
instruções num local seguro para consultas
posteriores.
Botões de função (modelos 4 em 1, 8 em 1)
1. Botão mute
2. Botões para selecção do aparelho
3. Text EIN: ligar o teletexto
4. Halten: parar na página de teletexto actual
5. ◄◄ Retrocesso / vermelho
► Reprodução / amarelo
►► Avanço rápido /azul
● Iniciar gravação
■ Parar / verde
ll Pausa / magenta
6. Botão "Shift"
7. Menu: aceder ao menu do aparelho
8. Botão de modo para selecção do grupo de
aparelhos secundário (apenas no modelo 8 em
1: AUX,DVBT,CBL,AMP)
9. Vol+/Vol-: Regulação do volume
10. Setup: configurações do telecomando
11. Botões numéricos 0 - 9
12. Smart TV: abrir o menu Smart TV (se suportado
pelo dispositivo final)
Shift+Smart TV: selecionar fonte AV externa
13. APPS: abrir menu da aplicação (se suportado
pelo dispositivo final)
Shift+APPS : comutar para números de canal
com dois dígitos
14. PROG+/PROG-: selecção do canal (para cima/
para baixo)
15 EXIT: deixar o menu do aparelho
16. OK: confirmar a selecção
17. EPG: guia de programação electrónico (se
suportado pelo aparelho AV seleccionado)
18. Info: informações On Screen (se suportado pelo
aparelho AV)
19. Text AUS: deixar o teletexto
20. Power: LIGAR/DESLIGAR / LED
1. Explicação do símbolo „Nota”
Nota
► Este símbolo remete para informações adicio-
nais ou informações importantes.
2. Itens fornecidos
- Telecomando universal
- Lista de códigos
- Estas instruções de utilização
3. Indicações de segurança
• Não utilize o telecomando universal em ambiente húmidos. Evite o contacto com enguiços de
água.
• Mantenha o telecomando universal afastado de
fontes de calor e nunca o exponha à luz solar
directa.
• Não deixe cair o telecomando universal.
• Não abra o telecomando universal, pois este
não possui componentes que requerem manutenção pelo utilizador.
• O telecomando universal, tal como todos os
aparelhos eléctricos, deve ser mantido fora do
alcance de crianças.
4. Primeiros passos - Colocar as pilhas
Nota
► Recomenda-se a utilização de pilhas alcali-
nas. Utilize duas pilhas do tipo „AAA” (LR
03/micro).
► Abra a tampa do compartimento das pilhas
nas costas do telecomando universal.
► Coloque as pilhas observando a polaridade
correcta (marcas „+” e „-”).
► Feche o compartimento das pilhas.
62
Page 65

Nota: Memória de código
► Qualquer código que tenha sido programa-
do previamente permanece gravado durante
10 minutos enquanto substitui a pilha.
Certique-se de que não pressiona nenhum
botão antes de ter colocado novas pilhas
dentro do controlo remoto. To dos os códigos serão apagados se pressionar um botão
enquanto não existirem pilhas no controlo
remoto.
Nota: Função de poupança de en-
ergia da pilha
► O controlo remoto desliga-se automatica-
mente quando pressiona o botão durante
mais de 15 segundos. Esta função permite
conservar a energia da pilha, caso o controlo remoto que preso, por exemplo, entre as
almofadas do sofá numa posição na qual
os botões estão continuamente a ser pressionados.
5. Setup
Nota
► Para garantir uma transmissão por infraver-
melhos sem falhas, oriente sempre o telecomando na direcção aproximada do aparelho
a comandar.
► Prima o botão „MODE” para seleccionar o
grupo de aparelhos secundário: AUX, AMP,
DVB-T, CBL (apenas no modelo 8 em 1).
► Prima o botão SHIFT para activar os botões de
função azuis do telecomando. A função SHIFT
pode ser desactivada voltando a premir o botão
SHIFT ou, automaticamente, se não for premido
nenhum botão durante aprox. 30 segundos.
► Se não for efectuada nenhuma introdução
ante
dur
conguração termina automaticamente. O
LED pisca seis vezes e depois apaga-se.
► Cada tipo de aparelho pode ser programado
em qualquer botão de aparelhos; por ex., é
possível programar um televisor em DVD,
AUX, etc.
► Não é possível comandar aparelhos com o
telecomando universal se este se encontrar
no modo Setup. Deixe o modo Setup e seleccione, depois, o aparelho desejado através
dos botões de selecção de aparelhos.
5.1 Introdução directa de códigos
O telecomando é fornecido com uma lista de
códigos para aparelhos. Esta lista de códigos
contém códigos de quatro dígitos da maior parte
dos fabricantes de aparelhos AV. Os códigos estão
ordenados alfabeticamente e agrupados segundo
o tipo de aparelho (por ex., TV, DVD, etc.). Se o
aparelho a comandar estiver indicado na lista,
a introdução directa via código do aparelho é o
método de introdução mais simples.
5.1.1 Ligue o aparelho a comandar.
5.1.2 Prima o botão SETUP e mantenha-o premido
até o LED car permanentemente aceso.
5.1.3 Seleccione, agora, o aparelho desejado
através do botão de aparelho (por ex., TV).
Se a selecção foi aceite com sucesso, o LED
pisca uma vez e permanece, depois, aceso.
5.1.4 Procure a marca e o tipo do aparelho na lista
de códigos.
5.1.5 Introduza o respectivo código de quatro
dígitos utilizando os botões numéricos 0-9.
O LED conrma a introdução de cada um dos
algarismos piscando rapidamente e apaga-se
depois de o quarto algarismo ser introduzido.
ox.30segundos,omodo
apr
de
63
Page 66

Nota
► Códigos válidos são automaticamente memo-
rizados no telecomando.
► Se for introduzido um código inválido, o LED
pisca seis vezes e, depois, apaga-se. Repita
os passos 5.1.1 até 5.1.5 ou utilize um outro
método de introdução.
5.2 Procura manual do código
O telecomando universal possui uma memória interna na qual estão pré-memorizados até 350 códigos
por tipo de aparelho para os aparelhos AV comuns.
É possível efectuar uma procura do código desejado
nestes códigos pré-memorizados até o aparelho
reagir aos comandos. Por exemplo, o aparelho a
comandar desliga-se (Botão POWER) ou comuta
para um outro canal (botão PROG+/PROG-).
5.2.1
Ligue o aparelho a comandar.
5.2.2 Prima o botão SETUP e mantenha-o premido
até o LED car permanentemente aceso.
5.2.3 Seleccione, agora, o aparelho desejado
através do botão de aparelho (por ex., TV).
Se a selecção foi aceite com sucesso, o LED
pisca uma vez e permanece, depois, aceso.
5.2.4 Prima o botão POWER ou PROG+/PROG- para
iniciar uma procura nos códigos pré-memorizados até o aparelho reagir ao comando.
5.2.5 Prima o botão MUTE (OK) para memorizar
o código e deixar a função de procura de
códigos. O LED apaga-se.
Nota
► Na memória interna do telecomando é possível
guardar até, no máx., 350 códigos dos aparelhos
mais comuns. Devido ao grande número de aparelhos AV disponíveis no mercado, é possível que
apenas estejam disponíveis as funções principais
mais frequentes.Neste caso, repita os passos 5.2.1
até 5.2.5 para encontrar um código mais adequado para o aparelho. Para alguns modelos especiais
é possível que não estejam disponíveis códigos.
64
5.3 Procura automática do código
A procura automática do código utiliza os mesmos
códigos pré-memorizados utilizados pela procura
manual (5.2). Neste tipo de procura, o telecomando
universal procura o código automaticamente até
que o aparelho a comandar reaja ao telecomando.
Por exemplo, o aparelho a comandar desliga-se
(Botão POWER) ou comuta para um outro canal
(botão PROG+/PROG-).sich das zu bedienende Gerät aus (Taste „POWER”) oder wechselt den Sender
(Tasten „PROG+/PROG-”).
Ligue o aparelho a comandar.
5.3.1
5.3.2 Prima o botão SETUP e mantenha-o premido
até o LED car permanentemente aceso.
5.3.3 Seleccione, agora, o aparelho desejado
através do botão de aparelho (por ex., TV).
Se a selecção foi aceite com sucesso, o LED
pisca uma vez e permanece, depois, aceso.
5.3.4 Prima o botão PROG+/PROG- ou o botão
POWER para iniciar a procura automática do
código. O LED pisca uma vez e permanece,
depois, aceso. O telecomando universal
requer 6 segundos para iniciar a primeira
procura de códigos.
Nota: Ajuste da velocidade de
procura
► A denição standard do tempo de procura
por código é 1 segundo. Se desejado, é
possível seleccionar um tempo de procura de
3 segundos por código. Para comutar entre
os tempos de procura, prima o botão PROG+
ou PROG- dentro dos 6 segundos antes da
procura automática ser iniciada.
5.3.5 O LED conrma a respectiva procura de
código piscando uma vez.
5.3.6 Prima o botão MUTE (OK) para memorizar
o código e deixar a função de procura de
códigos. O LED apaga-se.
5.3.7 Para interromper a procura automática
durante o processo de procura, prima o botão
EXIT.
Page 67

Nota
► Se foram percorridos todos os códigos e não
foi encontrado um código válido, o telecomando universal deixa a procura automática
e regressa ao modo de operação normal. O
código actualmente memorizado é mantido.
5.4 Identificação de códigos
A identicação do código oferece-lhe a opção
de determinar um código já introduzido no
telecomando.
5.4.1 Prima o botão SETUP e mantenha-o premido
até o LED car permanentemente aceso.
5.4.2 Seleccione, agora, o aparelho desejado
através do botão de aparelho (por ex., TV).
Se a selecção foi aceite com sucesso, o LED
pisca uma vez e permanece, depois, aceso.
5.4.3 Prima o botão SETUP. O LED pisca uma vez e
permanece, depois, aceso.
5.4.4 Para procurar o primeiro dígito do código,
prima um dos botões numéricos 0-9. O LED
pisca uma vez para o primeiro algarismo do
código de quatro dígitos.
5.4.5 Repita o passo 5.4.4 para o segundo, terceiro
e quarto algarismo.
CODES
TV VCR SATDVD
AUX AMP CBL DVBT
6. Funções especiais
6.1 Função "Punch Through" de canal
Com a função „Punch Through” de canal, é possível
fazer um bypass com os comandos botões PROG+/
PROG- do aparelho actualmente comandado e
mudar de canal de um segundo aparelho. Os
restantes comandos não são afectados.
Para activar a função „Punch Through” de canal:
•Prima o botão de selecção de aparelho desejado
(por ex., TV).
•Prima o botão „PROG+” e mantenha-o premido.
•Prima o botão de selecção de aparelho desejado
(por ex., SAT).
•Largue o botão „PROG+” (o LED pisca uma vez se
a função for activada).
Para desactivar a função „Punch Through” de canal:
•Prima o botão de selecção de aparelho desejado
(por ex., TV).
•Prima o botão „PROG-” e mantenha-o premido.
•Prima o botão de selecção de aparelho desejado
(por ex., SAT).
•Largue o botão „PROG-” (o LED pisca duas vezes
se a função for desactivada).
6.2 Função "Punch Through" de volume do som
Com a função „Punch Through” de volume do som,
é posslível fazer um bypass com os comandos botões
VOL+/VOL- do aparelho actualmente comandado e
regular o volume do som de um segundo aparelho.
Os restantes comandos não são afectados.
Para activar a função „Punch Through” de volume do som:
•Prima o botão de selecção de aparelho desejado
(por ex., TV).
•Prima o botão „VOL+” e mantenha-o premido.
•Prima o botão de selecção de aparelho desejado
(por ex., SAT).
•Largue o botão „VOL+” (o LED pisca uma vez se
a função for activada).
Para desactivar a função „Punch Through” de volume
do som:
•Prima o botão de selecção de aparelho desejado
(por ex., TV).
•Prima o botão „VOL-” e mantenha-o premido.
•Prima o botão de selecção de aparelho desejado
(por ex., SAT).
•Largue o botão „VOL-” (o LED pisca duas vezes se
a função for desactivada).
65
Page 68

6.3 Macro Power
Com MACRO POWER é possível ligar/desligar,
simultaneamente, dois aparelhos AV.
Para activar a função „Macro Power”:
•Prima o botão de selecção de aparelho desejado
(por ex., TV).
•Prima o botão „POWER” e mantenha-o premido.
•Prima o botão de selecção de aparelho desejado
(por ex., SAT).
•Largue o botão „POWER” (o LED pisca uma vez
se a função for activada).
Para desactivar a função „Macro Power”:
•Prima o botão de selecção de aparelho desejado
(por ex., TV).
•Prima o botão „PWOER” e mantenha-o premido.
•Prima o botão de selecção de aparelho desejado
(por ex., SAT).
•Largue o botão „POWER” (o LED pisca duas
vezes se a função for desactivada).
7. MANUTENÇÃO
•
Nunca utilize pilhas usadas juntamente com pilhas novas, pois pilhas usadas tendem a derramar
e poderão reduzir o desempenho do telecomando.
•
Nunca use detergentes abrasivos ou produtos de limpeza agressivos para limpar o telecomando universal.
•
Mantenha o telecomando universal livre de pó
limpando-o regularmente com um pano seco suave.
8. PROCURA E ELIMINAÇÃO DE FALHAS
P.
O telecomando universal não funciona!
R.
Verique o aparelho AV. O telecomando universal
não pode comandar o aparelho se este estiver
desligado com o botão LIG/DESL principal.
R.
Verique se as pilhas do telecomando estão correctamente inseridas e se a polaridade está correcta.
Certique-se que foi premido o botão de
R.
selecção do aparelho correcto.
R. Substitua pilha com pouca carga.
P.
Se estiverem disponíveis vários códigos de
aparelho para a marca do meu aparelho AV, qual
é o código correcto?
Para determinar o código correcto, experimente
R.
sucessivamente os códigos até a maioria das
funções do aparelho funcionar correctamente.
66
P.
O aparelho AV não reage a alguns comandos de botões.
Teste outros códigos até a maiorias das funções
R.
funcionarem correctamente.
9. Contactos e apoio técnico
Em caso de dúvidas sobre o produto, contacte o
serviço de assistência ao produto da Hama.
Linha de apoio ao cliente: +49 9091 502-115
(alemão/inglês)
Para mais informações sobre os serviços de apoio
ao cliente, visite: www.hama.com
10. Indicações de eliminação
Nota em Protecção Ambiental:
Após a implementação da directiva
comunitária 2012/19/EU e 2006/66/EU no
sistema legal nacional, o seguinte
aplica-se: Os aparelhos eléctricos e
electrónicos, bem como baterias, não
podem ser eliminados juntamente com o lixo
doméstico. Consumidores estão obrigados por lei a
colocar os aparelhos eléctricos e electrónicos, bem
como baterias, sem uso em locais públicos
especícos para este efeito ou no ponto de venda.
Os detalhes para este processo são denidos por lei
pelos respectivos países. Este símbolo no produto,
o manual de instruções ou a embalagem indicam
que o produto está sujeito a estes regulamentos.
Reciclando, reutilizando os materiais dos seus
velhos aparelhos/baterias, esta a fazer uma enorme
contribuição para a protecção do ambiente.
Page 69

T Kullanma kılavuzu
Üniversal uzaktan kumanda
Bir Hama ürünü satın aldığınız için teşekkür ederiz!
Bir miktar zaman ayırın ve aşağıdaki bilgileri ve
talimatları tamamen okuyun. Lütfen bu kılavuzu
ileride yeniden okumak üzere güvenli bir yerde
saklayın.
Fonksiyon tuşları (4 in 1, 8 in 1 modelleri)
1. Sesi kapatma düğmesi
2. Cihaz seçme tuşları
3. Metin AÇ: Teleteksti aç
4. Durdur: Güncel teletekst sayfasını durdur
5. ◄◄ Geriye/kırmızı
► Oku/sarı
►► Hızlı ileriye/mavi
● Kayıt yapmaya başla
■ Dur/yeşil
ll Mola/mor
6. Shift tuşu
7. Menu: Cihaz menüsünü aç
8. İkincil cihaz grubunu seçmek için mod tuşu
(sadece 8 in 1 modelinde: AUX,DVBT,CBL,AMP)
9. Vol+/Vol-: Ses seviyesi ayarı
10. Kurulum: Uzaktan kumandanın ayarları
11. Sayısal tuşlar 0-9
12. Smart TV: Smart TV menüsünü aç (uç cihazdan
destekleniyorsa)
Shift+Smart TV: harici AV kaynağını seç
13. APPS: App menüsünü aç (uç cihazdan
destekleniyorsa)
Shift+APPS : İki basamaklı istasyon
numaralarına geç
14. PROG+/PROG-: Program seçimi, yukarıya/
aşağıya
15. EXIT: Cihaz menüsünden çıkılır
16. OK: Seçiminizi onaylar
17. EPG: Elektronik program kılavuzu (seçilen AV
cihazı tarafından destekleniyorsa)
18. Info: Ekran üstündeki bilgiler (AV cihazı
tarafından destekleniyorsa)
19. Metin KAPAT: Teleteksten çıkılır
20. Güç: AÇ/KAPAT / LED
1. Uyarı sembolünün açıklanması
Uyarı
► Bu sembol ek bilgilere veya önemli uyarılara
işaret eder.
2. Teslimat içeriği
- Üniversal uzaktan kumanda
- Kod listesi
- Bu kullanım kılavuzu
3. Güvenlik uyarıları
• Üniversal uzaktan kumandayı nemli ortamlarda
kullanmayın ve sıçrama suyu ile temas etmesini
önleyin.
• Üniversal uzaktan kumandayı ısı kaynaklarından
uzak tutun ve doğrudan güneş ışığına maruz
bırakmayın.
• Üniversal uzaktan kumandayı yere düşürmeyin.
• Üniversal uzaktan kumandanın içini açmayın.
Üzerinde kullanıcı tarafından bakımı yapılacak
parçalar bulunmaz.
• Diğer elektrikli cihazlar gibi üniversal
uzaktan kumanda da çocuklar tarafından
kullanılmamalıdır.
4. İlk adımlar – Pillerin yerleştirilmesi
Uyarı
► Alkalin piller kullanılması önerilir. İki adet
„AAA” tipi pil kullanınız (LR 03/Micro).
► Üniversal uzaktan kumandanın arkasındaki
akü yuvasının kapağını açın.
► Aküleri „+/-” işaretleri doğru olacak şekilde
yerleştirin.
► Pil yuvasını kapatın.
67
Page 70

Uyarı:Kod belleği
► Aküyü değiştirirken programlanmış olan
kodlar 10 dakika süre ile kayıtlı olarak kalır.
Uzaktan kumandaya yeni pil yerleştirmeden
önce herhangi bir butona basmadığınızdan
emin olun. Uzaktan kumandada pi yokken
herhangi bir butona basıldığında, tüm kodlar silinir.
Uyarı: Akü tasarruf işlevi
► Bir butona 15 saniyeden daha fazla
basıldığında, uzaktan kumanda otomatik
olarak kapanır. Bu sayede uzaktan kumanda örneğin, sedir minderleri arasında
sıkıştığında akünün boşalmasını önler.
5. Setup
Uyarı
► Kızılötesiışın aktarımı içinuzaktan kumandayı
kullanılacak olan cihaza doğru tutun.
► İkincil cihaz grubunu seçmek için „MODE”
tuşuna basın: AUX, AMP, DVB-T, CBL (sadece
8 in 1 modelinde).
► Mavi fonksiyon tuşlarını kullanmak için
Shift tuşuna basın. Shift tuşuna yeniden
basıldığında veya 30 saniye süre ile herhangi bir tuşa basılmadığında Shift fonksiyonu
devre dışı bırakılır.
► Yaklaşık 30 saniye süre ile herhangi bir giriş
yapılmazsa, Setup modu sona erer. LED altı
kez yanıp söner ve daha sonra da tamamen
söner.
► Her cihaz tipi sadece bir cihaz tuşuna pro-
gramlanabilir, örneğin bir televizyon DVD,
AUX vb. altında programlanabilir.
► Üniversal uzaktan kumanda Setup modunda
olduğu sürece herhangi bir cihaza kumanda
edemezsiniz. Setup modundan çıkın ve cihaz
seçme tuşları ile kullanılacak olan cihazı
seçin.
5.1 Doğrudan kod girişi
Üniversal uzaktan kumandanın teslimat içeriğinde
bir kod listesi mevcuttur. Bu kod listesi çoğu AV
cihazı üreticilerinin dört basamaklı kod numarasını
cihaz tipine göre (örn. TV, DVD vb.) alfabetik bir
sırada gösterir. Kullanılacak olan cihazın kodu bu
listede mevcutsa, kodun doğrudan girilmesi en
kolay yöntemdir.
5.1.1 Kullanılacak olan cihazı açın.
5.1.2 LED devamlı olarak yanana kadar „SETUP”
tuşuna basın.
5.1.3 Cihaz tuşu üzerinden kullanılacak olan cihazı
(örn. TV) seçin. Seçim doğru yapıldığında,
LED bir defa yanıp söner ve daha sonra da
devamlı olarak yanar.
5.1.4 Kod listesinde kullanılacak olan cihazın
markasını ve tipini bulun.
5.1.5 Daha sonra da ilgili dört basamaklı kodu
sayısal tuşlar 0 - 9 üzerinden girin. LED girilen
rakamları her seferinde kısaca yanıp sönerek
onaylar ve dördüncü basamak girildikten
sonra söner.
Uyarı
► Geçerli bir kod otomatik olarak kaydedilir.
► Girilen kod doğru değilse, LED altı kez yanıp
söner ve daha sonra tamamen kapanır. Bu
durumda 5.1.1 ile 5.1.5 arasındaki adımları
tekrarlayın veya kod girişi için başka bir
yöntem kullanın.
68
Page 71

5.2 Manuel kod girişi
Üniversal uzaktan kumandanın dahili belleğine en
önemli AV cihazlarının her cihaz tipi için 350 adete
kadar kod kayıtlıdır. Kullanılacak olan cihaz bir
yanıt verene kadar bu kodları sırayla girebilirsiniz.
Örneğin, kullanılacak olan cihaz kapanır („POWER”
tuşu) veya istasyon değişir („PROG+/PROG-” tuşu).
5.2.1 Kullanılacak olan cihazı açın.
5.2.2 LED devamlı olarak yanana kadar SETUP
tuşuna basın.
5.2.3 Cihaz tuşu üzerinden kullanılacak olan cihazı
(örn. TV) seçin. Seçim doğru yapıldığında,
LED bir defa yanıp söner ve daha sonra da
devamlı olarak yanar.
5.2.4 Kullanılacak olan cihaz bir yanıt gösterene
kadar „POWER” veya „PROG+/PROG-” tuşuna
basarak kayıtlı olan kodları tarayın.
5.2.5 Kodu kaydetmek ve kod arama modundan
çıkmak için „MUTE(OK)” tuşuna basın. LED
söner.
Uyarı
► Dahili belleğe en yaygın olan cihazlara
ait en fazla 350 kod kaydedilebilir. Piyasada yaygın olarak bulunan AV cihazı
adeti çok fazla olduğundan, sadece
en önemli fonksiyonların kullanılması
mümkün olabilir. Bu durumda uygun
bir kod bulabilmek için 5.2.1 ile 5.2.5
arasındaki adımları tekrarlayın. Bazı
özel cihaz modelleri için bir kod mevcut olmayabilir.
5.3 Otomatik kod arama
Otomatik kod aramada manuel kod aramada (5.2)
kayıtlı olan aynı kodlar kullanılır. Aralarındaki tek
fark, üniversal uzaktan kumandanın kullanılacak
olan cihaz bir yanıt verene kadar kodları otomatik
olarak aramasıdır. Örneğin, kullanılacak olan cihaz
kapanır („POWER” tuşu) veya istasyon değişir
(„PROG+/PROG-” tuşları).
5.3.1 Kullanılacak olan cihazı açın.
5.3.2 LED devamlı olarak yanana kadar „SETUP”
tuşuna basın.
5.3.3 Cihaz tuşu üzerinden kullanılacak olan cihazı
(örn. TV) seçin. Seçim doğru yapıldığında,
LED bir defa yanıp söner ve daha sonra da
devamlı olarak yanar.
5.3.4 Otomatik kod aramayı başlatmak için
„PROG+/PROG-” ya da „POWER” tuşuna
basın. LED bir defa yanıp söner ve daha sonra
da devamlı olarak yanar. Üniversal uzaktan
kumandanın ilk kodu aramaya başlaması
6 saniye sürer.
Uyarı: Arama hızının ayarlanması
► Her kod için arama süresi 1 saniyedir. Bu
süreyi isteğe göre her kod için 3 saniyeye kadar uzatabilirsiniz. Arama süreleri arasında
değiştirmek için, otomatik kod aramayı
başlatmadan önce 6 saniye içerisinde
„PROG+” ya da „PROG-” tuşuna basın.
5.3.5 İlgili kodun aranması bir kez yanıp sönen LED
ile gösterilir.
5.3.6 Kodu kaydetmek ve kod arama modundan
çıkmak için „MUTE(OK)” tuşuna basın. LED
söner.
5.3.7 Arama esnasında otomatik aramayı kesmek
Uyarı
► Kod arama başarısız olduğunda, üniversal
uzaktan kumanda otomatik kod aramayı
durdurur ve çalışma moduna geri döner.
Güncel olarak kayıtlı olan kod değişmez.
69
Page 72

5.4 Kod tanıma
Kod tanıma ile önceden girilmiş olan bir kod tespit
edilebilir.
5.4.1 LED devamlı olarak yanana kadar „SETUP”
tuşuna basın.
5.4.2 Cihaz tuşu üzerinden kullanılacak olan cihazı
(örn. TV) seçin. Seçim doğru yapıldığında,
LED bir defa yanıp söner ve daha sonra da
devamlı olarak yanar.
5.4.3 „SETUP” tuşuna basın. LED bir defa yanıp
söner ve daha sonra da devamlı olarak yanar.
5.4.4 İlk rakamı aramak için 0 ile 9 arasındaki
tuşlardan birine basın. Dört basamaklı kod
numarasının ilk rakamı için LED bir kez yanıp
söner.
5.4.5 Adım 5.4.4‘ü ikinci, üçüncü ve dördüncü
rakamlar için de tekrarlayın.
CODES
TV VCR SATDVD
AUX AMP CBL DVBT
6. Özel fonksiyonlar
6.1 Verici Punch-Through
Verici Punch-Through fonksiyonu ile PROG+ veya
PROG- komultarı kullanılmakta olan cihazı atlayarak
ikinci bir cihazın vericisine geçebilir. Bu durum diğer
komultarı etkilemez.
Verici Punch-Through fonksiyonunu etkinleştirmek
için:
• İstenen cihaz tuşuna basın (örn. TV).
•„PROG+” tuşunu basılı olarak tutun.
• İstenen cihaz tuşuna basın (örn. SAT).
•„PROG+” tuşunu bırakın (ayar etkinleştiğinde LED
bir kez yanıp söner).
Verici Punch-Through fonksiyonunu devre dışı
bırakmak için:
• İstenen cihaz tuşuna basın (örn. TV).
•„PROG-” tuşunu basılı olarak tutun.
• İstenen cihaz tuşuna basın (örn. SAT).
•„PROG-” tuşunu bırakın (ayar devre dışı
bırakıldığında LED iki defa yanıp söner).
6.2 Ses seviyesi Punch-Through
Ses seviyesi Punch-Through fonksiyonu ile VOL+
veya VOL- komutları kullanılmakta olan cihazı
atlayarak ikinci bir cihazı ses seviyesine geçebilir.
Diğer tüm komutlar etkilenmez.
Ses seviyesi Punch-Through fonksiyonunu
etkinleştirmek için:
• İstenen cihaz tuşuna basın (örn. TV).
•„VOL+” tuşunu basılı olarak tutun.
• İstenen cihaz tuşuna basın (örn. SAT).
•„VOL+” tuşunu bırakın (ayar etkinleştiğinde LED
bir kez yanıp söner).
Ses seviyesi Punch-Through fonksiyonunu devre dışı
bırakmak için:
• İstenen cihaz tuşuna basın (örn. TV).
•„VOL-” tuşunu basılı olarak tutun.
• İstenen cihaz tuşuna basın (örn. SAT).
•„VOL-” tuşunu bırakın (ayar devre dışı
bırakıldığında LED iki defa yanıp söner).
6.3 Macro Power
Macro Power ile iki AV cihazını aynı anda açıp /
kapatabilirsiniz.
Macro Power fonksiyonunu etkinleştirmek için:
• İstenen cihaz tuşuna basın (örn. TV).
•„POWER” tuşunu basılı olarak tutun.
• İstenen cihaz tuşuna basın (örn. SAT).
•„POWER” tuşunu bırakın (ayar etkinleştiğinde
LED bir kez yanıp söner).
Macro Power fonksiyonunu devre dışı bırakmak için
• İstenen cihaz tuşuna basın (örn. TV).
•„POWER” tuşunu basılı olarak tutun.
• İstenen cihaz tuşuna basın (örn. SAT).
•„POWER” tuşunu bırakın (ayar devre dışı
bırakıldığında LED iki defa yanıp söner).
70
Page 73

7. BAKIM
• Üniversal uzaktan kumandada kesinlikle eski
ve yeni pilleri birlikte kullanmayın. Eski piller
akabilir ve güç kaybına sebep olabilir.
• Üniversal uzaktan kumandayı kesinlikle
aşındırıcı maddelerle veya keskin temizlik
maddeleri ile temizlemeyin.
• Üniversal uzaktan kumanda üzerindeki tozları
kuru ve yumuşak bir bez ile temizleyin.
8. HATA GİDERME
S. Üniversal uzaktan kumadan çalışmıyor!
C. AV cihazını kontrol edin. Cihazın ana şalteri
kapalı ise, cihazın uzaktan kumandası çalışmaz.
C. Pillerin doğru olarak takıldığını ve kutuplarının
doğru olduğunu kontrol edin.
C. Cihaza ait olan cihaz tuşuna basılıp
basılmadığını kontrol edin.
C. Zayıayan aküleri değiştirin.
S. AV cihazım için birden fazla kod kayıtlı ise,
doğru kodu nasıl seçerim.
C. AV cihazı için doğru olan kodu bulabilmek için,
cihazın çoğu fonksiyonlarının çalıştığı kodu
bulana kadar, cihaza ait tüm kodları deneyiniz.
S. AV cihazım sadece bir iki tuş komutuna yanıt
veriyor.
C. Tuşların çoğu doğru olarak çalışana kadar başka
kodları deneyin.
9. Servis ve destek
Ürünle ilgili herhangi bir sorunuz varsa, lütfen
HAMA ürün danışmanlığına başvurunuz.
Hotline: +49 9091 502-115 (Alm/İng)
Diğer destek bilgileri için, bkz.:
www.hama.com
10. Atık toplama bilgileri
Çevre koruma uyarısı:
Avrupa Birliği Direkti 2012/19/EU ve
2006/66/EU ulusal yasal uygulamalar için
de geçerli olduğu tarihten itibaren:
Elektrikli ve elektronik cihazlarla piller
normal evsel çöpe atılmamalıdır.
Tüketiciler için, artık çalışmayan elektrikli ve
elektronik cihazları piller, kamuya ait toplama
yerlerine veya satın alındıkları yerlere
götürülmelidir. Bu konu ile ilgili ayrıntılar ulusal
yasalarla düzenlenmektedir. Ürün üzerinde,
kullanma kılavuzunda veya ambalajda bulunan bu
sembol tüketiciyi bu konuda uyarır. Eski cihazların
geri kazanımı, yapıldıkları malzemelerin
değerlendirilmesi veya diğer değerlendirme şekilleri
ile, çevre korumasına önemli bir katkıda
bulunursunuz. Yukarıda adı geçen atık toplama
kuralları Almanya’da piller ve aküler için de
geçerlidir.
71
Page 74

M Manual de utilizare
Telecomandă universală
Vă mulţumim că aţi optat pentru un produs Hama.
Vă rugăm să vă luați puțin timp și să citiți complet
următoarele instrucțiuni și informații. Vă rugăm să
păstraţi acest manual pentru consultare ulterioară
într-un loc sigur.
Taste de funcționare (modelul 4 în 1, 8 în 1)
1. Comutator pentru dezactivarea sonorului
2. Taste pentru selecția aparatului
3. Text EIN: Porniți teletextul
4. Opriți: Opriți la pagina de teletext actuală
5. ◄◄ Retur/roșu
► Redare/galben
►► Derulare rapidă înainte/albastru
● Porniți înregistrarea
■ Stop/verde
ll Pauză/purpuriu
6. Tasta Shift
7. Meniu: Deschideți meniul aparatului
8. Tasta de mod pentru alegerea grupei
secundare de aparate (numai modelul 8 în 1:
AUX,DVBT,CBL,AMP)
9. Vol+/Vol-: Reglarea volumului sonor
10. Setup: Setările telecomenzii
11. Taste cu cifre 0-9
12. Smart TV: Deschideți meniul Smart TV (dacă
este susținut de aparatul final)
Shift+Smart TV: alegeți sursă externă AV
13. APPS: Deschideți meniul App (dacă este
susținut de aparatul final)
Shift+APPS : Comutați pe un emițător cu două
cifre
14. PROG+/PROG-: Selecția programului, în sus/
în jos
15. EXIT: Părăsiți meniul aparatului
16. OK: Confirmați selecţia
17. EPG: Comandă electronică a programului (dacă
este susținută de aparatul AV ales)
18. Info: Informații On-Screen (dacă este susținut
de aparat AV)
19. Text AUS: Părăsiți teletextul
20. Power: ÎNCHIS/DESCHIS / LED
1. Explicarea simbolurilor de indicații
Indicaţie
► Acest simbol indică informații sau instrucțiuni
suplimentare importante.
2. Accesorii livrate
- Telecomandă universală
- Listă coduri
- Acest manual de utilizare
3. Instrucţiuni de siguranţă
• Nu folosiți telecomanda universală în ambianță
umedă și evitați contactul cu apa.
• Țineți telecomanda la distanță de sursele de
căldură și nu o plasați în radiația directă a
soarelui.
• Nu o maltratați, nu o lăsați să cadă.
• Nu o deschideți. Nu conține componente care
se pot înlocui de utilizator.
• Te lecomanda, ca de altfel toată aparatele
electrice, nu are ce căuta în mâinile copiilor!
4. Primii pași – introducerea bateriilor
Indicaţie
► Se recomandă baterii alcaline. Folosiţi 2 ba-
terii tip „AAA” (LR 03/Micro).
► Deschideţi capacul compartimentului bateri-
ilor de pe spatele telecomenzii.
► Introduceți bateriile având grijă ca marcajul
pentru polaritate „+/-” să e corect.
► Închideţi compartimentul bateriilor.
72
Page 75

Indicaţie: Memorie de coduri.
► La schimbarea bateriilor toate codurile pro-
gramate de dumneavoastră rămân până
la 10 minute memorate. To tuși trebuie să
aveți grijă să nu să apăsați nici o tastă până
nu ați introdus baterii noi în telecomandă.
Apăsarea oricărei taste fără ca telecomanda
să aibă baterii, duce la ștergerea tuturor
codurilor.
Indicaţie: Funție de economisire a
energiei
► Telecomanda se deconectează automat dacă o
tastă se ține apăsată mai mult de 15 secunde.
În acest fel se prelungește duratade funcționare
a bateriilor, în cazul în care telecomanda este
înțepenită într-un loc unde tastele sunt apăsate
continuu de ex. între pernele de pe canapea.
5. Setup
Indicaţie
► Pentru transmiterea corectă a razelor
infraroșii țineți telecomanda în direcția aparatului care se comandă.
► Apăsați tasta „MODE” pentru selectarea
grupei secundare de aparate: AUX, AMP,
DVB-T, CBL (numai în modelul 8 în 1).
► Pentru folosirea tastelor albastre de
funcționare apăsați tasta Shift. Funcția Shift
se dezactivează printr-o nouă apăsare a tastei Shift, sau automat dacă timp de cca 30
secunde nu se apasă nici o tastă.
► Dacă timp de cca 30 sec nu se execută nici
o setare modul setup se închide. LED-ul
luminează de șase ori și se stinge.
► Fiecare tip de aparat poate programat cu
ajutorul oricărei taste, de ex. un televizor se
poate programa cu DVS, AUX ș.a.m.d.
► Cât timp aparatul de comandat se aă în
modul setup nu poate deservit cu telecomanda. Părăsiți modul setup și alegeți cu
tastele de selectare aparatul de comandat.
5.1 Introducerea directă a codului
În accesoriile livrate cu telecomanda este și o
listă cu coduri. Lista cuprinde codul compus din
4 cifre al celor mai mulți producători de aparate
AV în ordine alfabetică, grupate în funcție de tipul
aparatului (de ex. televizoare, DVD ș.a.m.d.). Dacă
aparatul de comandat se aă pe listă, metoda cea
mai simplă de introducere a codului este introducerea directă a codului.
5.1.1 Porniţi aparatul pe care doriţi să-l comandaţi.
5.1.2 Țineți apăsată tasta „SETUP” până când LED-
ul luminează continuu.
5.1.3 Alegeți cu tastele de selectare aparatul de
comandat (de ex.TV). La o selecție corectă
LED-ul pâlpâie o dată apoi continuu.
5.1.4 Căutați în lista de coduri marca și tipul
aparatului de comandat.
5.1.5 Introduceți codul de 4 cifre cu ajutorul ta-
stelor cu numere 0-9. După ecare cifră LEDul conrmă introducerea acesteia print-un
pâlpâit scurt și se stinge după a patra cifră.
Indicaţie
► Un cod valabil se memorează automat.
► Dacă codul nu este valabil LED-ul pâlpâie
de șase ori și se stinge. Repetați pașii 5.1.1
până la 5.1.5, sau folosiți altă metodă de
introducere a codului.
73
Page 76

5.2 Căutarea manuală a codului
Telecomanda universală posedă o memorie internă,
în care se găsesc deja până la 350 de coduri
pro tip de aparat, pentru aparatele AV cele mai
uzuale. Puteți introduce codurile la rând până când
aparatul de comandat reacționează. De exemplu
aparatul de comandat se oprește (tasta „POWER”)
sau schimbă canalul (tasta „PROG+/PROG-”).
5.2.1 Porniţi aparatul pe care doriţi să-l comandaţi.
5.2.2 Țineți apăsată tasta „SETUP” până când LEDul luminează continuu.
5.2.3 Alegeți cu tastele de selectare aparatul de
comandat (de ex.TV). La o selecție corectă
LED-ul pâlpâie o dată apoi continuu.
5.2.4 Pentru a naviga prin codurile presetate
apăsați tasta „POWER” sau „PROG+/
PROG-” până când aparatul de comandat
reacționează.
5.2.5 Apăsaţi „MUTE(OK)” pentru a salva codul în
memorie și a părăsi căutarea codului. LED-ul
se stinge.
Indicaţie
► În memoria internă se pot memora cel mult
350 de coduri ale celor mai uzuale aparate.
Din cauza numărului mare de aparate AV de
pe piață se poate întâmpla ca numai cele
mai uzuale funcțiuni principale să vă stea la
dispoziție. În acest caz, repetați pașii 5.2.1
până la 5.2.5 pentru găsirea unui cod mai
adecvat. Pentru câteva modele speciale de
aparate este posibil ca nici un cod să nu e
adecvat.
5.3 Căutarea automată a codului
Căutarea automată a codului folosește aceleași
coduri presetate ca la căutarea manuală (5.2). Telecomanda examinează codurile automat până când
aparatul de comandat reacționează. De exemplu
aparatul de comandat se oprește (tasta „POWER”)
sau schimbă canalul (taste „PROG+/PROG-”).
5.3.1 Porniţi aparatul pe care doriţi să-l comandaţi.
5.3.2 Țineți apăsată tasta „SETUP” până când LEDul luminează continuu.
5.3.3 Alegeți cu tastele de selectare aparatul de
comandat (de ex.TV). La o selecție corectă
LED-ul pâlpâie o dată apoi continuu.
5.3.4 Apăsaţi tasta „PROG+/PROG-” sau „POWER”
pentru a porni căutarea automată a codului.
LED-ul pâlpâie o dată apoi continuu. După
6 secunde telecomanda universală începe
prima căutare.
Indicaţie: Setarea vitezei de
căutare
► Timpul de căutare standard pentru un cod
este setat la 1 secundă. Dacă doriți puteți
trece la un timp de căutare de 3 secunde
pentru un cod. Pentru a trece la alt timp de
căutare, apăsați „PROG+” sau „PROG-” în
intervalul de 6 secunde înainte de începerea
automată de căutare a codului.
5.3.5 LED-ul conrmă ecare cod printr-un singur
pâlpâit.
5.3.6 Apăsaţi „MUTE(OK)” pentru a salva codul în
memorie și a părăsi căutarea codului. LED-ul
se stinge.
5.3.7 Pentru întreruperea căutării automate în
timpul desfășurării, apăsați tasta „EXIT”.
Indicaţie
► Dacă toate codurile au fost cercetate fără
succes, telecomanda părăsește căutarea
automată a codului și se întoarce automat în
modul de funcționare. Codul actual memorat
rămâne neschimbat.
74
Page 77

5.4 Recunoașterea codului
Recunoașterea codului vă permite să vă procurați
un cod deja setat.
5.4.1 Țineți apăsată tasta „SETUP” până când LEDul luminează continuu.
5.4.2 Alegeți cu tastele de selectare aparatul de
comandat (de ex.TV). La o selecție corectă
LED-ul pâlpâie o dată apoi continuu.
5.4.3 Apăsaţi tasta „SETUP”. LED-ul pâlpâie o dată
apoi continuu.
5.4.4 Pentru căutarea primei cifre apăsați o tasta
cu numere de la 0 la 9. LED-ul pâlpâie o dată
pentru prima cifră a codului de patru numere.
5.4.5 Repetați pasul 5.4.4 pentru a doua, a treia și
a patra cifră.
CODES
TV VCR SATDVD
AUX AMP CBL DVBT
6. Funcţii speciale
6.1 Canal Punch-Through
Cu funcţia canal Punch-Through puteţi să ocoliţi
comenzile PROG+ sau PROG- ale aparatului actual
de comandat, și să modificaţi canalul unui al doilea
aparat. Toate celelalte comenzi nu sunt influenţate.
Activarea funcţiei canal Punch-Through:
•Apăsaţi tasta aparatului dorit (de ex. TV).
• Ţineţi apăsată tasta „PROG+”.
•Apăsaţi tasta aparatului dorit (de ex. SAT).
•Lăsaţi liberă tasta „PROG+” (la adivarea setării
LED-ul pâlpâie o dată).
Dezactivarea funcţiei canal Punch-Through:
•Apăsaţi tasta aparatului dorit (de ex. TV).
• Ţineţi apăsată tasta „PROG-”.
•Apăsaţi tasta aparatului dorit (de ex. SAT).
•Lăsaţi liberă tasta „PROG-” (la dezactivarea
setării LED-ul pâlpâie de două ori).
6.2 Volum sonor Punch-Through
Cu funcţia volum sonor Punch-Through puteţi să
ocoliţi comenzile VOL+ sau VOL- ale aparatului
actual de comandat, și să modificaţi volumul sonor
al unui al doilea aparat. Toate celelalte comenzi nu
sunt influenţate.
Activarea funcţiei volum sonor Punch-Through:
•Apăsaţi tasta aparatului dorit (de ex. TV).
• Ţineţi apăsată tasta „VOL+”.
•Apăsaţi tasta aparatului dorit (de ex. SAT).
•Lăsaţi liberă tasta „VOL+” (la adivarea setării
LED-ul pâlpâie o dată).
Dezactivarea funcţiei volum sonor Punch-Through:
•Apăsaţi tasta aparatului dorit (de ex. TV).
• Ţineţi apăsată tasta „VOL-”.
•Apăsaţi tasta aparatului dorit (de ex. SAT).
•Lăsaţi liberă tasta „VOL-” (la dezactivarea setării
LED-ul pâlpâie de două ori).
6.3 Macro Power
Cu Macro Power puteţi să porniţi/ opriţi în același
timp două aparate AV.
Activarea funcţiei Macro Power:
•Apăsaţi tasta aparatului dorit (de ex. TV).
• Ţineţi apăsată tasta „POWER”.
•Apăsaţi tasta aparatului dorit (de ex. SAT).
•Lăsaţi liberă tasta „POWER” (la adivarea setării
LED-ul pâlpâie o dată).
Dezactivarea funcţiei Macro Power:
•Apăsaţi tasta aparatului dorit (de ex. TV).
• Ţineţi apăsată tasta „POWER”.
•Apăsaţi tasta aparatului dorit (de ex. SAT).
•Lăsaţi liberă tasta „POWER” (la dezactivarea
setării LED-ul pâlpâie de două ori).
75
Page 78

7. ÎNTREȚINERE
• Nu folosiți niciodată în același timp baterii noi și
vechi în telecomandă deoarece cele vechi pot să
curgă și să diminueze performanța.
• Nu curățați niciodată telecomanda cu substanțe
de lustruit sau detergenți caustici.
• Nu expuneți telecomanda prafului, ștergeți-o cu
o cârpă uscată, moale.
8. ÎNLĂTURARE DEFECȚIUNI
I. Te lecomanda mea universală nu funcționează!
R. Vericaţi aparatul AV. Dacă comutatorul prin-
cipal este deconentat, telecomanda nu poate
deservi aparatul.
R. Vericați dacă bateriile sunt corect plasate și
polaritatea respectată.
R. Vercați dacă ați apăsat tasta corectă
corespunzătoarea aparatului.
R. Dacă nivelul de încărcare al bateriilor a scăzut,
înlocuiţi-le.
I. Dacă în lista cu coduri sunt trecute mai multe
pentru marca aparatul meu AV, cum selectez
codul corect?
R. Pentru stabilirea codului corect, testați codurile
unul după altul, până când majoritatea tastelor
funcționează corect.
I. Aparatul meu AV reacționează numai la anumite
comenzi ale tastelor.
R. Probați și alte coduri, până când majoritatea
tastelor funcționează corect.
9. Suport și service
Dacă aveți întrebări adresaţi-vă la Hama
consultanță privind produsul.
Hotline: +49 9091 502-115 (Ger./Ang.)
Alte informații de suport găsiți aici:
www.hama.com
10. Informații pentru reciclare
Instrucţiuni pentru protecţia mediului
înconjurător:
Din momentul aplicării directivelor
europene 2012/19/EU şi 2006/66/EU
în dreptul național sunt valabile
următoarele: Aparatele electrice şi
electronice nu pot salubrizate cu
gunoiul menajer. Consumatorul este obligat
conform legii să predea aparatele electrice și
electronice la sfârșitul duratei de utilizare la locurile
de colectare publice sau înapoi de unde au fost
cumpărate. Detaliile sunt reglementate de către
legislaţia țării respective. Simbolul de pe produs, în
instrucţiunile de utilizare sau pe ambalaj indică
aceste reglementări. Prin reciclarea, revaloricarea
materialelor sau alte forme de valoricare a
aparatelor scoase din uz aduceți o contribuție
importantă la protecția mediului nostru
înconjurător.
76
Page 79

S Bruksanvisning
Universalfjärrkontroll
Tack för att du har köpt en produkt från Hama. Ta
dig tid och läs igenom nedanstående anvisningar
och information. Förvara bruksanvisningen på en
säker plats för framtida behov.
Funktionsknappar (på modellerna 4 i 1, 8 i 1)
1. Ljudavstängning
2. Knappar för att välja apparat
3. Text PÅ: Visa text-tv
4. Håll: Håll kvar den aktuella text-tv-sidan
5. ◄◄ Bakåtspolning/rött
► Uppspelning/gult
►► Snabb framåtspolning/blått
● Starta inspelning
■ Stopp/grönt
ll Paus/magenta
6. Shift-knapp
7. Menu: Öppna apparatmenyn
8. Lägesknapp för att välja den sekundära
apparatgruppen (endast på modell 8 i 1:
AUX,DVBT,CBL,AMP)
9. Vol+/Vol-: Volyminställning
10. Setup: Inställningar på fjärrkontrollen
11. Sifferknappar 0-9
12. Smart TV: Öppna Smart TV-menyn (om detta
stöds av slutapparaten)
Shift+Smart TV: välj extern AV-källa
13. APPAR: Öppna app-menyn (om detta stöds av
slutapparaten)
Shift+APPS : Växla till tvåsiffriga kanalnummer
14. PROG+/PROG-: Programval, uppåt/nedåt
15. EXIT: Avsluta apparatmenyn
16. OK: Bekräfta ett val
17. EPG: Elektronisk programguide (på AV-
apparater som har stöd för detta)
18. Info: On screen-information (på AV-apparater
som har stöd för detta)
19. Text AV: Stäng av text-tv
20. Power: PÅ/AV / Lysdiod
1. Förklaring av informationssymbolen
Observera
► Den här symbolen visar att det nns mer in-
formation eller viktiga anvisningar.
2. Förpackningens innehåll
- Universalfjärrkontroll
- Kodlista
- Den här bruksanvisningen
3. Säkerhetsanvisningar
• Använd inte fjärrkontrollen i fuktig miljö och
undvik kontakt med vatten.
• Håll fjärrkontrollen på avstånd från värmekällor
och utsätt den inte för direkt solljus.
• Ta ppa inte fjärrkontrollen i golvet.
• Öppna inte fjärrkontrollen. Den innehåller inga
delar som du kan reparera själv.
• Som alla elektriska apparater ska denna fjärrkontroll hållas på säkert avstånd från barn.
4. Första stegen – sätta i batterier
Observera
► Vi rekommenderar alkaliska batterier. An-
vänd två batterier av typen „AAA” (LR 03/
micro).
► Ta bort batteriluckan på fjärrkontrollens
baksida.
► Sätt i batterierna och observera „+/-”-marke-
ringarna så att batteriernas poler vänds rätt.
► Stäng locket till batterifacket igen.
77
Page 80

Observera: Kodminne
► Alla koder du har programmerat förblir
sparade under upp till 10 minuter medan
du byter batteriet. Se till att du inte trycker
på några knappar innan du har satt in nya
batterier i fjärrkontrollen. Alla koder raderas
om en knapp trycks in medan det inte nns
några batterier i fjärrkontrollen.
Observera: Batterisparfunktion
► Fjärrkontrollen stänger av sig automatiskt
när en knapp trycks in under mer än 15
sekunder. Detta sparar batteriström om
fjärrkontrollen skulle fastna i ett läge där
knapparna trycks in hela tiden, som mellan
soffkuddar.
5. Setup
Observera
► Rikta alltid fjärrkontrollen mot apparaten så
att den infraröda kommunikationen blir så
bra som möjligt.
► Tryck på ”MODE” för att välja en sekundär
apparatgrupp: AUX, AMP, DVB-T, CBL (endast på modell 8 i 1).
► Tryck på shift-tangenten för att aktivera de
blå funktionsknapparna. Shift-funktionen
stängs av om du trycker på shift-knappen
igen eller väntar ca 30 sekunder utan att
trycka på någon knapp.
► Setup-läget avslutas automatiskt efter ca
30 sekunder om du inte trycker på någon
knapp. Lysdioden blinkar sex gånger och
slocknar.
► Apparatknapparna kan programmeras
med vilken apparattyp som helst, t.ex. kan
du programmera en tv på DVD- eller AUXknappen o.s.v.
► När fjärrkontrollen benner sig i Setup-läget
kan den inte styra några apparater. Avsluta
Setup-läget och välj en apparat genom att
trycka på någon av apparatknapparna.
5.1 Direkt kodinmatning
I fjärrkontrollens förpackning medföljer en kodlista.
Kodlistan innehåller fyrsiffriga koder för de esta
AV-apparattillverkarna i bokstavsordning, grupperade efter apparattyp (t.ex. TV, DVD o.s.v.). Om du
hittar din apparat i listan är direkt inmatning det
lättaste sättet att mata in koden.
5.1.1 Sätt på apparaten.
5.1.2 Tryck på ”SETUP“ tills lysdioden lyser kon-
stant.
5.1.3 Välj apparat genom att trycka på önskad
apparatknapp (t.ex. TV). När du har valt
apparat blinkar lysdioden en gång och lyser
sedan konstant.
5.1.4 Leta upp din apparats märke och typ i
kodlistan.
5.1.5 Mata in den fyrsiffriga koden med hjälp av
sifferknapparna 0-9. Lysdioden bekräftar varje sifferinmatning med en kort blinkning och
slocknar när den fjärde siffran har matats in.
Observera
► Giltiga koder sparas automatiskt.
► Om en ogiltig kod matas in blinkar lysdioden
sex gånger och slocknar sedan. Upprepa i så
fall steg 5.1.1 till 5.1.5 eller mata in koden
med hjälp av en annan metod.
78
Page 81

5.2 Manuell kodsökning
Universalfjärrkontrollen har ett inbyggt minne som
redan innehåller upp till 350 koder per apparattyp
för de vanligaste AV-apparaterna. Du kan gå
igenom dessa koder tills din apparat reagerar.
Apparaten kan t.ex. stängas av (knappen „POWER”)
eller byta kanal (knapparna „PROG+/PROG-”).
5.2.1 Sätt på apparaten.
5.2.2 Tryck på SETUP tills lysdioden lyser konstant.
5.2.3 Välj apparat genom att trycka på önskad
apparatknapp (t.ex. TV). När du har valt
apparat blinkar lysdioden en gång och lyser
sedan konstant.
5.2.4 Tryck på „POWER” eller „PROG+/PROG-” för
att bläddra bland de förinställda koderna tills
din apparat reagerar.
5.2.5 Tryck på „MUTE(OK)” för att spara koden och
avsluta kodsökningen. Lysdioden slocknar.
Observera
► I internminnet går det att spara maximalt
350 koder för de vanligaste apparaterna.
Eftersom det nns så många AV-apparater
på marknaden fungerar eventuellt bara apparatens huvudfunktioner. Om detta händer
upprepar du steg 5.2.1 till 5.2.5 för att leta
efter en ännu kompatiblare kod. För vissa
speciella apparatmodeller nns det eventuellt ingen kod tillgänglig.
5.3 Automatisk kodsökning
Den automatiska kodsökningen använder samma
förinställda koder som den manuella kodsökningen
(5.2). Universalfjärrkontrollen söker igenom koderna automatiskt tills din apparat reagerar. Apparaten
kan t.ex. stängas av (knappen „POWER”) eller byta
kanal (knapparna „PROG+/PROG-”).
5.3.1 Sätt på apparaten.
5.3.2 Tryck på ”SETUP“ tills lysdioden lyser kon-
stant.
5.3.3 Välj apparat genom att trycka på önskad
apparatknapp (t.ex. TV). När du har valt
apparat blinkar lysdioden en gång och lyser
sedan konstant.
5.3.4 Tryck på knappen „PROG+/PROG-” eller
„POWER” för att starta den automatiska
kodsökningen. Lysdioden blinkar en gång och
lyser sedan konstant. Det dröjer 6 sekunder
innan fjärrkontrollen startar den första
sökningen.
Observera: Ställa in sökhastighet
► Söktiden per kod är som standard inställd på
1 sekund. Söktiden kan ändras till 3 sekunder per kod. Gör så här för att växla mellan
söktiderna: Tryck på „PROG+” eller „PROG-”
inom de 6 sekunderna det tar för den automatiska kodsökningen att starta.
5.3.5 Lysdioden bekräftar varje kodsökning genom
att blinka en gång.
5.3.6 Tryck på „MUTE(OK)” för att spara koden och
avsluta kodsökningen. Lysdioden slocknar.
5.3.7 För att avbryta den automatiska sökningen,
tryck på „EXIT”.
Observera
► Om fjärrkontrollen inte hittar någon kod
bland alla koder avslutas den automatiska
kodsökningen och fjärrkontrollen återgår
till det normala läget. Den sparade koden
ändras inte.
79
Page 82

5.4 Kodidentifiering
Med hjälp av kodidentieringen kan du hitta en
redan inmatad kod.
5.4.1 Tryck på ”SETUP“ tills lysdioden lyser kon-
stant.
5.4.2 Välj apparat genom att trycka på önskad
apparatknapp (t.ex. TV). När du har valt
apparat blinkar lysdioden en gång och lyser
sedan konstant.
5.4.3 Tryck på ”Setup”. Lysdioden blinkar en gång
och lyser sedan konstant.
5.4.4 Tryck på en av sifferknapparna 0 till 9 för
att söka efter den första siffran. Lysdioden
blinkar en gång för den första siffran i den
fyrsiffriga koden.
5.4.5 Upprepa steg 5.4.4 för den andra, tredje och
fjärde siffran.
CODES
TV VCR SATDVD
AUX AMP CBL DVBT
6. Erikoistoiminnot
6.1 Lähettimen läpilyönti
Kanavan läpilyöntitoiminnolla voit kiertää
parhlaillaan ohjattavan laitteen komennot PROG+
tai PROG- ja vaihtaa toisen laitteen kanavat. Tämä
ei vaikuta mihinkään muihin komentoihin.
Näin aktivoit kanavan läpilyöntitoiminnon:
•Paina haluamaasi laitteen näppäintä (esim. TV).
•Pidä ˝PROG+˝-näppäintä pohjassa.
•Paina haluamaasi laitteen näppäintä (esim. SAT).
•Laske ˝PROG+˝-näppäin taas irti (LED-valo
vilkahtaa kerran, kun asetus on aktivoitu).
Näin poistat kanavan läpilyöntitoiminnon käytöstä:
•Paina haluamaasi laitteen näppäintä (esim. TV).
•Pidä ˝PROG-˝-näppäintä pohjassa.
•Paina haluamaasi laitteen näppäintä (esim. SAT).
•Laske ˝PROG-˝-näppäin taas irti (LED-valo
vilkahtaa kahdesti, kun asetus poistetaan
käytöstä).
6.2 Äänenvoimakkuuden läpilyönti
Äänenvoimakkuuden läpilyöntitoiminnolla
voit kiertää parhaillaan ohjattavan laitteen
komennot VOL+ tai VOL- ja vaihtaa toisen laitteen
äänenvoimakkuuden. Tämä ei vaikuta mihinkään
muihin komentoihin.
Näin aktivoit äänenvoimakkuuden läpilyöntitoiminnon:
•Paina haluamaasi laitteen näppäintä (esim. TV).
•Pidä ˝VOL+˝-näppäintä pohjassa.
•Paina haluamaasi laitteen näppäintä (esim. SAT).
•Laske ˝VOL+˝-näppäin taas irti (LED-valo
vilkahtaa kerran, kun asetus on aktivoitu).
Näin poistat äänenvoimakkuuden läpilyöntitoiminnon käytöstä:
•Paina haluamaasi laitteen näppäintä (esim. TV).
•Pidä ˝VOL-˝-näppäintä pohjassa.
•Paina haluamaasi laitteen näppäintä (esim. SAT).
•Laske ˝VOL-˝-näppäin taas irti (LED-valo vilkahtaa
kahdesti, kun asetus poistetaan käytöstä).
6.3 Macro Power
Macro Power -toiminnolla voit kytkeä kaksi AVlaitetta samanaikaisesti päälle/pois.
Näin aktivoit Macro Power -toiminnolla:
•Paina haluamaasi laitteen näppäintä (esim. TV).
•Pidä ˝POWER˝-näppäintä pohjassa.
•Paina haluamaasi laitteen näppäintä (esim. SAT).
•Laske ˝POWER˝-näppäin taas irti (LED-valo
vilkahtaa kerran, kun asetus on aktivoitu).
Näin poistat Macro Power -toiminnolla käytöstä:
•Paina haluamaasi laitteen näppäintä (esim. TV).
•Pidä ˝POWER˝-näppäintä pohjassa.
•Paina haluamaasi laitteen näppäintä (esim. SAT).
•Laske ˝POWER˝-näppäin taas irti (LED-valo
vilkahtaa kahdesti, kun asetus poistetaan
käytöstä).
80
Page 83

7. UNDERHÅLL
• Använd aldrig gamla och nya batterier samti-
digt i fjärrkontrollen. Gamla batterier tar slut
snabbare och kan leda till förlorad strömförsörjning.
• Rengör aldrig fjärrkontrollen med slipande eller
aggressiva rengöringsmedel.
• Håll fjärrkontrollen dammfri genom att torka av
den med en torr och mjuk trasa.
8. FELSÖKNING
F. Min universalfjärrkontroll fungerar inte!
R. Kontrollera AV-apparaten. Om apparatens
strömbrytare är avstängd kan fjärrkontrollen
inte styra apparaten.
R. Kontrollera att batterierna är korrekt isatta och
att deras poler är rättvända.
R. Kontrollera att du verkligen har tryckt in appa-
ratknappen för apparaten i fråga.
R. Byt ut batterierna om de är urladdade.
F. Om det nns mer än en apparatkod för min AV-
apparats märke, hur väljer jag rätt apparatkod?
R. Du hittar rätt apparatkod genom att testa
koderna i tur och ordning tills du hittar den
kod som får est knappar på fjärrkontrollen att
fungera korrekt.
F. Min AV-apparat reagerar endast på några få
knappfunktioner.
R. Te sta de andra koderna tills du hittar den kod
som får est knappar på fjärrkontrollen att
fungera korrekt.
9.
Service och support
Kontakta Hama produktrådgivning om du har frågor
om produkten.
Hotline: +49 9091 502-115 (ty/eng)
Du hittar mer support-information här:
www.hama.com
10. Kasseringshänvisningar
Not om miljöskydd:
Efter implementeringen av EU direktiv
2012/19/EU och 2006/66/EU i den
nationella lagstiftningen, gäller följande:
Elektriska och elektroniska apparater samt
batterier får inte kastas i hushållssoporna.
Konsumenter är skyldiga att återlämna elektriska
och elektroniska apparater samt batterier vid slutet
av dess livslängd till, för detta ändamål, offentliga
uppsamlingsplatser. Detaljer för detta denieras via
den nationella lagstiftningen i respektive land.
Denna symbol på produkten, instruktionsmanualen
eller på förpackningen indikerar att produkten
innefattas av denna bestämmelse. Genom
återvinning och återanvändning av material/
batterier bidrar du till att skydda miljön och din
omgivning.
81
Page 84

L Käyttöohje
Yleiskaukosäädin
Kiitos, että päätit ostaa Hama-tuotteen. Varaa
aikaa ja lue seuraavat ohjeet ja tiedot kokonaan.
Säilytä tämä ohje turvallisessa paikassa
myöhempää tarvetta varten.
Toimintonäppäimet (mallit 4 in 1, 8 in 1)
1. Mykistin
2. Näppäimet laitteen valintaan
3. Text EIN: Teksti-tv päälle
4. Pito: Säilytä nykyinen teksti-tv-sivu
5. ◄◄ Kelaus taakse / punainen
► Toisto / keltainen
►► Kelaus eteen / sininen
● Käynnistä nauhoitus
■ Seis/vihreä
ll Tauko/magenta
6. Shift-näppäin
7. Menu: Avaa laitevalikko
8. Tilanäppäin toissijaisen laiteryhmän
valitsemiseen (vain malli 8 in 1:
AUX,DVBT,CBL,AMP)
9. Vol+/Vol-: Äänenvoimakkuuden säätö
10. Setup: Kaukosäätimen asetukset
11. Numeronäppäimet 0-9
12. Smart TV: Avaa Smart TV -valikko (jos
päätelaitteesi tukee toimintoa)
Shift+Smart TV: valitse ulkoinen AV-lähde
13. APPS: Avaa App-valikko (jos päätelaitteesi
tukee toimintoa)
Shift+APPS : Vaihda kaksinumeroisiin
kanavanumeroihin
14. PROG+/PROG-: Ohjelman valinta, ylös/alas
15. EXIT: Poistu laitevalikosta
16. OK : Vahvista valinta
17. EPG: Sähköinen ohjelmaopas (jos valittu AV-
laite tukee sitä)
18. Info: OSD-tiedot (jos AV-laite tukee niitä)
19. Teksti POIS: Sulje teksti-tv
20. Virta: PÄÄLLE/POIS / LED-valo
1. Ohjesymbolin selitys
Ohje
► Tämä symboli viittaa lisätietoihin tai tärkeisiin
ohjeisiin.
2. Toimituksen sisältö
- Yleiskaukosäädin
- Koodiluettelo
- Tämä käyttöohje
3. Turvaohjeet
• Älä käytä yleiskaukosäädintä kosteissa ympäri-
stöissä, ja vältä sen altistamista roiskevesille.
• Pidä yleiskaukosäädin erillään lämmönlähteistä,
äläkä altista sitä suoralle auringonpaisteelle.
• Älä päästä yleiskaukosäädintä putoamaan.
• Älä avaa yleiskaukosäädintä. Se ei sisällä
käyttäjän huollettavia osia.
• Yleiskaukosäädin kuten muutkaan sähkölaitteet
eivät kuulu lasten käsiin!
4. Ensimmäiset toimenpiteet – paristojen
asettaminen paikoilleen
Ohje
► Suosittelemme laitteeseen alkaliparistoja.
Käytä siinä kahta ”AAA”-paristoa (LR 03 /
Micro).
► Irrota paristolokeron kansi yleiskaukosääti-
men takaa.
► Aseta paristot paikoilleen varmistaen, että
napojen ”+/-”-merkinnät tulevat oikein päin.
► Sulje paristolokero.
82
Page 85

Ohje: Koodimuisti
► Ohjelmoimasi koodit säilyvät laitteen muis-
tissa 10 minuutin ajan paristoja vaihtaessasi. Älä paina mitään näppäintä, ennen kuin
olet asettanut uudet paristot kaukosäätimen
sisään. Kaikki koodit häviävät muistista, jos
jotain näppäintä painetaan, kun kaukosäätimessä ei ole paristoja.
Ohje: Virransäästötoiminto
► Kaukosäädin kytkeytyy automaattisesti pois
päältä, jos näppäintä pidetään pohjassa yli
15 sekunnin ajan. Tämä säästää paristojen
virtaa, jos kaukosäädin jää jumiin paikkaan,
jossa näppäimet ovat koko ajan pohjassa,
esimerkiksi sohvatyynyjen väliin.
5. Asetukset
Ohje
► Jotta infrapunasäteet kulkisivat oikein, su-
untaa kaukosäädin aina suunnilleen ohjattavan laitteen suuntaan.
► Paina “MODE”-näppäintä valitaksesi toissi-
jaisen laiteryhmän: AUX, AMP, DVB-T, CBL
(vain 8 in 1 -mallissa).
► Sinisiä toimintonäppäimiä pääset käyttä-
mään painamalla Shift-näppäintä. Shifttoiminto poistuu käytöstä painamalla
Shift-näppäintä uudelleen tai automaattisesti noin 30 sekunnin kuluttua viimeisestä
näppäimen painalluksesta.
► Jos noin 30 sekuntiin ei paineta mitään
näppäintä, laite poistuu Setup-tilasta. LEDvalo vilkahtaa kuusi kertaa ja sammuu.
► Jokaisen laitetyypin voi ohjelmoida minkä ta-
hansa laitenäppäimen alle, esim. television
voi ohjelmoida toimimaan DVD-, AUX- jne.
näppäimillä.
► Yleiskaukosäätimellä ei voi ohjata mitään
laitetta silloin, kun se on Setup-tilassa.
Poistu Setup-tilasta ja valitse ohjattava laite
laitevalintanäppäimillä.
5.1 Koodien syöttäminen suoraan
Yleiskaukosäätimen toimitukseen sisältyy koodiluettelo. Koodiluettelossa näkyvät useimpien
AV-laitevalmistajien nelinumeroiset koodit
aakkosjärjestyksessä, laitetyypeittäin ryhmiteltyinä
(esim. TV, DVD jne.). Jos ohjattava laite on mukana
koodiluettelossa, yksinkertaisin ohjelmointitapa on
koodin syöttäminen suoraan.
5.1.1 Käynnistä ohjattava laite.
5.1.2 Paina “SETUP”-näppäintä, kunnes LED-valo
palaa jatkuvasti.
5.1.3 Valitse ohjattava laite (esim. TV) laitenäppä-
imellä. Kun valinta on onnistunut, LED-valo
vilkahtaa kerran ja palaa sen jälkeen jatkuvasti.
5.1.4 Etsi koodiluettelosta ohjattavan laitteen
merkki ja tyyppi.
5.1.5 Syötä vastaava nelinumeroinen koodi
numeronäppäimillä 0-9. LED-valo vahvistaa
kunkin yksittäisen numeron syötön lyhyellä
vilkahduksella ja sammuu neljännen numeron
jälkeen.
83
Page 86

Ohje
► Voimassa oleva koodi tallennetaan auto-
maattisesti.
► Jos koodi ei ole oikea, LED-valo vilkahtaa
kuusi kertaa ja sammuu lopuksi. To ista vaiheet 5.1.1 – 5.1.5 tai käytä koodien syöttämiseen toista menetelmää.
5.2 Manuaalinen koodihaku
Yleiskaukosäätimessä on sisäinen muisti, jossa
on valmiiksi 350 koodia / laitetyyppi yleisimpiin
AV-laitteisiin. Voit käydä näitä koodeja läpi, kunnes
ohjattava laite reagoi. Ohjattava laite voi esimerkiksi sammua (”POWER”-näppäin) tai vaihtaa kanavaa
(”PROG+/PROG-).
5.2.1 Käynnistä ohjattava laite.
5.2.2 Paina “SETUP”-näppäintä, kunnes LED-valo
palaa jatkuvasti.
5.2.3 Valitse ohjattava laite (esim. TV) laitenäppäimellä. Kun valinta on onnistunut, LED-valo
vilkahtaa kerran ja palaa sen jälkeen jatkuvasti.
5.2.4 Paina näppäintä “POWER” tai “PROG+/PROG“ selataksesi ennalta asetettuja koodeja,
kunnes ohjattava laite reagoi.
5.2.5 Tallenna koodi ja poistu koodihausta
painamalla näppäintä ”MUTE(OK)”. LED-valo
sammuu.
Ohje
Sisäiseen muistiin voi tallentaa enintään 350
yleisimpien laitteiden koodia. Koska markkinoilla on lukuisia AV-laitteita, voi käydä niin, että
saatavilla ovat vain yleisimmät päätoiminnot. Jos
näin on, toista vaiheita 5.2.1 – 5.2.5 löytääksesi
paremmin sopivan koodin. Joihinkin erikoislaitemalleihin ei ehkä ole saatavana koodia.
5.3 Automaattinen koodihaku
Automaattisessa koodihaussa käytetään samoja
ennalta määritettyjä koodeja kuin manuaalisessa
koodihaussa (5.2). Yleiskaukosäädin testaa koodeja
kuitenkin automaattisesti, kunnes ohjattava laite
reagoi. Ohjattava laite voi esimerkiksi sammua
(”POWER”-näppäin) tai vaihtaa kanavaa (”PROG+/
PROG--näppäin).
5.3.1 Käynnistä ohjattava laite.
5.3.2 Paina “SETUP”-näppäintä, kunnes LED-valo
palaa jatkuvasti.
5.3.3
Valitse ohjattava laite (esim. TV) laitenäppäimellä. Kun valinta on onnistunut, LED-valo vilkahtaa kerran ja palaa sen jälkeen jatkuvasti.
5.3.4
Paina näppäintä „PROG+/PROG-” tai
„POWER” käynnistääksesi automaattisen
koodihaun. LED-valo vilkahtaa kerran ja
palaa sen jälkeen jatkuvasti. Kestää noin
6 sekuntia, ennen kuin yleiskaukosäädin
aloittaa ensimmäisen haun.
Ohje: Hakunopeuden asettaminen
► Koodikohtaisen hakuajan vakioasetus on
1 sekunti. Jos tämä ei käy, voit siirtyä 3
sekunnin hakuaikaan koodia kohti. Vaihda
hakuaikaa painamalla näppäintä ”PROG+”
tai ”PROG-” 6 sekunnin sisällä ennen automaattisen koodihaun alkua.
5.3.5 LED-valo vahvistaa kunkin koodihaun yksittäisellä vilkahduksella.
5.3.6 Tallenna koodi ja poistu koodihausta
painamalla näppäintä ”MUTE(OK)”. LED-valo
sammuu.
5.3.7 Jos haluat keskeyttää automaattisen haun hakuprosessin aikana, paina ”EXIT”-näppäintä.
84
Page 87

Ohje
► Jos kaikkia koodeja on etsitty tuloksetta,
yleiskaukosäädin lopettaa automaattisen
koodihaun ja palaa automaattisesti käyttötilaan. Tällöin tallennettu koodi säilyy
ennallaan.
5.4 Koodien tunnistus
Koodien tunnistuksen avulla voit selvittää jo
syötetyn koodin.
5.4.1 Paina “SETUP”-näppäintä, kunnes LED-valo
palaa jatkuvasti.
5.4.2 Valitse ohjattava laite (esim. TV) laitenäppäimellä. Kun valinta on onnistunut, LED-valo
vilkahtaa kerran ja palaa sen jälkeen jatkuvasti.
5.4.3 Paina „SETUP”-näppäintä. LED-valo vilkahtaa
kerran ja palaa sen jälkeen jatkuvasti.
5.4.4 Etsi ensimmäistä numeroa painamalla yhtä
numeronäppäintä 0-9. LED-valo vilkahtaa
kerran nelinumeroisen koodin ensimmäisen
numeron kohdalla.
5.4.5 Toista vaihe 5.4.4 toisen, kolmannen ja
neljännen numeron kohdalla.
CODES
TV VCR SATDVD
AUX AMP CBL DVBT
6. Erikoistoiminnot
6.1 Lähettimen läpilyönti
Kanavan läpilyöntitoiminnolla voit kiertää
parhlaillaan ohjattavan laitteen komennot PROG+
tai PROG- ja vaihtaa toisen laitteen kanavat. Tämä
ei vaikuta mihinkään muihin komentoihin.
Näin aktivoit kanavan läpilyöntitoiminnon:
•Paina haluamaasi laitteen näppäintä (esim. TV).
•Pidä ˝PROG+˝-näppäintä pohjassa.
•Paina haluamaasi laitteen näppäintä (esim. SAT).
•Laske ˝PROG+˝-näppäin taas irti (LED-valo
vilkahtaa kerran, kun asetus on aktivoitu).
Näin poistat kanavan läpilyöntitoiminnon käytöstä:
•Paina haluamaasi laitteen näppäintä (esim. TV).
•Pidä ˝PROG-˝-näppäintä pohjassa.
•Paina haluamaasi laitteen näppäintä (esim. SAT).
•Laske ˝PROG-˝-näppäin taas irti (LED-valo
vilkahtaa kahdesti, kun asetus poistetaan
käytöstä).
6.2 Äänenvoimakkuuden läpilyönti
Äänenvoimakkuuden läpilyöntitoiminnolla
voit kiertää parhaillaan ohjattavan laitteen
komennot VOL+ tai VOL- ja vaihtaa toisen laitteen
äänenvoimakkuuden. Tämä ei vaikuta mihinkään
muihin komentoihin.
Näin aktivoit äänenvoimakkuuden läpilyöntitoiminnon:
•Paina haluamaasi laitteen näppäintä (esim. TV).
•Pidä ˝VOL+˝-näppäintä pohjassa.
•Paina haluamaasi laitteen näppäintä (esim. SAT).
•Laske ˝VOL+˝-näppäin taas irti (LED-valo
vilkahtaa kerran, kun asetus on aktivoitu).
Näin poistat äänenvoimakkuuden läpilyöntitoiminnon käytöstä:
•Paina haluamaasi laitteen näppäintä (esim. TV).
•Pidä ˝VOL-˝-näppäintä pohjassa.
•Paina haluamaasi laitteen näppäintä (esim. SAT).
•Laske ˝VOL-˝-näppäin taas irti (LED-valo vilkahtaa
kahdesti, kun asetus poistetaan käytöstä).
6.3 Macro Power
Macro Power -toiminnolla voit kytkeä kaksi AVlaitetta samanaikaisesti päälle/pois.
Näin aktivoit Macro Power -toiminnolla:
•Paina haluamaasi laitteen näppäintä (esim. TV).
•Pidä ˝POWER˝-näppäintä pohjassa.
•Paina haluamaasi laitteen näppäintä (esim. SAT).
•Laske ˝POWER˝-näppäin taas irti (LED-valo
vilkahtaa kerran, kun asetus on aktivoitu).
85
Page 88

Näin poistat Macro Power -toiminnolla käytöstä:
•Paina haluamaasi laitteen näppäintä (esim. TV).
•Pidä ˝POWER˝-näppäintä pohjassa.
•Paina haluamaasi laitteen näppäintä (esim. SAT).
•Laske ˝POWER˝-näppäin taas irti (LED-valo vilkahtaa
kahdesti, kun asetus poistetaan käytöstä).
7. Huolto
Älä koskaan käytä yleiskaukosäätimessä sama-
naikaisesti vanhoja ja uusia paristoja, siellä
vanhoilla paristoilla on taipumus vuotaa, mikä
voi heikentää suorituskykyä.
•
Älä missään tapauksessa puhdista yleiskaukosäädintä hankausaineilla tai voimakkailla puhdistusaineilla.
Pidä yleiskaukosäädin puhtaana pölystä puhdis-
•
tamalla se kuivalla ja pehmeällä liinalla.
8. Vianmääritys
K. Yleiskaukosäätimeni ei toimi!
V. Tarkista AV-laite. Jos laitteen virta on katkaistu
pääkatkaisimesta, yleiskaukosäädin ei voi
ohjata laitetta.
V. Tarkista, että paristot on asetettu oikein paikoil-
leen ja navat oikein päin.
V. Tarkista, oletko painanut laitetta vastaavaa
laitenäppäintä.
V.
Vaihda paristot, kun niiden varaustaso on heikko.
K.
Jos AV-laitteeni merkkiä edustaa luettelossa
useita laitekoodeja, miten valitsen oikean niistä?
V.
Määritä oikea, AV-laitetta vastaava laitekoodi
testaamalla koodit vuorotellen, kunnes useimmat näppäimet toimivat asianmukaisesti.
K. AV-laitteeni reagoi vain muutamiin näppäinko-
mentoihin.
V. Kokeile muita koodeja, kunnes useimmat
näppäimet toimivat asianmukaisesti.
9. Huolto ja tuki
Tuotetta koskevissa kysymyksissä pyydämme kääntymään Haman tuoteneuvonnan puoleen.
Tukilinja: +49 9091 502-115 (saksa/englanti)
Lisää tukitietoja on osoitteessa
www.hama.com
10. Hävittämisohjeet
Ympäristönsuojelua koskeva ohje:
Siitä lähtien, kun Euroopan unionin
direktiivi 2012/19/EU ja 2006/66/EU
otetaan käyttöön kansallisessa
lainsäädännössä, pätevät seuraavat
määräykset: Sähkö- ja elektroniikkalaitteita
ja paristoja ei saa hävittää talousjätteen mukana.
Kuluttajalla on lain mukaan velvollisuus toimittaa
sähkö- ja elektroniikkalaitteet niiden käyttöiän
päätyttyä niille varattuihin julkisiin keräyspisteisiin
tai palauttaa ne myyntipaikkaan. Tähän liittyvistä
yksityiskohdista säädetään kulloisenkin osavaltion
laissa. Näistä määräyksistä mainitaan myös
tuotteen symbolissa, käyttöohjeessa tai
pakkauksessa. Uudelleenkäytöllä, materiaalien/
paristoja uudelleenkäytöllä tai muilla vanhojen
laitteiden uudelleenkäyttötavoilla on tärkeä
vaikutus yhteisen ympäristömme suojelussa.
86
Page 89

B Работна инструкция
Универсално дистанционно
Благодарим Ви, че избрахте продукт Hama.
Отделете време и прочетете инструкциите и
информацията. Моля, запазете инструкциите
на сигурно място за бъдещи справки. Ако
продавате устройството, моля, предайте тези
инструкции на новия собственик.
Функционални бутони (модели 4 в 1 и 8 в 1)
1. Изключване на звука
2. Клавиши за избор
3. Влизане в телетекст
4. Задържане на текущата страница в
телетекста
5. ◄◄ Превърти назад/ червено
► Пусни/ жълто
►► Превърти напред/ синьо
● Започване на запис
■ Спри/ зелено
ll Пауза/ магента
6. Клавиш за превключване
7. Отваряне на менюто на устройството
8. Клавиш за избор на режим за устройство
от вторична група (само за модел 8 в 1:
AUX,DVBT,CBL,AMP)
9. Промяна на звука +/-
10. Настройки на дистанционното
11. Клавиши от 0 до 9
12. Smart TV: Отваряне меню на Smart TV (когато
се поддържа от крайното устройство)
Shift+Smart TV: избор на външен AV източник
13. APPS: Отваряне меню на приложение (когато
се поддържа от крайното устройство)
Shift+APPS : Превключване към двуцифрени
номера на канали
14.Промяна на програмата нагоре/надолу
15. Излизане от менюто на устройството
16. OK: Потвърждаване на избор
17. Електронен наръчник за програми (ако се
поддържа от избраното A/V устройство)
18. Информация на екрана (ако се поддържа от
избраното A/V устройство)
19. Излизане от телетекст
20. Включване/ Изключване/ LED индикатор
1. Обяснение на предупредителните
символи и указания
Забележка
► Използват се за допълнително обозначаване
на информация или важни указания.
2. Съдържание на опаковката
-
Универсално дистанционно
- Списък с кодове
- Инструкции за употреба
3. Забележки за безопасност
• Не използвайте универсалното дистанционно
във влажна и мокра среда и избягвайте
контакт с вода.
• Не излагайте универсалното дистанционно
на пряка слънчева светлина и не го
съхранявайте в близост до топлинни
източници.
• Не изпускайте универсално дистанционно.
• Никога не разглобявайте универсалното
дистанционно. То съдържа части, които не се
обслужват от потребителя.
• Както с всички електрически уреди, дръжте
универсалното дистанционно далеч от деца.
4. Първи стъпки - поставяне на батерията
Забележка
► Препоръчват се алкални батерии.
Използвайте тип „AAA“ (LR 03/Micro) 2 броя
► Премахнете капака на батерията на гърба
на вашето дистанционно (А).
► Проверете исканата полярност на
батериите и ги поставете съгласно
знаците “+/–” в предназначеното
отделение (В).
► Затворете капачето на отделението за
батерии (С).
87
Page 90

Забележка: Запазване на кодове
► Всички кодове, които сте програмирали,
остават съхранени до 10 минути докато
сменяте батерията на дистанционното.
Уверете се, че не натискате бутони, докато
поставяте новите батерии. Всички кодове
ще бъдат изтрити, ако натиснете някой
бутон по време на смяната.
Забележка: Функция за
икономия на батерията
► Дистанционното се изключва
автоматично, когато един бутон е
натиснат за повече от 15 секунди. Това
спестява енергия, ако дистанционното е
поставено в позиция, в която бутоните са
постоянно натиснати, например между
възглавници на канапета.
5. Настройка
Забележка
► За да използвате правилното
инфрачервенoто предаване, винаги
насочвайте вашето дистанционно в
приблизителната посока на устройството,
което искате да контролирате.
► Натиснете бутона за настройка на
режима, за да изберете устройство от
вторична група: AUX, AMP, DVB-T, CBL
(само за модел 8 в 1).
► Натиснете клавиша за превключване, за
да оперирате със сините функционални
клавиши. Тази функция се деактивира
чрез натискане на същия клавиш или
автоматично след около 30 сек без
употреба.
► Невъвеждане на данни в продължение
на около 30 секунди ще отмени режима
за настройка. LED индикаторът ще мига 6
пъти и ще се изключи.
► Всеки тип устройство може да се
програмира с всякакъв ключ, т.е.
телевизор може да се програмира с DVD,
AUX и др.
► Не е възможно да контролирате друго
устройство, докато универсалното
дистанционно е в режим на настройка.
Излезте от този режим и изберете
устройството, което искате да се
контролира, с помощта на клавишите
за избор.
5.1 Директно въвеждане на код
В пакета с универсално дистанционно ще
намерите списък с кодове. Той показва
4-цифрени кодове за повечето A/V
производители на устройства по азбучен ред и
групирани по тип устройство (напр. телевизия,
DVD, и т.н.). Ако устройството, което искате да
контролирате, е в списъка с кодове, най-удобния
метод е директен запис на кода.
5.1.1 Включете устройството, което искате да
контролирате.
5.1.2 Натиснете бутона за настройка, докато
LED индикаторът не започне да свети
постоянно.
5.1.3 Изберете устройството, което искате да се
контролира (напр. телевизор), с помощта
на бутоните. При успешен избор LED
светлината ще светне един път, след което
тя ще продължи да свети постоянно.
88
Page 91

5.1.4 Проверете в списъка с кодове за марката
и типа на устройството, което искате да
контролирате.
5.1.5 Въведете съответния 4-цифрен код
с помощта на клавишите 0-9. LED
индикаторът ще потвърждава всяка
въведена цифра като светне един път
кратко и ще се изключи след четвъртата
цифра.
Забележка
► Ако кодът е валиден, той се записва
автоматично.
► Ако кодът е невалиден, LED индикаторът
мига шест пъти и след това се изключва.
Повторете стъпки от 5.1.1 до 5.1.5 или
използвайте различен код.
5.2 Ръчно търсене на код
Универсалното дистанционно е оборудвано с
вътрешна памет, в която има до 350 кода за
най-често срещаните A / V устройства.
Можете да преминете през тези кодове, докато
устройството, което искате да контролирате,
реагира (например: устройството се изключи
или промени канал).
5.2.1 Включете устройството, което искате да
контролирате.
5.2.2 Натиснете бутона за настройка, докато
LED индикаторът не започне да свети
постоянно.
5.2.3 Изберете устройството, което искате да се
контролира (напр. телевизор), с помощта
на бутоните. При успешен избор LED
светлината ще светне един път, след което
тя ще продължи да свети постоянно.
5.2.4 Натиснете бутона за включване или
навигационните бутони за смяна на
програмата, за да преминете през
предварително запаметените кодове.
Извършвайте това действие докато
устройството, което искате да управлявате,
реагира.
5.2.5 Натиснете бутона за без звук, за да
запазите кода и за да излезете от
търсенето му. LED индикаторът ще се
изключи.
Забележка
► Вътрешна памет позволява до 350 от
най-често срещаните кодове да бъдат
предварително записани. Заради
обширния брой на различни A / V
устройства на пазара са налични само
кодовете за най-често срещаните
устройства. Между тях може да няма
подходящ код за устройството, избрано
от вас.
5.3 Автоматично търсене на код
Автоматичното търсене на код използва същите
предварително записани кодове както при
ръчно търсене на код (5.2), но универсално
дистанционно преминава през кодовете
автоматично докато устройството, което искате
да контролирате, реагира. Например: изключва
се или променя канал.
5.3.1 Включете устройството, което искате да
контролирате.
5.3.2 Натиснете бутона за настройка докато
LED индикаторът не започне да свети
постоянно.
5.3.3 Изберете устройството, което искате да се
контролира (напр. телевизор), с помощта
на бутоните. При успешен избор LED
светлината ще светне един път, след което
тя ще продължи да свети постоянно.
5.3.4 Натиснете навигационните бутони за
смяна на програмата или бутона за
включване, за да преминете към режим
на автоматично търсене. LED светлината
ще светне един път, след което тя
ще продължи да свети постоянно.
Универсално дистанционно има
латентност от 6 секунди преди началото на
първото сканиране.
89
Page 92

Забележка: Настройки за
скоростта на сканиране
► Скоростта на сканиране може да се
настрои да засича на 1 или на 3
секунди. Настройката по подразбиране за
сканиране на времето за един код е 1 сек.
Ако този интервал е неудобен, можете да
преминете към 3 сек. сканиране за код.
За да превключите, натиснете единия от
бутоните за навигация на програмите
преди автоматичното търсене на код да
започне сканиране.
5.3.5 LED индикаторът потвърждава всяко едно
сканиране на код с едно премигване.
5.3.6 Натиснете бутона за без звук, за да
запазите кода и за да излезете от режим
на търсене. LED индикаторът ще се
изключи.
5.3.7 За да спрете автоматичното търсене на
код по време на процеса на сканиране,
натиснете бутона за изход.
5.4.2 Изберете устройството, което искате да се
контролира (напр. телевизор), с помощта
на бутоните. При успешен избор LED
светлината ще светне един път, след което
тя ще продължи да свети постоянно.
5.4.3 Натиснете бутона за настройка докато
LED индикаторът не започне да свети
постоянно.
5.4.4 За да намерите първата цифра, натиснете
цифровите клавиши от 0 до 9. LED
индикаторът ще мигне веднъж, за да
потвърди въвеждането на първата цифра
на 4-цифрен код.
5.4.5 Повторете стъпка 5.4.4 за втората, третата
и четвъртата цифра.
CODES
TV VCR SATDVD
AUX AMP CBL DVBT
Забележка
► Когато всички кодове са сканирани без
успех, универсалното дистанционно
излиза от режим на автоматично търсене
на код и се връща в оперативен режим.
Текущо съхраненият код не се променя.
5.4 Идентификация на кода
Идентификационният код ви предлага
възможност да използвате вече въведен код.
5.4.1 Натиснете бутона за настройка докато
LED индикаторът не започне да свети
постоянно.
90
6. Специални функции
6.1 Punch Through Channel
Функцията Punch Through Channel позволява
промяната на програмата на контролираното
в момента устройството да се отрази на
промяната на програмата и на второ устройство.
Всички други команди остават неповлияни.
За да активирате настройката punch through
channel:
•Натиснете копчето за режим на вашето
желано устройство (напр. телевизор).
•Натиснете и задръжте бутона за промяна на
програмата нагоре.
•Натиснете копчето за режим на вашето
желано устройство.
•Пуснете бутона за промяна на програмата
нагоре (индикаторът мига веднъж, ако
настройката е активирана).
Page 93

За да деактивирате настройката punch through
channel:
•Натиснете копчето за режим на вашето
желано устройство (напр. телевизор).
•Натиснете и задръжте бутона за промяна на
програмата надолу.
•Натиснете копчето за режим на вашето
желано устройство.
•Пуснете бутона за промяна на програмата
надолу (индикаторът мига два пъти, ако
настройката е деактивирана).
6.2 Punch Through Volume
Функцията Punch Through Volume позволява
промяната на звука на контролираното в момента
устройството да се отрази на силата на звука и на
второ устройство. Всички други команди остават
неповлияни.
За да активирате настройката punch through volume:
•Натиснете копчето за режим на вашето
желано устройство (напр. телевизор).
•Натиснете и задръжте бутона за промяна на
звука нагоре.
•Натиснете копчето за режим на вашето
желано устройство.
•Пуснете бутона за промяна на звука нагоре
(индикаторът мига веднъж, ако настройката е
активирана).
За да деактивирате настройката punch through
volume:
•Натиснете копчето за режим на вашето
желано устройство (напр. телевизор).
•Натиснете и задръжте бутона за промяна на
звука надолу.
•Натиснете копчето за режим на вашето
желано устройство.
•Пуснете бутона за промяна на звука надолу
(индикаторът мига два пъти, ако настройката
е деактивирана).
6.3 Macro Power
Macro Power ви позволява да включите/
изключите две устройства едновременно.
За да активирате настройката macro power:
•Натиснете копчето за режим на вашето
желано устройство (напр. телевизор).
•Натиснете и задръжте бутона включване.
•Натиснете копчето за режим на вашето
желано устройство.
•Пуснете бутона за включване (индикаторът
мига веднъж, ако настройката е активирана).
За да деактивира
•Натиснете копчето за режим на вашето
желано устройство (напр. телевизор).
•Натиснете и задръжте бутона включване.
•Натиснете копчето за режим на вашето
желано устройство.
•Пуснете бутона за включване (индикаторът
мига два пъти, ако настройката е
деактивирана).
7. Поддръжка
• Не смесвайте нови и употребявани батерии
при захранването на универсалното
дистанционно, тъй като старите батерии са
склонни към изтичане.
• Не използвайте корозивни или абразивни
почистващи препарати за универсалното
дистанционно.
• Дръжте универсално дистанционно далеч от
прах като го избърсвате с мека суха кърпа.
8. Отстраняване на проблеми
В. Моето универсално дистанционно не работи!
О. Проверете устройството, което то контролира.
Ако основното му захранване е изключено,
вашето дистанционно не може да го
управлява.
О. Проверете дали батериите са поставени
правилно и дали са в правилната +/позиция.
О. Проверете дали сте натиснали клавиша за
съответния режим на устройство, което се
контролира от дистанционното.
О. Ако батериите са изтощени, сменете ги.
те настройк
ата
macr
o power:
91
Page 94

В. Ако няколко кода са изброени под марката на
моето контролирано устройство, как мога да
избера правилния код?
О. За да определите правилния код за вашето
устройство, тествайте кодовете един по
един докато стигнете до този, който работи
коректно.
В. Моята контролирана техника отговаря само
на някои от командите.
О. Тествайте други кодовете докато стигнете до
този, който работи коректно
9. Сервиз и съпорт
За въпроси във връзка с продукта се обърни към
отдела за консултация за продукти на Хама.
Гореща телефонна линия: +49 9091 502-115
(немски/английски)
Допълнителна информация за съпорт ще
намерите тук: www.hama.com
10. Указания за изхвърляне
Указание относно защитата на околната
среда:
От момента на прилагането на
европейските директиви 2012/19/EU и
2006/66/EО в националното право на
съответните страни важи следното:
Електрическите и електронните уреди и
батериите не бива да се изхвърлят с битовите
отпадъци. Потребителят е длъжен по закон да
върне електрическите и електронните уреди и
батериите в края на тяхната дълготрайност на
изградените за целта обществени пунктове за
събиране на отпадъци или на търговския обект.
Подробностите по въпроса са регламентирани в
законодателството на съответната страна.
Символът върху продукта, упътването за
употреба или опаковката насочва към тези
разпоредби. Чрез рециклирането, преработката
на материалите или други форми на
оползотворяване на старите уреди/батерии вие
допринасяте за защитата на нашата околна
среда.
92
Page 95

93
Page 96

Hama GmbH & Co KG
86652 Monheim
www.hama.com
/Germany
All listed brands are trademarks of the corresponding companies. Errors and omissions excepted,
and subject to technical changes. Our general terms of delivery and payment are applied.
00012306_07/06.16
 Loading...